- 29 Oct 2024
- 4 Minutes to read
- Print
- DarkLight
- PDF
How to Setup a Relativity® Plus Connector
- Updated on 29 Oct 2024
- 4 Minutes to read
- Print
- DarkLight
- PDF
Configure a Relativity® OAuth2 Client for a Relativity® Plus Connector
Configuring a Relativity®* OAuth2 client is the first step in creating a Brainspace dataset with a Brainspace Relativity® Plus connector for Relativity® v9.7 and newer versions of Relativity®.
Note
Relativity® 9.7.229.5 does not support database-backed authorization codes with load-balanced web servers. Using multiple web servers will result in the Relativity® Plus connector failing to authenticate. This can be resolved by configuring the Relativity® Plus connector to communicate with a single Relativity® web server.
To configure a Relativity® OAuth2 client:
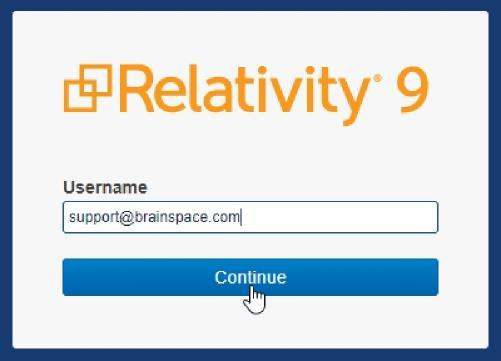
Open a Relativity® instance in a web browser, type your username, and then click the Continue button:
The Relativity® password dialog will open.
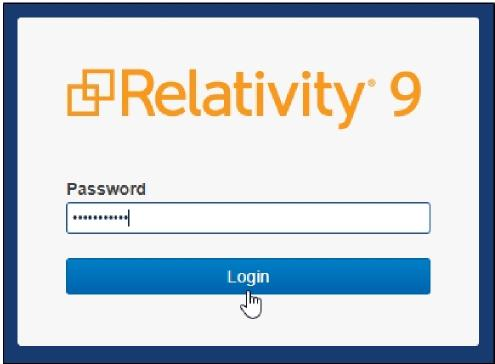
Type your password, and then click the Login button:
The Relativity® Workspaces window will open.
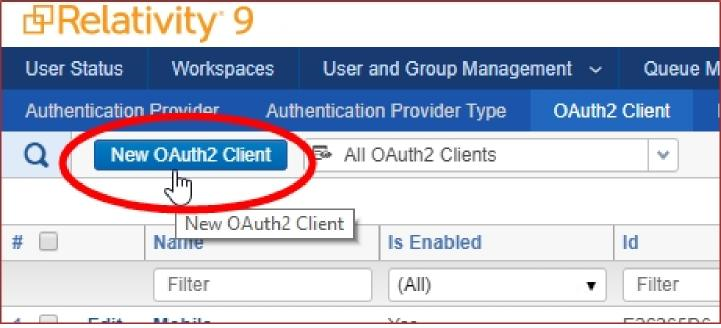
Click the Authentication menu dropdown arrow, and then click the OAuth2 Client option:

Click the New OAuth2 Client button:
The OAuth2 Client Information dialog will open.
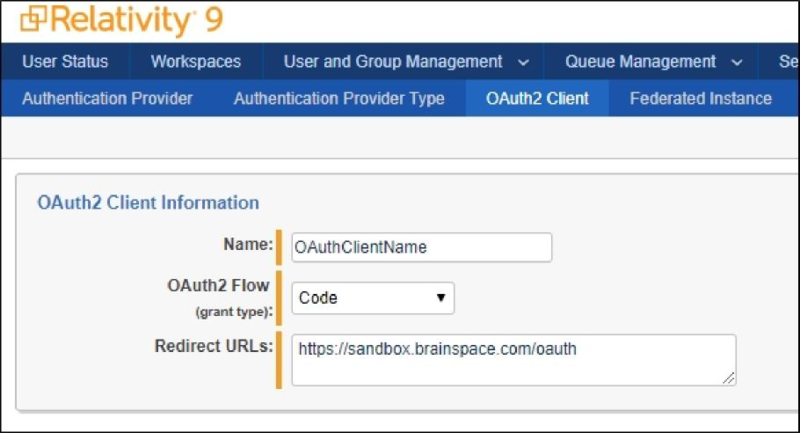
Type a name for the client.
Set OAuth2 Flow to Code.
Type the redirect URL (fully-qualified domain name) with /oauth as the URL endpoint:
In the Access Token Lifetime field, type a session timeout value:

Note
Relativity® does not issue refresh tokens. If your OAuth2 session exceeds the session timeout value, you must clear your credentials and create a new OAuth2 token. The OAuth2 session timeout can be set to a low value to be more secure, or it can be set to a maximum of one year.
Click the Save button.
The OAuth2 Client Information screen will refresh.

Make note of the Client ID and Client Secret codes.
You will need this information when creating the Relativity® Plus connector in Brainspace.
After configuring a Relativity® OAuth2 client, you are ready to create a Relativity® Plus connector in Brainspace (see Create a Relativity® Plus Connector).
Create a Relativity® Plus Connector
After configuring a Relativity® OAuth2 client, you are ready to create a Relativity® Plus connector in Brainspace. You will need the Client ID and Client Secret that you created for the Relativity® OAuth2 client.
To create a Relativity® Plus connector:
In the user dropdown menu, click Administration:
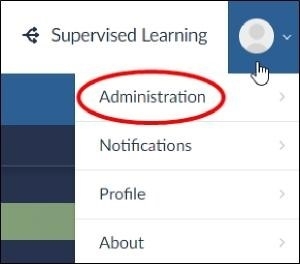
The Datasets screen will open.
Click the Connectors button:
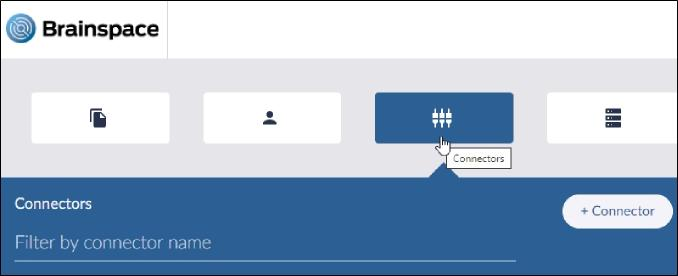
The Connectors screen will open.
Click the Add Connector button:
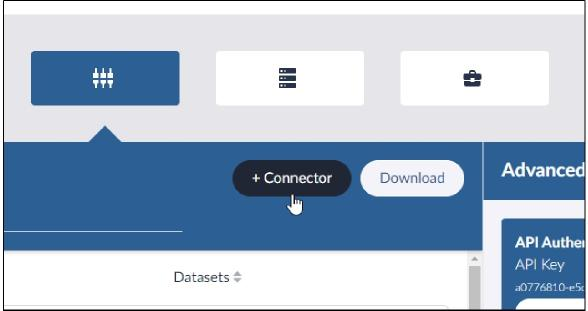
The Connector menu will open.
Click the Relativity® Plus option in the menu.
The Relativity® Plus connector dialog will open.
In the Connector Name field, type a name for the connector.
In the Relativity® Base Document URL field, type the Relativity® base URL that points to the Relativity® domain user-interface (fully-qualified domain name) with /Relativity as the URL endpoint.
In the API field, toggle the switch to the On position to allow self-signed certificates.
In the Brainspace Analytics Fields To Overlay After A Full Build field, click an option in the list, and then select all options using the keyboard command Ctrl-A.
In the Relativity® API Host Machine Name (FQDN) field, type the fully-qualified domain name for the Relativity® REST / ObjectManager API.
In the HTTPS field, toggle the switch to the On position to enable HTTPS.
In the Client ID and Client Secret fields, paste or type the codes that were generated by Relativity® when you created the OAuth2 client (see Configure a Relativity® OAuth2 Client for a Relativity® Plus Connector).
In the Concurrency field, type a value (minimum of 2) for the number of threads to use for ingest and mass operations.
Click the Test Connector button.
After the connector test is successful, click the Create Connector button.
The new Relativity® Plus connector will be added to the Connectors screen.
After creating a Relativity® Plus connector, you are ready to create a dataset. You can also manage the connector settings or permanently delete the connector from Brainspace at any time. To configure the advanced settings for a Relativity® Plus connector, click the Advanced link in the Relativity® Plus connector dialog.
Update a Relativity® Plus Connector
After creating a Relativity® Plus connector, you can change the connector’s settings at any time.
To update a Relativity® Plus connector:
In the user dropdown menu, click Administration:
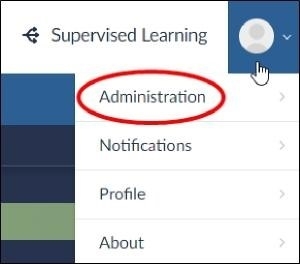
The Datasets screen will open.
Click the Connectors button:
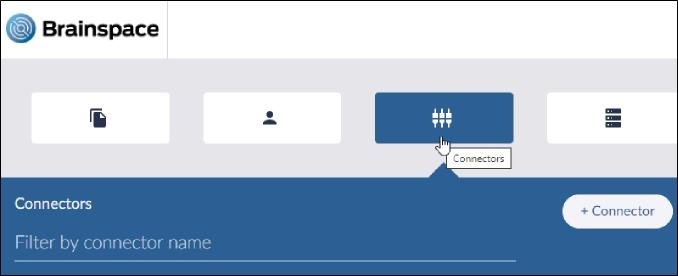
The Connectors screen will open.
Click the Update Connector icon:

The connector configuration dialog will open.
Modify any of the connector options, and then click the Test connector button.
After the connector test is successful, click the Create Connector button. The updated Relativity® Plus connector will refresh on the Connectors screen.
After updating a Relativity® Plus connector, you are ready to create a dataset or continue using it for Brainspace datasets. You can also manage the connector settings or permanently delete the connector from Brainspace at any time. To configure the advanced settings for a Relativity® Plus connector, click the Advanced link in the Relativity® Plus connector dialog.
Delete a Relativity® Plus Connector
After creating a Relativity® Plus connector, you can permanently delete it from Brainspace at any time. To delete a Relativity® Plus connector:
In the user dropdown menu, click Administration:
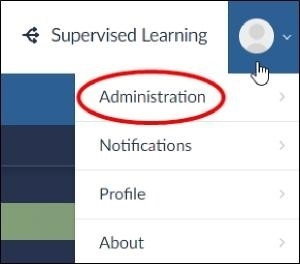
The Datasets screen will open.
Click the Connectors button:
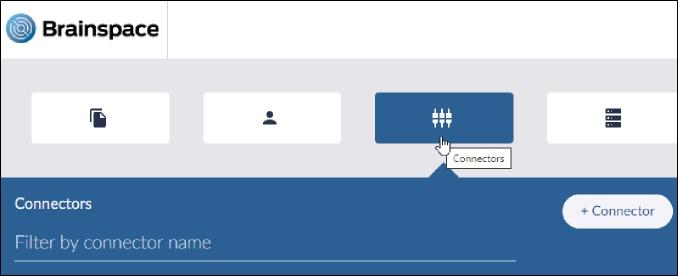
The Connectors screen will open.
Click the Delete Connector icon as shown in the following image:
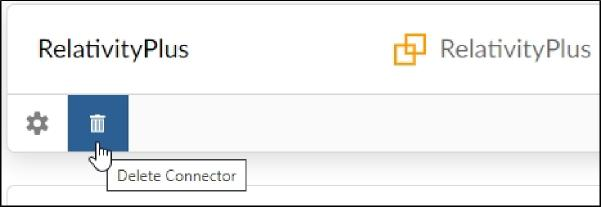
A confirmation dialog will open.
Click the Delete button.
The confirmation dialog will close, and the Relativity® Plus connector will be permanently deleted from Brainspace.
Note
This product may only be used by parties with valid licenses for Relativity®, a product of Relativity ODA LLC. Relativity ODA LLC does not test, evaluate, endorse or certify this product.
.png)


