- 29 Oct 2024
- 12 Minutes to read
- Print
- DarkLight
- PDF
Installation & Upgrade
- Updated on 29 Oct 2024
- 12 Minutes to read
- Print
- DarkLight
- PDF
Important
This article is applicable for upgrading to Brainspace version 6.8. See Installation & Upgrade Guide - Brainspace 7.
Prerequisites
All prerequisites must be satisfied before installing Brainspace software. If you have any issues verifying that you have satisfied these prerequisites, contact Reveal Support before the scheduled installation.
Operating System and Hardware Validation
This validation ensures that you have all of the necessary software and hardware requirements for a successful Brainspace three-server installation.
Brainspace is only supported on RedHat or CentOS 7.6 – 7.9.
Root Access and Third-Party Application Credentials
Customer personnel who will be involved in the installation must have root access to all three servers and administration credentials for any third-party applications involved in the installation.
Brainspace License File
The Brainspace license file is created specifically for your installation. The text file naming convention is <YOUR COMPANY NAME><EXPIRATION DATE>-license.txt.
Note
For the installation call with Brainspace, this file must be in the same directory as the installer file. If you have not received an email with this file, contact Reveal Support before the installation date.
Brainspace Installation Script
The installation script sets up and installs Brainspace software on the Application server, Analytics server, and On-Demand Analytics server.
This file naming convention is brainspace-<VERSION-NUMBER>.install where <VERSION-NUMBER> is the Brainspace software version that you are installing.
You may get this script directly from our FTP site or in an email from Reveal Support.
Note
Keep this file readily accessible as it is used for installing Brainspace. If you have not received an email with this file, contact Reveal Support before the installation date.
Supported Web Browser
You access the Brainspace software using a web browser.
Brainspace supports the following browsers:
• Chrome
• Firefox
• Edge (Chromium based version)
/localdata-share
Brainspace requires that /localdata/brainspace on the Application Server be shared to the On-Demand Analytics Server (ODA) and be mounted on the ODA as /localdata-share.
A /localdata-share directory should also be made on the Analytics Server, this will not be a share directory from the Application Server, just a local directory on the Analytics Server.
Additional information can be found in our Configure the data and localdata-shares article.
Notes
The following are items that should be noted for either Upgrades or New Installations.
PostgreSQL Update
Upgrading beyond Brainspace 6.5 means an upgrade to PostgreSQL from 9.6 to 13.4.
With this upgrade a new pg_hba.conf file gets created in /var/lib/pgsql/13/data/ and we do not copy over the information from the original one in /var/lib/pgsql/9.6/data/.
You should still see files in /var/lib/pgsql/9.6/data/ so you can see how the entries for these two servers are listed in the pg_hba.conf file.
After the upgrade completes you can add in the entries for the Analytics and On-Demand Analytics to the /var/lib/pgsql/13/data/pg_hba.conf file.
You will need to restart postgres with systemctl restart postgresql-13.
It is HIGHLY recommend stopping the platform service first with systemctl stop brainspace-platform, restarting postgres, then starting the platform with systemctl start brainspace-platform.
Perl-libs
Brainspace 6.6.0 requires installing the perl-libs package prior to installing or upgrade to this version. This is the only version that has this requirement. This can be done with the following command as root:
yum -y install perl-libs
New Installation
Install the Application Server
After satisfying all prerequisites, install the Application server.
Note
Root access to all three servers and administration credentials for any third-party applications involved in the installation is required.
To install the Application (Runtime) server:
Execute the following command to switch to root user:
sudo su -
Note
If prompted, enter the user password.
Extract the contents of the tar file:
tar -xvf brainspace-<version number>.tar
In the directory where the tar file was extracted go into the new version directory and start the install:
cd brainspace-<version number> && bash install-rpm.sh
Note
You can exit the installer at any time. To restart the installation, re-execute the bash command bash install-rpm.sh
After the command is executed, the following menu will open:
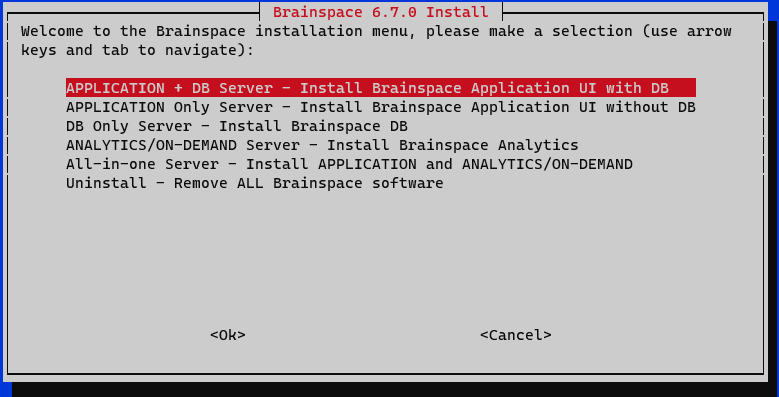
When the script is complete, you will see a completion status message.
With APPLICATION Server highlighted, press Enter on your keyboard.
The Set Database Password dialog box will appear; press Enter:
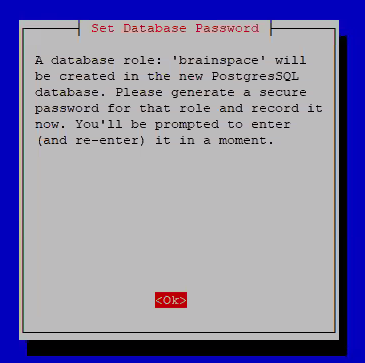
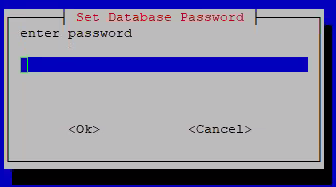
Enter a password for the PostgreSQL database user, then press Enter:
Note
You will use this password on all 3 servers and it can only be alphanumeric, no special characters.
Re-enter the password:
.png)
When installation completes you will be presented with the following, giving the URL for accessing the UI as well as the default Username and password:
.png)
Note
Note the password, you will need it later.
Copy the license file from the installation directory to
/var/lib/brains/.brainspace/brainspace_license.txt
The following is an example of how to copy the license to the target location from the installation directory:
cp <YOUR COMPANY NAME><EXPIRATION DATE>-license.txt /var/lib/brains/.brainspace/brainspace_license.txt
To overwrite the default license file, enter yes.
Note
If SELinux is enabled, SELinux must be configured to allow HAProxy to connect to Tomcat via TCP.
One way to do this is to use the following command:
setsebool -P haproxy_connect_any 1
After successfully installing the Application server, you will install the Analytics server and then the On-Demand server.
Install the Analytics Server and On-Demand Analytics Server
After successfully installing the Application server, you will install the Analytics (Build) server and then the On-Demand server.
Note
The following installation procedure is identical for the Analytics and On-Demand Analytics servers. After installing the Analytics server, repeat the procedure for the OnDemand Analytics server.
To Install the Analytics server
Execute the following command to switch to root user:
sudo su -
Note
If prompted, enter the user password.
Extract the contents of the tar file:
tar -xvf brainspace-<version number>.tar
In the directory where the tar file was extracted go into the new version directory and start the install:
cd brainspace-<version number> && bash install-rpm.sh
Note
You can exit the installer at any time. To restart the installation, re-execute the bash command bash install-rpm.sh
After the command is executed, the following menu will open.
Select ANALYTICS/ON-DEMAND Server with the down-arrow, and then press Enter on your keyboard. The Set Database Password dialog will open.
.png)
Enter the password that you set up for the Brainspace PostgreSQL password from the Application (Runtime) server, and then press Enter on your keyboard:
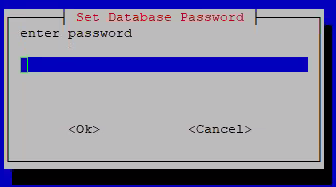
Re-enter the password, and then press Enter on your keyboard:
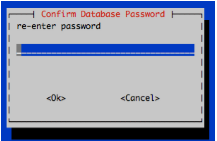
Enter the IP address or fully-qualified domain name for the Application server, and then press Enter on your keyboard:

On the ODA & Analytics Servers, for 6.3 installs, when prompted enter the location of the /localdata/brainspace share from the Application Server:

Note
The share from the Application Server should be /localdata/brainspace and the mount point on the ODA should be /localdata-share.
This will be asked for on the Analytics Server, however this just needs to be a directory on the Analytics Server and does NOT have to be a share from any other server.
To see how to configure this see Configure the data and localdata-shares article.
Copy the license file from the installation directory to /var/lib/brains/.brainspace/brainspace_license.txt
The following is an example of how to copy the license to the target location from the installation directory:
cp <YOUR COMPANY NAME><EXPIRATION DATE>-license.txt /var/lib/brains/.brainspace/brainspace_license.txt
To overwrite the default license file, enter yes. After successfully installing the Analytics server, repeat this procedure to install the On-Demand Analytics server.
Test the Brainspace License File
After installing the Application (Runtime) server, Analytics (Build) server, and the On-Demand Analytics (Analytics) server, you must verify that your Brainspace license file is recognized by the servers.
Note
You must test the license file on all three servers.
Execute the following command to login as root: sudo su –
Note
If prompted, enter the user password.Verify that the brains user has ownership and read permissions of the license file:
ls -l /var/lib/brains/.brainspace/brainspace_license.txt
Note
If the license is not owned by the brains user, change ownership using the following command:
chown brains:brains /var/lib/brains/.brainspace/brainspace_license.txt
To log in as the brains user, execute the following command: su - brains (the dash is important).
The screen will show that you are now user brains as shown in the following example:

To determine if the Brainspace license is recognized and correctly matches the license terms, execute the following command:
bt info
The screen will show information about your license file, including the expiration date, as shown in the following example:
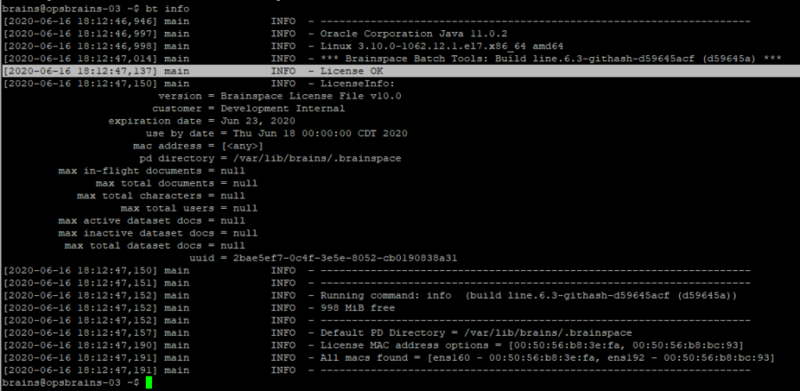
After successfully testing the Brainspace license on the Application server, repeat this procedure to verify that the license file is recognized on the Analytics server and the OnDemand Analytics server.
After successfully testing the Brainspace license on all three servers, you are ready to log in to Brainspace for the first time.
Log into Brainspace
To login to Brainspace:
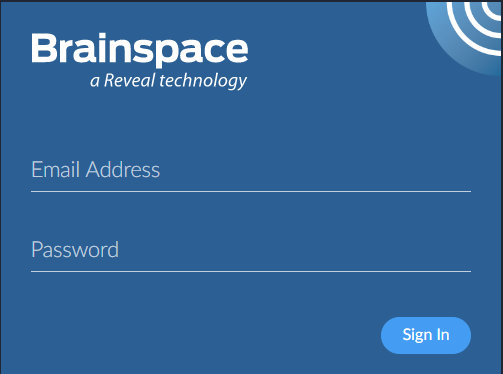
In the URL line of your web browser, enter the IP address or fully-qualified domain name for the Application server, and then press Enter on your keyboard. The web browser will load the Brainspace login screen:
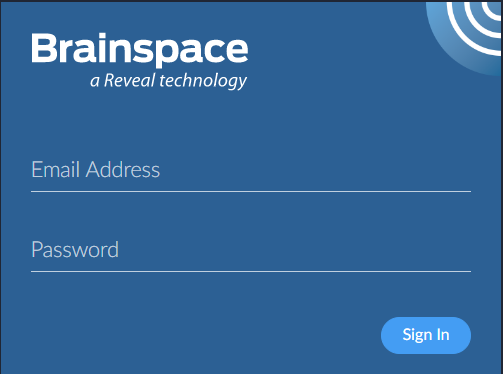
Type [email protected] as the email address and the password provided in the install completion dialog box after the Application was installed as the password.
The Change Your Password dialog will open.
Create a new password, and then click Change Password. General parameters specify at least 12 characters: 1 CAP, 1 number, 1 special character. The system will tell you if the password is not acceptable.
You will now need to login with the new password.
After logging in to Brainspace and changing your password, you are ready to register the Analytics server and On-Demand Analytics server.
Register the Analytics Server and On-Demand Analytics Server
After logging in to Brainspace and changing your password, you are ready to register the Analytics server first and then the On-Demand Analytics server.
Note
The following installation procedure is identical for the Analytics server and On-Demand Analytics server.
To add the Analytics server first:
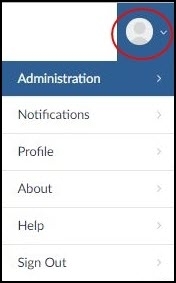
In the user drop-down menu, click Administration:
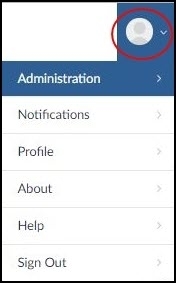
The Datasets screen will open.
Click the Services button:

Click the + Service button:
.png)
The Services screen will open.

In the Service URL field, type the IP address or fully-qualified domain name of your Analytics server prefixed with https:// and suffixed with the port number 1604.
Note
If using the IP address, the URL should be similar to the following example: https://10.8.2.202:1604 If using the fully-qualified domain name, the URL should be similar to the following example: https://my-analytics-server.example.com:1604
Click the Service Type drop-down menu, and then select Brainspace Analytics.
In the Service Name field, type a name for the server.
If connectivity to the Brainspace Analytics server from the Application (Runtime) server was successfully established, a check mark will display with the server, as shown in the following example: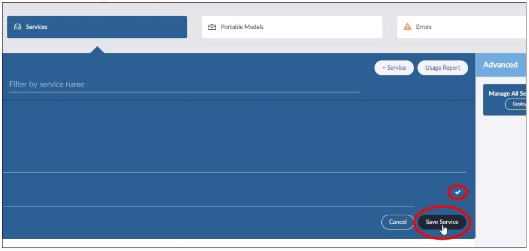
Click the Save Service button: Your Analytics server will appear on the Services screen.
Verify that the installed Brainspace version number appears with the server, as shown in the following example:
.png)
After successfully registering the Analytics server, repeat this procedure for the On-Demand Analytics server.
If your servers are not registered correctly or if you have problems loading your servers, contact Reveal Support.
After successfully installing the Application server, Analytics server, and the On-Demand Analytics server, you will set up the first Brainspace user and create a dataset.
For details, click here to view online help documentation.
Test Dataset (Enron 10k)
Brainspace provides a test dataset that can be used for a test build, so you can ensure that the services are working. The file provided is called enron-10k-2.0-docs.dat and is located, by default, in /tmp/brainspace-<Version Number>/datasets; this path could vary if you changed the directory the installer unpacked to. To use this dat file do the following:
Go to the directory containing the brainspace-<version number> directory:

Copy the dat file to /data/brainspace:
.png)
Change to the /data/brainspace directory and make the owner and group of the enron dat file brains:brains with chown brains:brains:enron-10k-2.0-docs.dat:

Now you can go to the Connectors Tab and create the Dat Connector by clicking + Connector:
.png)
Select DAT from the drop down:

Give the Connector a Name and in the Offset Path From field fill in the path, because this is in /data/brainspace a period is all that is needed, and press Update Connector:
.png)
Now go to the Datasets Tab and select +Dataset:
.png)
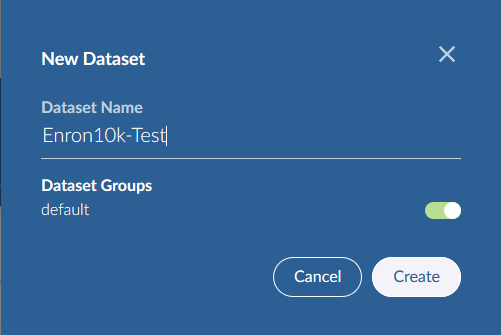
Name the dataset and press Create:
Upgrading
Pre-upgrading Checks
Before proceeding with an upgrade to a new version of Brainspace, the following checks should be done to help ensure a successful upgrade.
Disk usage/availability
/tmp and /var should have at least 18G of free space to help ensure a successful upgrade. The easiest way to check is with:
df -h
If upgrading from 6.5 or previous versions run du -h /var/lib/pgsql/9.6 --max-depth=0 to get the amount of space that PostgreSQL is taking up. You will need double that amount of free space on /var, ideally this will be in addition to having at least 18G of free space. This is for the Application/DB Server Only.
Copy your brainspace_ss.pem file
If you have a custom SSL certificate for HAProxy you should copy your /etc/brainspace/ssl/brainspace_ss.pem file to /tmp before running the upgrade and then copy it back to /etc/brainspace/ssl/ after. This will keep from needing to pull it from the archive that is made during the upgrade. This can easily be done with:
cp /etc/brainspace/ssl/brainspace_ss.pem /tmp/
Upgrading Application Server
Note
If this is an upgrade from 6.2 then ensure that NFS is running on the Application Server with systemctl status nfs, if it is not then start it with systemctl start nfs. Also ensure that /etc/exports has the entry to share /localdata/brainspace to the ODA Server.
Execute the following command to switch to root user:
sudo su -i
Note
If prompted, enter the user password.
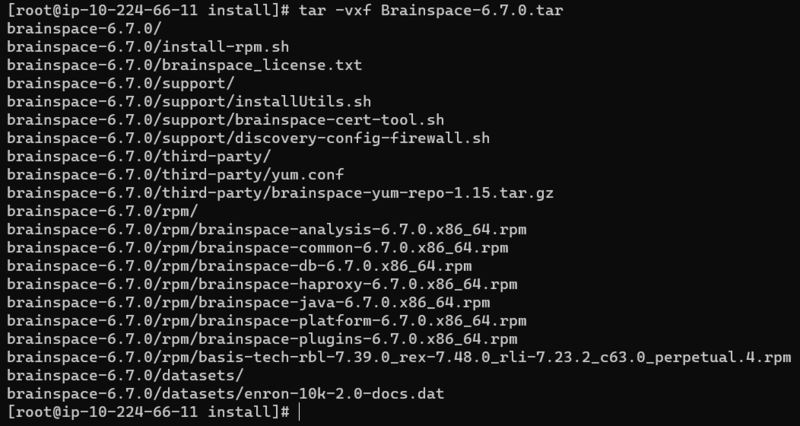
Extract the contents of the tar file:
tar -xvf brainspace-<version number>.tar
In the directory where the tar file was extracted go into the new version directory and start the install:
cd brainspace-<version number>
./install-rpm.sh
Note
You can exit the installer at any time. To restart the installation, re-execute the bash command ./install-rpm.sh
After the command is executed, the following menu will open:

With APPLICATION Server highlighted, press Enter on your keyboard
For upgrades from 6.5 or earlier the update to Postgres 9.6 to 13 will take place. You know that portion was successful if you see the following:
.png)
If you see anything else let the installer continue and contact support before proceeding further.
Once the Upgrade completes you will see “Installation of Brainspace is complete!”
.png)
Restore your brainspace_ss.pem if you made a copy of it before the upgrade, then restart brainspace-haproxy. You can do this with the following commands:
cp /tmp/brainspace_ss.pem /etc/brainspace/ssl/brainspace_ss.pem
systemctl restart brainspace-haproxy
For upgrade from 6.5 or earlier, after the install completes, check the /var/lib/brains/.brainspace/brainspace.DBConfig file, ensure that the following lines are present:
ssl=true
sslFactory=org.postgresql.ssl.NonValidatingFactory
If the above is not present it will need to be added to the end of the file and brainspace-platform restart with systemctl restart brainspace-platform.
The brainspace.DBConfig file should look similar to this:

If the Analytics and On-Demand Analytics Servers are on a different subnet than the Application Server you will need to add entries to the end of the /var/lib/pgsql/13/data/pg_hba.conf file. By default the file will look like this:
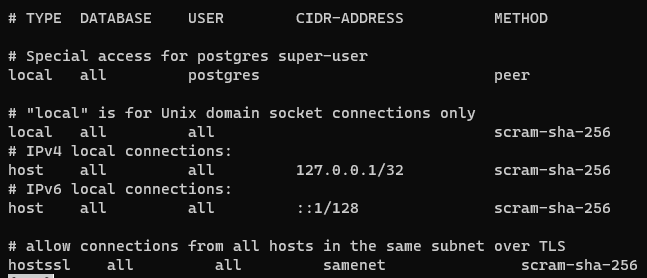
You will need to add the entries under the "IPv4 local connections:" section. An example of how it would look could be:
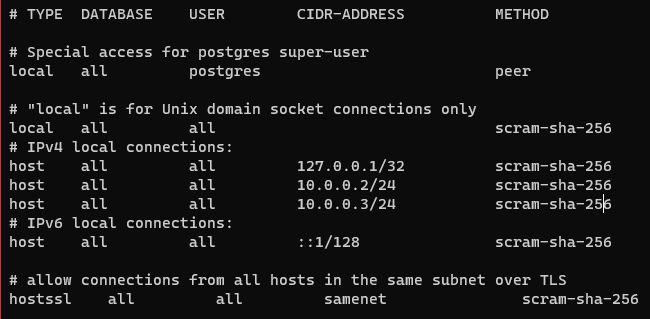
*Where 10.0.0.2 and 10.0.0.3 would be the IP and subnet mask for you Analytics and ODA Servers.
Once the changes have been made and saved then you will need to restart postgres. To do this you will need to issue the following commands:
systemctl stop brainspace-platform
systemctl restart postgresql-13
systemctl start brainspace-platform
Upgrading Analytics & On-Demand Analytics
Note
You will need a /localdata-share directory on the Analytics Server, this should NOT be an NFS mount like it is on the On-Demand Analytics Server.
Execute the following command to switch to root user:
sudo su -i
Note
If prompted, enter the user password.
Extract the contents of the tar file:
tar -xvf brainspace-<version number>.tar
In the directory where the tar file was extracted go into the new version directory and start the install:
cd brainspace-<version number>
./install-rpm.sh
Note
You can exit the installer at any time. To restart the installation, re-execute the bash command ./install-rpm.sh
After the command is executed, the following menu will open:

Highlight ANALYTICS/ON-DEMAND Server, and then press Enter on your keyboard.
For upgrades from 6.2 you will see the below prompt for the location of the localdata-share:

Note
The share from the Application Server should be /localdata/brainspace and the mount point on the ODA should be /localdata-share.
Note
To see how to configure this see Configure the data and localdata shares.
After the upgrade completes successfully you will see a message similar to what is seen on the Application Server.
.png)
For upgrade from 6.5 or earlier, after the install completes, check the /var/lib/brains/.brainspace/brainspace.DBConfig file, ensure that the following lines are present:
ssl=true
sslFactory=org.postgresql.ssl.NonValidatingFactory
If the above is not present it will need to be added to the end of the file followed by the brainspace-analysis service restarted with systemctl restart brainspace-analysis
The brainspace.DBConfig file should look similar to this:

Confirmations After Upgrading
After you’ve upgraded all servers, you will want to do the following to confirm everything is working as expected:
Login to Brainspace with your credentials:
Go to Administration and then to the “Services Tab”:

Confirm all Services are on the same version and that the Services are all showing “Active” and “READY” and that they are all on the same version:
.png)
.png)


.png)
.png)
.png)


.png)


.png)

.png)

.png)

.png)
.png)


.png)
.png)


.png)


.png)