What is a Brainspace Connector?
A connector is a plug-in that enables the import and export of data from Brainspace to Reveal, Relativity® or other supported applications. A connector for a certain platform establishes a link between Brainspace and a specified workspace or project using credentials to access the connected platform. A connector must be available before a Brainspace dataset can be created. In addition to connecting Brainspace to third-party applications, you can also establish connectors between specific file types such as a standard Concordance Load File (DAT) or JSON.
Integration
Integration between Reveal Review and Brainspace makes use of several components. The main component is a Java connector running within Brainspace. The connector interacts with the Brainspace UI and communicates with the Reveal Review REST API to retrieve text and metadata and perform other database functions. Reveal Review also communicates directly to the Brainspace REST API to add additional functionality.
This document is based on Brainspace SDK 6.5.4.
Adding a Connector
The first step in getting started is setting up a connector in Brainspace. This creates the connection to the Reveal REST API.
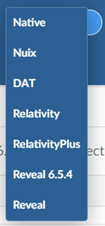
Go to Administration->Connectors and hit the +Connector button on the right-hand side. Select Reveal for the connector type.
For backward compatibility with older systems, there may be several Reveal connector versions listed. To use Reveal 6.5.4, the Reveal REST API must be at least version 10.3.31.
Main Settings
The connector name and the URL to connect to the Reveal REST API must be specified.
The naming convention for the Reveal Rest API URL is:
https://<hostname>.<domain>/rest/api

Overlay Settings

The connector can automatically create custom fields in the Reveal project database (in the IMPORT_DOCUMENTS table) and populate the values immediately after ingestion. You can also manually run the overlay as a separate step after ingestion if desired.
The following is the complete list of overlay fields:
BD EMT AttachmentCount | BD EMT DuplicateID |
|---|---|
BD StrictDupStatus | BD EMT ThreadIndent |
BD EMT ThreadSort | BD IsStrictDupPivot |
BDID | BD ExactDupStatus |
BD EMT IsDuplicate | BD EMT IsMessage |
BD EMT FamilyID | BD IsNearDupPivot |
BD EMT ThreadHasMissingMessage | BD NearDupSetID |
BD EMT WasUnique | BD Summary |
BD EMT ThreadID | BD EMT EmailAction |
BD IsExactPivot | BD EMT ThreadPath Full |
BD EMT MessageCt | BD Languages |
BD EMT Intelligent Sort | BD ExactDupSetID |
BD EMT IsUnique | BD NearDupStatus |
BD EMT DuplicateID | BD NearDupSimilarityScore |
BD Primary Language | BD EMT UniqueReason |
BD EMT WasUniqueReason | BD RelatedSetID |
BD StrictDupSetID | BD EMT AttachmentCount |
Enable option Enable Multiple Overlay Sets if you wish to connect different datasets to the same Reveal project. This will ensure unique fields names in Reveal.
Example field names: Option off: BD EMT WasUnique
Option on: BD Dataset 140 EMT WasUnique
A field profile is also created in Reveal during overlay. By default, admin groups are given access to the profile.
Example profile names:
Option off: BD Dataset
Option on: BD Dataset 140
Option Enable Clearing Documents Prior to Overlay can remain off by default. If re-running overlay this option can be used to clear all values prior to re-overlaying.
Advanced Connector Settings
There are some fields located under the “Advanced” link. Click the link to display them.

The document ingest batch size is how many documents (field values and text) to pull at one time in a chunk over the Reveal API. A good default range is 200-500.
The document id batch size is used during ingest and syncing to return a list of document ids from Reveal. A good default is 10,000.
The overlay batch size is used when sending Brainspace field values to Reveal for overlay. A good default is 1000.
The key field can be either ITEMID or BEGDOC, it is used to sync docs between the systems. ITEMID is the more efficient choice.
Allow deletes on sync push will remove any docs from a work folder in Reveal that are no longer present in a notebook in Brainspace. This is also used in tag sync to un-tag documents that have been removed from a notebook. Note: This pertains to notebook syncing and not connected tag syncing.
You can click Test Connector to verify connection to the Reveal Rest API or just click Create Connector (this will also verify before it creates).

The new connector won’t show any datasets yet because it hasn’t been associated with any. The same connector will be used for multiple cases to pull documents into datasets.
Setting Brainspace Root Folder in Reveal
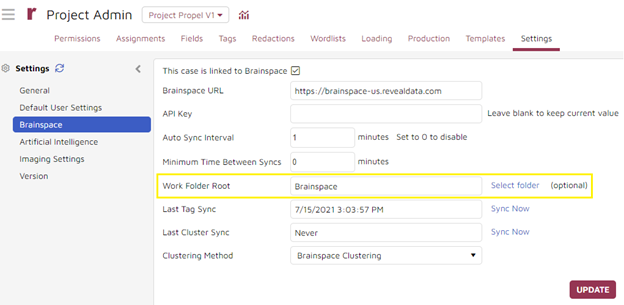
Before creating a dataset in Brainspace, you should set the work folder root in Reveal Review for the project you wish to ingest. The setting is located under Admin->Settings->Brainspace. This will limit the number of work folders used within Brainspace in projects with many top-level work folders directly under the main root.
Creating a Dataset for a Reveal Case
Once you have created a connector, the next step is to create a dataset. Typically you would have one dataset for each Reveal project but it is possible to create multiple datasets for a project. From the connectors page, click the Dataset button on the top left and then hit the +Dataset button on the right-hand side. Name your dataset after an existing Review project and click Create.
The groups are not controlled by Reveal; they are Brainspace groups that have access to the dataset. The empty dataset will be created and will expand automatically.

Click Choose Connector under the middle data section and select a previously created connector.
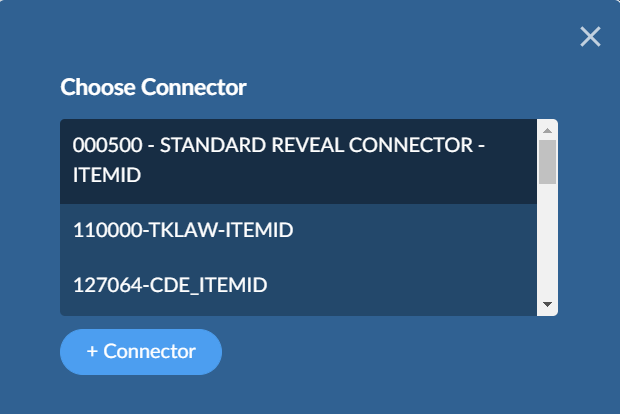
The first time you use a connector it will attempt to connect to the Reveal REST API to verify access. You must enter the username and password used to access the Reveal database.
The next step displays the available Reveal Review projects. Select one and click Save & Proceed.
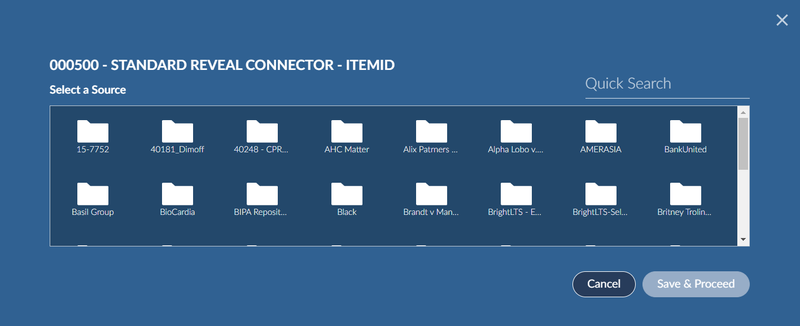
The next step allows you to pick the documents you wish to pull from the project in Review.
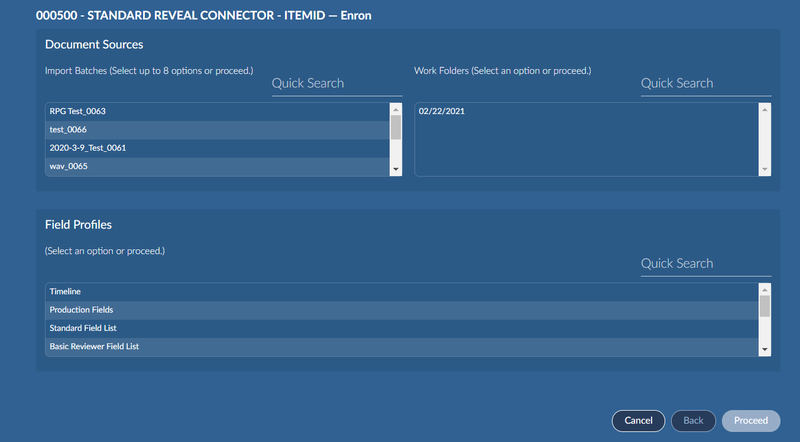
You can pull from import batches and/or top-level work folders. The work folder root is configured under Admin->Settings->Brainspace in Reveal Review. The work folders available in the connector are controlled by the normal security methods in Reveal Review based on the user id used in the connector credentials.
The top two lists are multi select. Select any combination of items from one or both lists. You must select at least 300 docs to ingest.
Select only one field profile in the bottom list. By default, Reveal creates a field profile named Brainspace ingest that contains the list of fields that are commonly used during ingest. The profile includes all fields required for analytics/email threading.
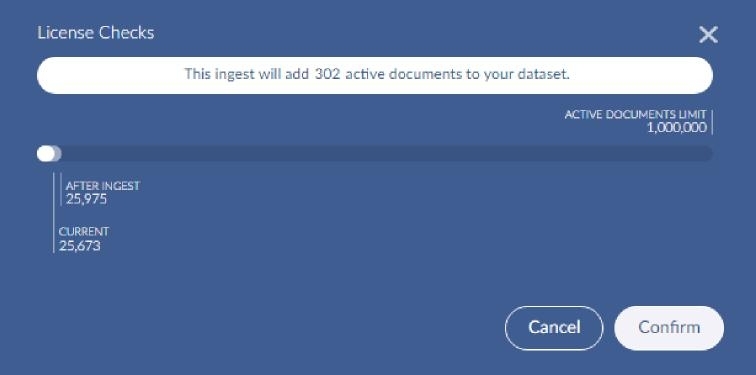
The next screen informs you of the count of documents in the selected items that will be ingested and the possible licensing impact. If you happen to select documents that have already been ingested, they will be re-ingested but they won’t count against the licensing. After confirming, the next step is the field mapping.
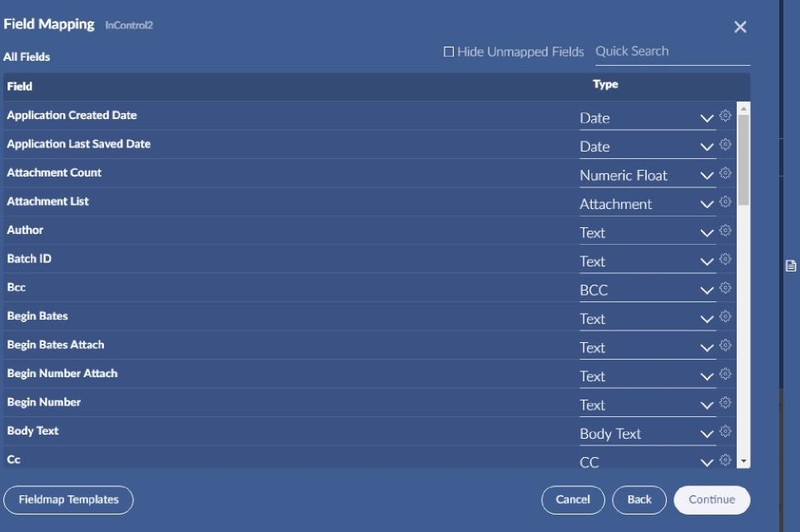
Dataset Field Mapping
Mapping Fields for a Dataset
There are a few fields that have special meaning in Brainspace and are recommended (these are shown below). The connector attempts to map all fields from the profile according to their data type or special meaning. In most cases the default mapping is sufficient and you can just click Continue.
Preview Field Mapping
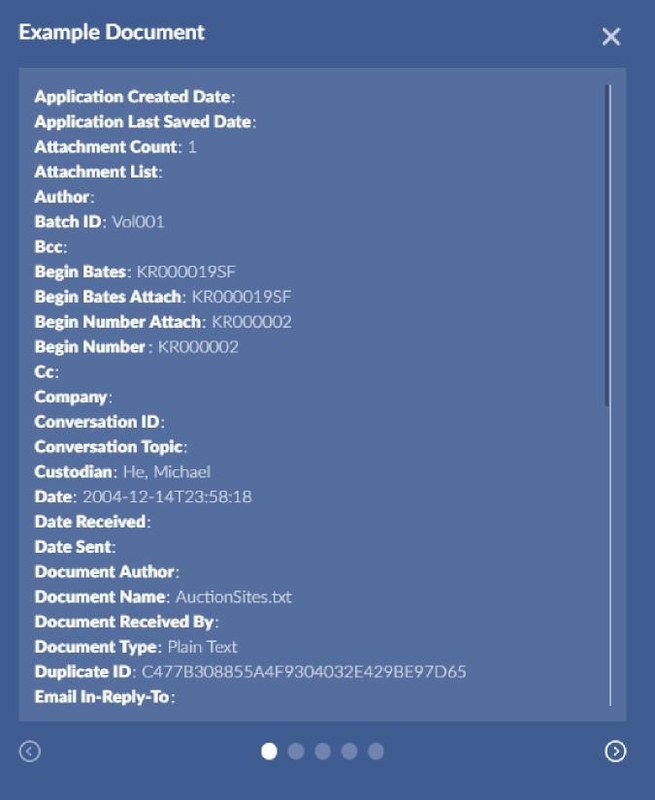
If you would like to preview the values for the mapped fields before hitting Continue, you can click the little icon in the middle right. You will be presented with a popup that contains circle buttons at the bottom to navigate through five docs. Body text is not included in the popup; it is too long and not very useful in this case.
Special Field Mapping
The following are fields of special significance:
Reveal Table Name | Brainspace |
|---|---|
SUBJECT_OTHER | Maps to “Email Subject”. Used as the title in Brainspace so if the value is blank in Reveal Review, the Brainspace title will be "No title". It is possible to map more than one Reveal field to the same Brainspace field and the values should combine however this could interfere with Brainspace analytics. |
SENDER | Maps to “From” |
RECIPIENT | Maps to “To” |
CC_ADDRESSES | Maps to “CC” |
BCC | Maps to “BCC” |
SENT_DATE, TIME_SENT | All known (non-custom) DATE, TIME pairs are combined into a single field value when ingested into Brainspace. You only need to include the date field in the profile, the time will append automatically. |
ATTACHMENT_LIST | Maps to “Attachment” |
BEGIN_NUMBER_ATTACH | Maps to “Parent ID” when using BEGDOC as ID. |
PARENT_ITEMID | Maps to “Parent ID” when using ITEMID as ID. |
CONVERSATION_ID | Maps to “Conversation Index” |
CUSTODIAN_NAME | Maps to “Custodian” |
ITEMID or BEGDOC | Map one or other to ID field to be used as the lookup key. ITEMID is commonly used as the key field with BEGDOC mapped to “String”. The ID field is the only required Brainspace field but ingest will fail if you are trying to ingest body text and no provided docs have text. |
BODY_TEXT | You can map one or more text sets from Reveal to "Body Text". The text will be appended together in the document viewer in Brainspace. For example, you could map the primary language version along with a secondary translation. "Extracted / OCR / Loaded" has special meaning. Extracted text is used first if available with fallback to OCR/loaded if not available. |
FILE_SIZE | Maps to “File Size” |
DOCUMENT_TYPE_DESC | Maps to “File Type” |
Running Ingest/Build/Overlay
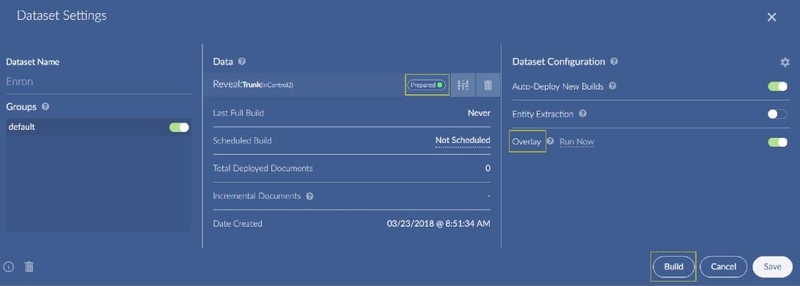
Once you complete field mapping, the dataset settings are displayed and the dataset will be in the “Prepared” state. Before build/ingest you can decide whether you want to overlay fields back into Reveal Review and after the build completes.
Click the Build button to start ingest.
Note
The button to the right of the “Prepared” text allows you to come back and re-configure the sources for a dataset once it is created. The trashcan on the bottom lower left allows you to remove a dataset. When you delete a running dataset, it will first go to “Stopped” state and will not disappear right away from the list; you can manually refresh the screen after a few seconds.
Build displays the following popup.
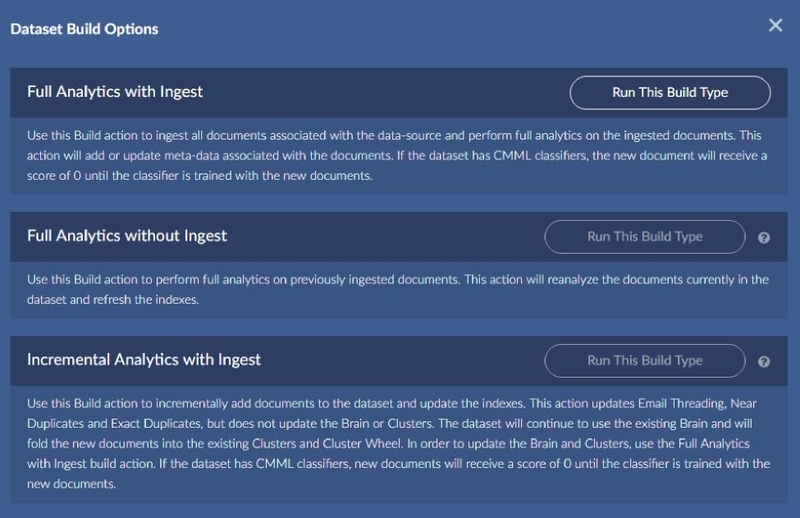
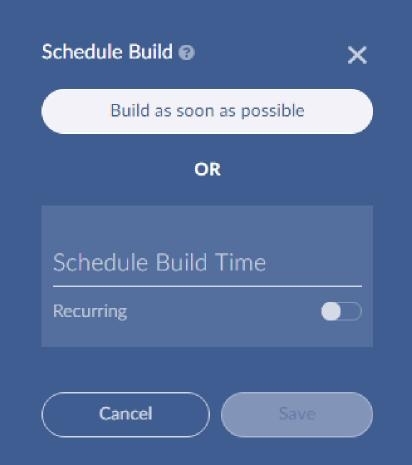
Choose whether to build as soon as possible or at a later time.
Once the build starts you will see progress on the far right hand side of the screen. Progress is reported every 10K documents.
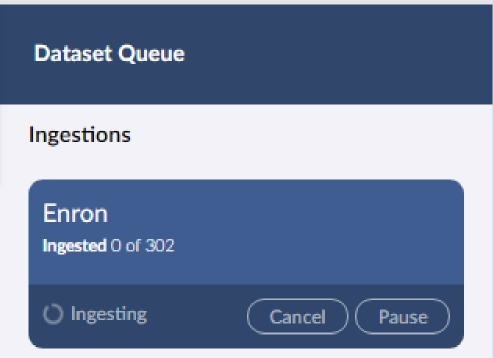
With ingest and build selected, the first stage pulls documents from Reveal Review and stores them in Brainspace.
Once ingest is complete, the build stage starts automatically.
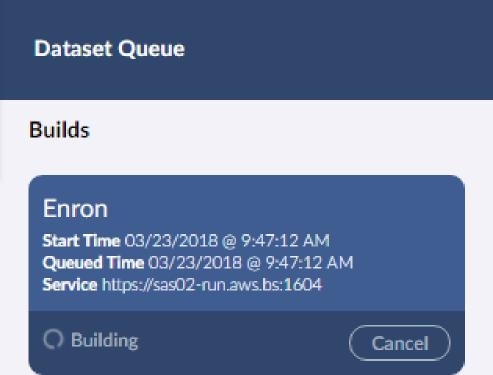
When the build completes, the area to the right will close and the dataset will be running and ready to go. If overlay was selected, you will see a message in the dataset area under admin that overlay is in progress. If it fails for some reason, an error message will be displayed.
Incremental Ingest
You can do an incremental ingest to add more docs to the same dataset. Re-open the dataset and click the button immediately to the right of the “Prepared” text to add more docs.
Notebook Syncing
This feature allows for pulling and pushing document ids between a Brainspace notebook and Reveal Review.
For pulling into Brainspace, you can select documents from a top-level work folder in Reveal Review or select documents with a certain tag. The work folders and tags available in the connector are controlled by the normal security methods in Reveal Review.
Pushing will either add notebook documents to a work folder in Reveal Review or tag the documents in Reveal Review.
To setup sync you need to first create a notebook in Brainspace.
There are numerous ways to do this in Brainspace.
A simple way to create a notebook is to click on Notebooks at the top of the main screen and click the New Notebook button.
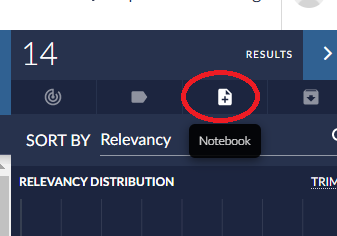
You can also click the plus icon in the results area to add the current document results to a notebook. In this case you can choose an existing or create new and include any related items.
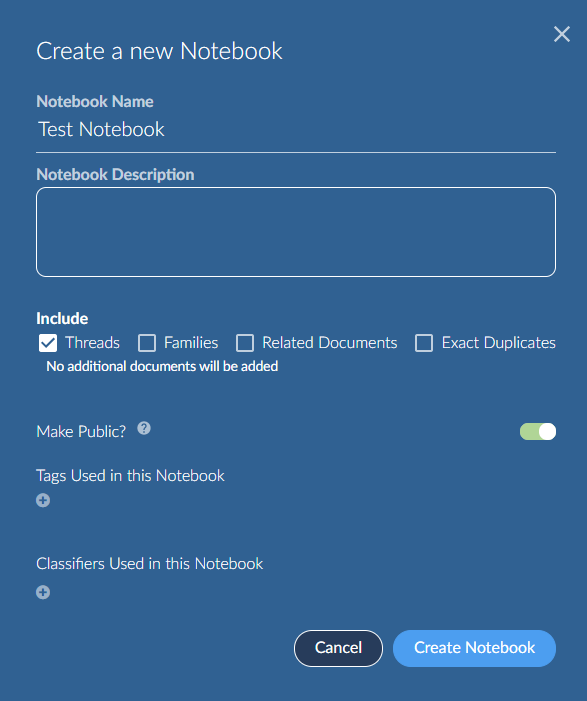
Be sure to make your Notebook “Public” so others can find it.
Once you create the notebook open it and you will see a Synchronize button on the right-hand side.

Note
If prompted for credentials, use the username and password associated with your Reveal review account, not your Brainspace account.
First select the field type to synchronize, either work folder or tag.
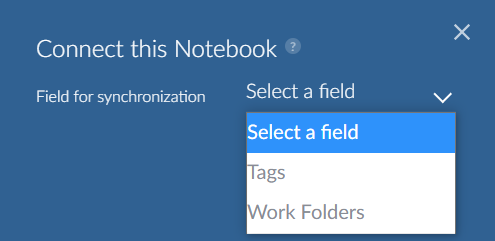
Then select the desired tag or work folder and click Next.
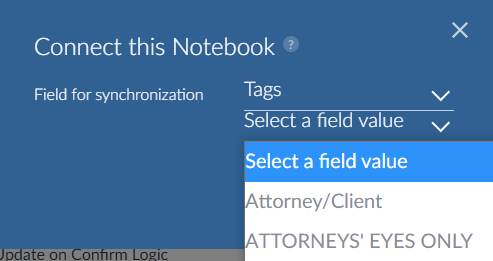
You can select to either push to or pull from Reveal Review.
When pushing to a work folder, there is an option Use notebook name (push only) that names the work folder the same as the notebook. If the work folder name is already in use, it will create a unique name.
For pushing you may see a message about concept metadata. For example, if you added a certain date range of documents to a notebook, the metadata may be present. You can choose to include this when sending to Reveal; it will be placed in a field name BD Concept Full. This field is not added to any field profile by default in Reveal.
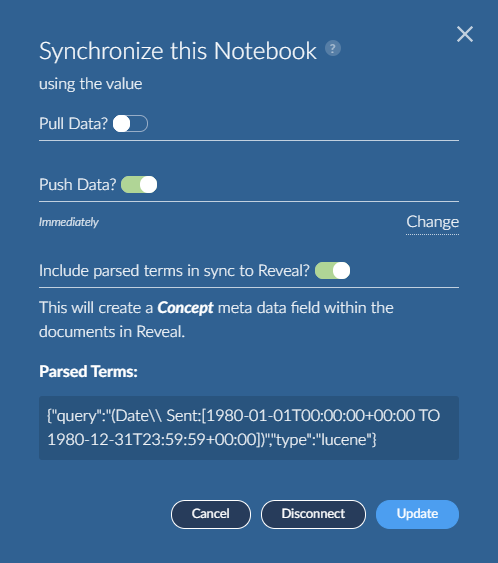
You may need to Refresh to update the synchronization status in the Brainspace web interface.
If you pushed documents, go to the work folder or tag in Reveal Review to verify. Click the Refresh icon at the top of the folders tree to update the count. For tags, it is best to go to the admin node to verify. The documents will be tagged using the user id from the connector credentials.
Note
You cannot push tags for documents in Reveal that are locked for tagging. If you attempt to tag these in a sync push, they will not be tagged and the count of documents in Reveal Review will not match the notebook.For pushing to Reveal Review there is an option in the connector configuration named Allow delete on sync push, to remove work folder docs or un-tag documents that have been removed from the notebook.
Pulling into Brainspace is additive which means documents removed from Reveal Review are not removed from the notebook. To remove them, you would have to remove all docs from the notebook before re-syncing.
Once you have setup sync for a notebook, it becomes “connected” and all you need to do to re-sync is click the Synchronized button again.

In this case you will see a different popup.
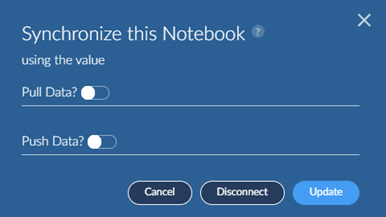
If you wish to sync to a different folder or tag you can disconnect and re-setup the sync.
Connected Tag Setup in Brainspace
Connected tags are another method to sync data from Reveal Review to Brainspace. You can connect a Reveal Review tag or work folder to a tag in Brainspace.
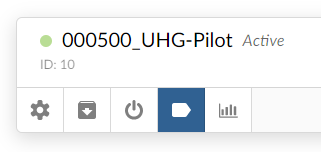
To setup a connected tag in Brainspace, go to admin area for datasets and click the tag button on a dataset.
In the popup, click Connect Tags.
You will be presented with another popup containing Reveal Review tags and work folders. Reveal Review supports three types of tags: multi-select, mutually exclusive, and tree. Brainspace connected tags only allow for a single choice tag with multiple options. This is the same as a mutually exclusive tag in Reveal Review.

Example of a mutually exclusive tag in Reveal connected to a Brainspace tag.
|
|
For a multi-select tag, multiple connected tags are created in Brainspace each with a single tag as an option. For example:

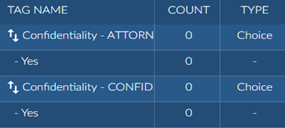
Similarly for a tree type tag, multiple connected tags are created in Brainspace with a single tag as an option. The tree levels are flattened out.

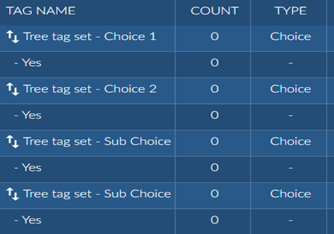
Work folders appear at the bottom of the list with the prefix “WF:”.

Check the tags and work folders you wish to connect and then press the Connect button. The popup will show the selected tags/work folders.
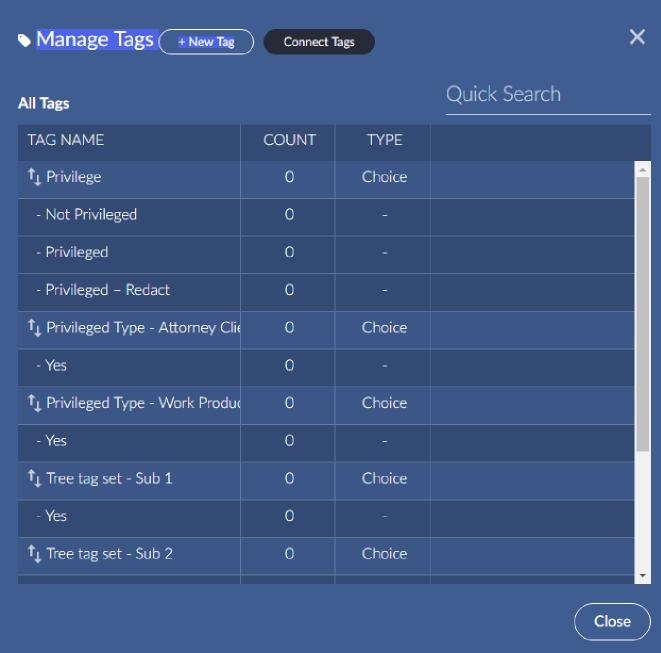
If you hover in the rightmost column of the grid, you can push or pull the document ids with the tags or work folders to/from Reveal Review. You can also choose to disconnect the tag.

Once you pull from Reveal Review for each one you can see the document counts.
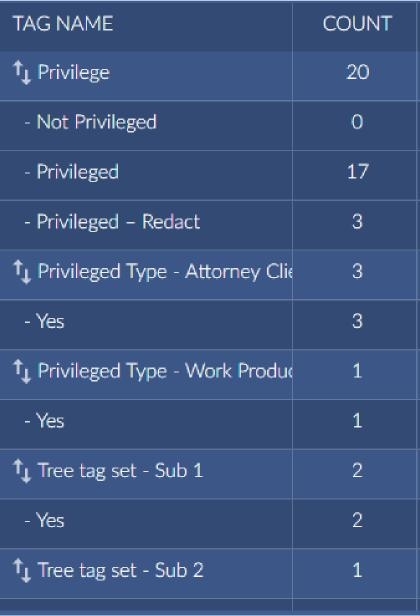
Using Connected Tags Within Brainspace
Connected tags are primarily used in CMML sessions in Brainspace but they are also available in other areas. One example of where you might use them is when performing an advanced search:
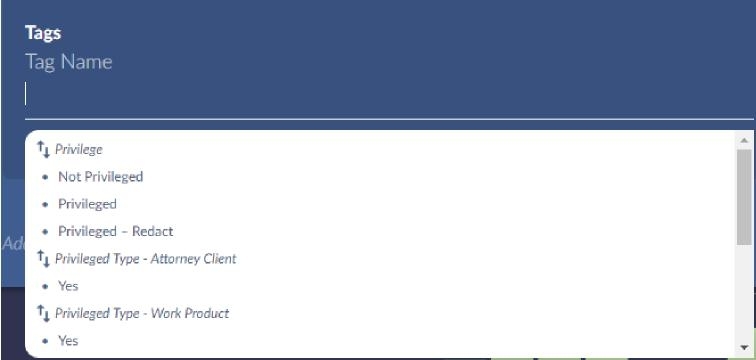
Another place where they are useful is when you click on a document, the connected tags are displayed on the left-hand side.
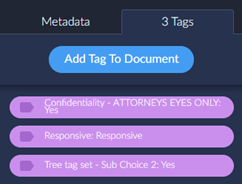
Connected Tag Auto Pull from Reveal Review
Connected tag syncing between Brainspace and Reveal is commonly initiated from within the Brainspace user interface. In the special case where you would like to pull connected tags from Reveal into Brainspace on a schedule outside of a CMML session, you can setup the following in Reveal under Project Admin->Settings->Brainspace.

The API key can be found on the right-hand side in the Brainspace admin area under Connectors.
Supervised Learning - CMML Workflow
Before creating a CMML classifier, you must first create a mutually exclusive tag in Reveal with 2 choices. Typically, the choices would be named Positive/Negative or Responsive/Non-Responsive. You can add additional choices to the tag for use in Reveal, for example “Further Review Required” or “Tech Issue”, but these will not be used in the CMML session.
Note
Starting with Brainspace 6.7, it is possible to add multiple choices, up to 5 positive, 5 negative and 5 neutral.
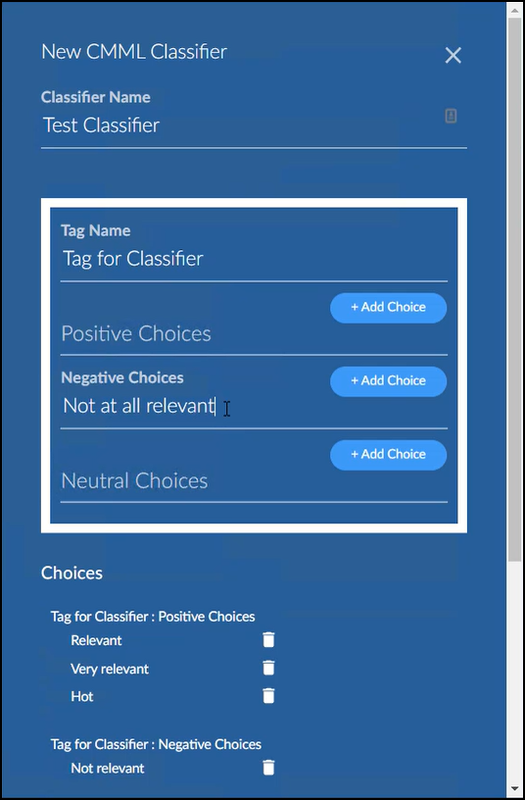
Each positive choice sends the same Yes classification, each negative choice sends the same No, and each neutral choice shows the document has been seen but not classified.
There is no need to put the tag into a tag profile in Reveal, that will be done automatically once the CMML session has been created. Follow the instructions earlier in this document for creating a connected tag.
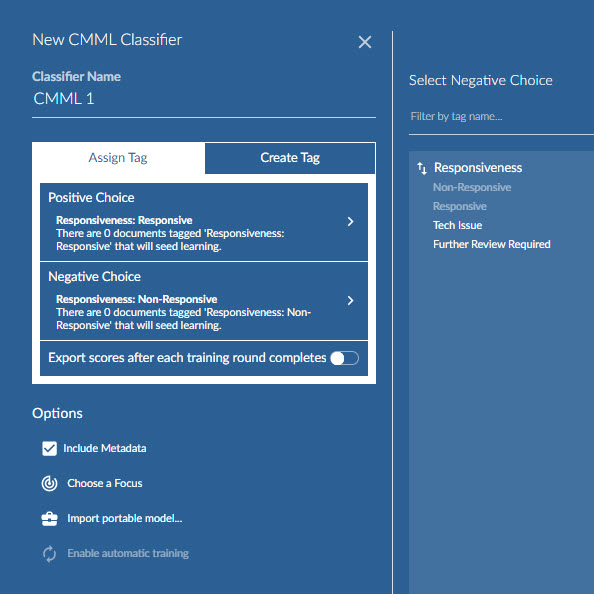
Once the connected tag is created click Supervised Learning -> New Classifier -> CMML.
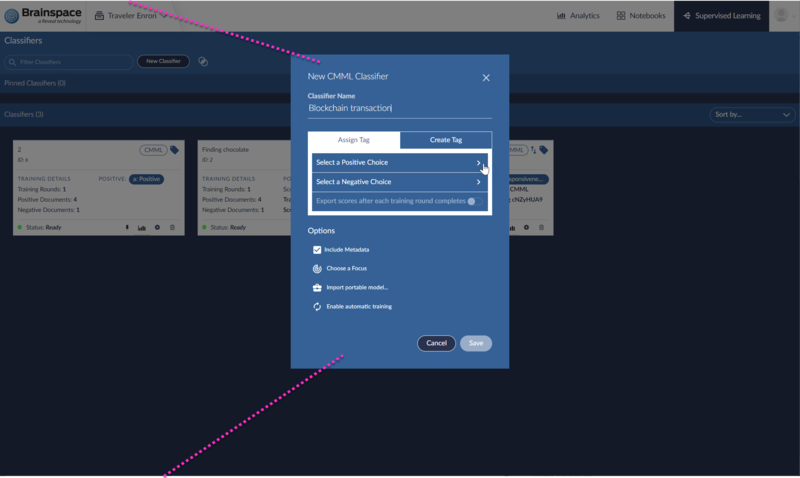
Give the Classifier a descriptive name. Under Assign Tag select the Reveal connected tag choice to use as the positive and negative tag for Brainspace. In most cases, you won’t pre-review documents in Reveal using the same connected tag before creating the CMML session, but if documents are reviewed ahead of time, then those documents will be used as initial seed documents.
If you wish to export scores back to Reveal automatically after each round, enable option Export scores after each training round completes.
CMML session can be run in manual or auto mode. In manual mode, you create a training round, tag the documents in Reveal, pull the tags from Reveal into Brainspace, and then export scores to Reveal (if desired). Auto mode streamlines the process by automatically supplying training round documents on a timed basis as needed. It will also pull scores after each round if enabled.
To enable automatic training, click Enable automatic training. Enter the number of documents you wish to review for each round along with the method for selecting documents and how often to poll the Reveal API to update tagging progress.
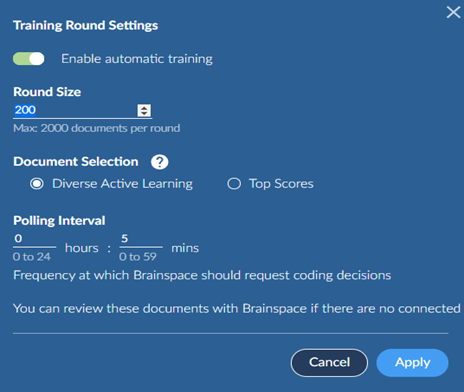
Immediately after creating the CMML session and when auto mode is enabled, messages will appear occasionally asking to refresh the screen.
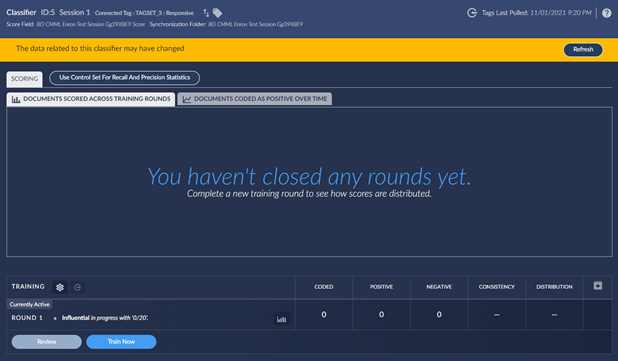
Each CMML session has a unique identifier that is also used within Reveal to allow for multiple sessions at the same time. For example:

When a CMML session is created in Brainspace, the following items are automatically created in Reveal.
CMML review team with admin access by default.
A unique suggested training field.
A unique tag profile to which the connected tag is added.
A unique score field.
A unique field profile with admin and CMML review team access by default. The training field, score field, and tag field are added to this profile.
Main CMML root work folder under the Brainspace root folder.
Unique classifier folder under the main CMML root folder with admin and CMML review team access by default.
A work folder with all documents used for training under the classifier root folder.
A suggested for training needing review work folder under the classifier root folder.
At the bottom of the CMML session, you can view the number of documents in the current round along with the count of documents coded. In auto mode, the Reveal API is polled for tagging information and after all documents in the training round are tagged, Brainspace will close the round, perform score calculation, and create a new training round.
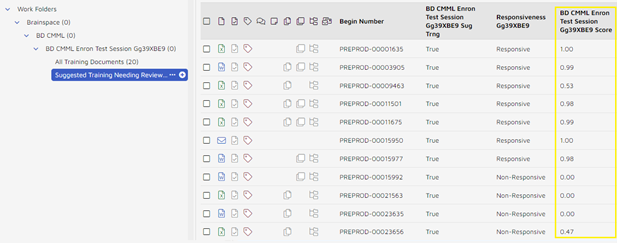
To review the documents in Reveal, navigate to the suggested training folder under the classifier folder for the session and review the documents using the connected tag. You should also pick the field profile for the session. If Review is already open, you need to refresh your browser to reload the field and tag profiles. As always, you can create an assignment job if needed.
In manual mode, you can pull tags in Brainspace using following icon at the top of the session area.

Once training is complete, you can manually export scores to Reveal using the following icon at the bottom of the session area. 
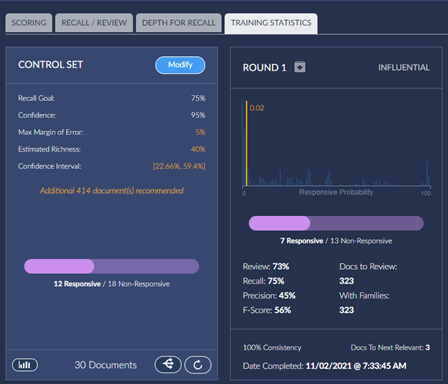
Session example after closing the first training round.
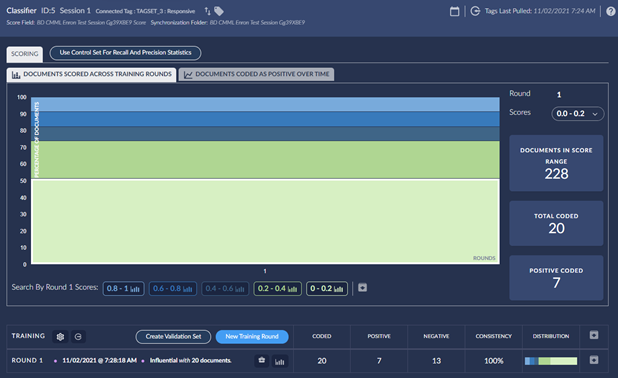
Scores in Reveal range from 0.00 to 1.00 with 1.00 being most responsive.
You can also create a control set if desired within a CMML session.

When a control set is created in Brainspace, the following items are automatically created in Reveal.
A work folder with all control set documents that need to be reviewed under the classifier root folder.
A unique field indicating the document is a control set member.
A unique tag profile, tag set, and choices used to review the control set documents.
A unique field profile with admin and CMML review team access by default. The control set member field, score field (from the original session creation), and control set tag field are added to this profile.
If Review is already open, you need to refresh your browser to reload the field and tag profiles.
Note the tag and field profiles for the control set review have CtrlSet in the name.
Ensure that you select these versions while reviewing control set documents.

You can use the following button to update the coded status in Brainspace during or after all control set documents are coded.

Once all documents are coded, the control set is processed.

If necessary, you can add additional documents to a control set after it is created using the Modify button.
Predictive Coding TAR 1.0 Workflow
Predictive Coding - TAR 1.0 Workflow Initialization
Note
As of Release 6.7 clients will no longer be able to create new Predictive Coding sessions. Existing Predictive coding sessions are not disabled, they can continue to be used in the near term. It is highly recommended that clients use CMML with ACS as a replacement for PC.
Most of the Predictive coding configuration in Reveal Review is done automatically when you create a new classification in Brainspace. With a dataset open in Brainspace, click the Supervised Learning button located in the upper right-hand corner.

Once the page loads, click the New Classifier button and select Predictive Coding as the type.
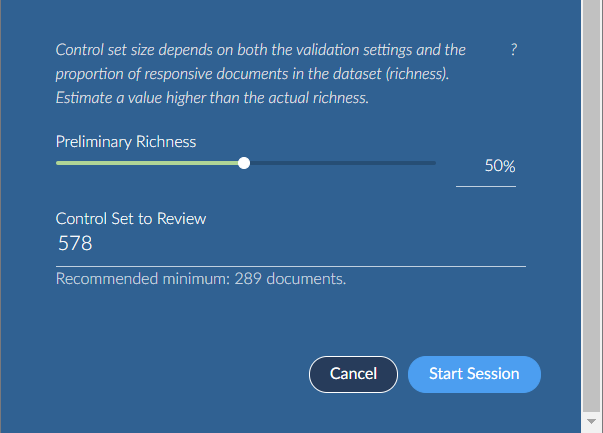
The settings on the next popup are beyond the scope of this document. In order to test the workflow you can leave the defaults as is with the exception of the number of control set documents to review toward the bottom. Lower this to a manageable number and click Start Session.
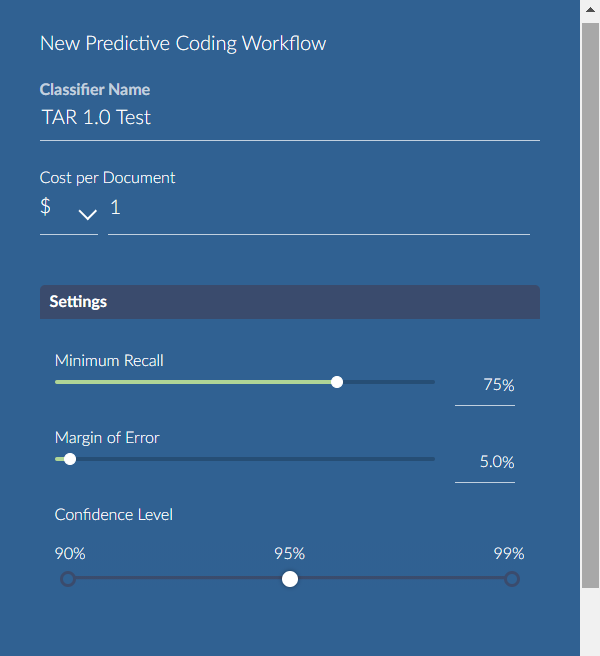
There will be a small delay while the setup is done in Reveal Review after which you will see the following:
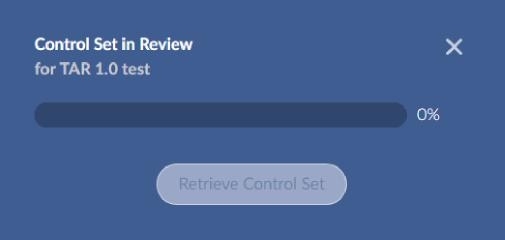
The popup is polling and will show progress updates as documents are reviewed in Reveal Review. Once 100% percent are complete, the Retrieve Control Set button will be enabled.
Predictive Coding – TAR 1.0 Workflow – Reviewing Documents
Note
As of Release 6.7 clients will no longer be able to create new Predictive Coding sessions. Existing Predictive coding sessions are not disabled, they can continue to be used in the near term. It is highly recommended that clients use CMML with ACS as a replacement for PC.
The following items are created automatically in Reveal Review when predictive coding is initialized within Brainspace.
Predictive Coding Team | A new team that is added to the tag profile and work folders mentioned below. This team does not initially contain users. The admin must set them when the TAR session starts or use a different existing team and add that team to the work folder and tag profile manually. |
BDPC Needs Review Field | All documents that need reviewing for the current round. (This just means the documents need to be reviewed in the current round, not whether or not they have actually been reviewed.) Reviewers do not typically need access to this field. This field is automatically deleted once the TAR session is closed in Brainspace. |
BDPC Predictive Rank Field | Score assigned to documents after each round and when TAR session is closed. Can be used to validate round results and final coding. Needs to be added manually by admin to a field profile but probably not required by normal reviewers. |
BDPC Use For Training Field | Whether a document will be used for training in Brainspace. Set automatically to false for the control set round and true for training rounds. This field is not required by normal reviewers. There is an admin function available in Brainspace to pull documents marked as “Use for Training” from Reveal Review. This would be used in an admin scenario where hot docs or highly relevant or non-relevant docs can be selected in Reveal Review and used in the next training round in Brainspace to help Brainspace better code the relevancy of documents. There is a “Manual” option when creating a training round that will pull these documents from Reveal Review. |
BDPC Auto Code Field | How each document was coded by Brainspace at the end of TAR the session. Value of 0 means Non-Responsive, 1 means Responsive, and NULL means not coded. Used by admin to produce the results or assign them out for further review if required. |
Predictive Coding Tag Profile | Tag profile with one tag pane and the created tag set mentioned below. The predictive coding team is automatically added. |
BDPC Is Responsive Tag | Tag with two choices, one for responsive and one for non-responsive. Automatically added to tag profile and tags are set to automatically trigger reviewed status. |
Predictive Coding Work Folder | Created under Brainspace root folder setup under admin in Reveal Review. The predictive coding team is automatically added. |
Needing Review Work Folder | Created as a subfolder under the predictive coding root and the predictive coding team is automatically added. This is the normal location where an admin would go after creating the control set or a training round to find the documents the Brainspace wants reviewed. The document can be reviewed directly from this folder or assigned by the admin. |
Reviewed Batches Work Folder | Created as a subfolder under the predictive coding root. Once documents are reviewed for a round and the results are retrieved in Brainspace the documents are moved to a new batch folder under this folder. This purpose is just to memorialize the documents from each round. |
Final Coding Work Folder | Created as a subfolder under the predictive coding root and used then a TAR session is closed in Brainspace. Two subfolders are created under this root with the final responsive and non-responsive coding results that were assigned by Brainspace. |
Once you have initialized the predictive coding session from within Brainspace locate the “Needing Review” folder underneath the predictive coding root. It will contain the documents from your control set.
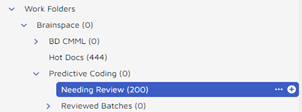
The document can be reviewed directly from this folder or assigned under the normal assignment area using the work folder in a search or the “needs review” field from IMPORT_DOCUMENTS.
If assigned the predictive coding tag profile should be used. If not assigned set the predictive coding tag profile before opening a document so it is selected by default in the document.

The predictive coding tag profile will look like the following.
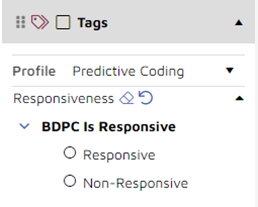
Once all documents have been reviewed the progress should be at 100 percent within Brainspace. Press the Retrieve Control Set button.
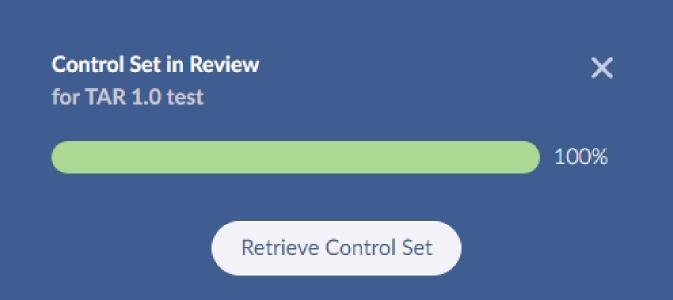
The popup will close and you will be returned to the main screen for the session. You can review the control set results and then begin adding training rounds.
Note
If you happened to mark all documents in the control set as responsive or non-responsive, then Brainspace will double the size of the control set and ask you to continuing reviewing those documents. Go back to Reveal Review, press the Refresh button in the left pane to refresh the work folders and then click on the “Needing Review” node to load the new documents.
If you are unsatisfied with the document results of the control set, you can convert that set to a training round that was selected. A control set can be converted to a training round by pressing the circular arrow at the bottom of the control set. This will convert the set and then automatically create a new control set for review.
Predictive Coding – TAR 1.0 Workflow –Training Rounds
Note
As of Release 6.7 clients will no longer be able to create new Predictive Coding sessions. Existing Predictive coding sessions are not disabled, they can continue to be used in the near term. It is highly recommended that clients use CMML with ACS as a replacement for PC.
There are two options for selecting documents when creating a training round: Automatic and Manual. In most cases you will use Automatic to allow Brainspace to select the documents. If an admin has marked docs for training in Reveal Review you can use the Manual button to pull those in.
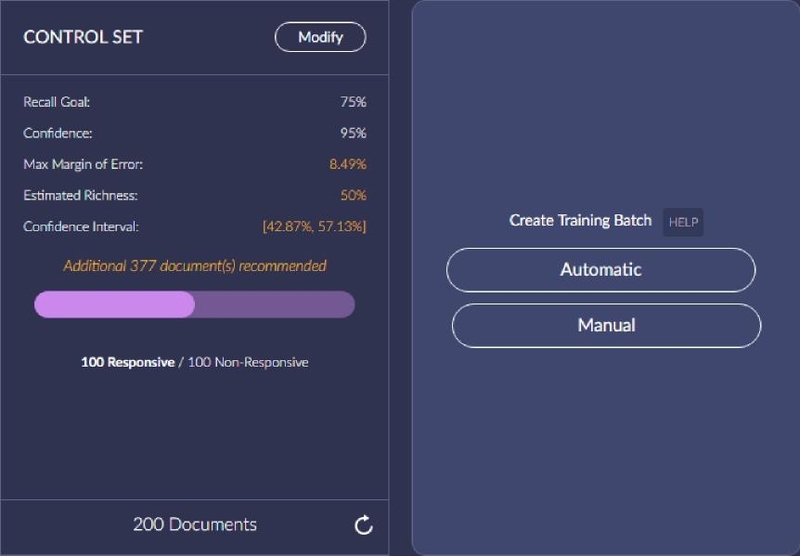
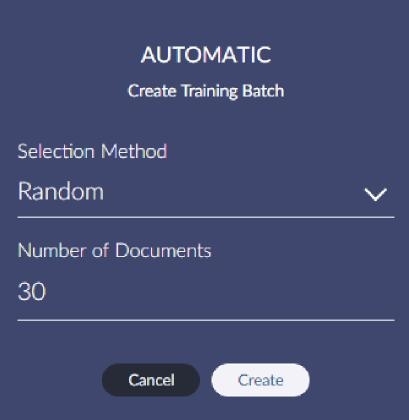
For the first training round only random and influential are available for the Automatic selection method. There are other methods available for subsequent rounds.
Training rounds display the progress directly in the main screen.
Note
It is not uncommon for documents from a previous training round or even from the control set to be included in a new training. This means you may see a percent complete immediately after creating the round without reviewing any documents from that round. Brainspace has verified that this is normal behavior and the documents do not need to be re-reviewed during the round.
Once the set has been created, return to the “Needing Review” folder in Reveal Review and review the documents in the same manner as the control set. If you are still logged into Reveal Review and sitting on the main form, you will need to press the refresh button on the left pane and then click on the “Needs Review” work folder node to load the new documents on the right-hand side.
Predictive Coding – TAR 1.0 Workflow – Closing the Session
Note
As of Release 6.7 clients will no longer be able to create new Predictive Coding sessions. Existing Predictive coding sessions are not disabled, they can continue to be used in the near term. It is highly recommended that clients use CMML with ACS as a replacement for PC.
Once you have created enough training rounds and the precision, recall, and F-Score have stabilized and you are satisfied with the results, you can click the close session button on the top right.
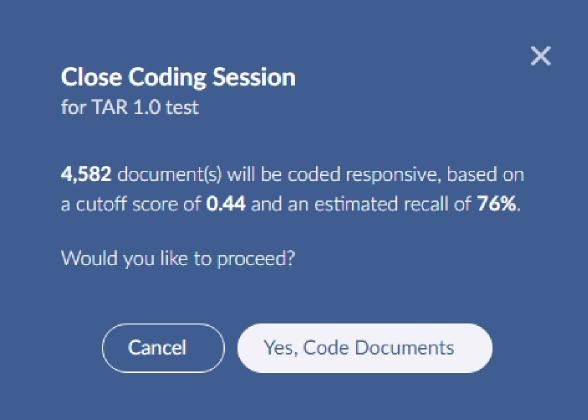
It can take a moment to store the results in Reveal Review. There is a small dark spinner that is displayed while this is taking place.
After you have closed a session you can re-open and continue creating training rounds. You will have to close and re-open to update the results in Reveal Review.

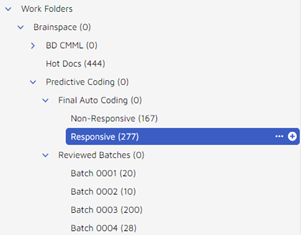
A final auto coding will contain the responsive and non-responsive documents as coded by Brainspace. The reviewed batches shown below are created after each round and store the documents reviewed during the round. The first batch is the control set round.
Predictive Coding – TAR 1.0 Workflow – Viewing final ranking
Note
As of Release 6.7 clients will no longer be able to create new Predictive Coding sessions. Existing Predictive coding sessions are not disabled, they can continue to be used in the near term. It is highly recommended that clients use CMML with ACS as a replacement for PC.e
There are 5 total fields of interest that you can add to a field profile so they can be displayed in the document grid.
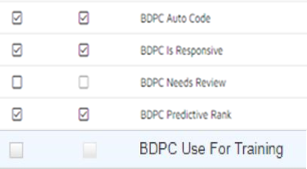
“BDPC Needs Review” and “BDPC Use For Training” are set while reviewing documents during the control set and training rounds and would mainly be useful for an administrator.
“BDPC Predictive Rank” is updated for each document after each round and the final result is stored when you close the session.
”BDPC Is Responsive” is the Reveal Review tag set and displays how the reviewer coded in Reveal Review.
“BDPC Auto Code” field is the final responsive/non-responsive coding result that Brainspace assigned. A value of true means responsive, false means non-responsive, and blank means not coded. You can view these two side by side to check for inconsistencies.
You can also create and run a BDPC coding consistency search. This is a search of all training documents which have a predictive coding score that is not consistent with the manual coding done by the reviewer. You want documents tagged by a reviewer as responsive but have a score less than 0.5 or tagged as non-responsive by the reviewer with a score greater than 0.5.

