- 26 Jun 2024
- 2 Minutes to read
- Print
- DarkLight
- PDF
Box Enterprise_ How to Connect and Collect
- Updated on 26 Jun 2024
- 2 Minutes to read
- Print
- DarkLight
- PDF

In this article:
Box Enterprise Overview
Box Enterprise Requirements
How to Connect and Collect Using Box Enterprise
Box Enterprise Overview
Box Enterprise is a cloud content management and file sharing service for businesses. Onna connects directly with the API to collect all information in native format from entire company Box accounts and/or specific user accounts.
Connector Features | |
Authorized Connection Required? Yes | Is identity mapping supported? Yes |
Audit logs available? Yes | Admin Access? Yes |
Supports a full archive? Yes | Custodian based collections? Yes |
Preserve in place with ILH? No | Resumable sync supported? Yes |
Supports Onna preservation? No | Syncs future users automatically? No |
Sync modes supported:
| Is file versioning supported? No |
Types of Data Collected | Metadata Collected |
|
|
Box Enterprise Considerations
Onna collects files based on their modified date field from Box.
Retrieving files from deactivated users is not possible due to limitations in Box Enterprise API.
Users receive email notifications that their folders are open during collections.
In the Box Enterprise Admin account, you can modify the email notifications users receive during collections into Onna.
1. Select the Admin Console then select Enterprise Settings.
2. In your Enterprise Settings select Notifications
3. Modify your desired options, or select "Disable email notifications for all users in your enterprise and all of their content."
Box Enterprise Requirements
Authorized connection to Box Enterprise in Onna.
To create an Authorized connection for Box Enterprise, you'll need an Admin account on a Box Enterprise account. Please Note: Co-admin accounts on Box will not be able to perform complete collections.
How to Connect and Collect Using Box Enterprise
To create a new Box Enterprise collection follow the steps below:
Step 1
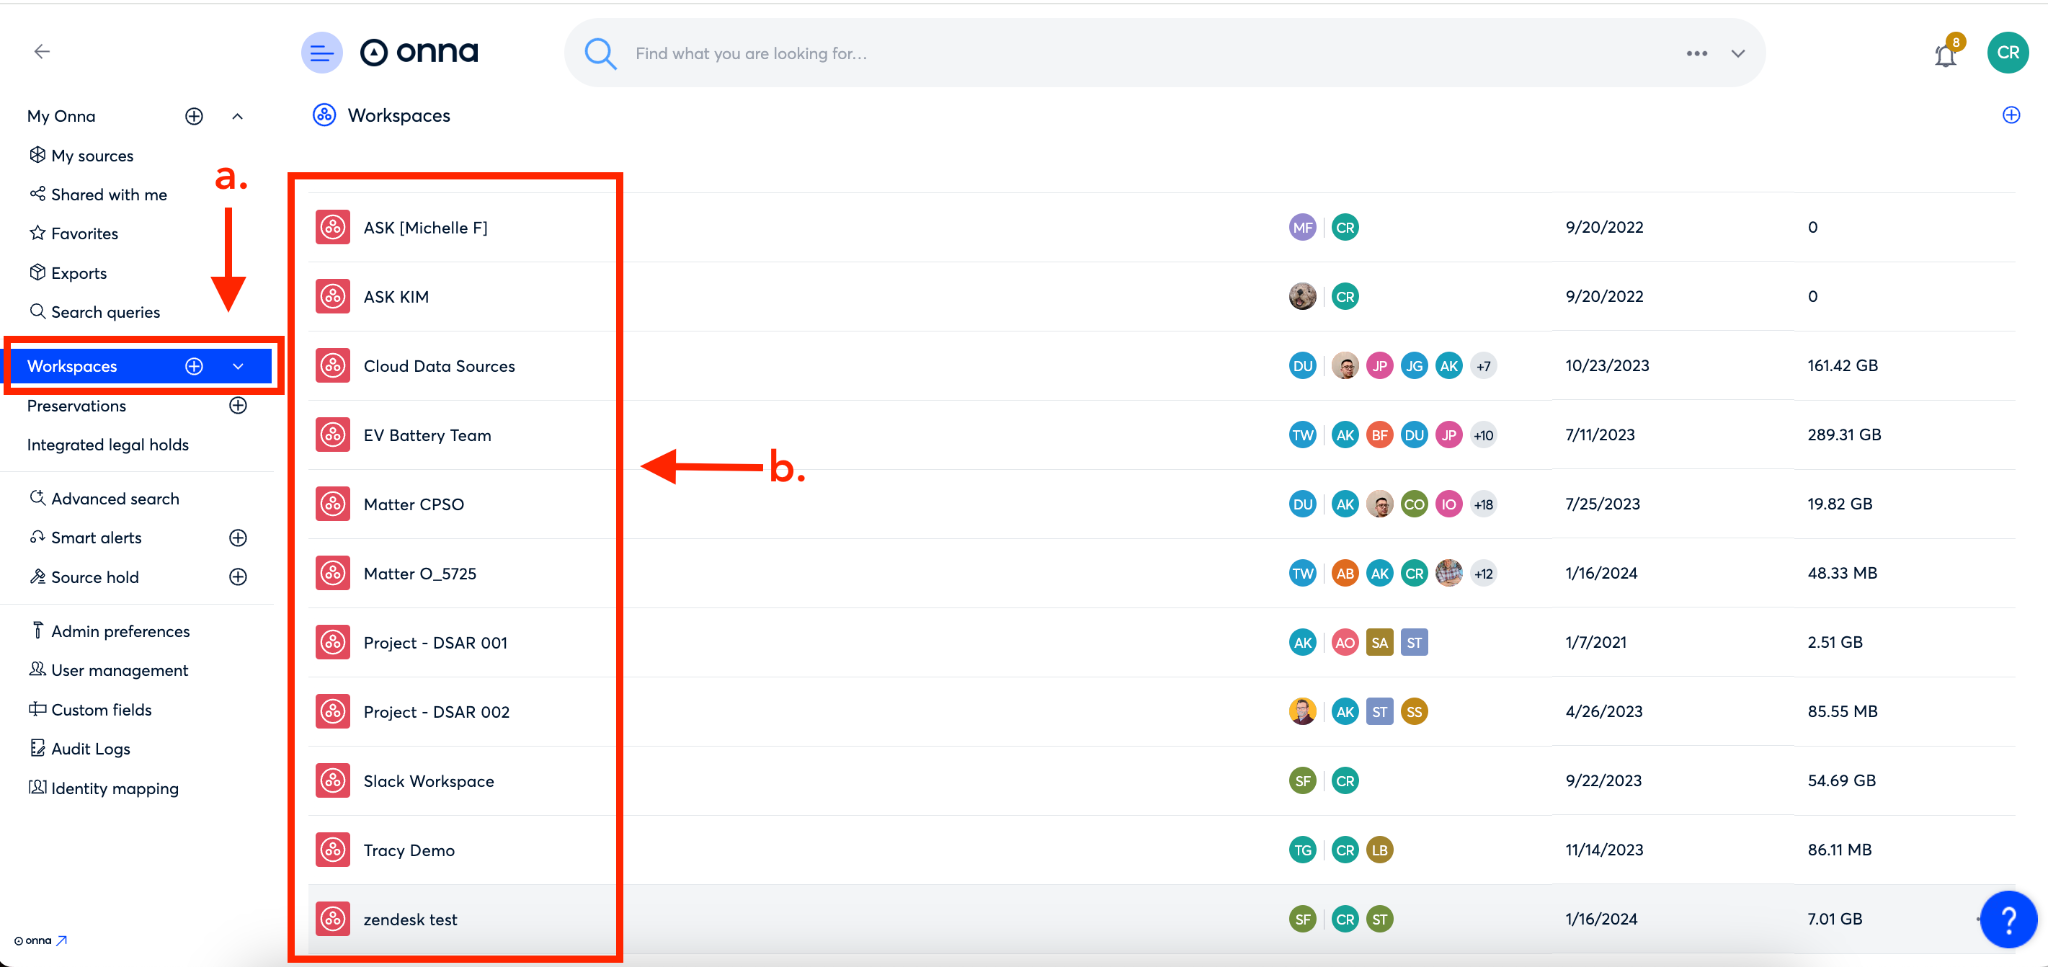
Click on ‘Workspaces’ in the main menu (a), then click on the workspace where you’d like to add a new sync (b).
Step 2
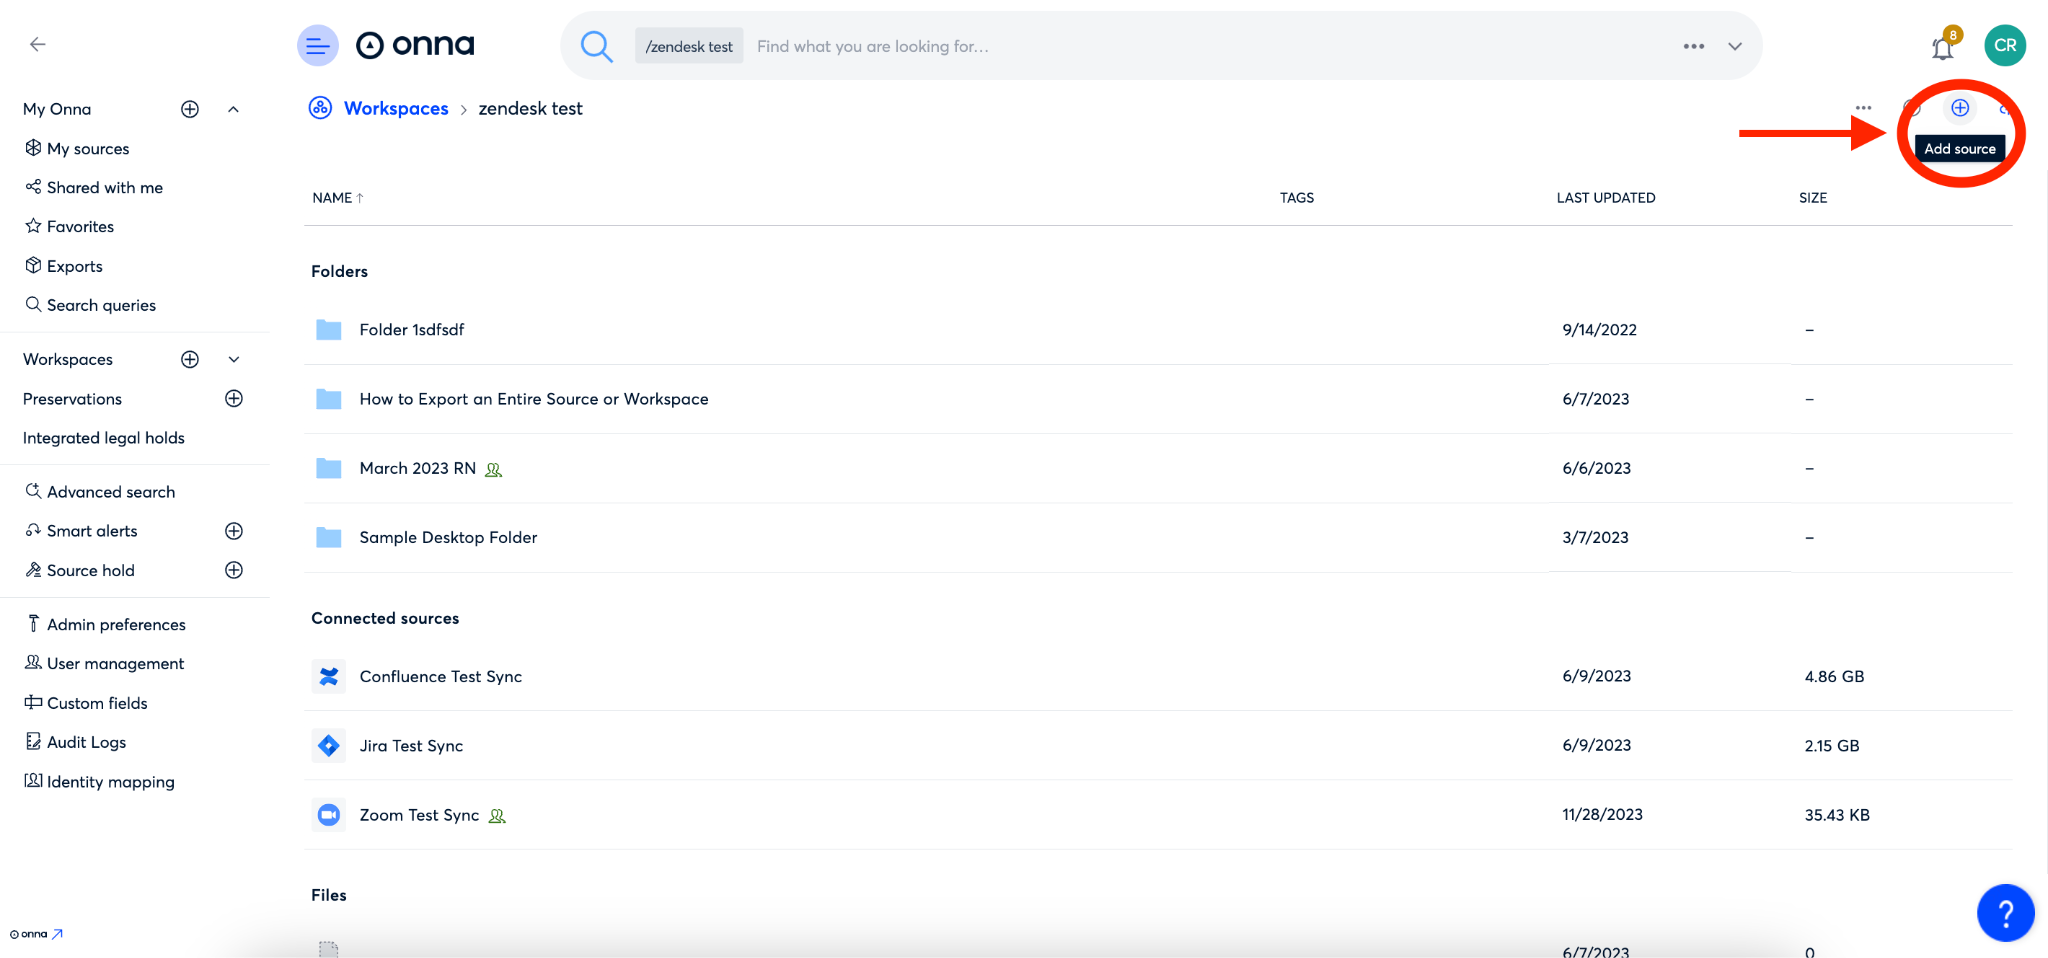
Click on the ‘+’ icon in the upper right corner to add a new source
Step 3
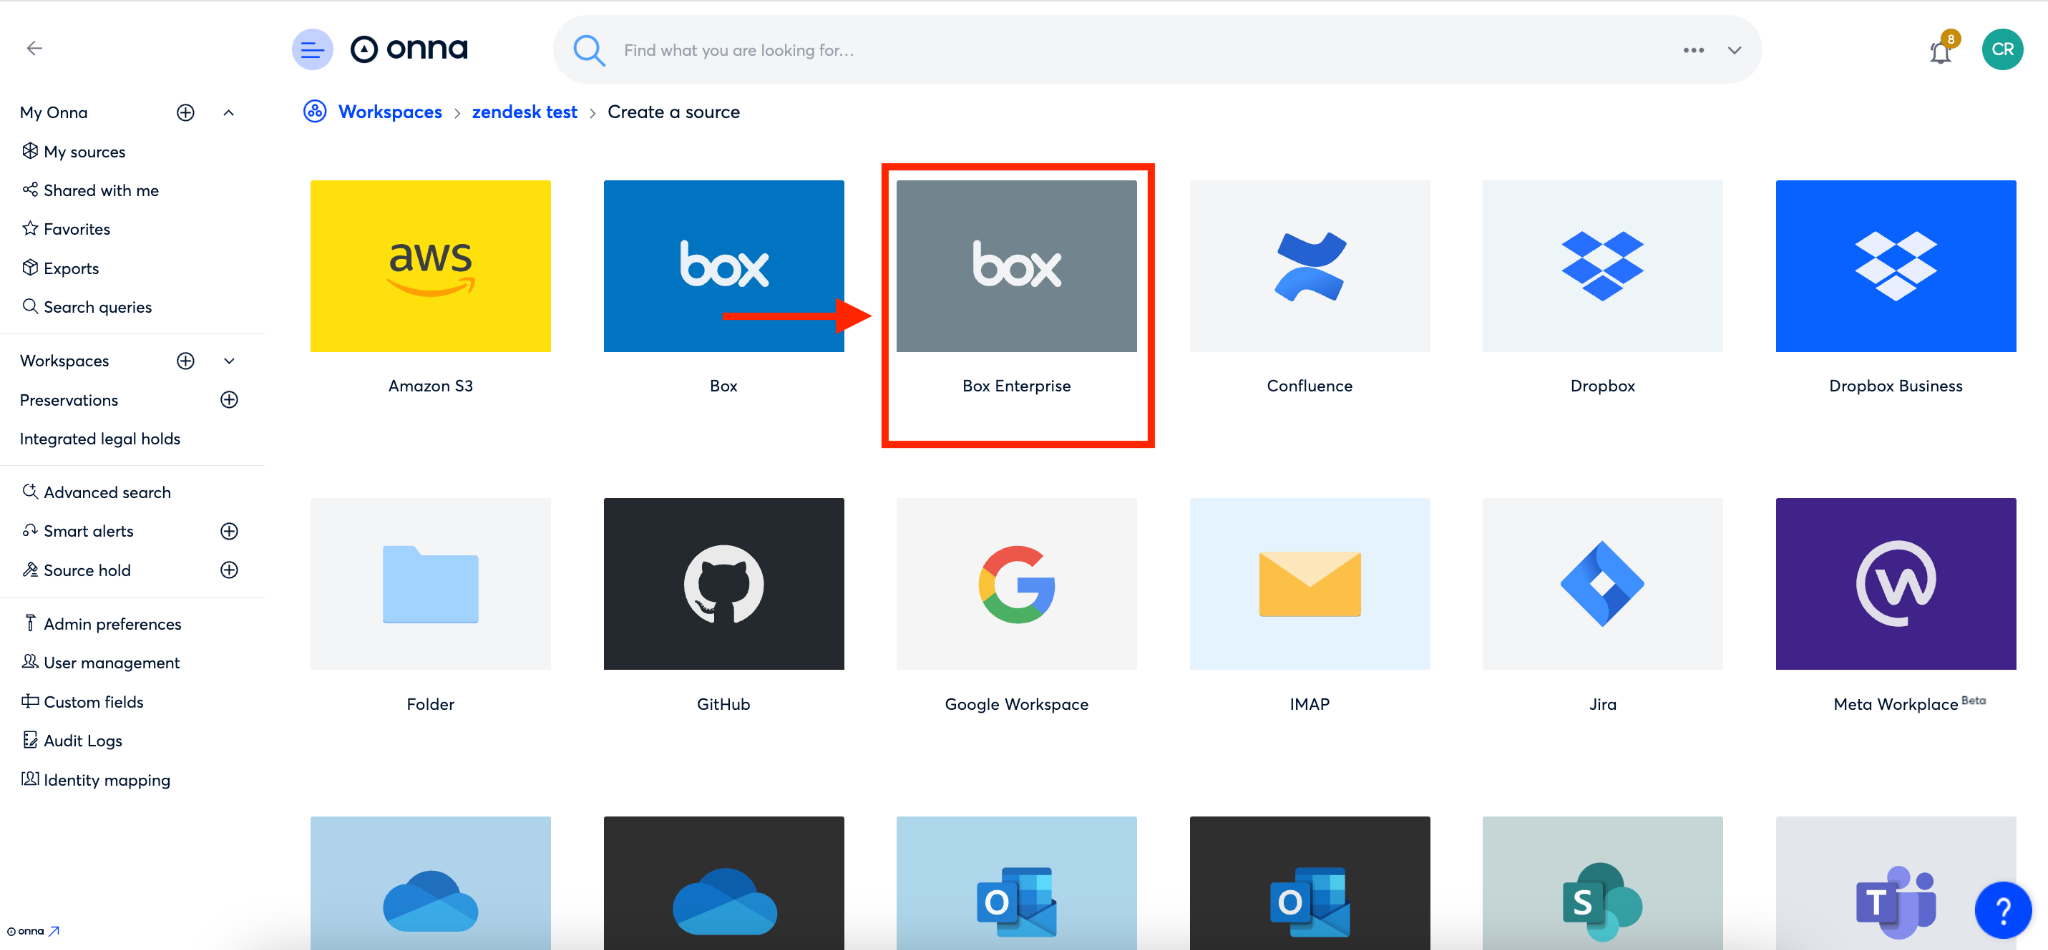
Select the Box Enterprise connector from your list of available connectors.
Step 4
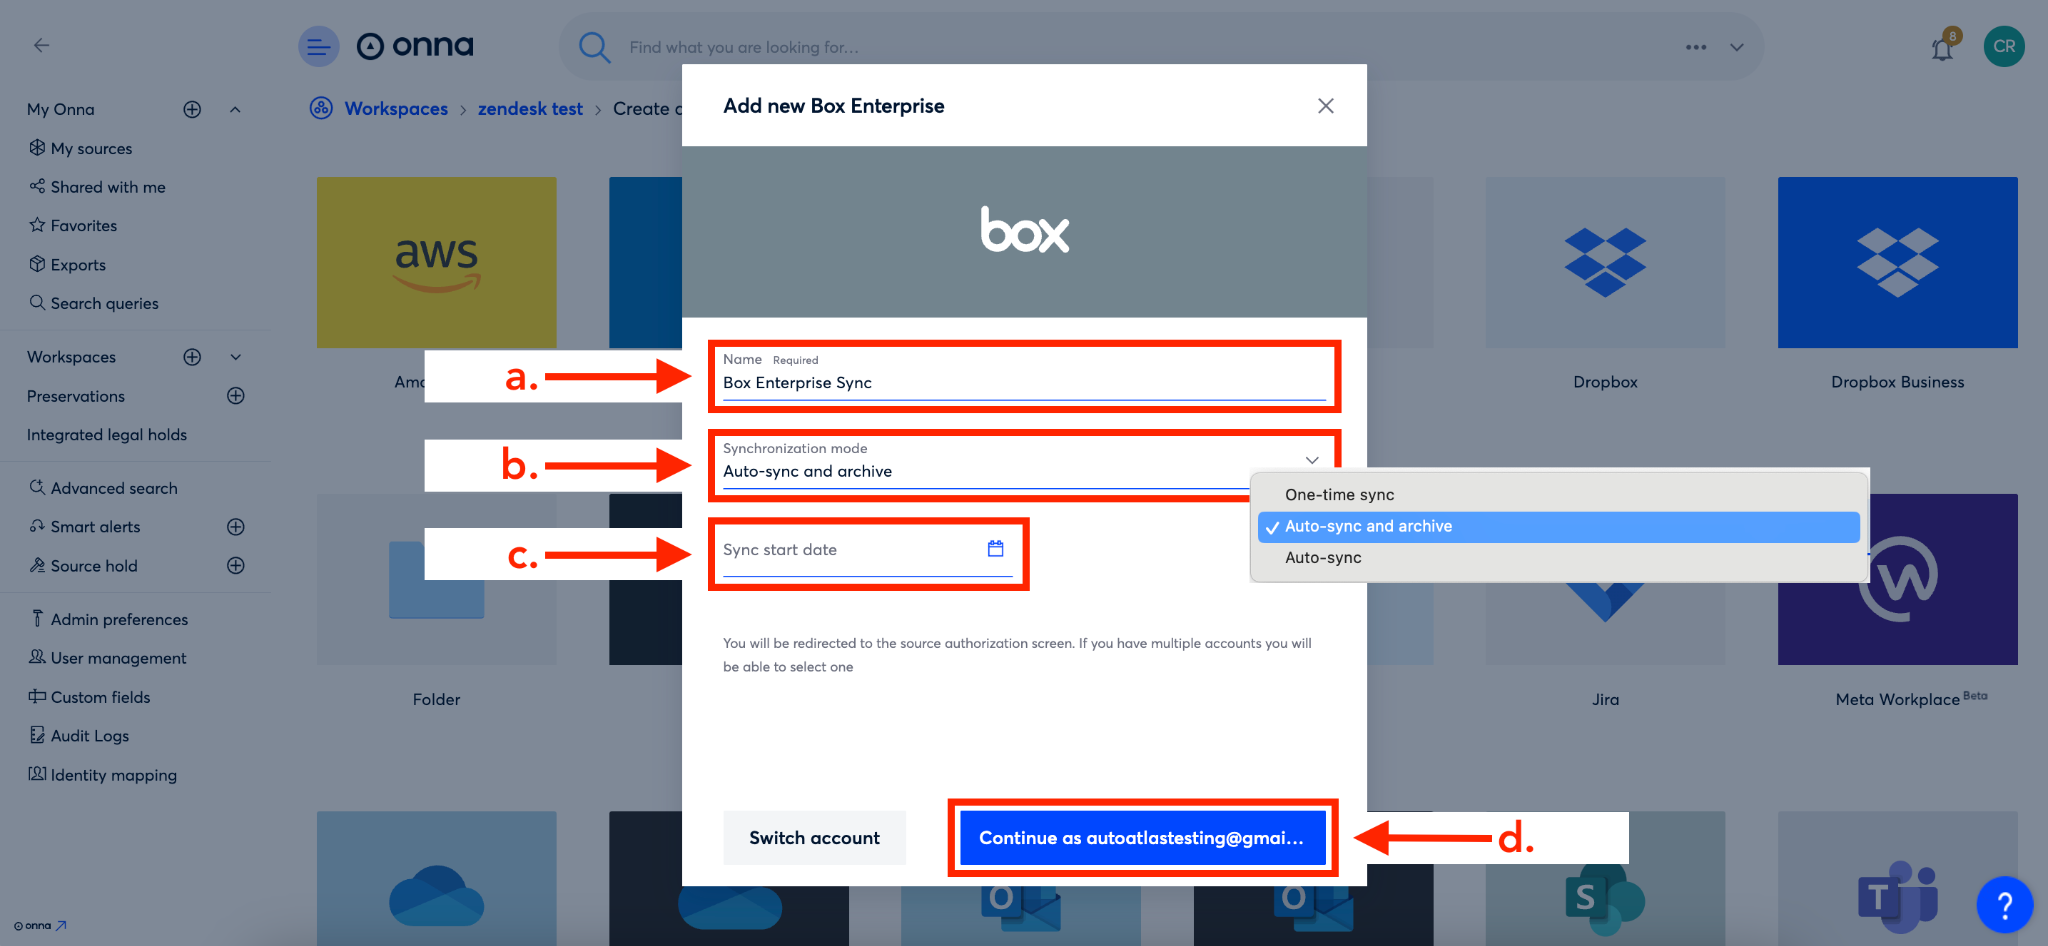
Next you’ll configure your sync. Start by naming your new sync in the ‘Name’ field (a). Then, select your ‘Synchronization mode’ (b), and set a start and/or end date for your sync (c). Then, click the blue ‘Continue as button’ (d).
Step 5
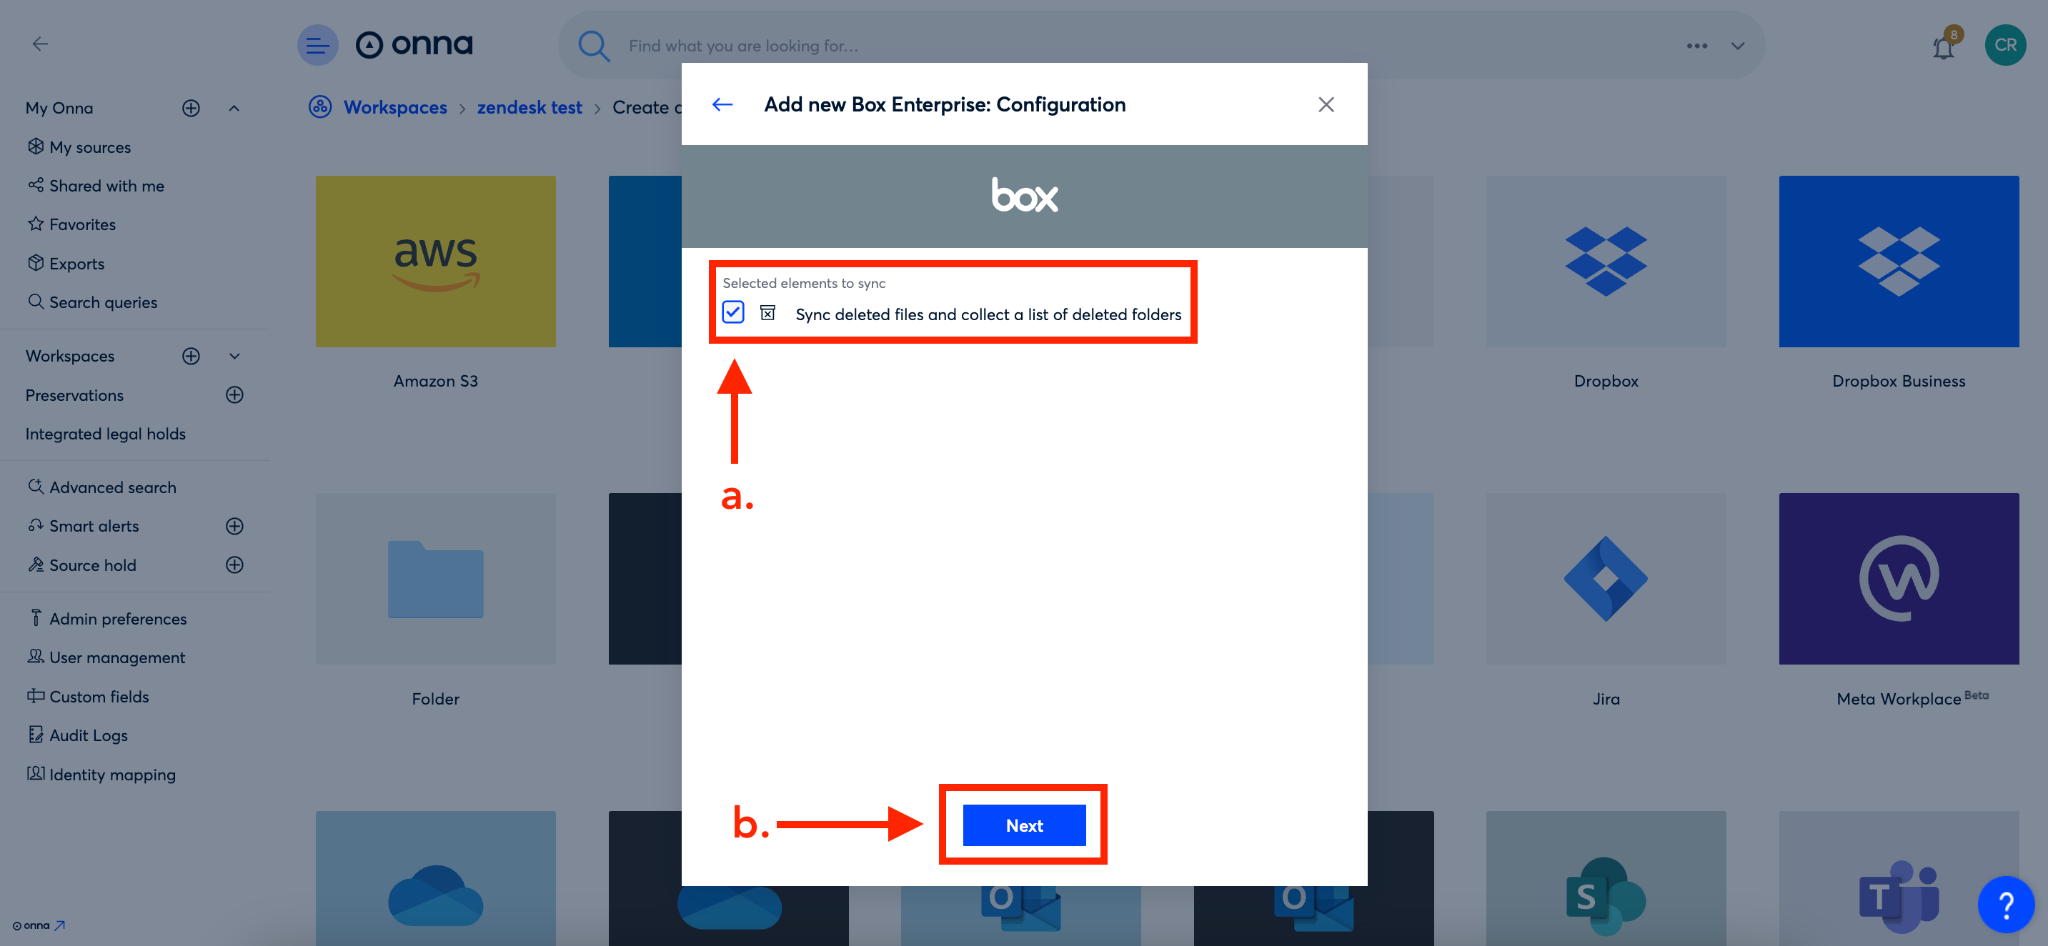
On the next screen you will determine if you want to collect deleted files and lists of deleted folders. To do so, put a check in the box next to ‘Sync deleted files and collect a list of deleted folders’ (a). Then, click the blue ‘Next’ button (b).
Step 6
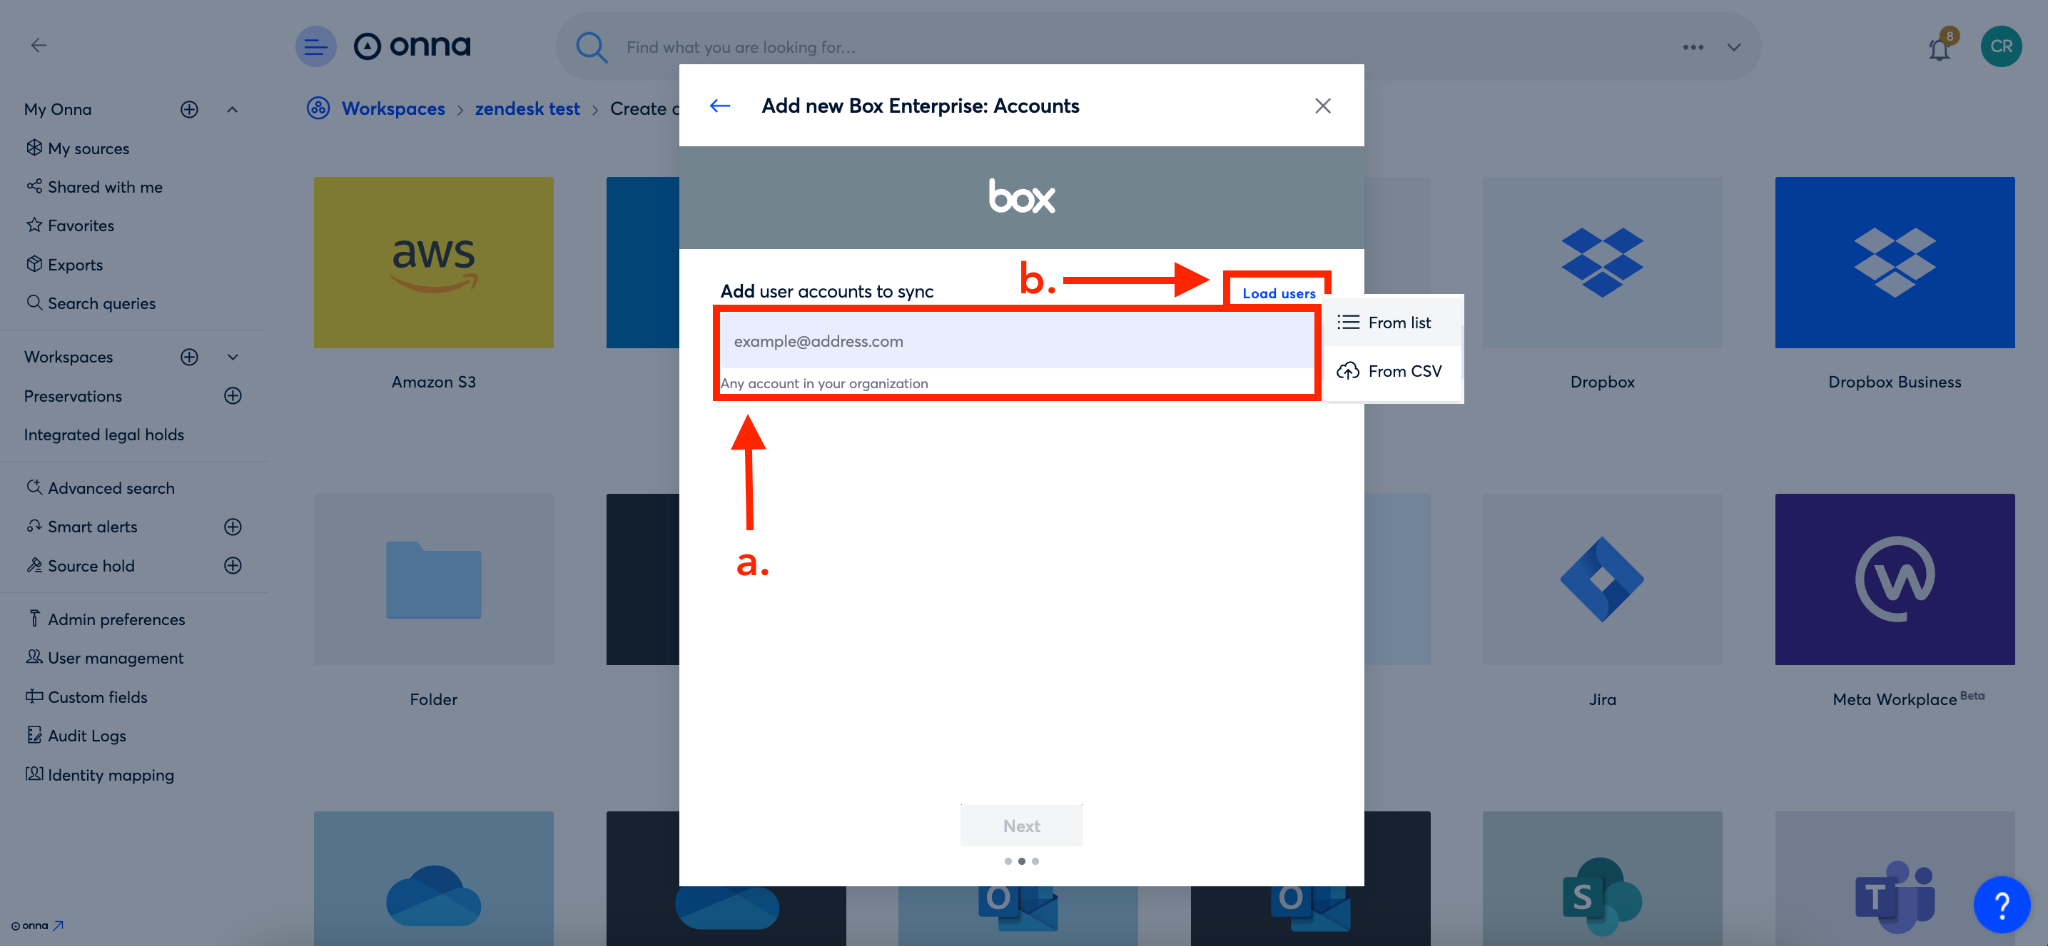
You can now add users to your sync. You can do this by manually adding user account email addresses in the ‘Add user accounts to sync field’ (a), or selecting the ‘Load users’ option (b) and choosing to either add users by selecting them ‘From list’ or uploading ‘From CSV’.
Step 7
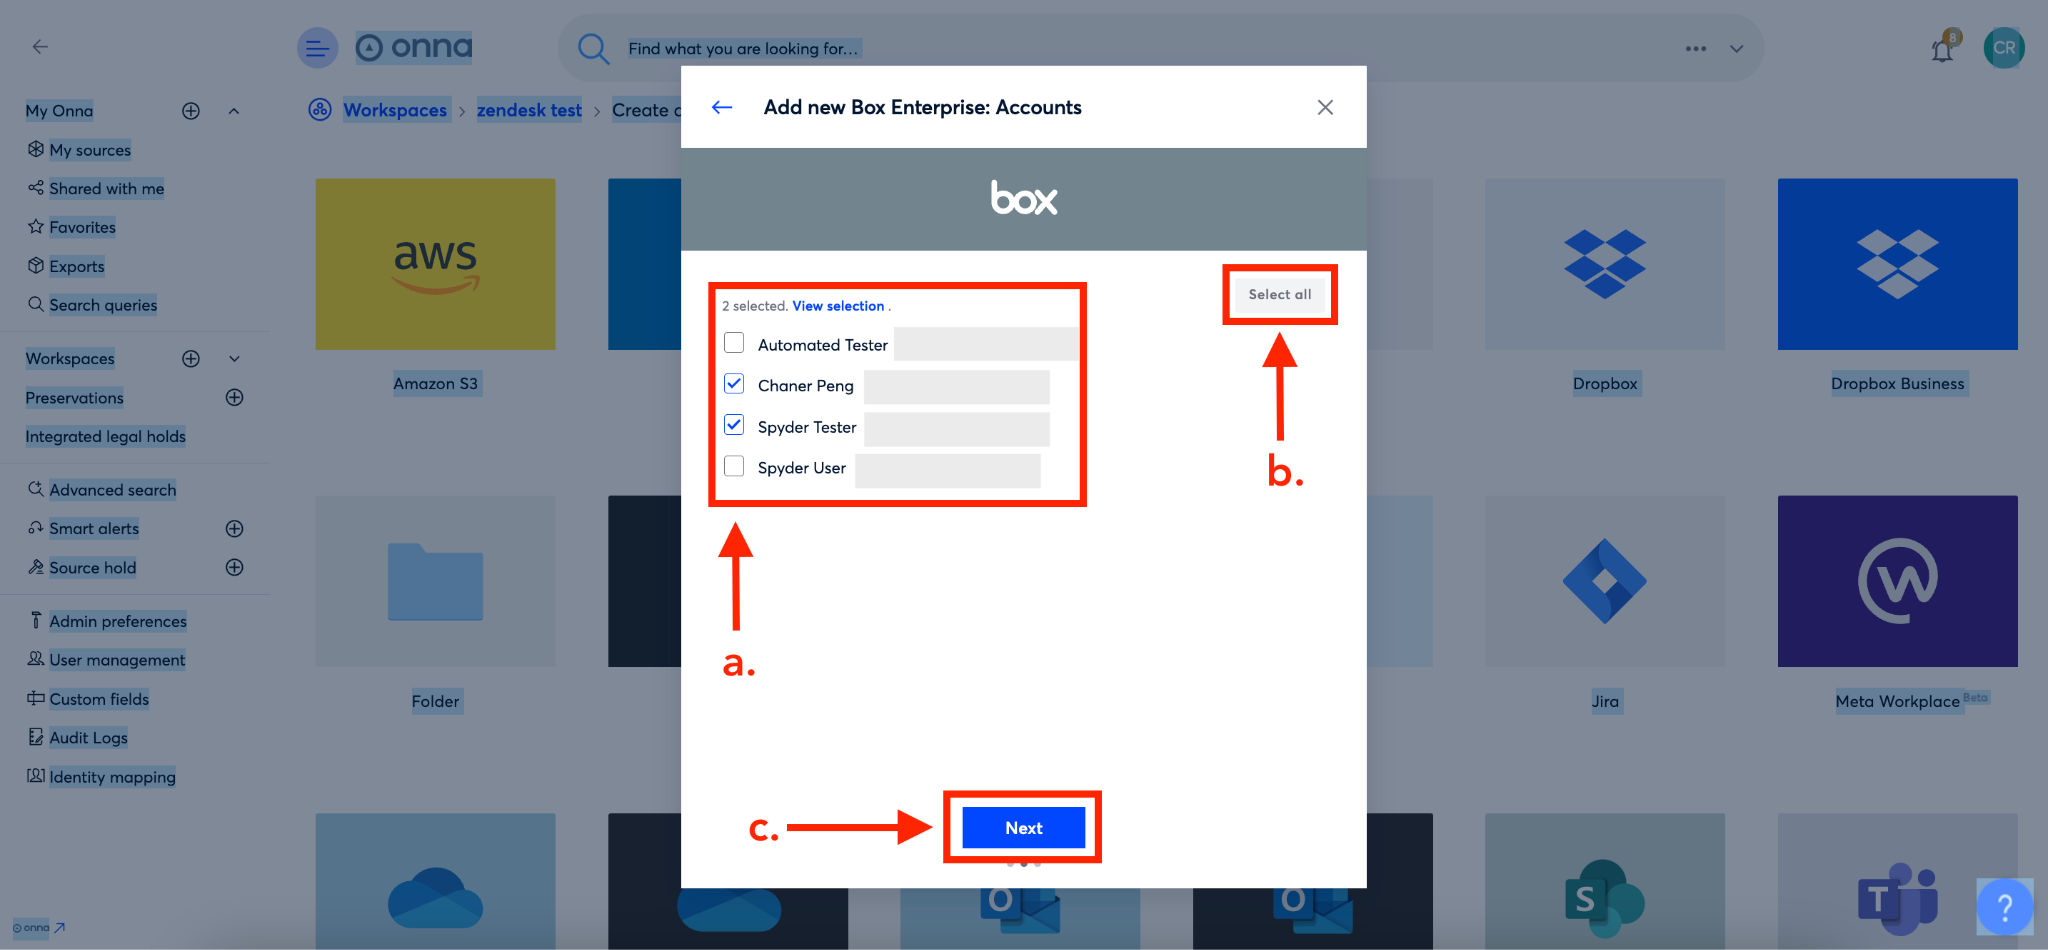
If you ‘Load users’ ‘From list’ a list of all users in your Box account will appear and you can either select individual users by putting a check in the box next to their name (a), or clicking the ‘Select all’ button (b) to choose all users in your account. Then, click the blue ‘Next’ button (c).
Step 8
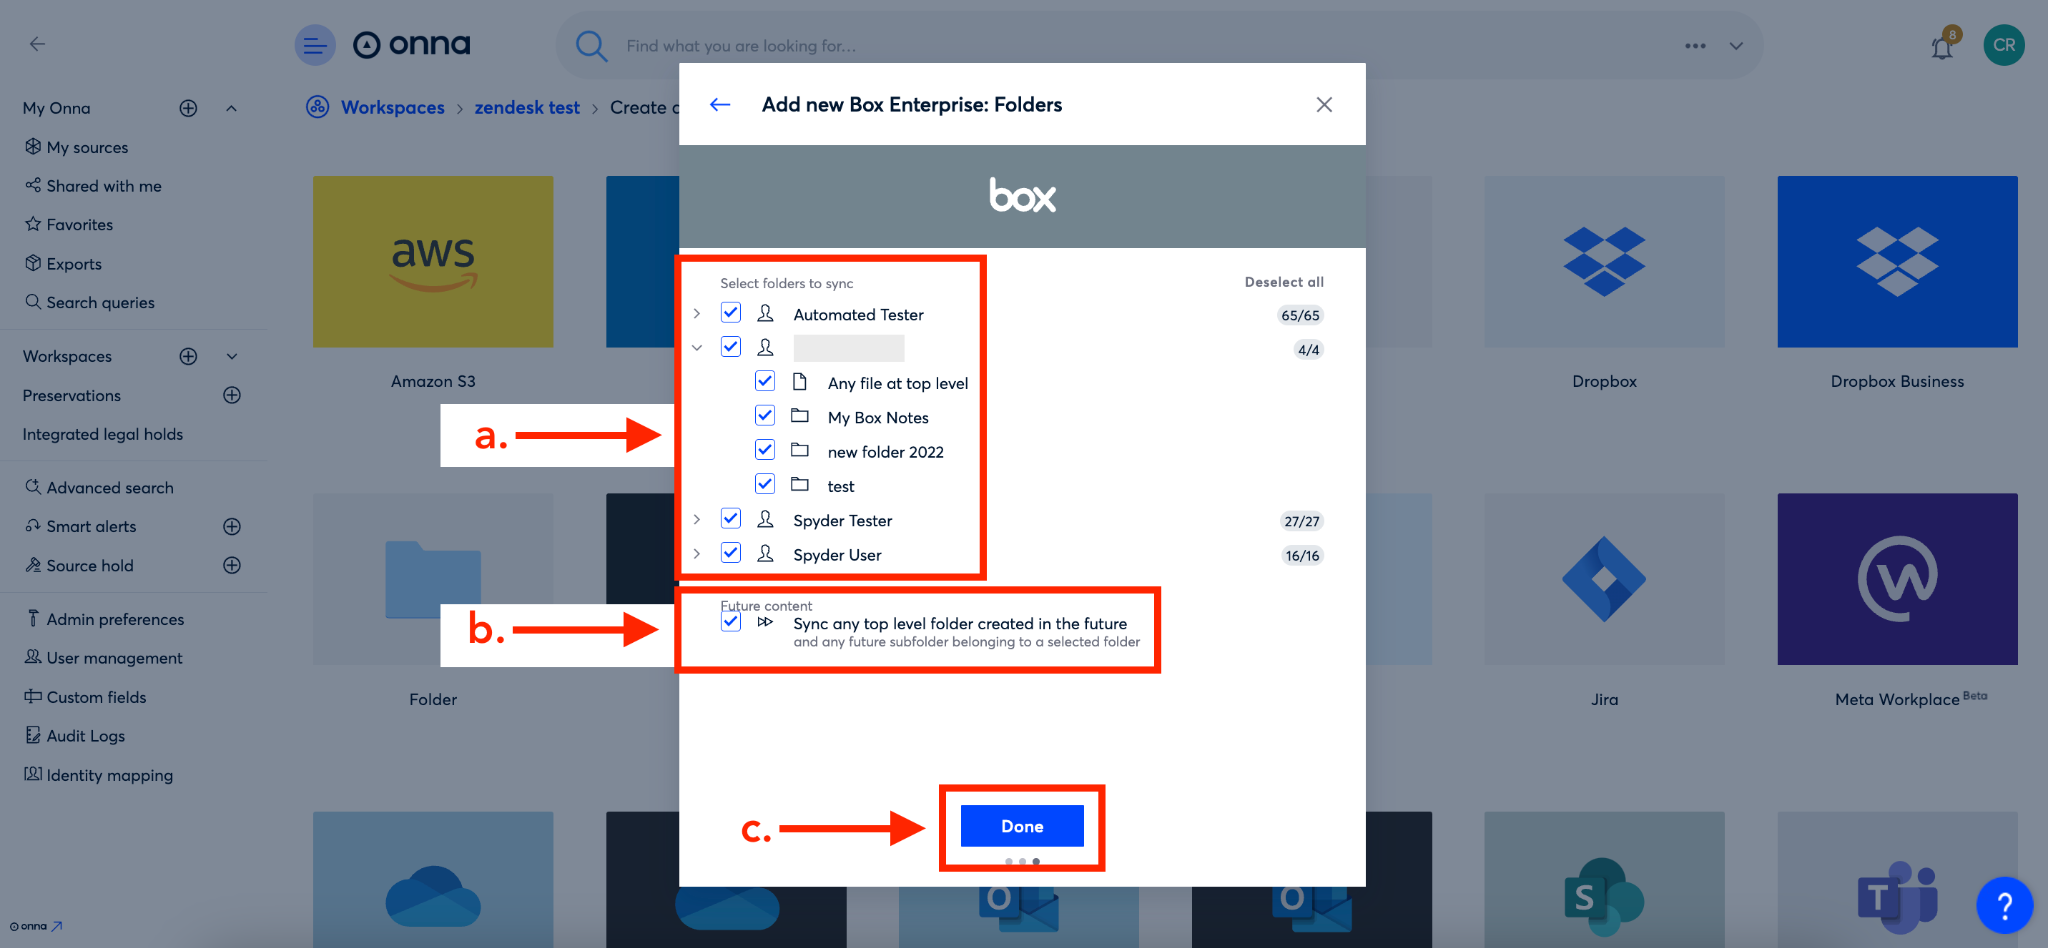
Finally, you’ll select the folders you want to include in your sync (a) and then, if you’d like to sync future content, put a check in the box next to ‘Sync any top level folder created in the future’ (b). Then, click the blue ‘Done’ button (c).
Step 9
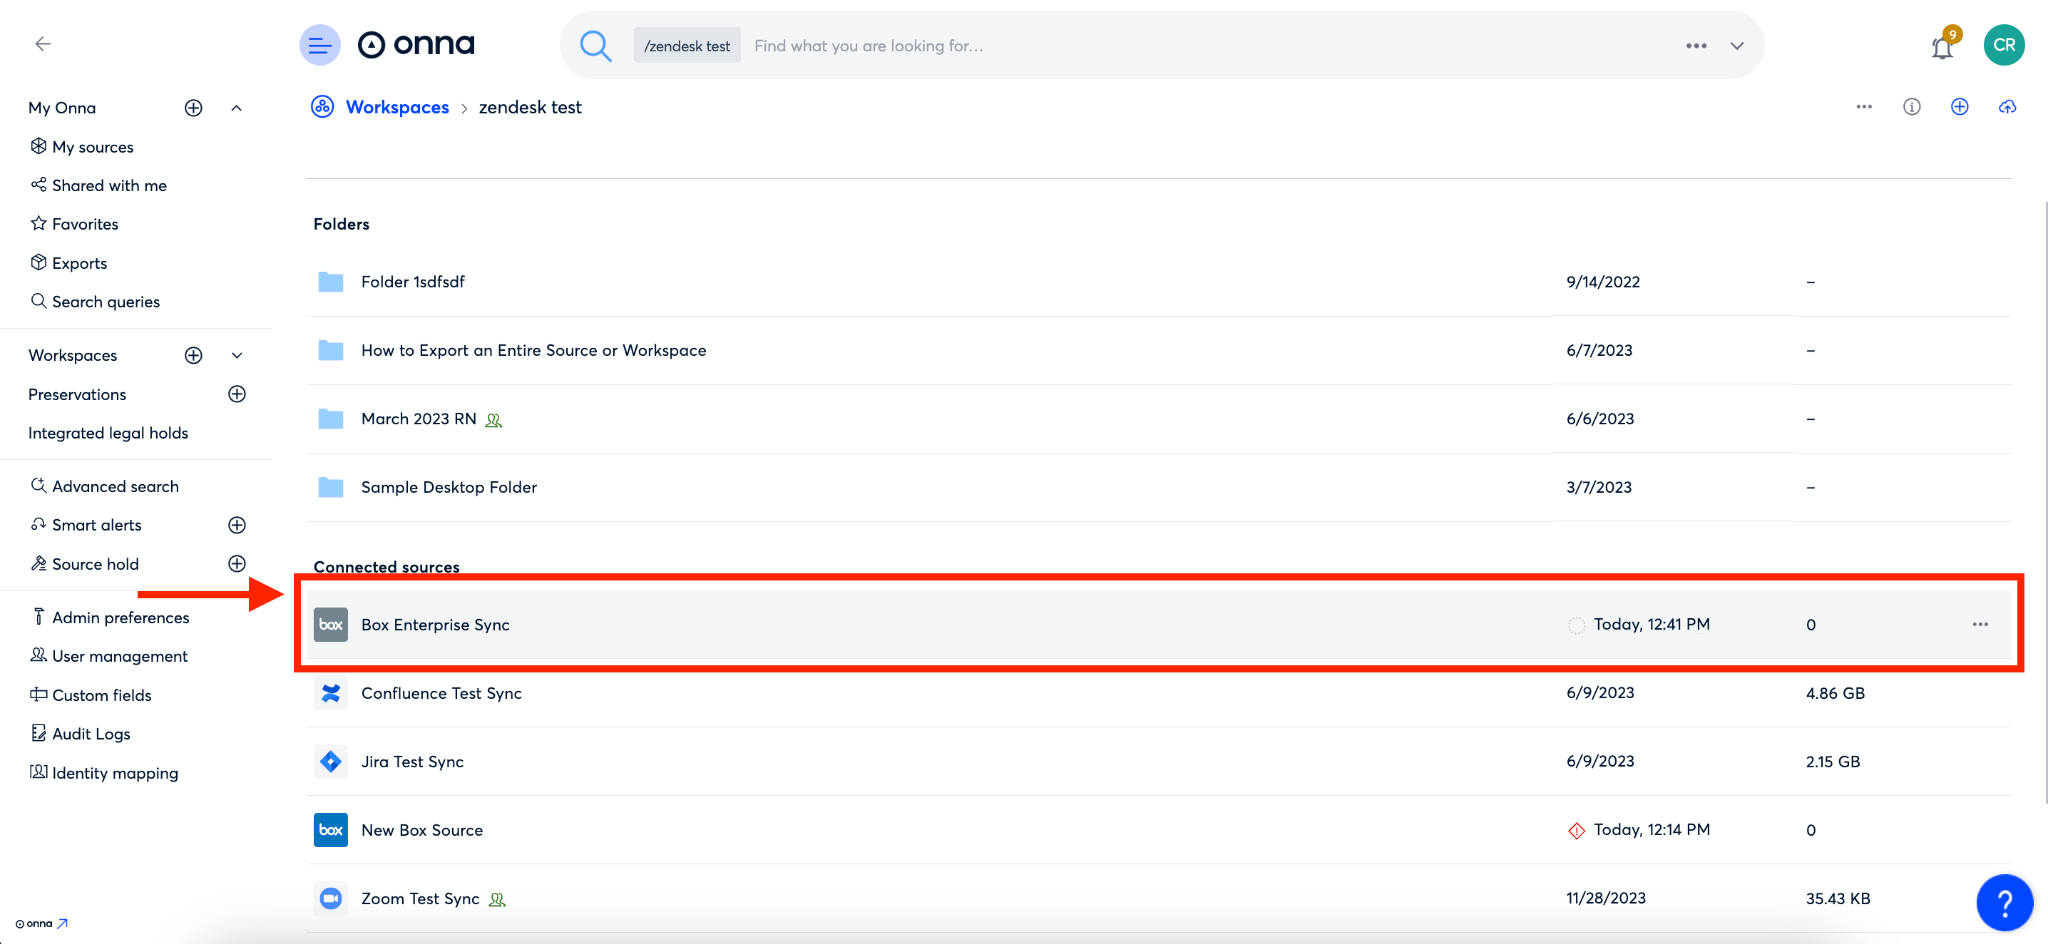
You’ll now see your new source appear alphabetically in the list of ‘Connected sources’ in your workspace.
.png)