Confluence_ How to Connect and Collect
- 26 Jun 2024
- 3 Minutes to read
- Print
- DarkLight
- PDF
Confluence_ How to Connect and Collect
- Updated on 26 Jun 2024
- 3 Minutes to read
- Print
- DarkLight
- PDF
Article summary
Did you find this summary helpful?
Thank you for your feedback

In this article:
Confluence Overview
Confluence Requirements
How to Connect and Collect Using Confluence
Confluence Overview
Confluence is a team content collaboration software. Onna supports Confluence Cloud and Server version 5.7 and up. Onna connects directly with the API to collect all information in native format. The integration collects all data and metadata from an entire Confluence site or individual spaces.
Connector Features | |
Authorized Connection Required? No | Is identity mapping supported? No |
Audit logs available? Yes | Admin Access? Yes |
Supports a full archive? Yes | Custodian based collections? No |
Preserve in place with ILH? No | Resumable sync supported? Yes |
Supports Onna preservation? No | Syncs future users automatically? No |
Sync modes supported:
| Is file versioning supported? No |
Note: Source Holds are supported by our Confluence connector. | |
Types of Data Collected | Metadata Collected |
|
|
Confluence Considerations
It's only possible to collect restricted spaces or pages if the account used to create the collection has access to the restricted space or page. Our connector can only see what that user sees, even if that user is an admin, as admins can also have restricted access to a space or page.
At this time it is not possible to sync archived spaces due to an API limitation. We suggest changing archived spaces to current in order to perform the required collection. Once the collection has successfully completed the spaces can be archived again.
When you choose to sync a single Confluence page, only the page for the link provided will be synced. Any parent or children pages will not be synced.
Confluence sources in Onna do not store usernames/passwords, instead they use JSESSION ID cookies. These credentials will need to be refreshed when the cookie expires. To avoid being frequently prompted to renew credentials, we suggest extending the amount of time the cookie is valid.
Confluence Requirements
In order to collect from Confluence the Confluence user account used to connect will need full access to the space(s) that need to be collected.
.
How to Connect and Collect Using Confluence
To set up a new Confluence source sync, follow the steps below:
Step 1
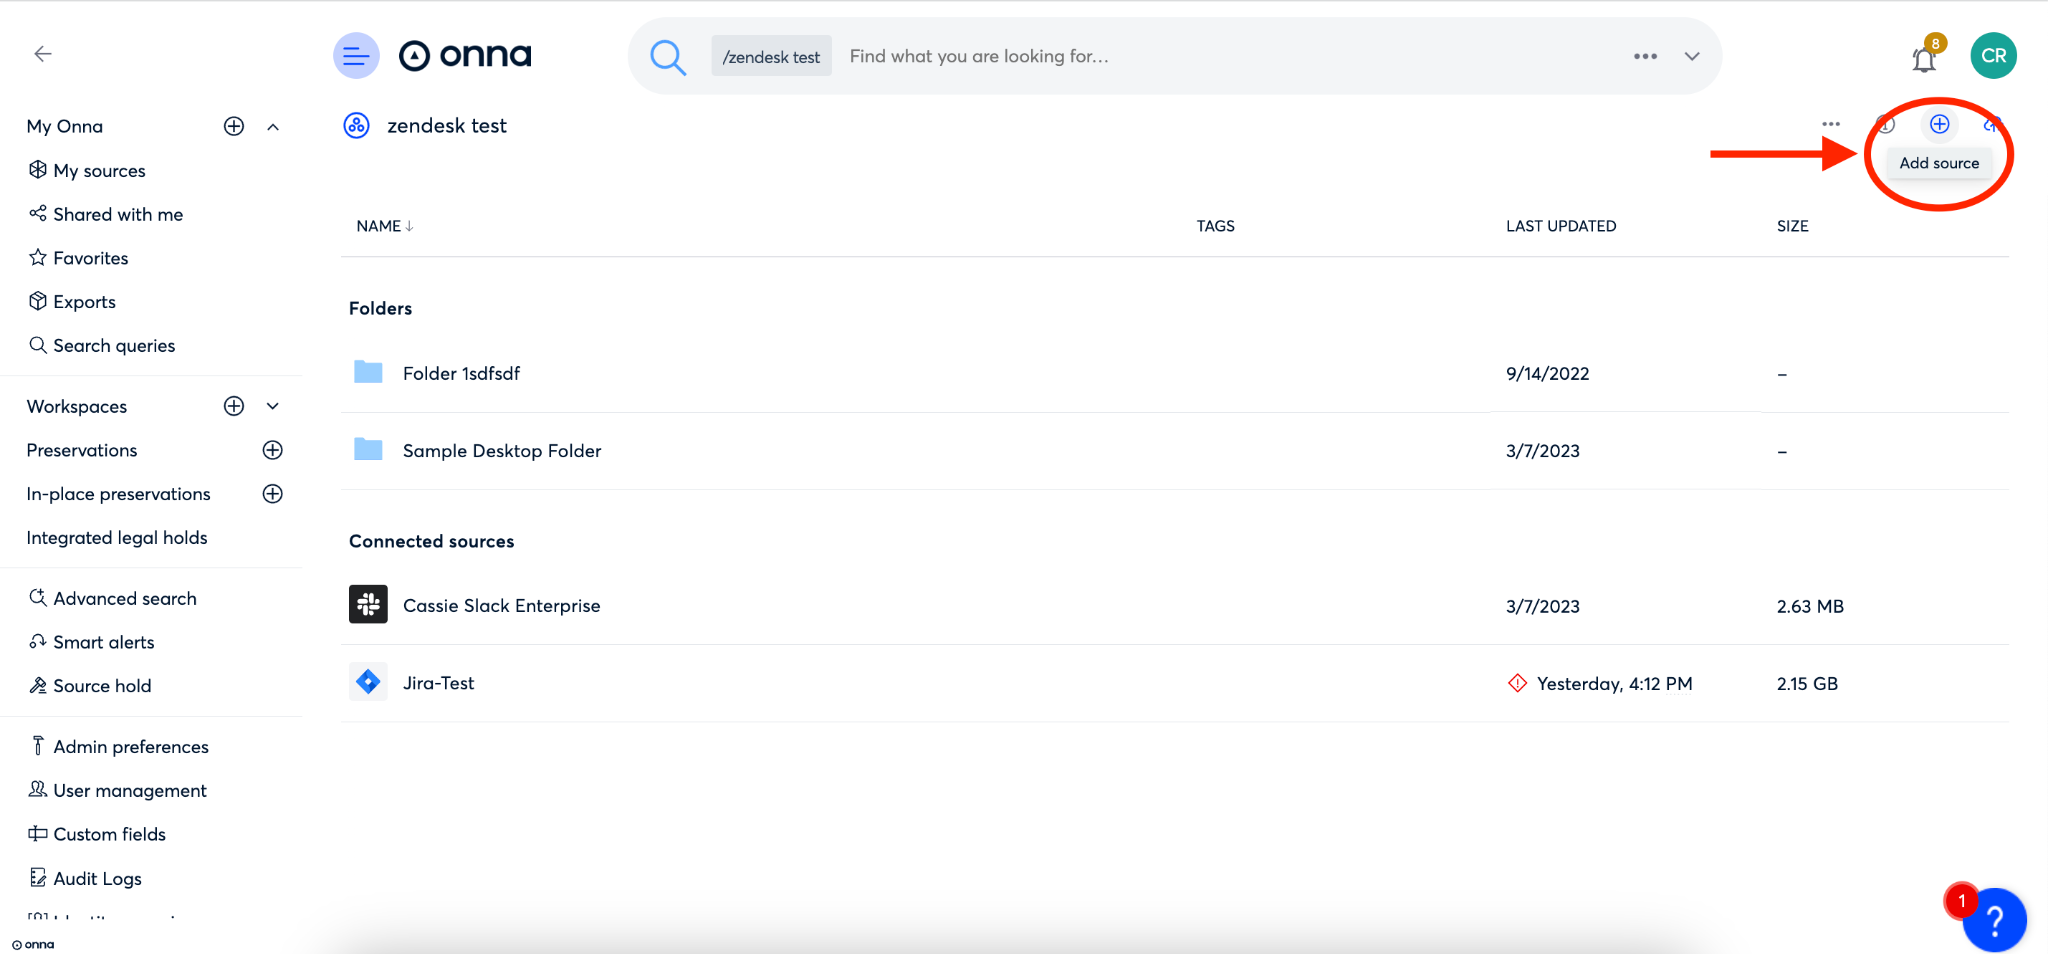
Navigate to the workspace where you want to set up your sync.
Inside that workspace click on the ‘+’ icon in the upper right corner of the screen to ‘Add source’.
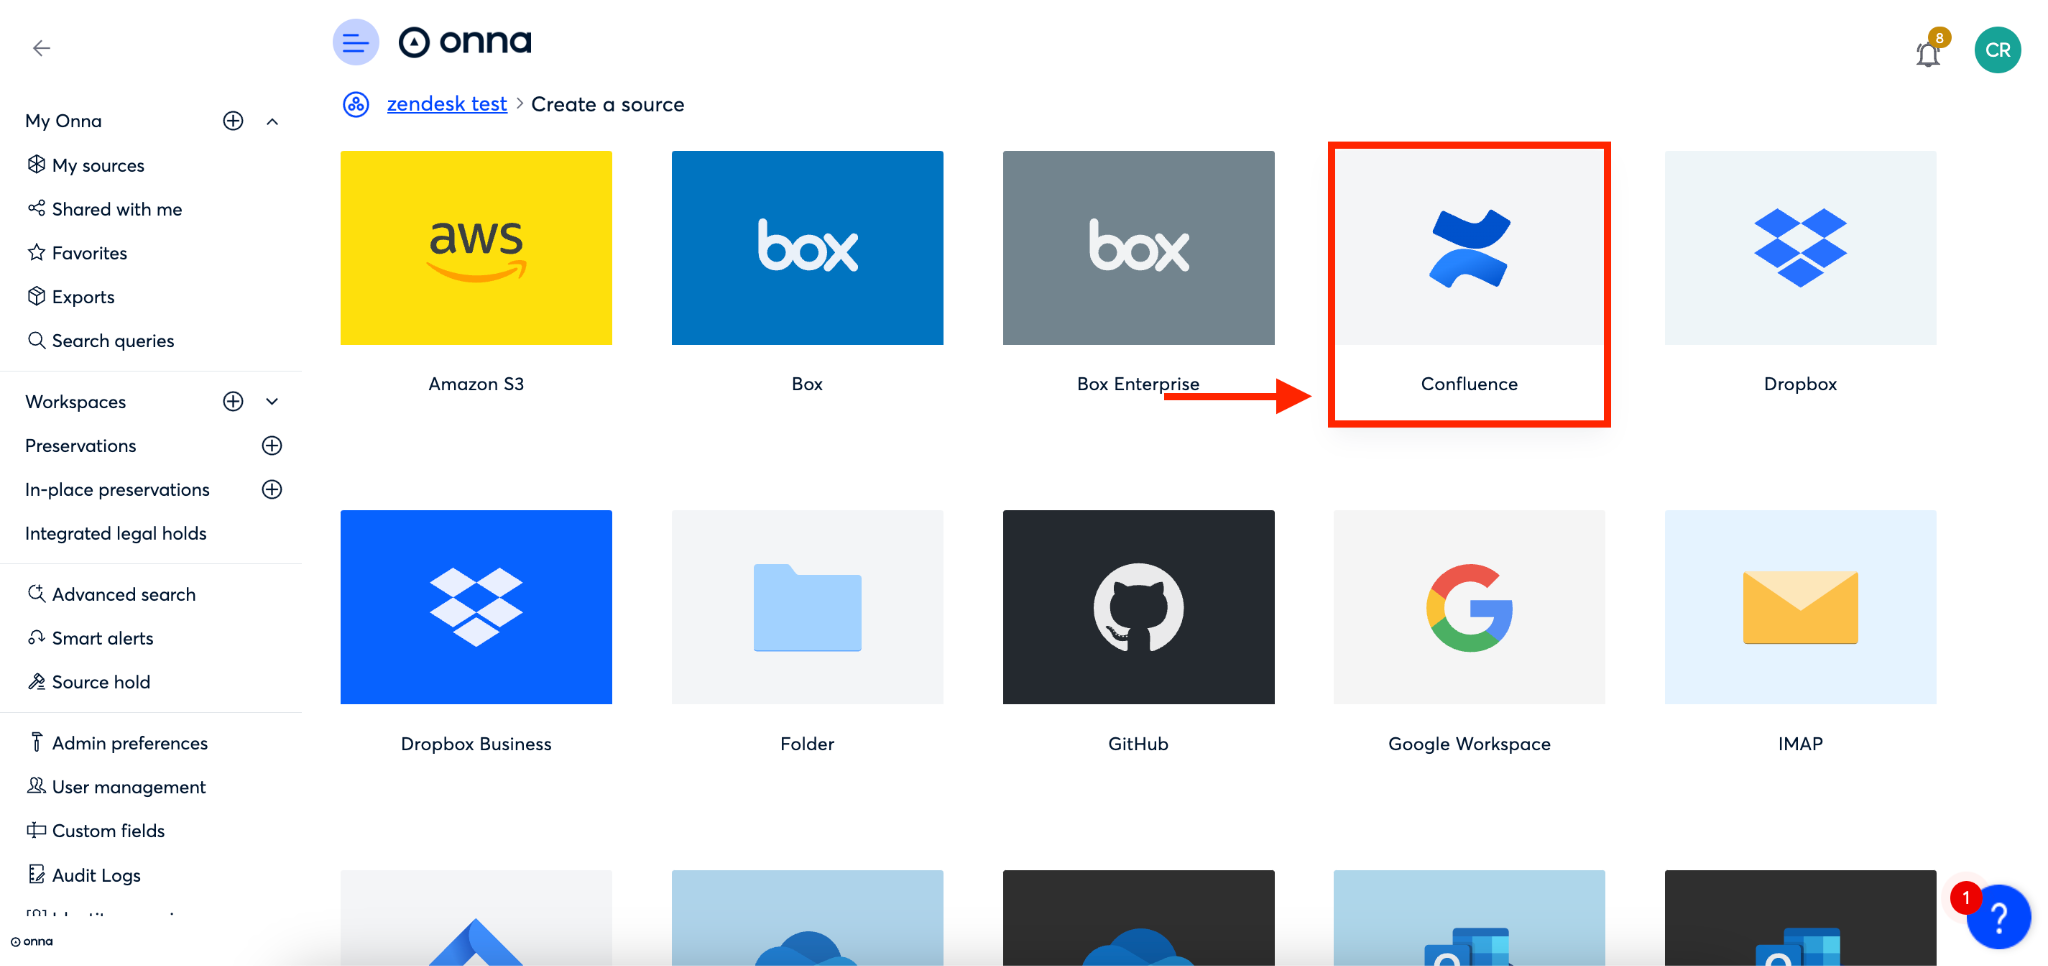
Step 2
You will now see a list of all sources enabled for your organization. Find and select the ‘Confluence’ source.
Step 3
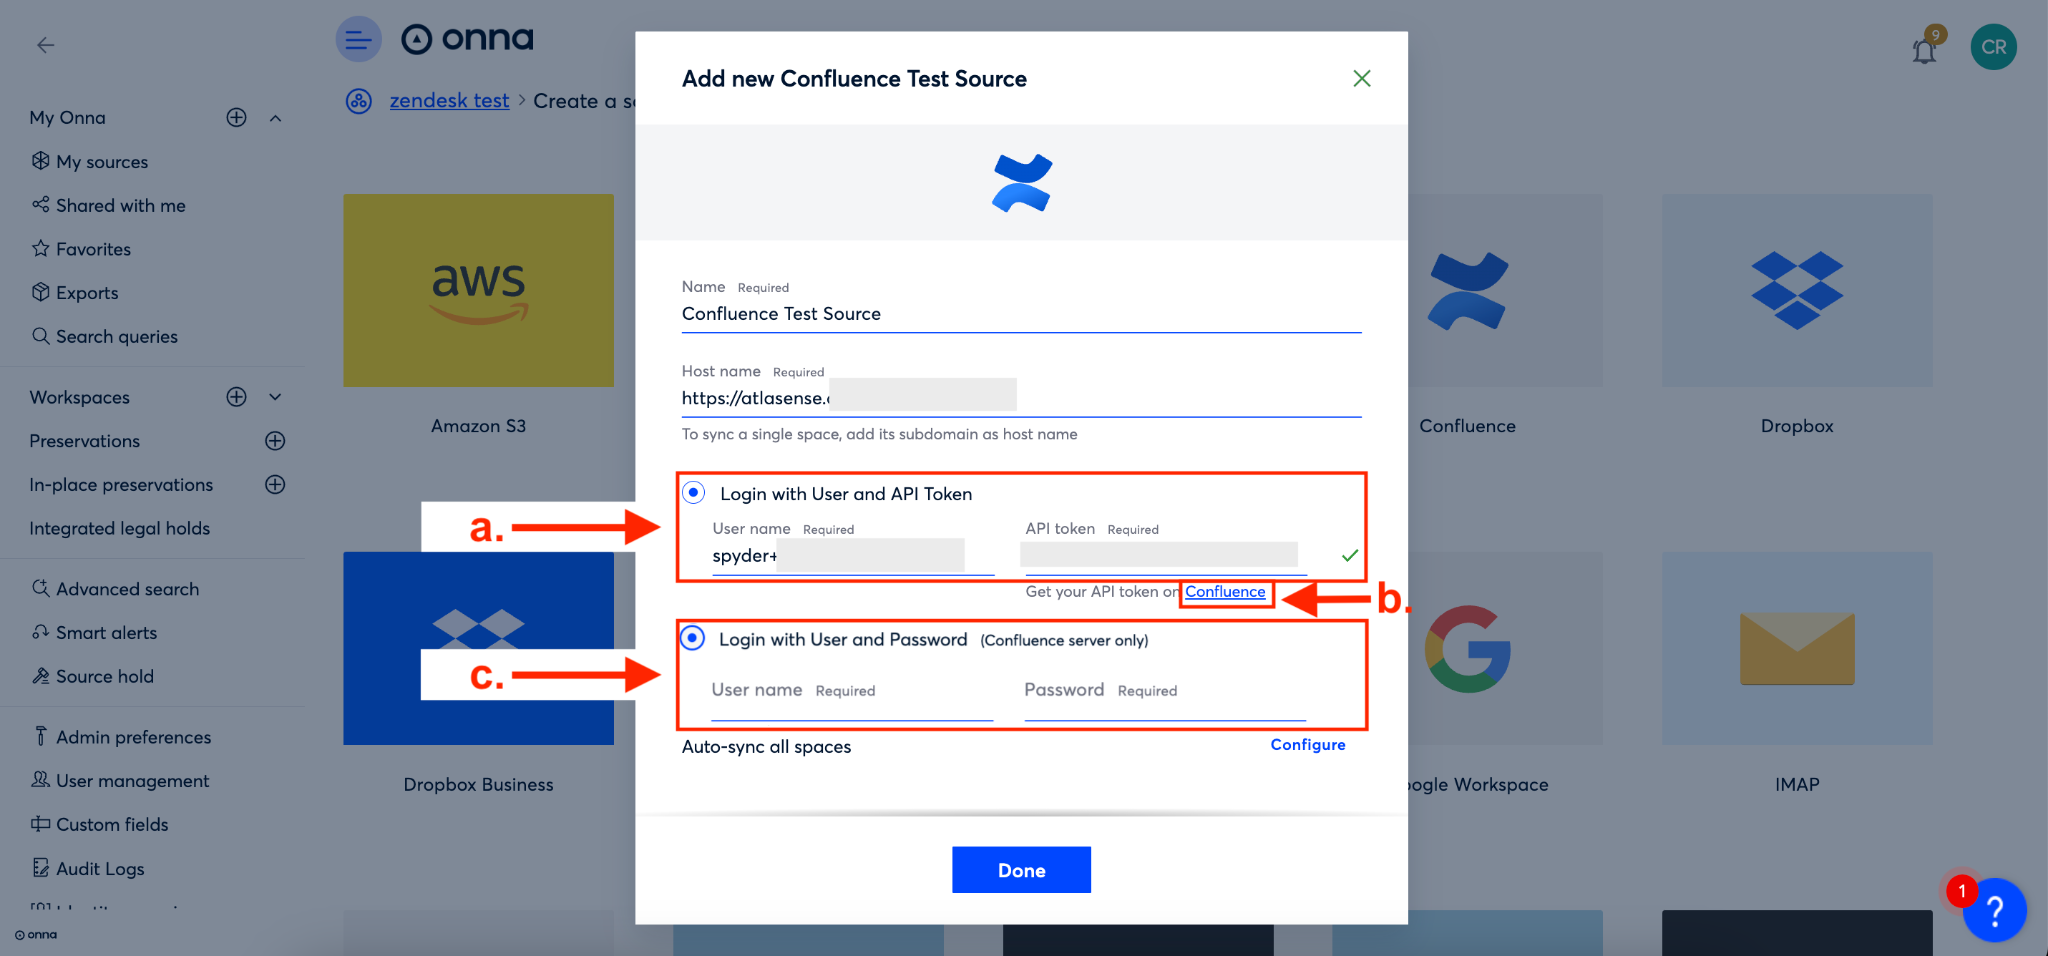
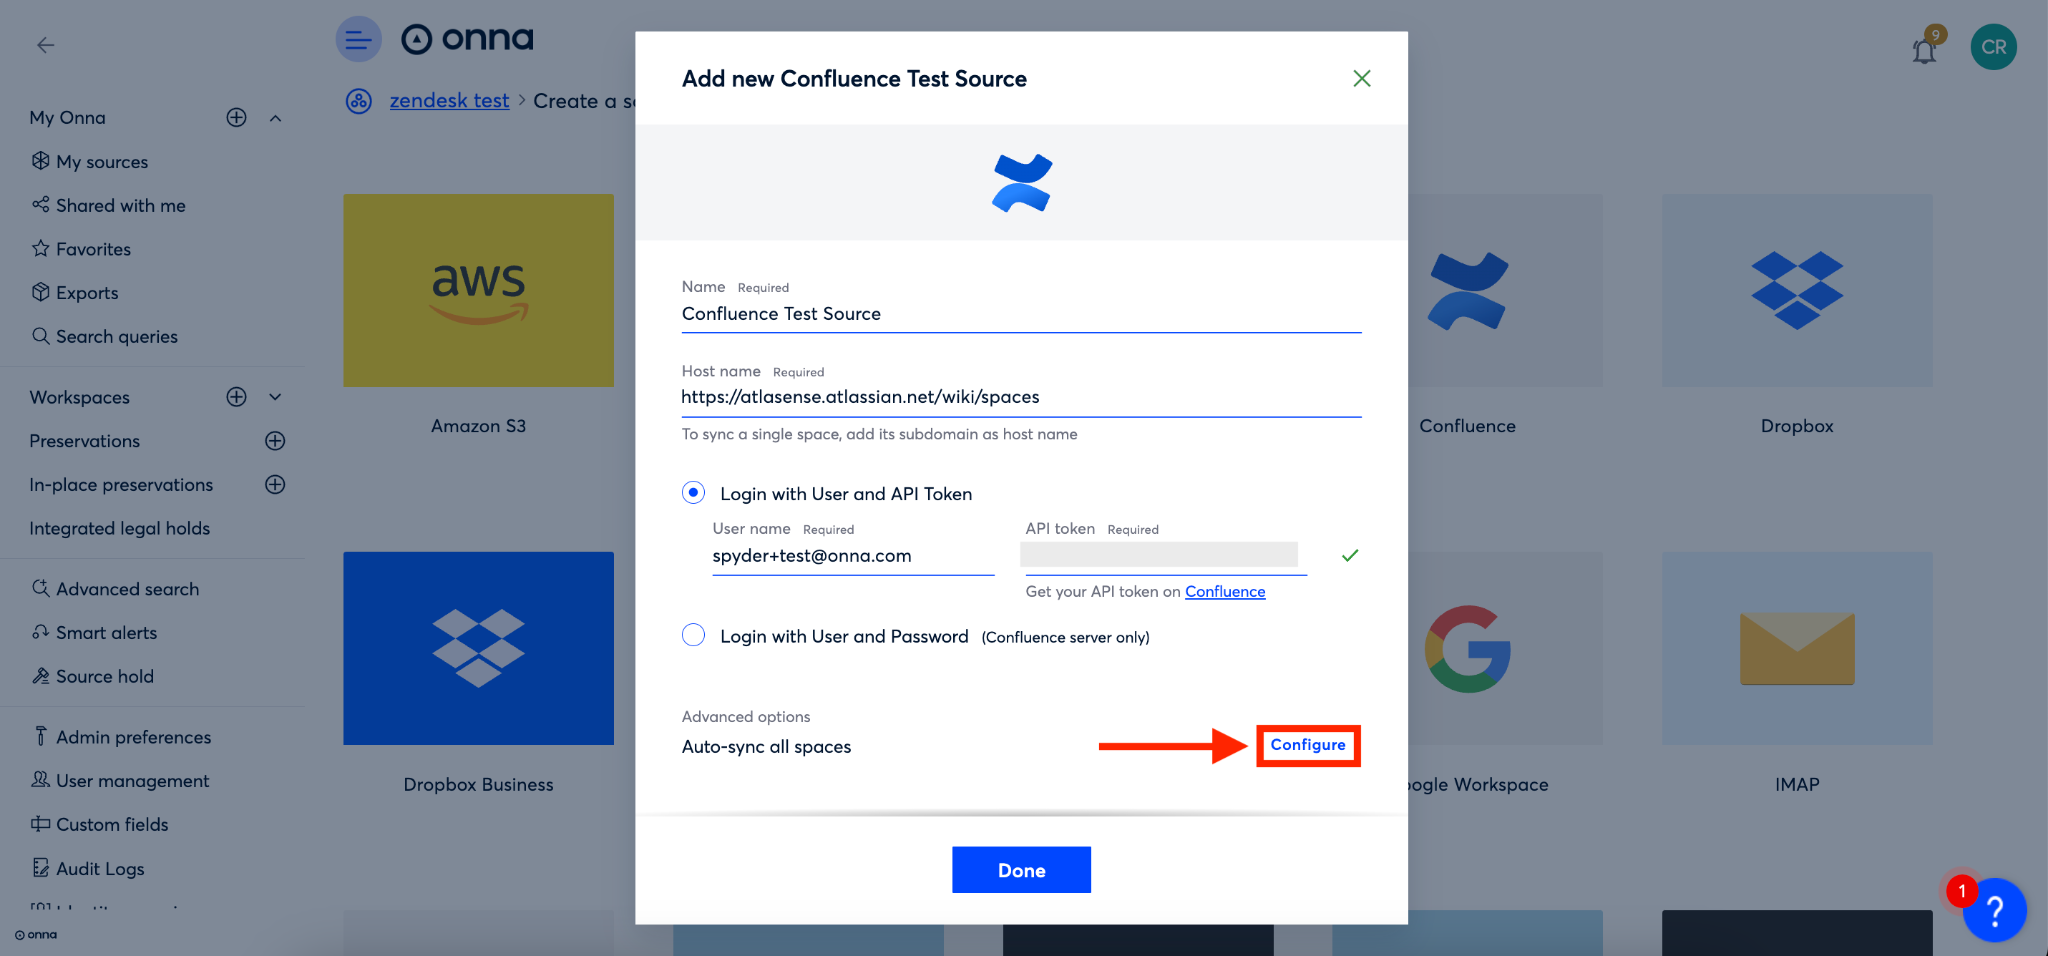
You’ll now name your source in the ‘Name’ field (a) and add your Confluence site URL in the ‘Host name’ field (b).
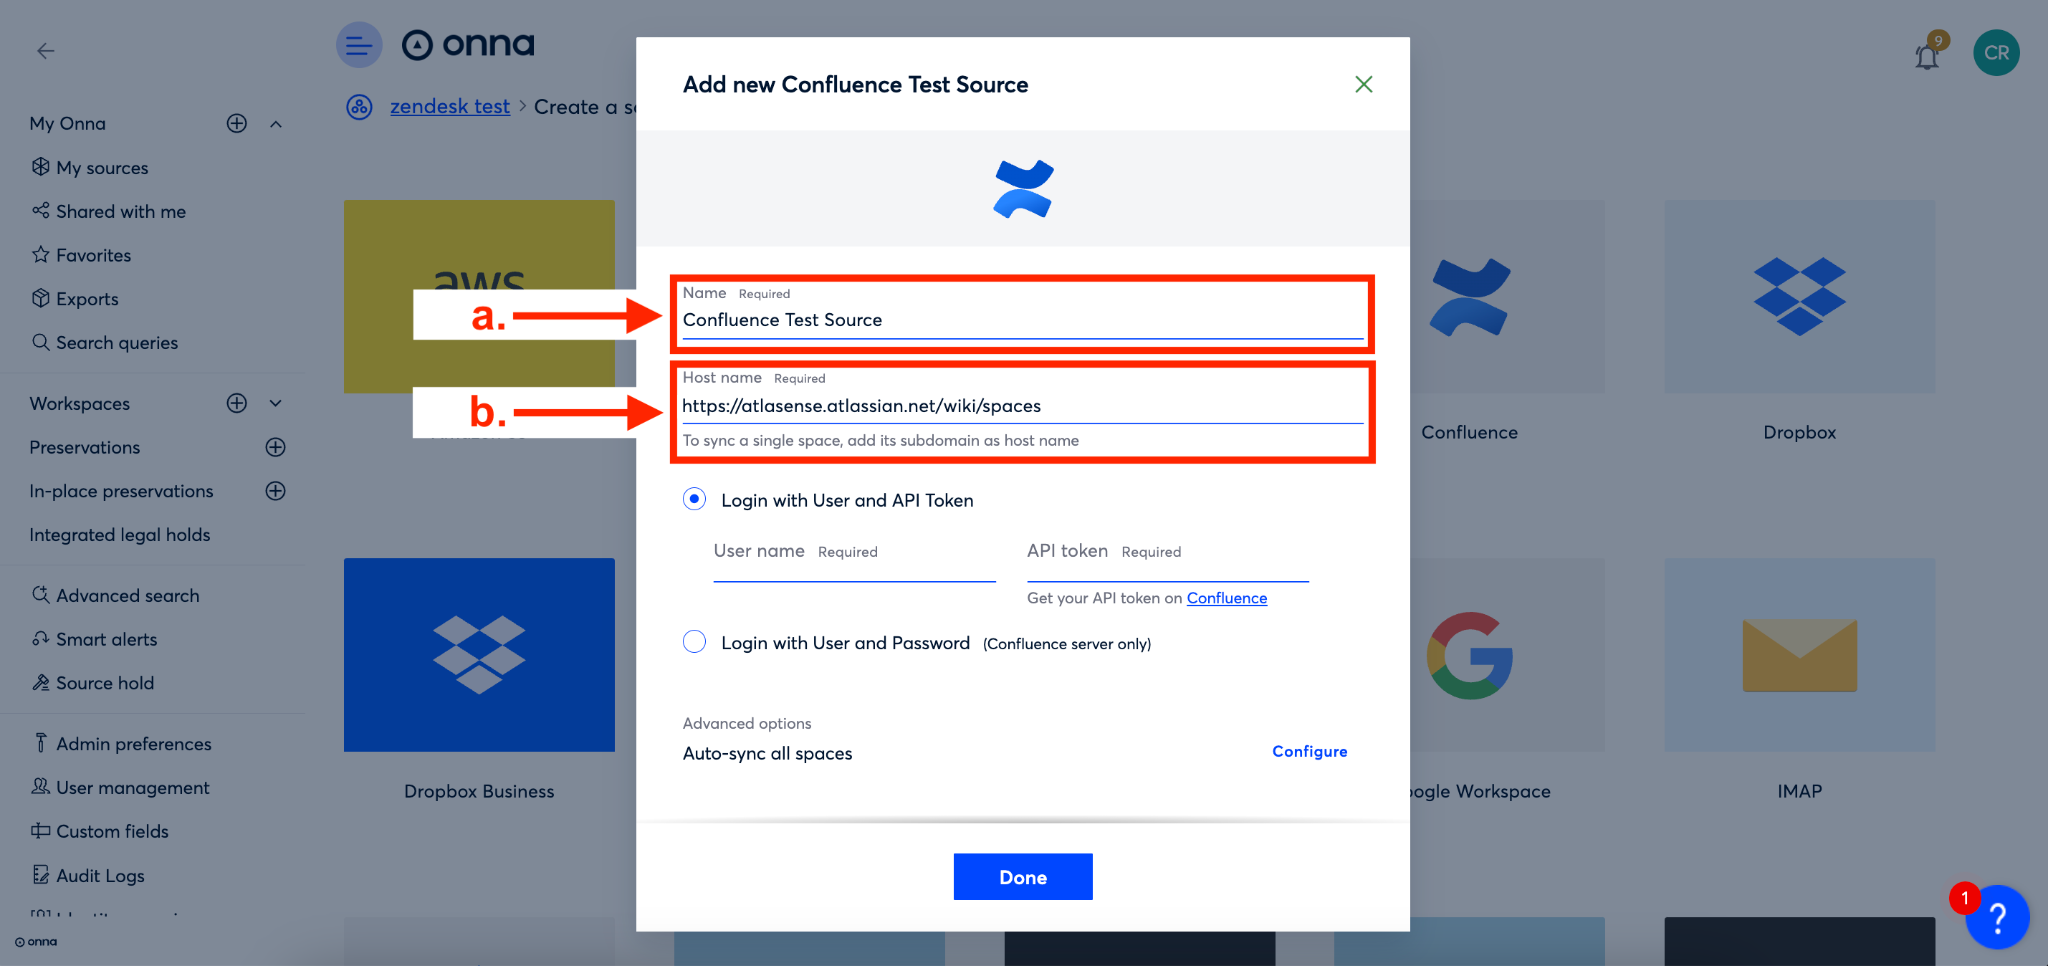
Step 4
You now have the option of connecting to Confluence in two ways.
First, you can ‘Login with User and API Token’ (a). Here you’ll enter your user name and then get an API token from Confluence (b). To generate an Atlassian API token, follow the instructions.
The second method of connecting is to ‘Login with User and Password’ (c). To do this you’ll simply enter your Confluence username and password. If the site is not hosted on Atlassian, then select the option to log in with user and password.
Step 5
Next, you’ll click on ‘Configure’ to select which data to sync and your preferred sync mode.
Step 6
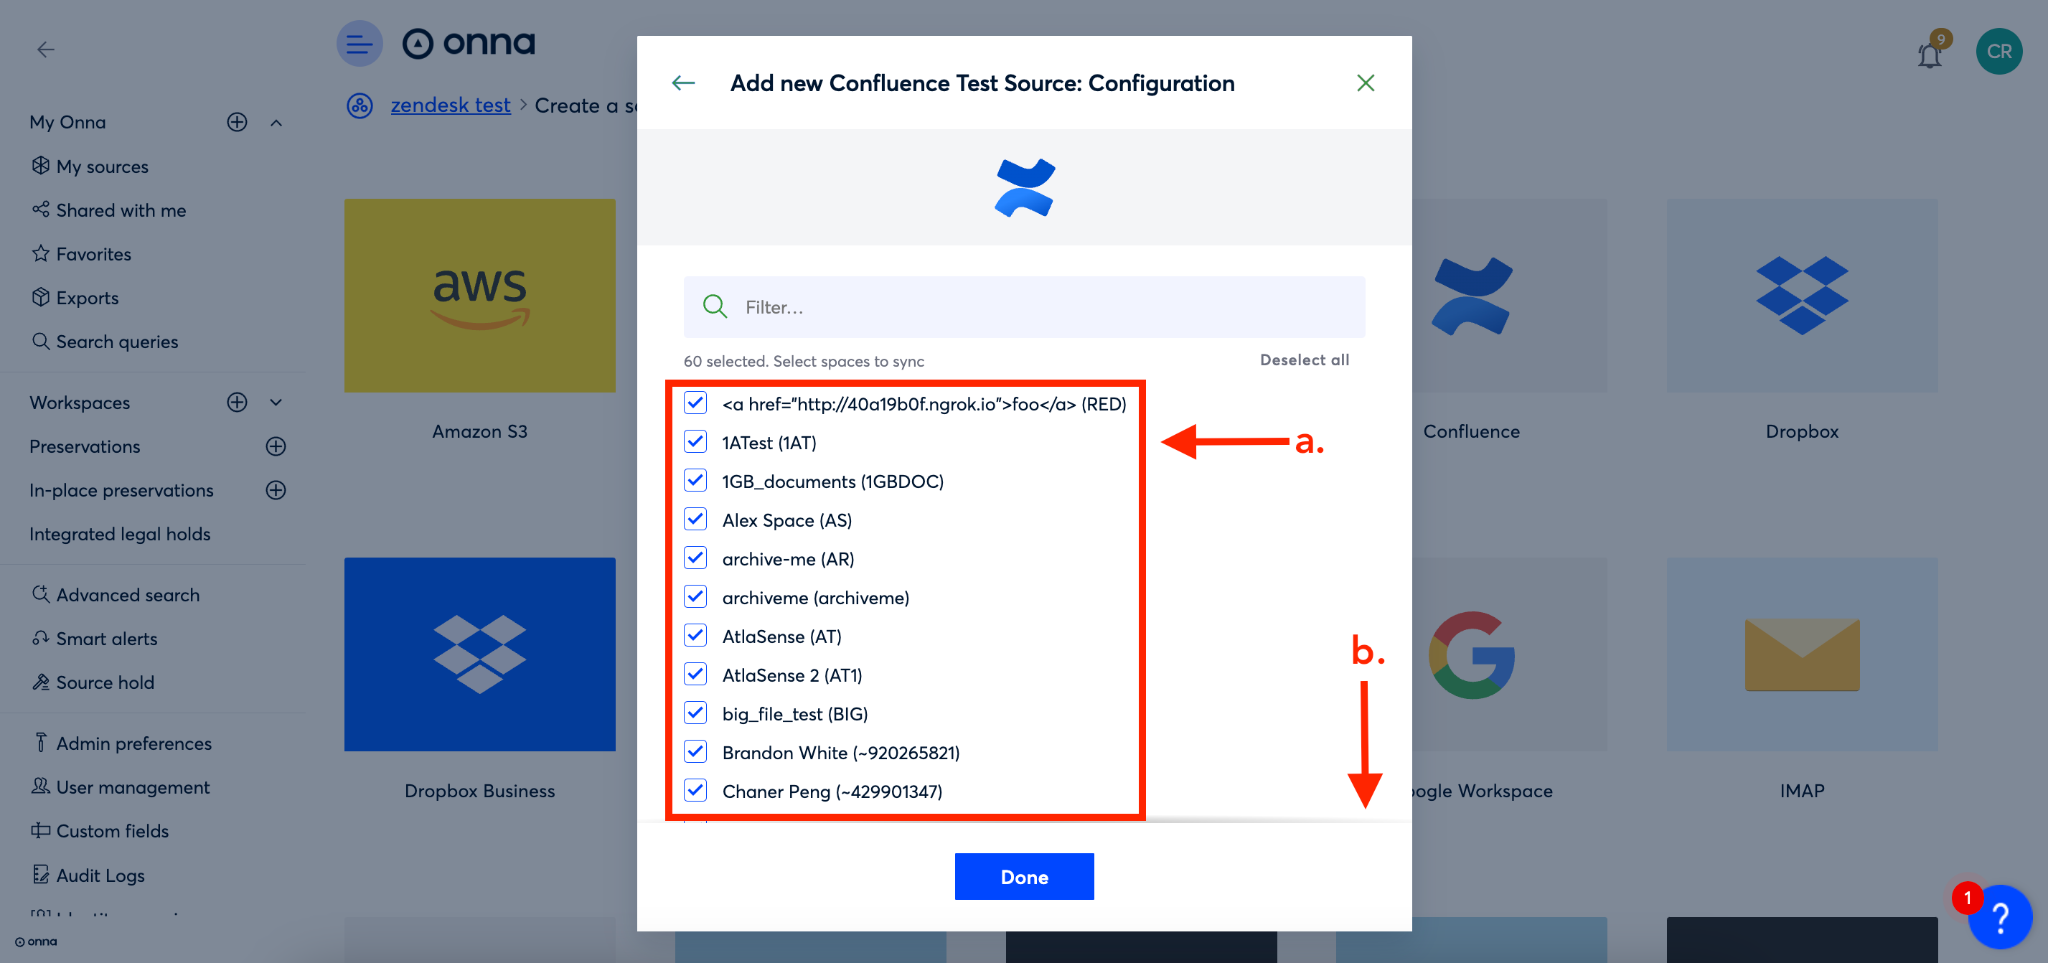
To configure you’ll first select the spaces that you want to sync (a). Then, you’ll scroll to the bottom of the configuration window (b).
Step 7
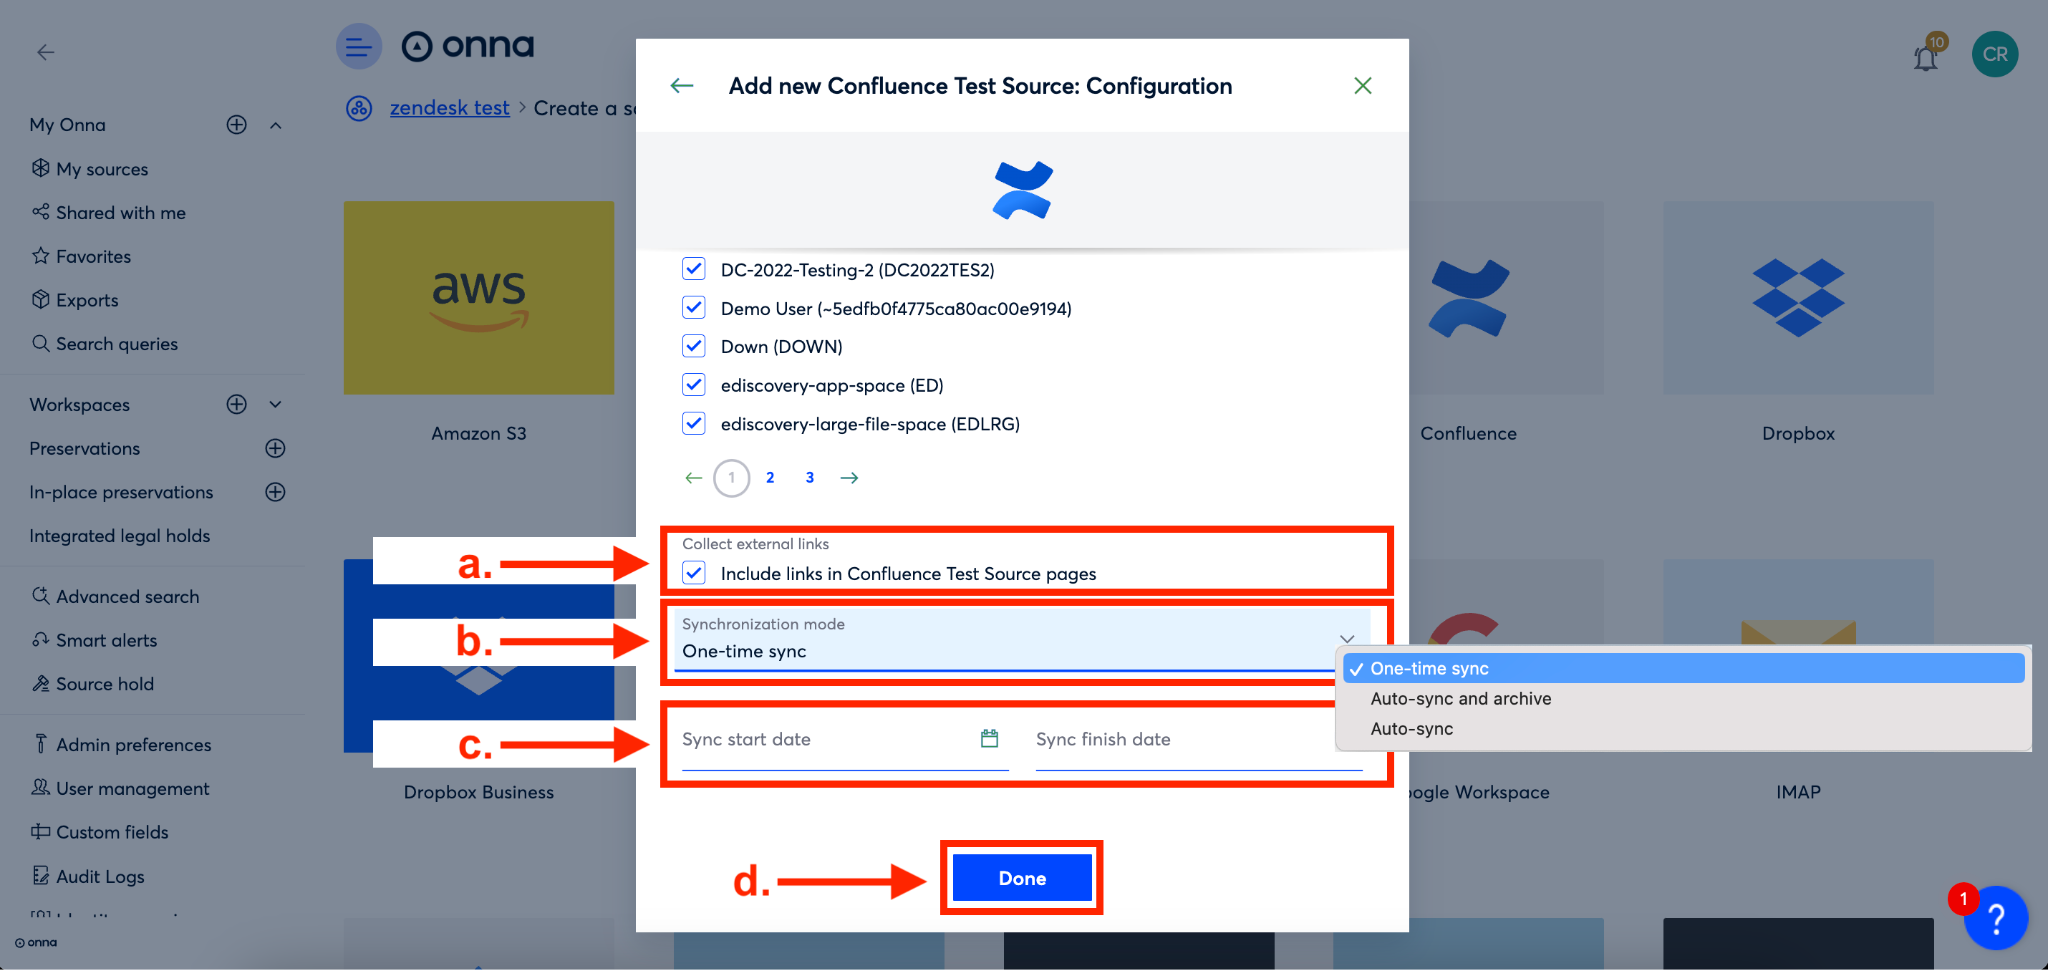
Now, you’ll decide if you want to ‘Collect external links’ in your sync. If you want to include them, check the box next to ‘Include links…’ (a).
Next, you’ll now click the arrow to the right of the ‘Synchronization mode’ field to select your sync mode from the dropdown that appears (b).
Then, you’ll set up your sync dates (c). If you’ve chosen a one-time sync you will enter a ‘Sync start date’ and a ‘Sync end date’. If you’ve chosen auto-sync or auto-sync and archive you will select a ‘Sync start date’ only. By leaving the ‘Sync start date’ empty will lead to the collection of all available data Confluence.
NOTE:The auto-sync mode is only supported for Confluence pages and files attached to a space.
Finally, you’ll click the blue ‘Done’ button (d).
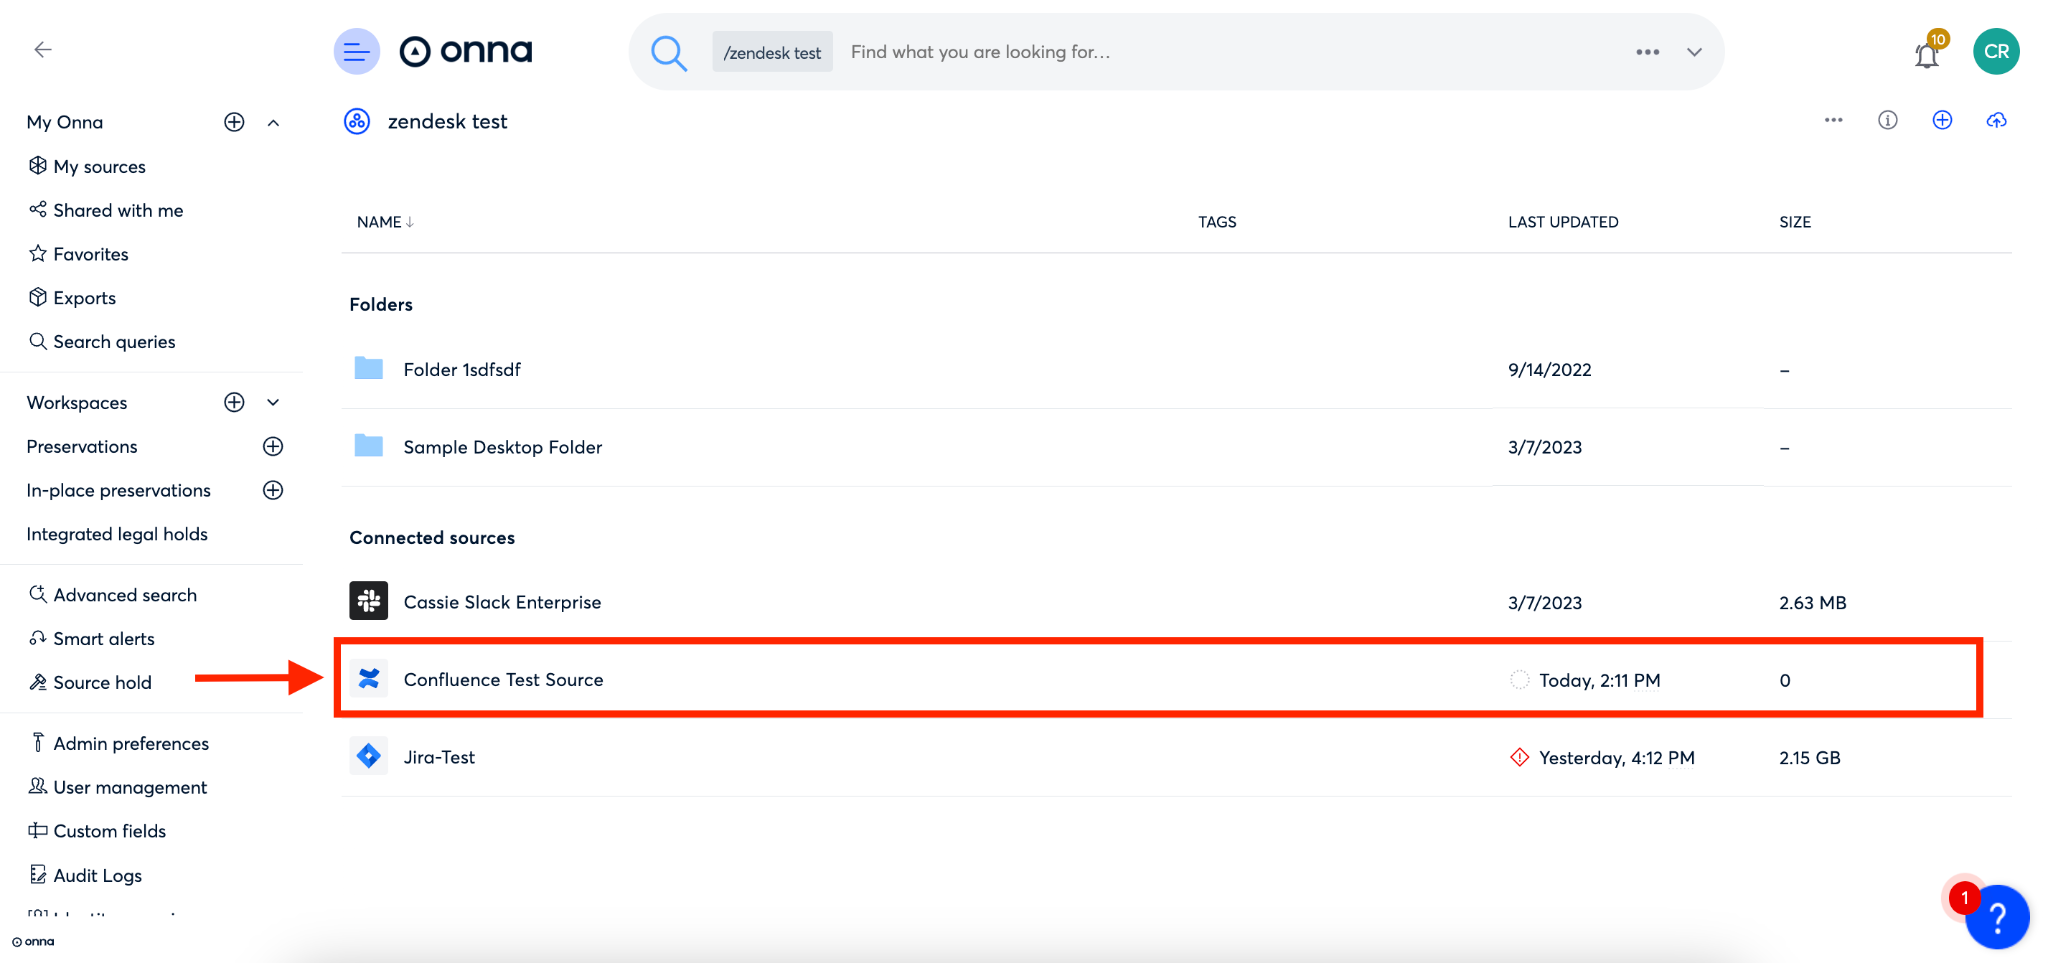
Step 8
Your sync is now in progress and visible inside the workspace you added it to. To learn more, see the article "How to Monitor Your Source Sync Status.”