Creating, Adding, and Managing Tags
- 23 Jul 2024
- 5 Minutes to read
- Print
- DarkLight
- PDF
Creating, Adding, and Managing Tags
- Updated on 23 Jul 2024
- 5 Minutes to read
- Print
- DarkLight
- PDF
Article summary
Did you find this summary helpful?
Thank you for your feedback

In this article you will learn:
How to Tag a Workspace
How to Tag a Source
How to Tag Files
Managing Tags
Tags are freeform metadata you can use to label workspaces, sources, or files, in Onna. Once applied to workspaces, sources, or files, you are able to search using tags, making tags an effective tool for organizing your data. Please note: Manage or edit permissions within a workspace are required to create and manage tags.
In order to use tagging an Onna admin must enable this feature in Admin Preferences. |
How to Tag a Workspace
Step 1
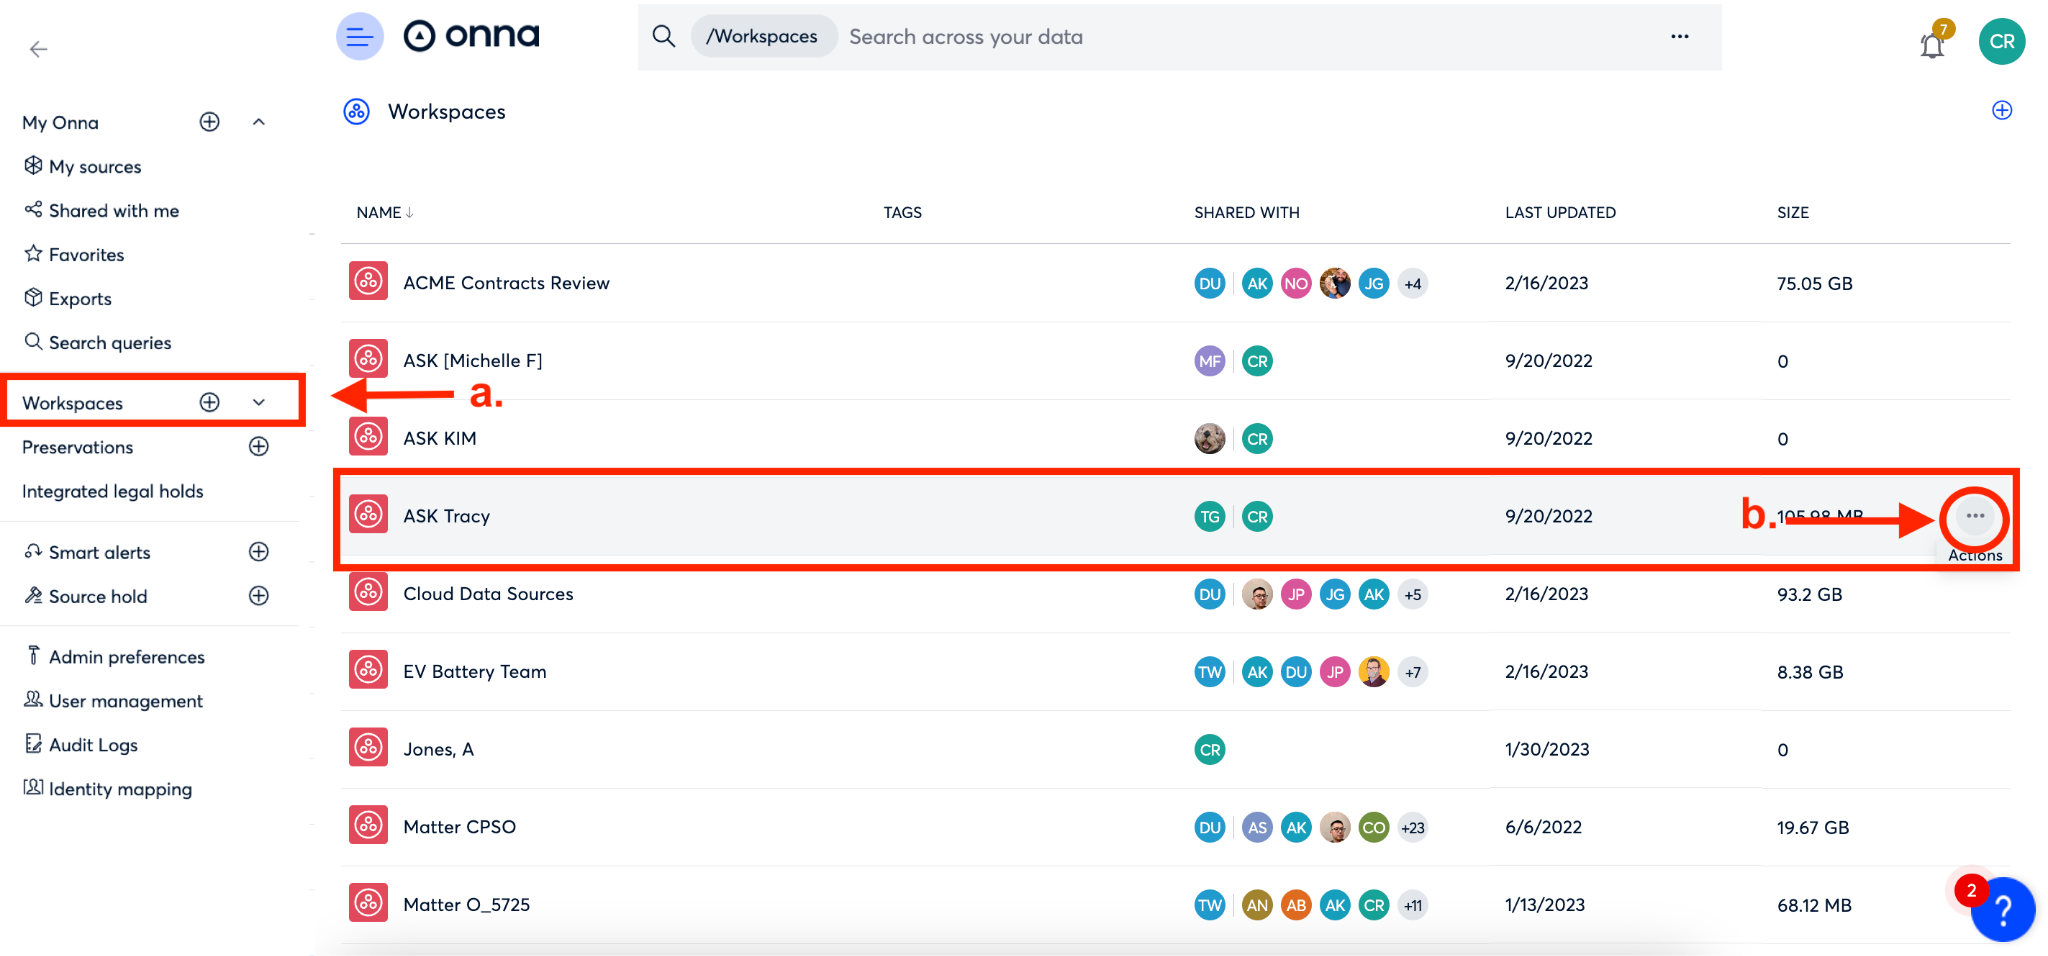
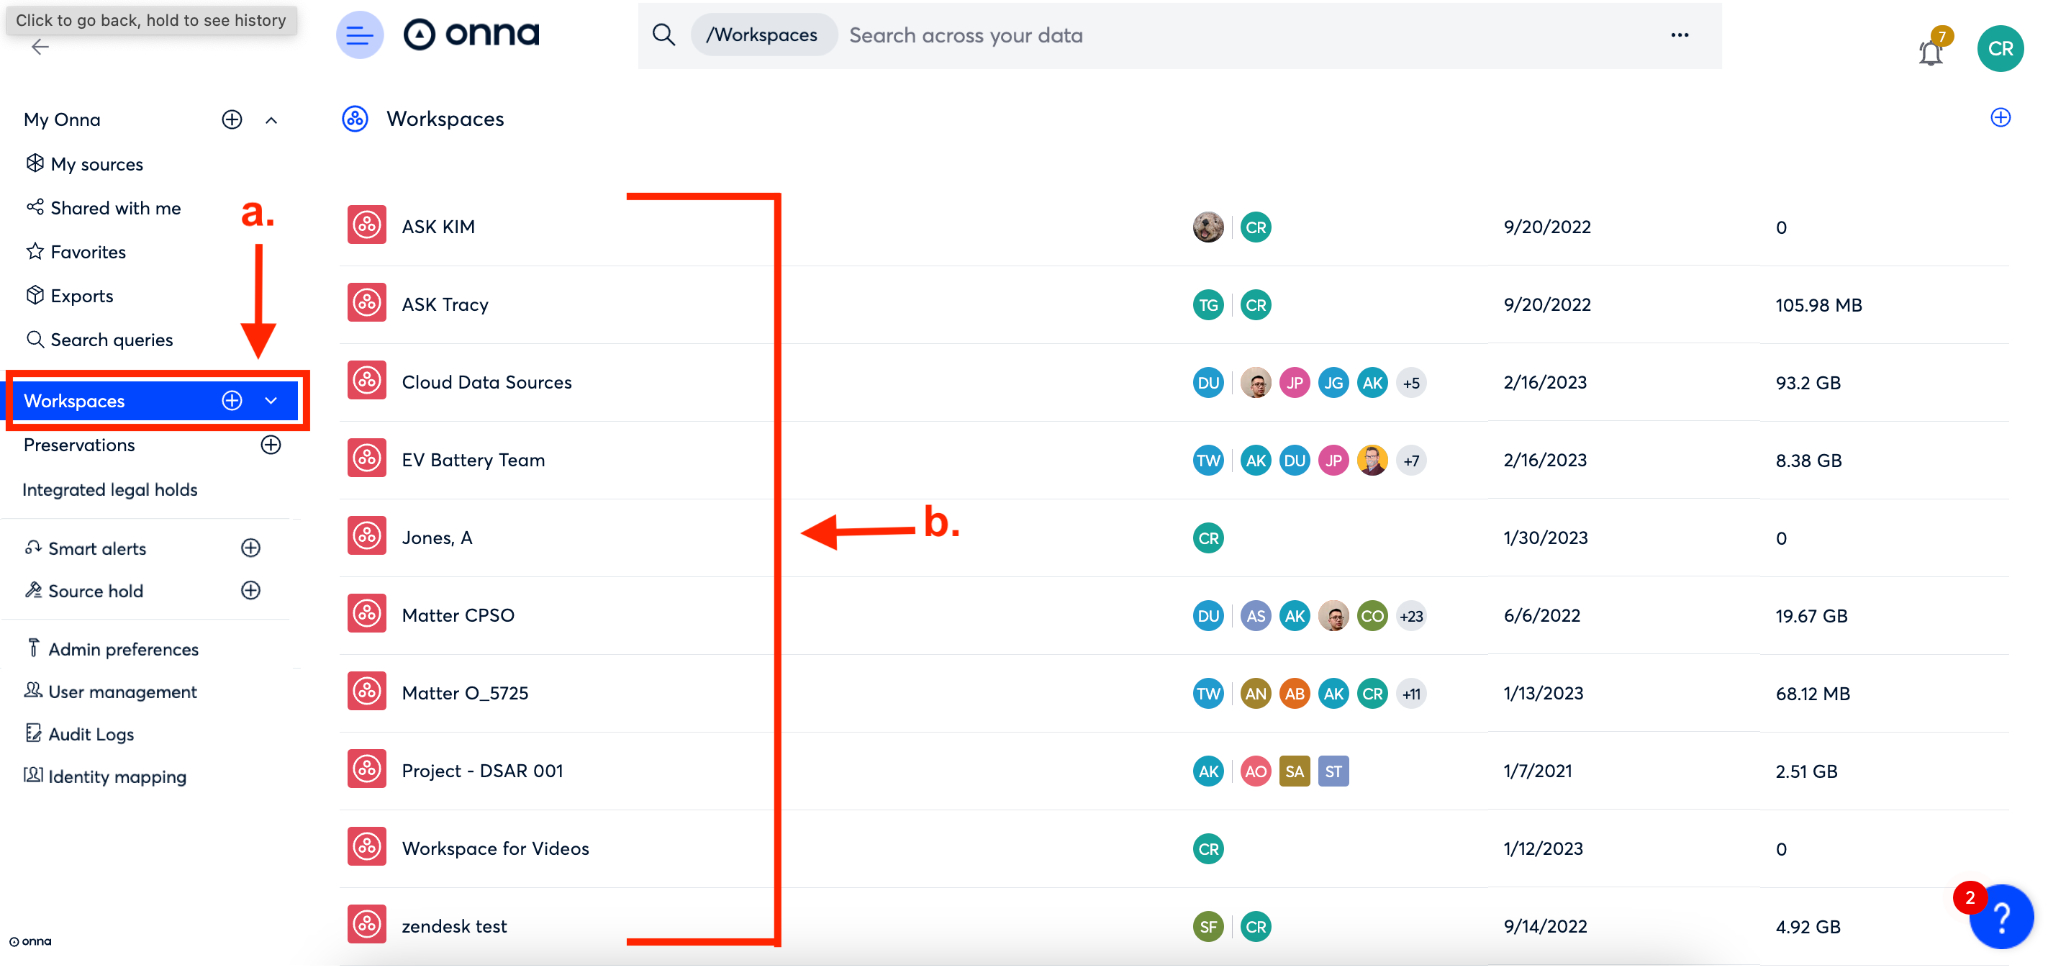
To begin, navigate to the ‘Workspaces’ page from the main menu (a). From here, find the workspace you want to add a tag to and click on the ellipsis to the right of the workspace row (b).
Step 2
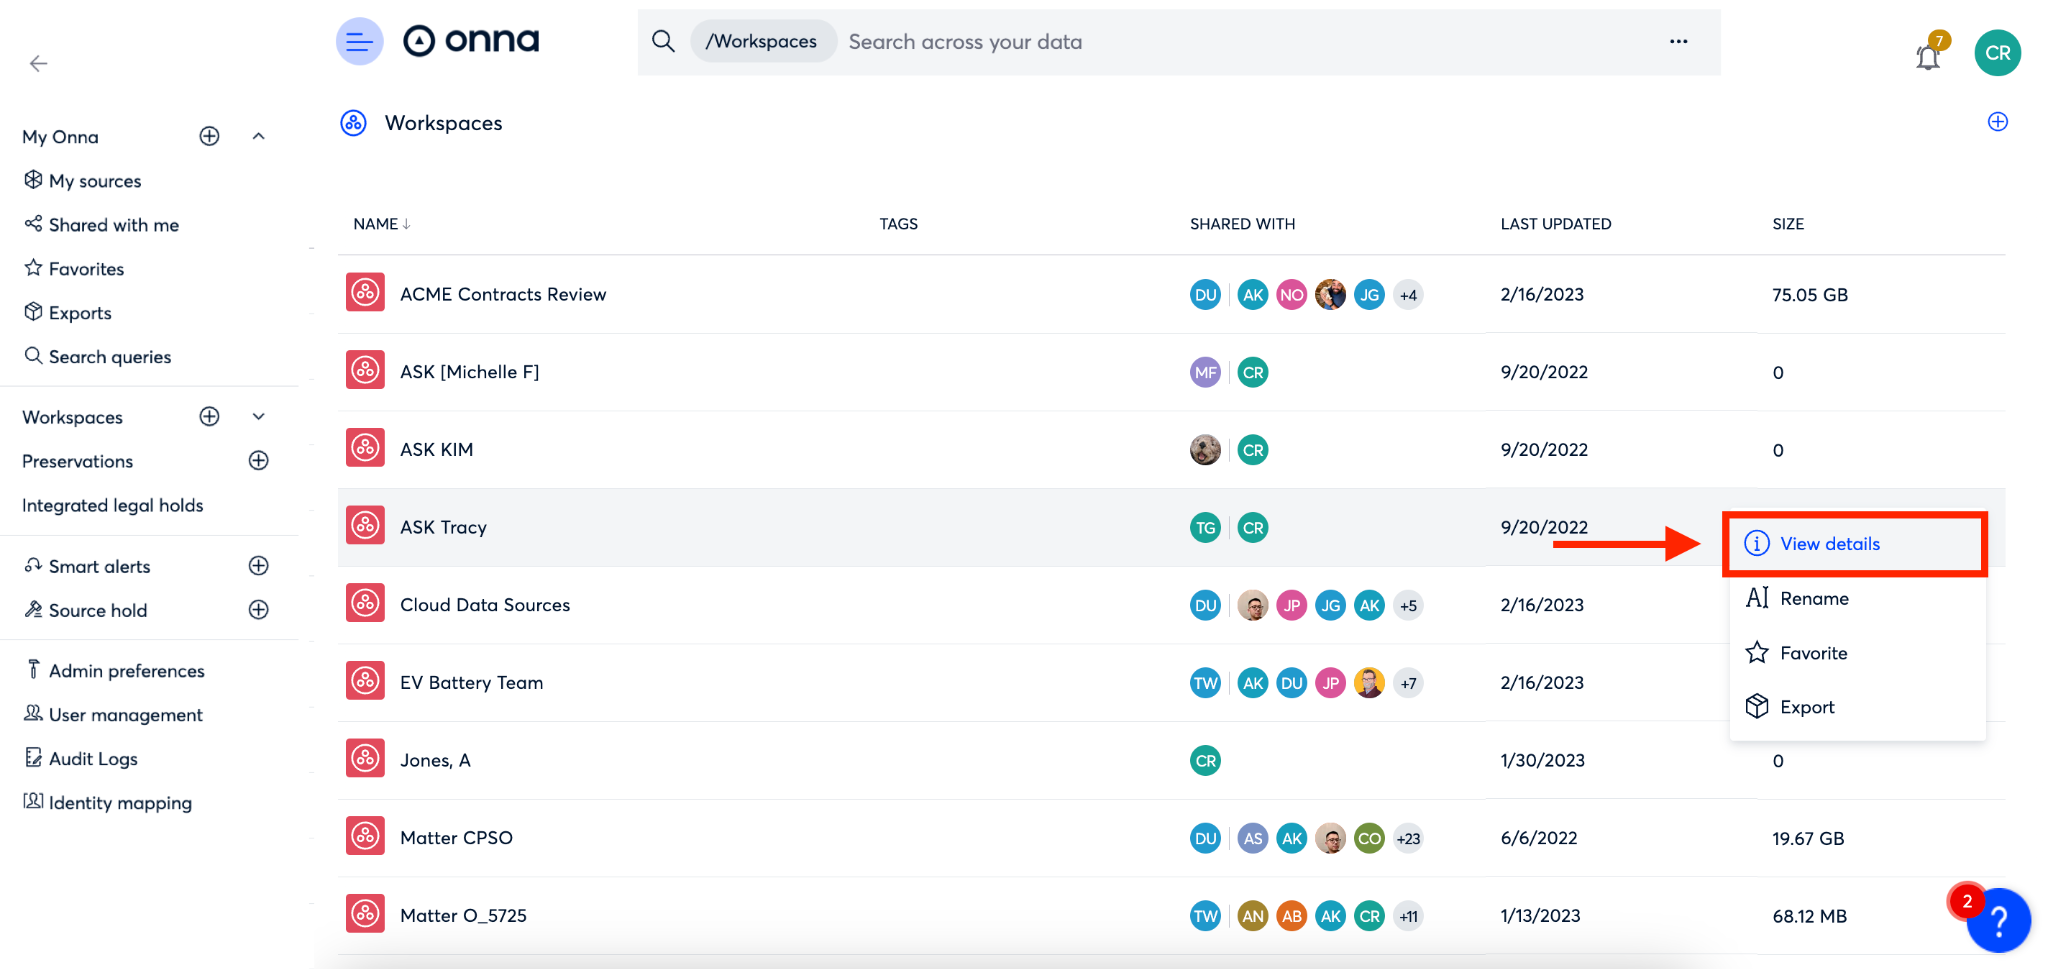
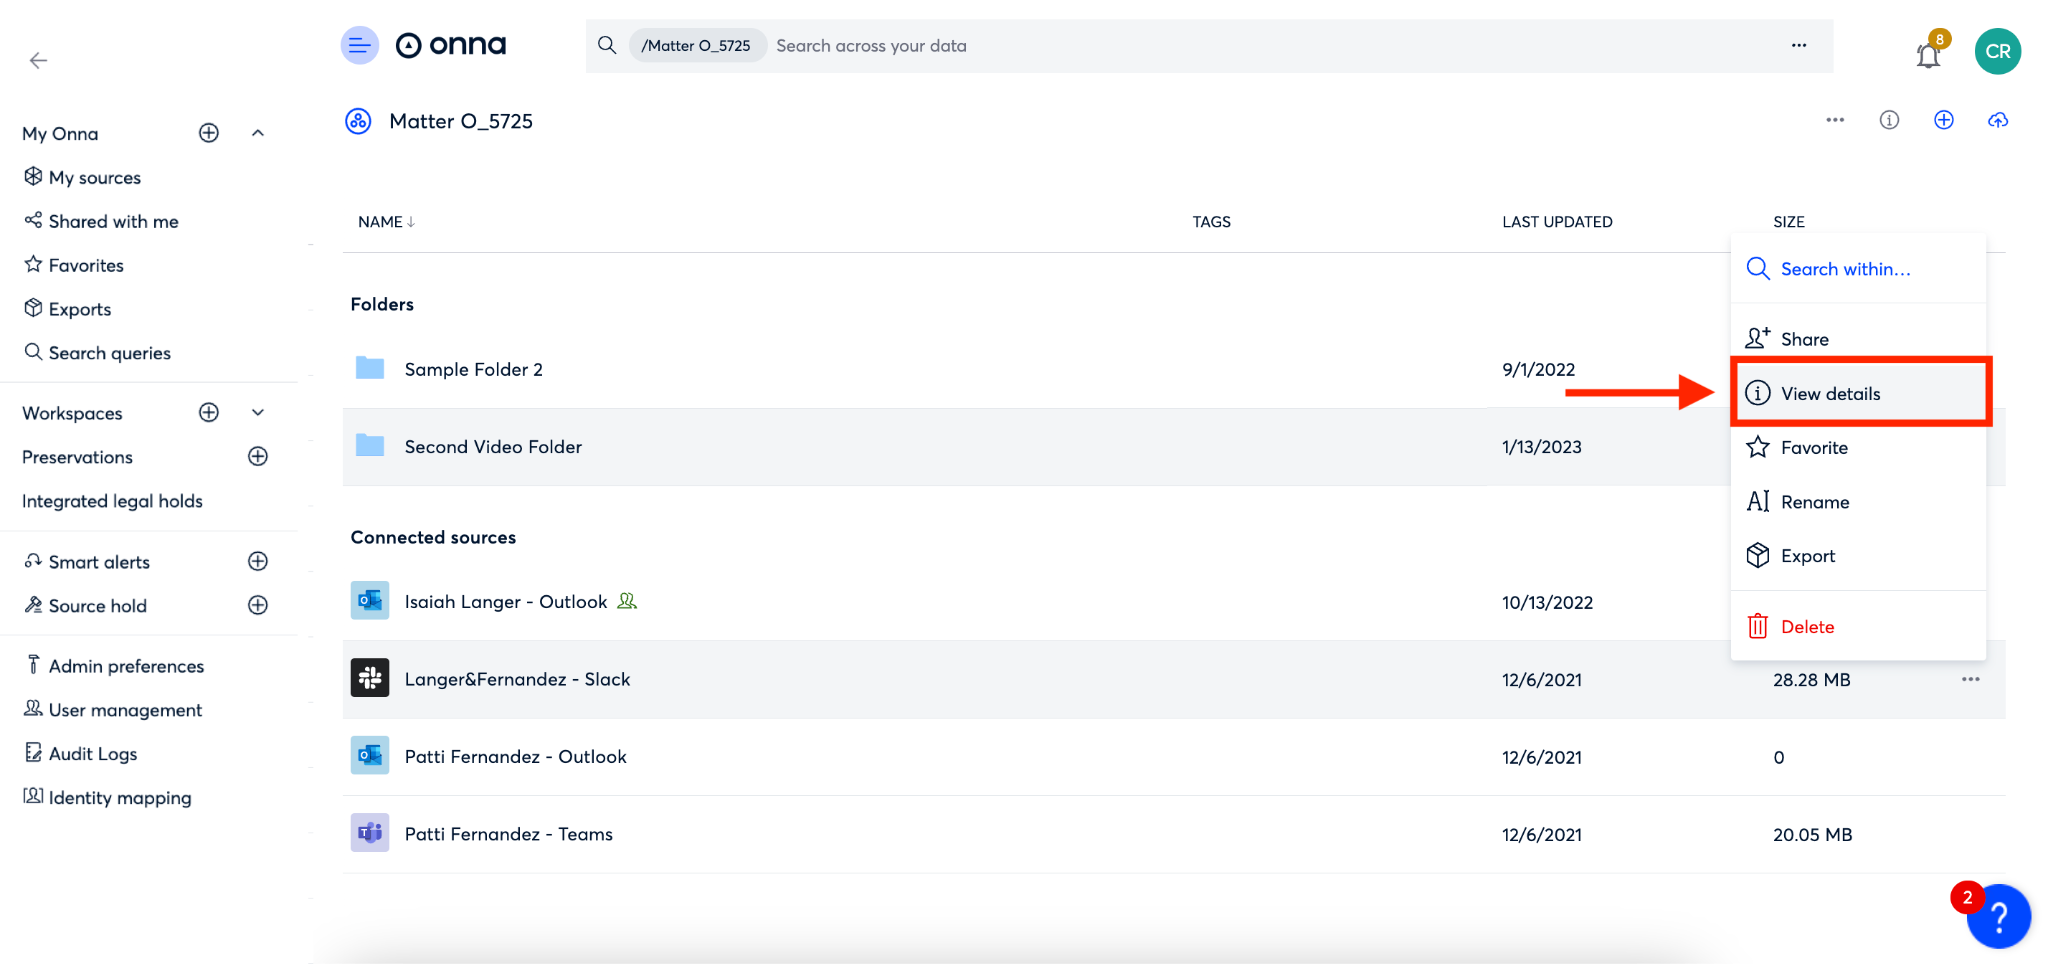
Select ‘View details’ from the dropdown that appears.
Step 3:
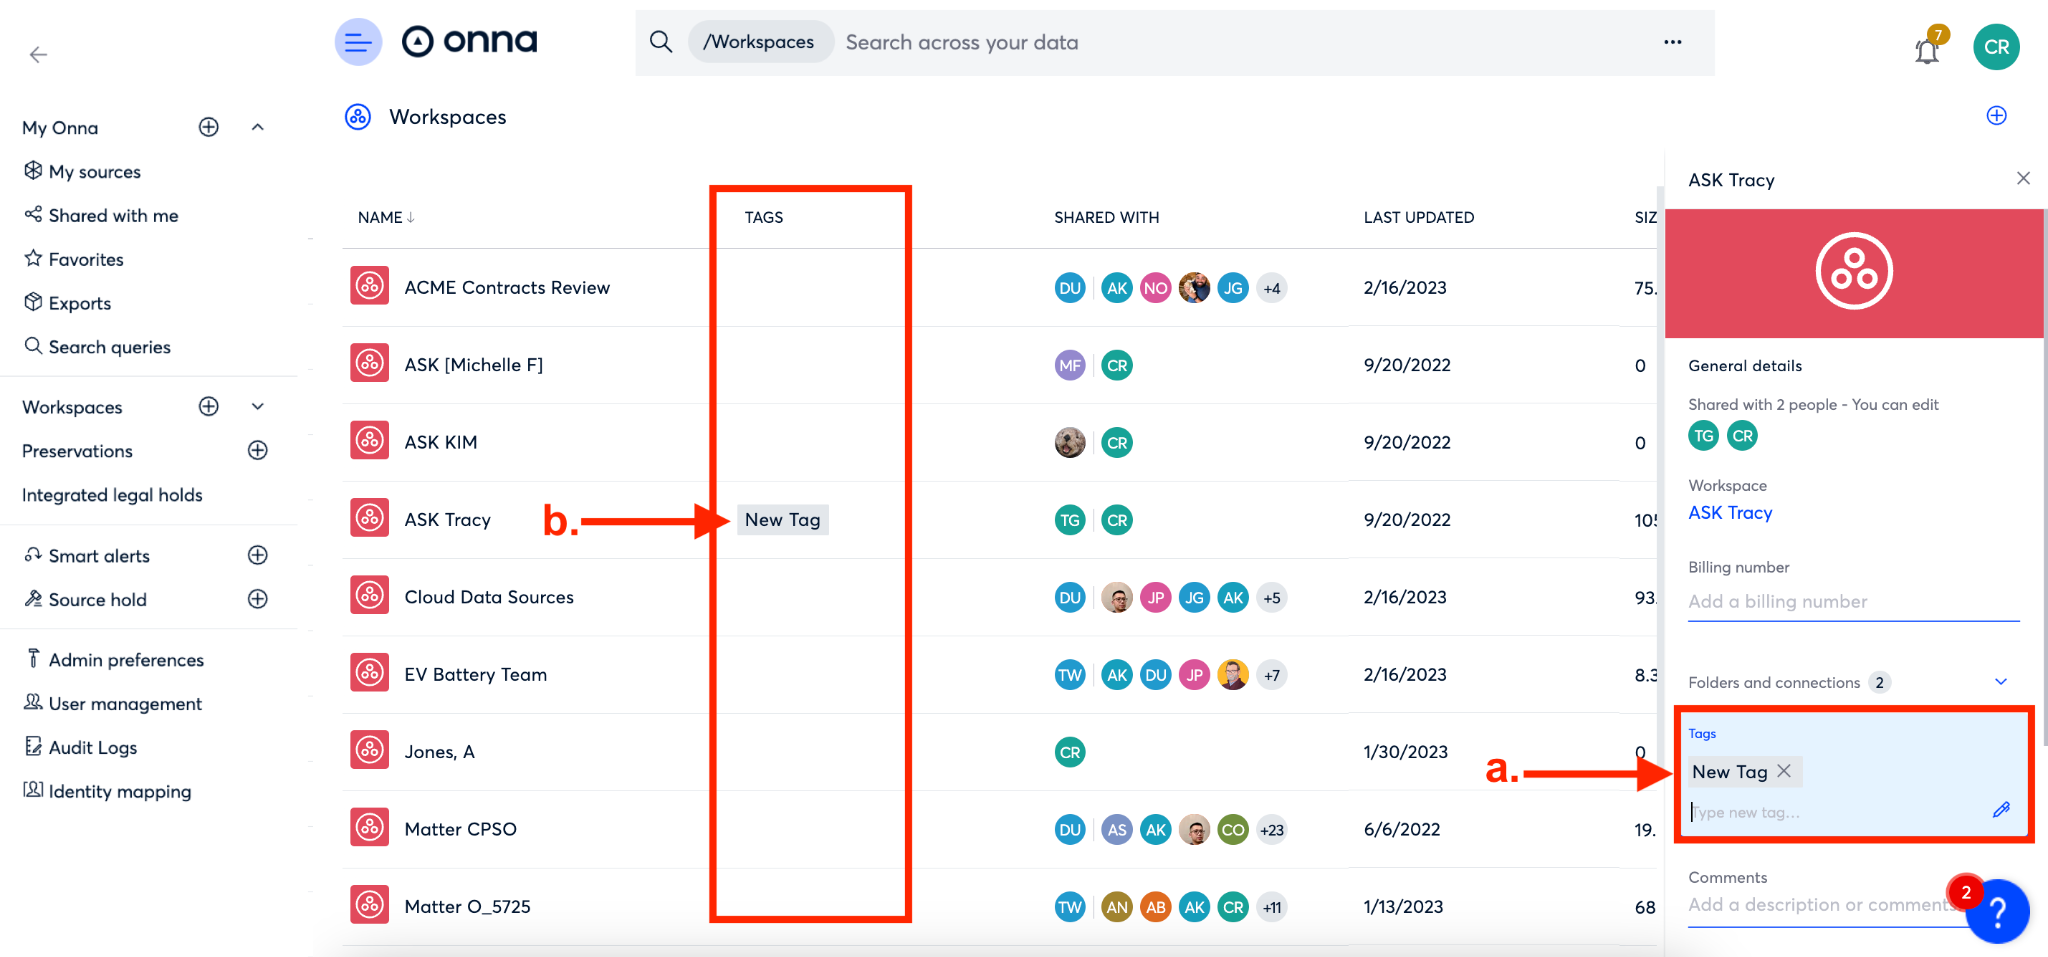
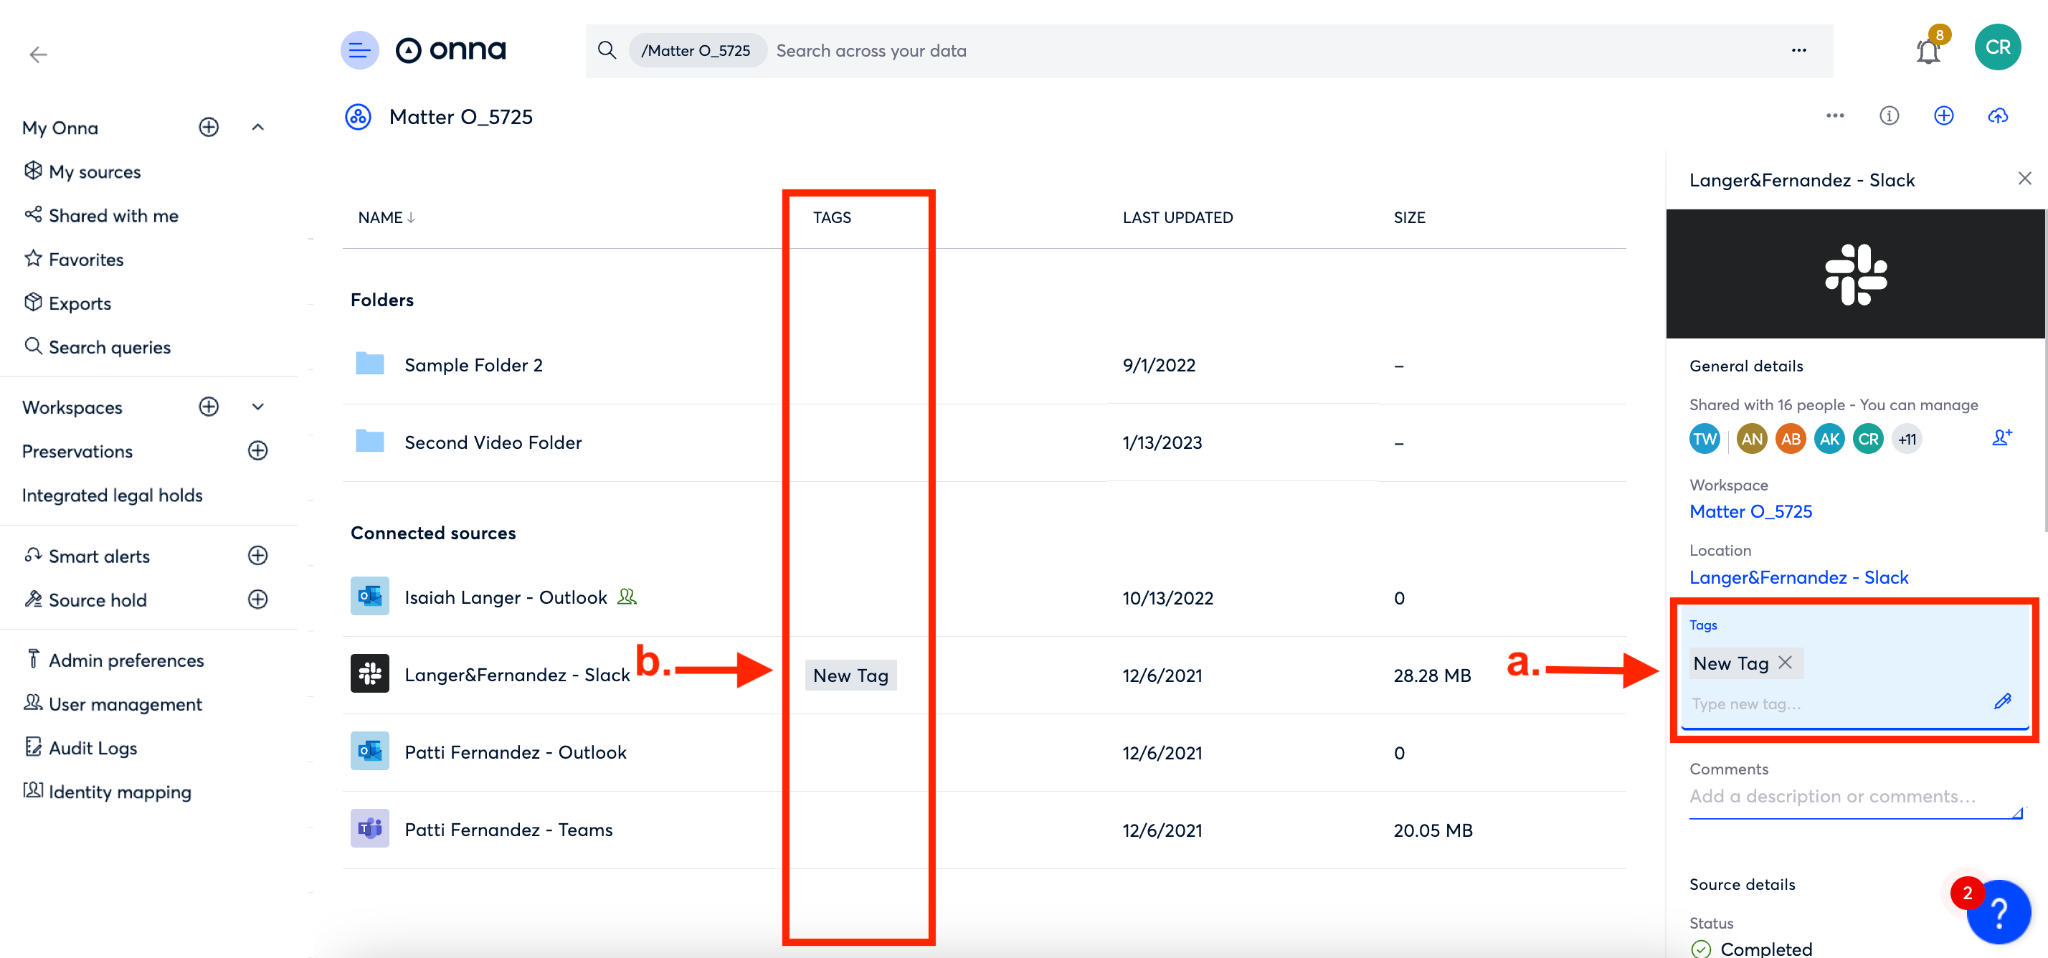
In the workspace details panel that appears on the right side of your screen, scroll to the ‘Tags’ section. Here you can type your tag (a). Once you hit the enter key, you’ll see the tag appear in the ‘Tags’ column (b).
How to Tag a Source
Step 1
To begin, navigate to the ‘Workspaces’ page from the main menu (a). From here select the workspace your source is in from your list of workspaces (b).
Step 2
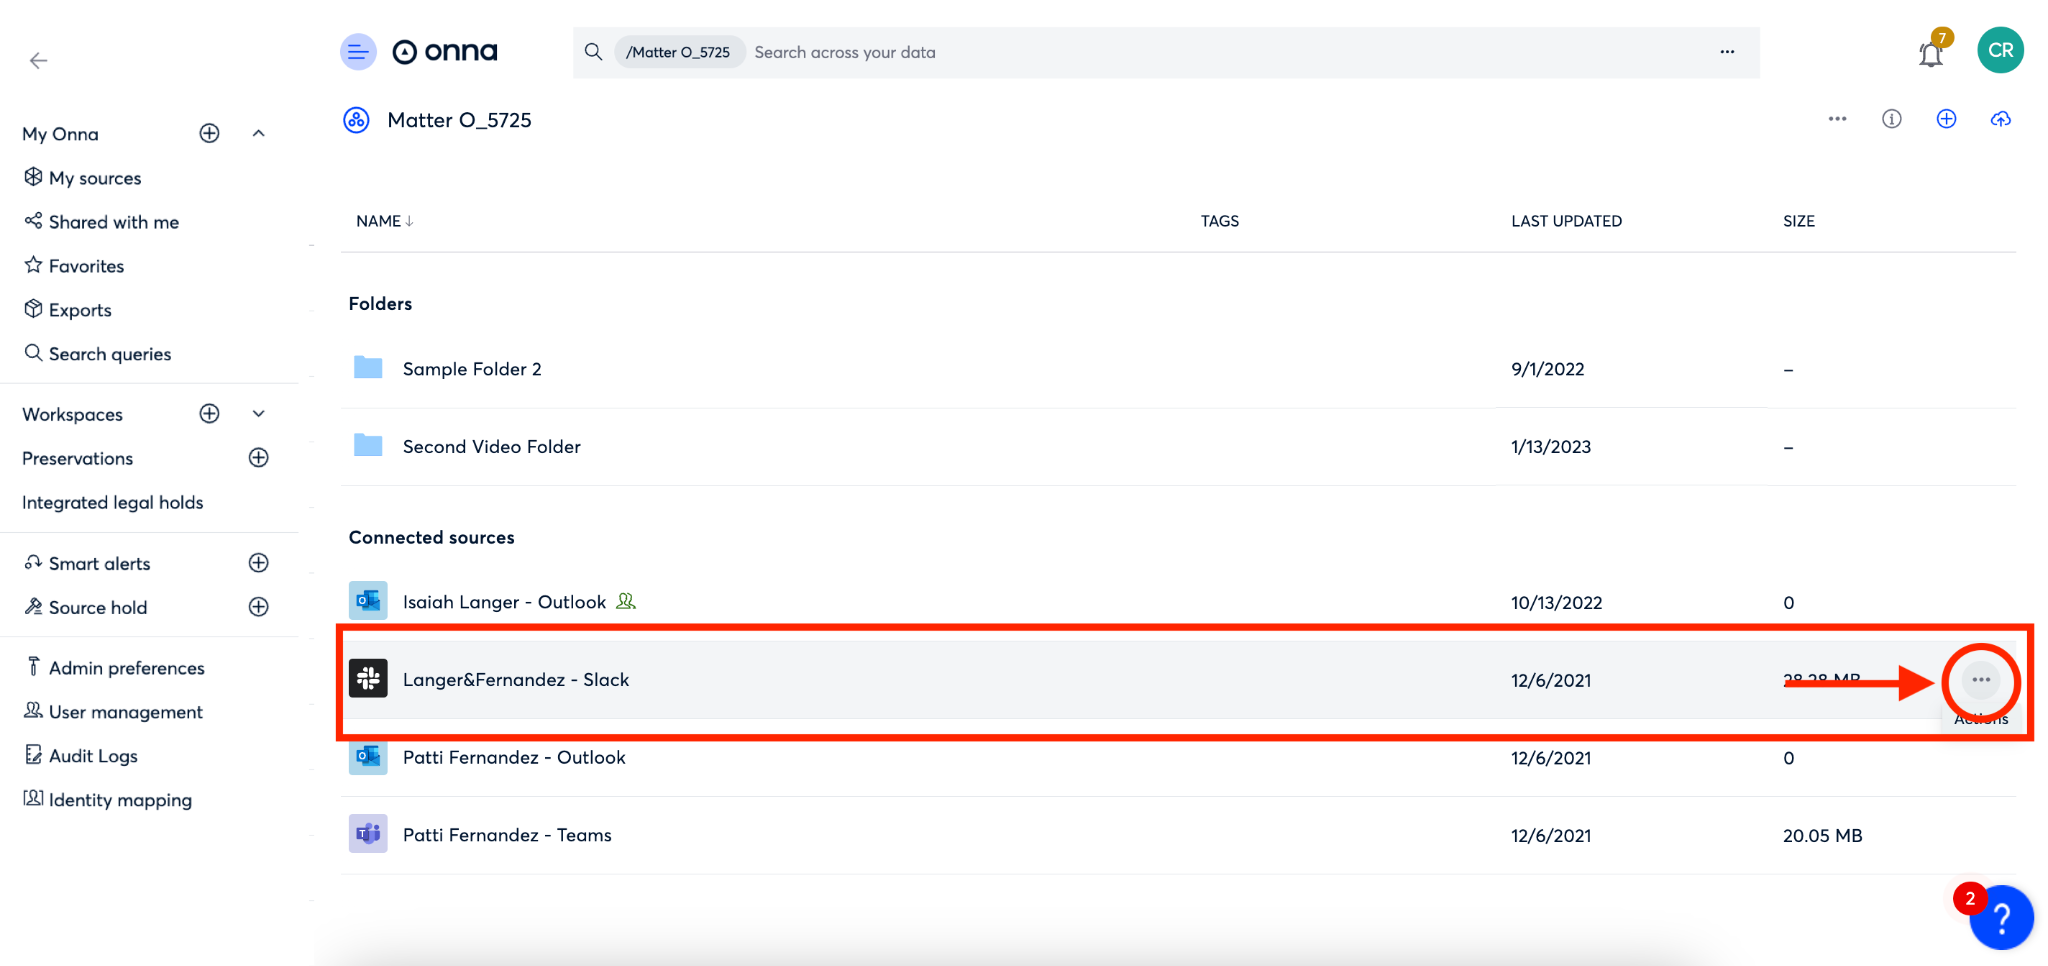
Once you’re inside the workspace, find the source you want to add a tag to, and click on the ellipsis to the right of the source row.
Step 3
Click ‘View details’ from the dropdown menu that appears.
Step 4
In the source details panel that appears on the right side of your screen, scroll to the ‘Tags’ section. Here you can type your tag (a). Once you hit the enter key, you’ll see the tag appear in the ‘Tags’ column (b).
How to Tag Files
In Onna you can tag files individually, or you can tag entire sets of search results at one time–saving you time while maintaining organized data.
Important Note: Currently with tagging we base the tagging job on a search, so if documents are actively being synced the end result of a tagging job may not match the initial result.
For example: If I have a search that populates 300,000 documents I want to tag, and as the tagging job is running more documents are ingested that also have that search criteria, they would get lumped in with the tagging job. The result would be more documents than you expect
Tagging Individual Files
Step 1
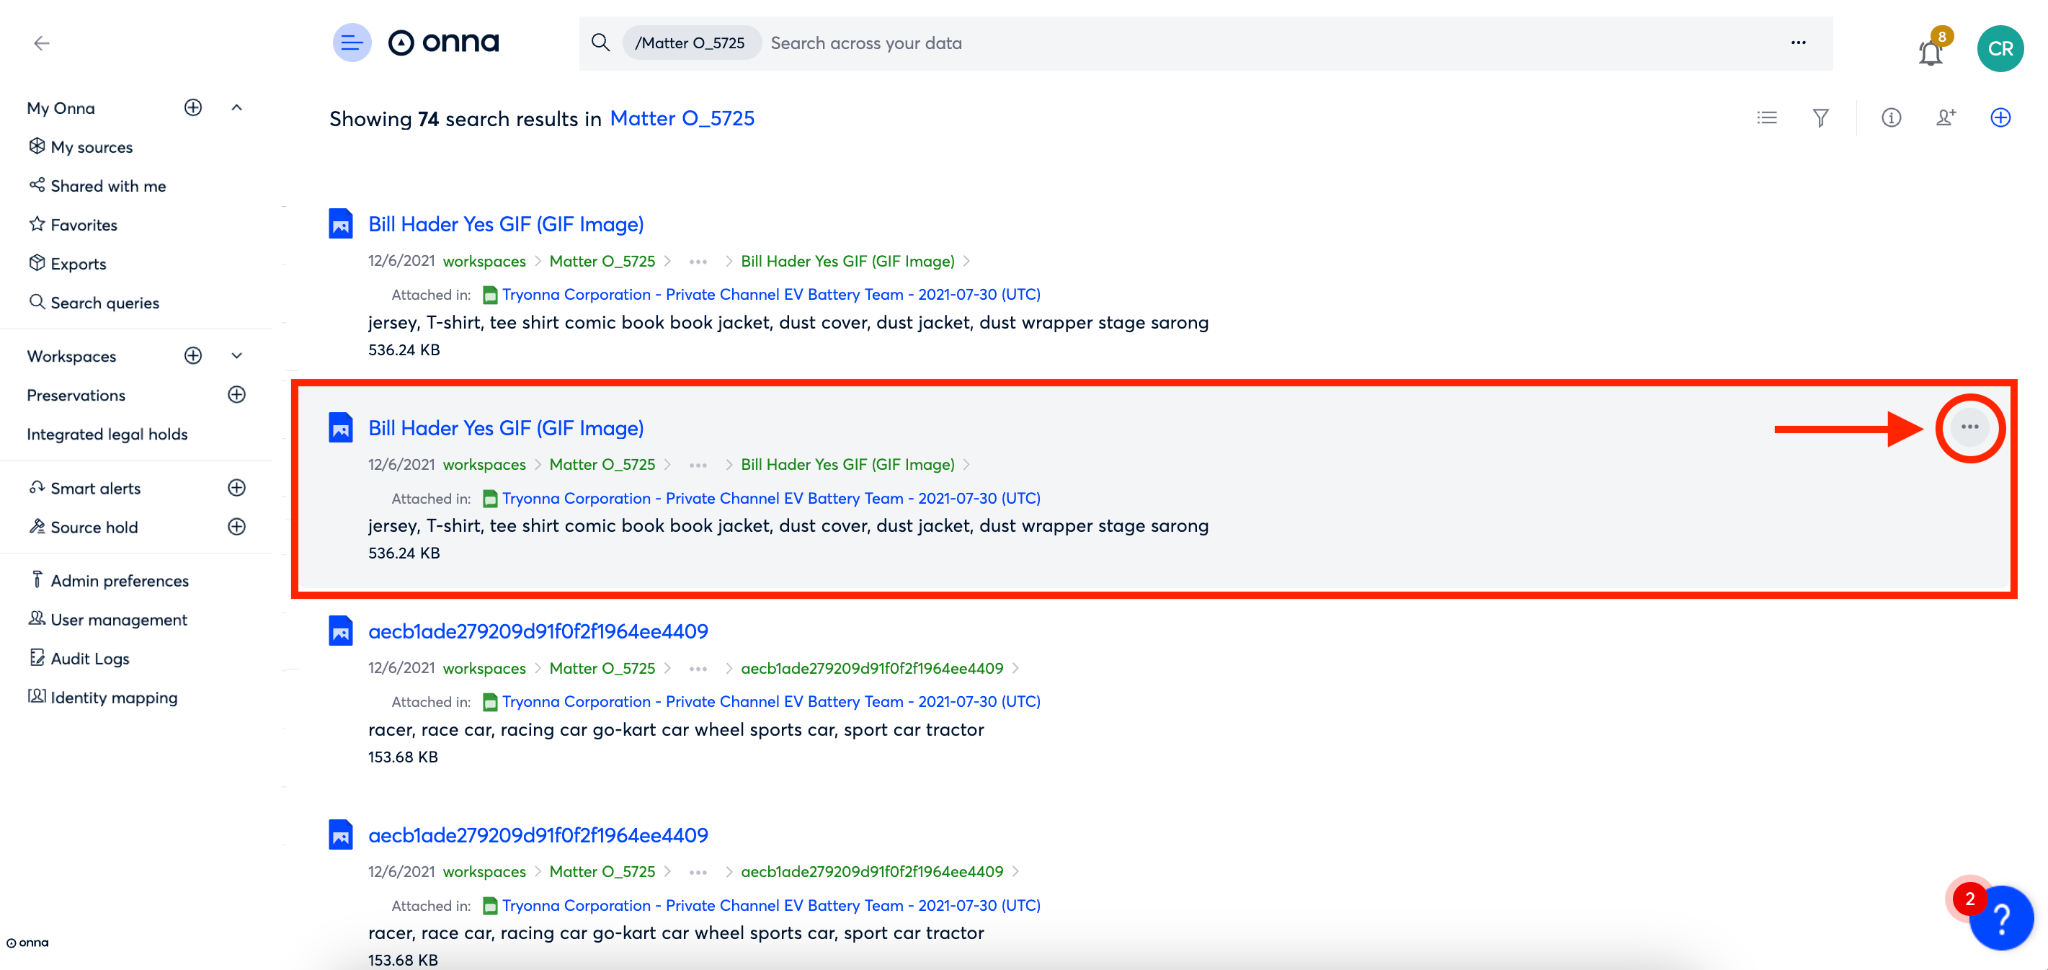
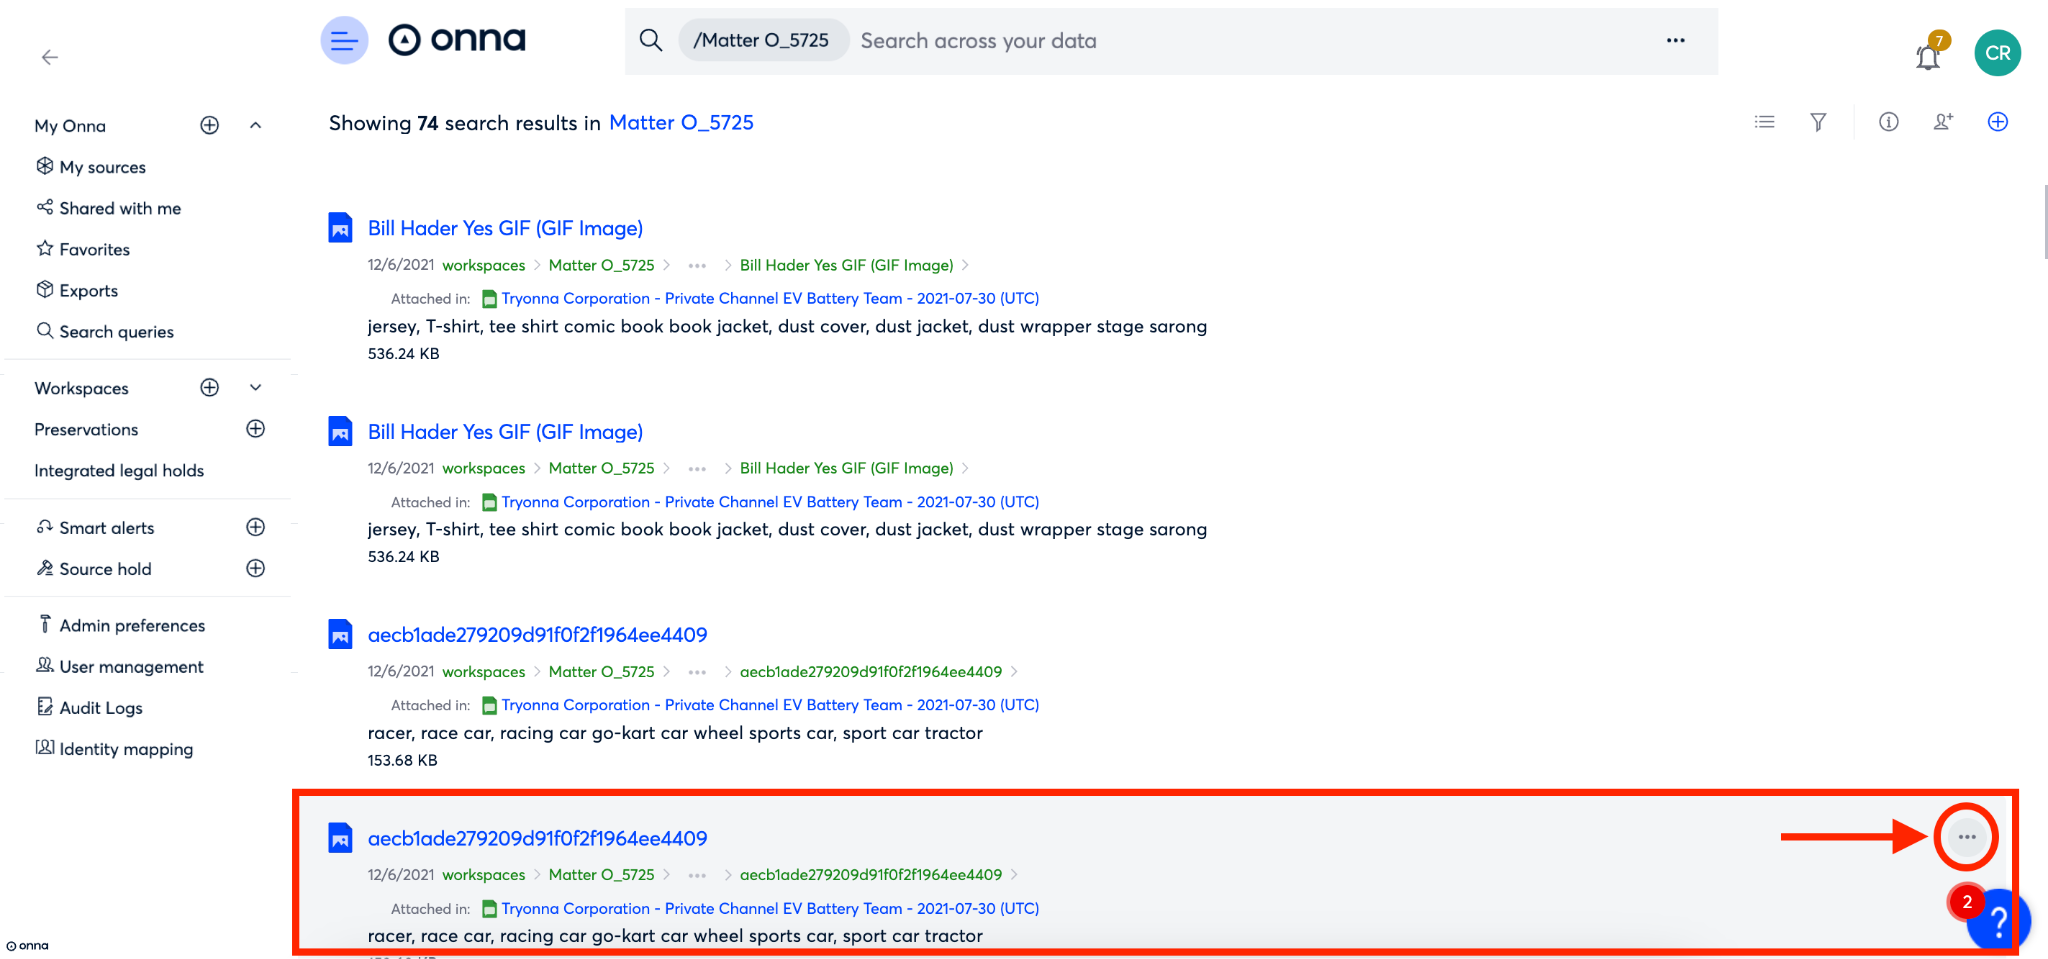
After completing a search, find the file you want to add a tag to in the list of results and click on the ellipsis to the right of the file row.
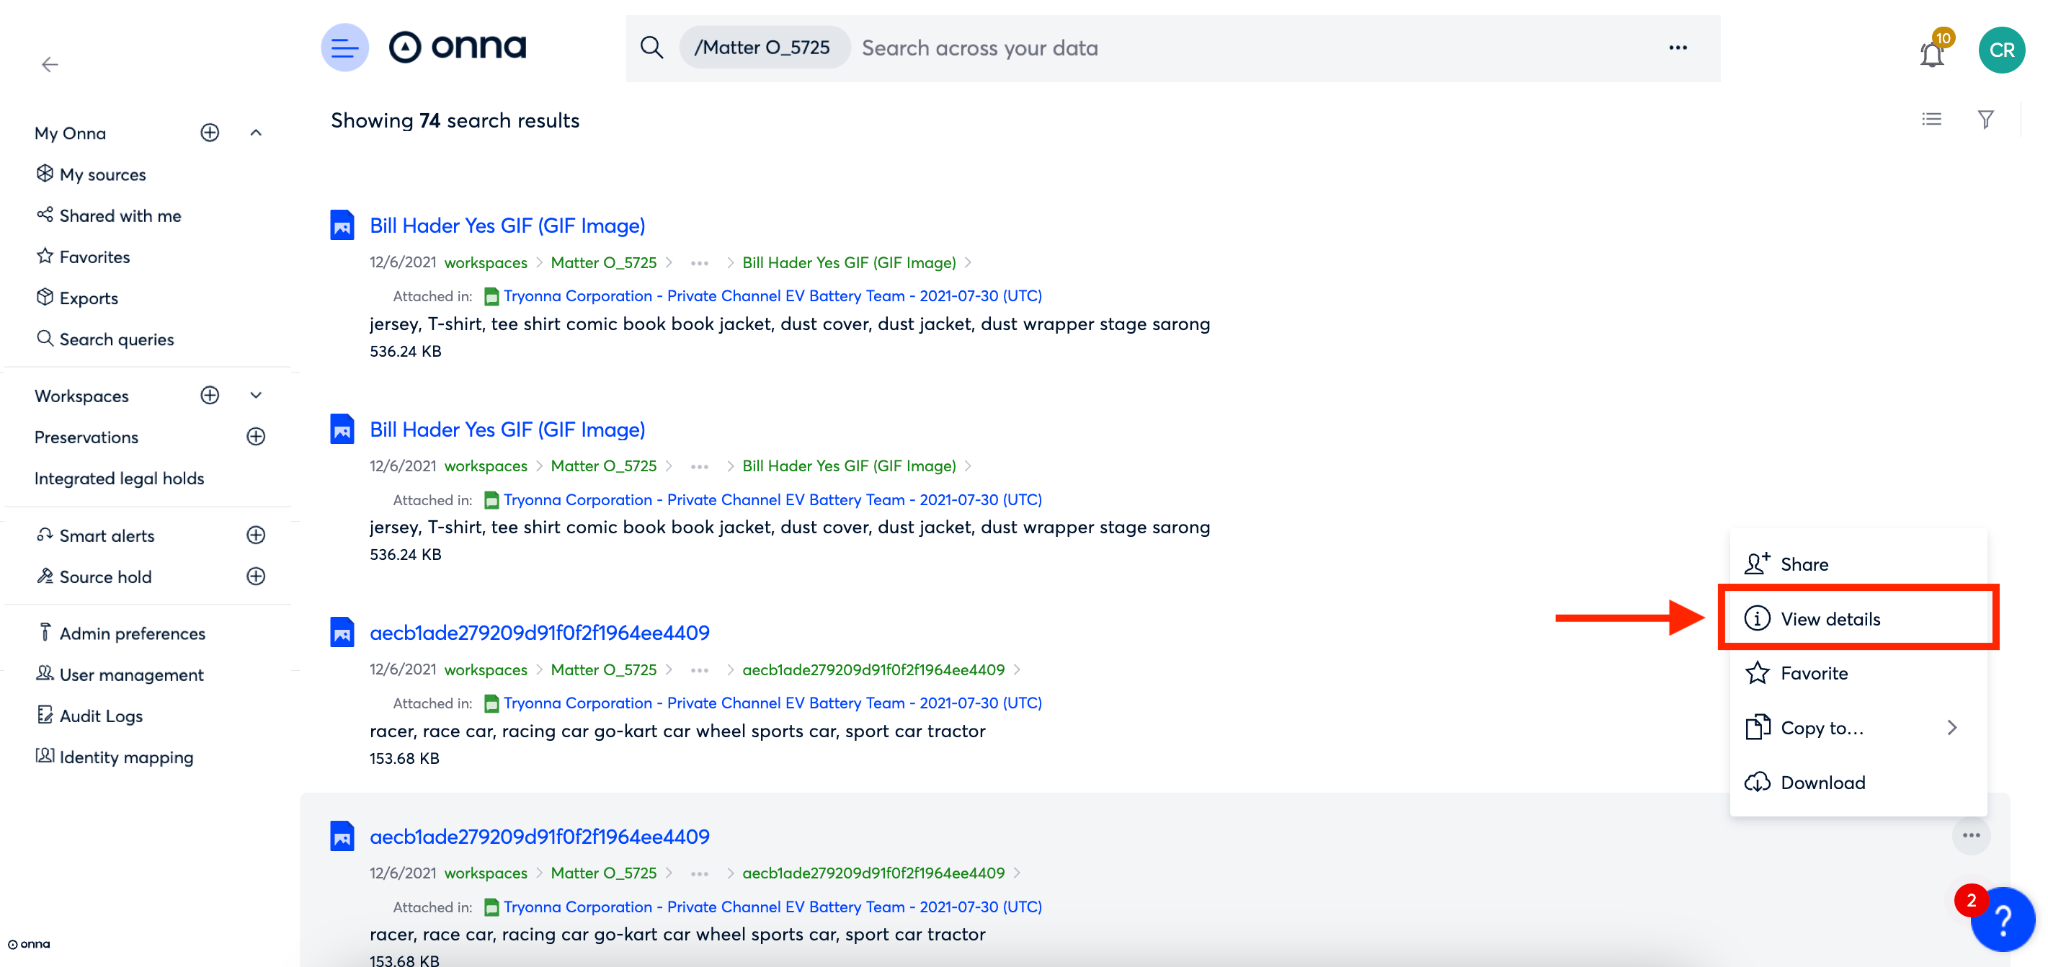
Step 2
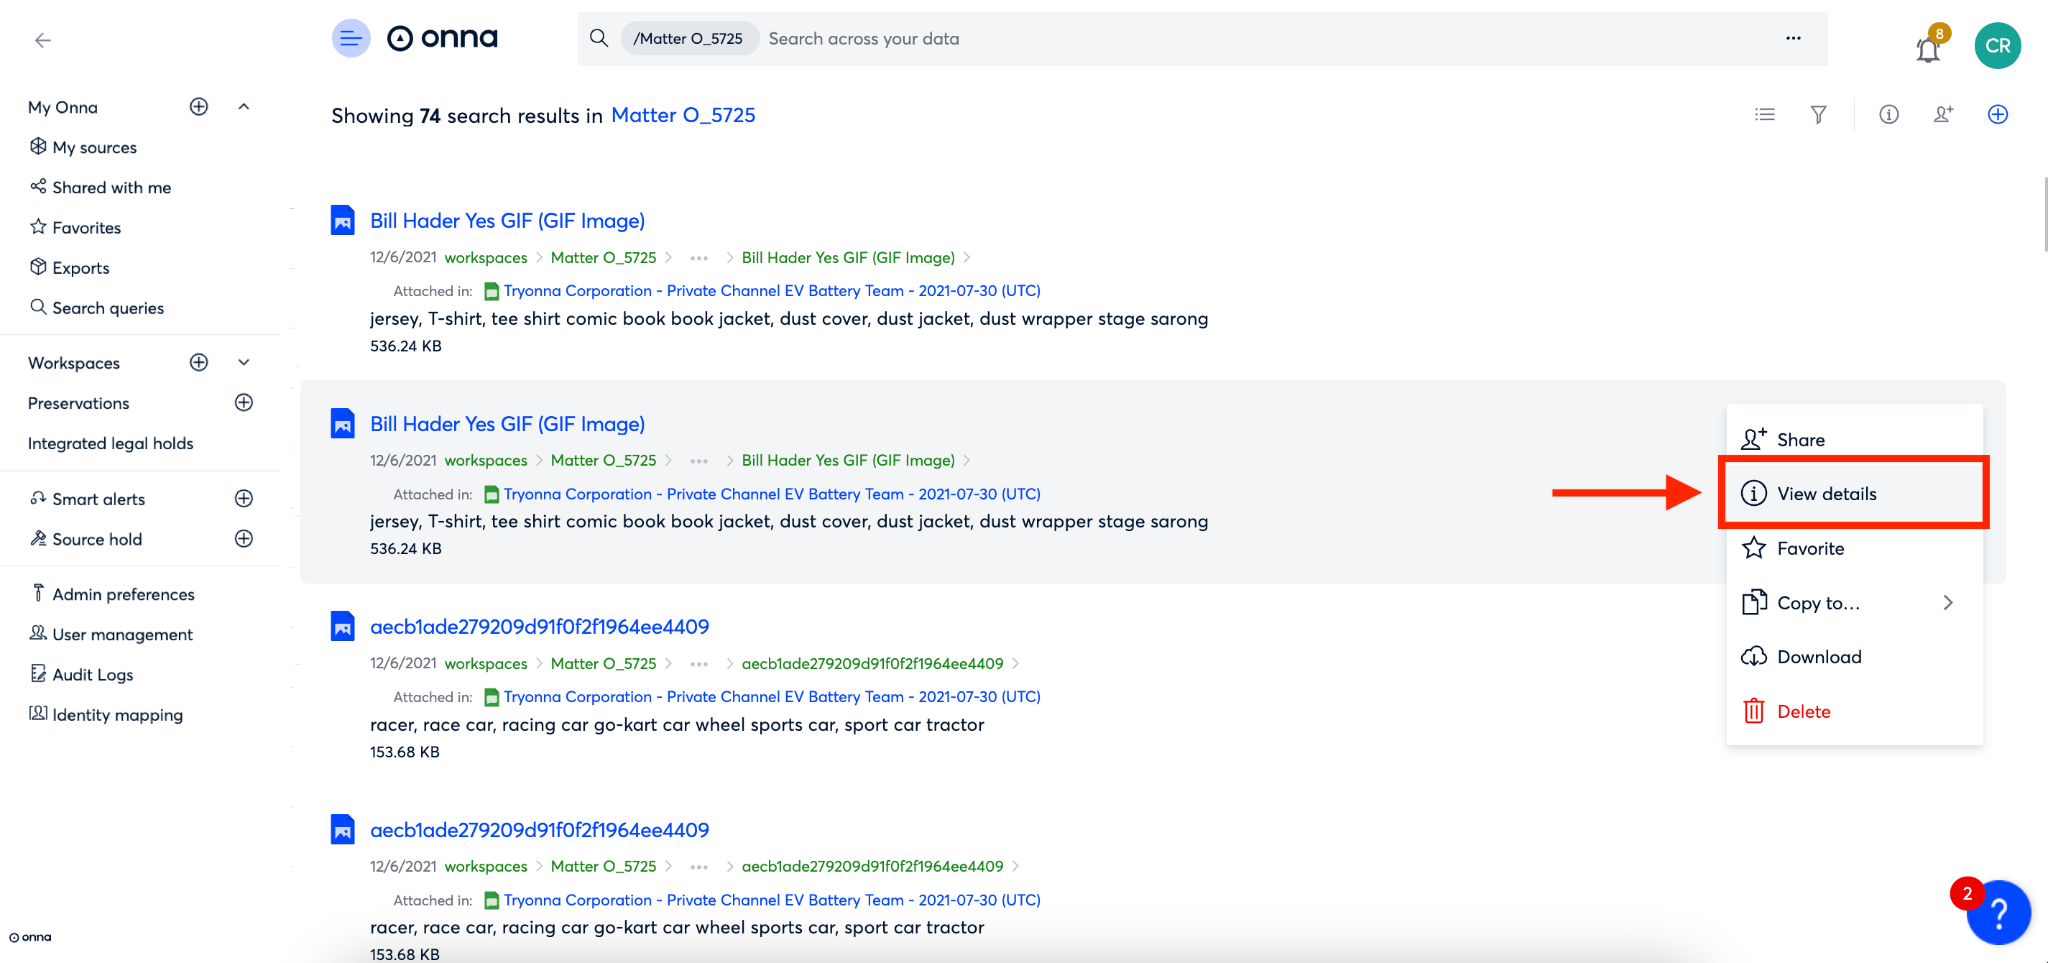
Click ‘View details’ from the dropdown menu that appears.
Step 3
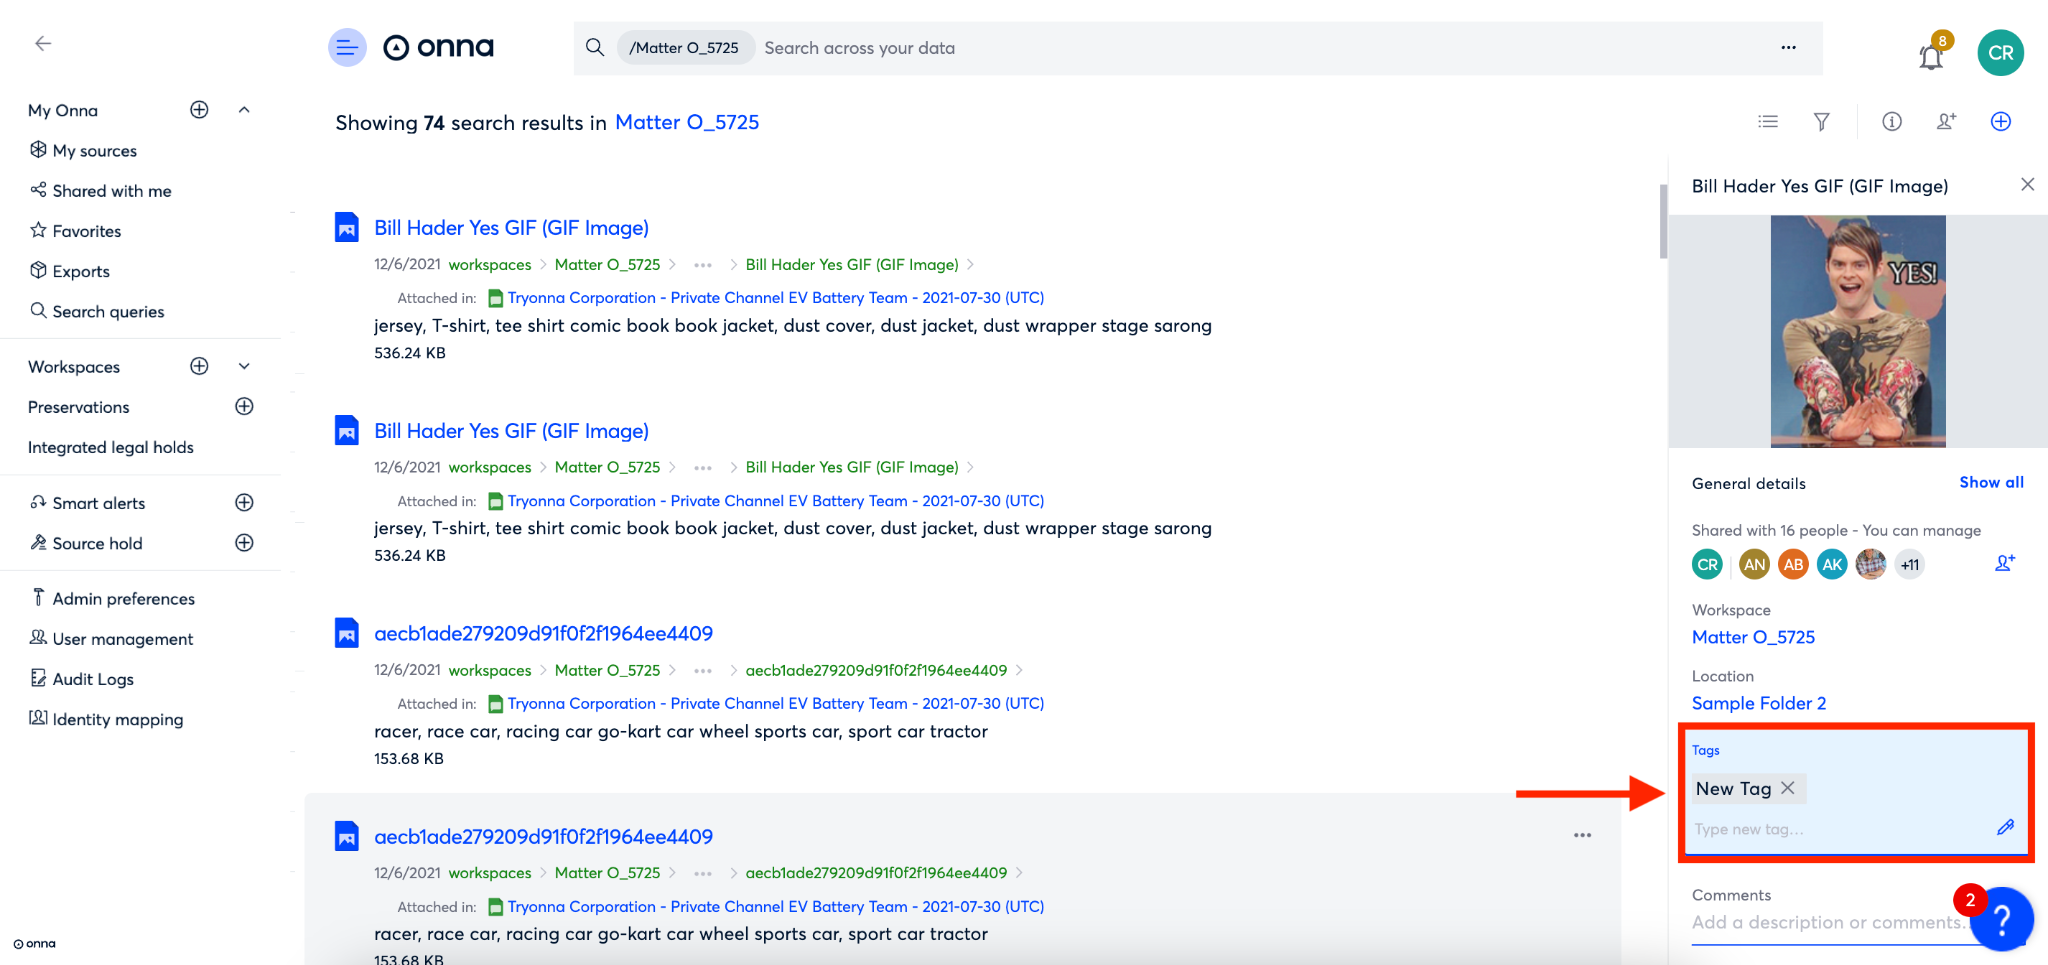
In the file details panel that appears on the right side of your screen, scroll to the ‘Tags’ section. Here you will type your tag and hit the enter key to add your tag to the file.
Please note: These same steps can also be used to tag individual files when viewing a resource and using the “View details” option in the right corner.
Tagging Entire Sets of Search Results
Step 1
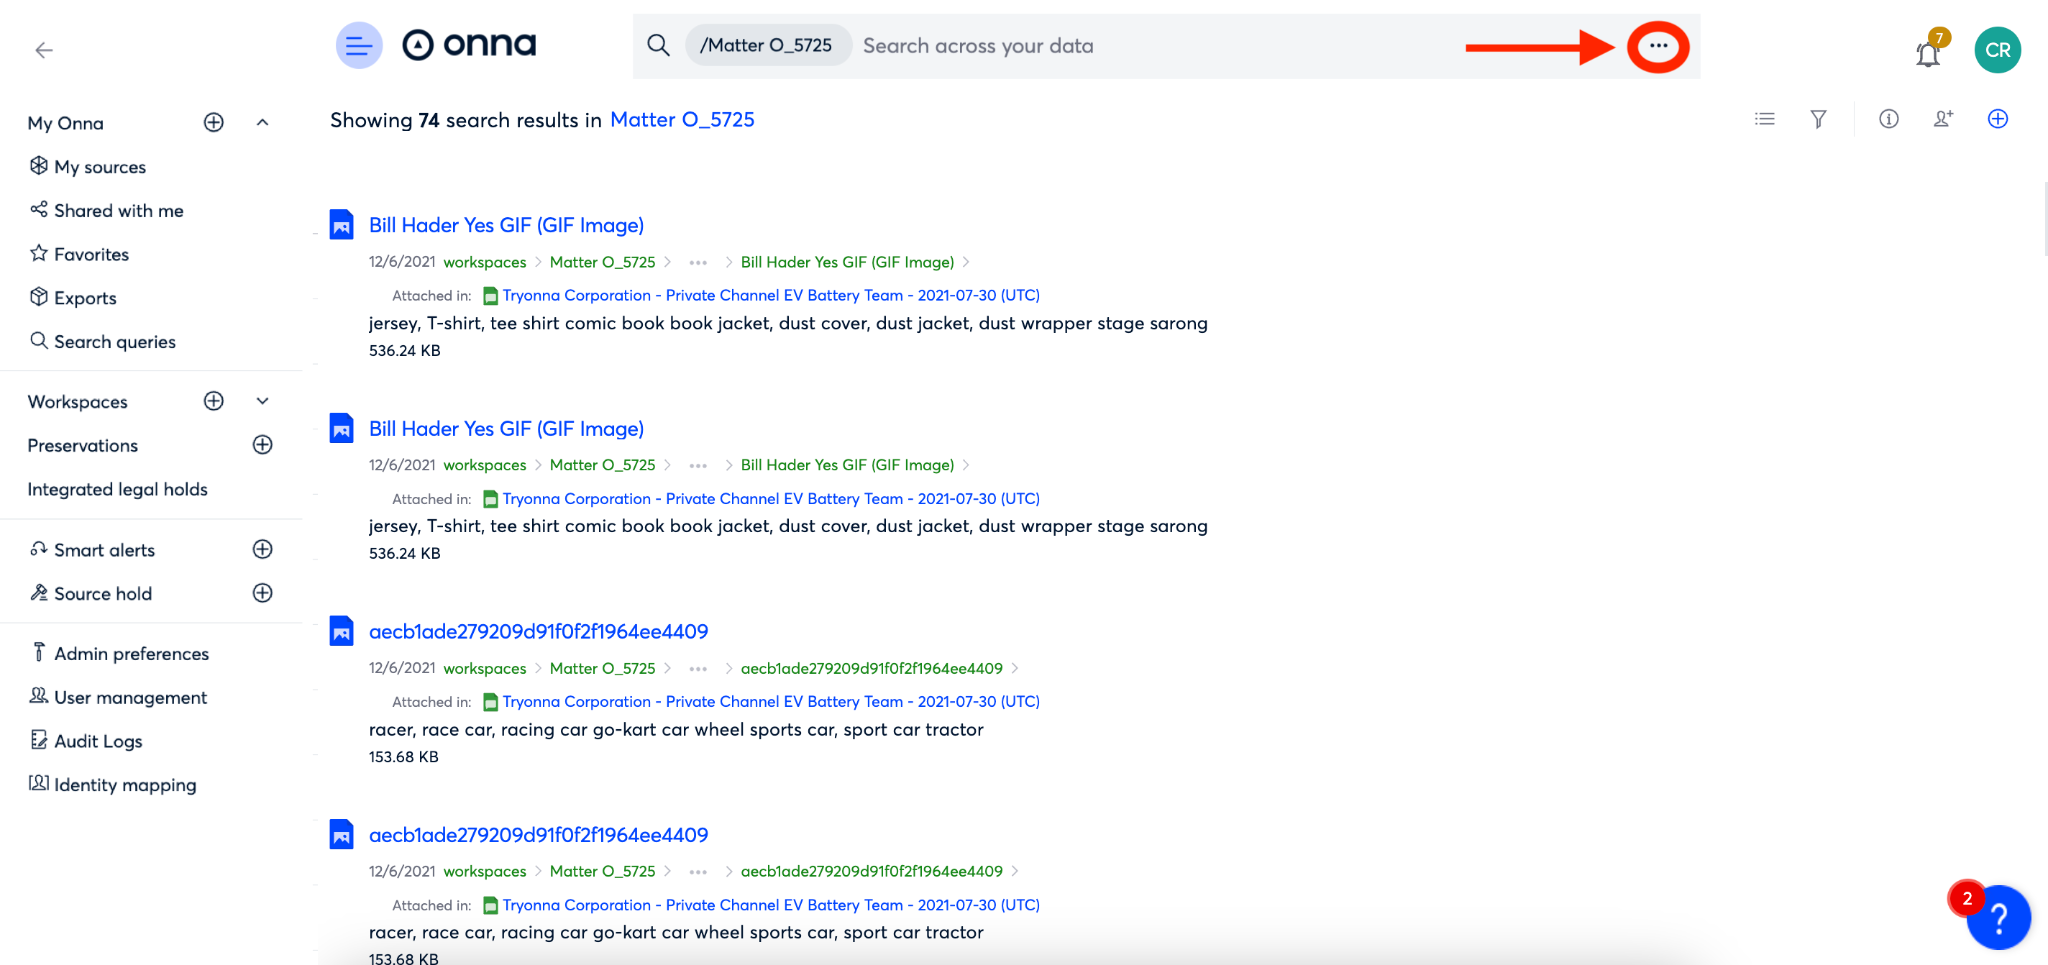
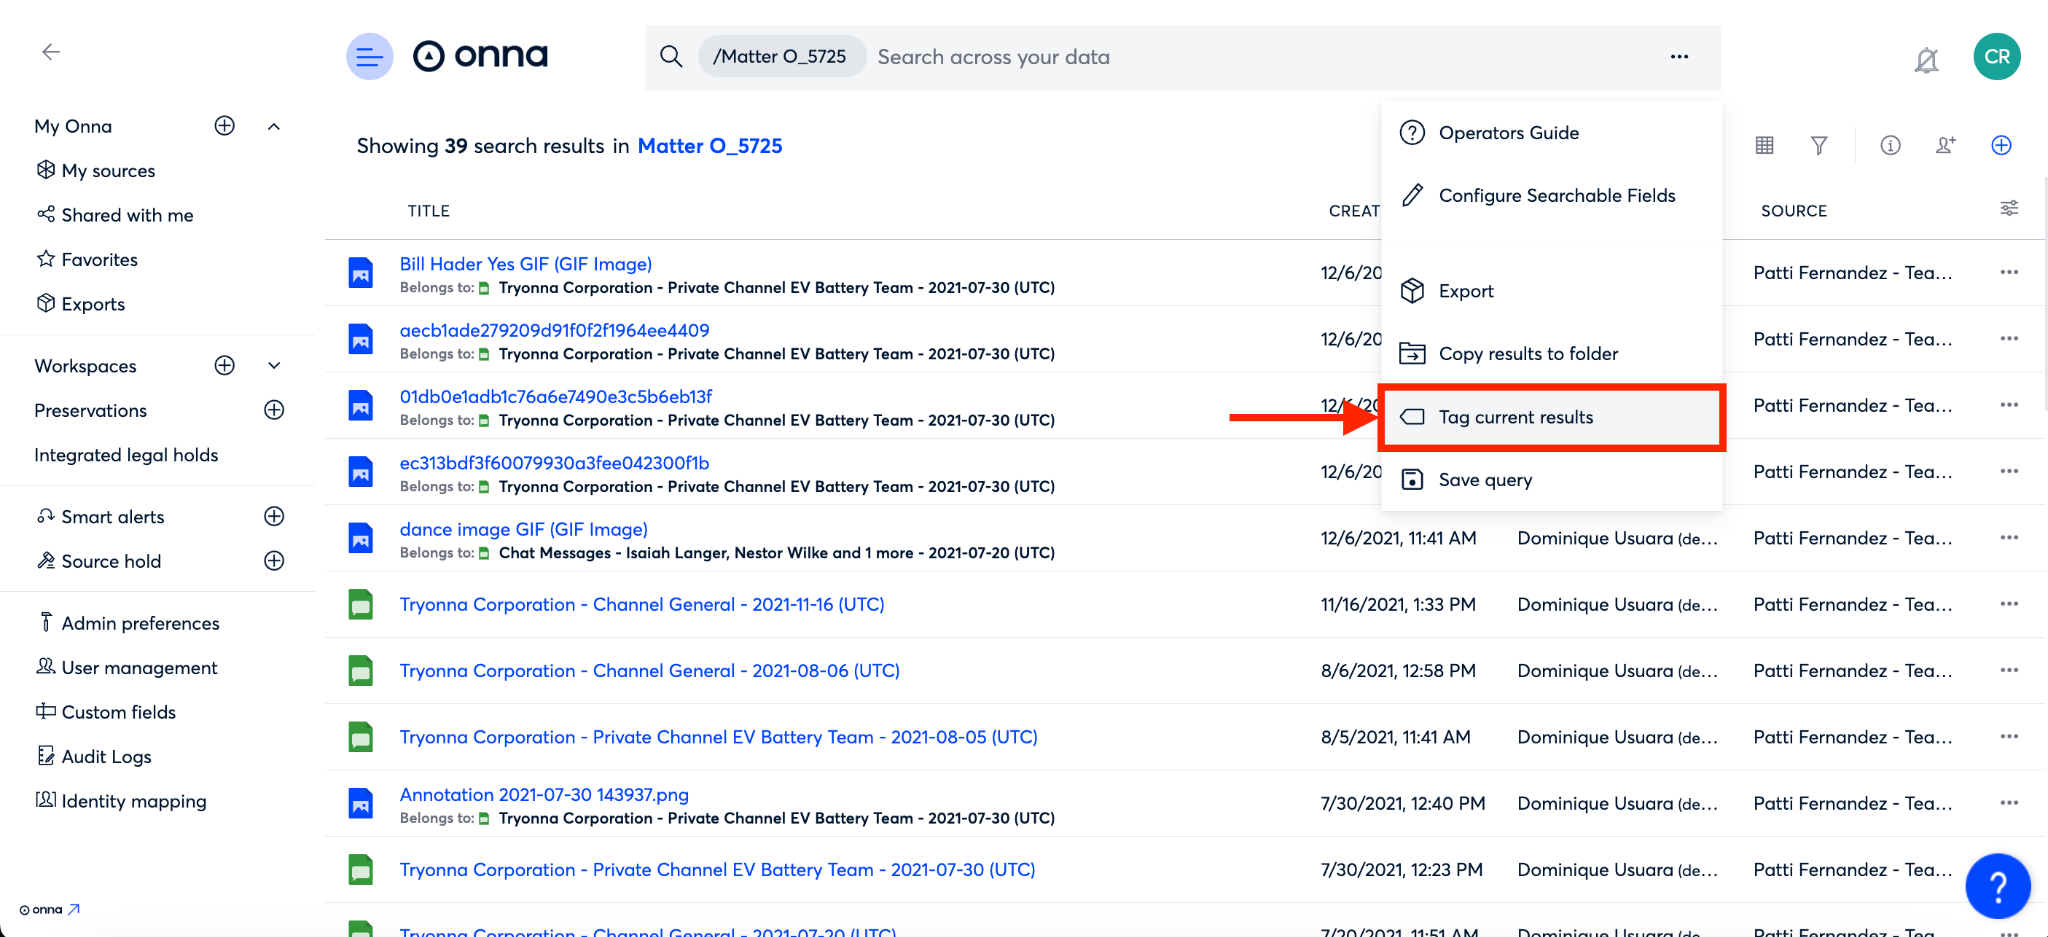
Upon completing a search, click on the ellipsis located in the search bar.
Step 2
Click on ‘Tag current results’ from the dropdown menu that appears.
Step 3:
After selecting ‘Tag current results’, another dropdown will appear giving you the option to ‘Tag current results only’ or ‘Tag current results and family members.’
.png "image(35).png")
Note: ‘Family members’ refer to a group of related documents that are logically connected and often treated as a single entity during the discovery process. These documents are usually part of a set originating from the same source or transaction and are organized together due to their interdependence.
After making your selection, a new window will appear that indicates you are adding tags to your entire set of search results, with the number of results listed.
Including family members:
.png "image(38).png")
Excluding family members:
.png "image(39).png")
.png "image(38).png")
.png "image(39).png")
From here:
Enter the tag(s) you want to add.
You have the option of adding a description. Note: Anything entered here will override existing descriptions.
After all tags are entered, click the ‘Add’ button.
Managing Tags
There may be times when you need to edit a tag, add additional tags, or delete tags. In Onna, you’re able to manage tags for individual files as well as groups of files. Just as you can add tags to entire sets of search results, you can also edit, add, or delete tags in bulk. To get started, follow the steps below:
Managing Individual Tags
Step 1
Find the file you want to manage tags for and click on the ellipsis to the right of the file row.

Step 2
Click on ‘View details’ from the dropdown menu that appears.

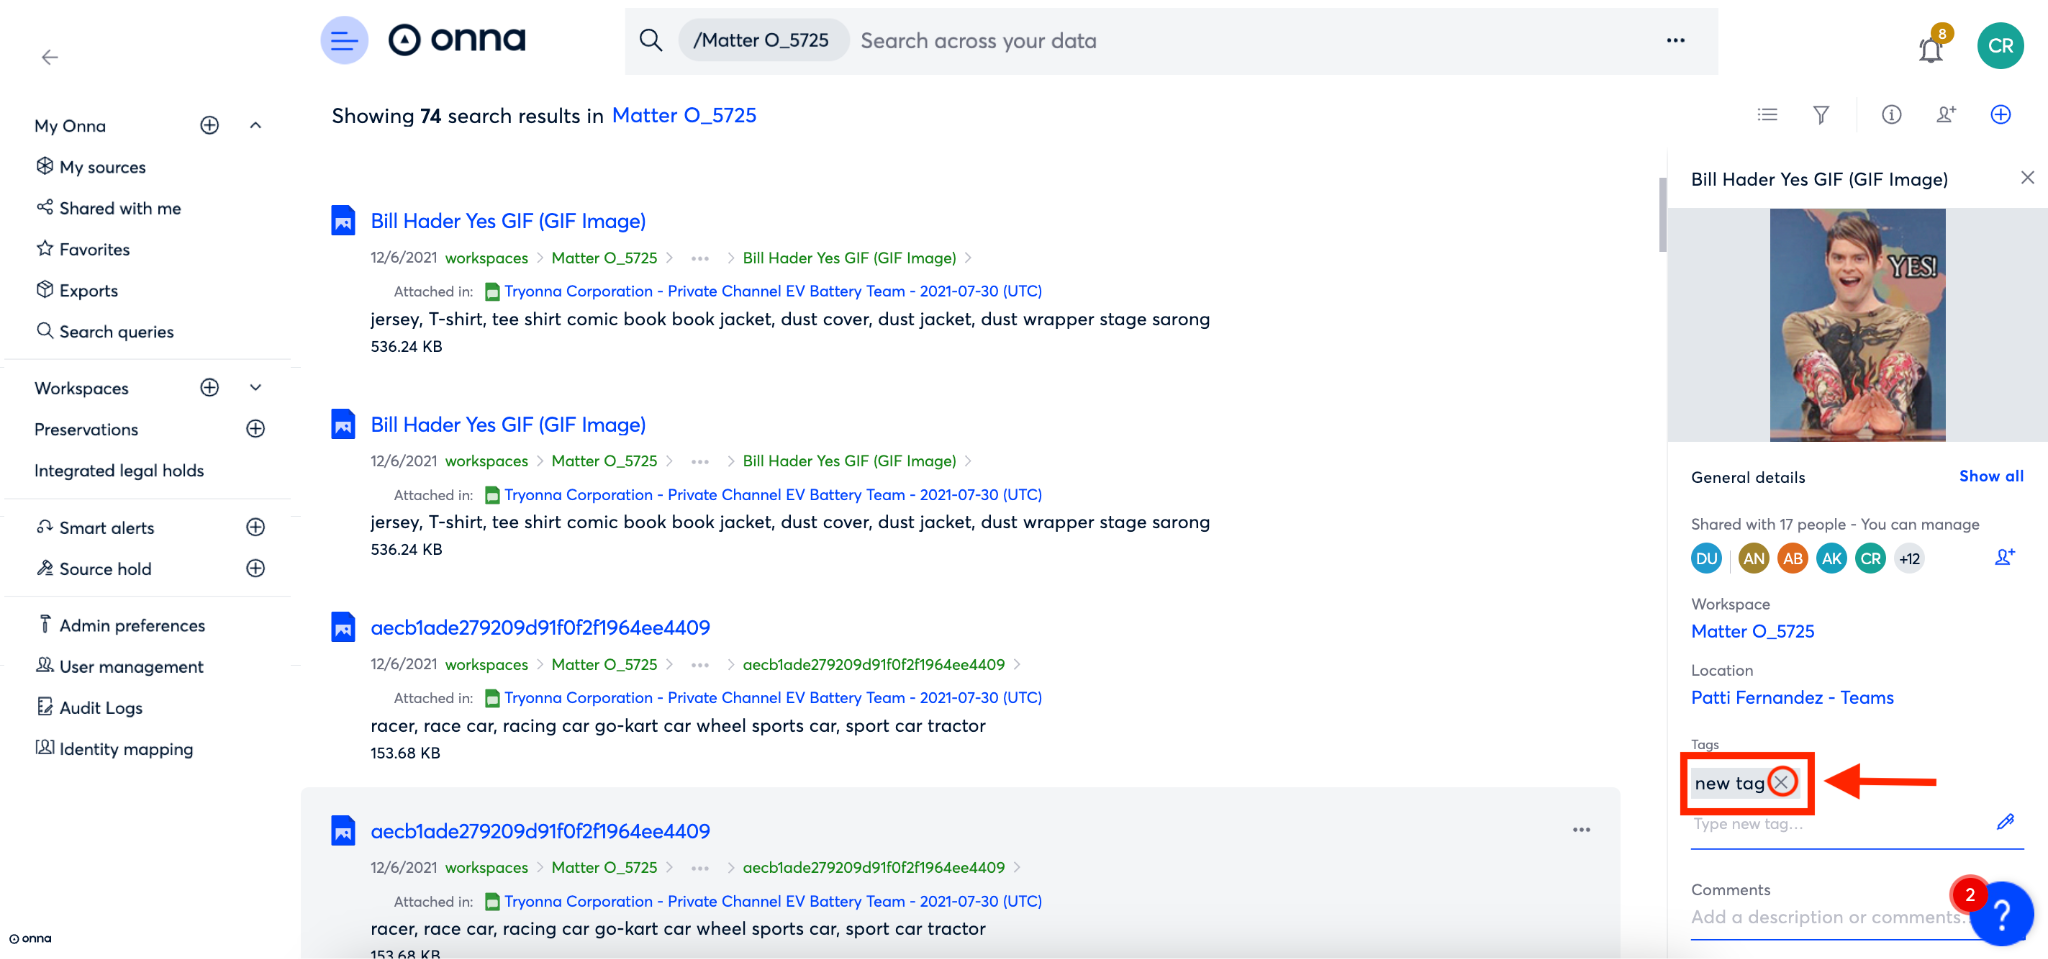
Step 3
Scroll down to the Tags section of the file details panel. In this section you can add any new tags and you can also delete existing tags by clicking on the ‘x’ to the right of the tag.
Please note: These same steps can also be used to tag individual files when viewing a resource and using the “View details” option in the right corner.
Managing Tags in Bulk
Step 1
Find any file that has the tag you want to manage. Click on the ellipsis to the right of that file.
Step 2
Click ‘View details’ from the dropdown that appears.
Step 3
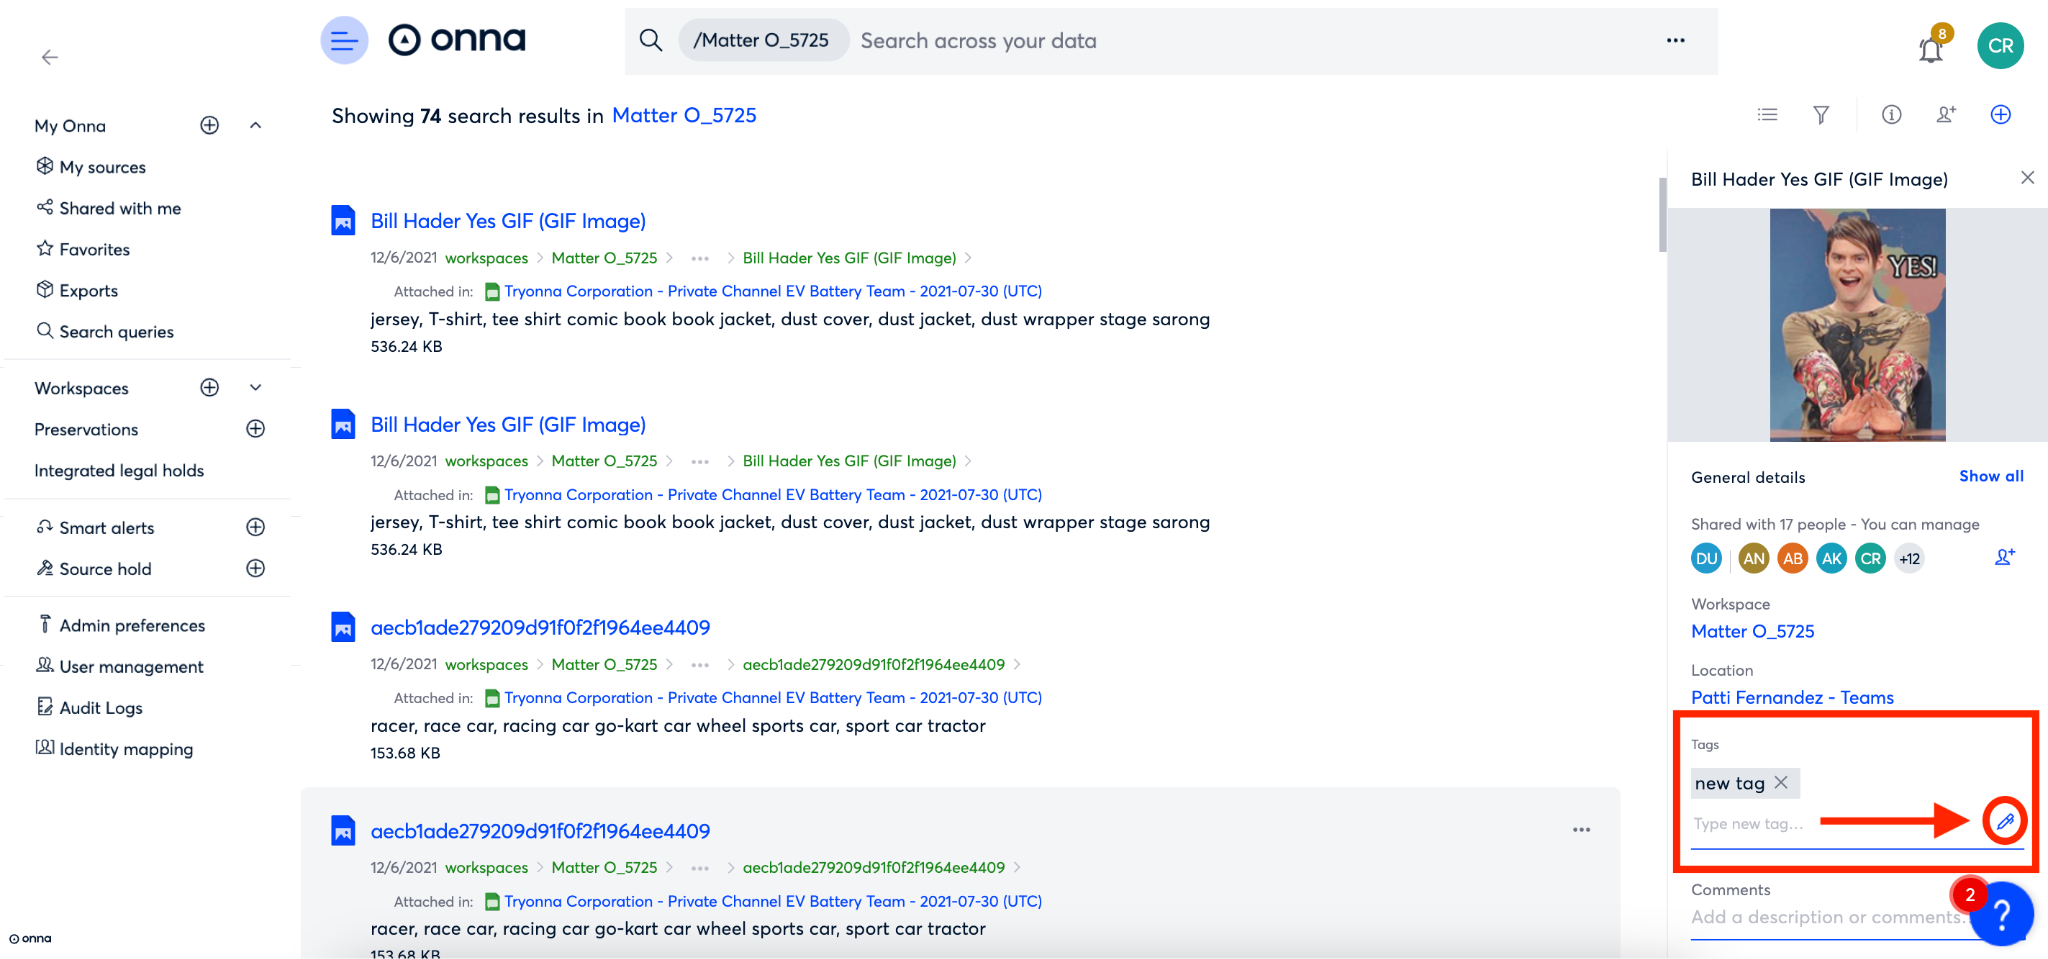
In the details panel for the file, scroll to the ‘Tags’ section and click on the pen icon in the bottom right corner of that section.
Step 4- Edit a Tag
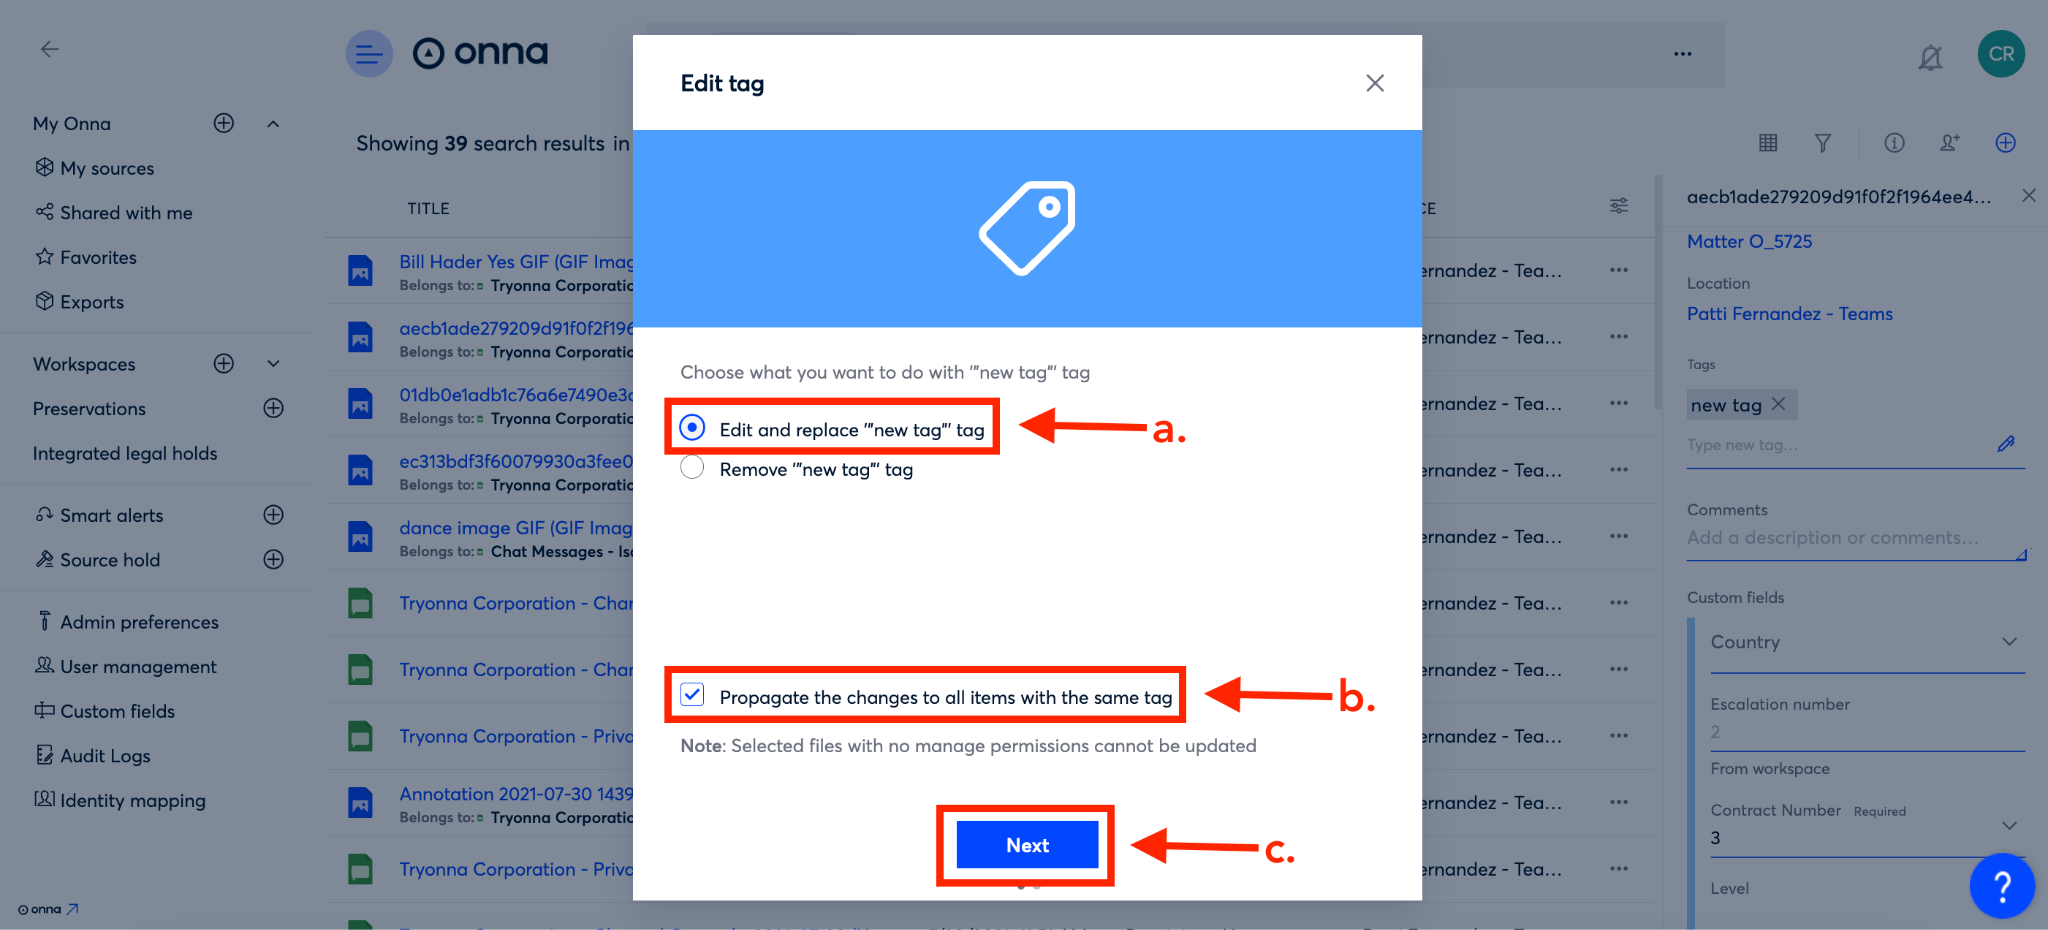
A new window will appear with two options: Edit and replace a tag, or Remove a tag. To edit a tag, click ‘Edit and replace tag’(a).
Then, make sure that there is a check next to ‘Propagate the changes to all items with the same tag’ (b). Note: This will edit and replace this tag in any file that includes the tag that you have manage permissions for. However, if you don’t have manage permission for a file you cannot edit the tag for that file.
When you’re done, click the blue ‘Next’ button (c).
Step 5
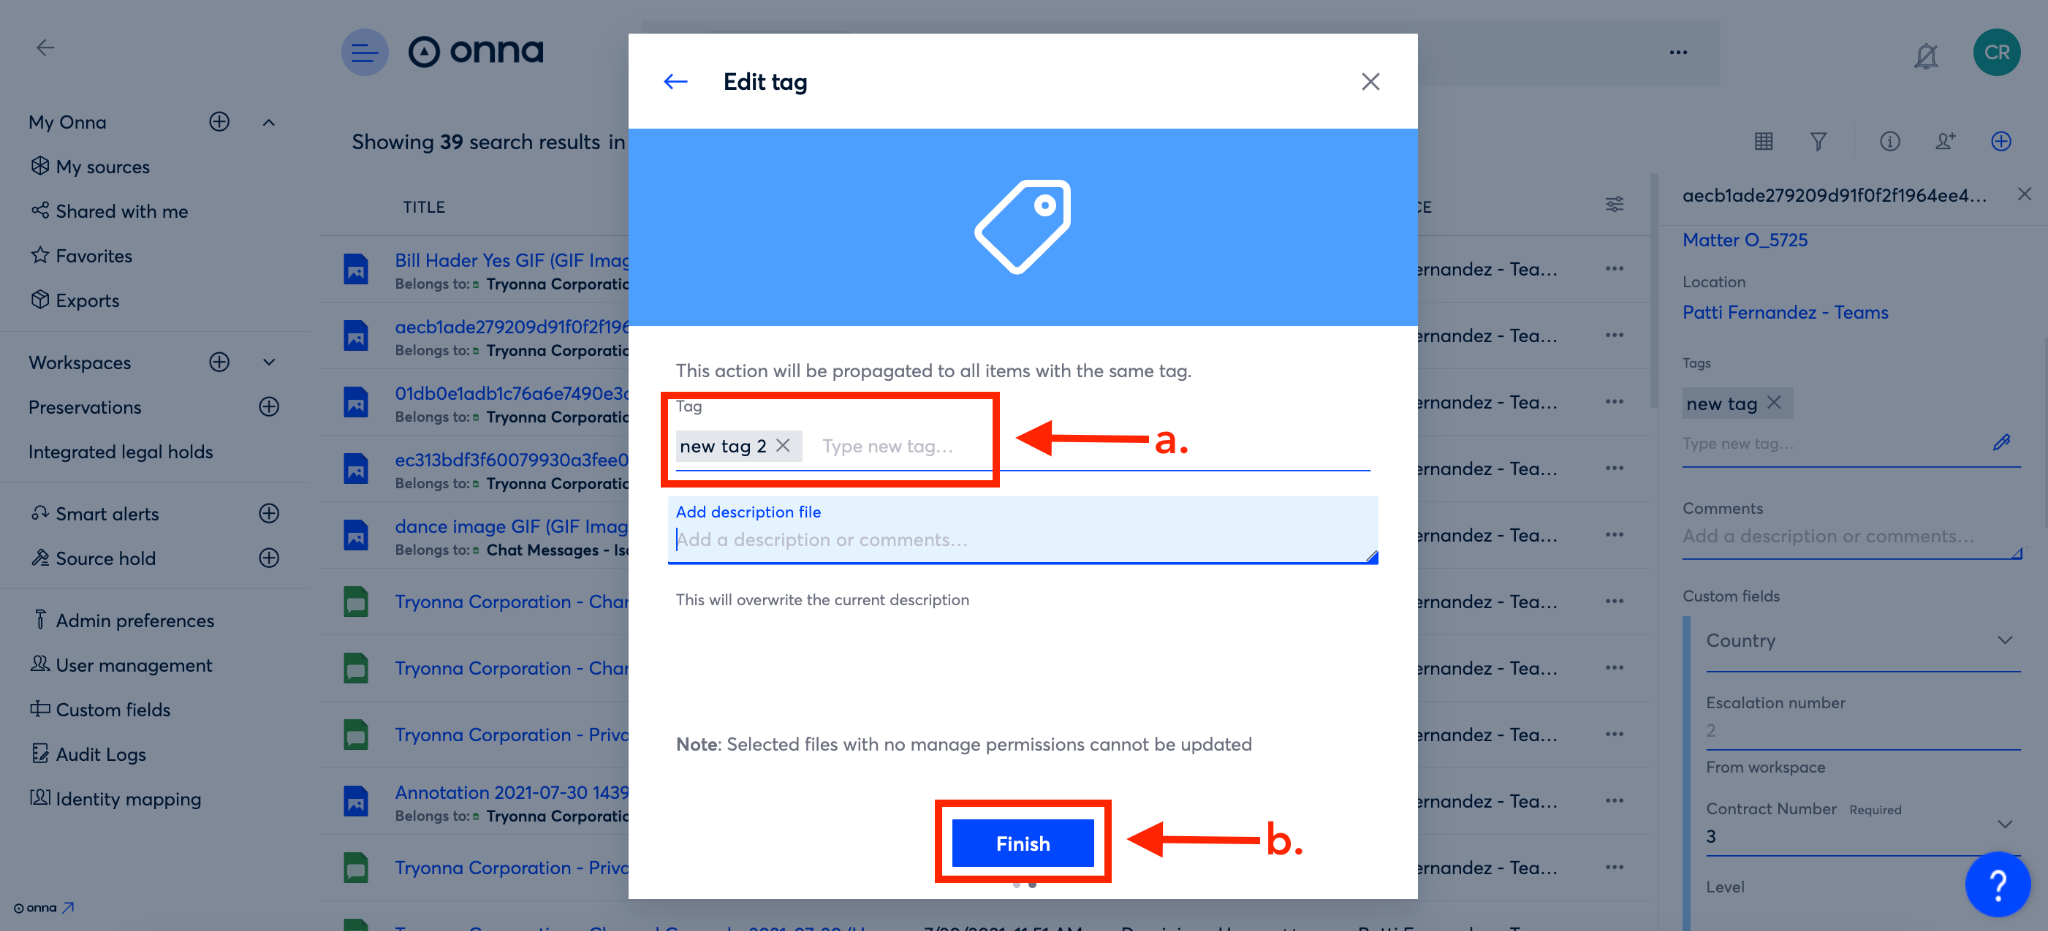
On the next screen, make any changes to tags in the section ‘Tag’ (a). When you’ve edited your tag click the blue ‘Finish’ button (b).
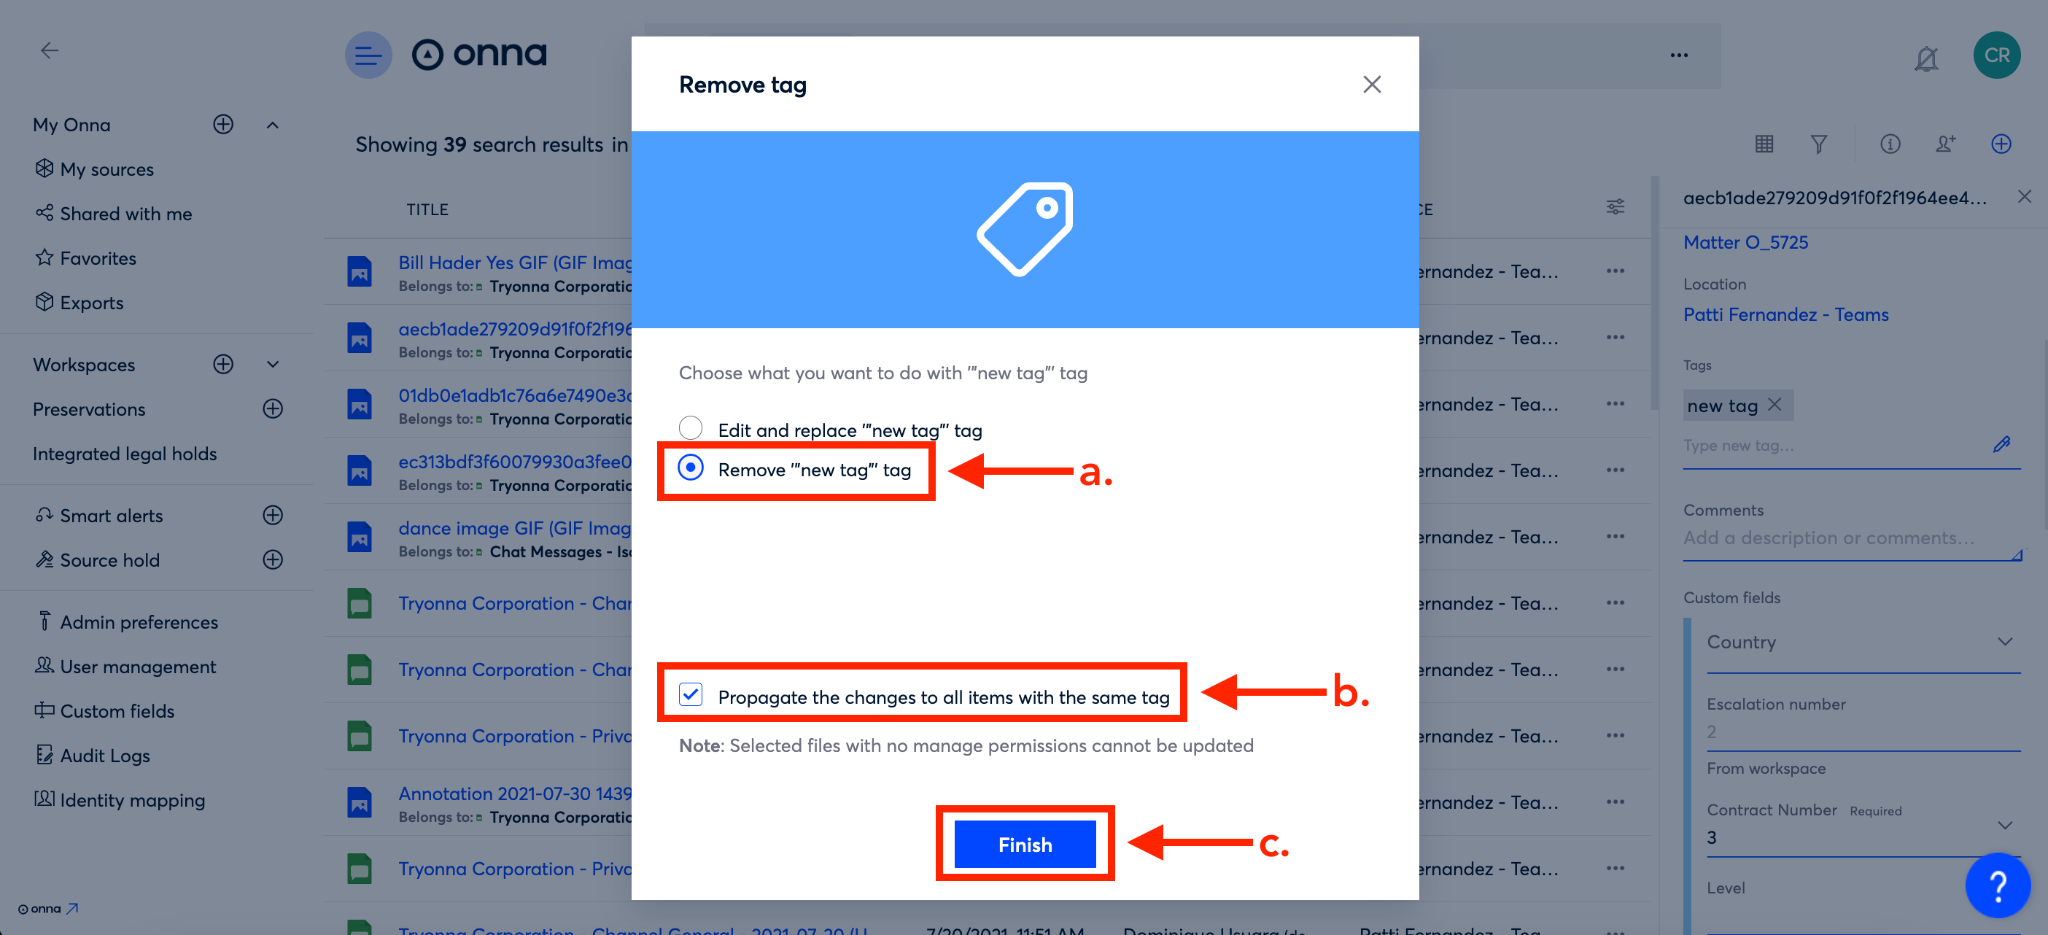
Step 6-Delete a Tag
A new window will appear with two options: Edit and replace a tag, or Remove a tag ‘Remove tag’(a).
Then, make sure that there is a check next to ‘Propagate the changes to all items with the same tag’ (b). Note: This will remove this tag from any file that includes the tag that you have manage permissions for. However, if you don’t have manage permission for a file you cannot delete the tag for that file.
When you’re done, click the blue ‘Finish’ button (c).
If you want to edit and replace the tag, continue to Step 5.