Dropbox Business_ How to Connect and Collect
- 26 Jun 2024
- 2 Minutes to read
- Print
- DarkLight
- PDF
Dropbox Business_ How to Connect and Collect
- Updated on 26 Jun 2024
- 2 Minutes to read
- Print
- DarkLight
- PDF
Article summary
Did you find this summary helpful?
Thank you for your feedback

In this article:
Dropbox Business Overview
Dropbox Business Requirements
How to Connect and Collect Using Dropbox Business
Dropbox Business Overview
Dropbox is a file hosting service and collaboration space. Onna integrates with Dropbox Business' API to extract all related data and metadata from entire company Dropbox accounts and/or specific user accounts.
Connector Features | |
Authorized Connection Required? Yes | Is identity mapping supported? Yes |
Audit logs available? Yes | Admin Access? Yes |
Supports a full archive? Yes | Custodian based collections? Yes |
Preserve in place with ILH? No | Resumable sync supported? Yes |
Supports Onna preservation? No | Syncs future users automatically? No |
Sync modes supported:
| Is file versioning supported? Yes |
Types of Data Collected | Metadata Collected |
|
|
Dropbox Business Considerations
Onna will collect all files in Dropbox that a user has access to. If the file was created & shared via an external organization, the Dropbox user must add the shared folder to their account in order for Onna to collect the folder/files.
Currently the integration does not collect Google Drive files that have been created in Dropbox.
Permanently deleting a file from Dropbox (without moving it to the Trash folder) will not delete it from Onna due to a limitation in Dropbox's API.
Dropbox Business Requirements
Authorized connection to Dropbox Business in Onna.
To create an authorized connection in Onna, you'll need a Team Admin account in your Dropbox Business account.
How to Connect and Collect Using Dropbox Business
Note: Before beginning a sync, we recommend signing into your Dropbox Business account in your browser. If you are using a service account, we recommend signing out of your regular account and signing back in with the service account credentials before running the collection.
To create a new Dropbox Business collection follow the steps below:
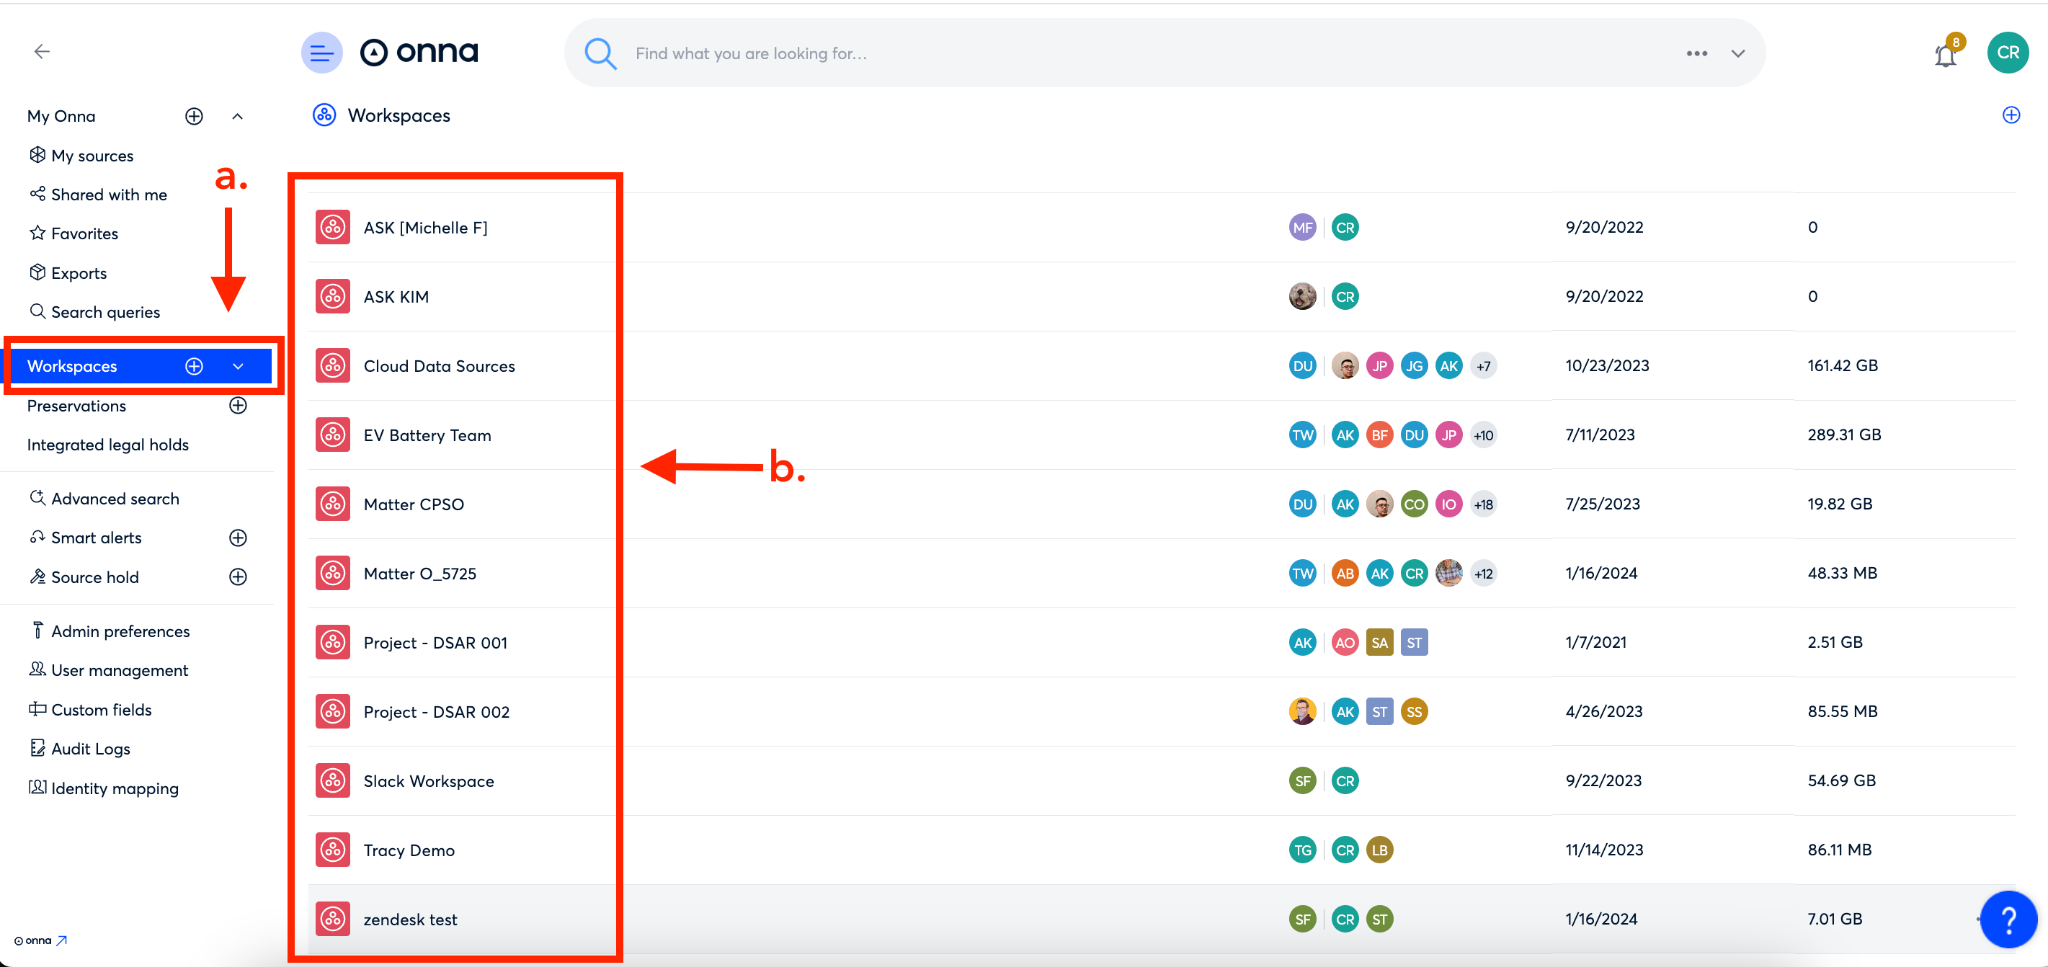
Step 1
Click on ‘Workspaces’ in the main menu (a), then click on the workspace where you’d like to add a new sync (b).
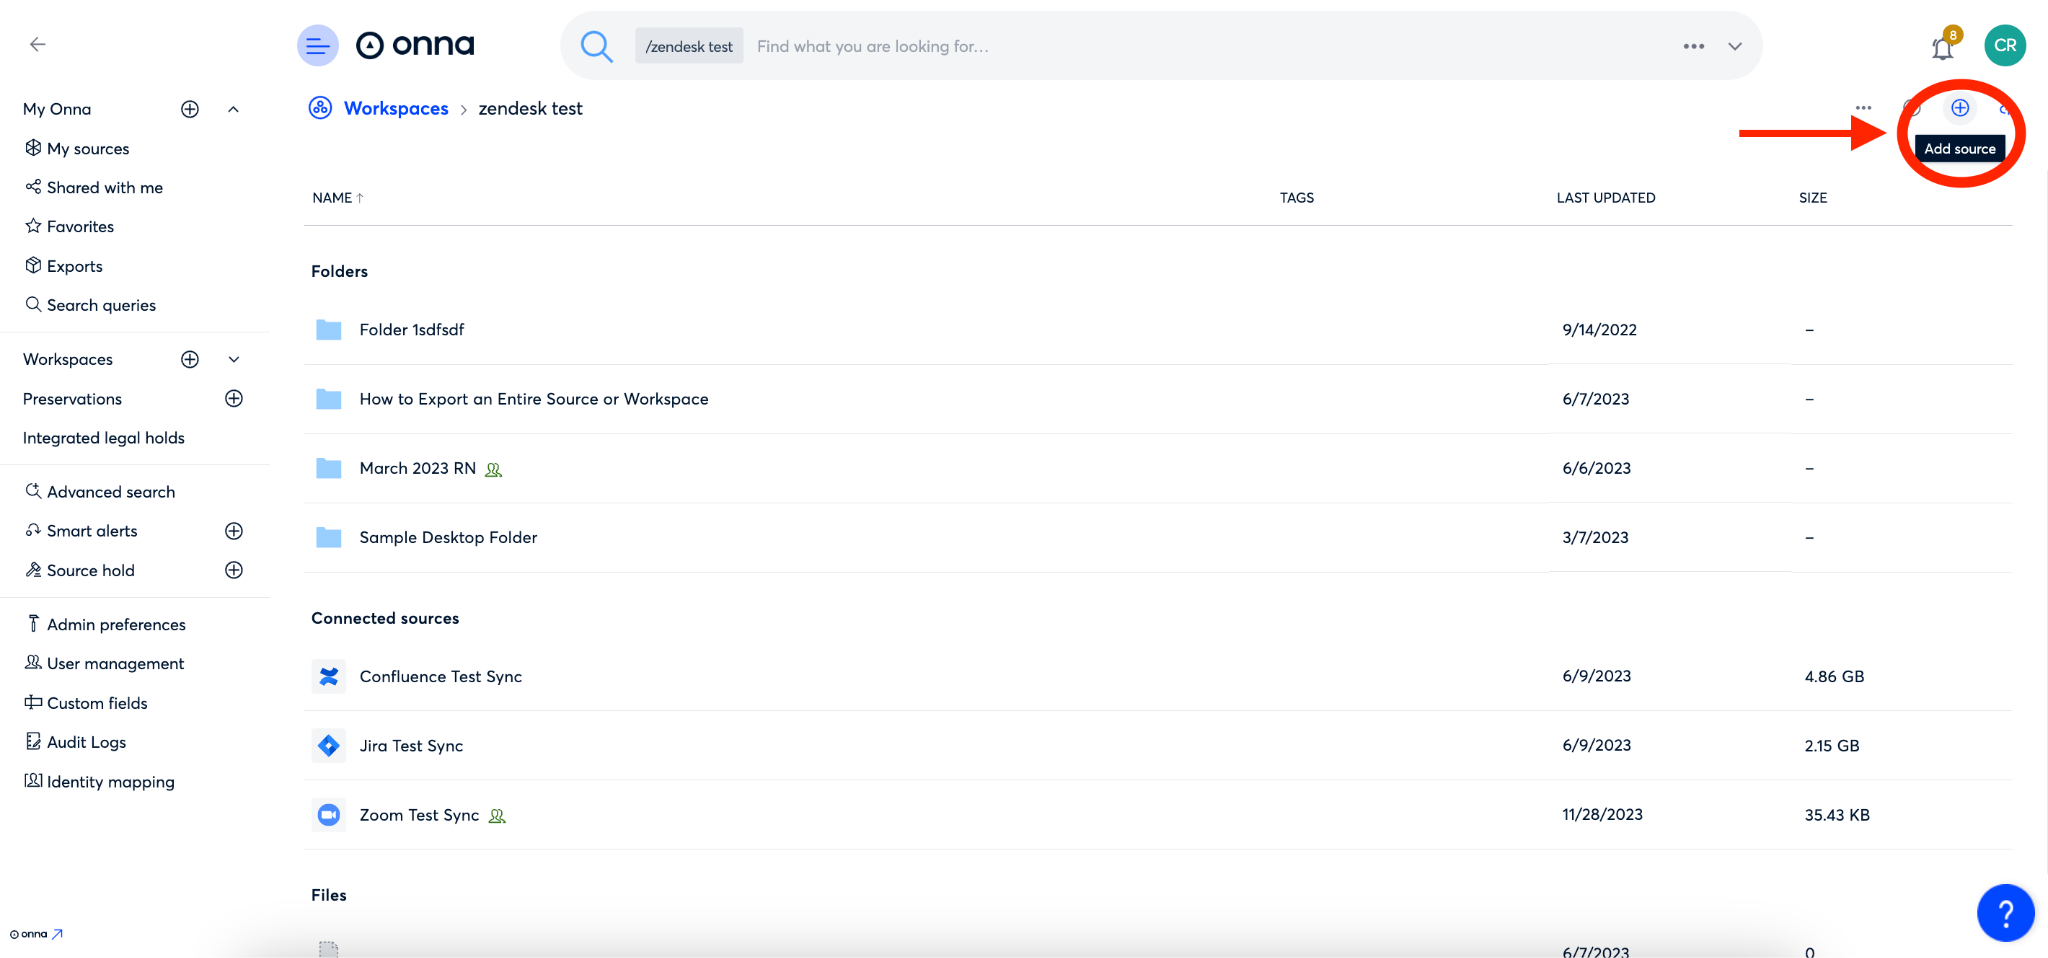
Step 2
Click on the ‘+’ icon in the upper right corner to add a new source
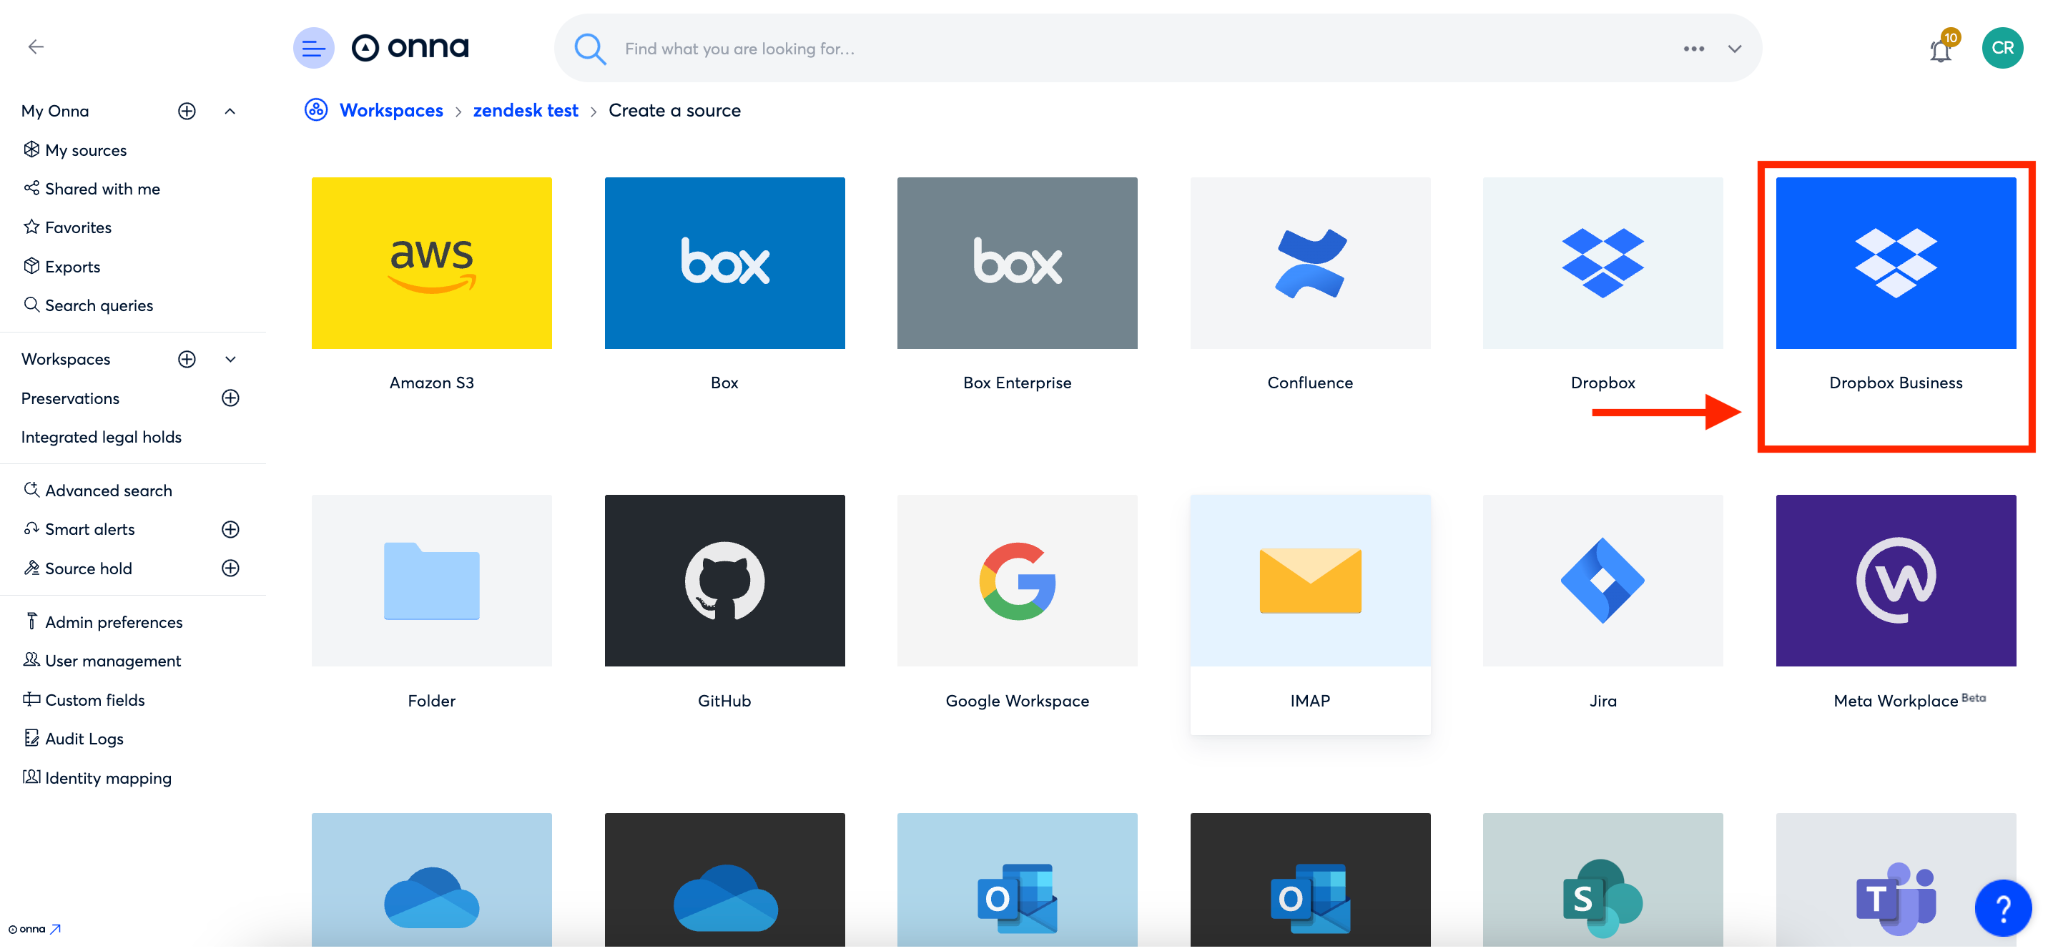
Step 3
Select the Dropbox Business connector from your list of available connectors.
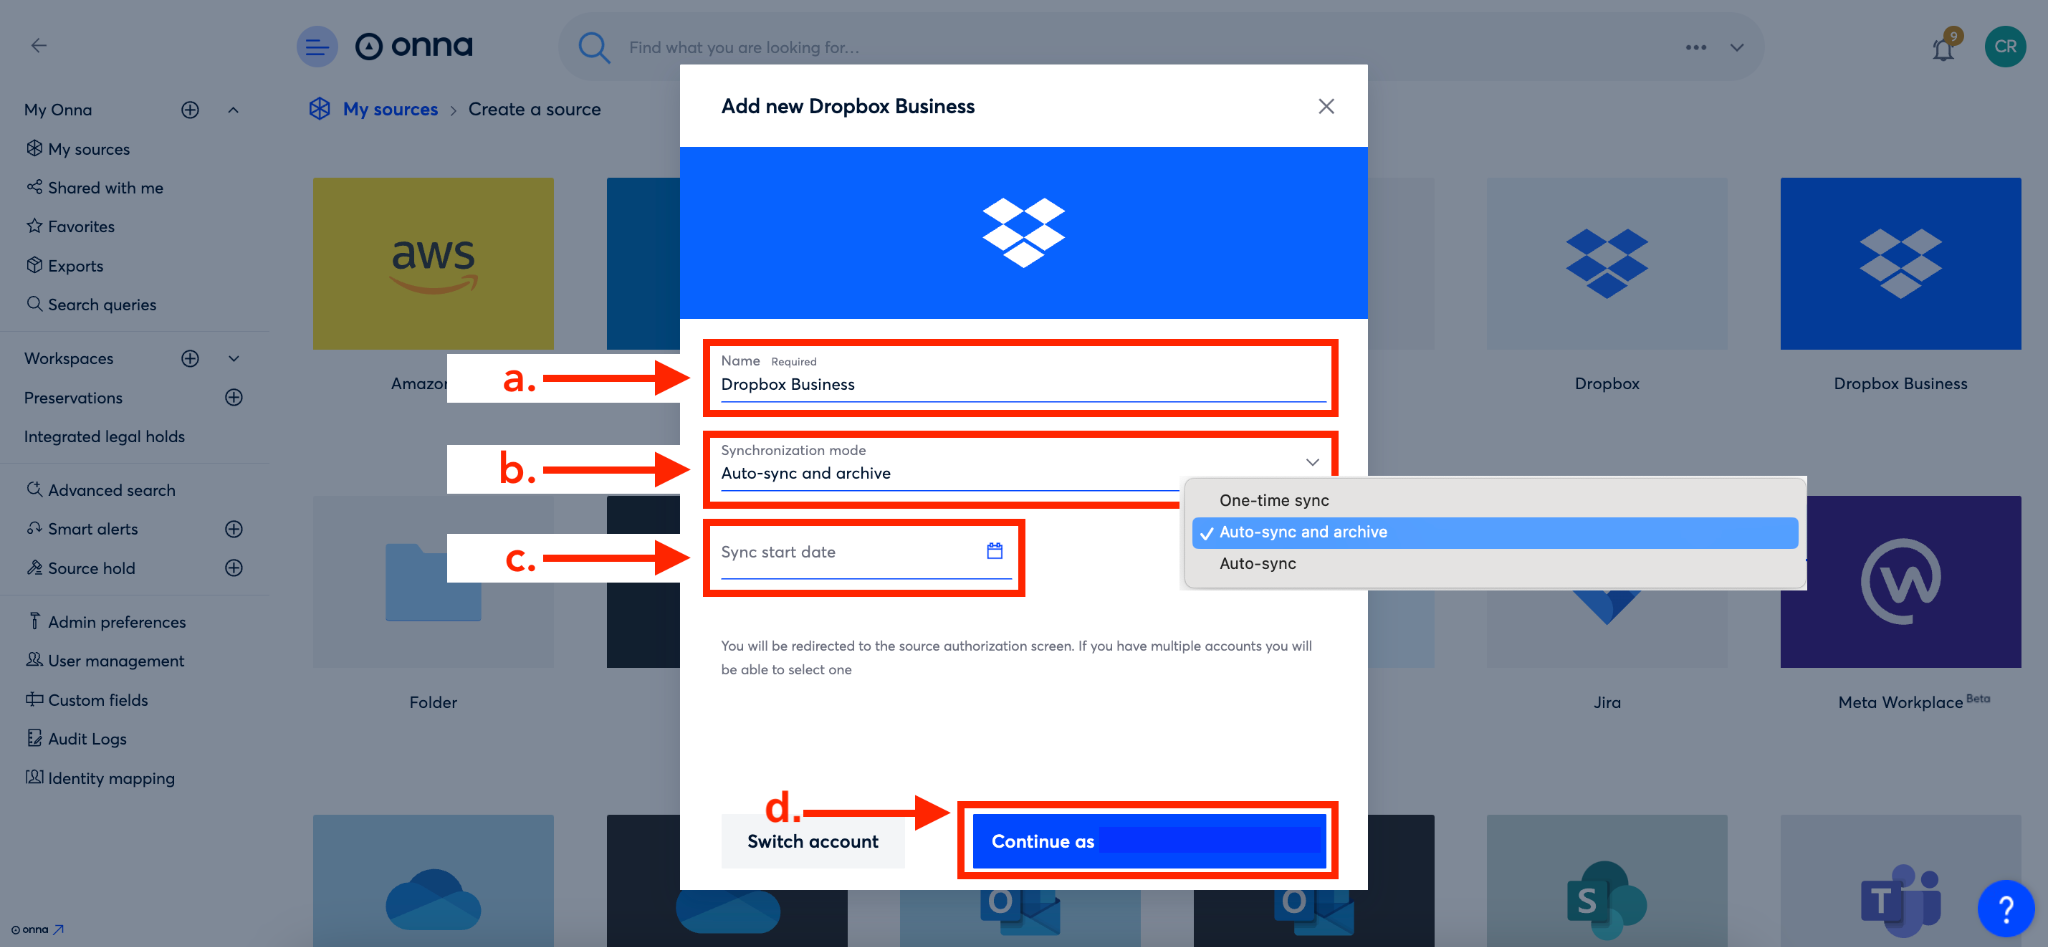
Step 4
To configure your Dropbox sync you’ll first name your sync in the ‘Name’ field (a). Then, select your synchronization mode (b) and set your sync start and/or end date (c). Then, click the blue ‘Continue as’ button (d).
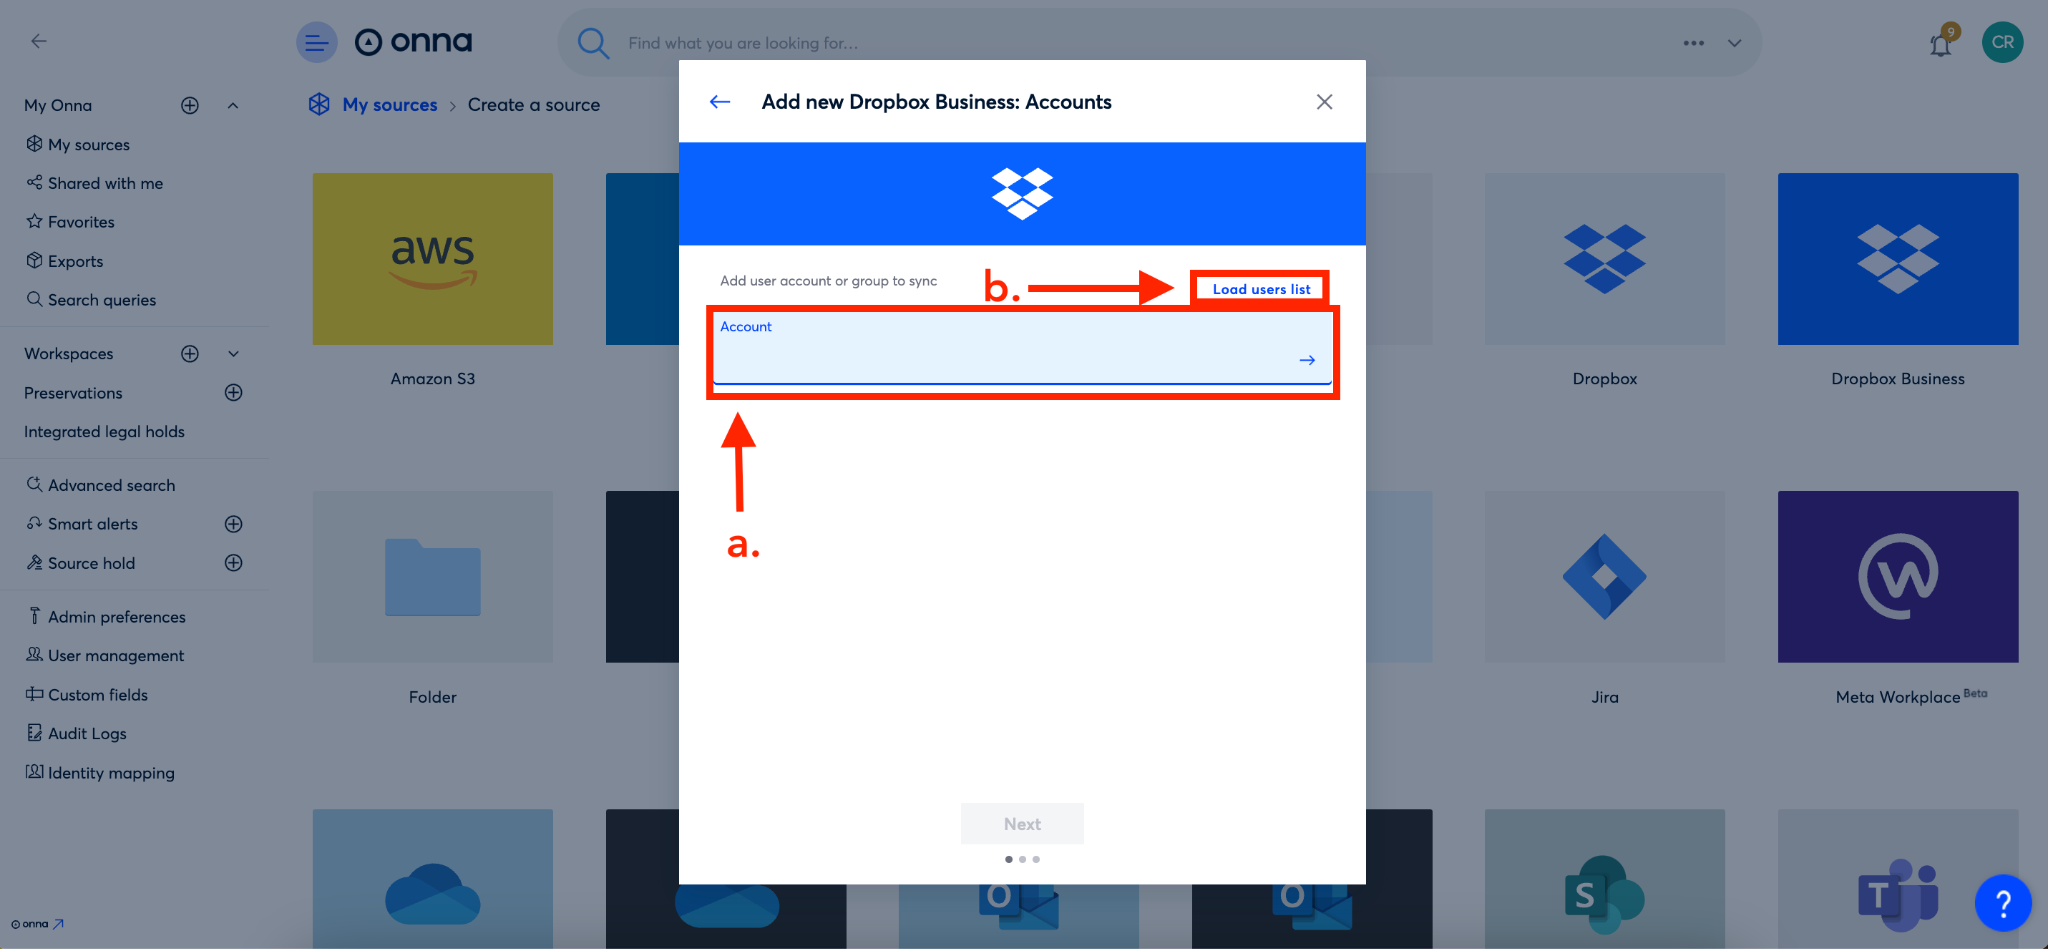
Step 5
You can now add users to your sync. You can do this by manually adding user account email addresses in the ‘Add user accounts to sync field’ (a), or selecting the ‘Load users’ option (b).
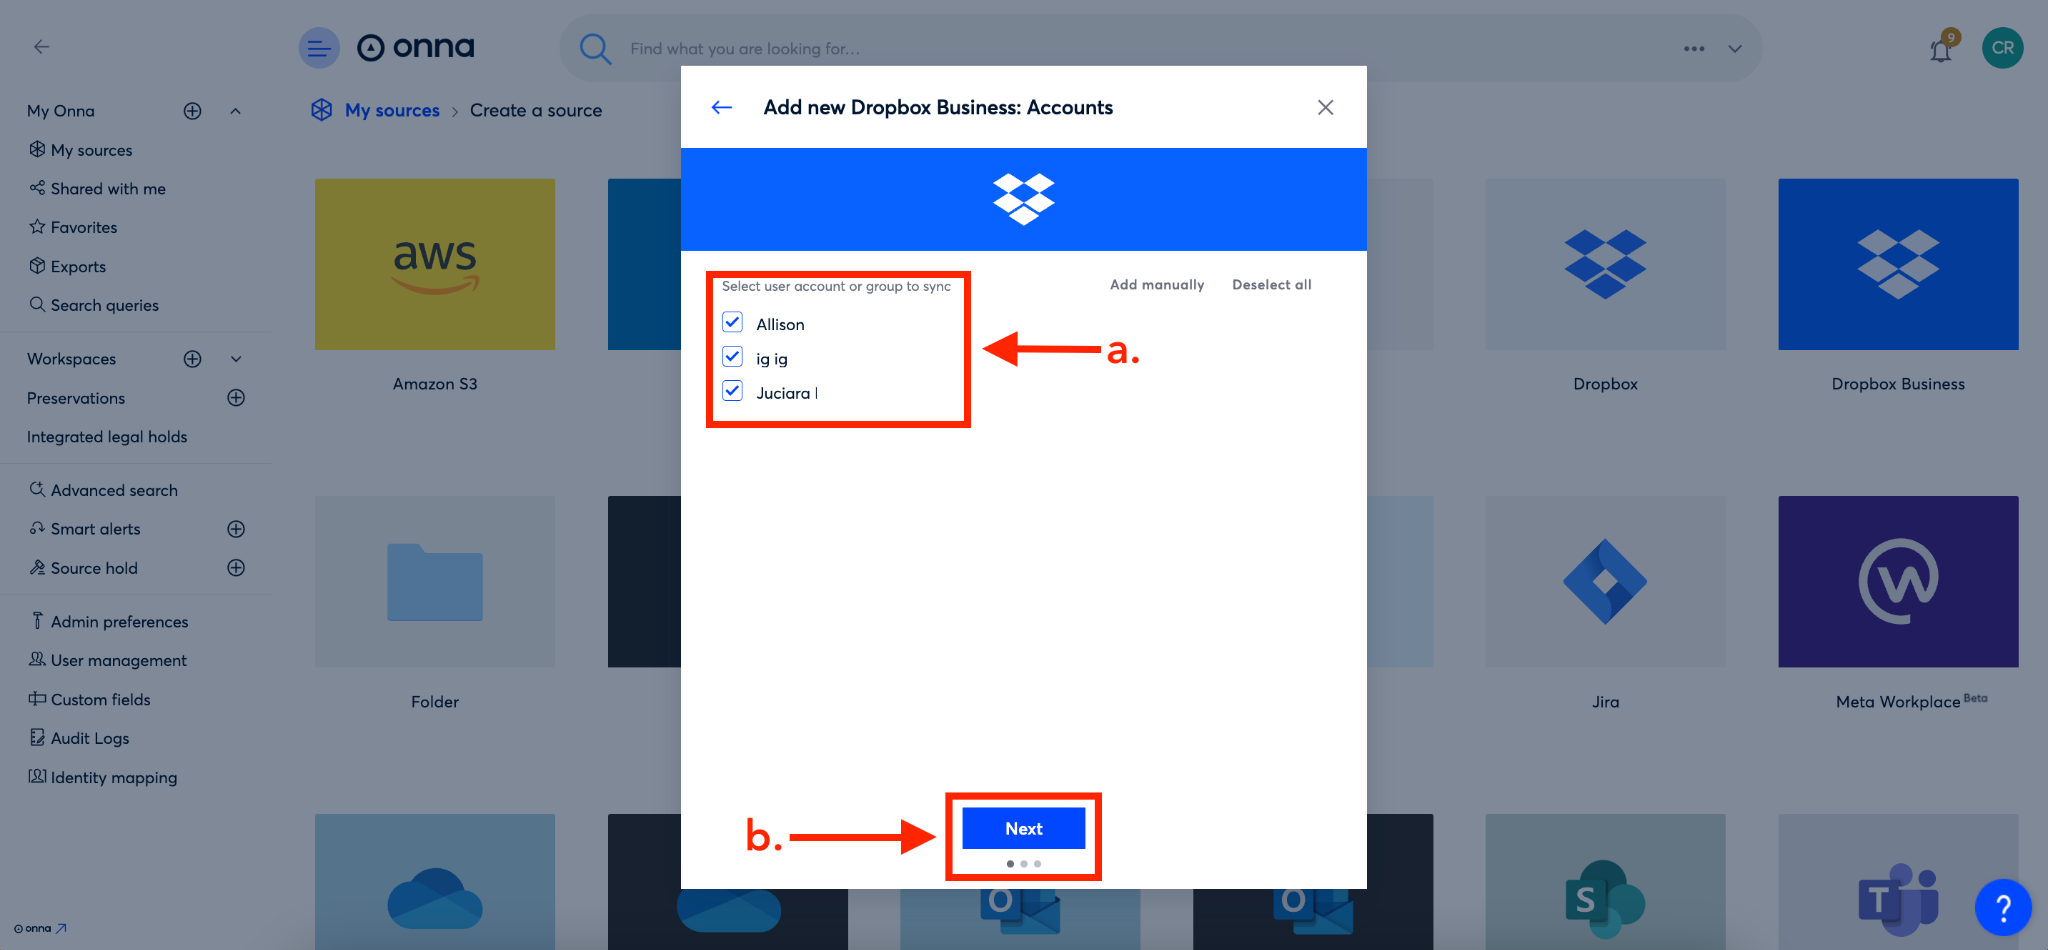
Step 6
If you ‘Load users’ list of all users in your Dropbox account will appear and you can select users by putting a check in the box next to their name (a). Then, click the blue ‘Next’ button (b).
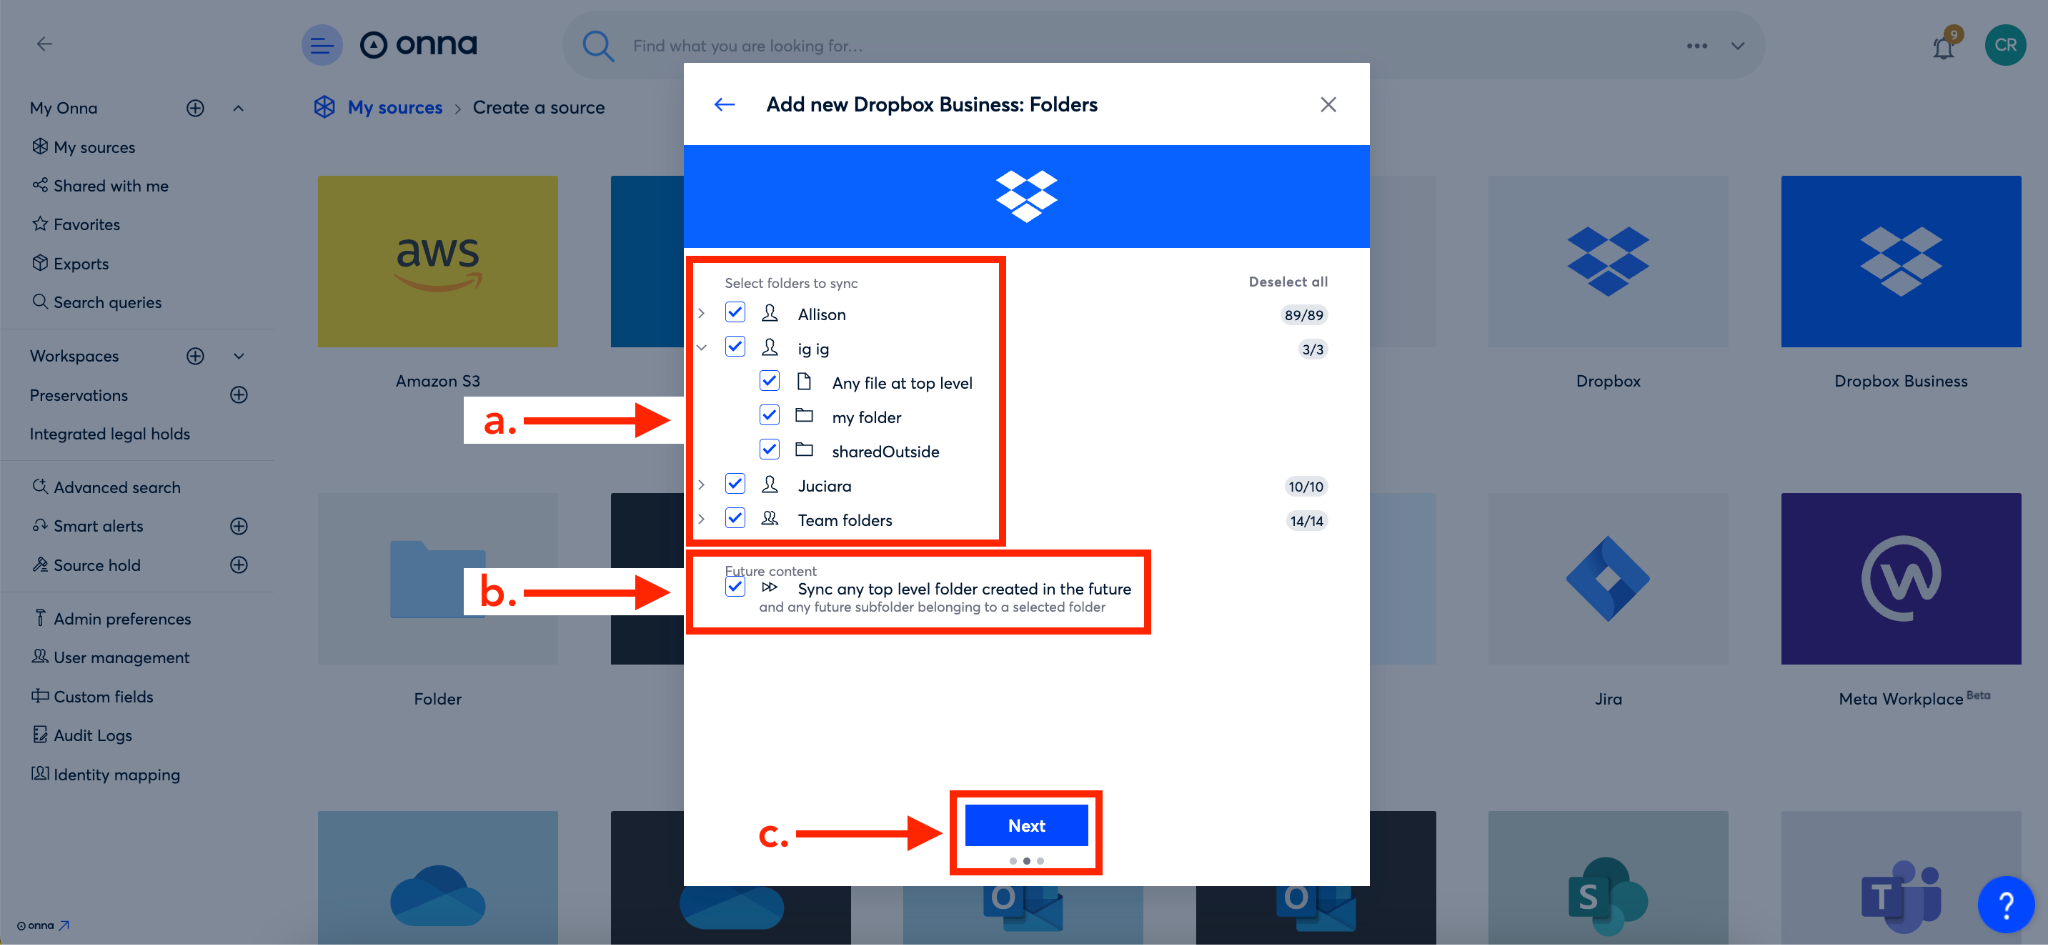
Step 7
On the next screen, you’ll select the folders you want to include in your sync (a) and then, if you’d like to sync future content, put a check in the box next to ‘Sync any top level folder created in the future’ (b). Then, click the blue ‘Next’ button (c).
Step 8
Your final step is to select files to sync (a). You can either select ‘Get all Dropbox files’ or ‘Get all Dropbox and Dropbox paper files’. Once you’ve selected your file preference you will click the blue ‘Done’ button (b).

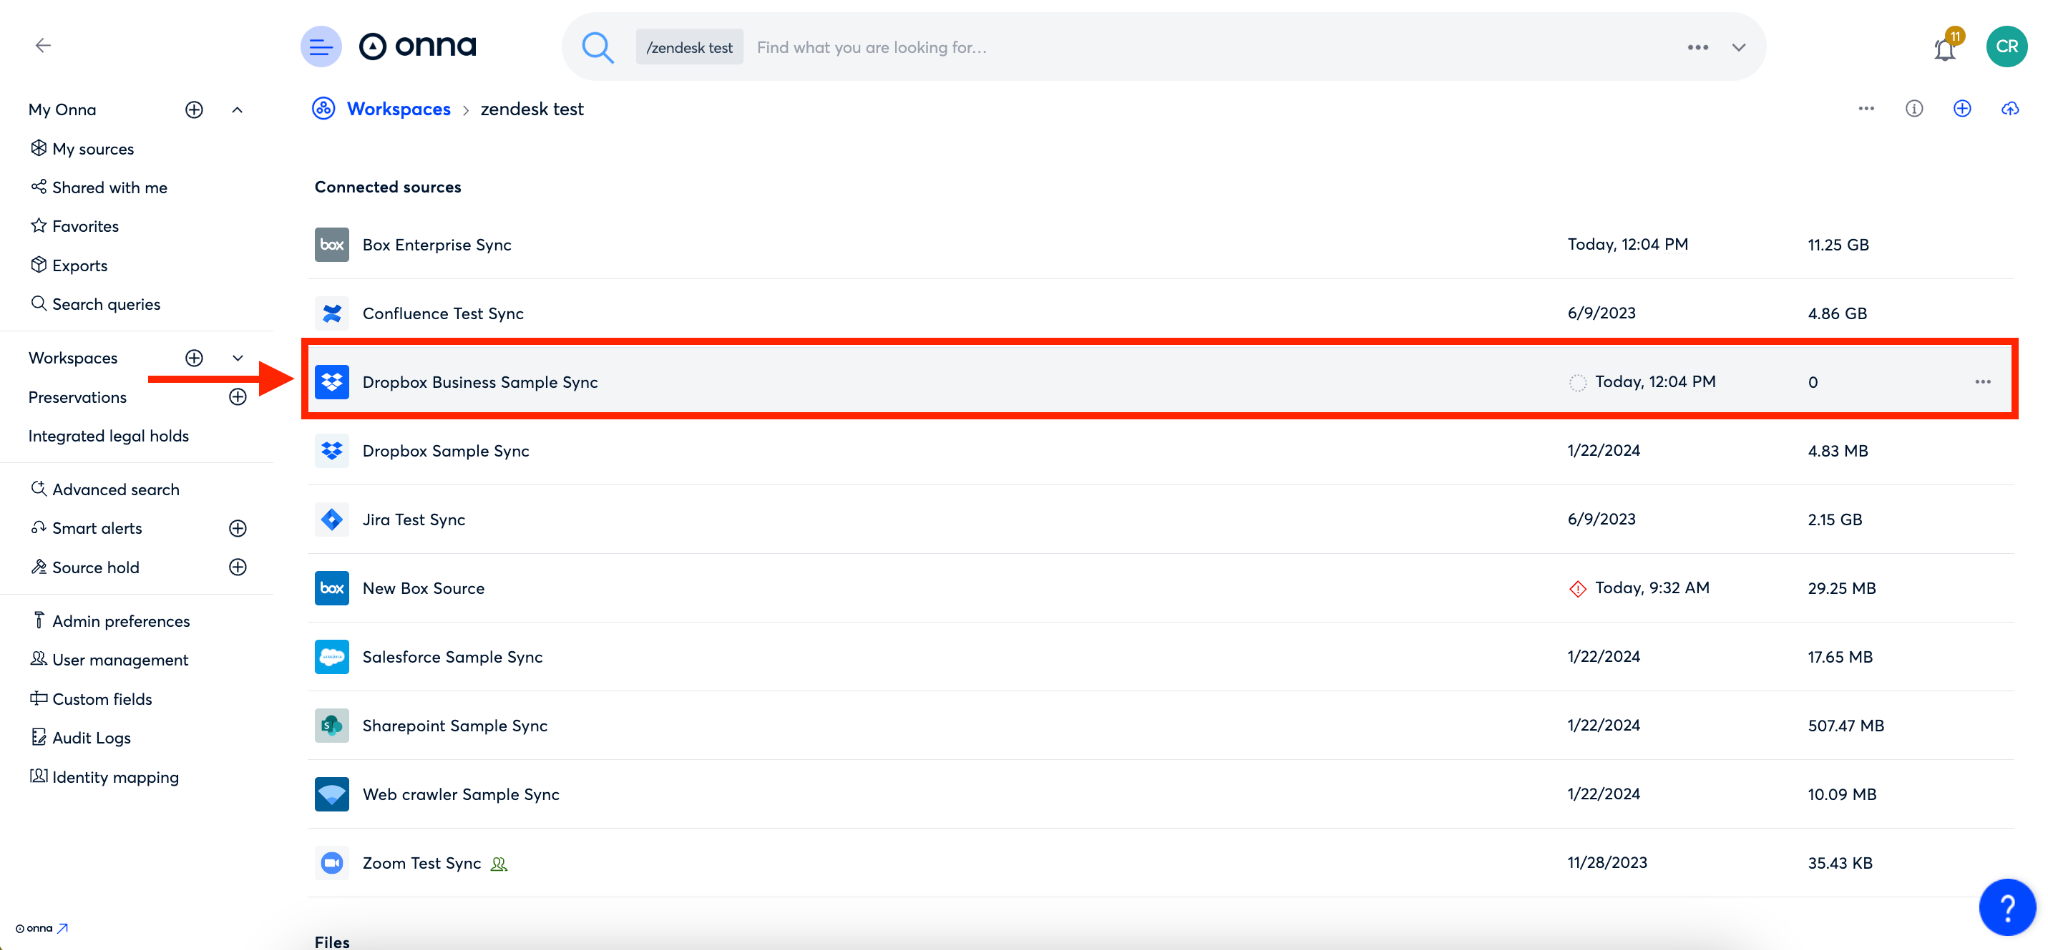
Step 9
You’ll now see your new source appear alphabetically in the list of ‘Connected sources’ in your workspace.