Creating and Managing User Groups in Onna
- 26 Jun 2024
- 2 Minutes to read
- Print
- DarkLight
- PDF
Creating and Managing User Groups in Onna
- Updated on 26 Jun 2024
- 2 Minutes to read
- Print
- DarkLight
- PDF
Article summary
Did you find this summary helpful?
Thank you for your feedback

In this article you will learn:
How to Create a New User Group
How to Manage Existing User Groups
How to Delete a User Group
How to Create a New User Group
By sharing workspaces, sources, or data with groups, you can reduce the time to manage access and ensure a more efficient access control to the information in your account. For example, you can create groups for a specific team or department in your organization.
To manage groups, you must have an admin role in Onna or have the special permission to ‘Manage groups’. If you have a member role in Onna and need to manage user groups please see your Onna administrator who is able to assign you the special permission to ‘Manage groups’. |
Step 1
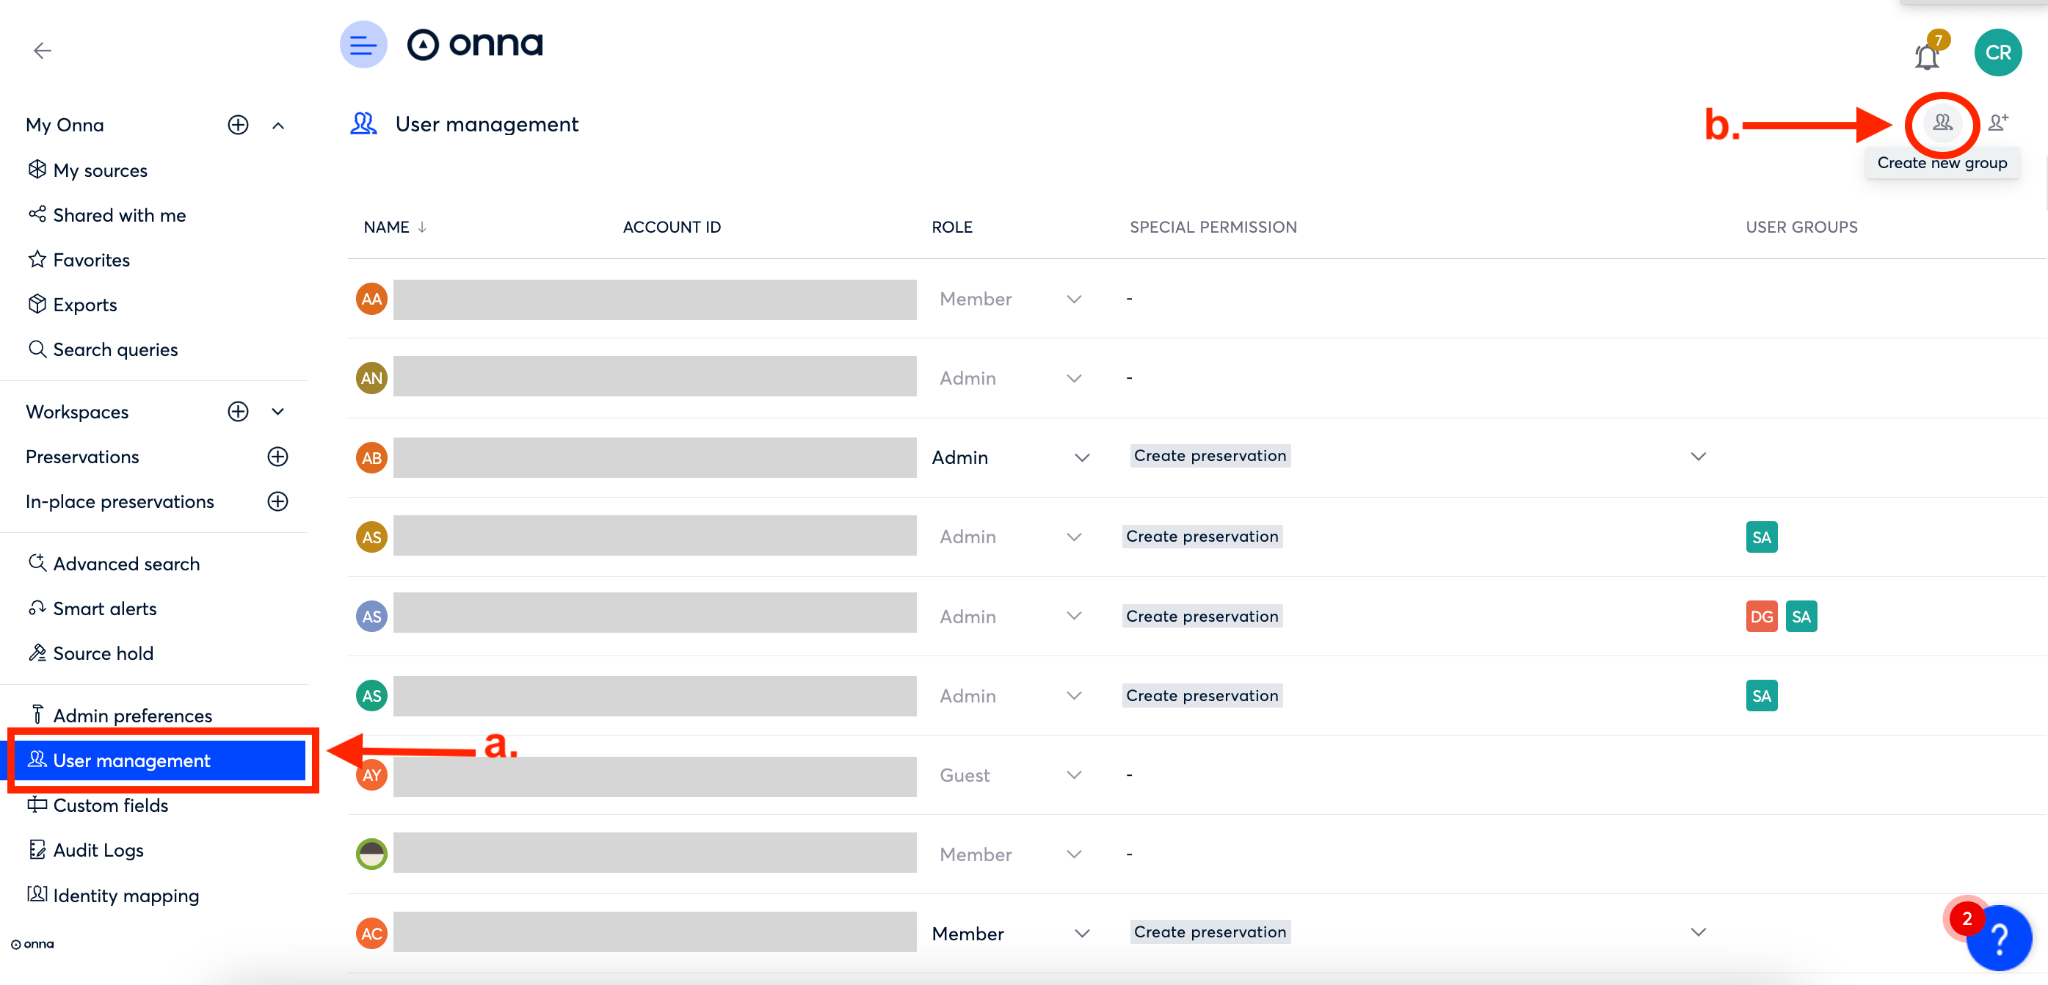
To begin creating a new user group you will first navigate to the ‘User management’ section from the Main menu (a).
Once you are on the ‘User management page’ you will click on the ‘Create new group’ icon in the upper right corner of the screen (b).
Step 2
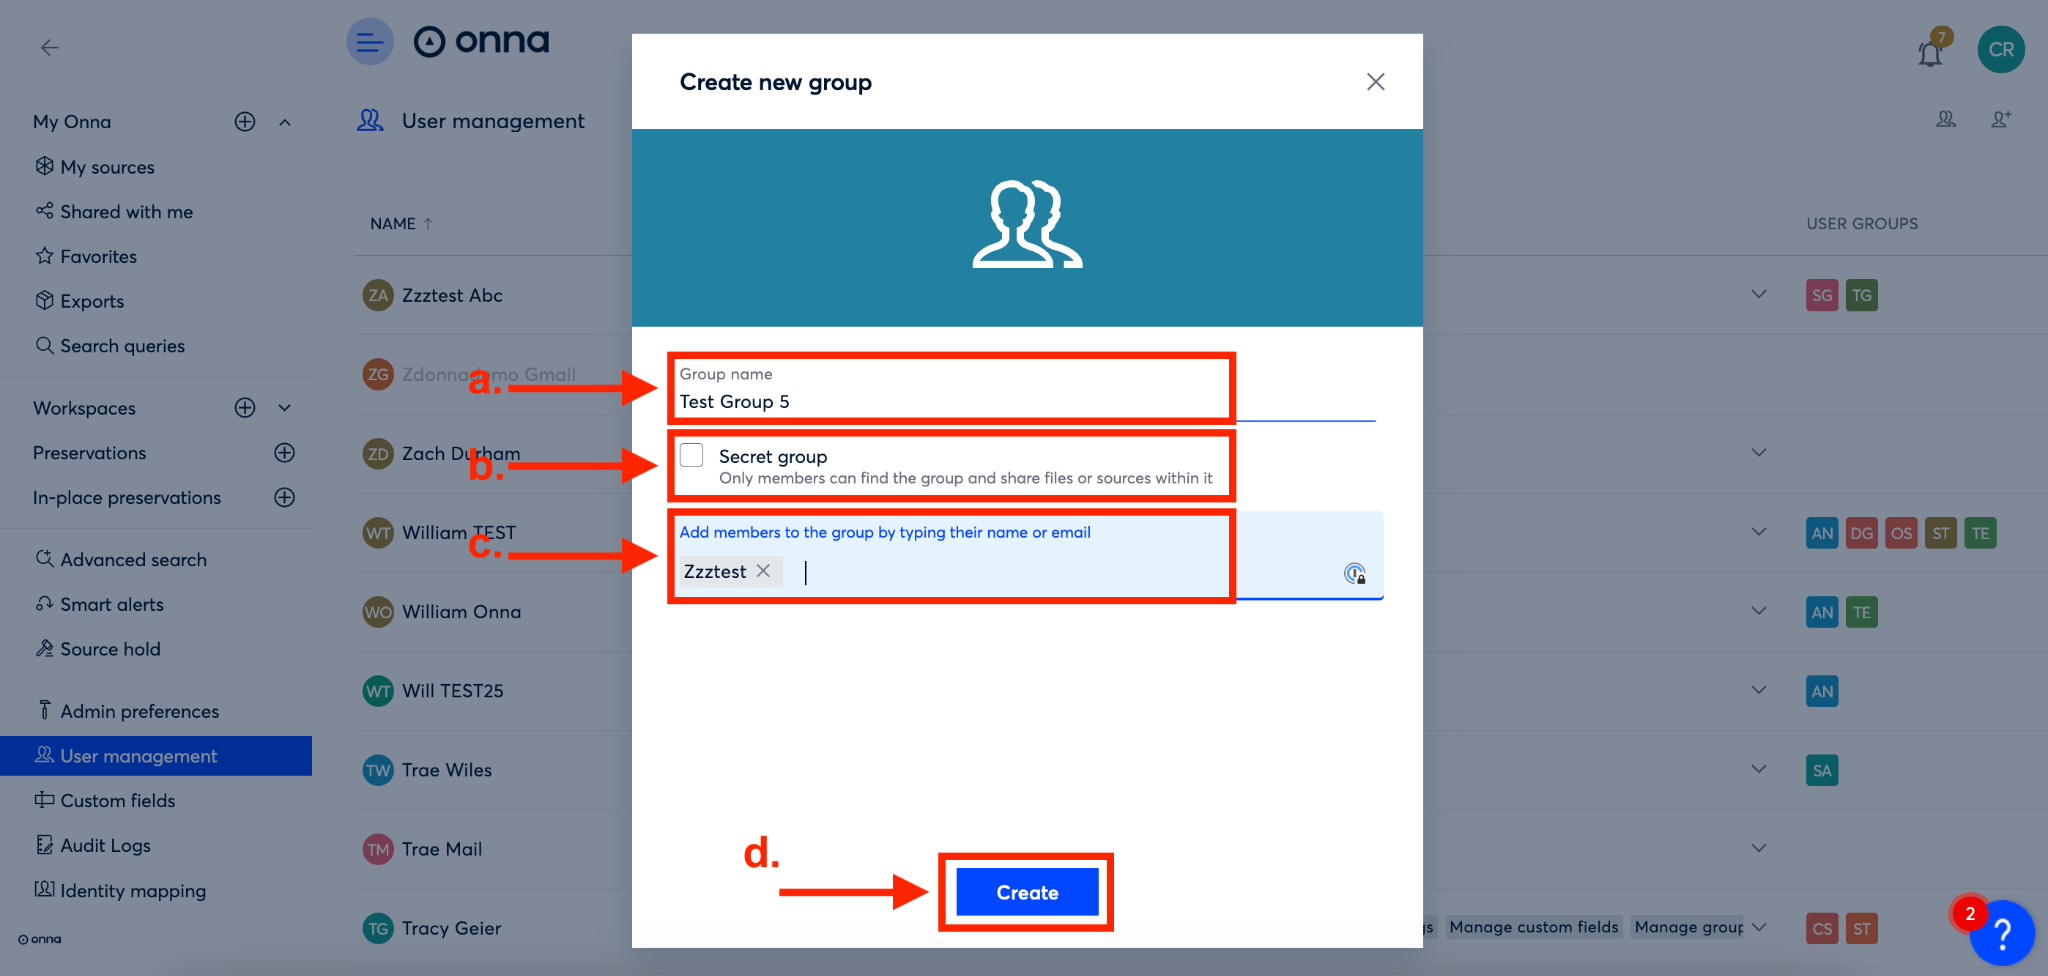
You’ll now see a ‘Create new group’ window appear. In this window you will name your group (a), determine the visibility of your group by checking the box ‘Secret’ to make it visible only to group members, or leaving it unchecked for site wide visibility(b), and then you’ll add the Onna users you want to include in the group (c).
Finally, you’ll click the blue ‘Create’ button (d) to create your group.
How to Manage Existing User Groups
Once a user group is created you’re able to add or remove users,and also change the visibility of the group as needed. To manage an existing user group follow the steps below:
Step 1
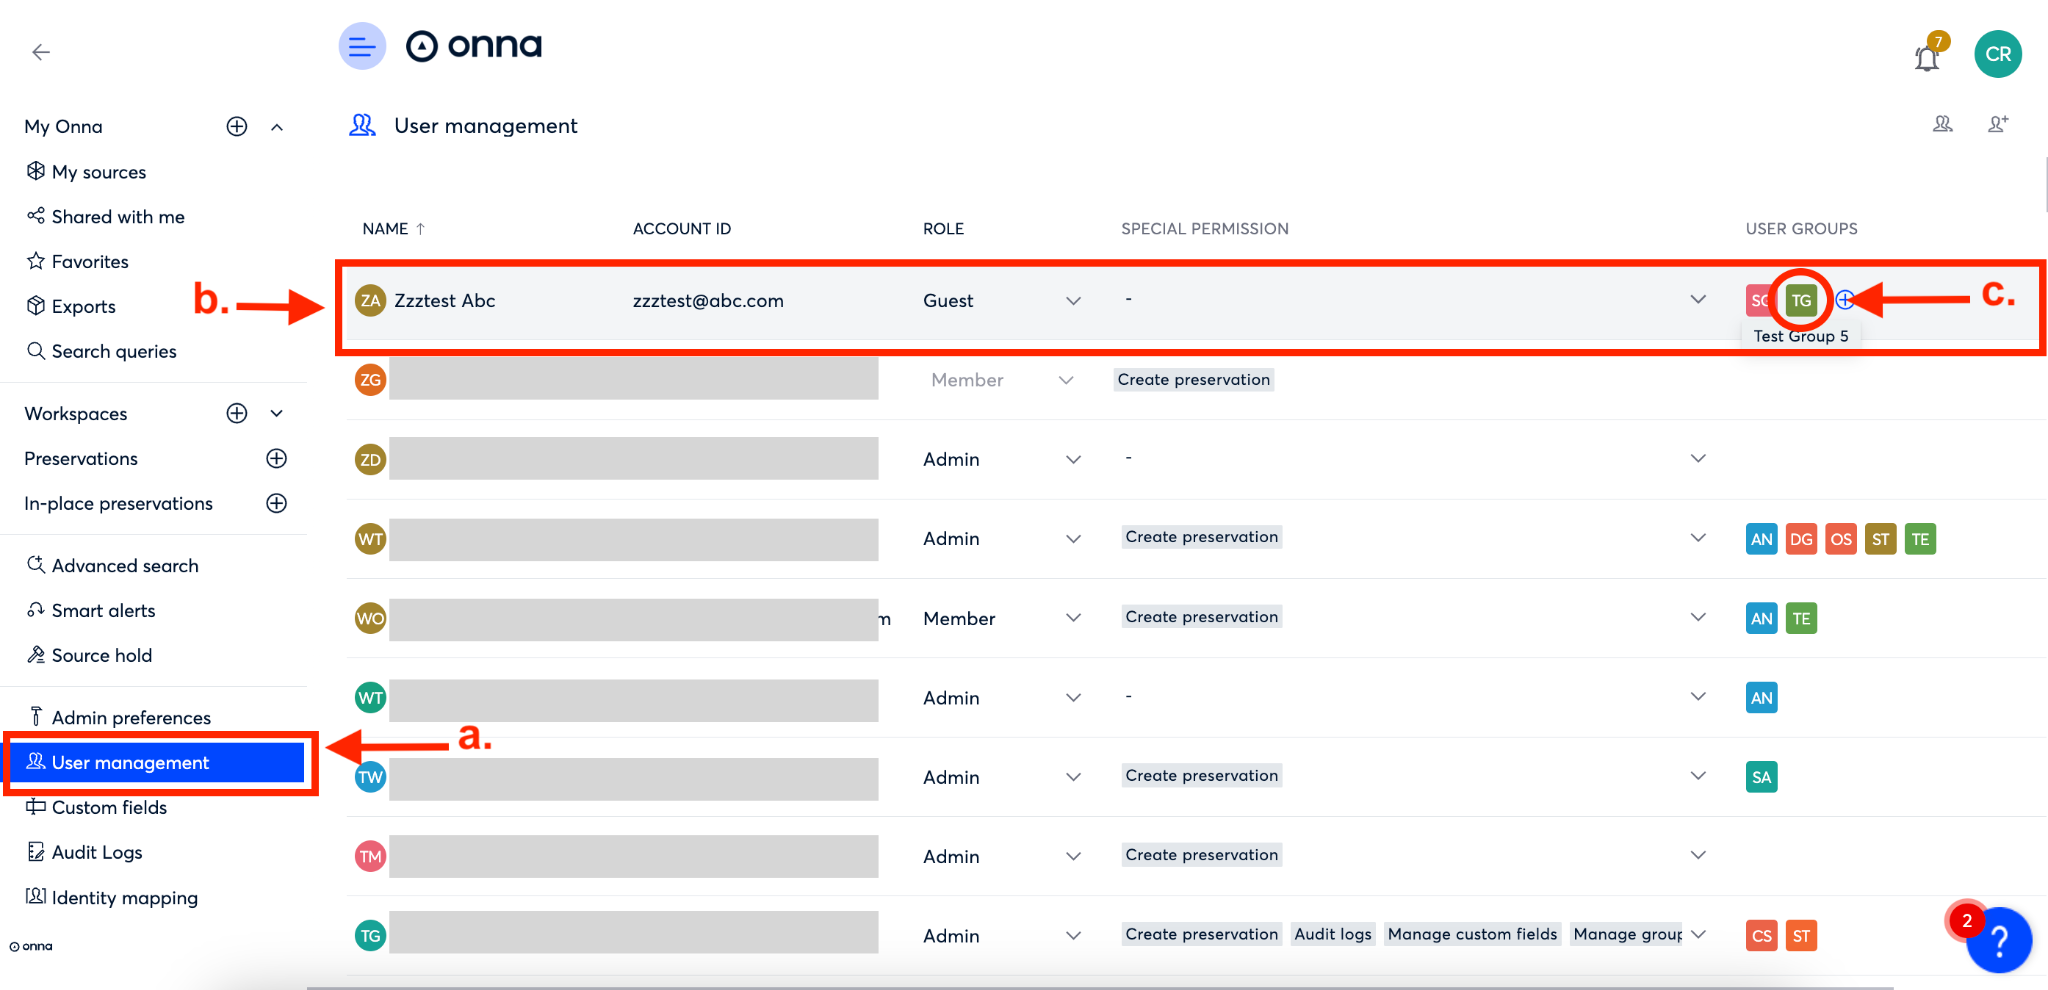
To manage an existing user group you will first navigate to the ‘User management’ section from the Main menu (a).
Once you’re on the ‘User management page’ find a user in the group you want to manage (b). In the row for that user, select the group you want to manage from the ‘User groups’ column (c).
Step 2
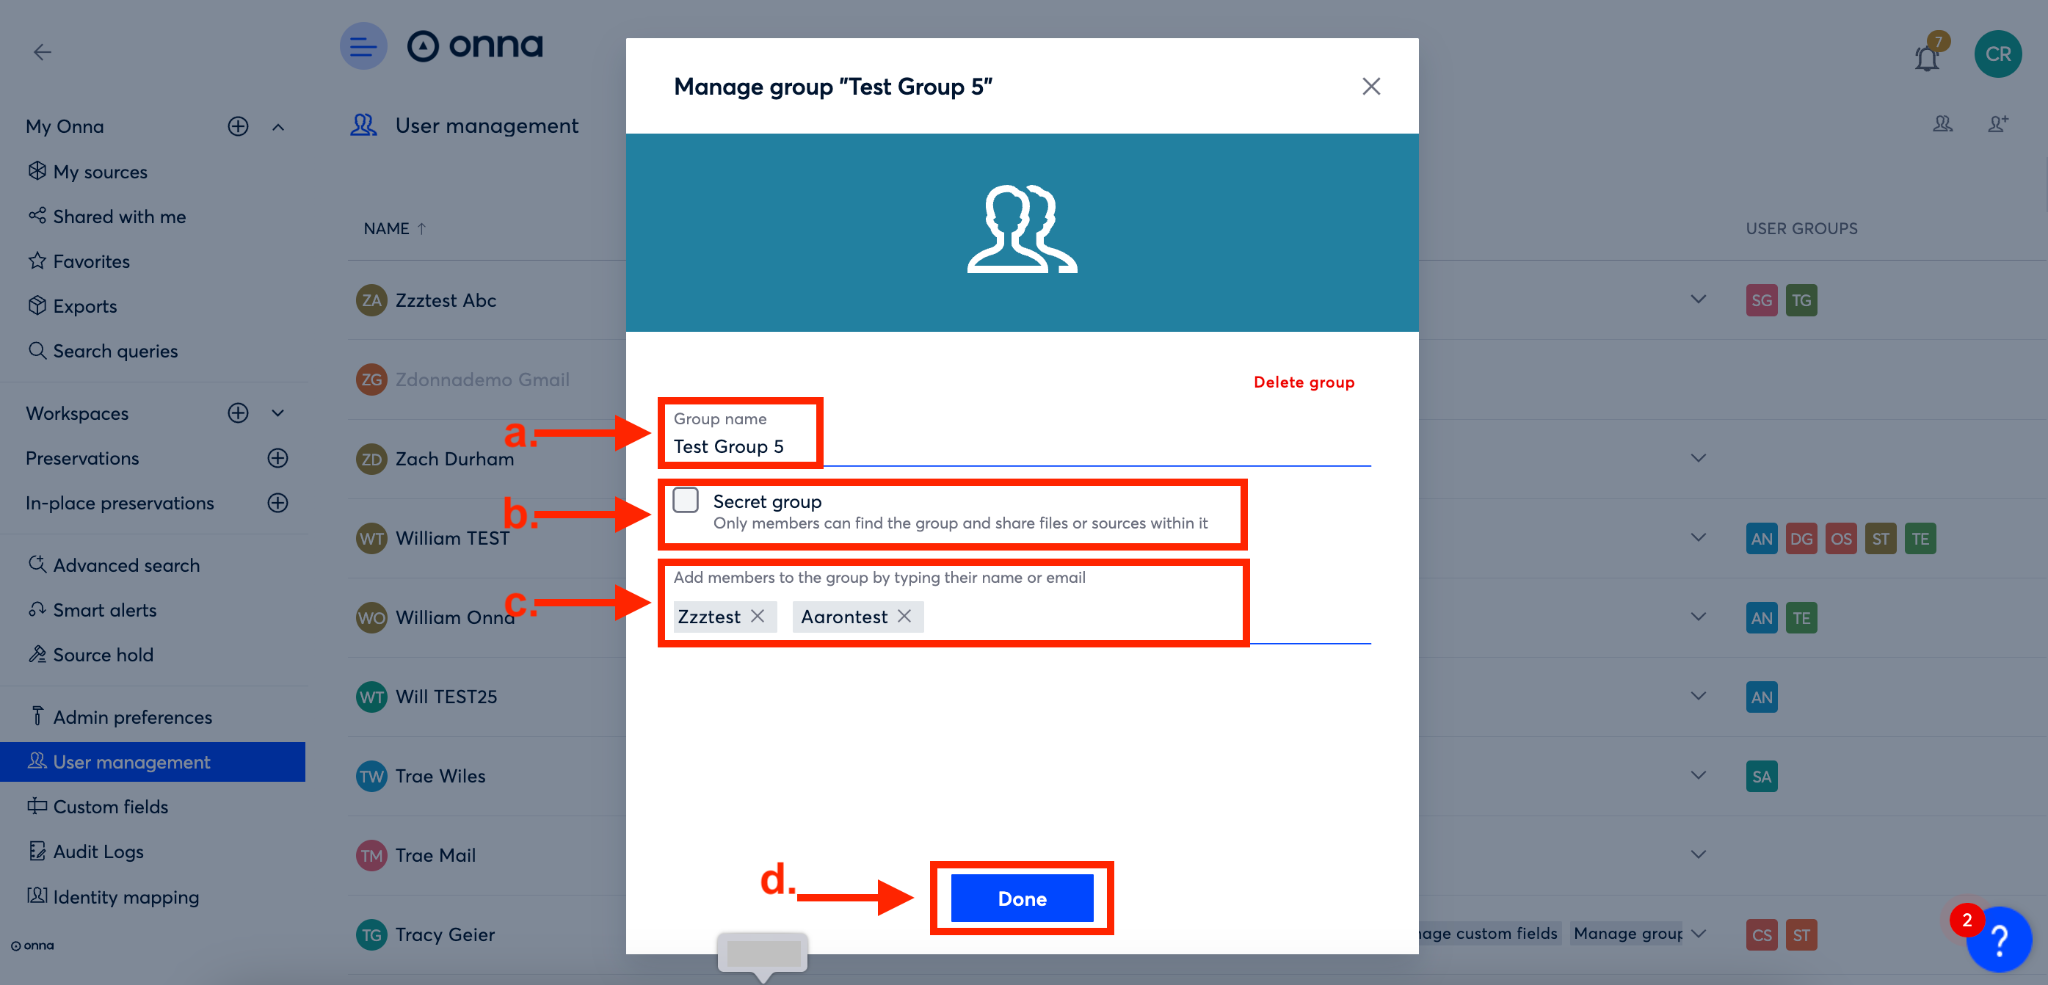
From here the ‘Manage group’ window will appear. In this window you’re able to change any aspect of the group including the name (a), the visibility (b), or the members (c).
When you’re done, click on the blue ‘Done’ button (d) to save your changes.
How to Delete a User Group
If a user group is no longer needed you can delete the group. To do so, follow the steps below:
Step 1
To delete a user group you will first navigate to the ‘User management’ section from the Main menu (a).
Once you’re on the ‘User management page’ find a user in the group you want to delete (b). In the row for that user, select the group you want to delete from the ‘User groups’ column (c).

Step 2
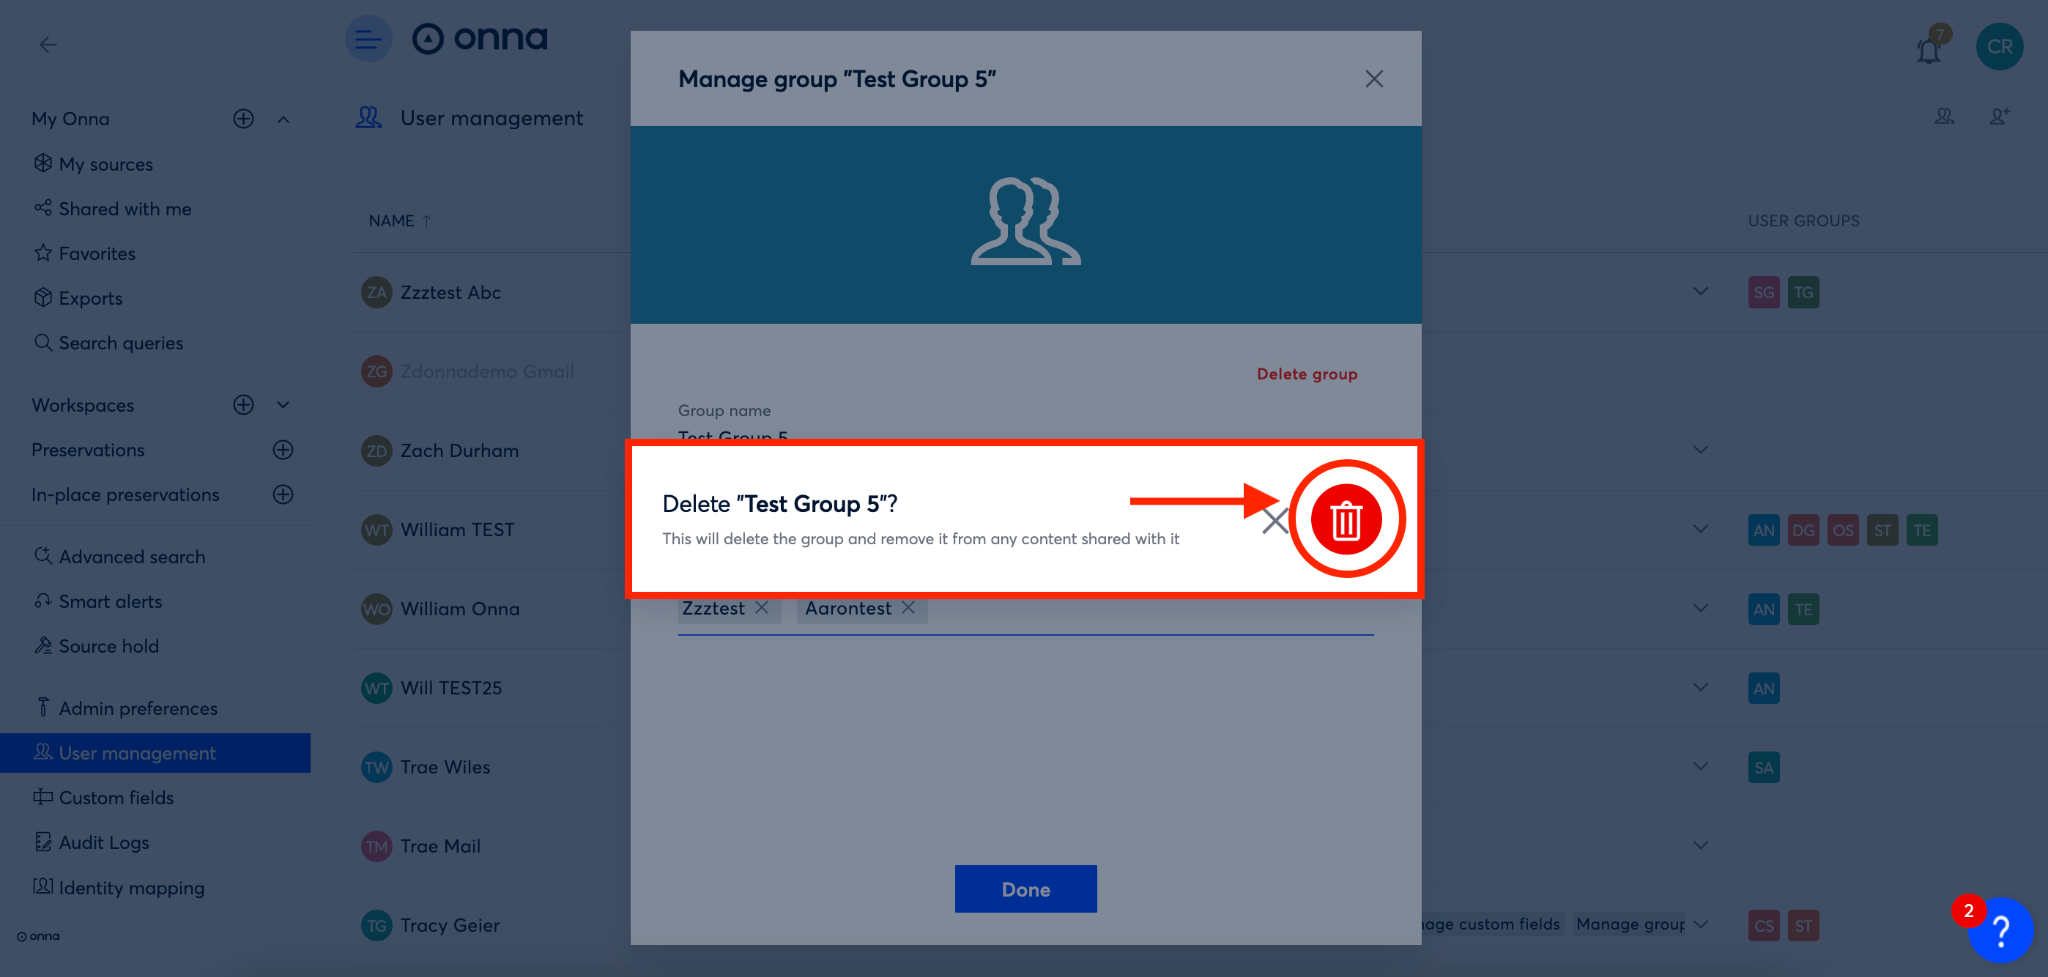
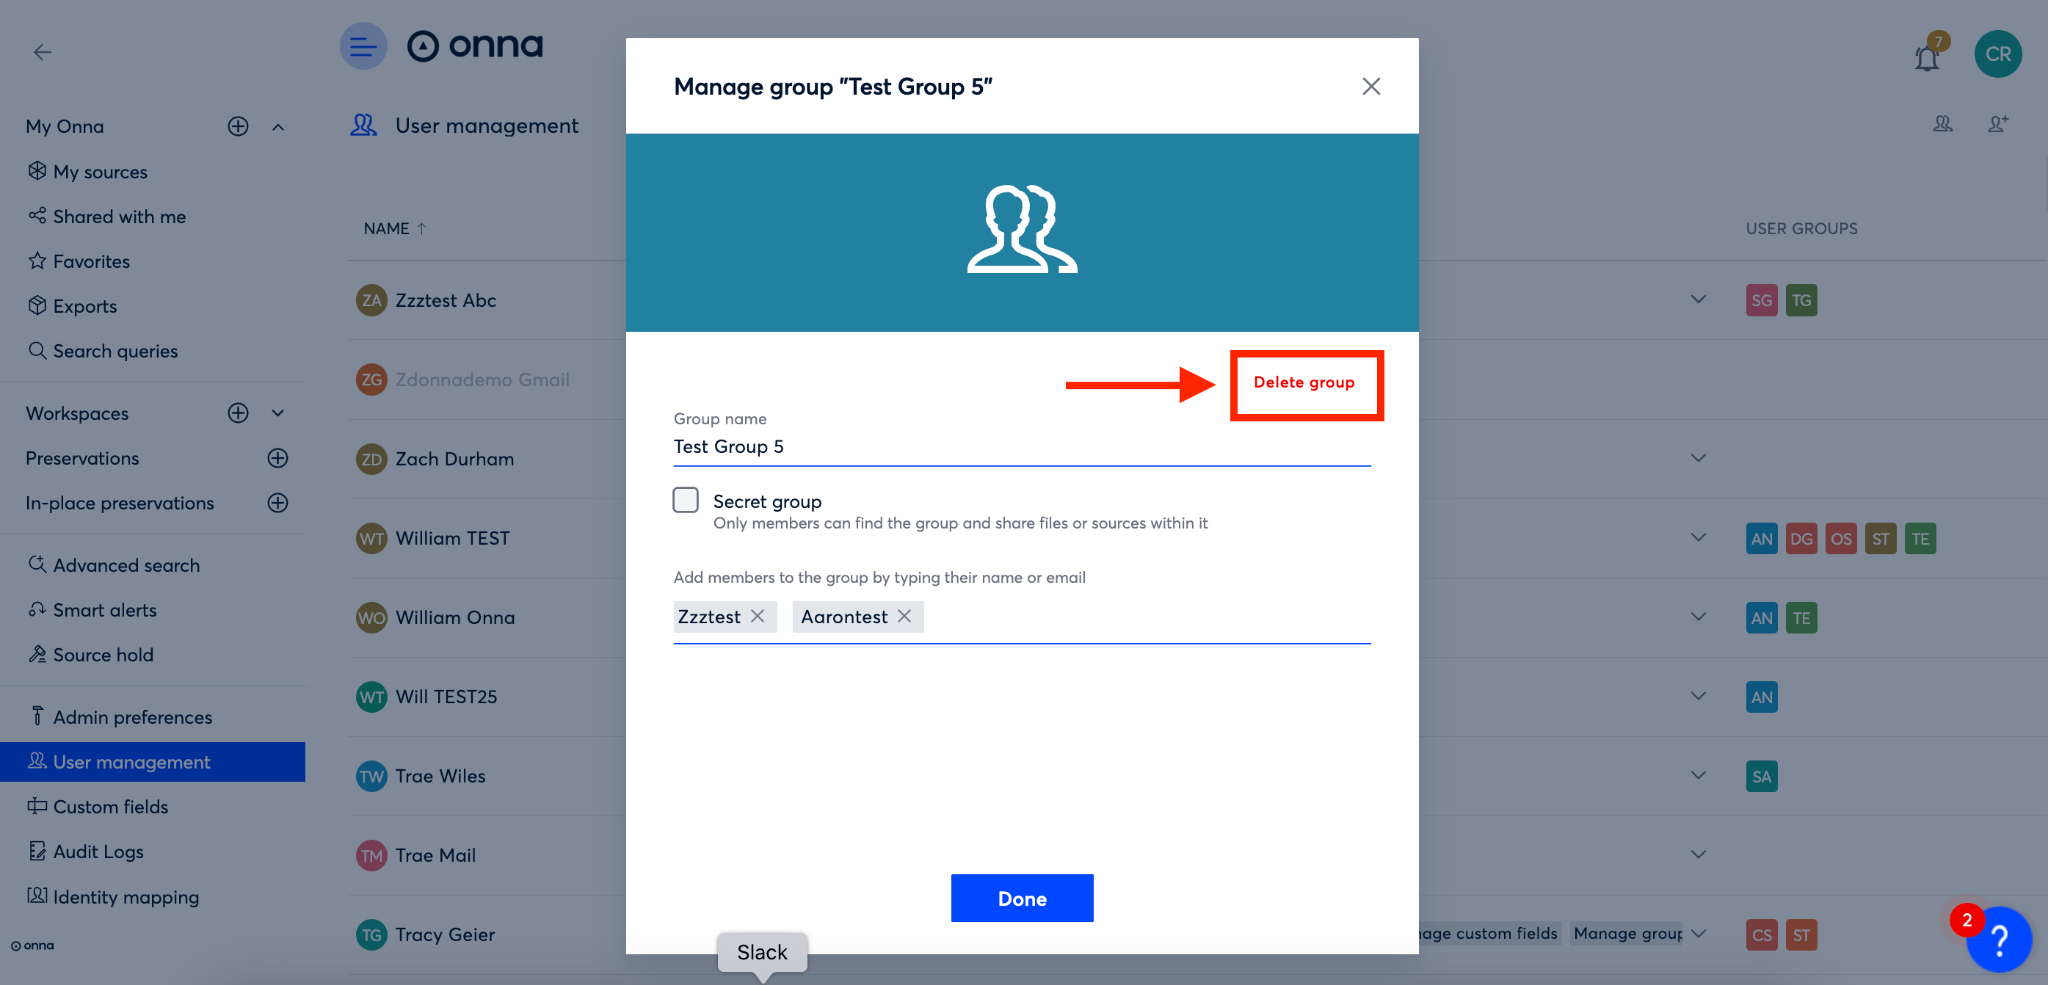
From here the ‘Manage group’ window will appear. In this window click on the red words ‘Delete group’ on the right side of the window.
Step 3
You’ll now see a confirmation box appear. To confirm and delete your group click on the red trash can icon. Your group is now deleted.