- 26 Jun 2024
- 5 Minutes to read
- Print
- DarkLight
- PDF
Getting Started with Sources
- Updated on 26 Jun 2024
- 5 Minutes to read
- Print
- DarkLight
- PDF

In this article:
Sources Overview
How to Set up a New Source Sync
Source Status
Source Options
Viewing Your Sources
Sources Overview
How We Connect and Collect
By using one of Onna’s ready-to-use connectors (shown to the right) you’re able to collect data across your organization’s collaboration, communication, and content tools providing one secure location to access your most important data.
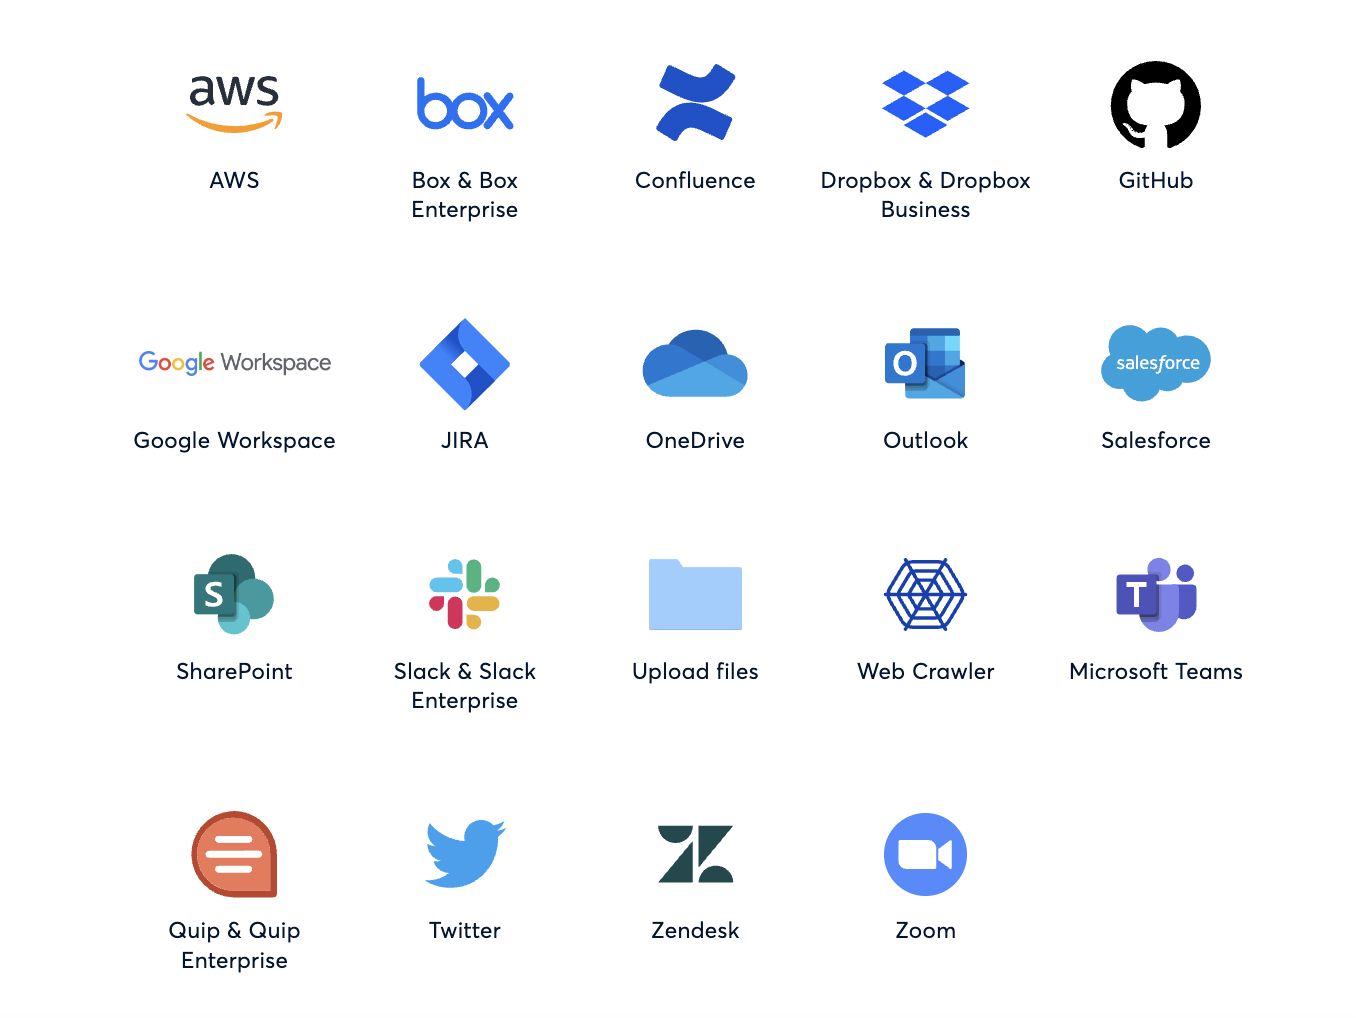
Connectors and Sources
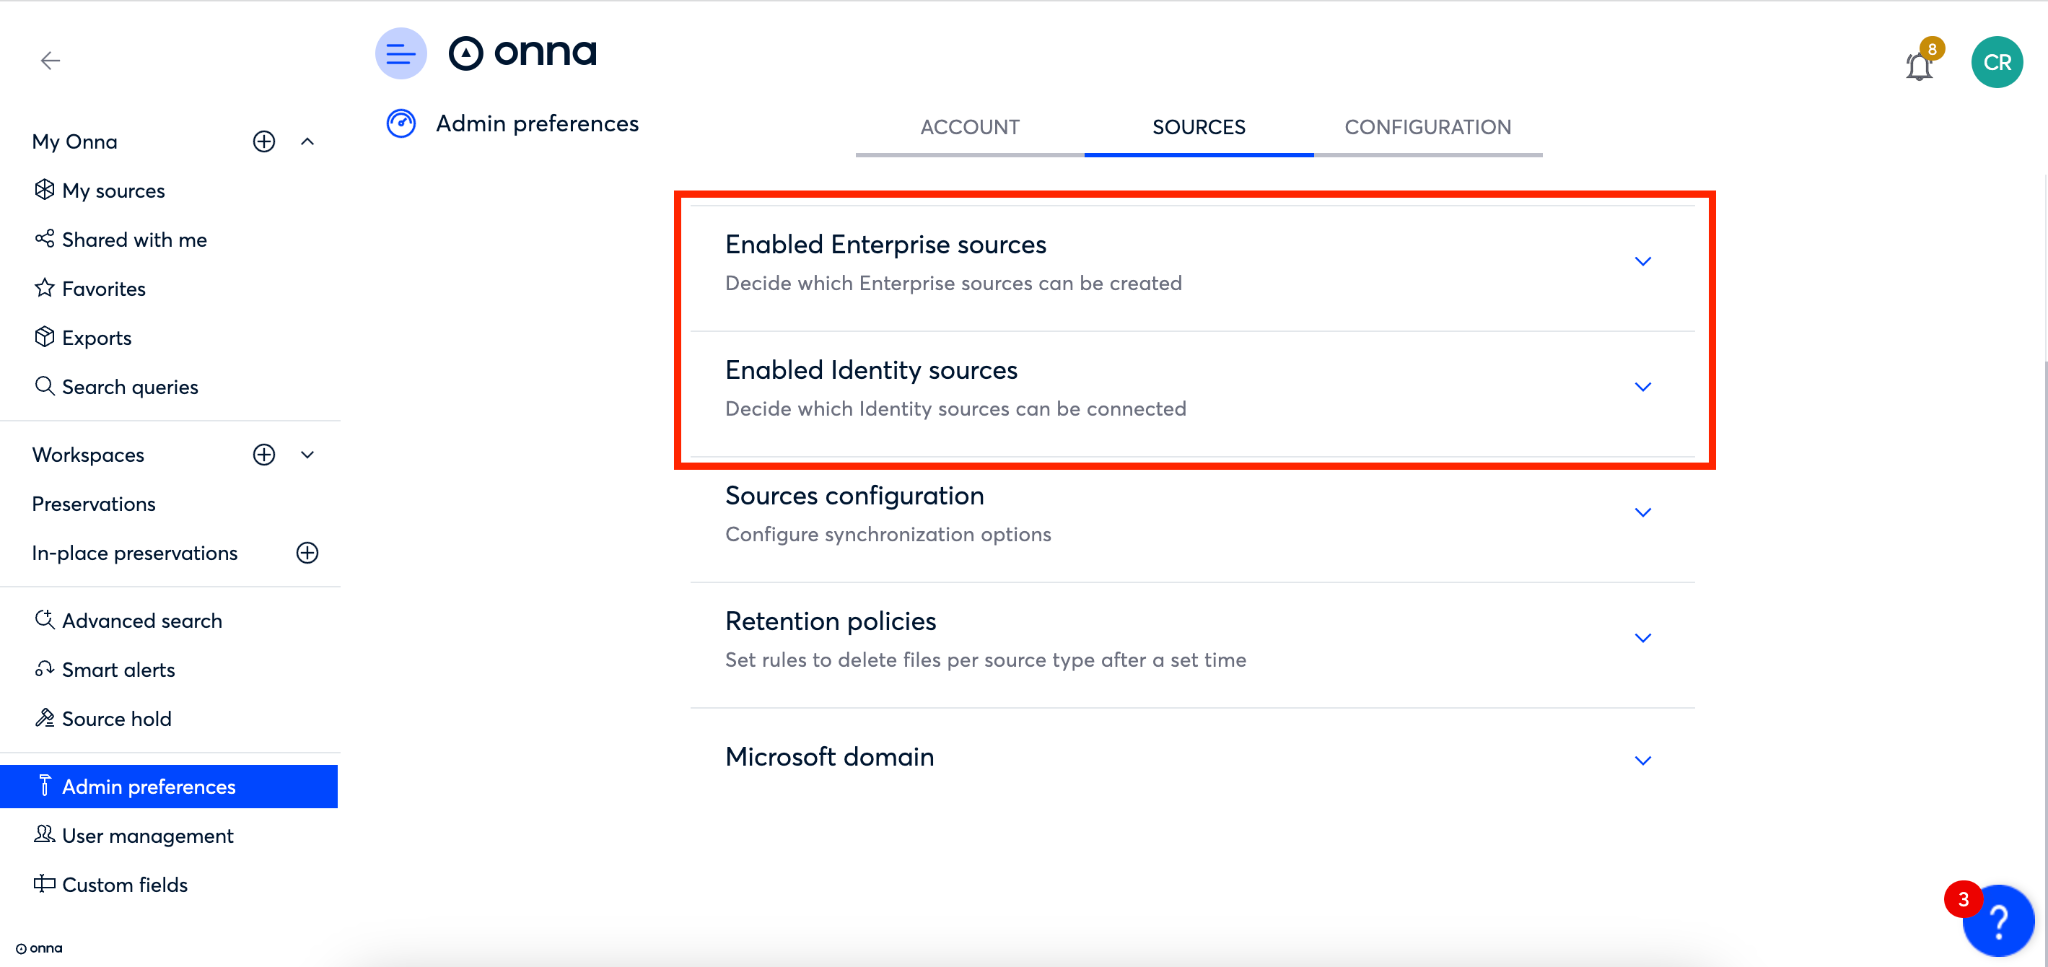
Your Onna admin can enable any of our ready-to-use connectors in the admin preferences section of your Onna site. Once a connector is enabled it can be used across your site to create new sources.
A source is a sync of a specific set of data that is collected using one of Onna’s ready-to-use connectors or the Onna API. For example, using our Slack Enterprise connector, User A can create a source for Matter 1 and User B can create a different source for Matter 2. Thus, using one connector to create two sources.
How to Set up a New Source Sync
You are able to set up a new source sync from two areas inside Onna, directly inside a workspace, or from the ‘My sources’ section. As a best practice to keep data organized, we highly recommend adding new sources inside relevant workspaces.
Create a New Source From a Workspace
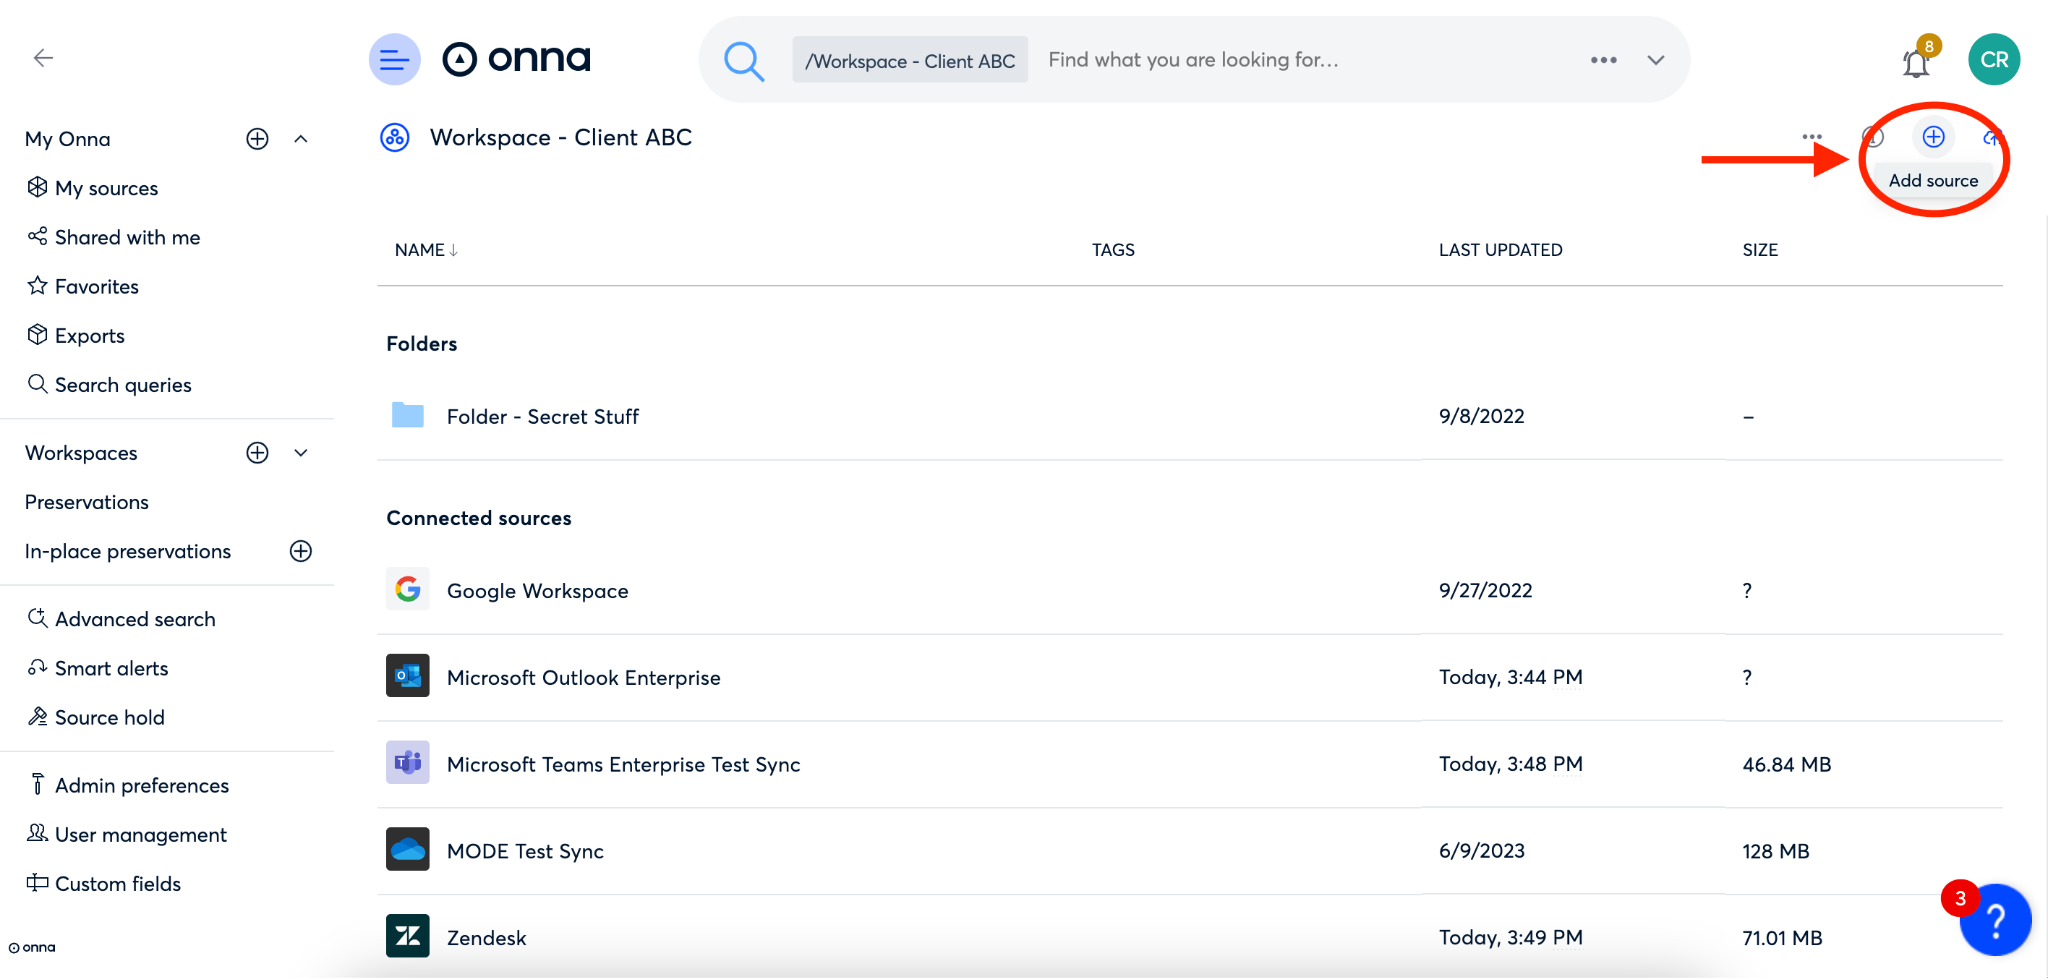
To create a new source from a workspace simply navigate to the workspace you want to create a source in and click on the ‘+’ icon in the upper right corner to add a source.
Create a New Source From ‘My sources’
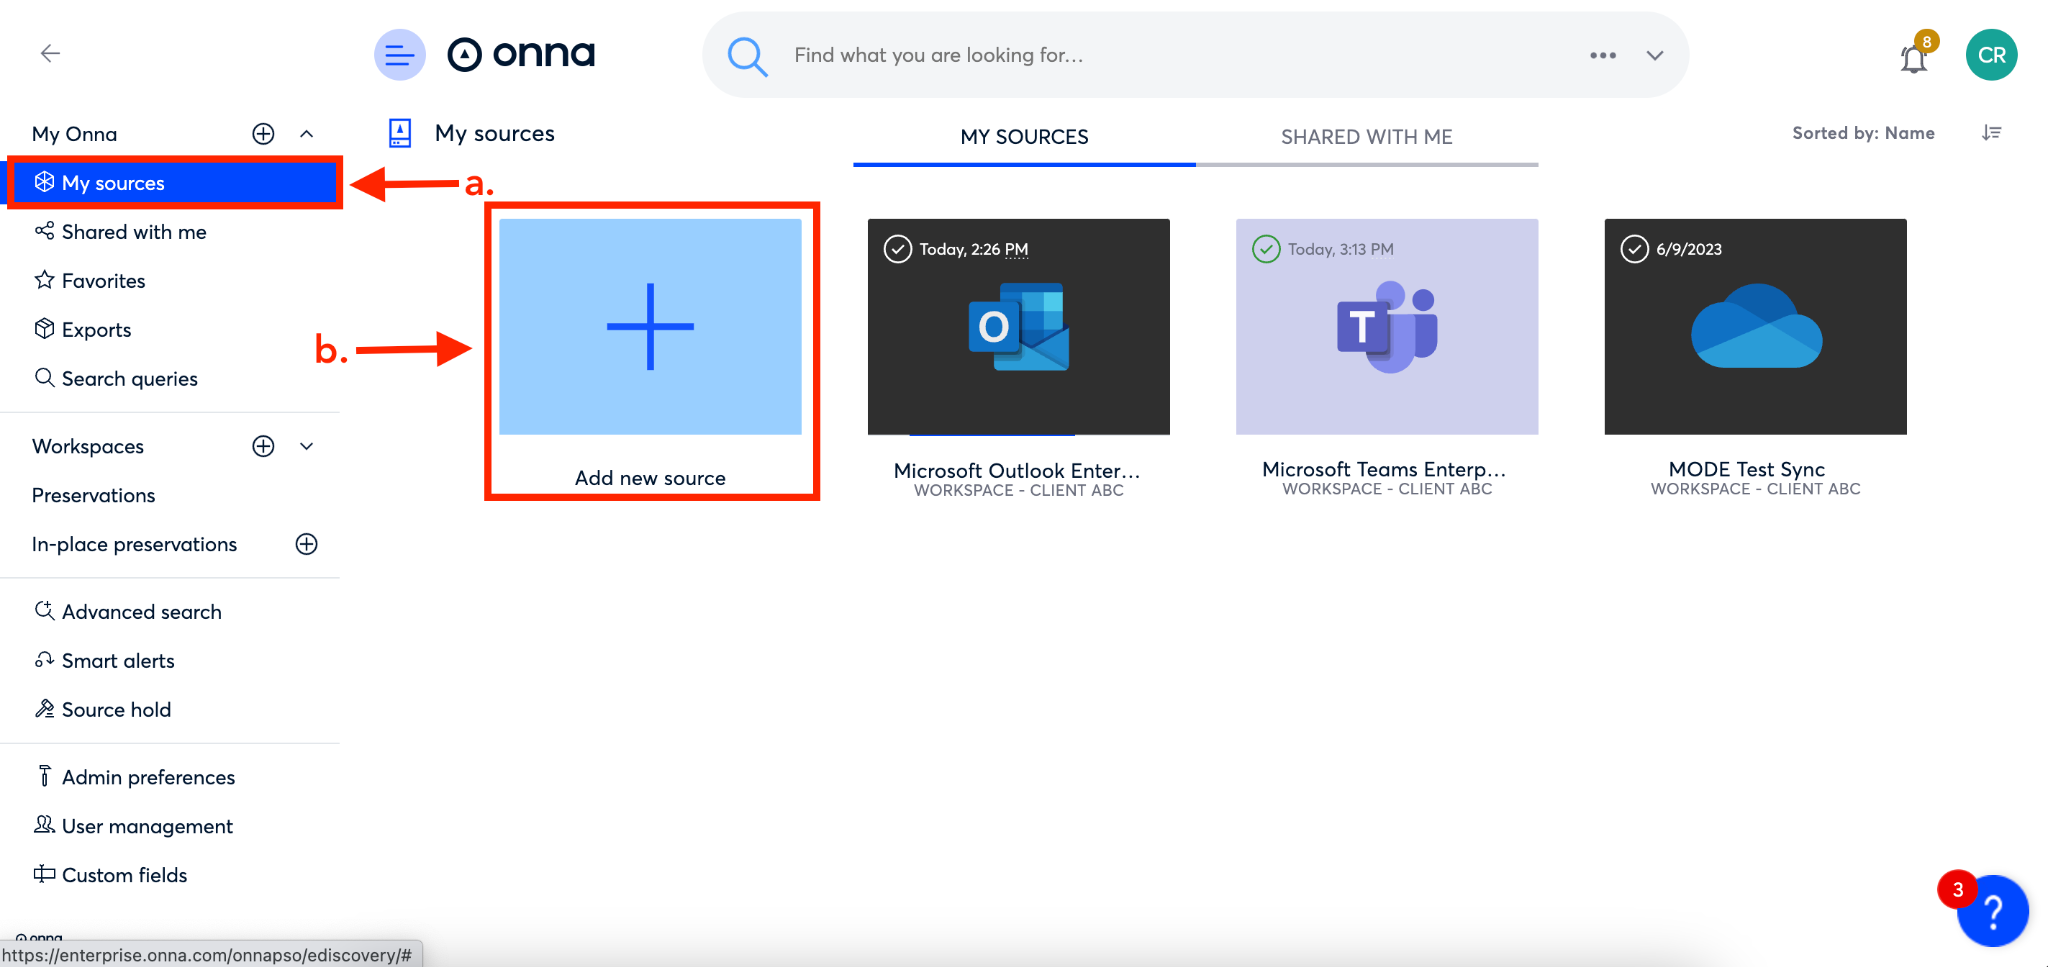
To create a new source from the ‘My sources’ page, you’ll first navigate to ‘My sources’ from the main menu (a), then click on the blue ‘Add new source’ icon (b).
Because Onna connects to each native application using their API, the data we are able to ingest is based on the limitations of that API. This makes each sync set-up process look slightly different after you click on the ‘Add source’ icon. It is important to review the documentation for the connectors you’re using to ensure you meet all the requirements to collect data, and understand how to set up a sync using that connector. You can find the right documentation for the connectors your organization uses on our Connectors Page.
A note about date selection when setting up new source syncs: When selecting a date during data source creation, our system registers the selected date in UTC. However, the hours are converted from the timezone the user is located in. For example, if the user is on the West Coast (PT) and selects a data source's 'from_date' as October 1, 2023, our system registers it as 2023-10-01T07:00:00 UTC. In PT, this equates to 2023-10-01T00:00:00. |
Source Status
Once your source is set up you will want to understand the status of your new sync to better understand how to take action on your data. The way you’ll get the most nuanced information about your sync is by monitoring your sync from the information details panel for the source. However, you may also see a symbol in the row for your source giving you some quick information about the status of your sync. Below you will find definitions for each of the icons you may see.
 | Indicates the source is initiating the collection. |
|---|---|
 | Indicates the source has finished collecting files but is still processing files. |
 | Indicates a source has finished collecting files and is at least 80% finished processing files. |
 | Indicates when a source has been paused. |
 | Indicates something has gone wrong with the sync such as the original source API not allowing a connection, an error with authentication, or an error processing a file. |
 | Indicates that recurring syncing for this source has been revoked. Hovering over this symbol will give you the date and time of the last sync. |
Authorized Connection Credentials
All of the enterprise connectors in Onna require the use of an authorized connection in order to collect data from that source. An authorized connection allows Onna to collect data from user accounts across your organization.
At times, syncs using enterprise connectors may fail due to an issue with the authorized connection credentials for that source. Below is a list of errors that could cause the sync to fail and how to resolve the issue.
Should one of these errors occur, data and identities will stop syncing and will not continue syncing until you resolve the issue. However, you will not lose any data already synced
Error | Cause | Solution |
Expired Credentials | The credentials used to create the authorized connection with the data source have expired. | Update the credentials within the data source and then renew the credentials in Onna. |
Revoked Credentials | The authorized connection credentials that had been shared with you have been revoked by the user who shared them with you. | Contact the user who shared the credentials to resolve the issue. |
Source Options
Once your source is set up you have many options available to you related to that source. You can access sources options by following the steps below:
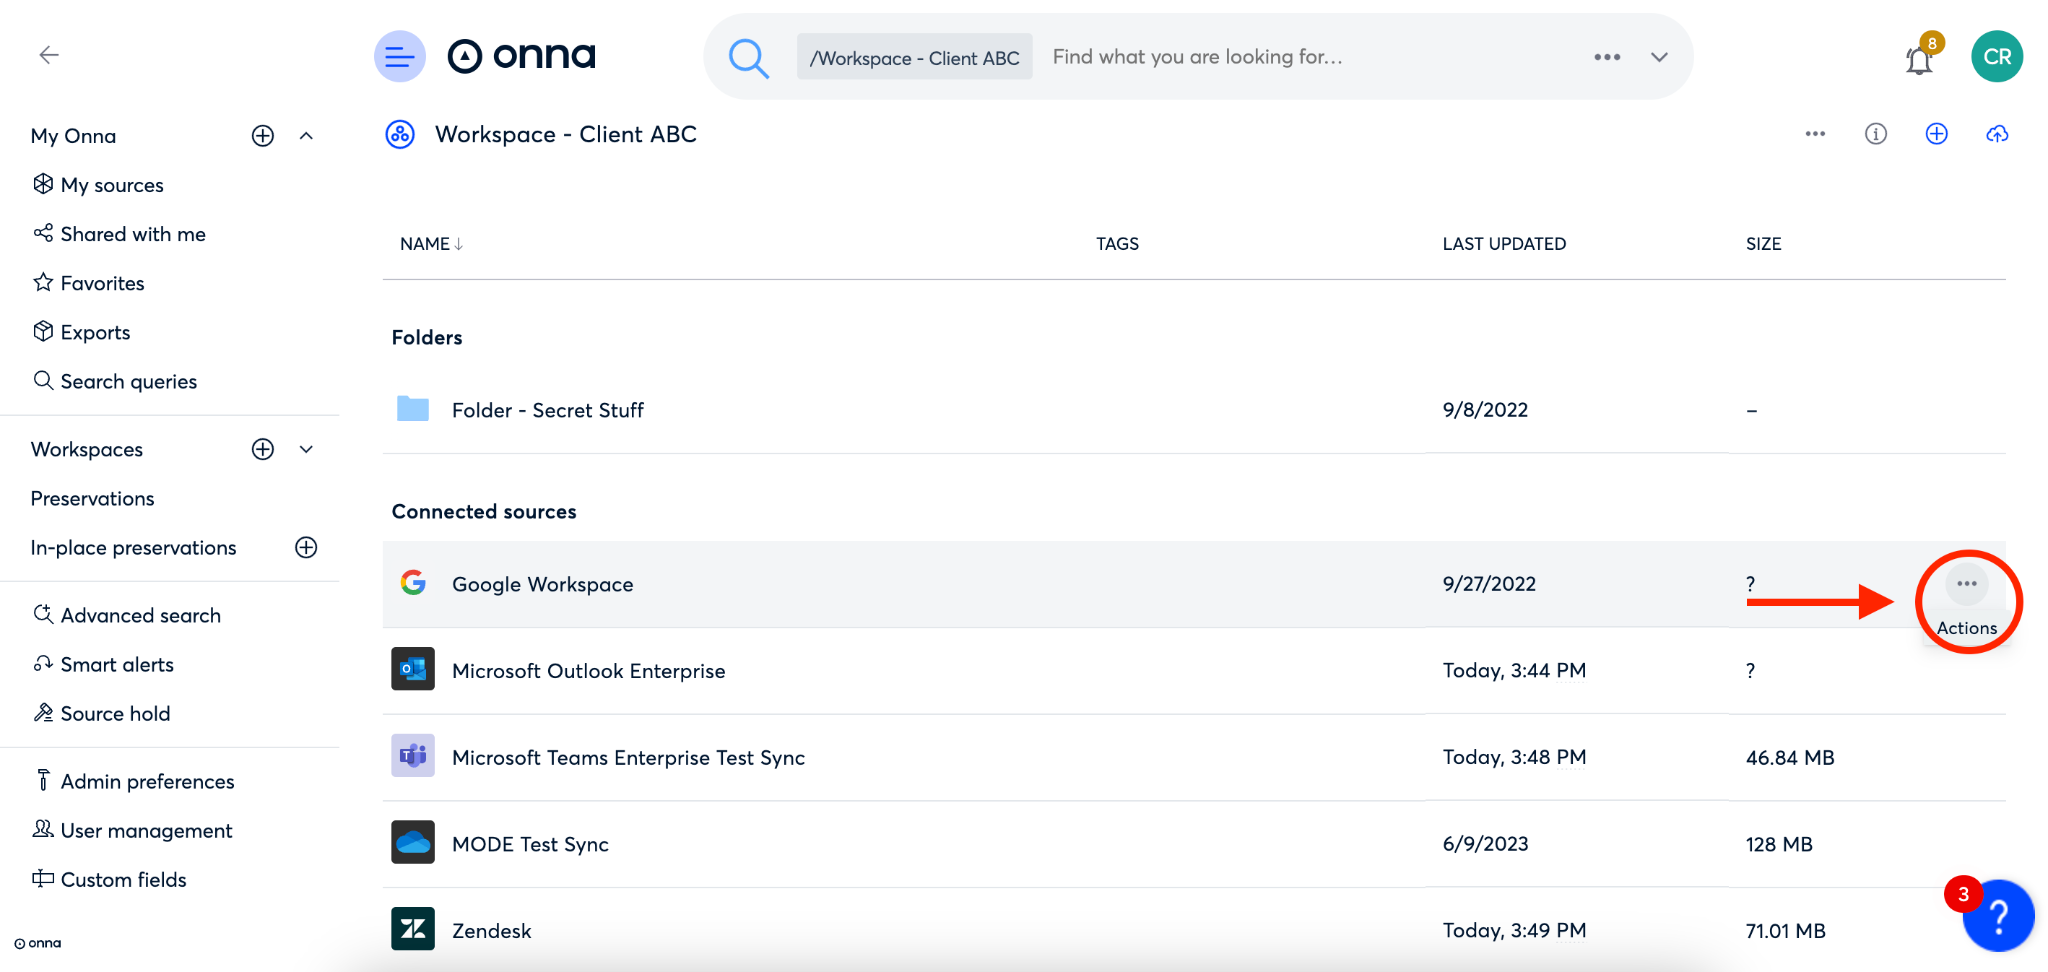
Step 1
Click on the ellipsis on the right side of the source row.
Step 2
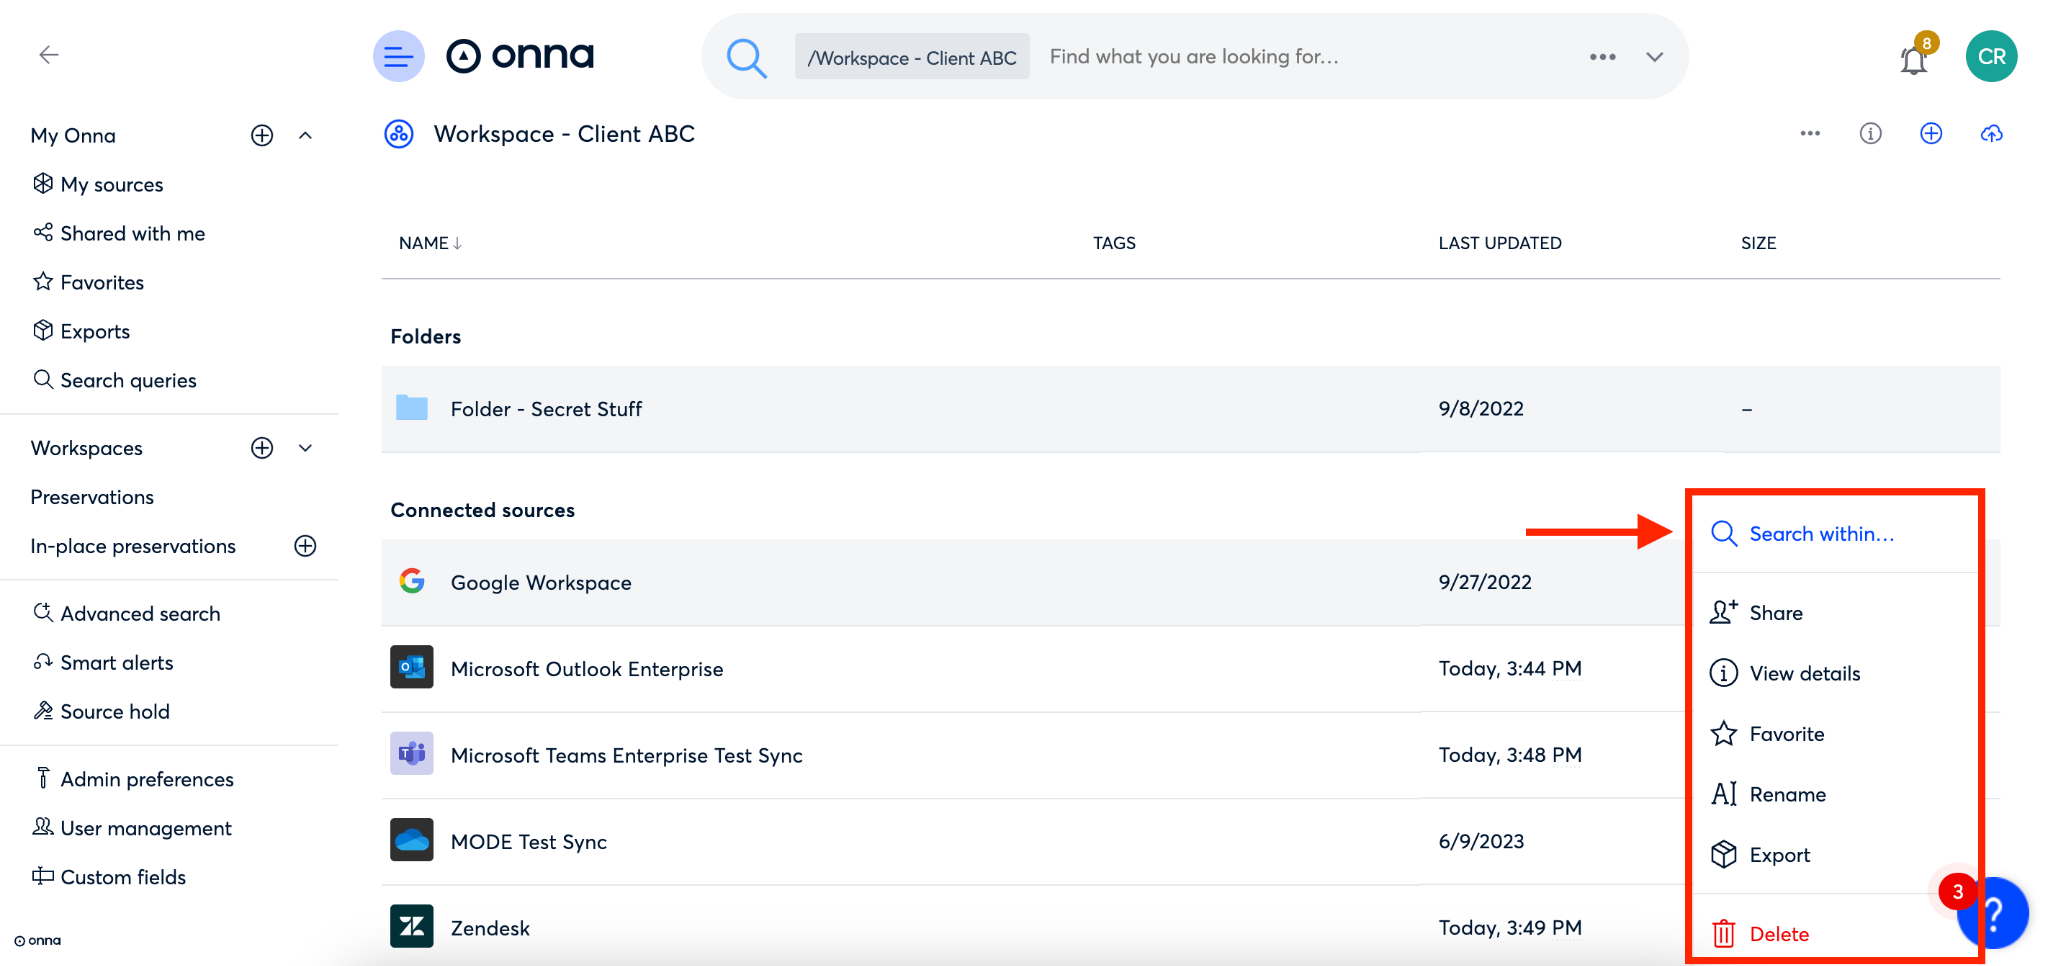
You will then see a dropdown menu appear showing you the following options:
Search within…- allows you to search only data in that source
Share- allows you to share the source with another Onna user
View details- allows you to view specific details about your sync
Favorite- allows you to add a source to your ‘Favorites’ page
Rename- allows you to rename your source
Export- allows you to export all data within the source
Delete- allows you to delete the source
Viewing Your Sources
On the ‘My sources’ page you can see all sources you have access to across your Onna site. Follow the steps below to navigate through the ‘My sources’ page.
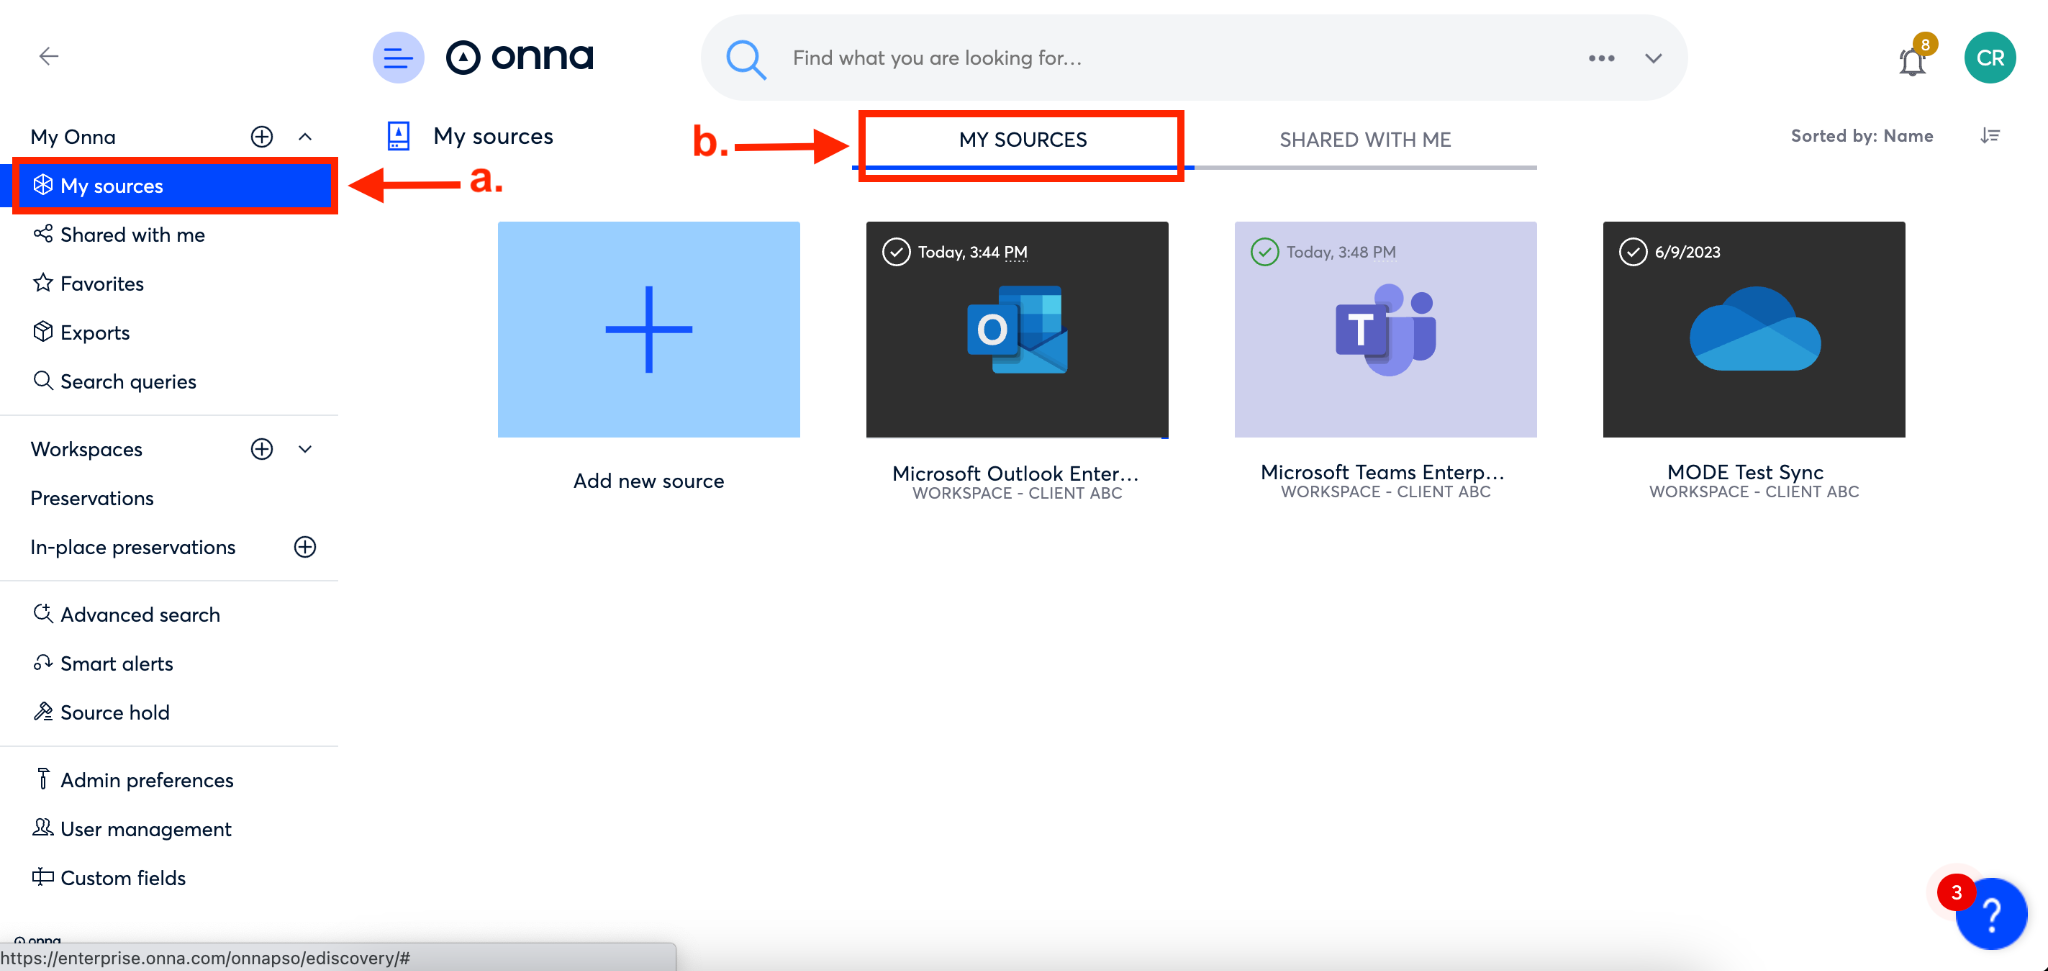
Step 1
Navigate to your ‘My sources’ page from the link in the main menu (a). You are then able to view all sources created by you in the ‘My Sources’ section (b).
Step 2
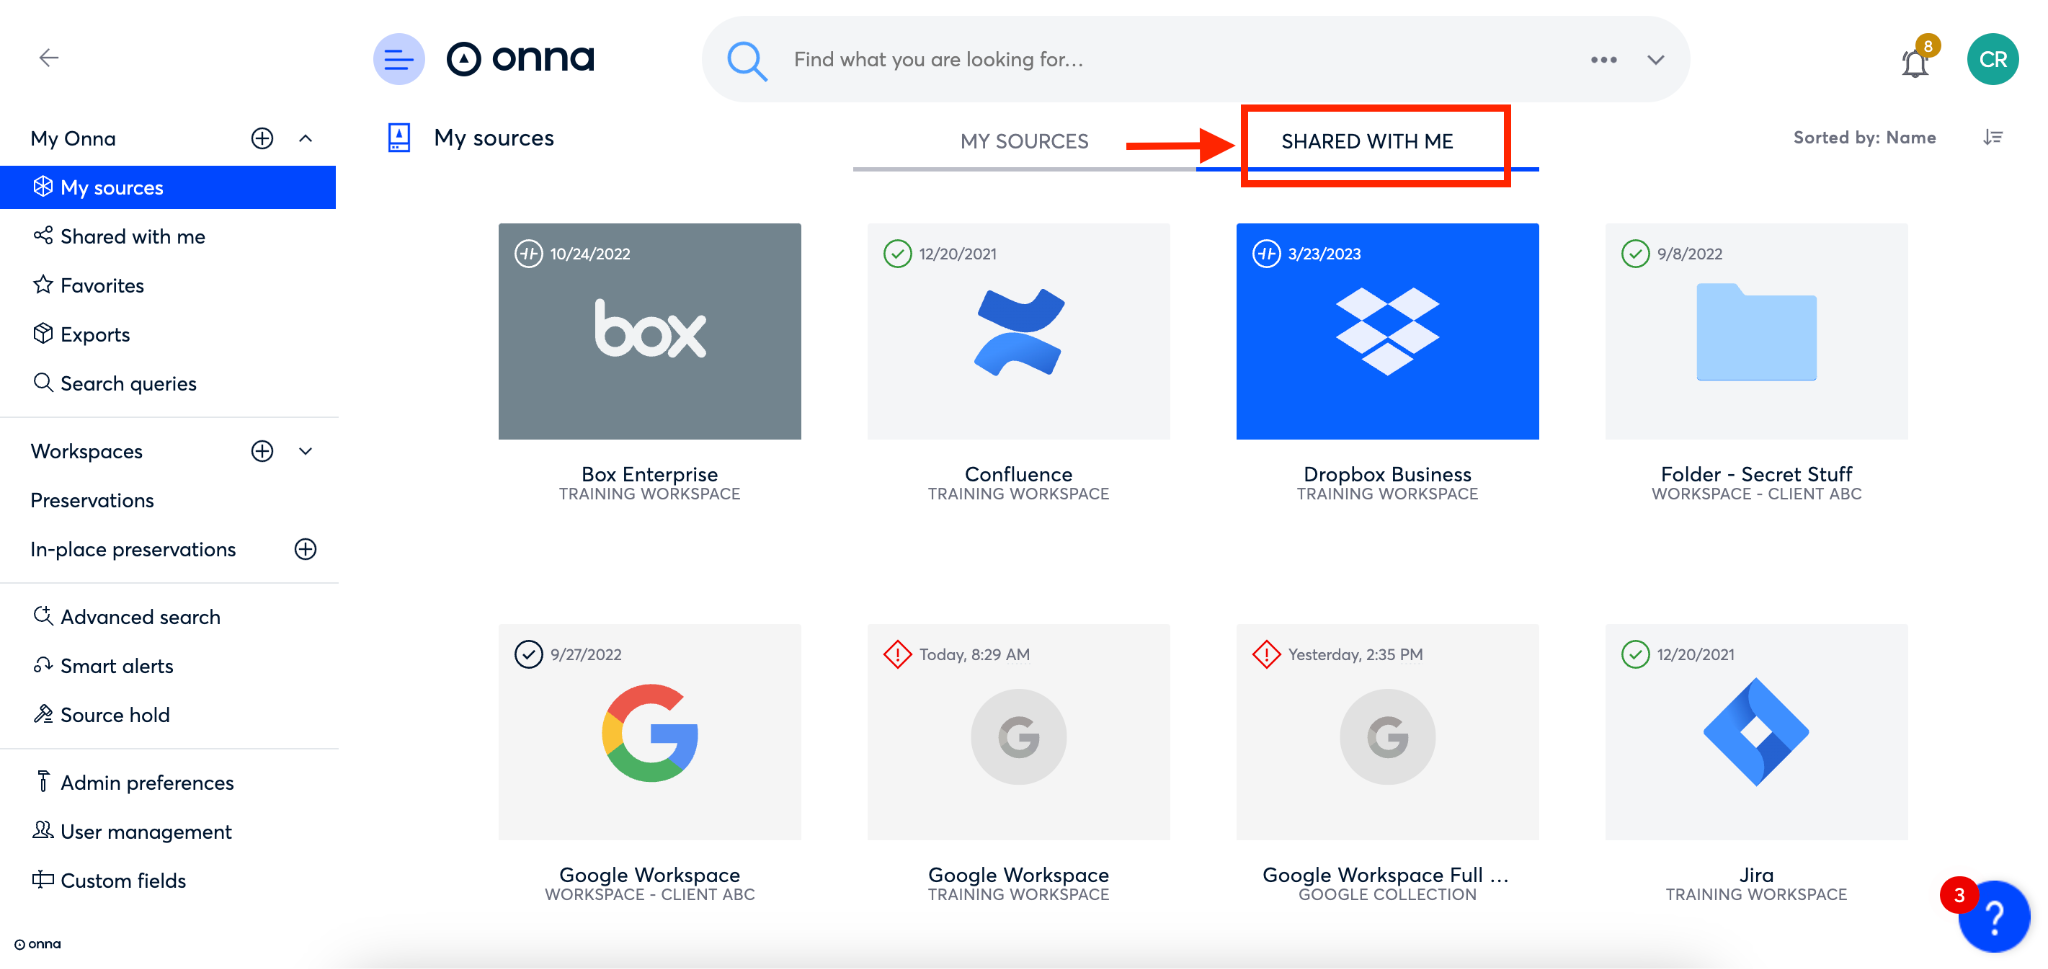
Click on ‘Shared With Me’ to view all sources that have been shared with you by other Onna users.
Step 3
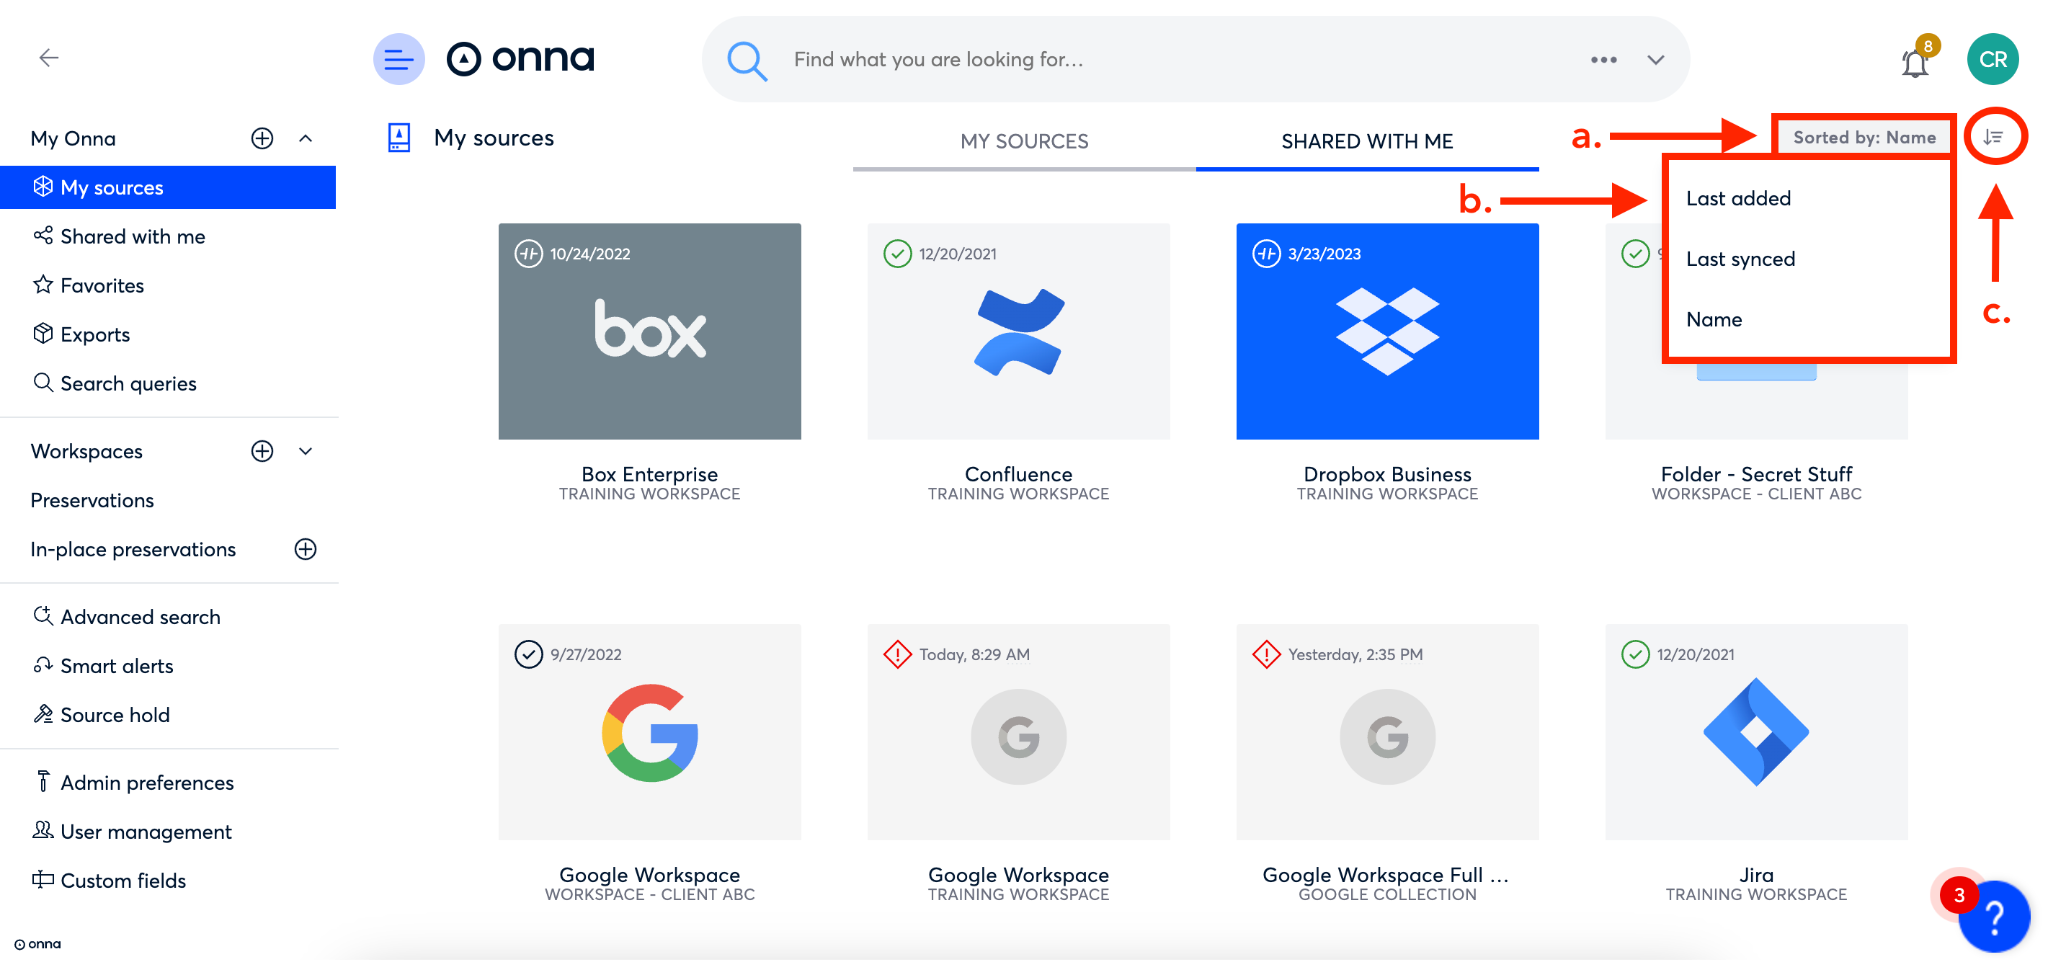
To sort your sources for easier viewing, click on ‘Sorted by:’ in the upper right corner of the screen (a). You’ll then see a drop down with three ways to sort your sources (b), ‘Last added’, ‘Last synced’, and ‘Name’. Finally you can click on the icon to the right of ‘Sorted by’ (c) to show your sources in ascending or descending order.
.png)