How to Share and Manage Exports
- 25 Jun 2024
- 5 Minutes to read
- Print
- DarkLight
- PDF
How to Share and Manage Exports
- Updated on 25 Jun 2024
- 5 Minutes to read
- Print
- DarkLight
- PDF
Article summary
Did you find this summary helpful?
Thank you for your feedback

In this article:
How to Share an Export
How to Manage Export Members
How to Rename an Export
How to Re-enable an Export Download
How to Delete an Export
How to Share an Export
There may be times when you need to share an export as part of your workflow. The new export member has the ability to view the export configuration and download the export using the export download link. However, please note, the new export member does not have the ability to re-enabling a download, add a new cloud transfer, or share the export with other users.
To share an export follow the steps below:
Step 1
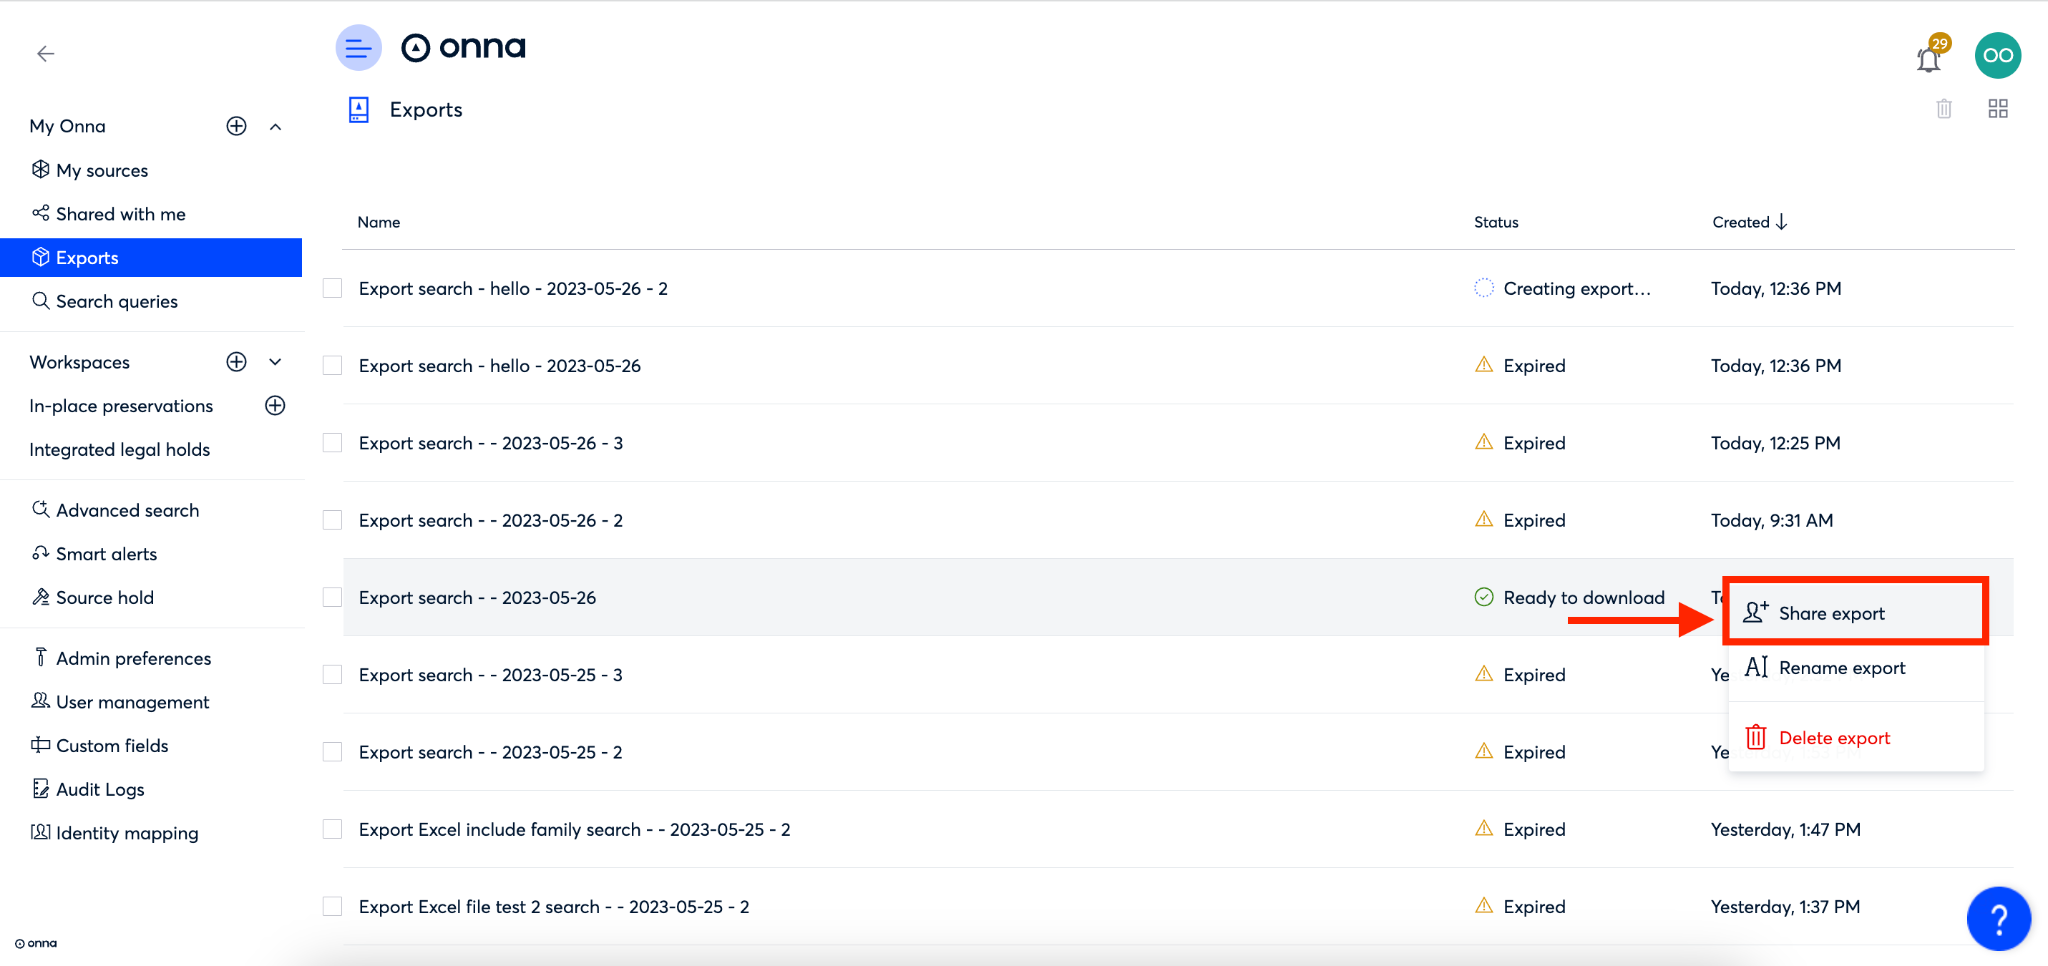
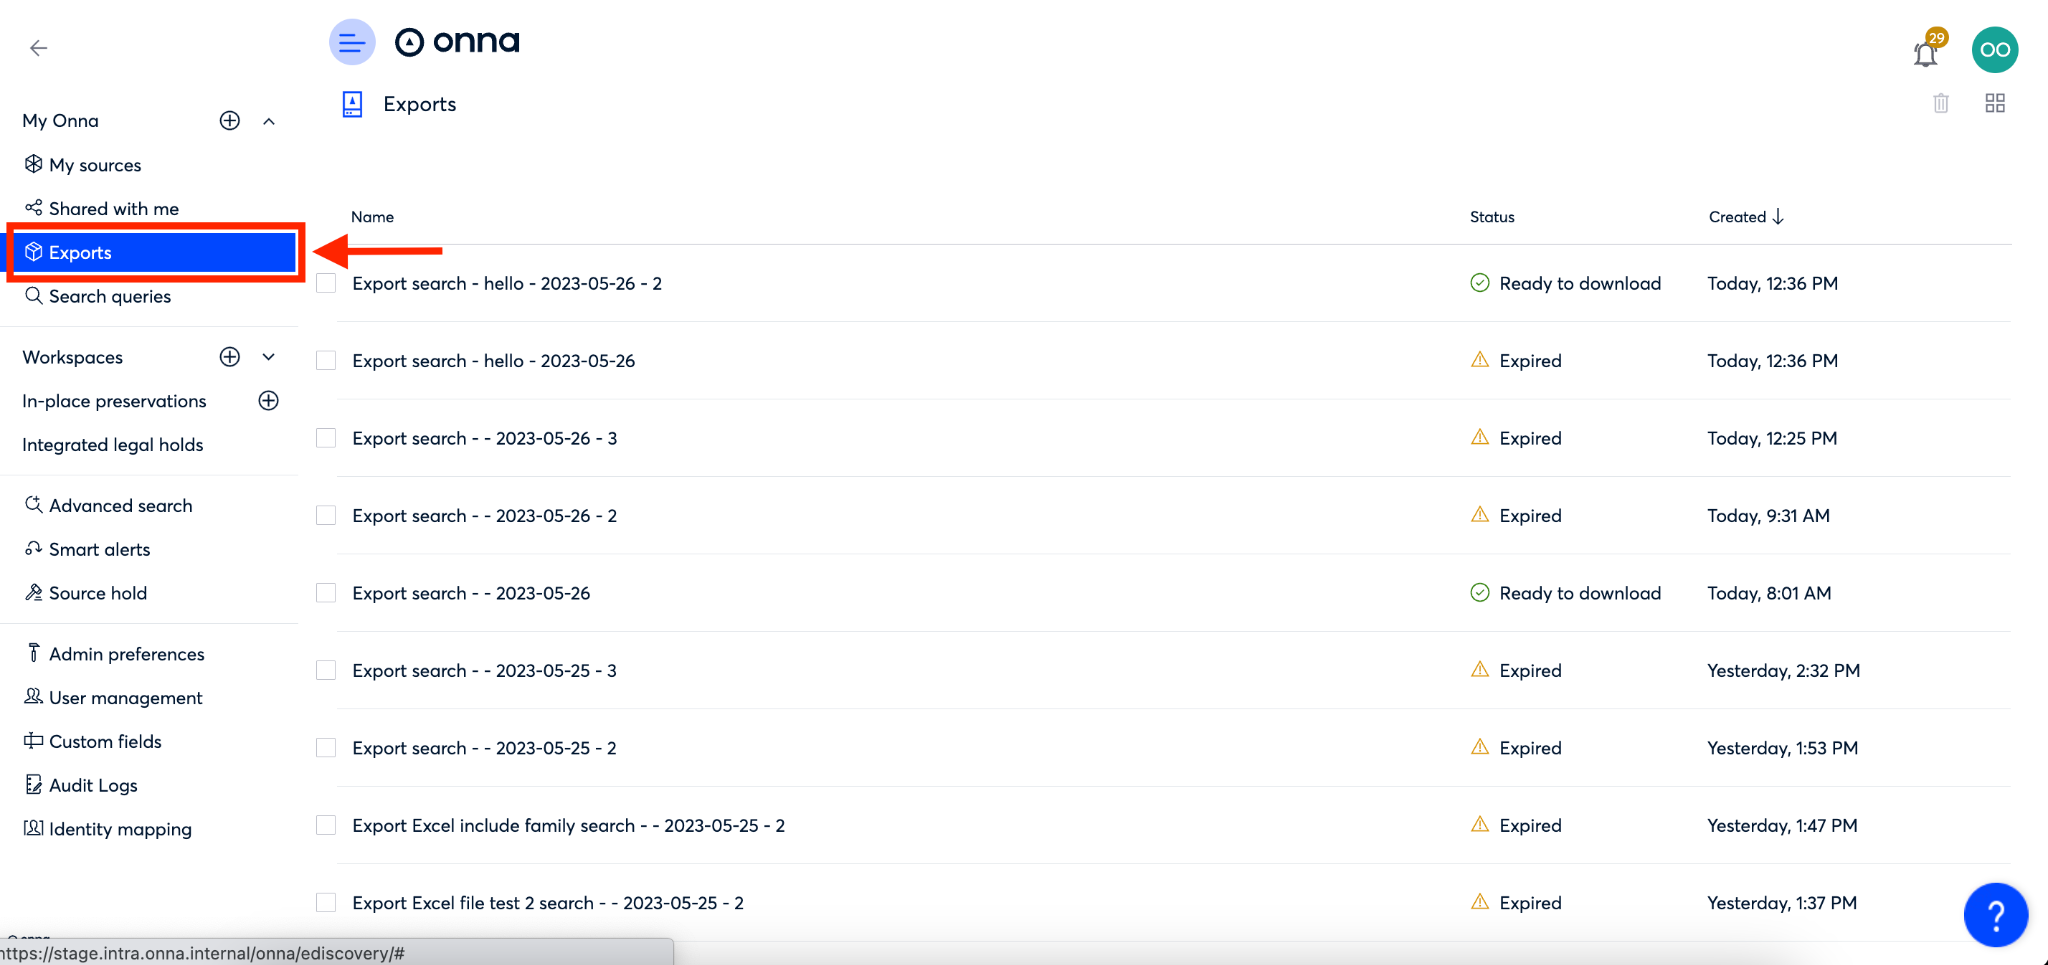
To begin sharing an export, click on ‘Exports’ from the main menu (a).
Once on the ‘Exports’ main page, click on the ellipsis to the right of the export you want to share (b).

Step 2
From the dropdown menu that appears, select ‘Share export’.
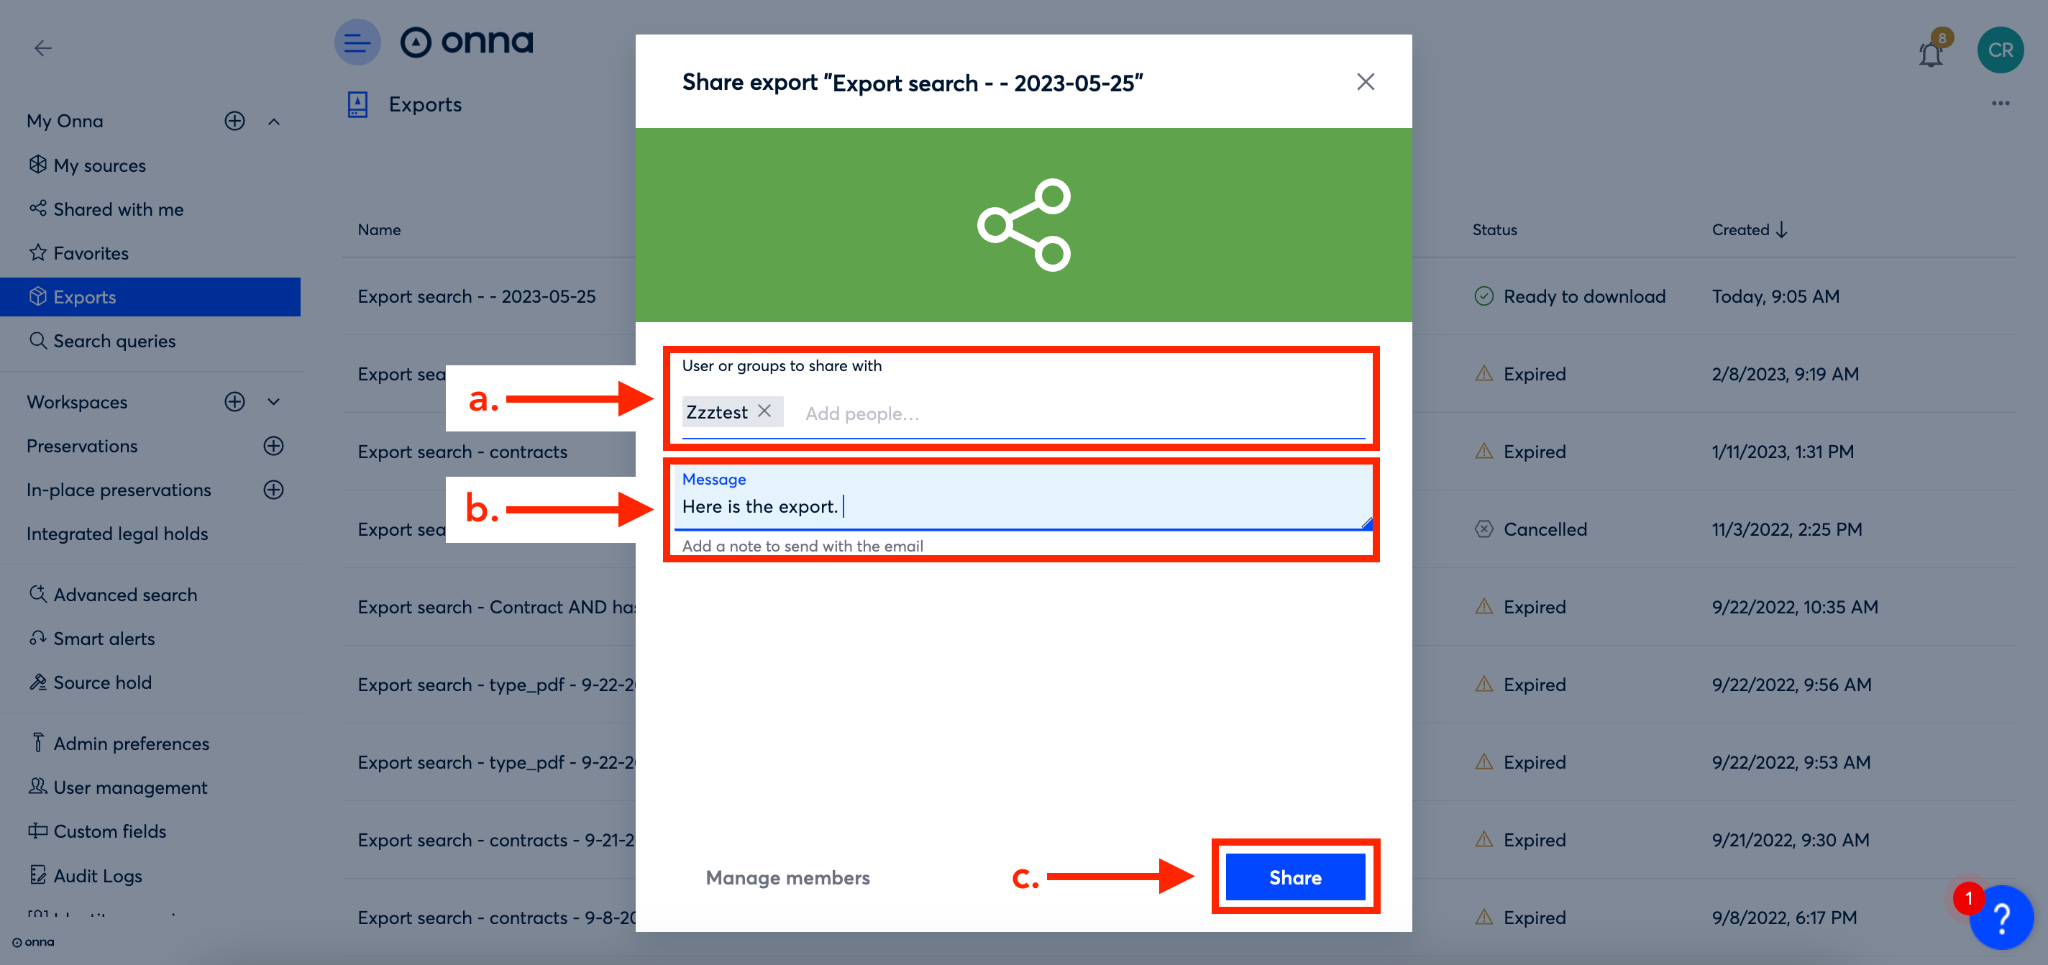
Step 3
You will now see a ‘Share export…’ screen. From here, type in the name of the Onna user or group you want to share the export with in the ‘User or groups to share with’ field (a).
Then, you have the option to add a message for the users/groups you’re sharing with. You can add this message in the ‘Message’ field (b).
To finish, click the blue ‘Share’ button (c).
How to Manage Export Members
After you’ve shared your export, you may need to remove export members. To manage your export members, follow the steps below:
Step 1
To begin managing export members, click on ‘Exports’ from the main menu (a).
Once on the ‘Exports’ main page, click on the ellipsis to the right of the export you want to share (b).

Step 2
From the dropdown menu that appears, select ‘Share export’.

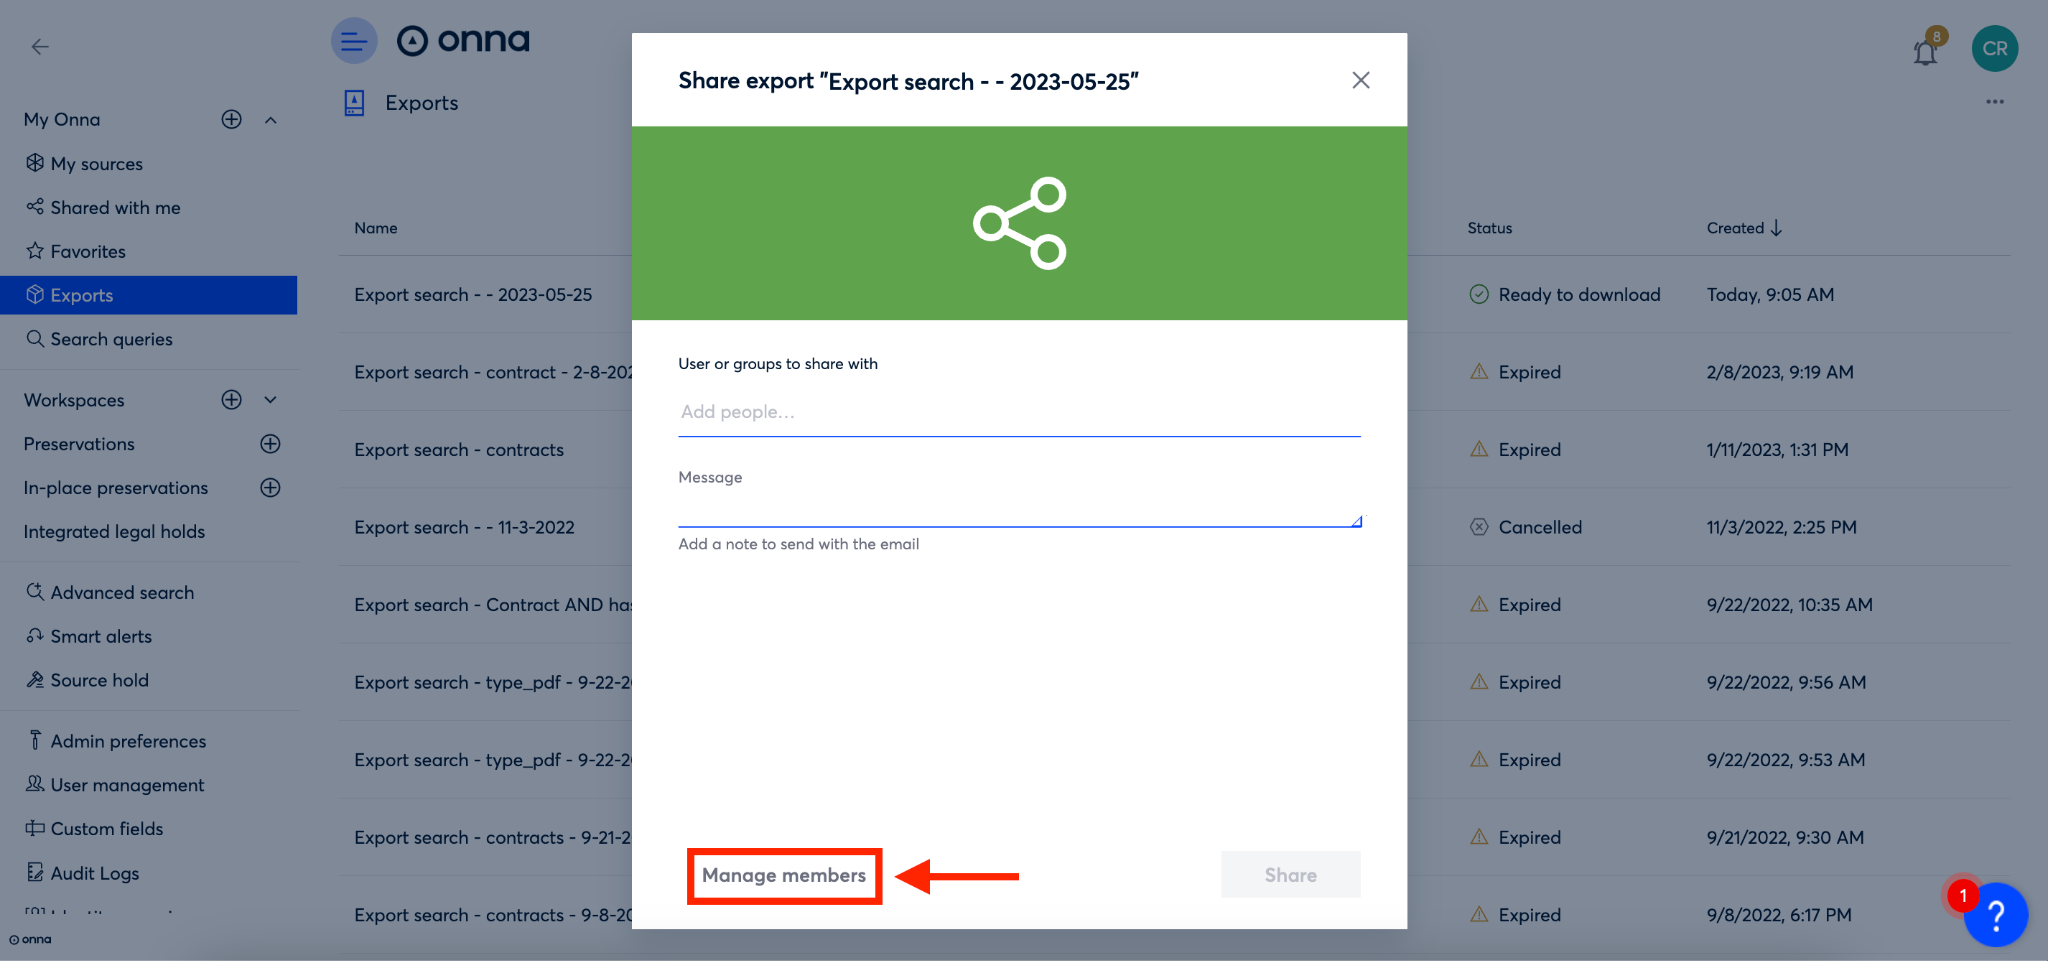
Step 3
You will now see a ‘Share export…’ screen. Click on ‘Manage members’ in the bottom left corner of this screen.
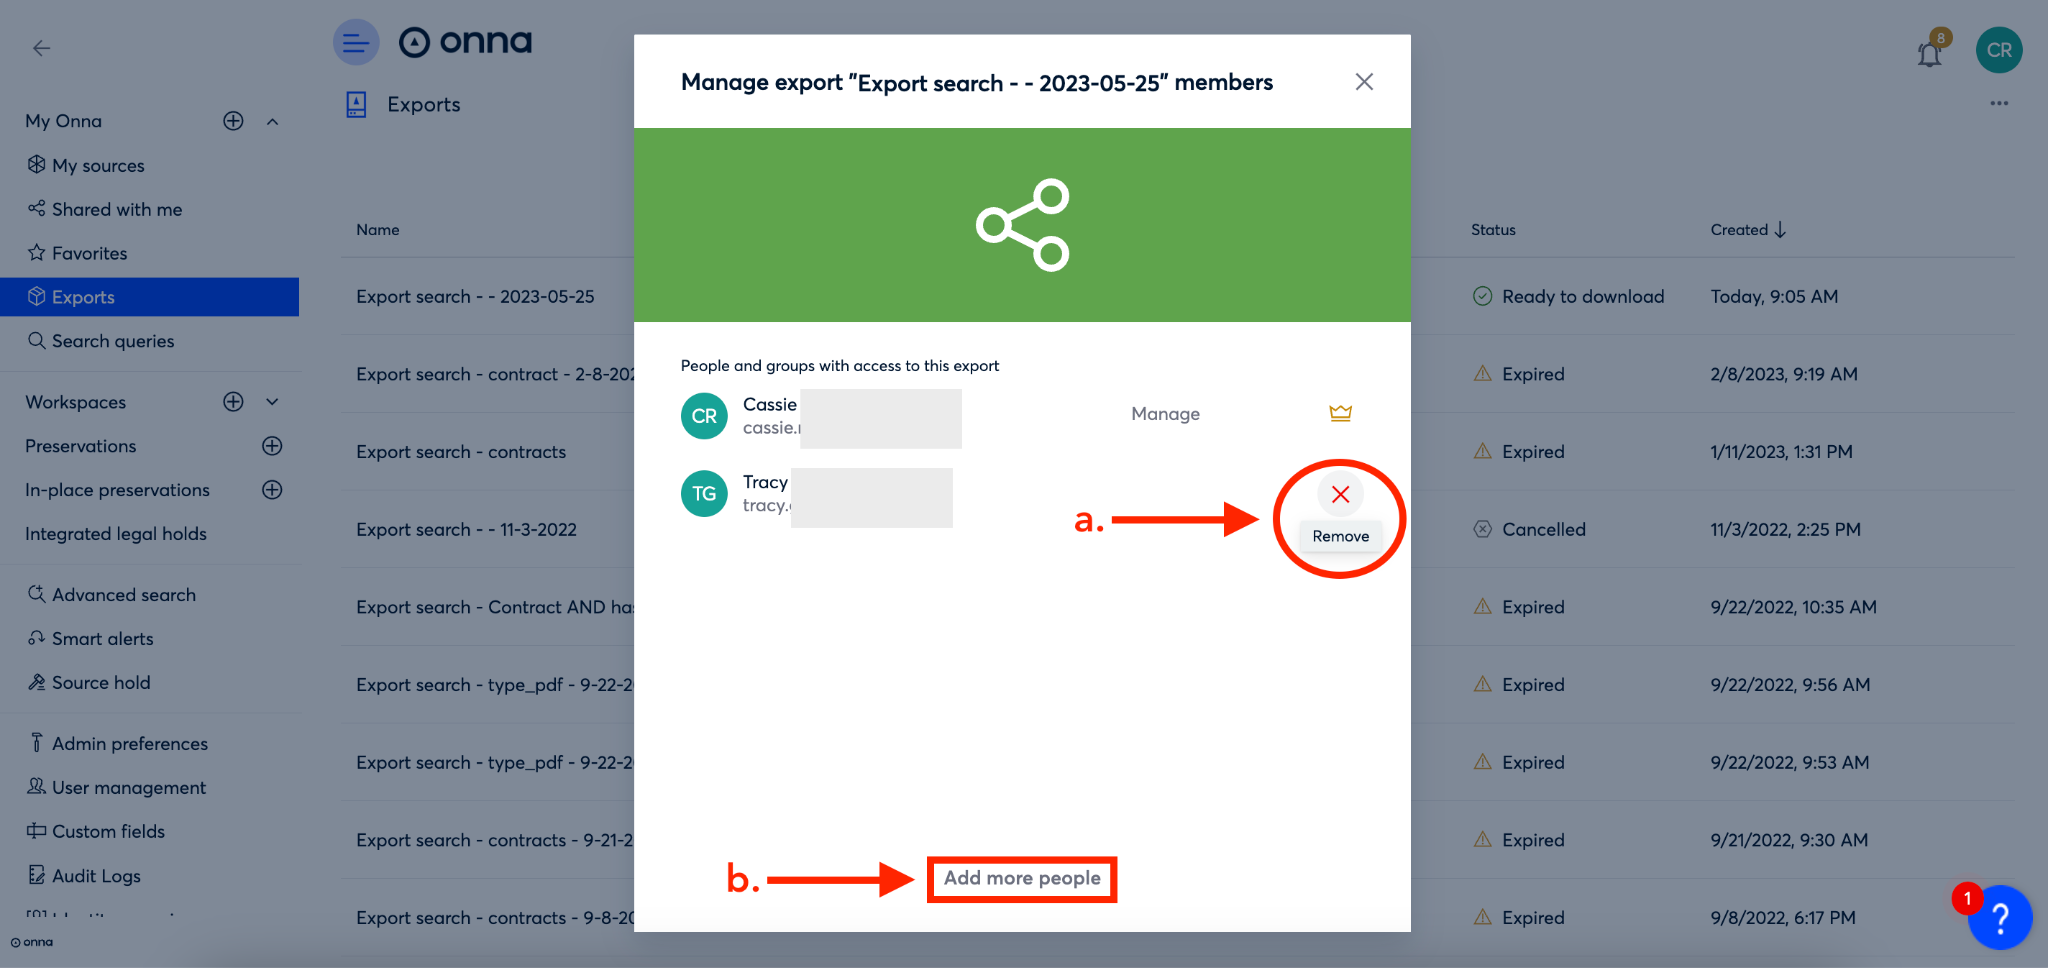
Step 4
You will now see a list of all members that have access to the export. To remove a member, click on the red ‘X’ to the right of their name (a).
You can also click on ‘Add more people’ at the bottom of the screen (b) to be redirected back to the ‘Share export…’ window in order to add more members to the export.
How to Rename an Export
In order to manage your exports better, you may need to rename an export after you’ve created it. It is possible to rename an export in two places: directly from the export list on the export main page, or from the details page for the export. To learn how to rename your export via either method, follow the steps below:
Rename an Export From the Export List
Step 1
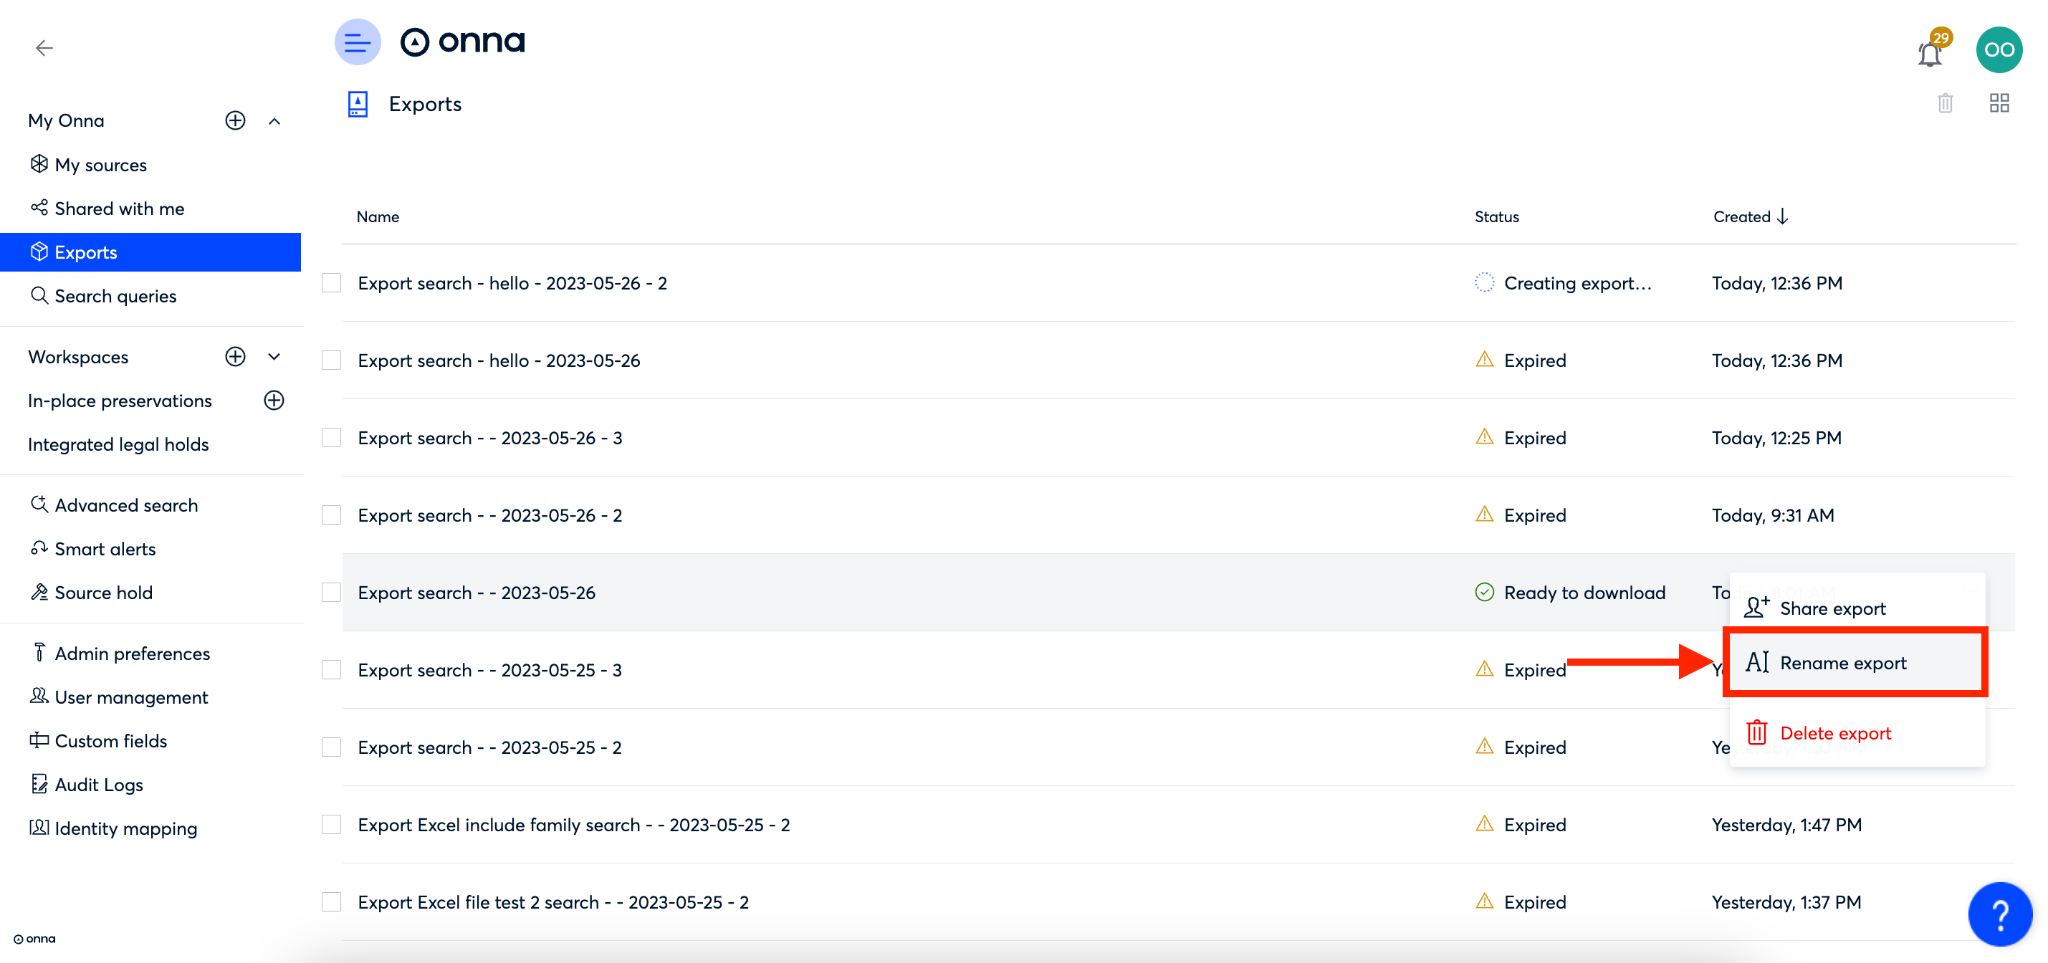
To begin renaming an export, click on ‘Exports’ from the main menu (a).
Once on the ‘Exports’ main page, click on the ellipsis to the right of the export you want to rename (b).

Step 2
From the dropdown menu that appears, select ‘Rename export’.
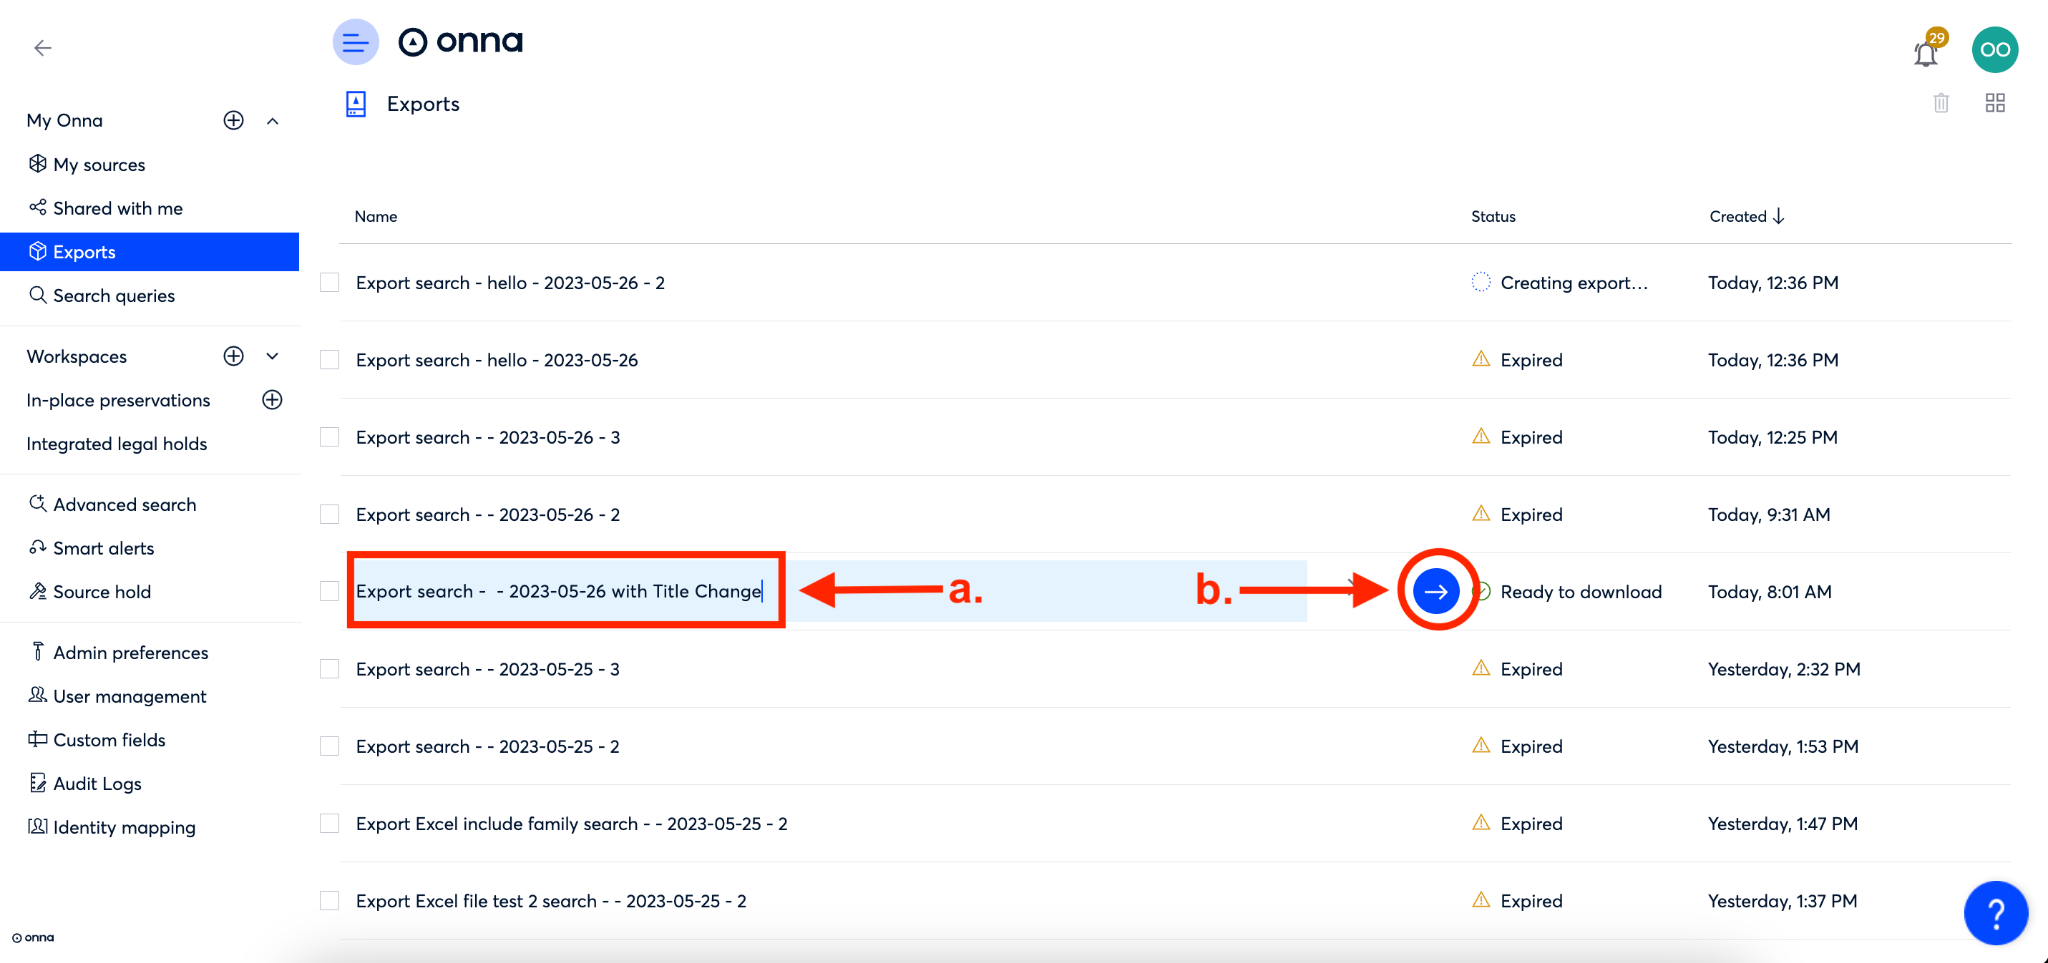
Step 3
You’ll now see an editable text field pop up in blue over the current title of your export. Simply click into the field and change the name (a). Then, click on the blue arrow to the right of the name (b). You can also click on the gray ‘X’ to cancel the changes.
The name of your export is now changed.
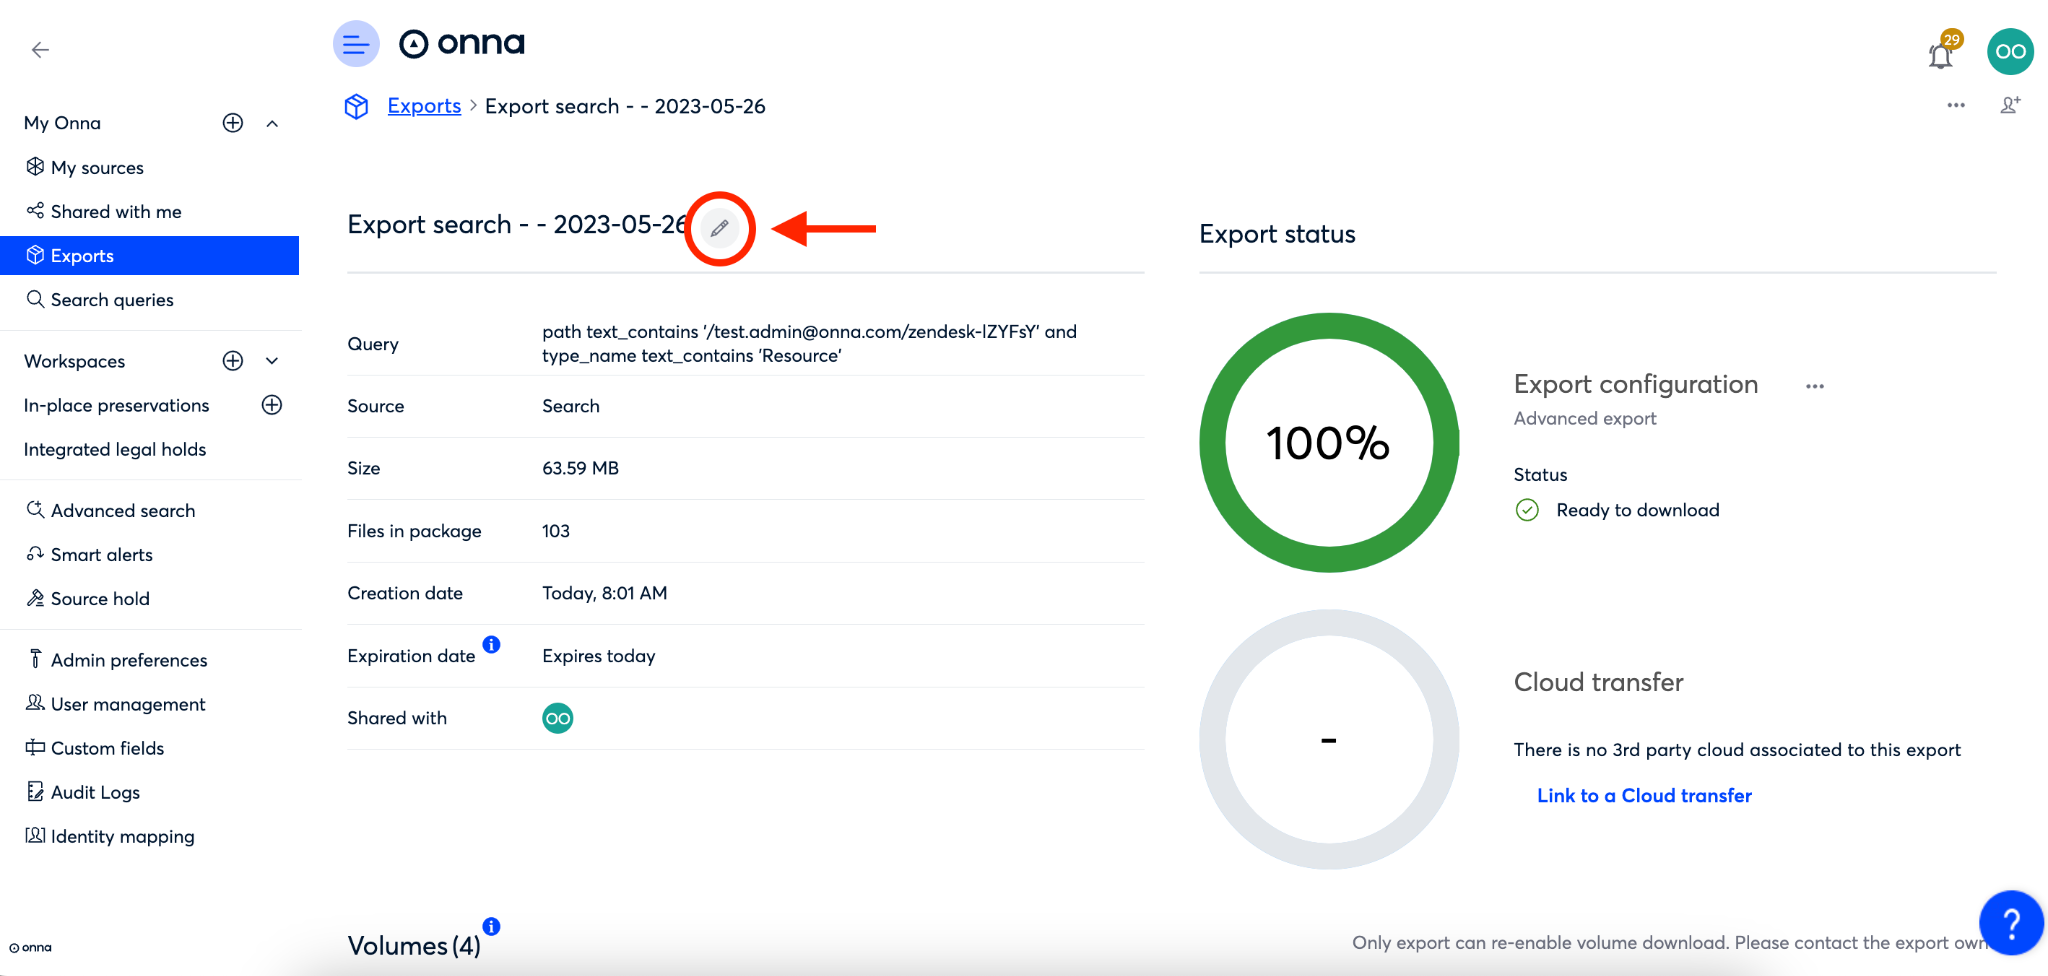
Rename an Export From the Details Page
Step 1
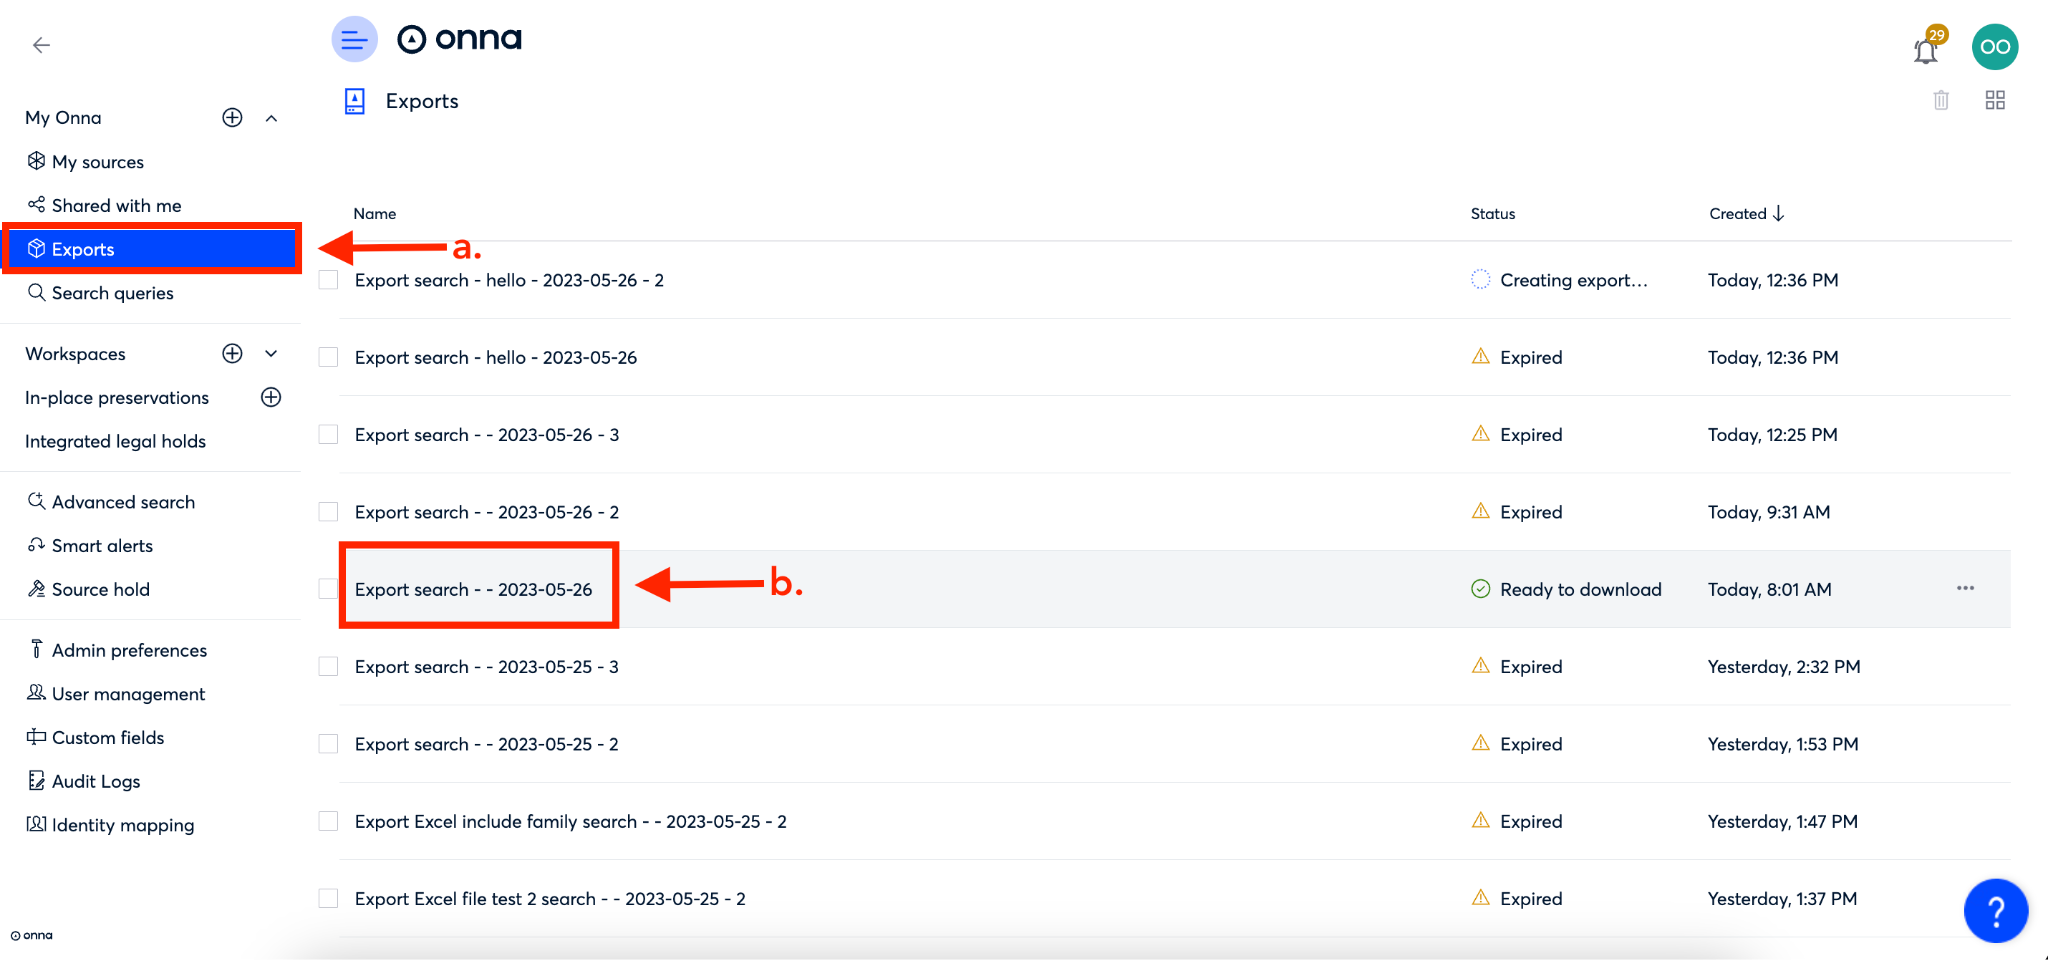
To begin renaming an export, click on ‘Exports’ from the main menu (a).
Once on the ‘Exports’ main page, click on the name of the export you want to rename (b).
Step 2
You will now be taken to the details page for that export. From here, click on the pencil icon to the right of the current export name.
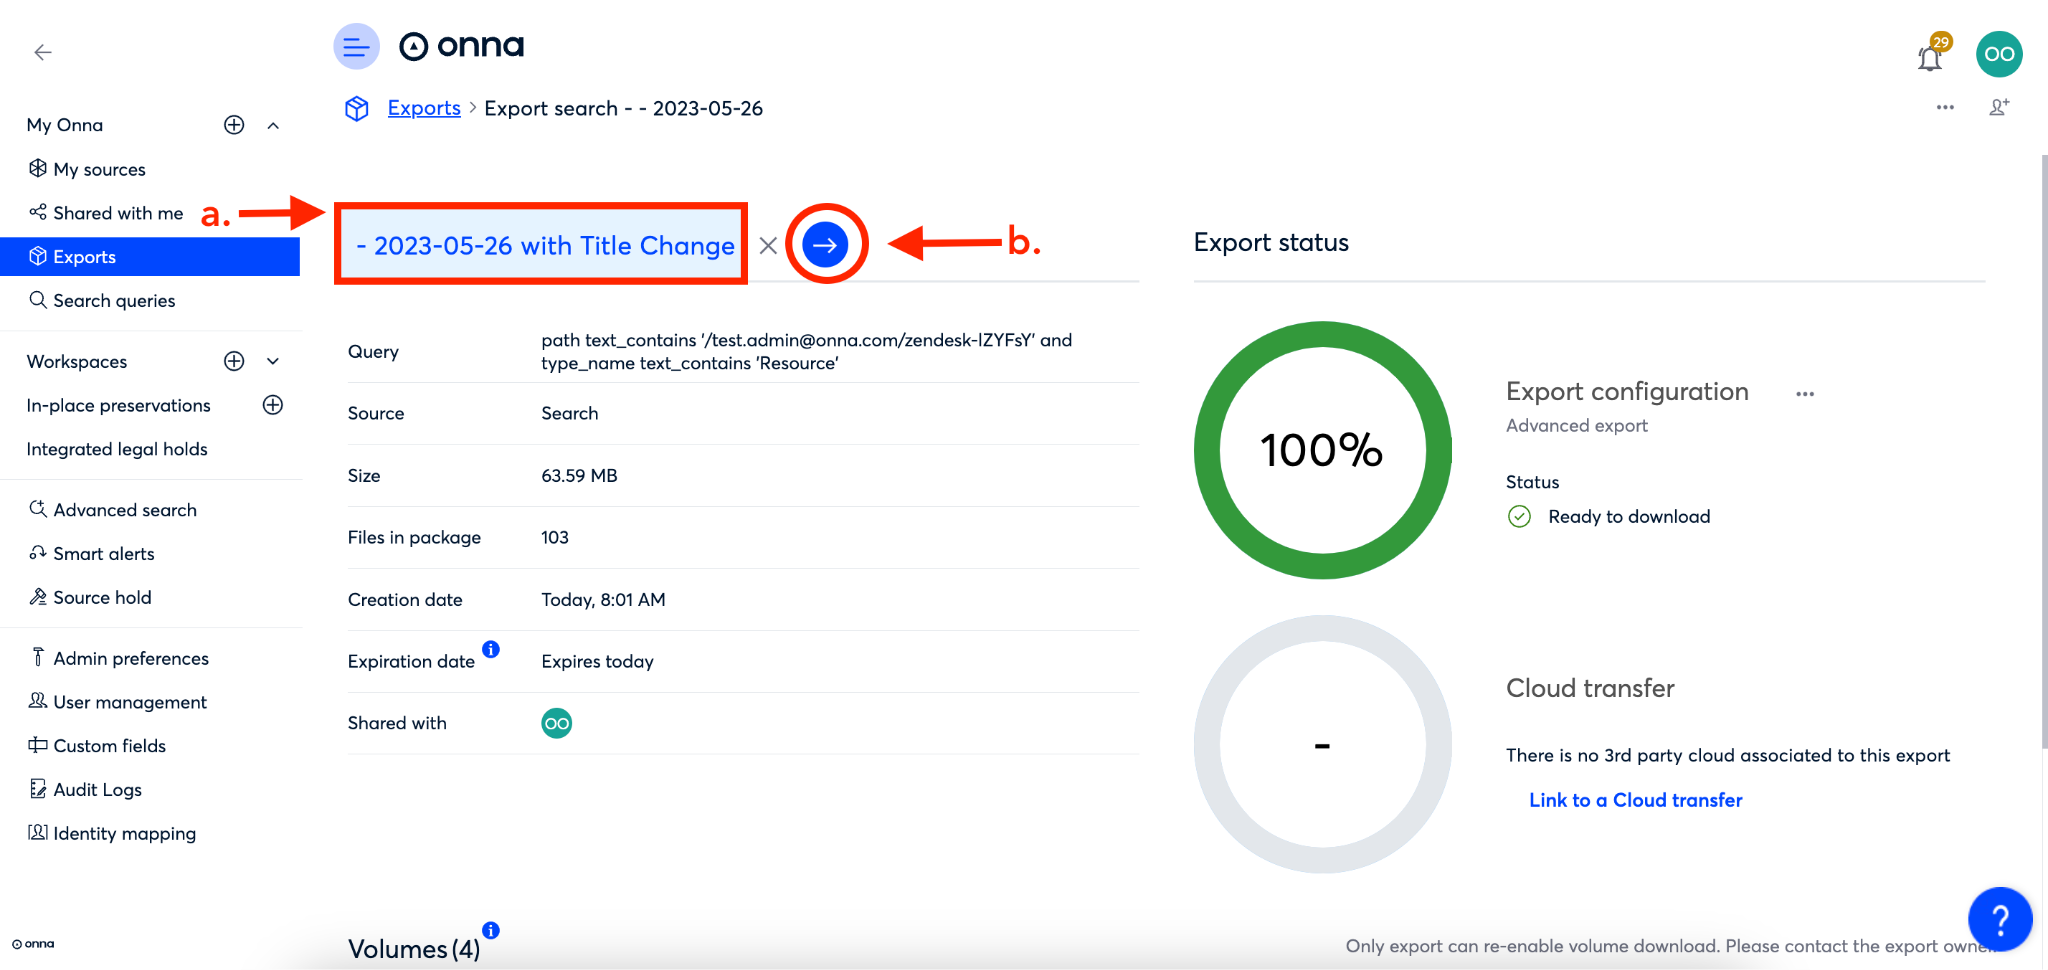
Step 3
You’ll now see an editable text field pop up in blue over the current title of your export. Simply click into the field and change the name (a). Then, click on the blue arrow to the right of the name (b).
The name of your export is now changed.
How to Re-enable an Export Download
For security purposes, the link to begin the export download is valid for 1 hour. After 1 hour, the link to download an export will expire. If you need to access the export at a later time, you will need to re-enable the export download link.
Please note that only the Onna user who created the export is able to re-enable the download. However, once the download link is re-enabled, anyone who has access to the export will be able to use the new link to download the export. |
To re-enable an export download link, follow the steps below:
Step 1
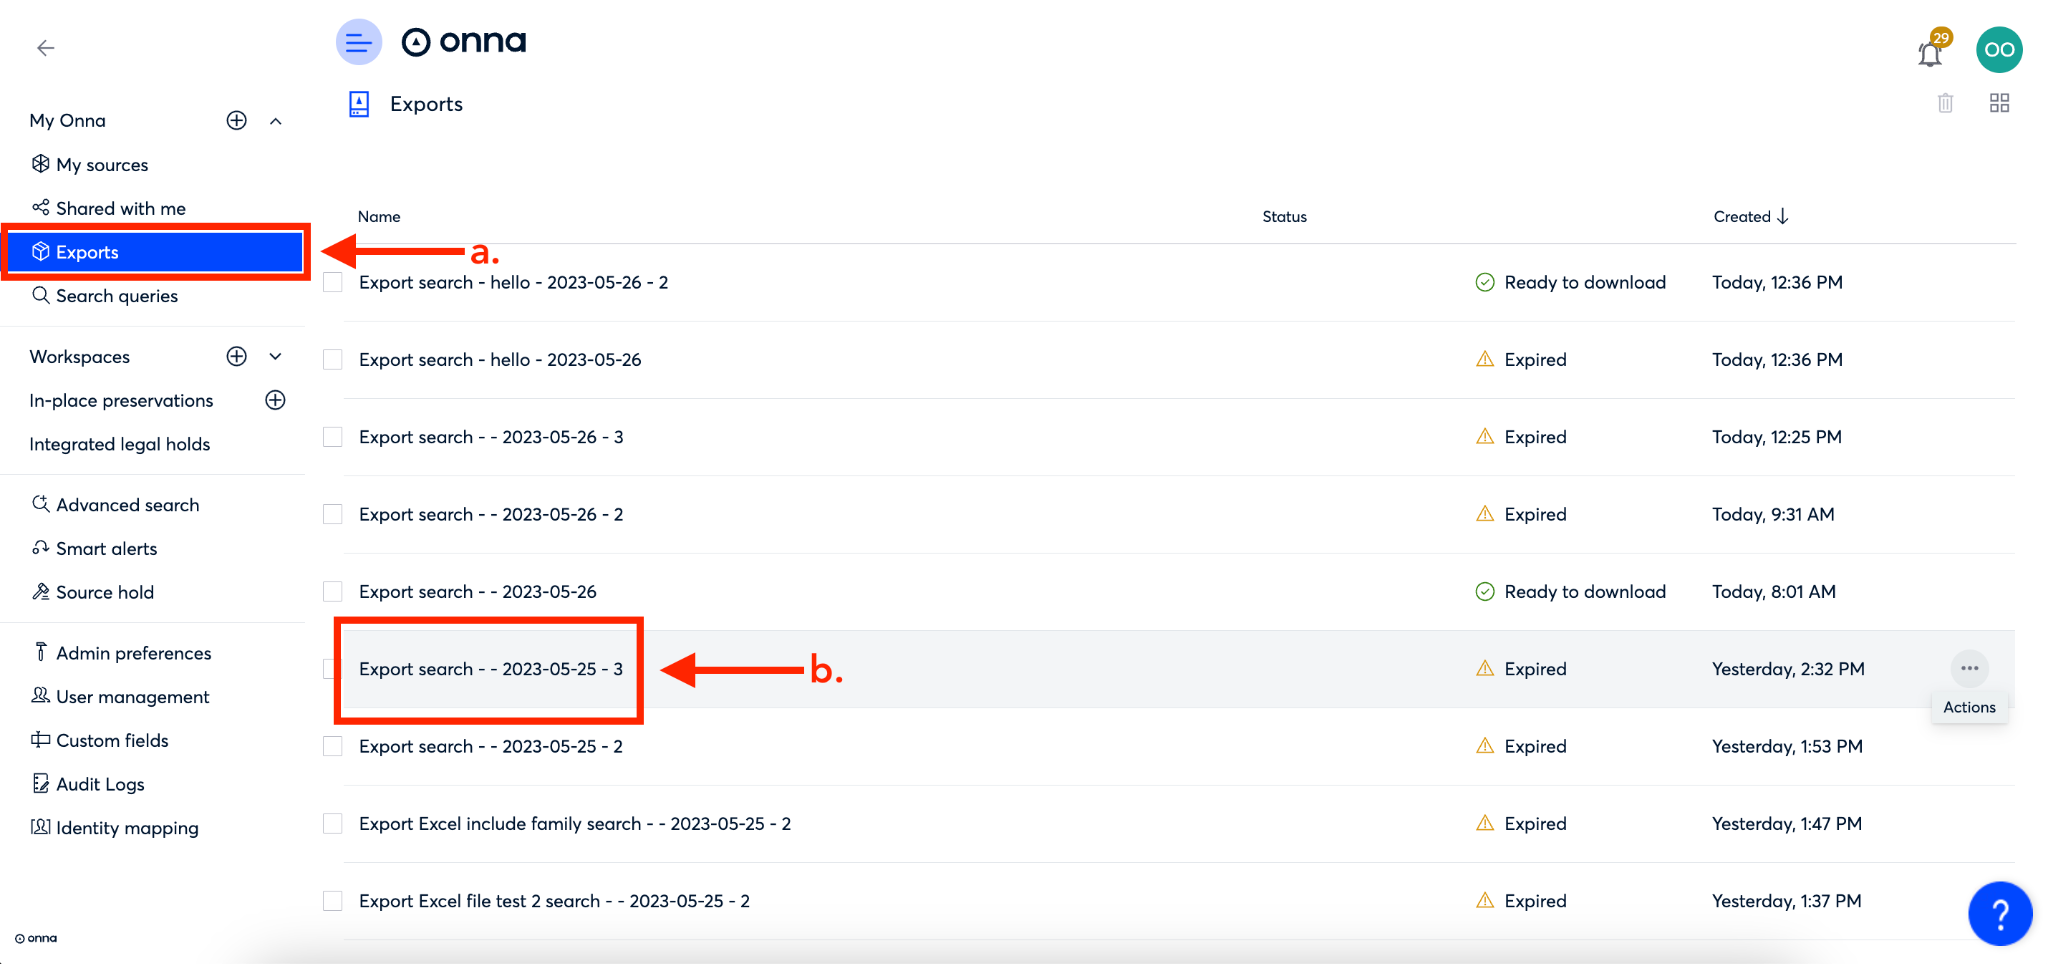
To begin re-enabling an export download, click on ‘Exports’ from the main menu (a).
Once on the ‘Exports’ main page, click on the name of the export you want to re-enable (b).
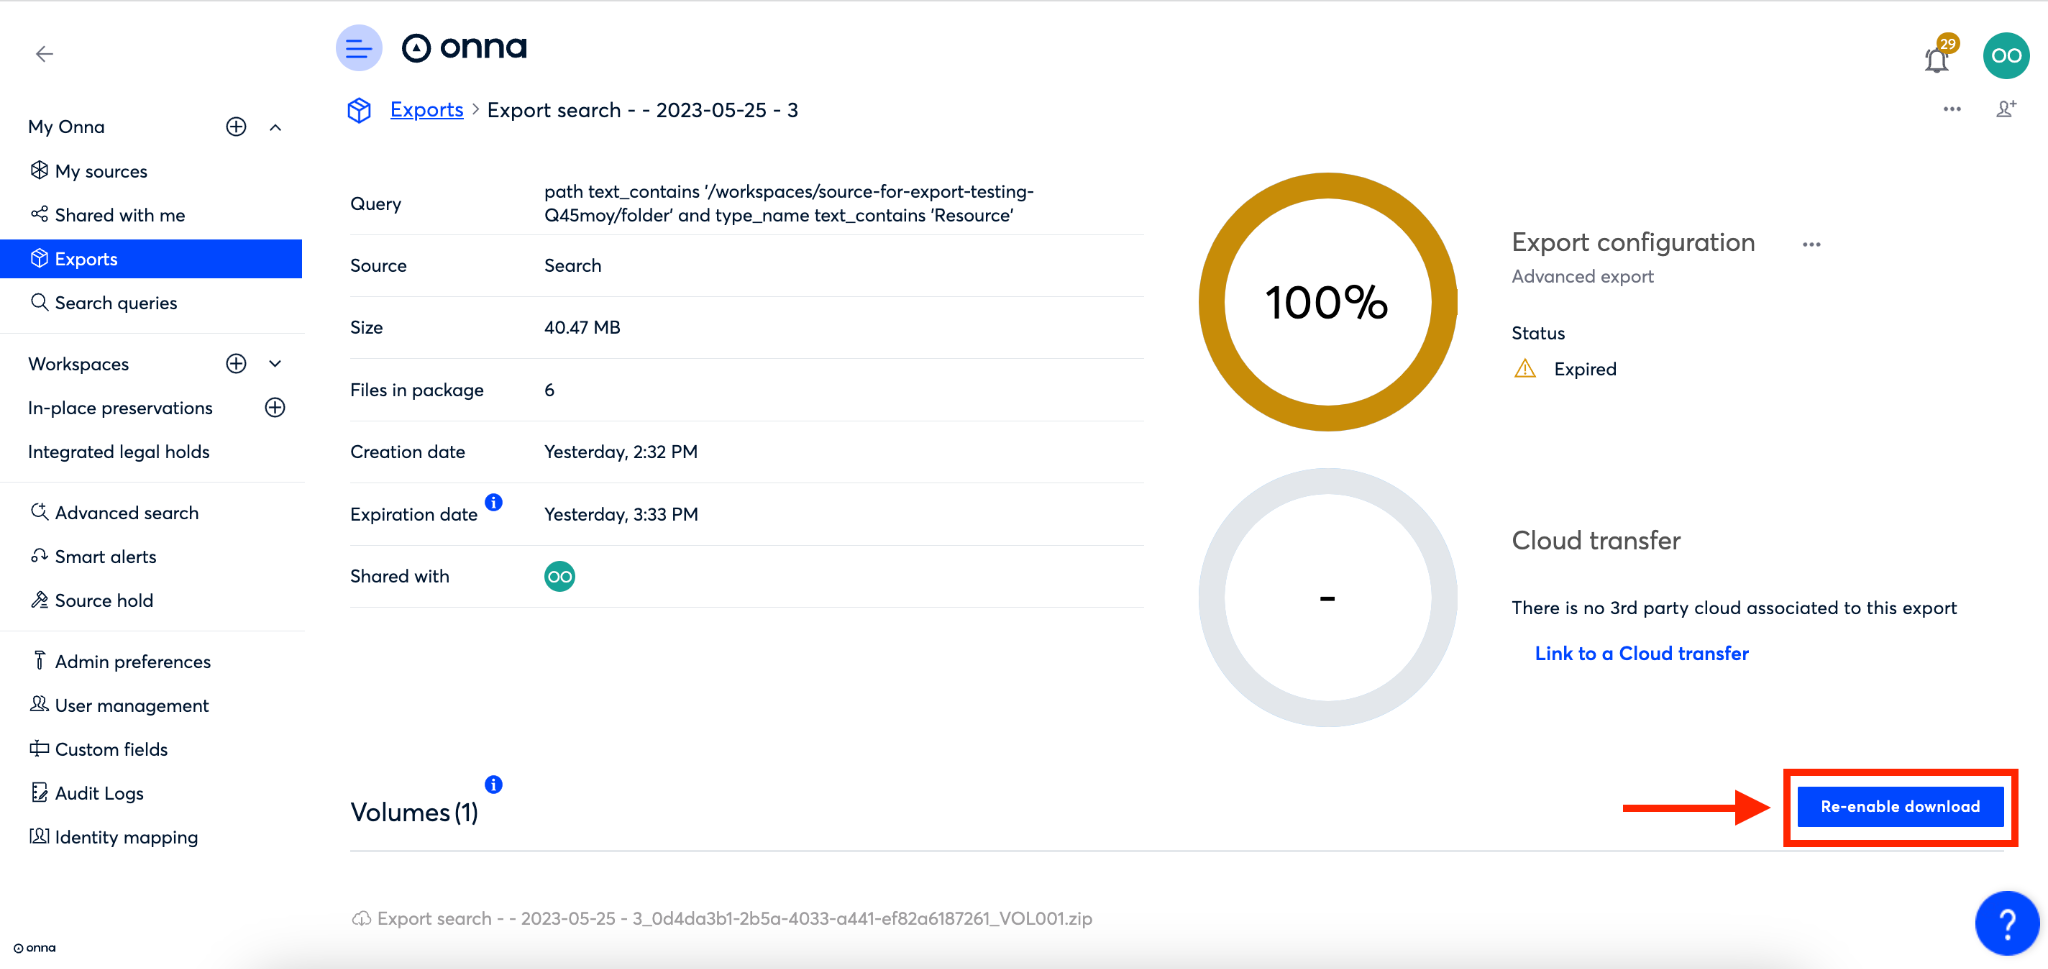
Step 2
You will now be taken to the details page for that export. Click on the blue ‘Re-enable download’ button in the bottom right corner of the page.
Step 3
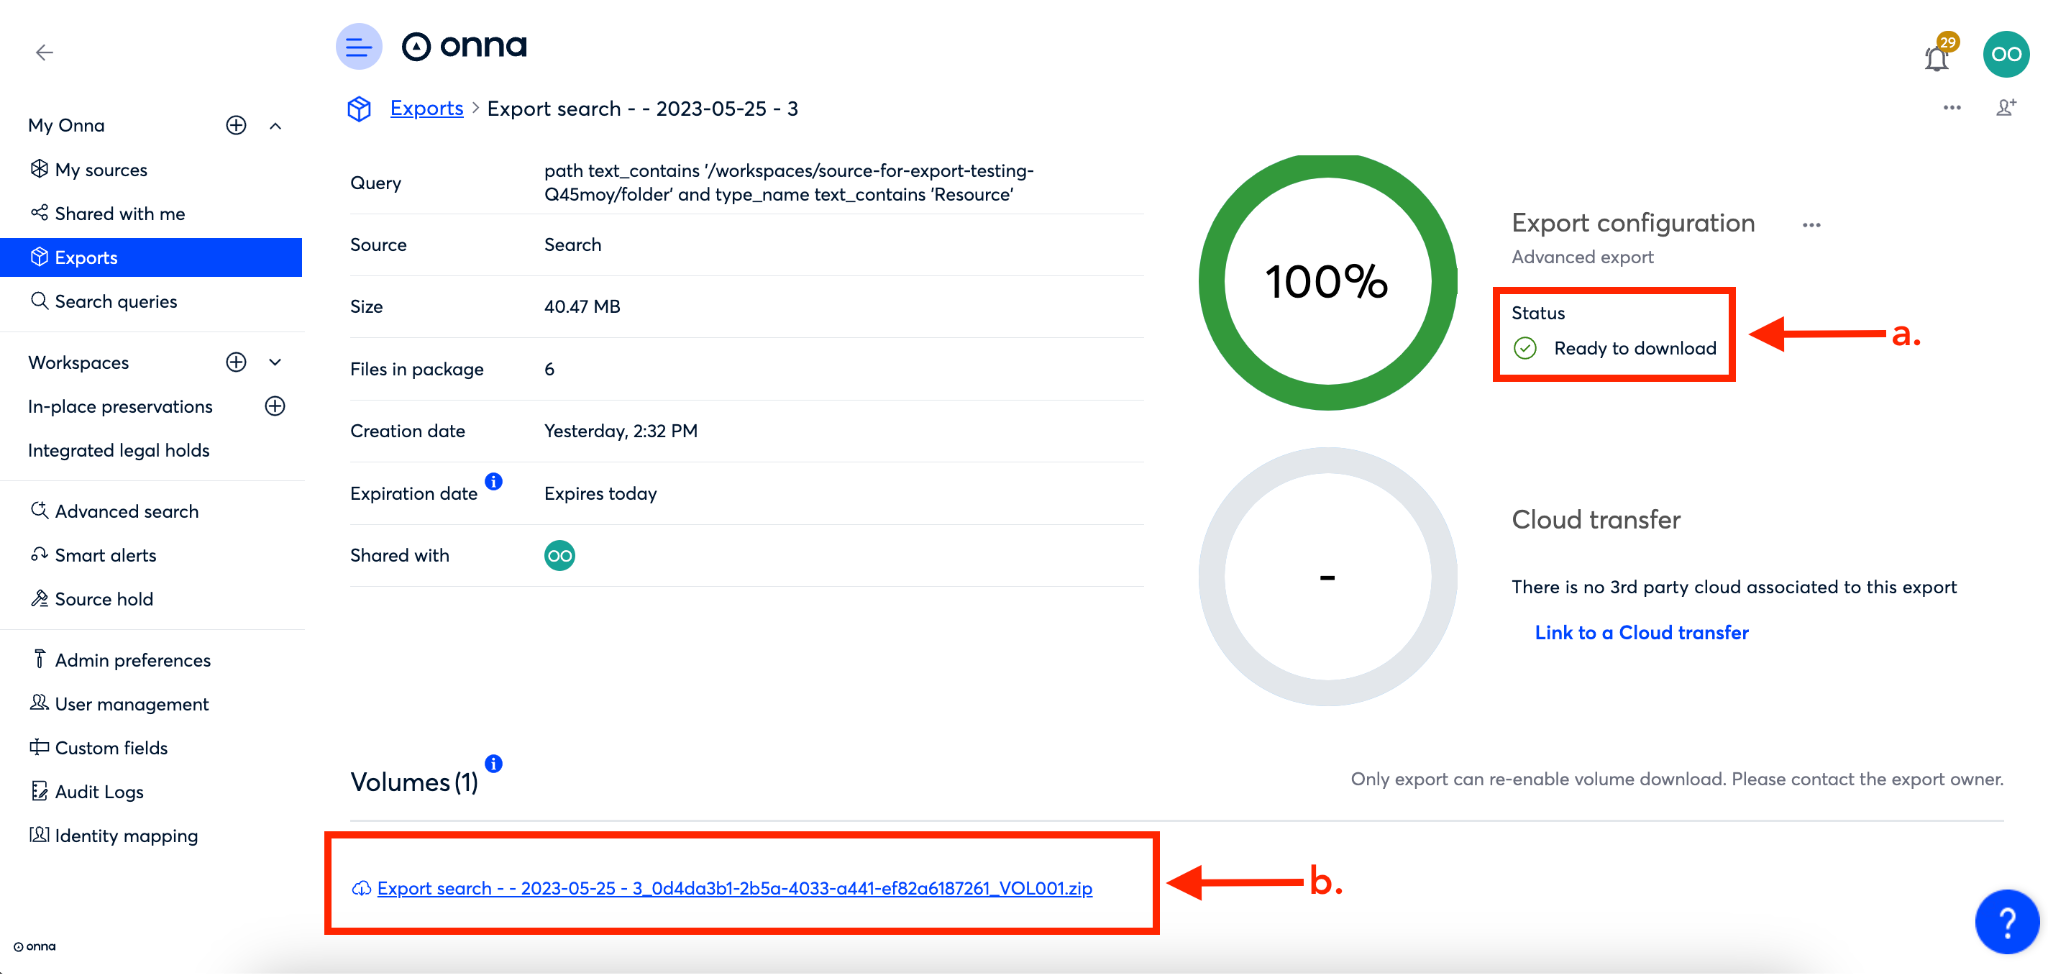
You’ll now see that the export ‘Status’ is ‘Ready to download’ (a).
Scroll to the bottom of the page, and you’ll see a new clickable download link listed under ‘Volumes’ (b). Click that link to download your export.
How to Delete an Export
In order to manage your exports, you may need to delete them from time to time. It is possible to delete a single export or to delete multiple exports at once. Below you will find steps for both.
Delete a Single Export
Step 1
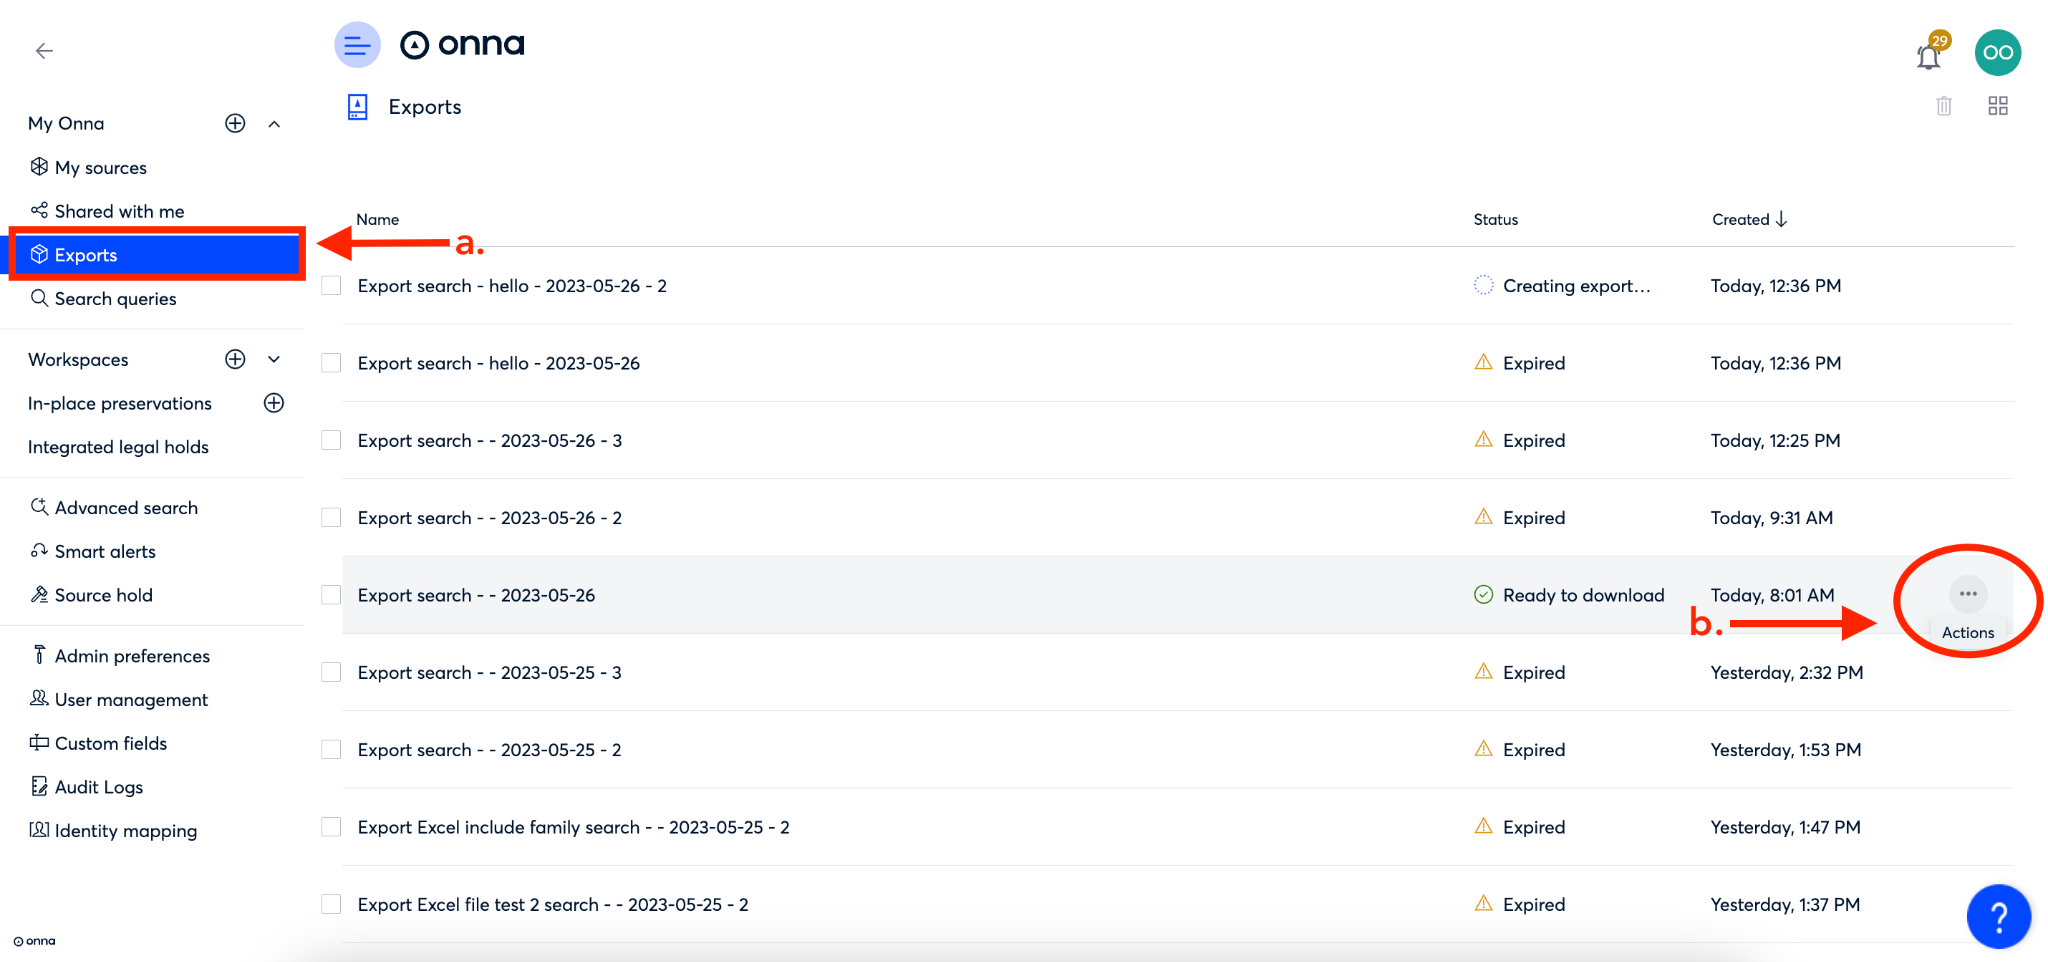
To begin deleting an export, click on ‘Exports’ from the main menu (a).
Once on the ‘Exports’ main page, click on the ellipsis to the right of the export you want to delete(b).
Step 2
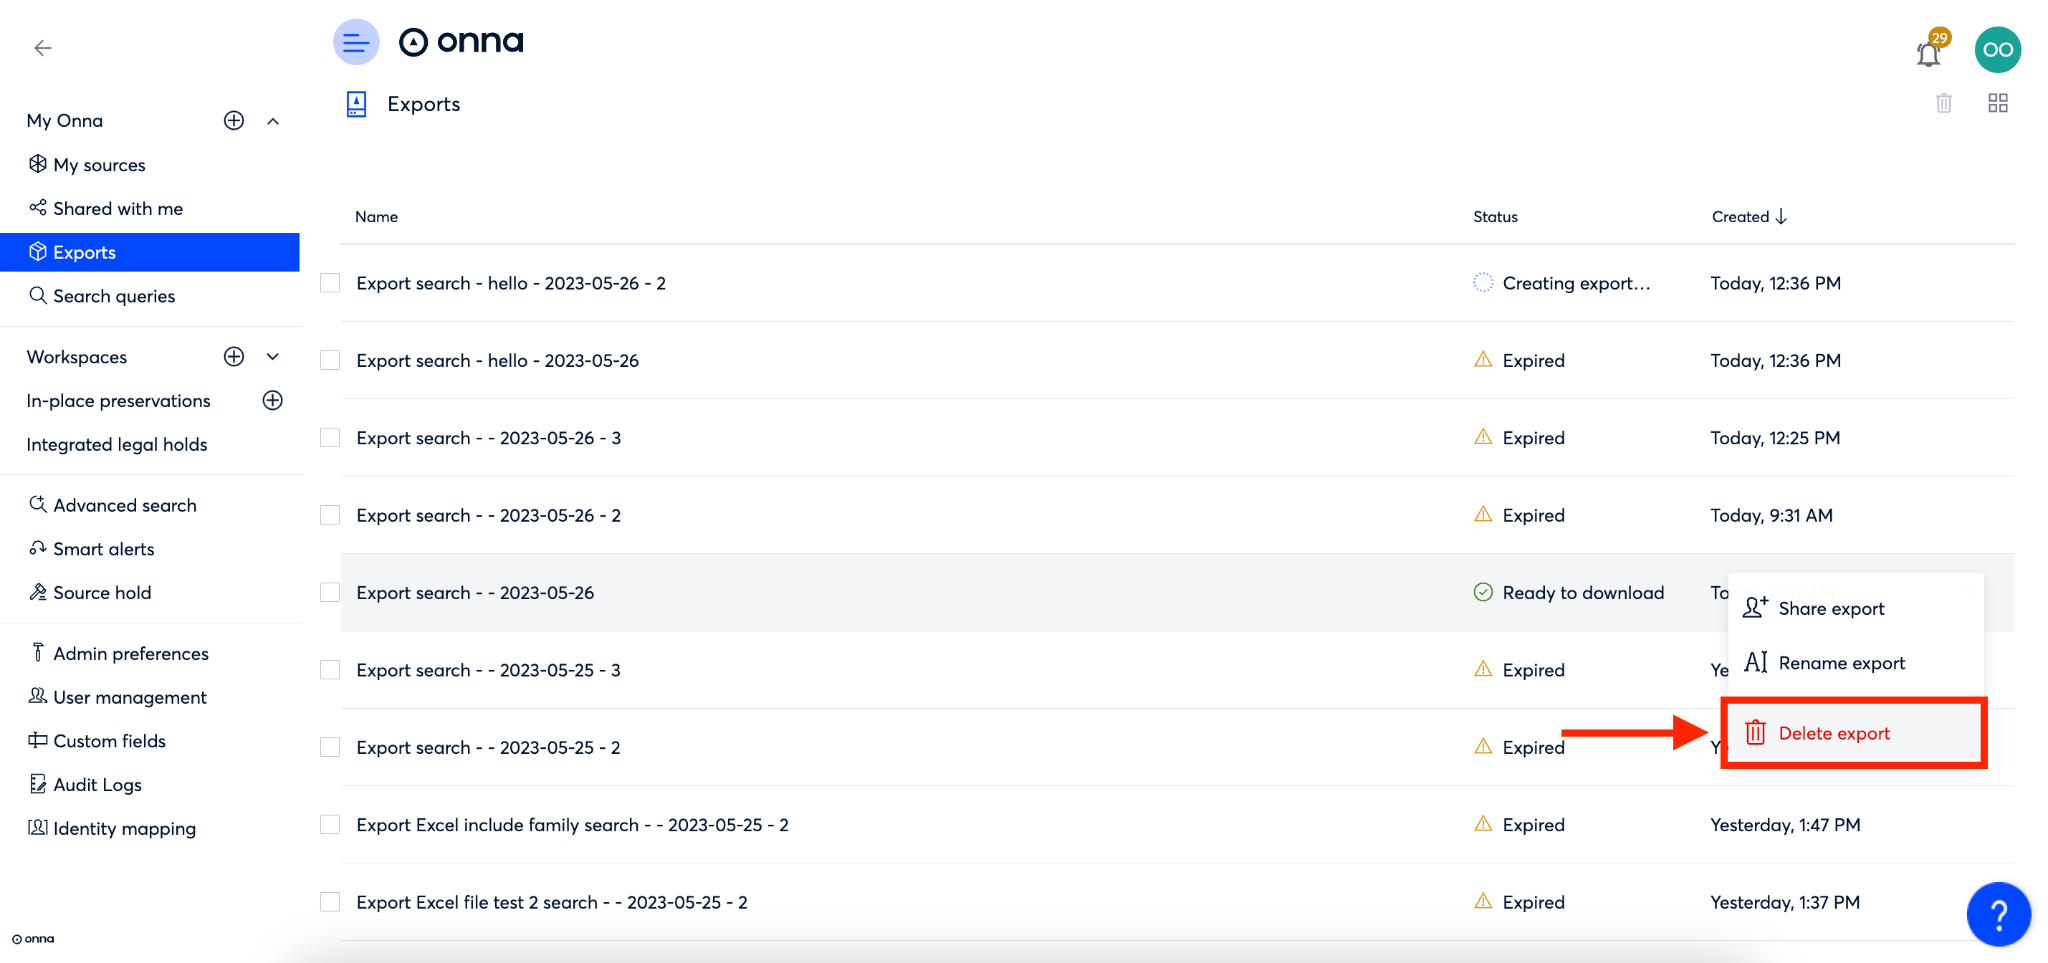
From the dropdown menu that appears, select ‘Delete’.
Step 3
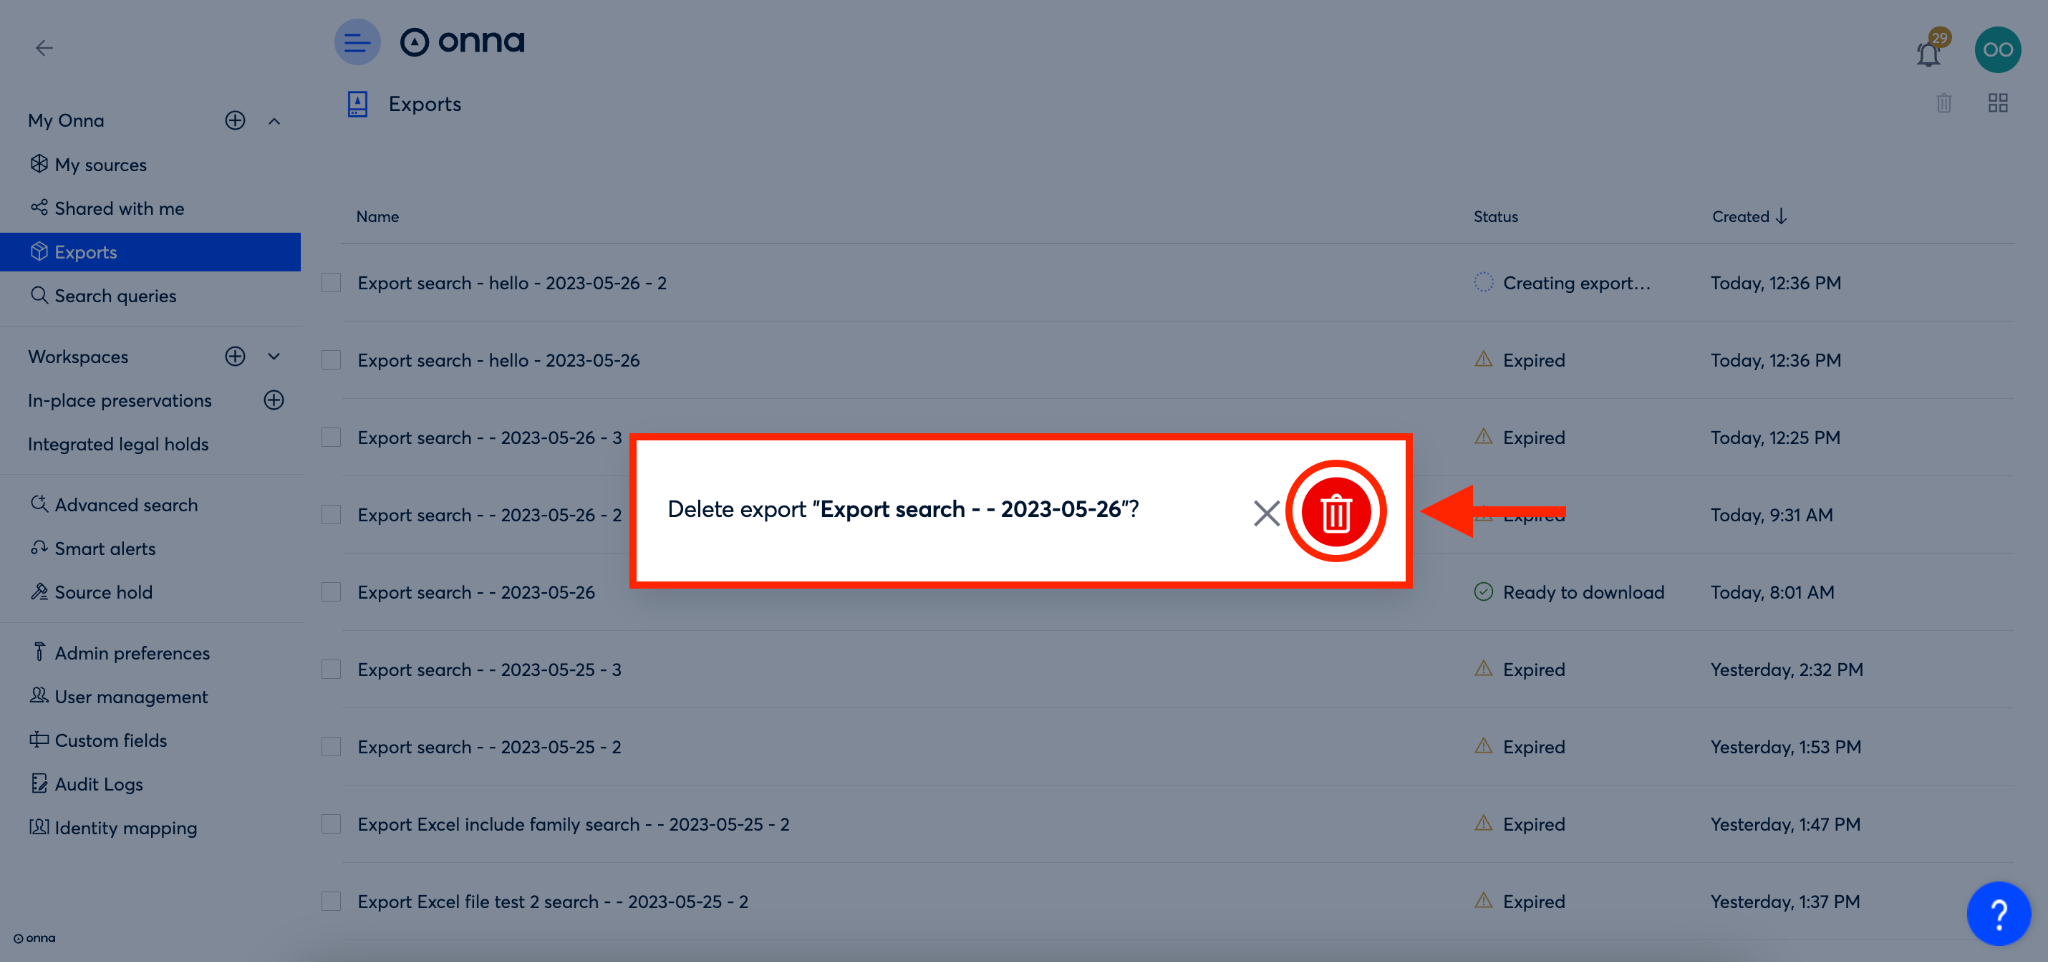
You’ll now see a pop-up appear asking you to confirm that you want to delete this export. To confirm and delete, click on the red trash can icon on the right side of the pop-up.
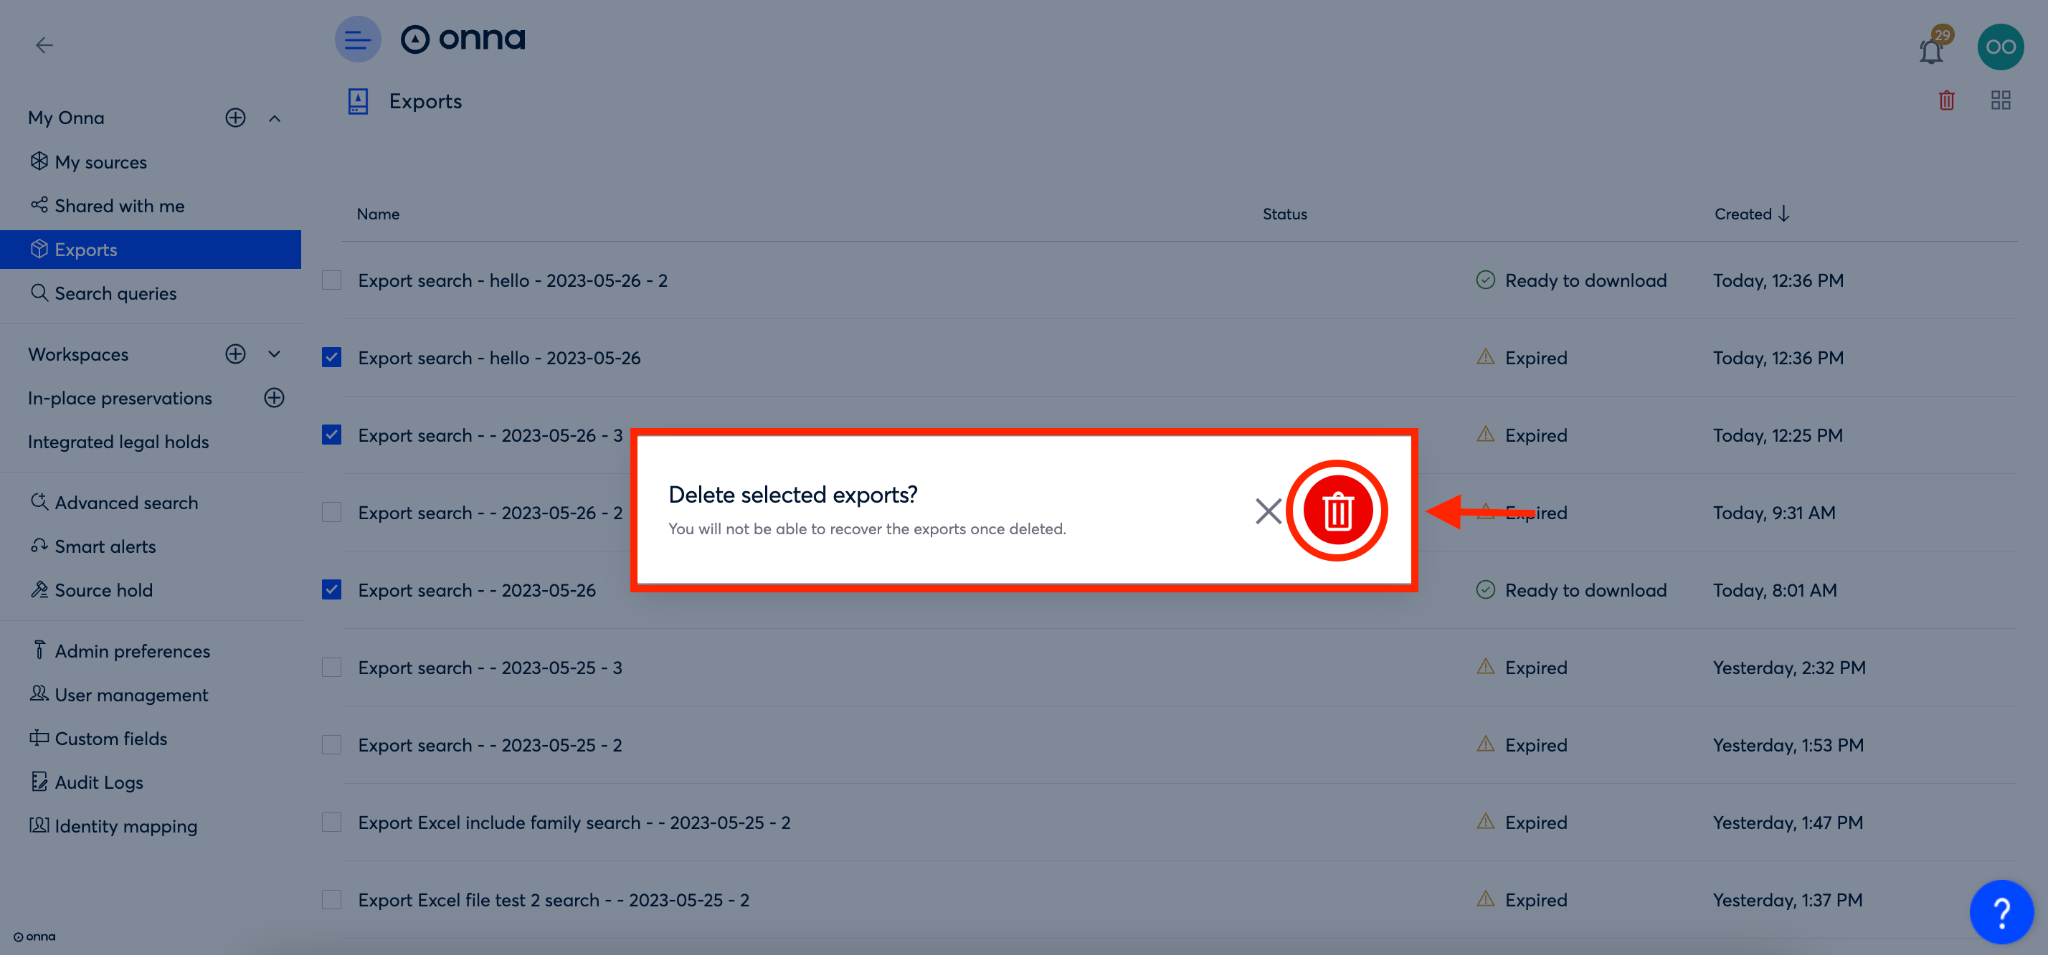
Delete Multiple Exports
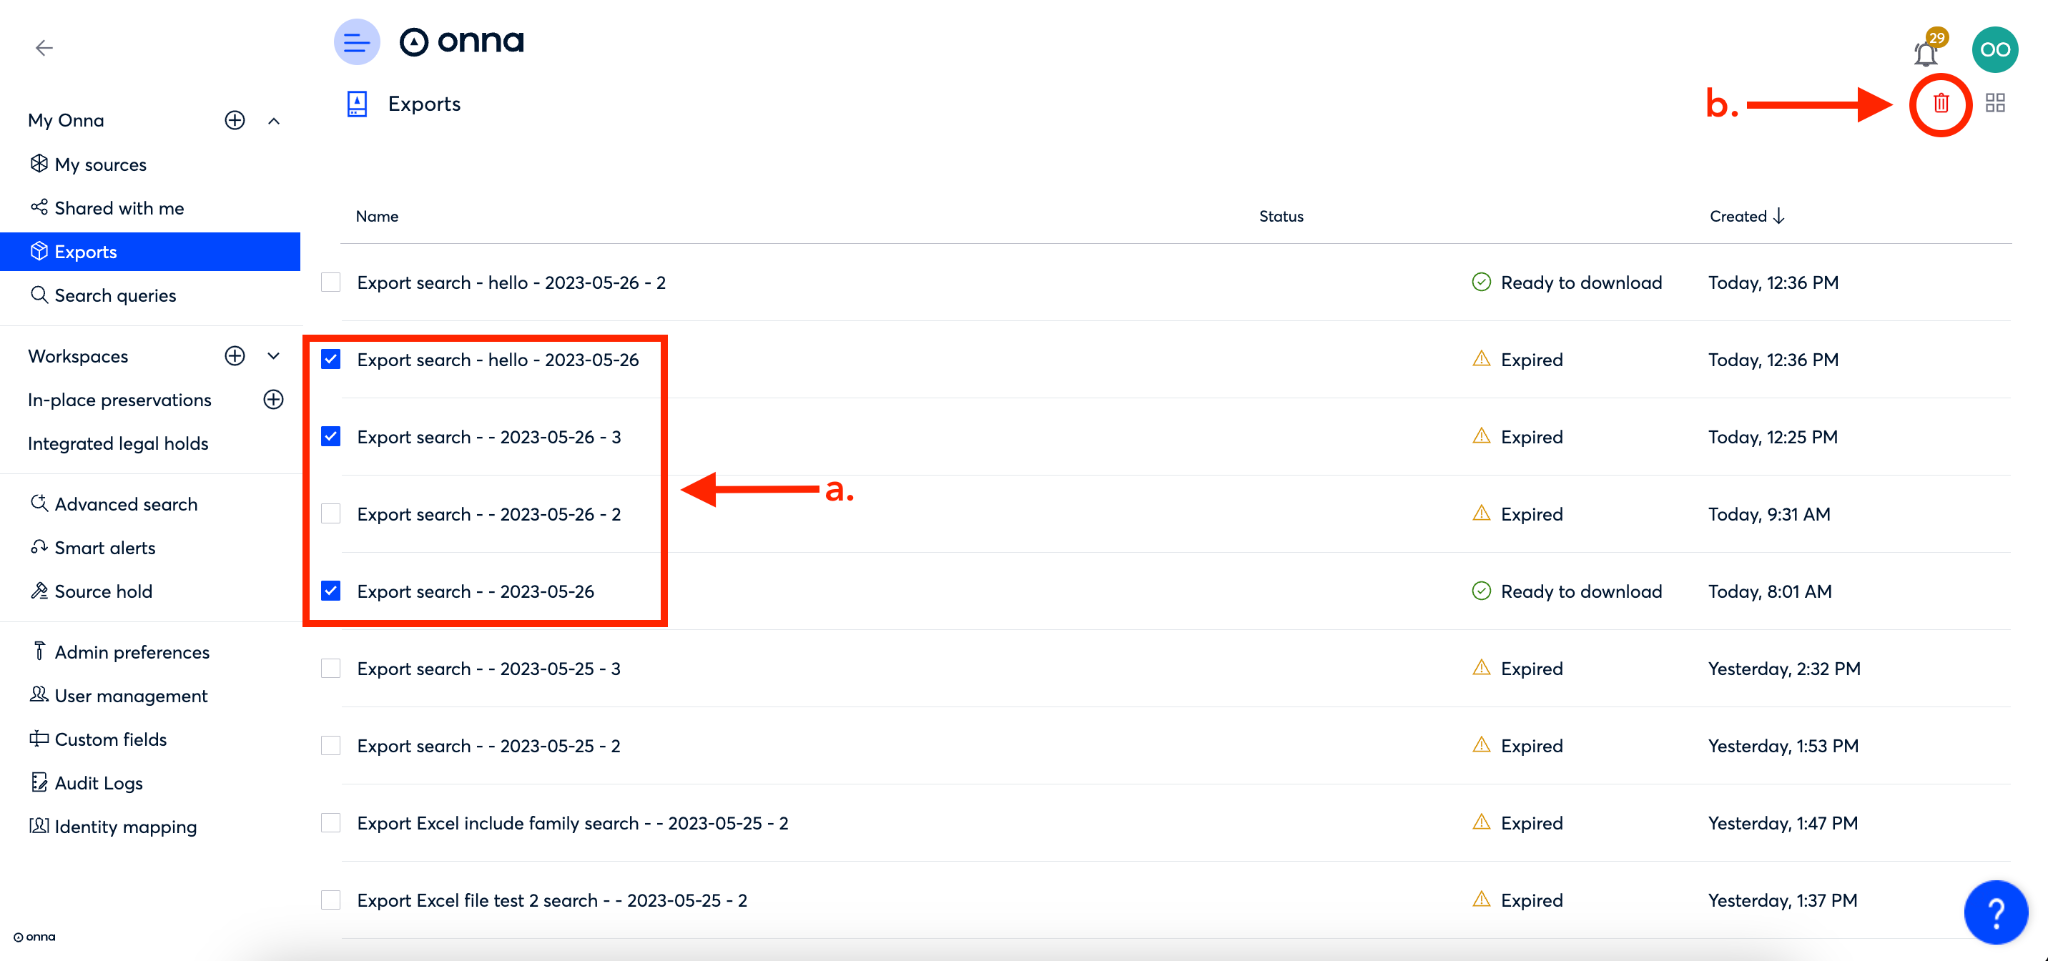
Step 1
To begin deleting multiple exports, click on ‘Exports’ from the main menu.
Step 2
Next, put a checkmark next to each export you want to delete (a).
Then, click on the red trash can icon in the upper right corner of the screen (b).
Step 3
You’ll now see a pop-up appear asking you to confirm that you want to delete the selected exports. To confirm and delete, click on the red trash can icon on the right side of the pop-up.