How to Create and Manage Notification Templates for Legal Holds
- 26 Jun 2024
- 3 Minutes to read
- Print
- DarkLight
- PDF
How to Create and Manage Notification Templates for Legal Holds
- Updated on 26 Jun 2024
- 3 Minutes to read
- Print
- DarkLight
- PDF
Article summary
Did you find this summary helpful?
Thank you for your feedback

In this article:
How to Create a New Notification Template
How to Edit a Notification Template
How to Preview a Notification Template
How to Delete a Notification Template
How to Create a Notification Template
While matters are active, there are common types of emails that may need to be sent to custodians. One way to streamline the notification process is to create reusable templates for each type of email, offering consistency in notifications across all your matters and saving you time as you add notifications to matters. Below you will learn how to create a notification template to streamline your legal hold notification workflow.
You can set up templates for each notification type as well as standard language you might use for different types of matters.
Step 1
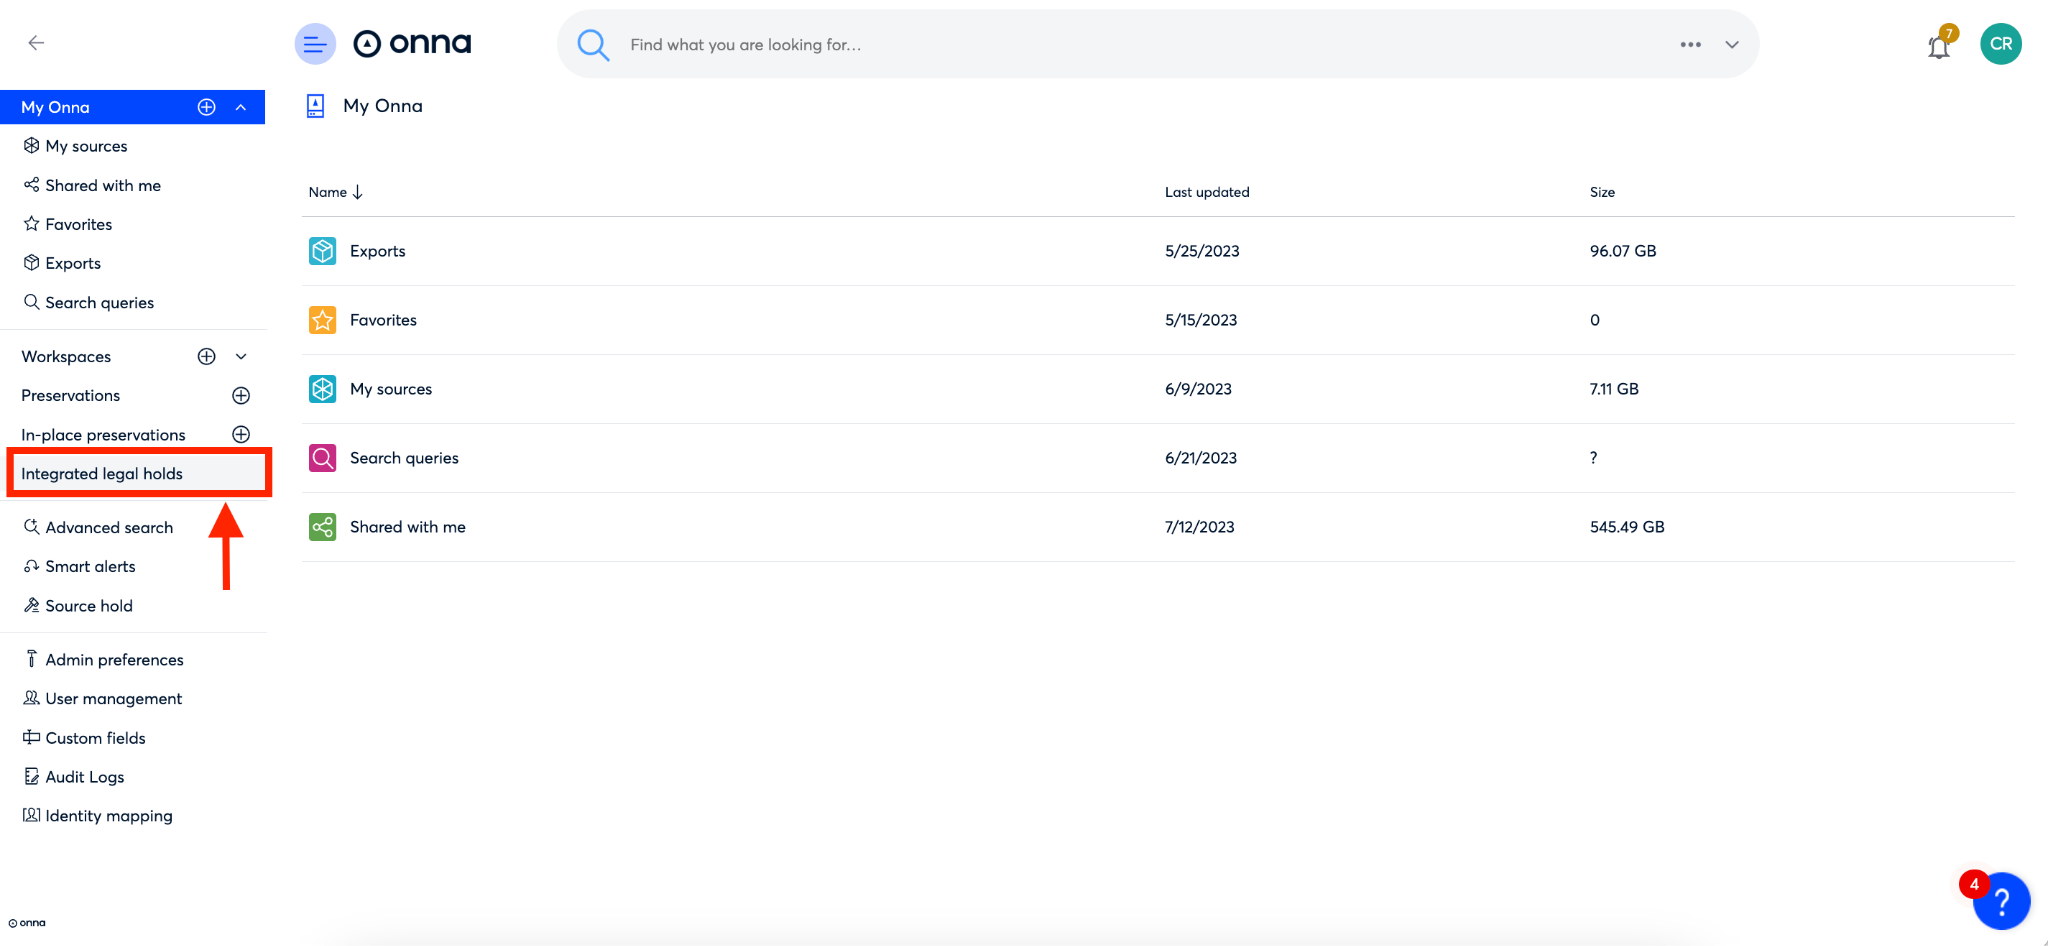
To begin, click on ‘Integrated legal holds’ from the main menu.
Step 2
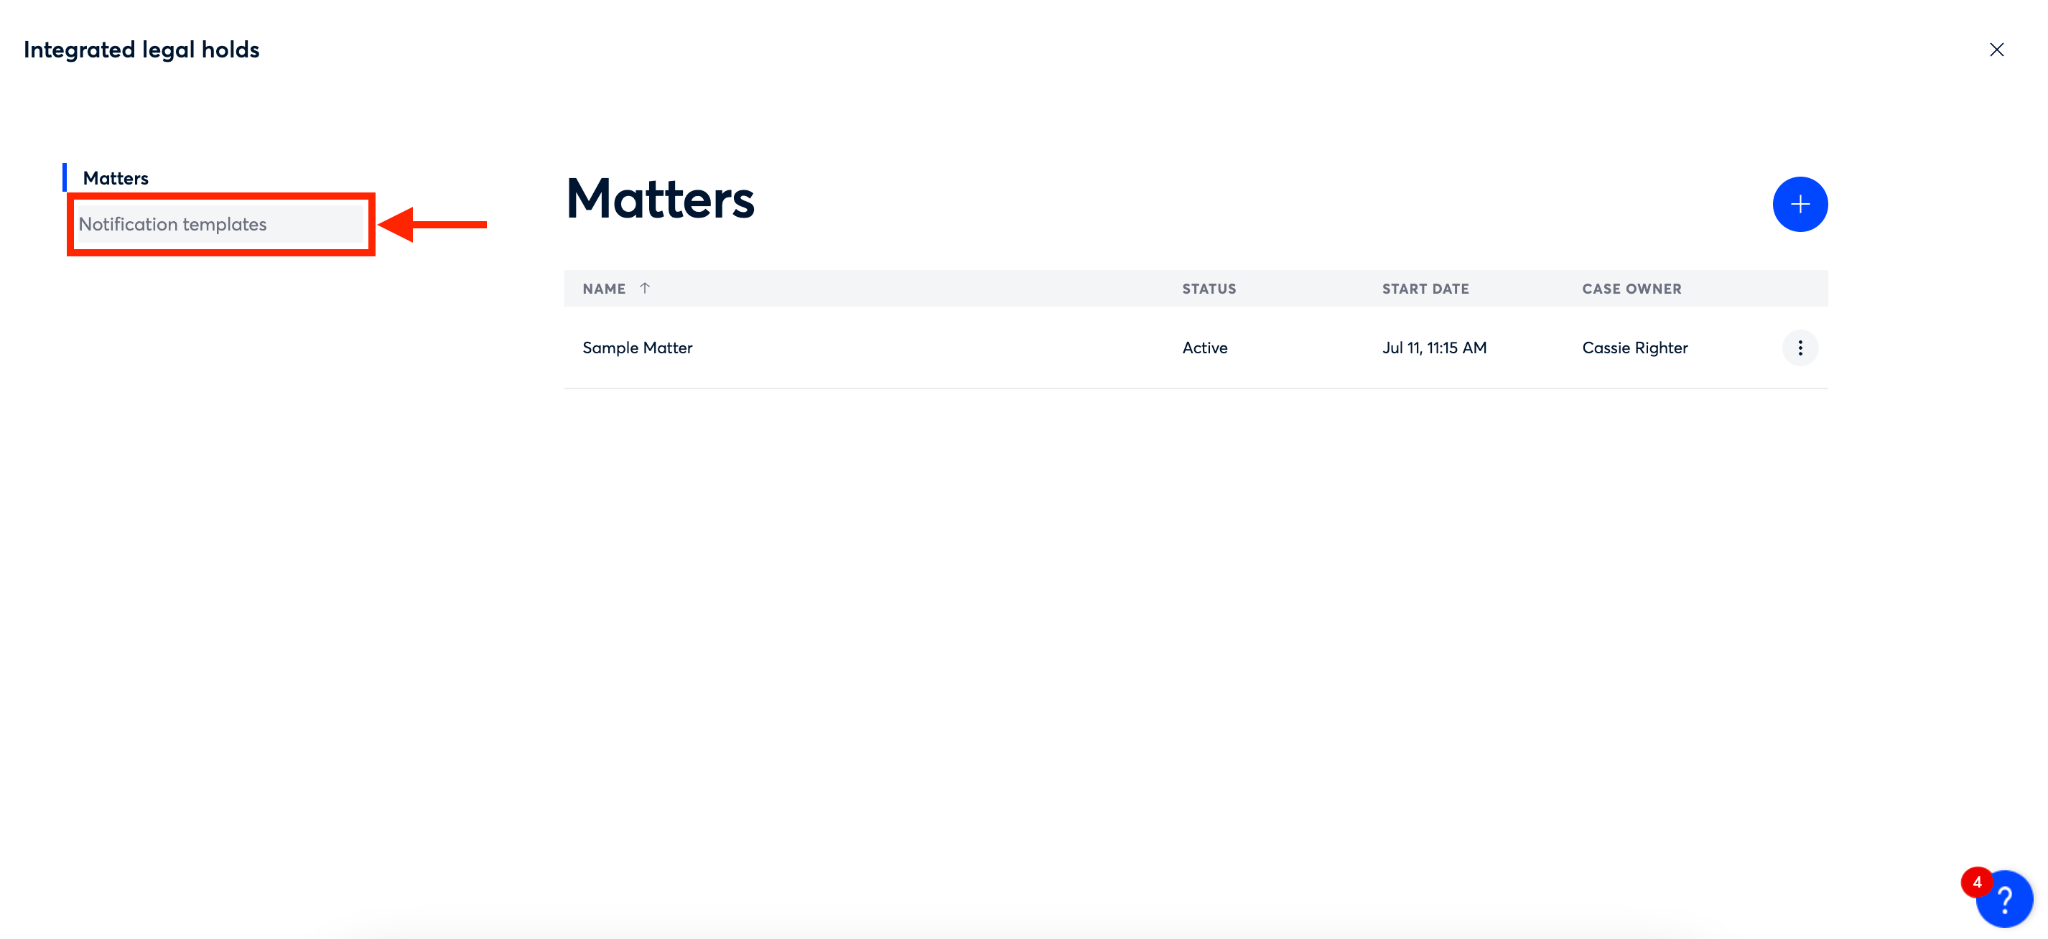
You will then be directed to the ‘Matters’ page inside ‘Integrated legal holds’.
From this page, click on ‘Notification template’ from the menu on the left.
Step 3
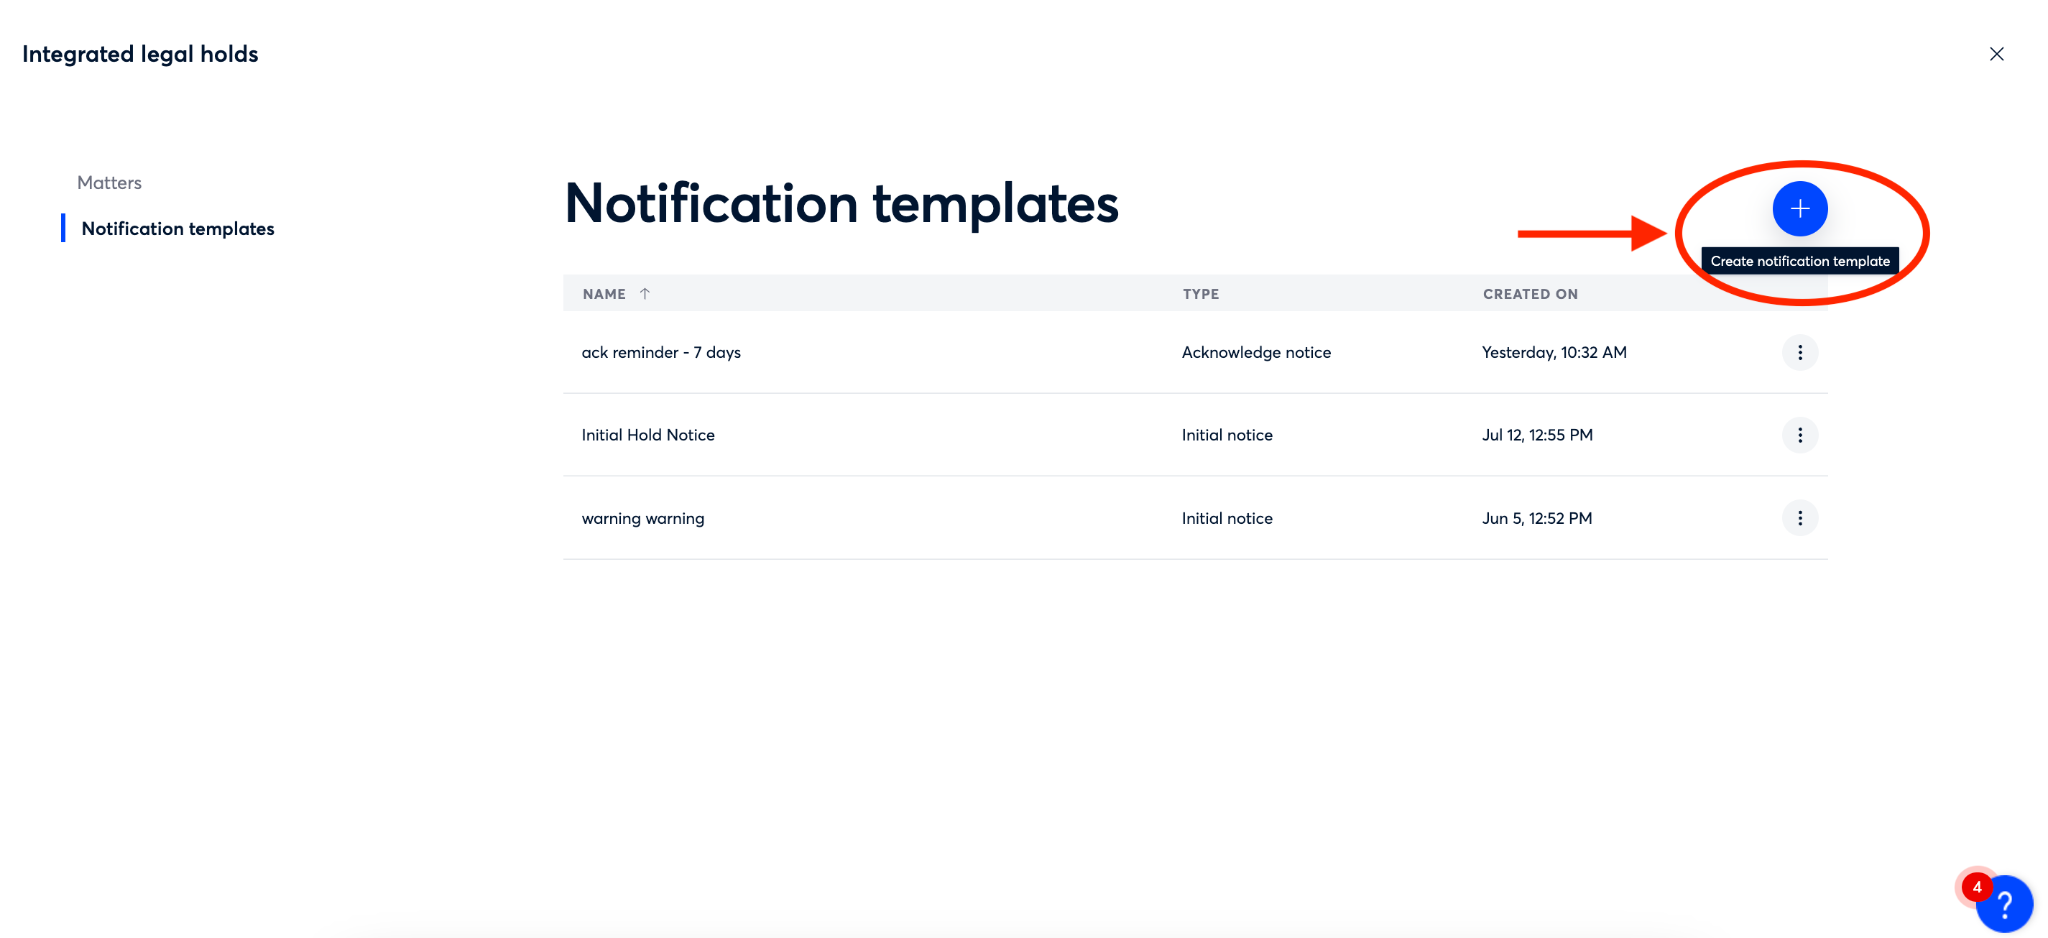
Once on the ‘Notification templates’ page, click on the blue ‘+’ icon in the upper right.
Step 4
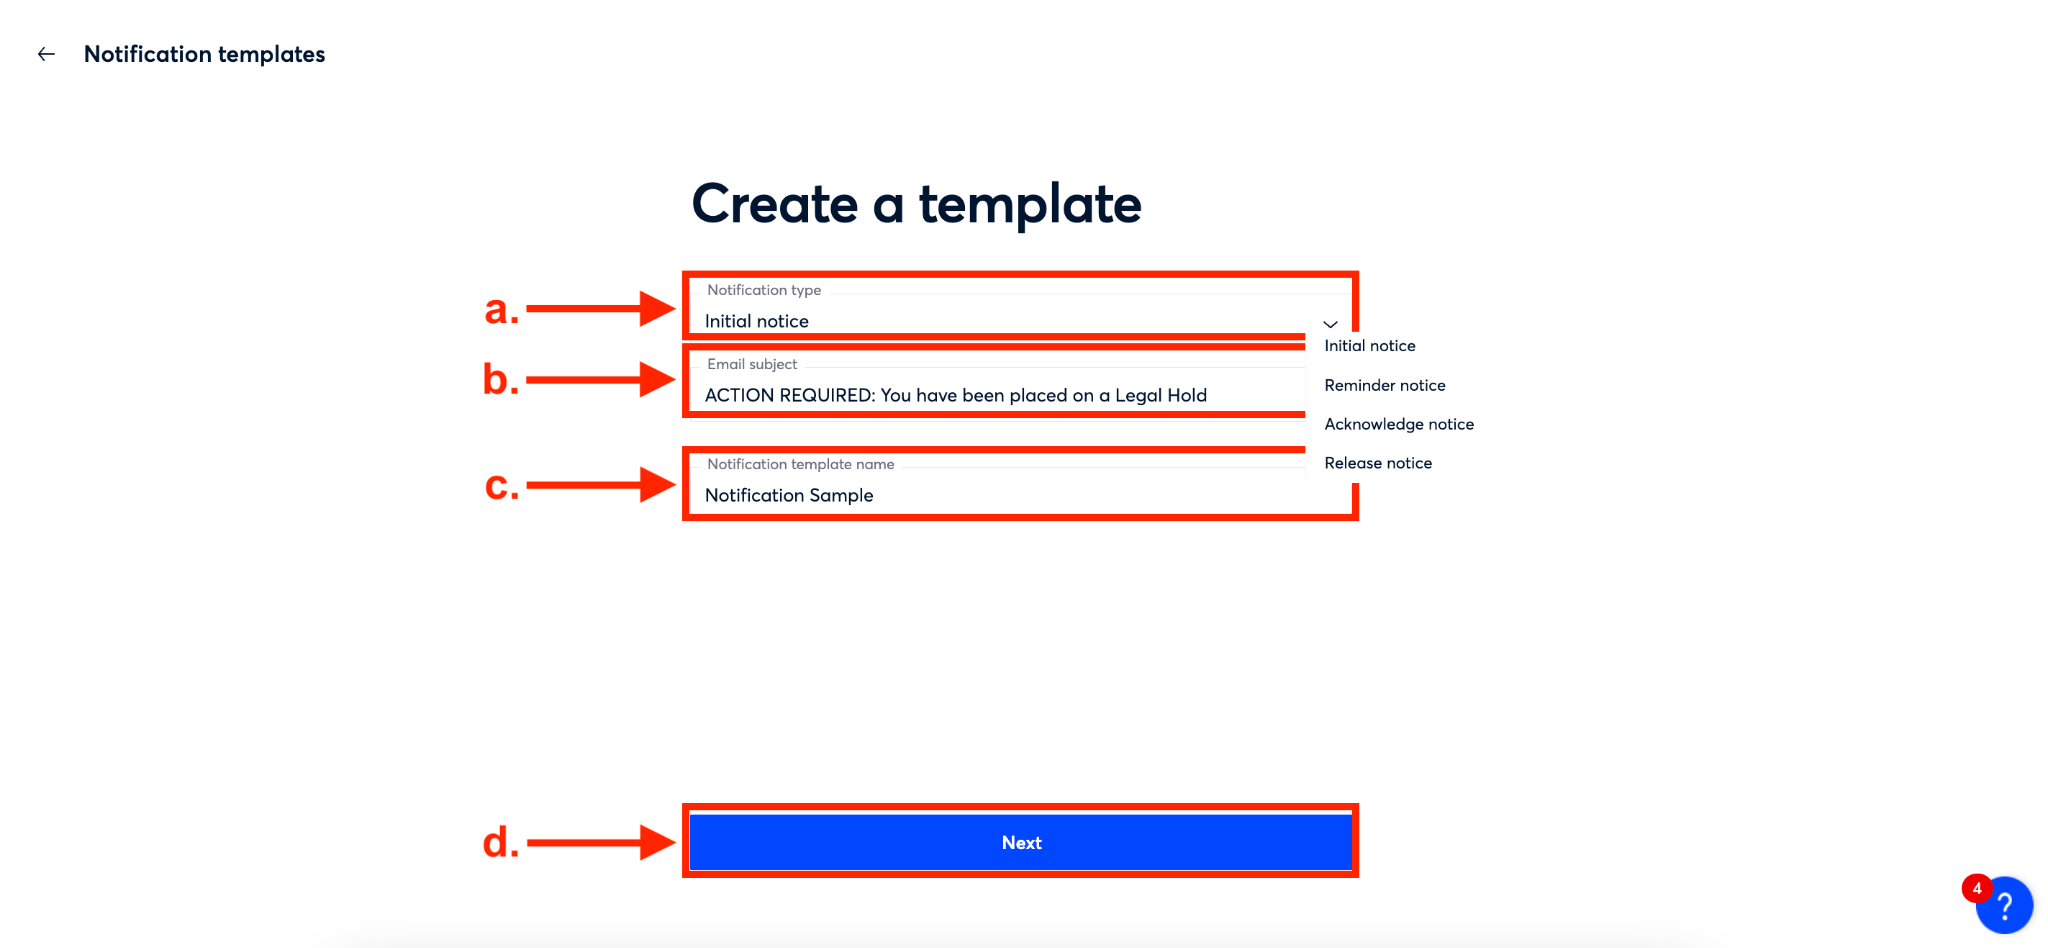
On the ‘Create a template’ page, you’ll now start creating your new template. First, select the type of notification you want from the dropdown menu in ‘Notification type’ field (a). Your options include:
Initial notice- Communicates with a custodian they are on legal hold and includes a link for the custodian to acknowledge they received the notification.
Reminder notice- Reminds a custodian they are on legal hold.
Acknowledge notice- Reminds a custodian they need to acknowledge they are on legal hold.
Release notice- Informs a custodian they have been released from a legal hold.
After selecting the type of notification, you will enter the default subject line for the email in the ‘Email subject’ field (b).
Then, name the template for internal identification purposes (c).
Finally, click the blue ‘Next’ button at the bottom of the page (d).
Step 5
On the next page, you will type and format the contents of your notification in the ‘Notice message’ field (a). You can then click the ‘Preview’ button (b) to see how the notification will appear to the recipient. Finally, to save your template, click the blue ‘Done’ button (c).

Step 6
You’ll now see your new template populate in your list of ‘Notification templates’ in alphabetical order.

How to Edit a Notification Template
Once a notification template has been created, there may be situations where the template needs to be updated. To edit any part of a template, follow the steps below:
Step 1
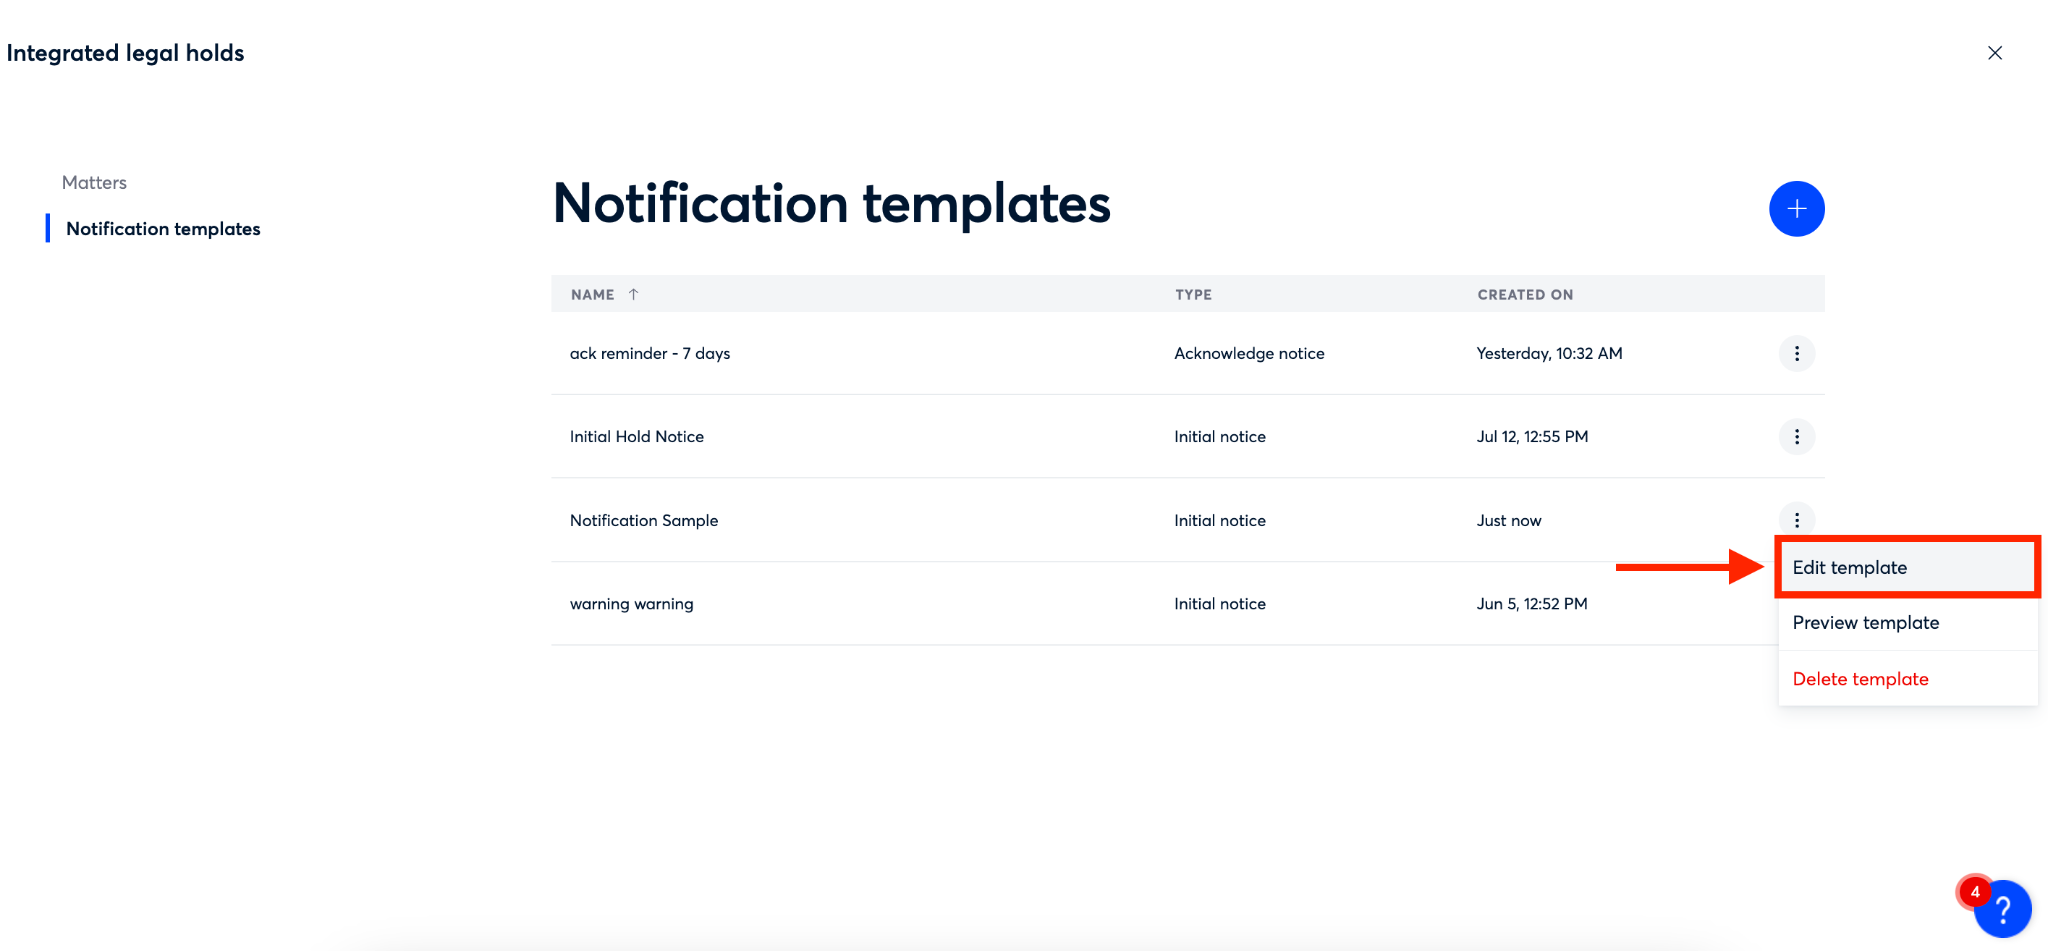
To begin, click on the ellipsis on the right side of the row of the template you want to edit.

Step 2
Select ‘Edit template’ from the dropdown menu that appears.
Step 3
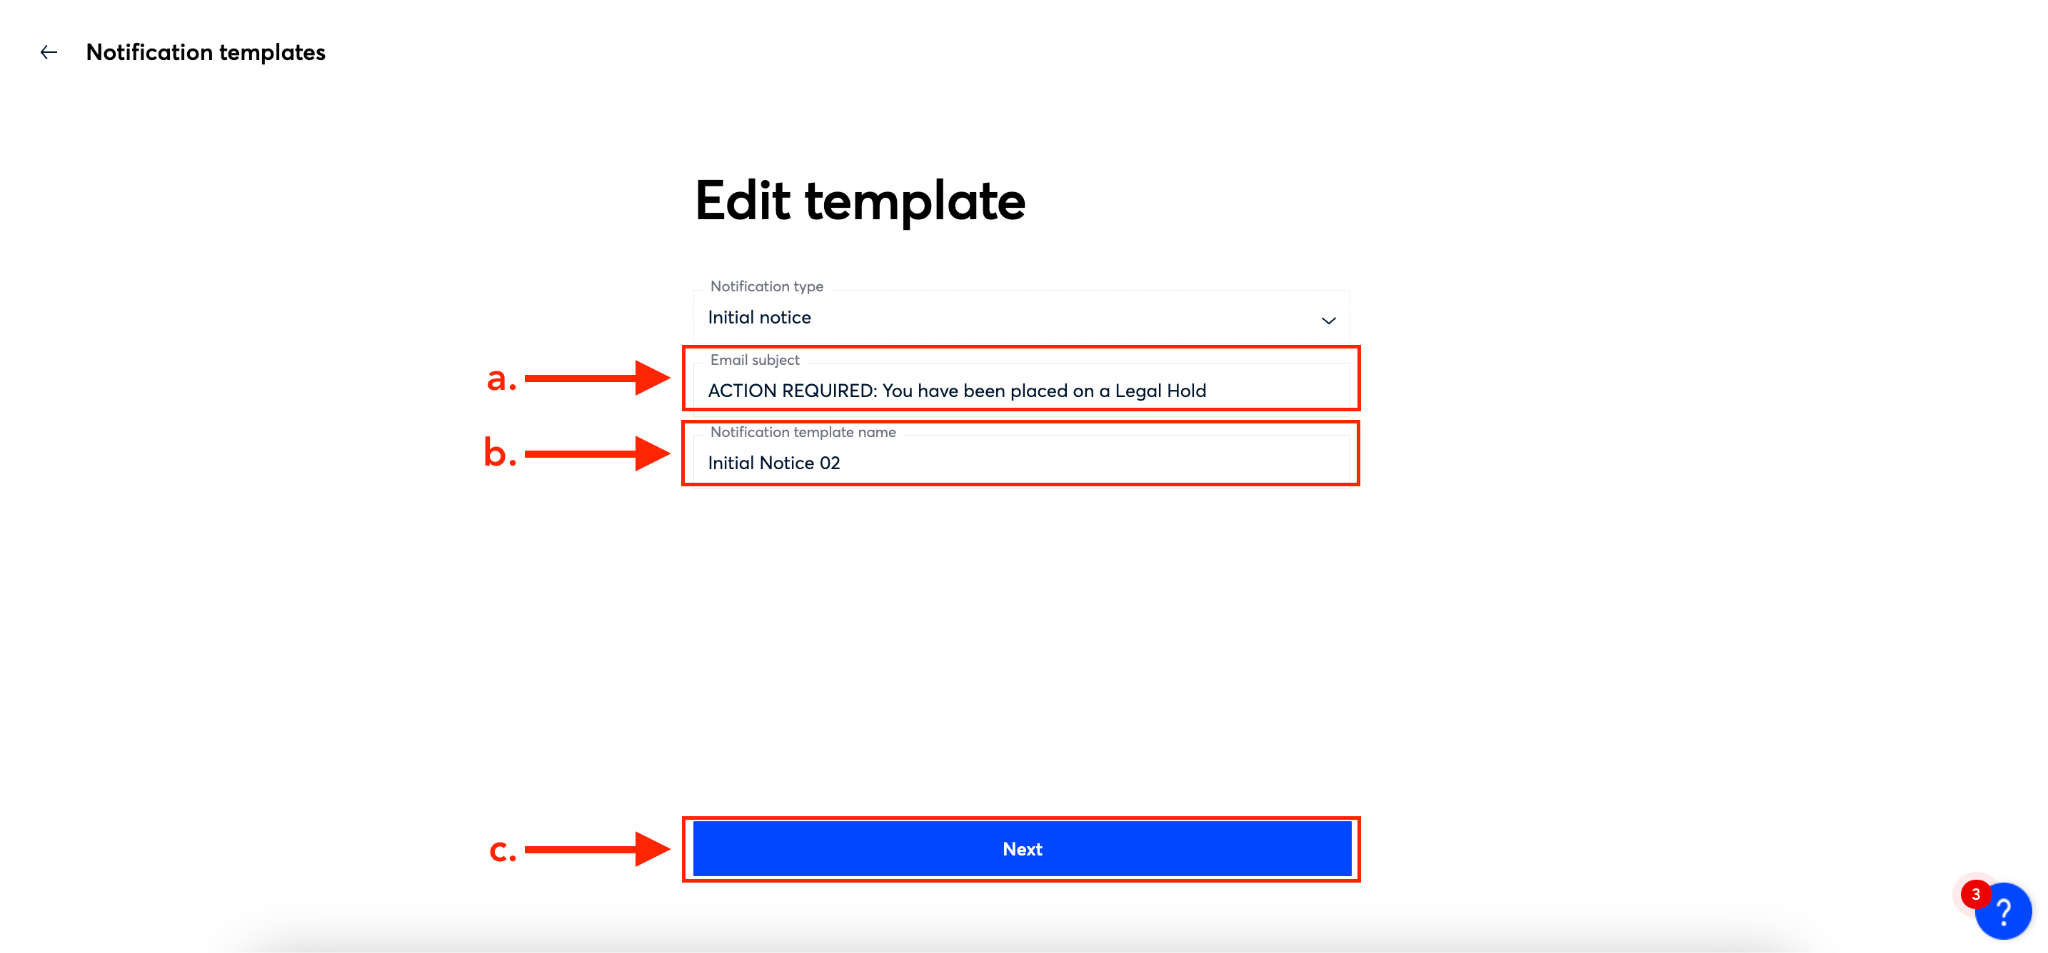
On the next screen, you can edit the subject line in the ‘Email subject’ field (a) or the name of your template in the ‘Notification template name’ field (b).
Once you’re done editing those fields, click on the blue ‘Next’ button at the bottom of the screen (c).
Step 4
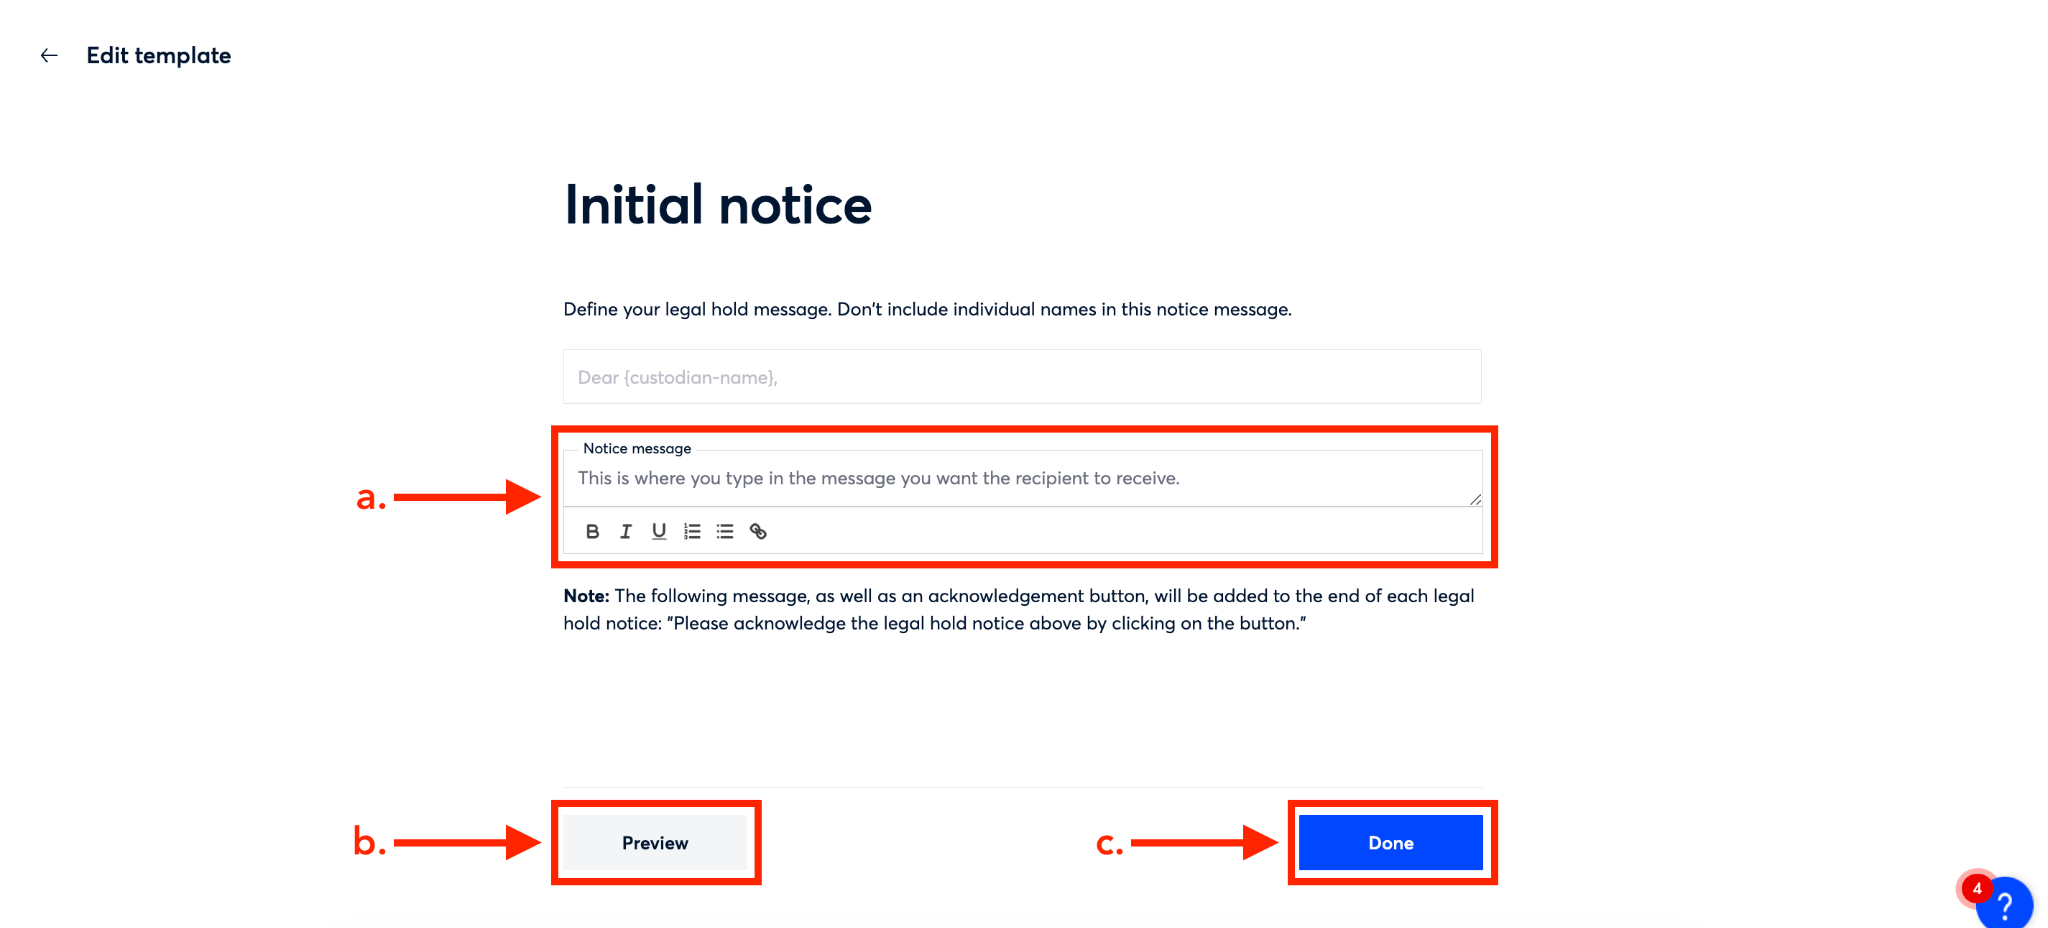
The last thing you can edit is the message body in the ‘Notice message’ field (a). When you’re done, you can see what your notification will look like by clicking the ‘Preview’ button (b) or just click the blue ‘Done’ button (c) to save the changes.
How to Preview a Notification Template
If you need to review the contents of a template quickly, it is possible to preview your templates. To preview a template, follow the steps below:
Step 1
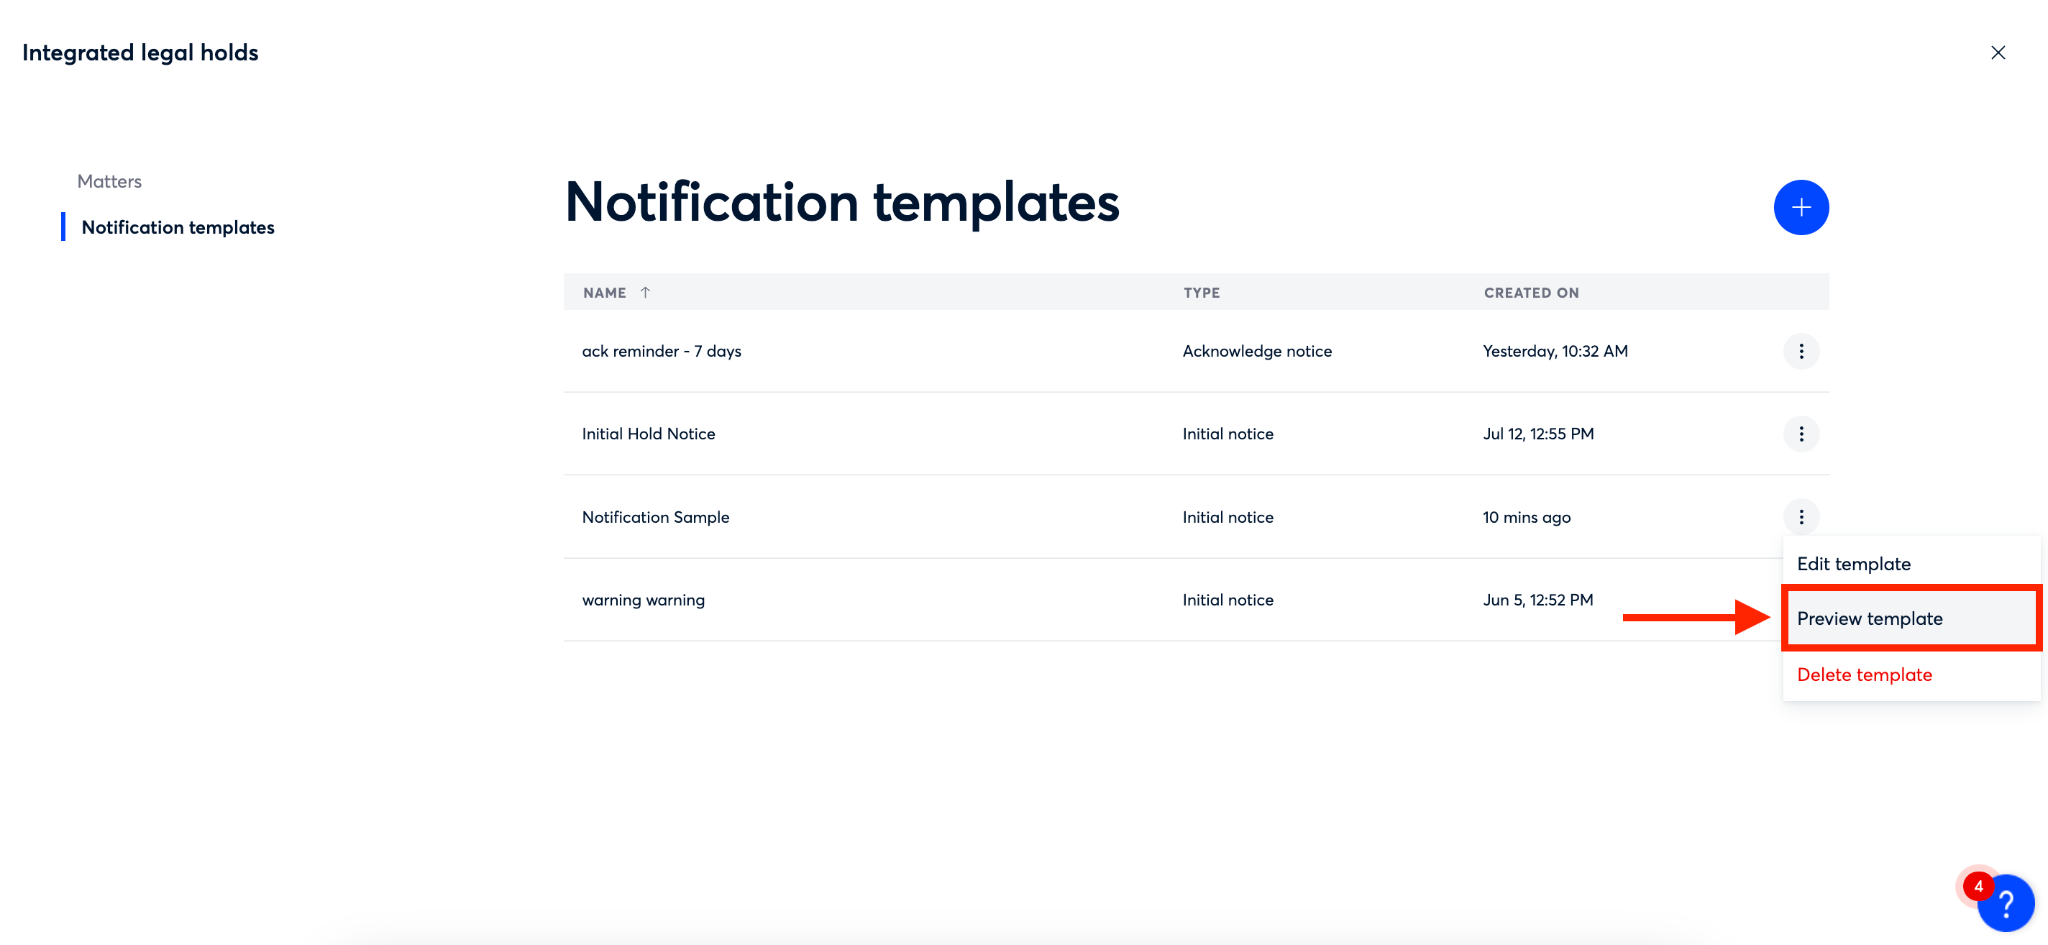
To begin, click on the ellipsis on the right side of the row of the template you want to preview.

Step 2
Select ‘Preview template’ from the dropdown menu that appears.
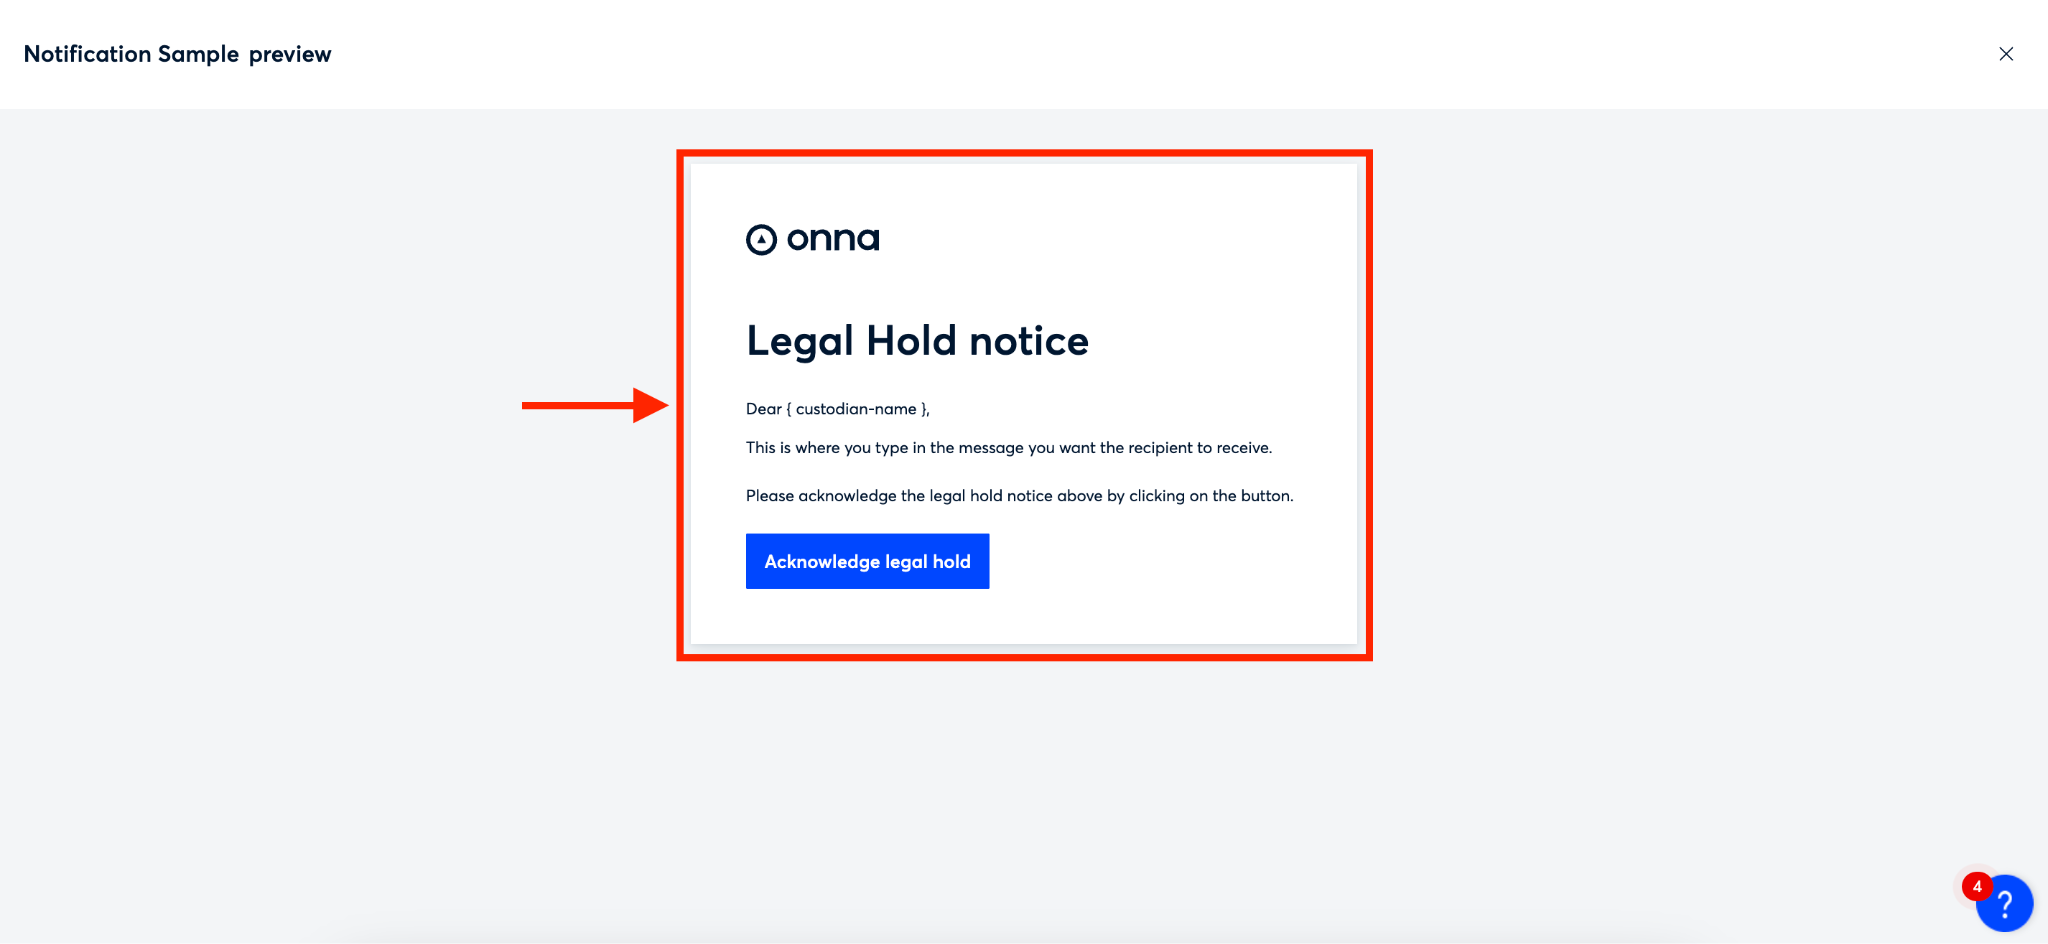
Step 3
You will now see a preview of the notification.
How to Delete a Notification Template
Once a template is no longer needed, it is possible to delete a template. To do so, follow the steps below:
Step 1
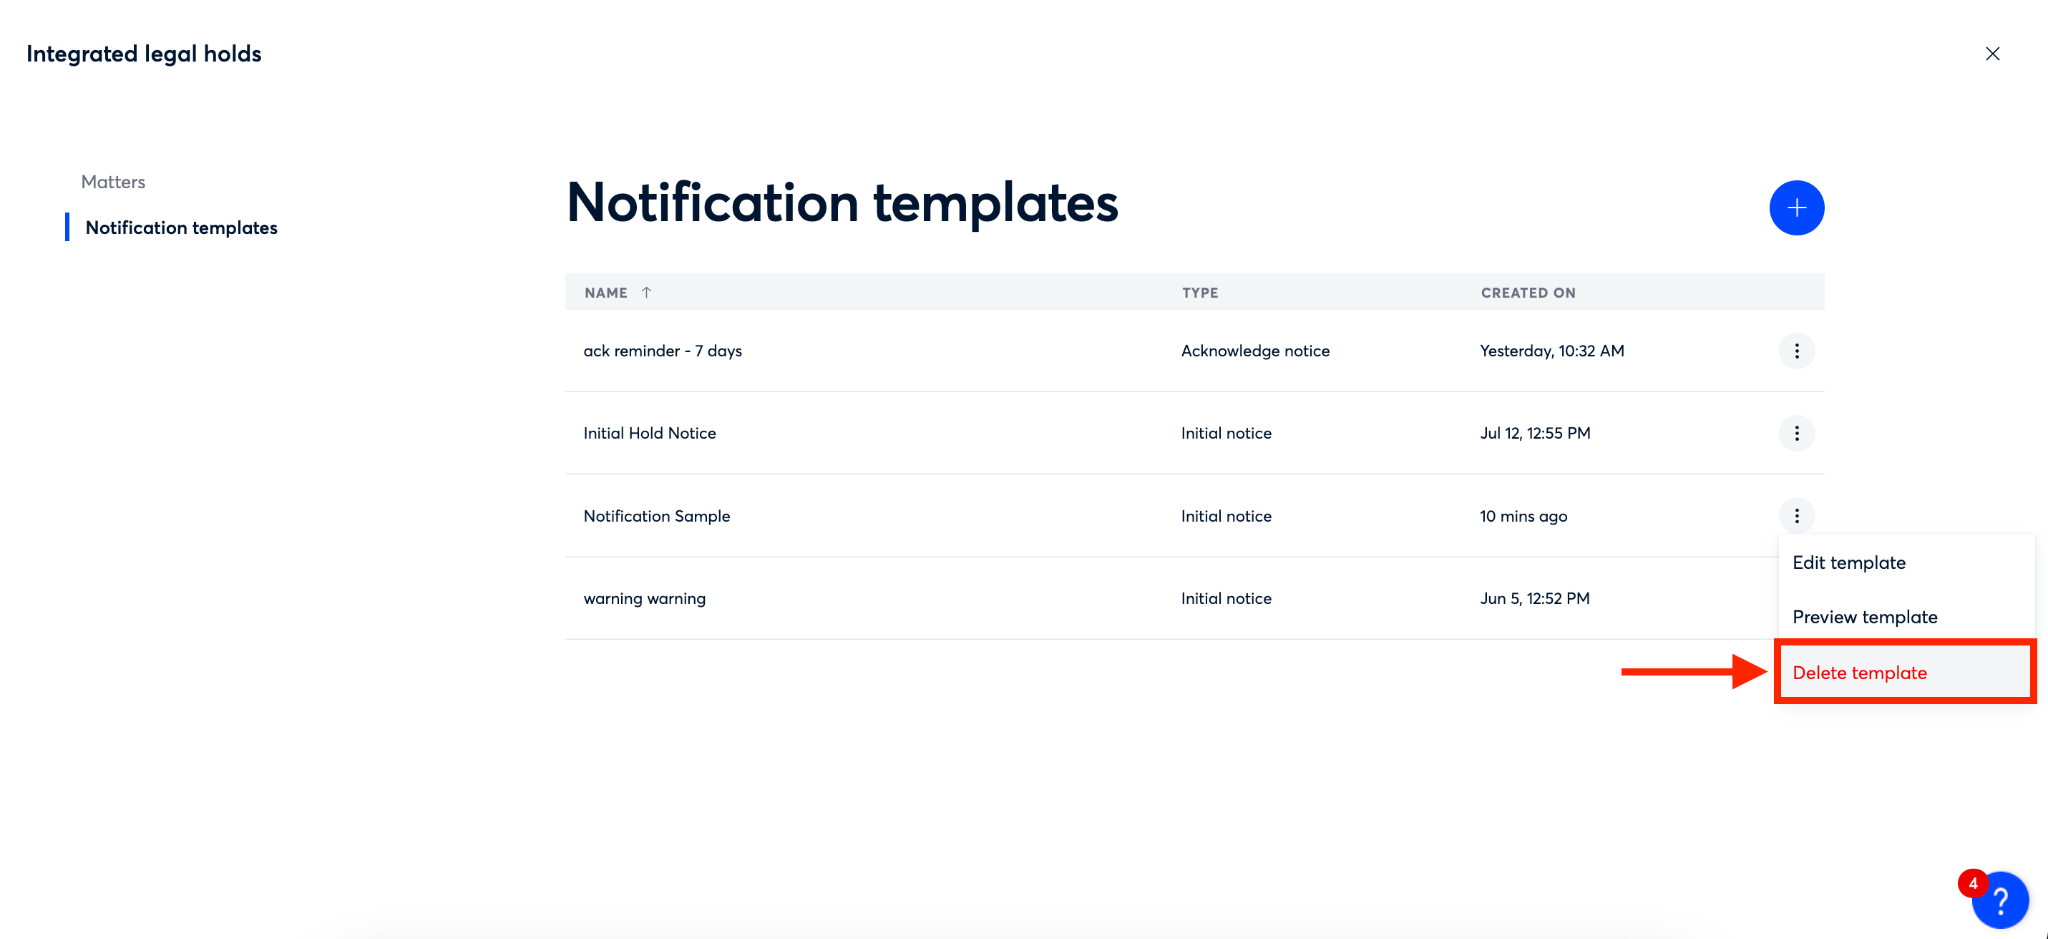
To begin, click on the ellipsis on the right side of the row of the template you want to delete.

Step 2
Select ‘Delete Template’ from the dropdown menu that appears.
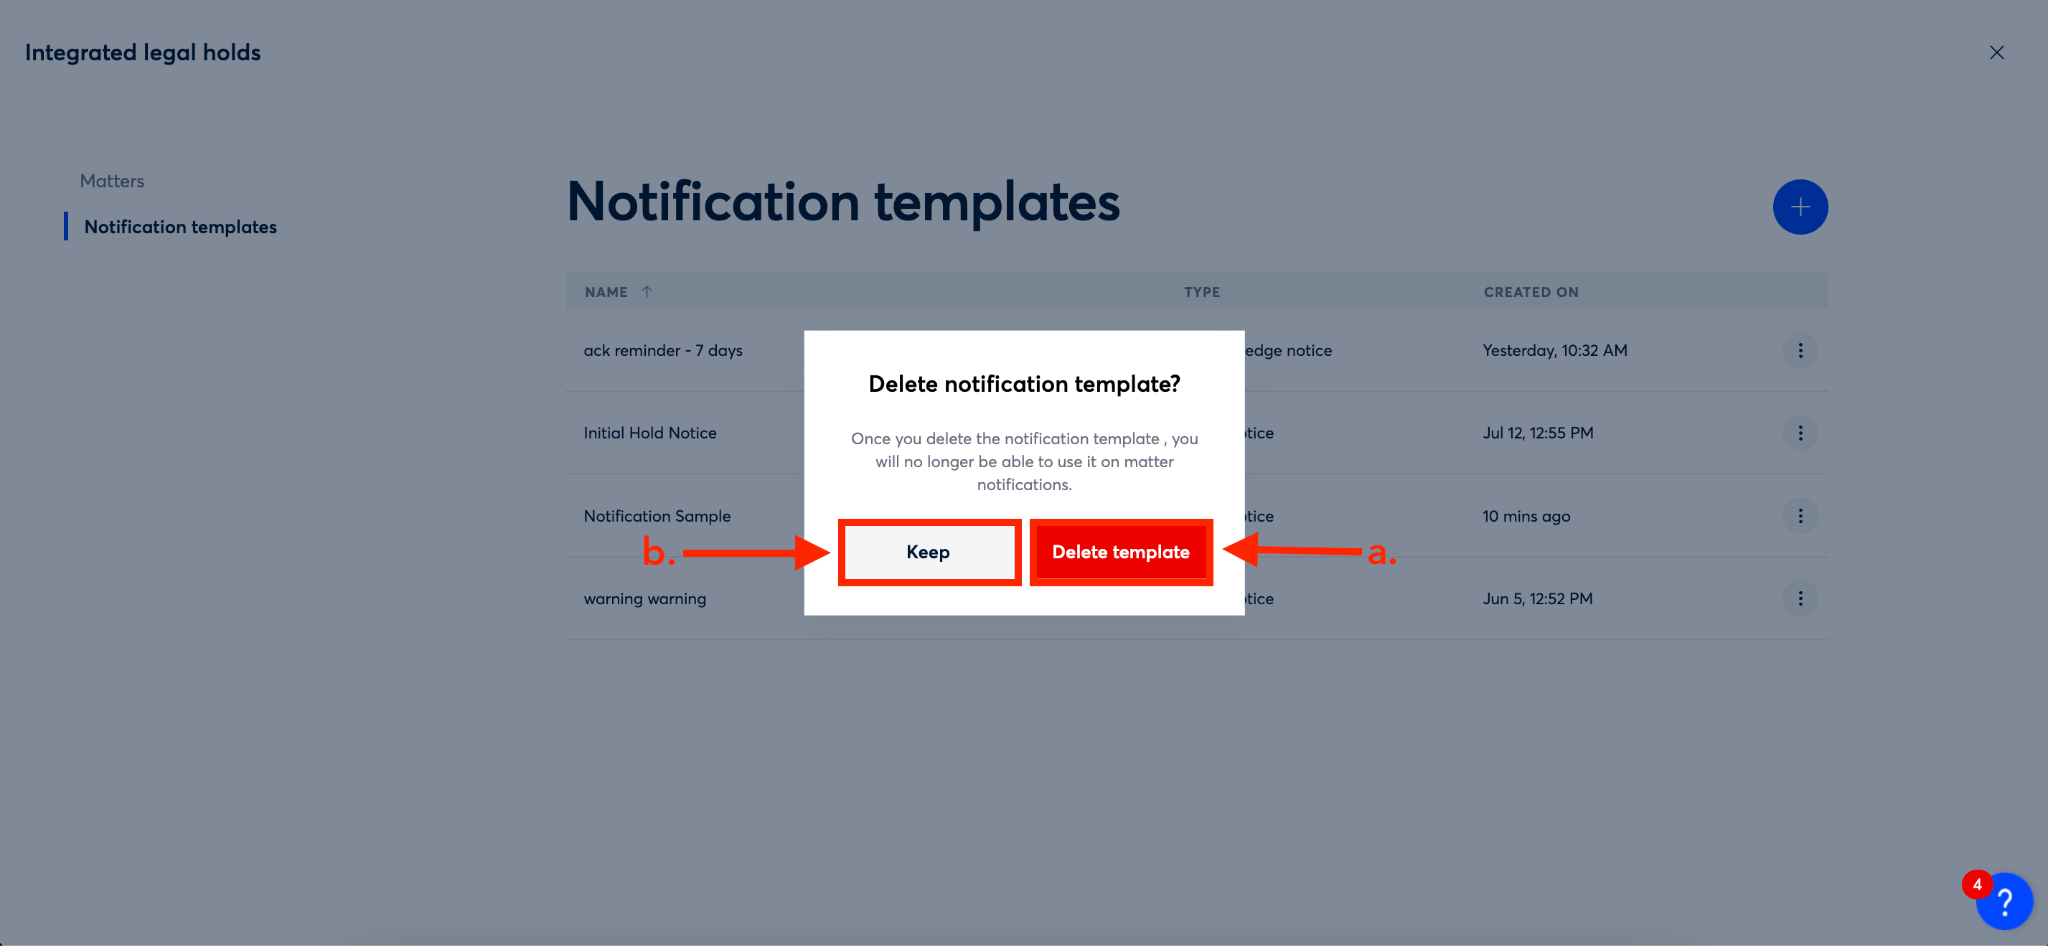
Step 3
You will now see a confirmation window appear asking you to confirm that you’d like to delete your notification template. To confirm and delete click the red ‘Delete template’ button (a). To keep, click the gray ‘Keep’ button (b).