Managing Workspace Users and Permissions
- 26 Jun 2024
- 3 Minutes to read
- Print
- DarkLight
- PDF
Managing Workspace Users and Permissions
- Updated on 26 Jun 2024
- 3 Minutes to read
- Print
- DarkLight
- PDF
Article summary
Did you find this summary helpful?
Thank you for your feedback
wiIn this article you will learn how to:
Understand Workspace Member Permissions
Add Onna Users to an Existing Workspace
Share a Workspace Externally
View and Change Workspace Member Permissions
Remove Users from a Workspace
As of November 7, 2022 the 'Contributor' workspace permission will be deprecated. Existing workspace members assigned the 'Contributor' permission will now have 'Edit' permissions.
Understanding Workspace Member Permissions
You can customize the workspace-specific permissions for users based on what access level you want to grant them. Permissions determine what tasks users can or cannot do on a workspace.
Please note that permissions assigned at the workspace level are inherited by the sources and resources within that workspace. For example, if a workspace member has 'Manager' permissions for the workspace they will also have 'Manager' permissions for the sources and resources in that workspace.
The available permissions are:
Permission | Capabilities |
Manage |
|
Edit |
|
View |
|
Adding Onna Users to an Existing Workspace
Once a workspace is created, workspace users with "Manager" permissions, have the option to invite Onna users or external members to that workspace.
Step 1
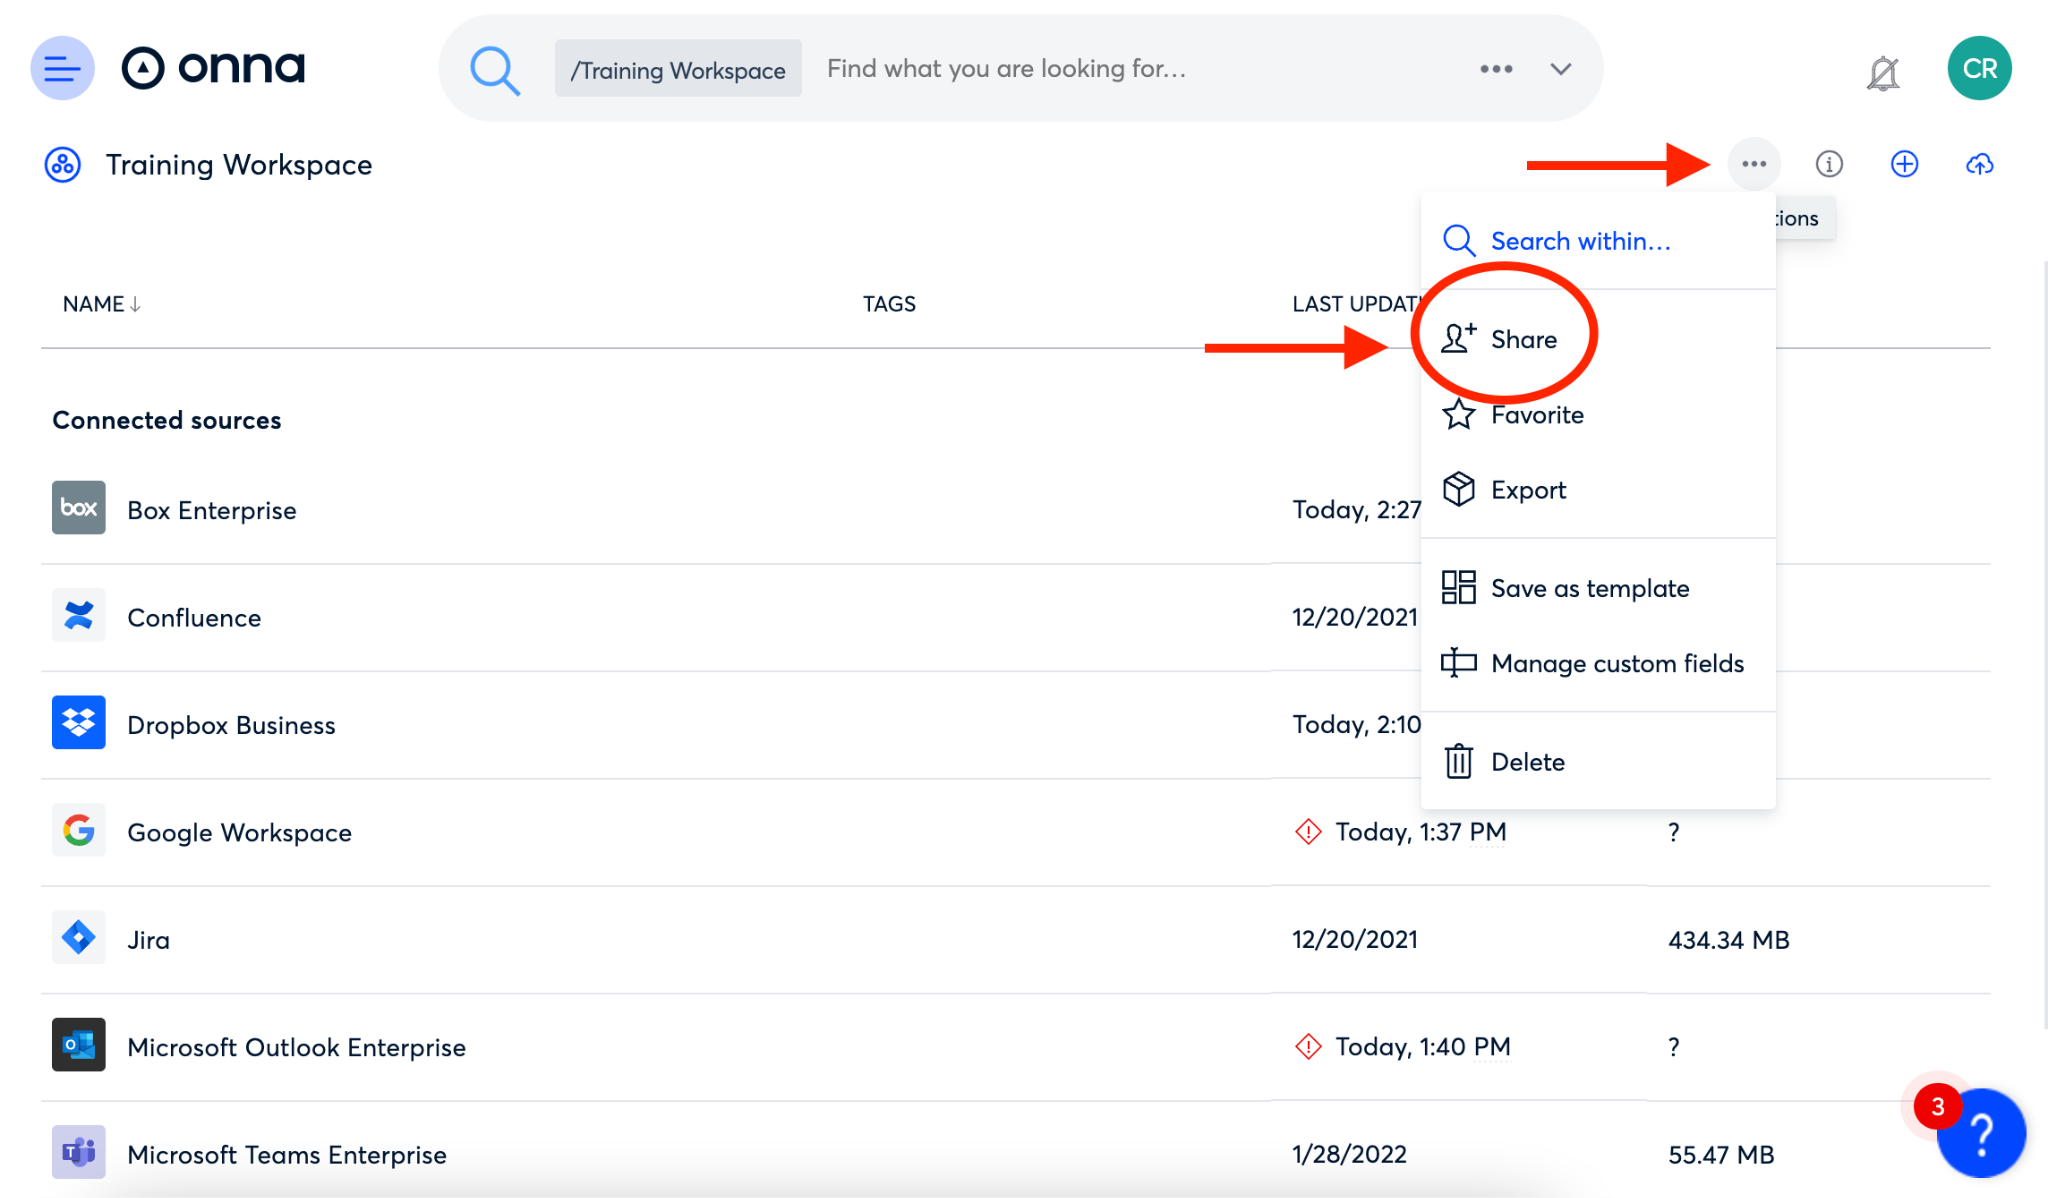
Head to the Workspace and click on the ellipsis at the top right-hand corner. From the pop-up menu click on the share icon.
Step 2
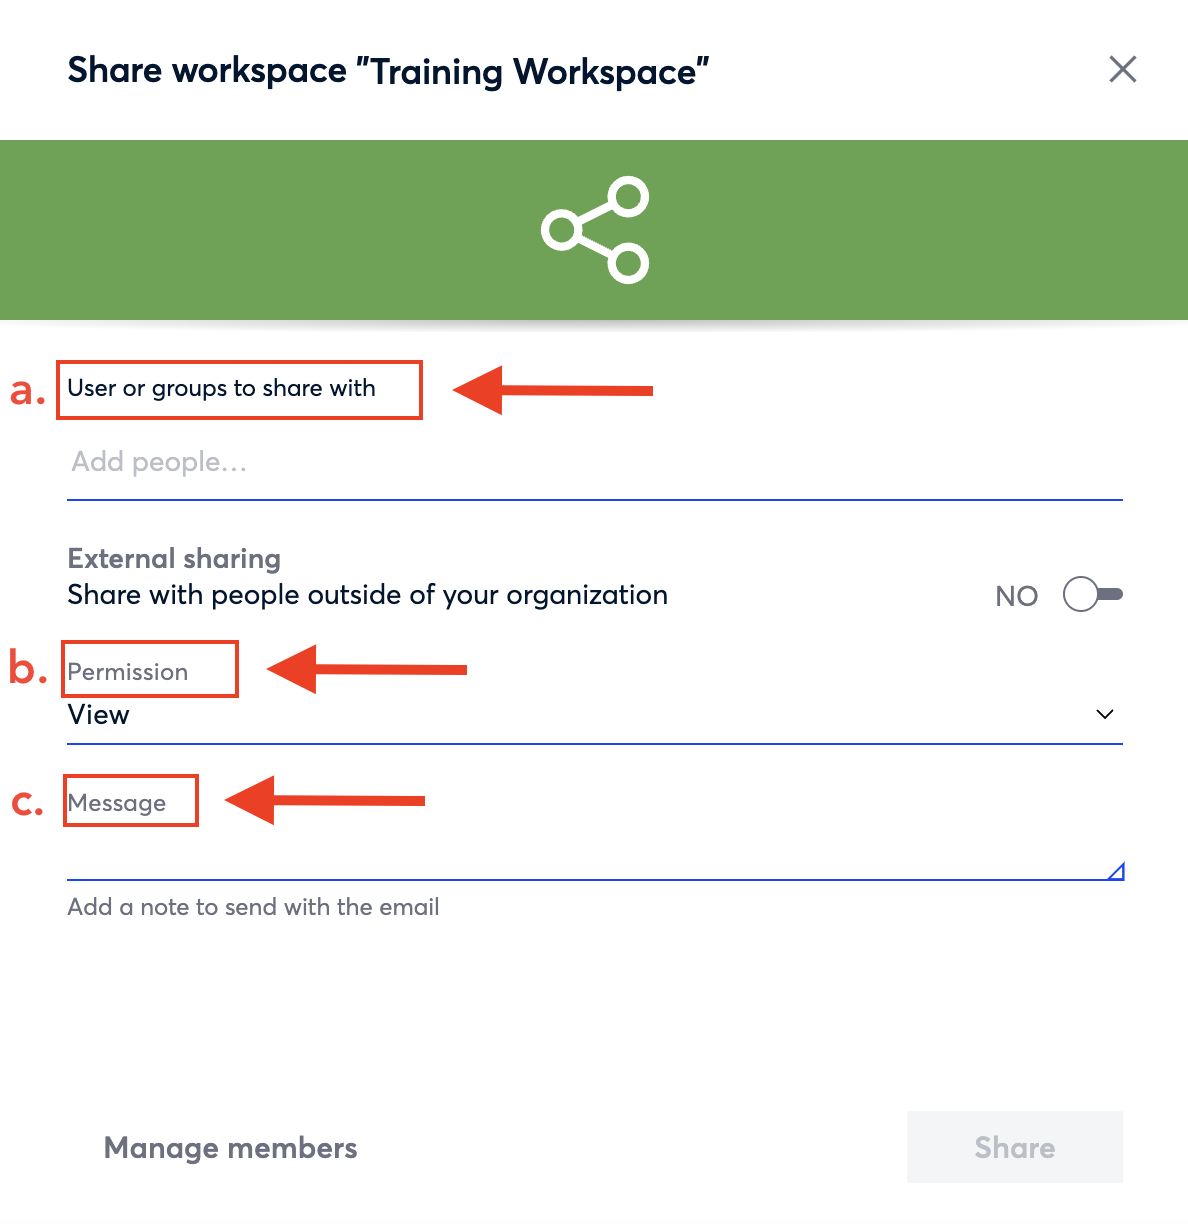
Next, a Workspace user modal will open where you can invite current users or user groups in your Onna account by:
a. Adding the name of the user or group.
b. Adjusting their Permissions
c. Including a message to the new user. (optional)
Sharing a Workspace Externally
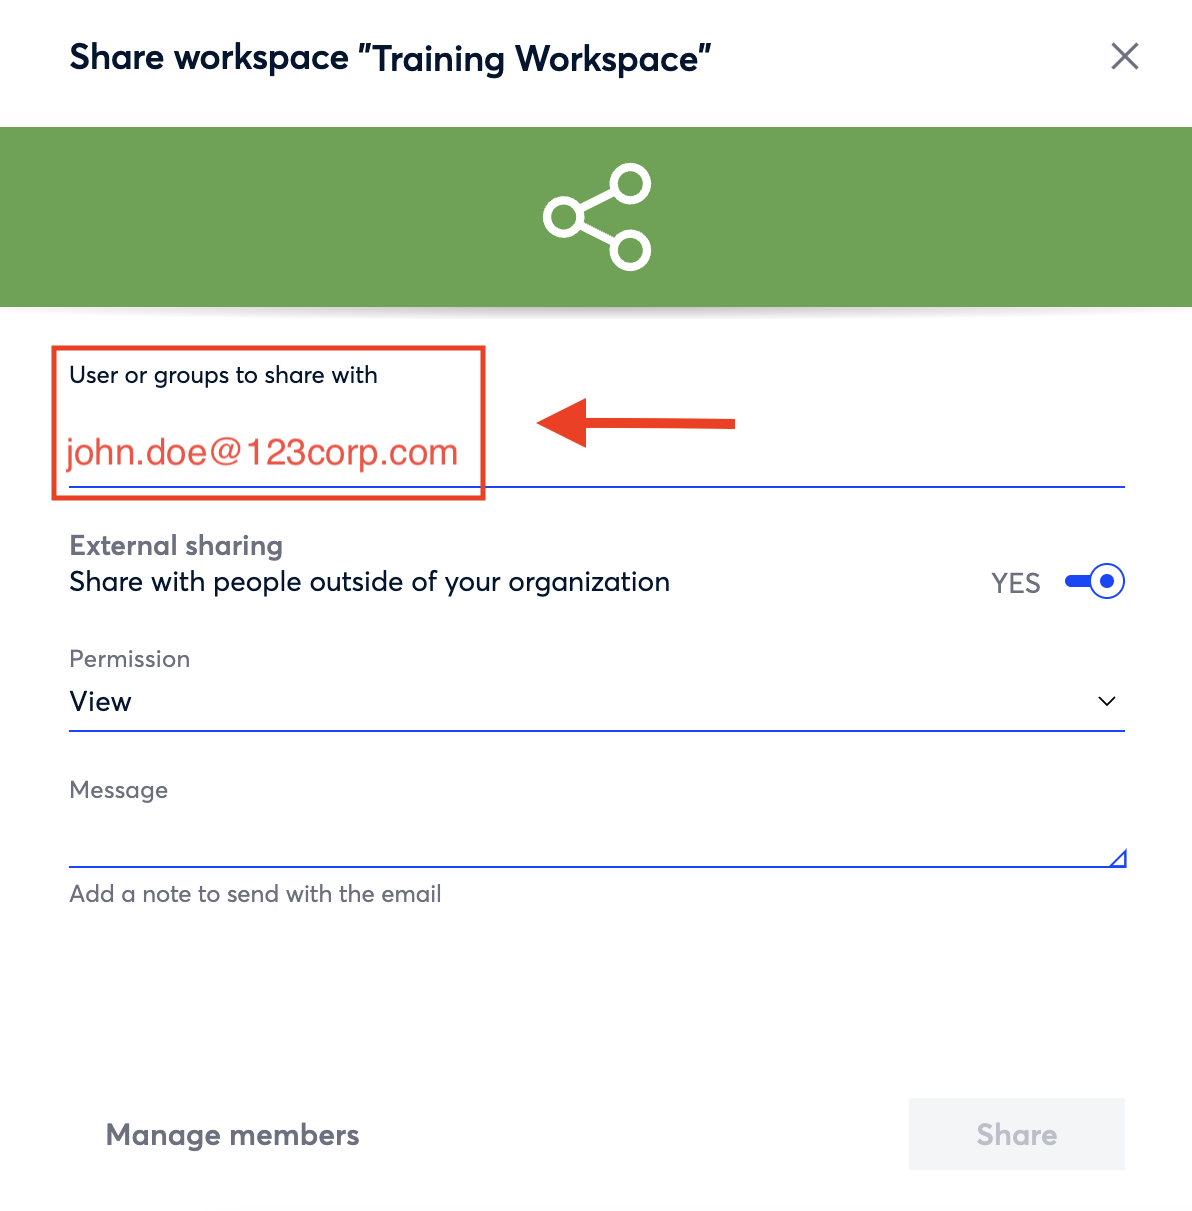
You may also share an Onna workspace with someone outside of your organization if your admin has enabled the external sharing setting for your site.
Note: If your Onna admin has 'Enforce to use SAML login' enabled, externally sharing will not be an option as the external person will not be able to bypass SSO.
Step 1
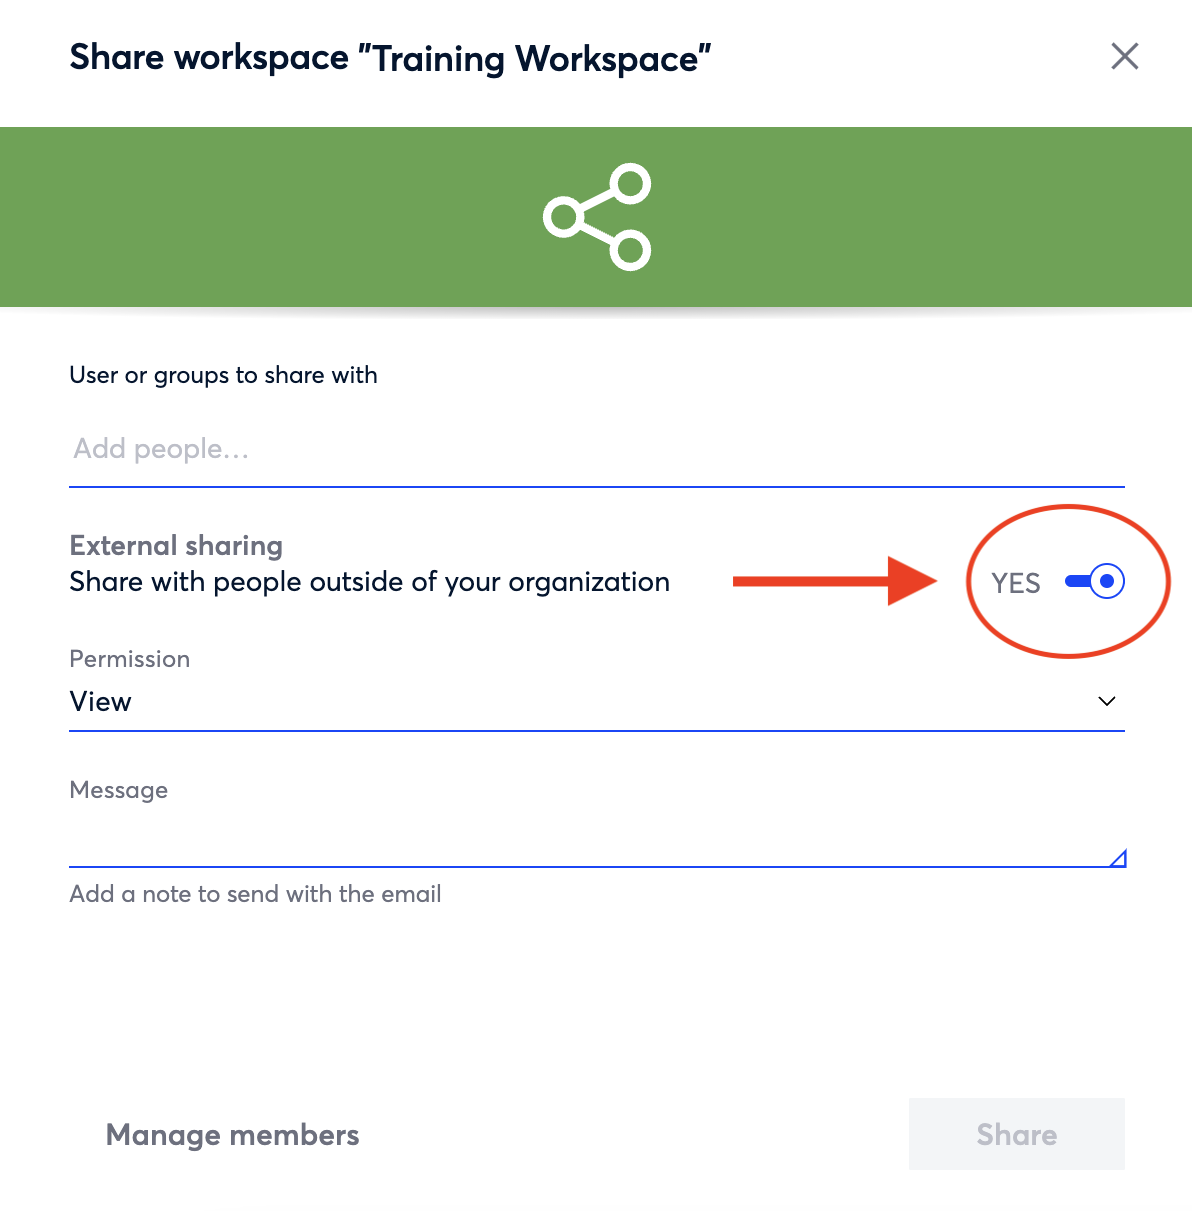
After opening the share modal (as above), the first step to share externally is to toggle External sharing to 'Yes'.
Step 2
You may then invite people who are not users in your Onna account (i.e. external counsel, third-party reviewers, etc.) to collaborate on the workspace by entering their email address.
Then, complete the rest of the information and share.
Note: External users will be granted the role of guest in Onna.
Viewing and Changing Workspace Member Permissions
To ensure that all users have the appropriate permissions you may want to view permissions and at time update workspace member permissions. To do so, follow the steps below:
Step 1
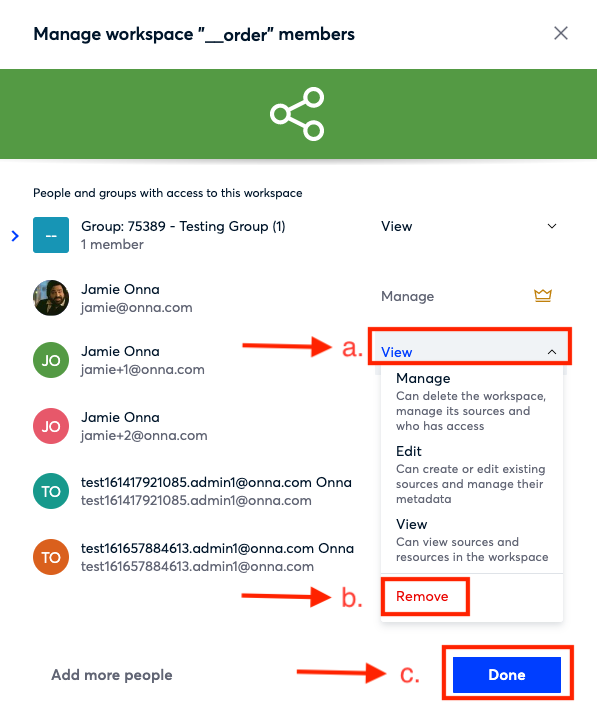
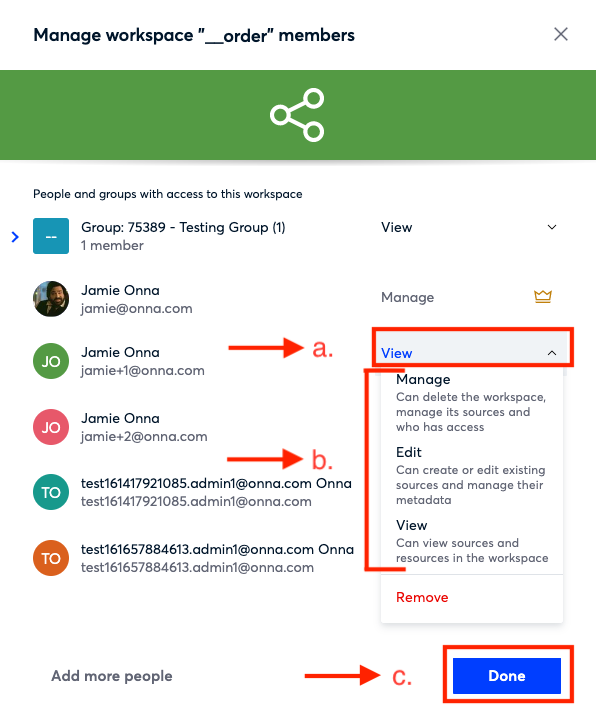
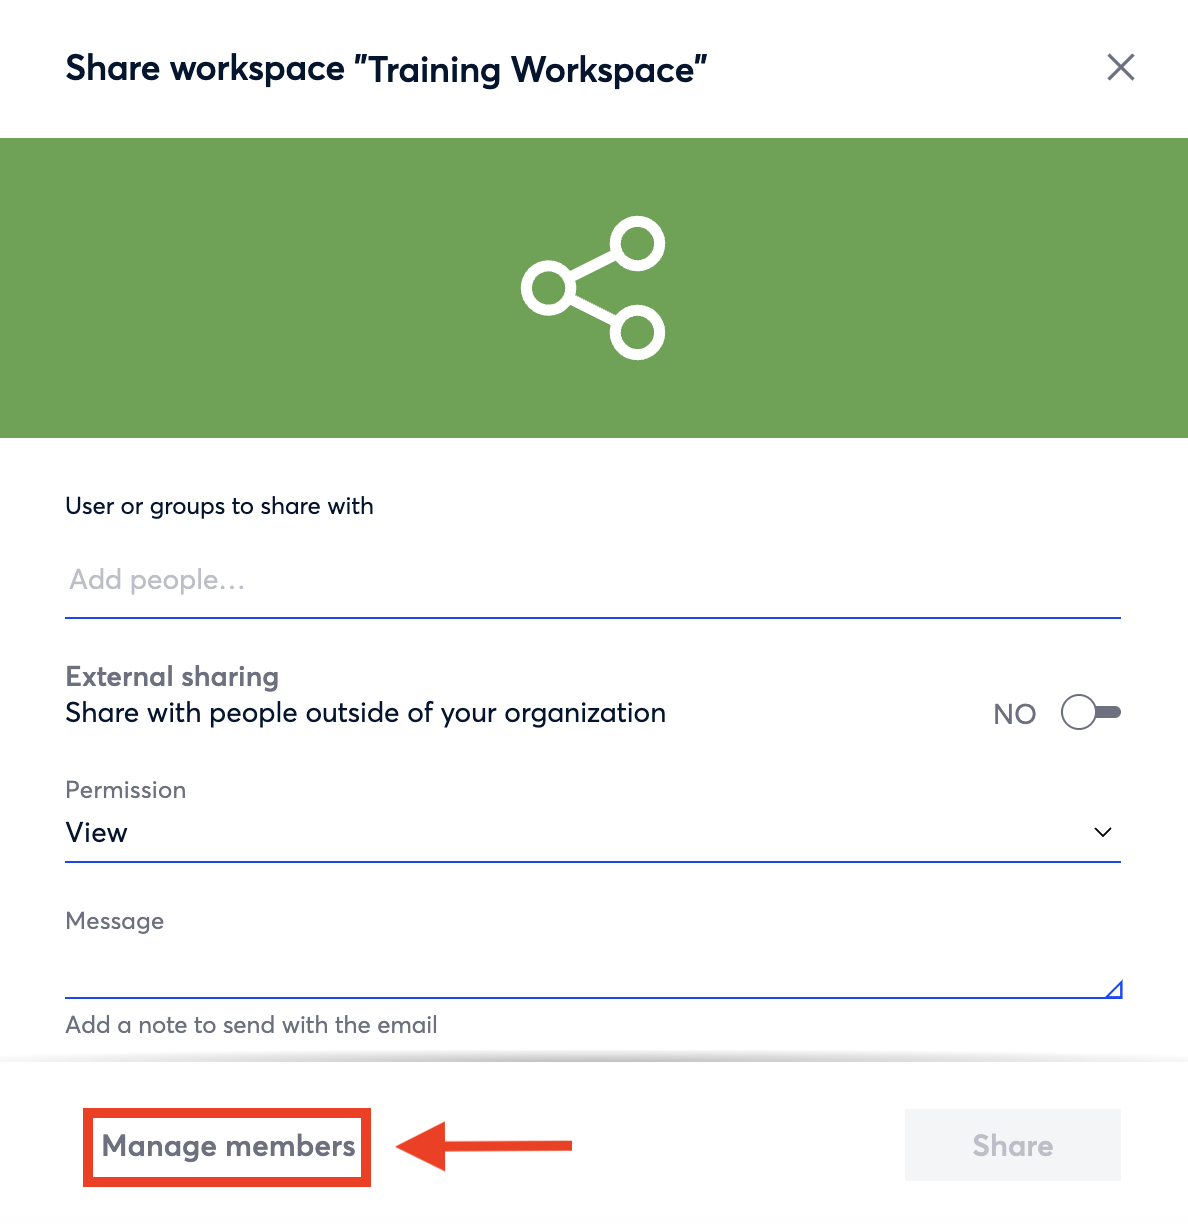
Navigate to the 'Share workspace' modal again. Once there, select 'Manage members' in the bottom left corner of the modal.

Step 2
From here you will see a list of your workspace members.
a. Next to each member you will see their current permissions and an arrow indicating a drop down menu. To change user permissions, click on that arrow.
b. From the dropdown menu that appears, select the new level of permission you want to assign to a user.
c. Click the blue 'Done' button in the bottom right hand corner of the modal.
Removing Users from a Workspace
For privacy or security reasons you may want to delete a user from a workspace. To do so, follow the steps below:
Step 1
Navigate to the 'Share workspace' modal again. Once there, select 'Manage members' in the bottom left corner of the modal.
Step 2
From here you will see a list of your workspace members.
a. Next to each member you will see their current permissions and an arrow indicating a drop down menu. To remove a member, click on that arrow.
b. From the dropdown menu that appears, select 'Remove'
c. Click the blue 'Done' button in the bottom right hand corner of the modal.