Microsoft Teams Enterprise_ How to Connect and Collect
- 26 Jun 2024
- 5 Minutes to read
- Print
- DarkLight
- PDF
Microsoft Teams Enterprise_ How to Connect and Collect
- Updated on 26 Jun 2024
- 5 Minutes to read
- Print
- DarkLight
- PDF
Article summary
Did you find this summary helpful?
Thank you for your feedback

In this article:
Microsoft Teams Enterprise Overview
Microsoft Teams Enterprise Requirements
How to Connect and Collect Using Microsoft Teams Enterprise
Microsoft Teams Enterprise Overview
Microsoft Teams, part of the Microsoft 365 family of products, is a chat-based workspace that combines instant messaging, voice, video, calling, and file-sharing. Onna connects directly to the Microsoft 365 Graph API and Export API to collect channels, chats, and other metadata from your Microsoft Teams account.
Connector Features | |
Authorized Connection Required? Yes | Is identity mapping supported? Yes |
Audit logs available? Yes | Admin Access? Yes |
Supports a full archive? Yes | Custodian based collections? Yes |
Preserve in place with ILH? No | Resumable sync supported? Yes |
Supports Onna preservation? Yes | Syncs future users automatically? Yes |
Sync modes supported:
| Is file versioning supported? Yes |
Types of Data Collected | Metadata Collected |
|
|
Microsoft Teams Enterprise Considerations
Collection Considerations
Onna is able to collect data from blocked users that have an active license.
Onna can collect edits and deletions in Microsoft Teams as long as:
The revision happens on a message that Onna has already captured.This is due to Microsoft Team's API not capturing revisions, so we’ve made them available only in Onna
Your MS Teams source is set up in Auto-sync and archive sync mode.
Onna is unable to collect channel events, such as channel renamed, member added, or channel deleted
Onna is unable to collect Team events, such as team renamed or member added
Onna is unable to collect files shared outside your organization
Search Considerations
Adaptive cards cannot be displayed in the preview. However, you can still search for them and export them.
Some emojis may appear different in Onna than in Teams
Microsoft Teams Enterprise Requirements
Onna uses the Microsoft Graph APIs to collect all your Microsoft Teams user data. For this, Onna requires organization-wide Graph API access. Only Microsoft users accounts with an Administrative Role can consent to this access. The user role with the least privileges that can consent to this is the Privileged Role Administrator. You can also use a role with greater privileges, such as Global Administrator.
Onna's Microsoft Teams connector leverages Microsoft Graph to ingest Teams data. More specifically, Onna connects to the Microsoft Teams API (Model A) to ingest chat and channel messages. Each member that you wish to ingest for must have one of the following licenses active:
Microsoft 365 E5/A5/G5 OR
Microsoft A1/A3/E1/E3/G1/G3/F1/F3 with one of the following add-ons
Microsoft 365 E5/A5/F5/G5 Compliance
Microsoft 365 E5/A5/F5/G5 Information Protection and Governance
Microsoft 365 F5 Security & Compliance
You also need access to the Teams Export API. Currently, access to this API is included with licenses that allow subscribing to chat messages. You don’t need to take any other action if you have one of those licenses. However, the official documentation indicates that requirements to access the API may change in the future. This is why we recommend checking the official documentation.
Before setting up a new sync using the Microsoft Teams Enterprise connector you will need to have access to authorized connection credentials in Onna. To learn more about how to set up and share an authorized connection visit the article, Creating and Managing Authorized Connections in Onna.
In order to set up an authorized connection for Microsoft Teams Enterprise you will need the following information:
For the purpose of setting up Onna with your Microsoft Teams account, we recommend creating a service account with the appropriate privileges instead of using an existing personal user account. When assigning new privileges to an account, it may take up to 24 hours for the changes to take effect.
Check out Microsoft documentation about admin roles and on how to assign these roles.
How to Connect and Collect Using Microsoft Teams Enterprise
Once you have the authorized connection credentials necessary you can set up a new sync by following the steps below:
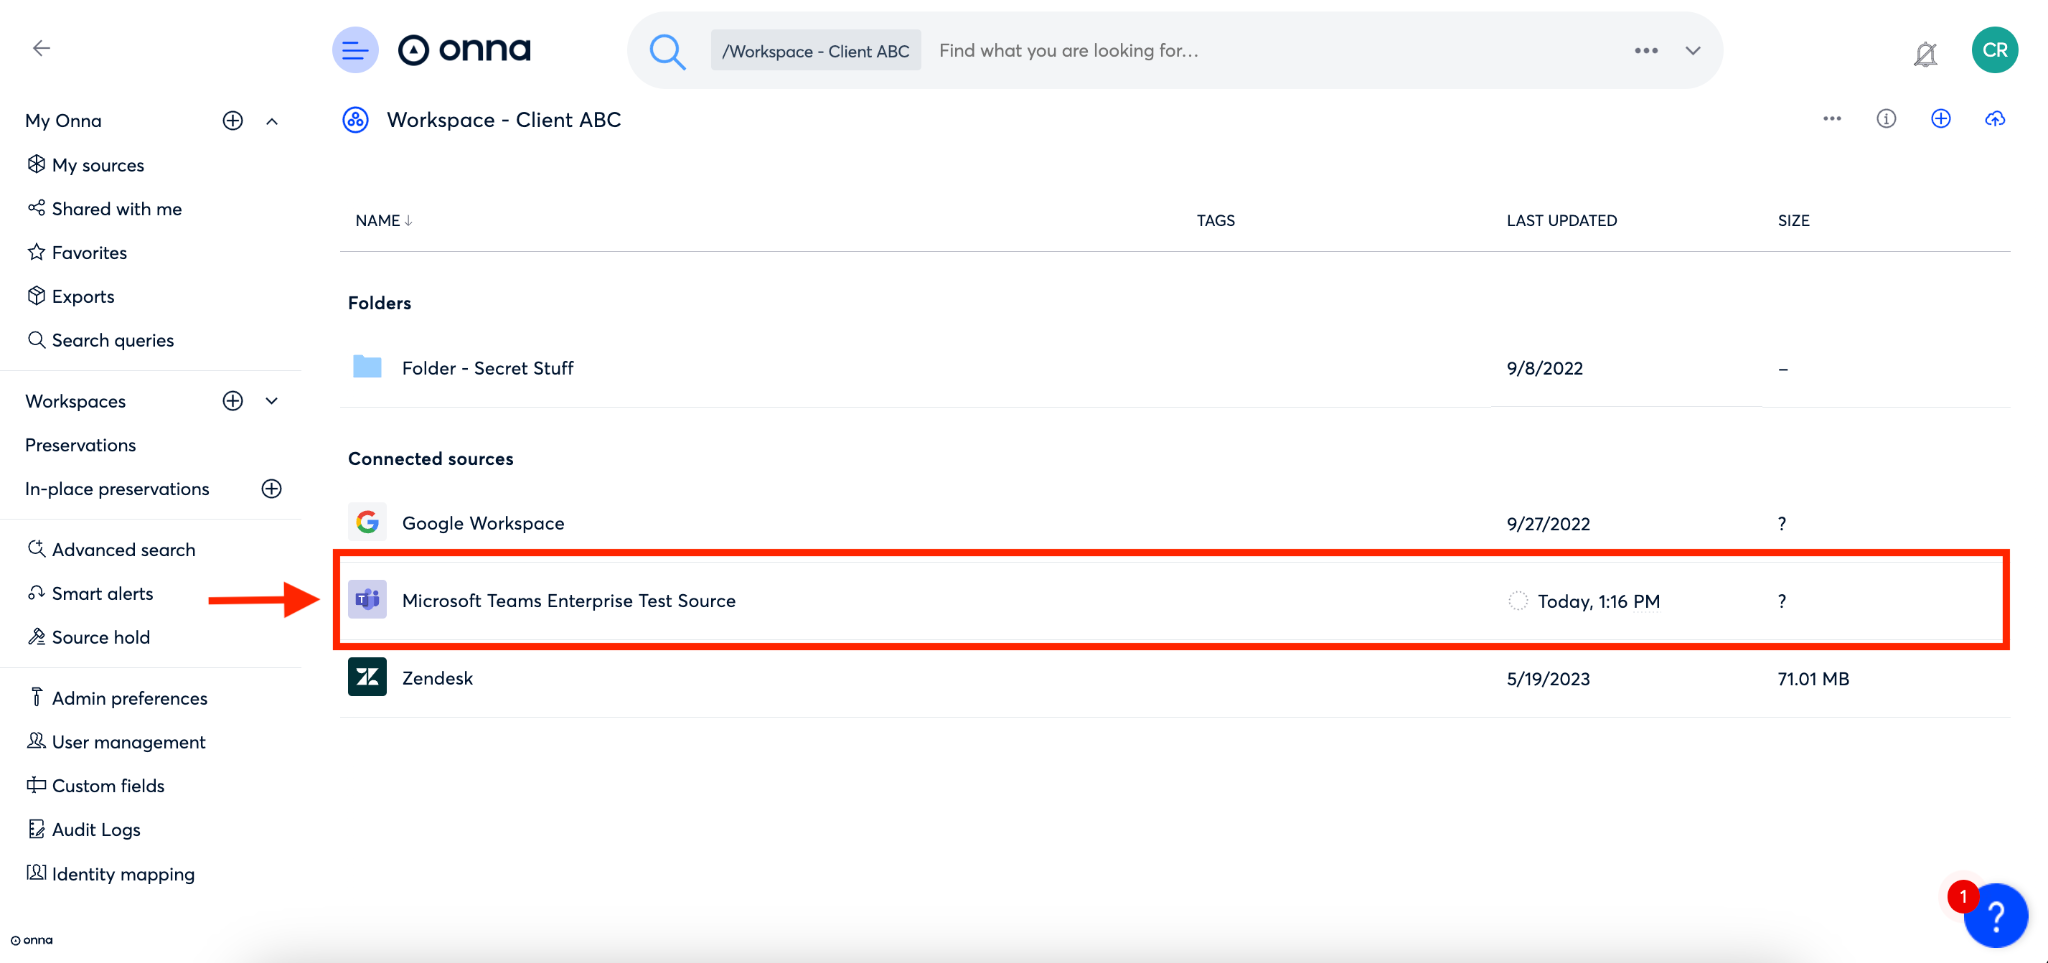
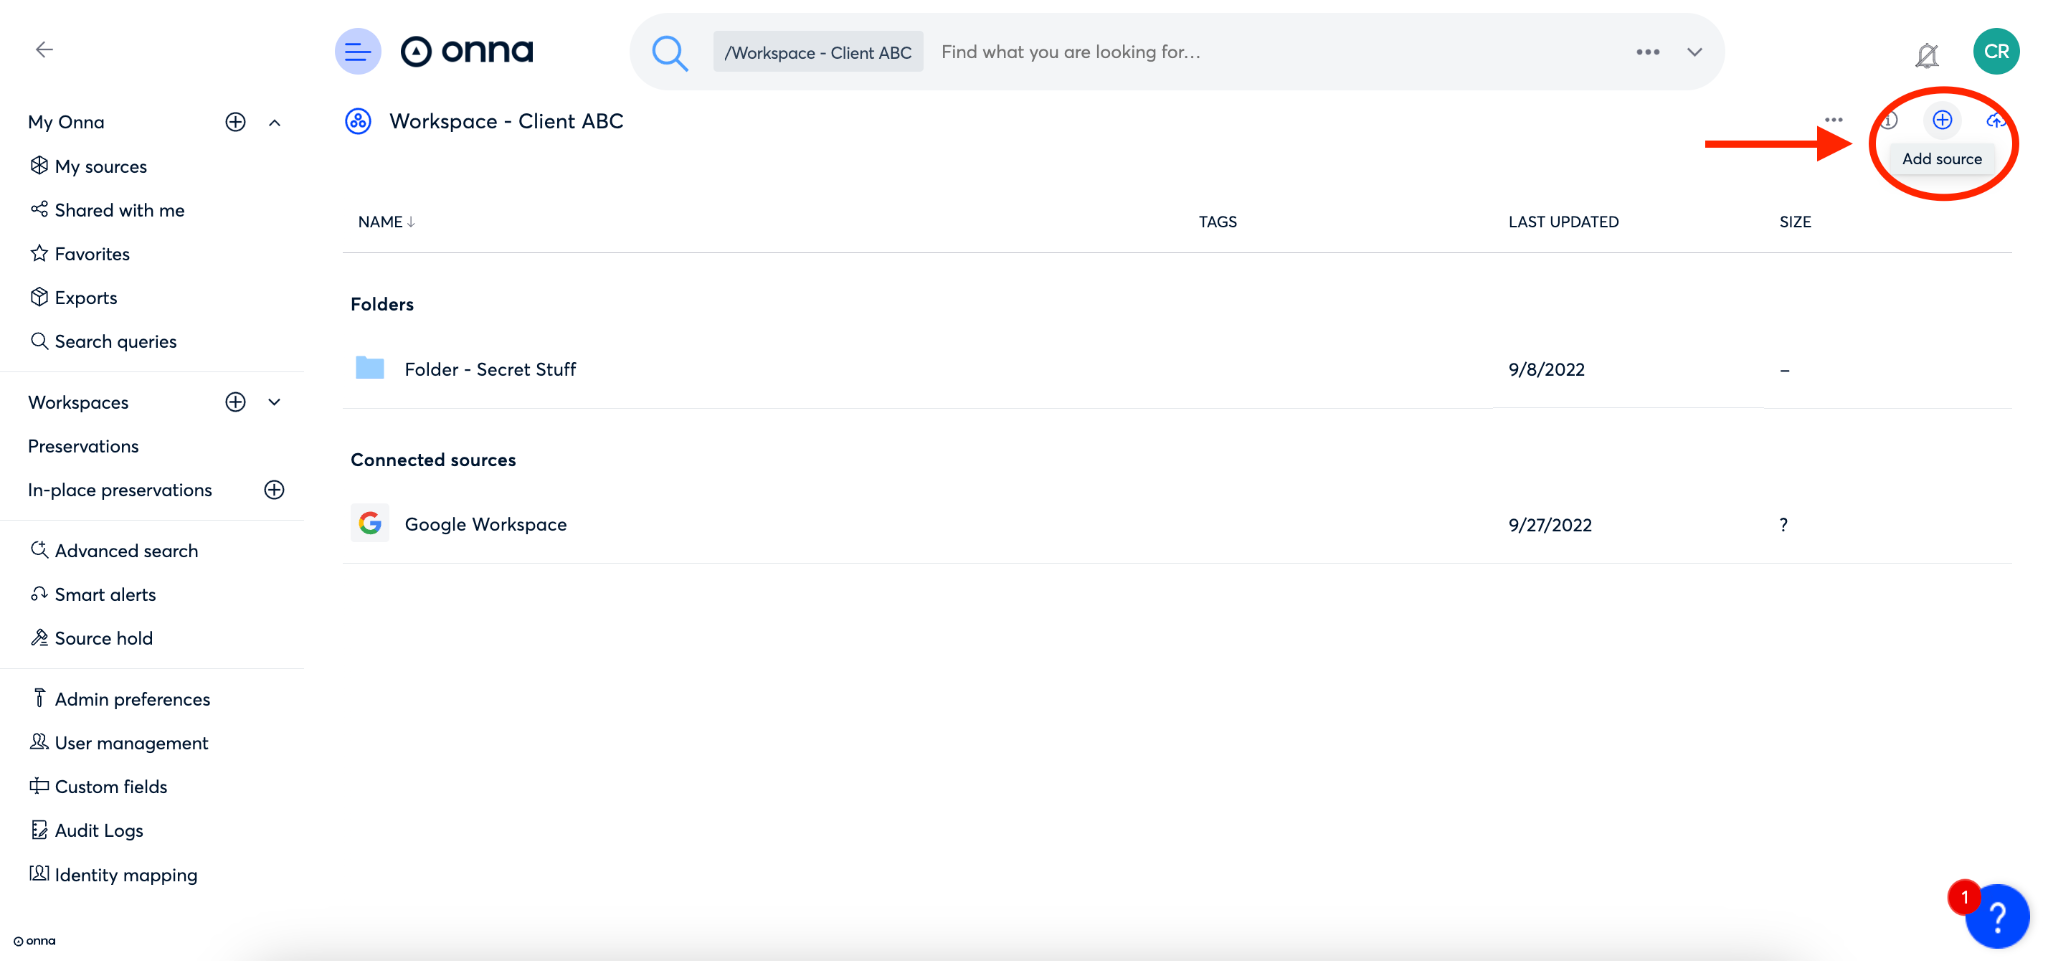
Step 1
Navigate to the workspace where you want to set up your sync.
Inside that workspace click on the ‘+’ icon in the upper right corner of the screen to ‘Add source’.
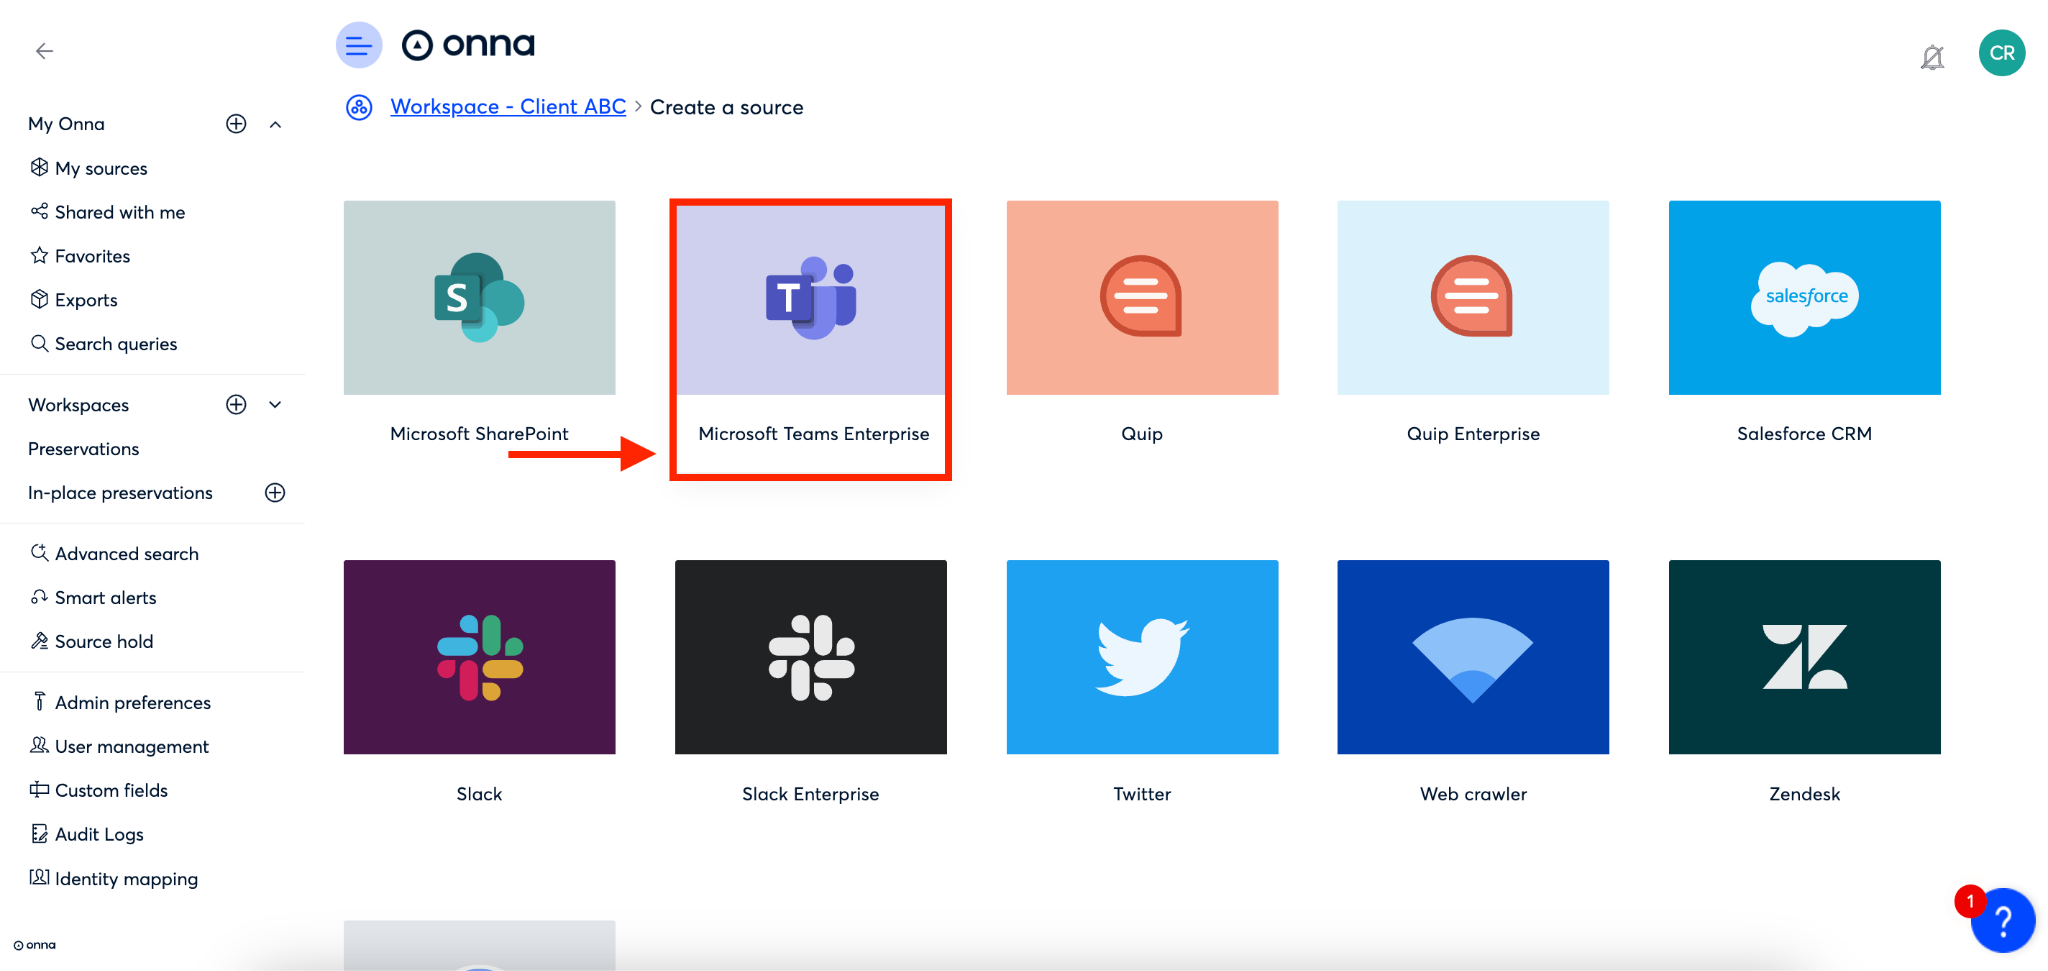
Step 2
You will now see a list of all sources enabled for your organization. Find and select the ‘Microsoft Teams Enterprise’ source.
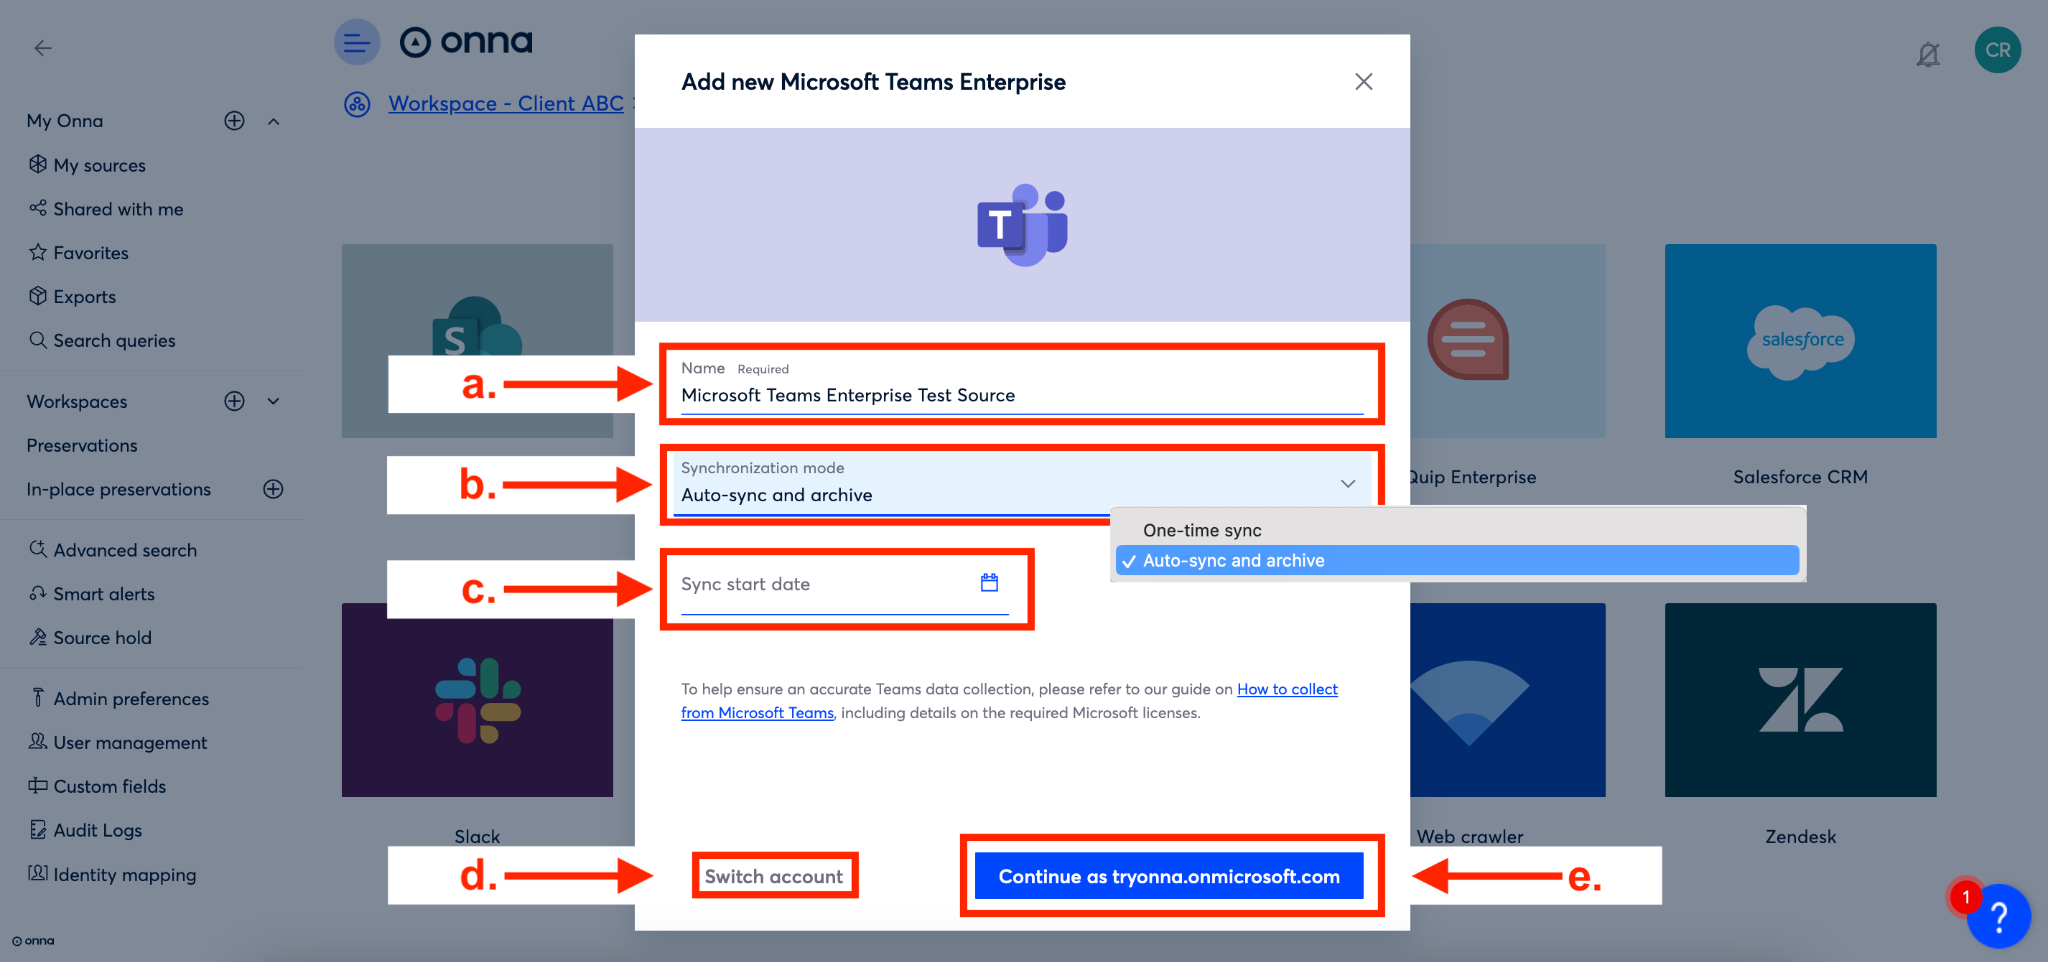
Step 3
You’ll now define the basic information for your new sync, including:
The name of your sync (We will autofill this field with the name of your source, but you can change it)
They sync mode you’d like to use
The start date for your sync (Note: If you’re choosing a one-time sync you’ll enter an start and end date for your sync)
Optional: If you need to, you can switch the authorized connection credentials you want to use to set up the sync by clicking switch account
Once you’ve selected the right account select the blue ‘Continue as...’ button
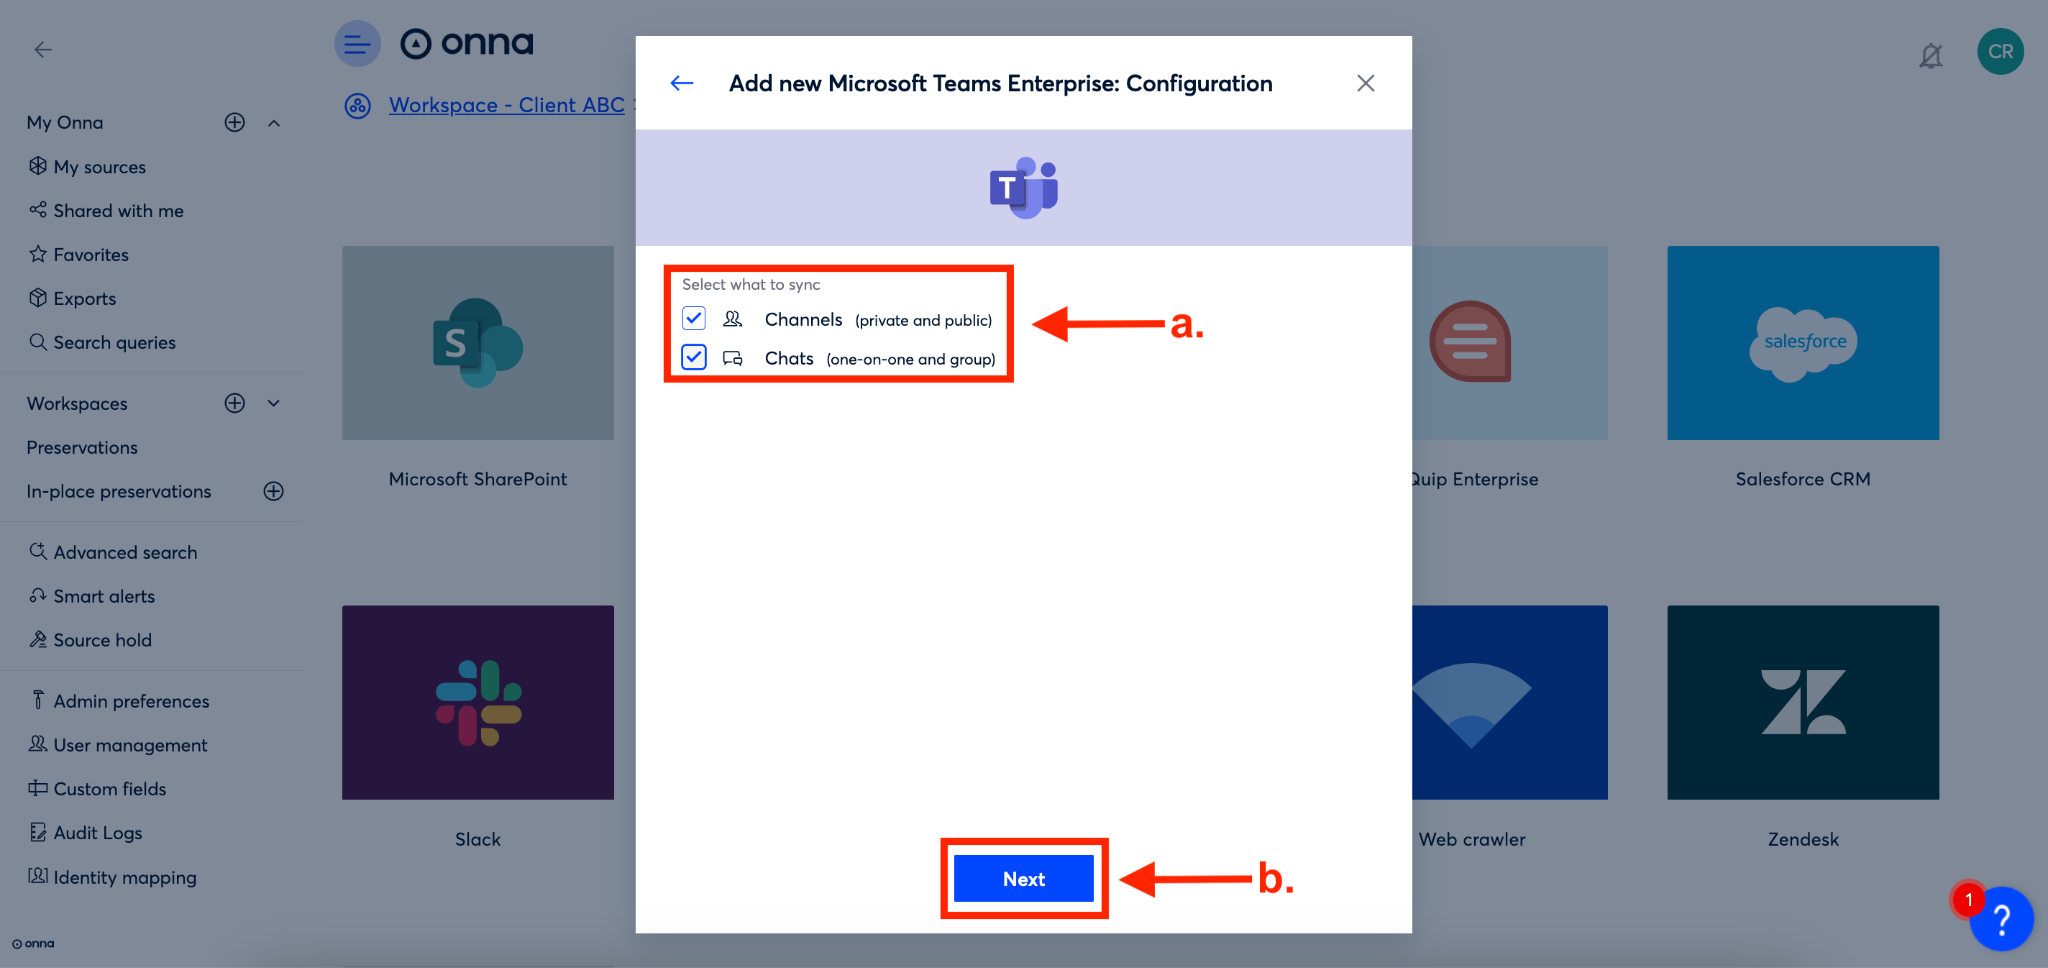
Step 4
Next you’ll configure what type of data you’d like to sync by:
Selecting whether you want to include Channels, Chats, or both in your sync. Put a check mark next to the data you want to sync.
Click the blue ‘Next’ button
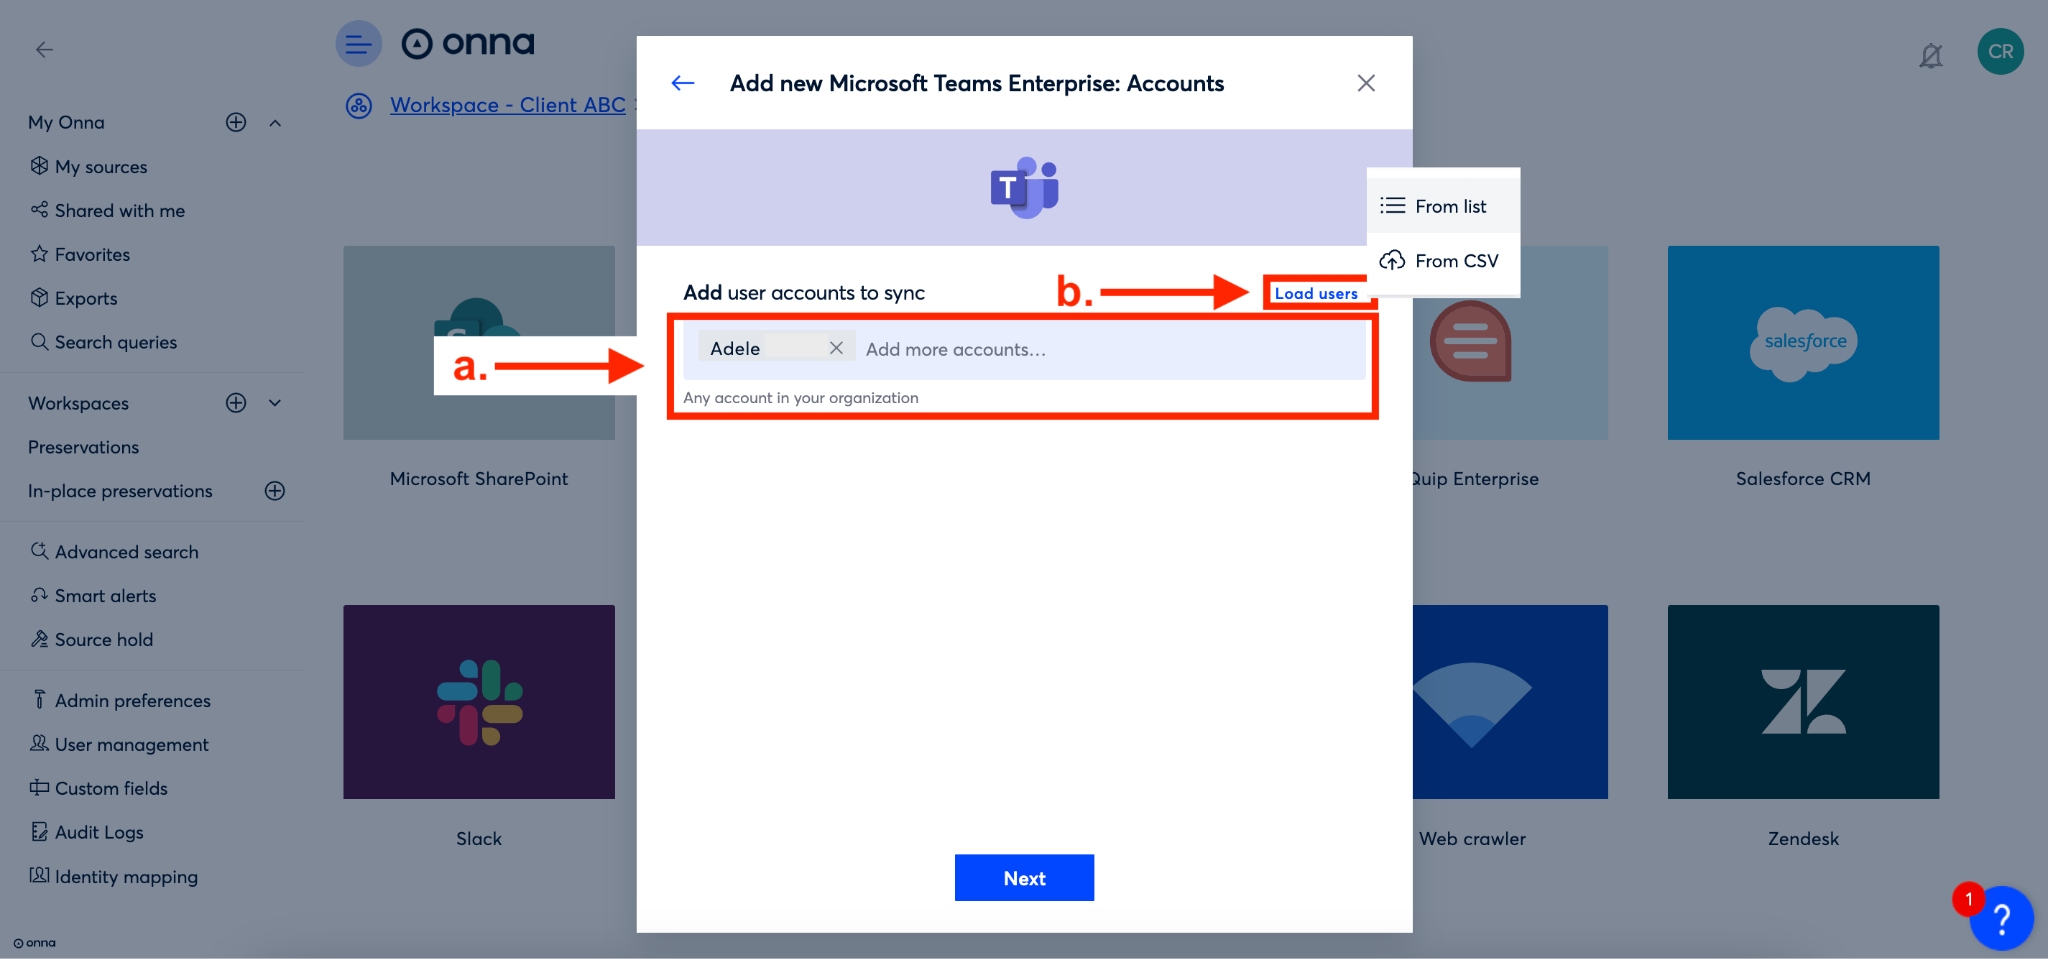
Step 5
You’ll now add the users you’d like to include in your sync. You can do this by either:
Manually adding users' email addresses. Or,
Loading users via a list or from a CSV by clicking ‘Load users’.
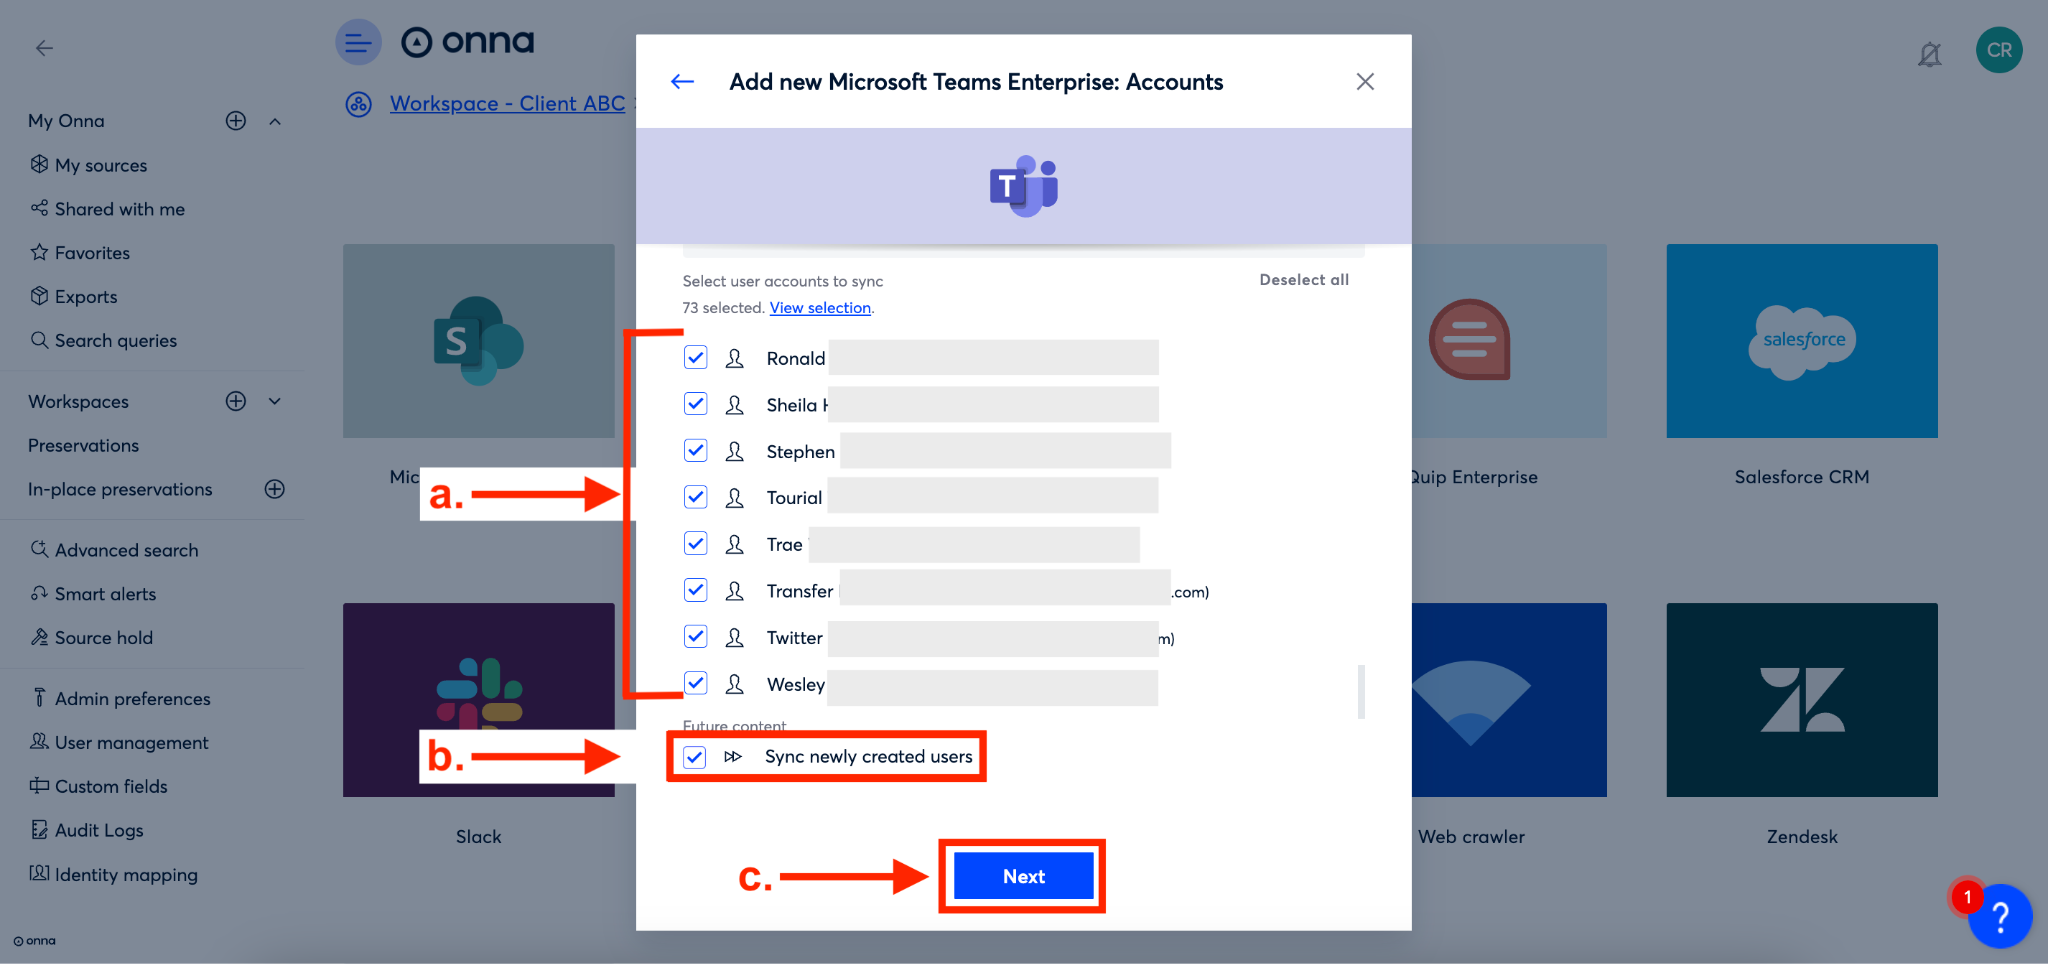
Step 6
If you select users from a list you will be directed to a screen where you will:
select the users you want to include or click ‘Select all’ to include all users.
Check the box next to ‘Sync newly created user’ to sync new users. Leave this box unchecked if you don’t want to sync future users.
Click the blue ‘Next’ button.
Step 7
You’ll now select user channels by:
Putting a check mark next to the users you want to collect data from. This will automatically select all workspaces, channels, and chats a user is a part of. To be more selective you can click the arrow next to the user name to then,
Select the workspace where the user has data and click the arrow next to that workspace to then,
Select the channels and chats you want to sync
Check the box next to ‘Sync newly created teams and channels’ to sync any new teams or channels added in the future. Leave this box unchecked if you don’t want to sync future teams and channels.
Click the blue ‘Done’ button.

Step 8
Your sync is now in progress and visible inside the workspace you added it to. To learn more, see the article "How to Monitor Your Source Sync Status”.