Viewing and Managing Preservations
- 26 Jun 2024
- 3 Minutes to read
- Print
- DarkLight
- PDF
Viewing and Managing Preservations
- Updated on 26 Jun 2024
- 3 Minutes to read
- Print
- DarkLight
- PDF
Article summary
Did you find this summary helpful?
Thank you for your feedback

In this article you will learn:
How to View a Preservation
How to Edit a Preservation
How to Export a Preservation
How to Finish a Preservation
How to Delete a Preservation
Viewing a Preservation
Once you have preservations set up you can view details about your preservations by following the steps below:
Step 1:
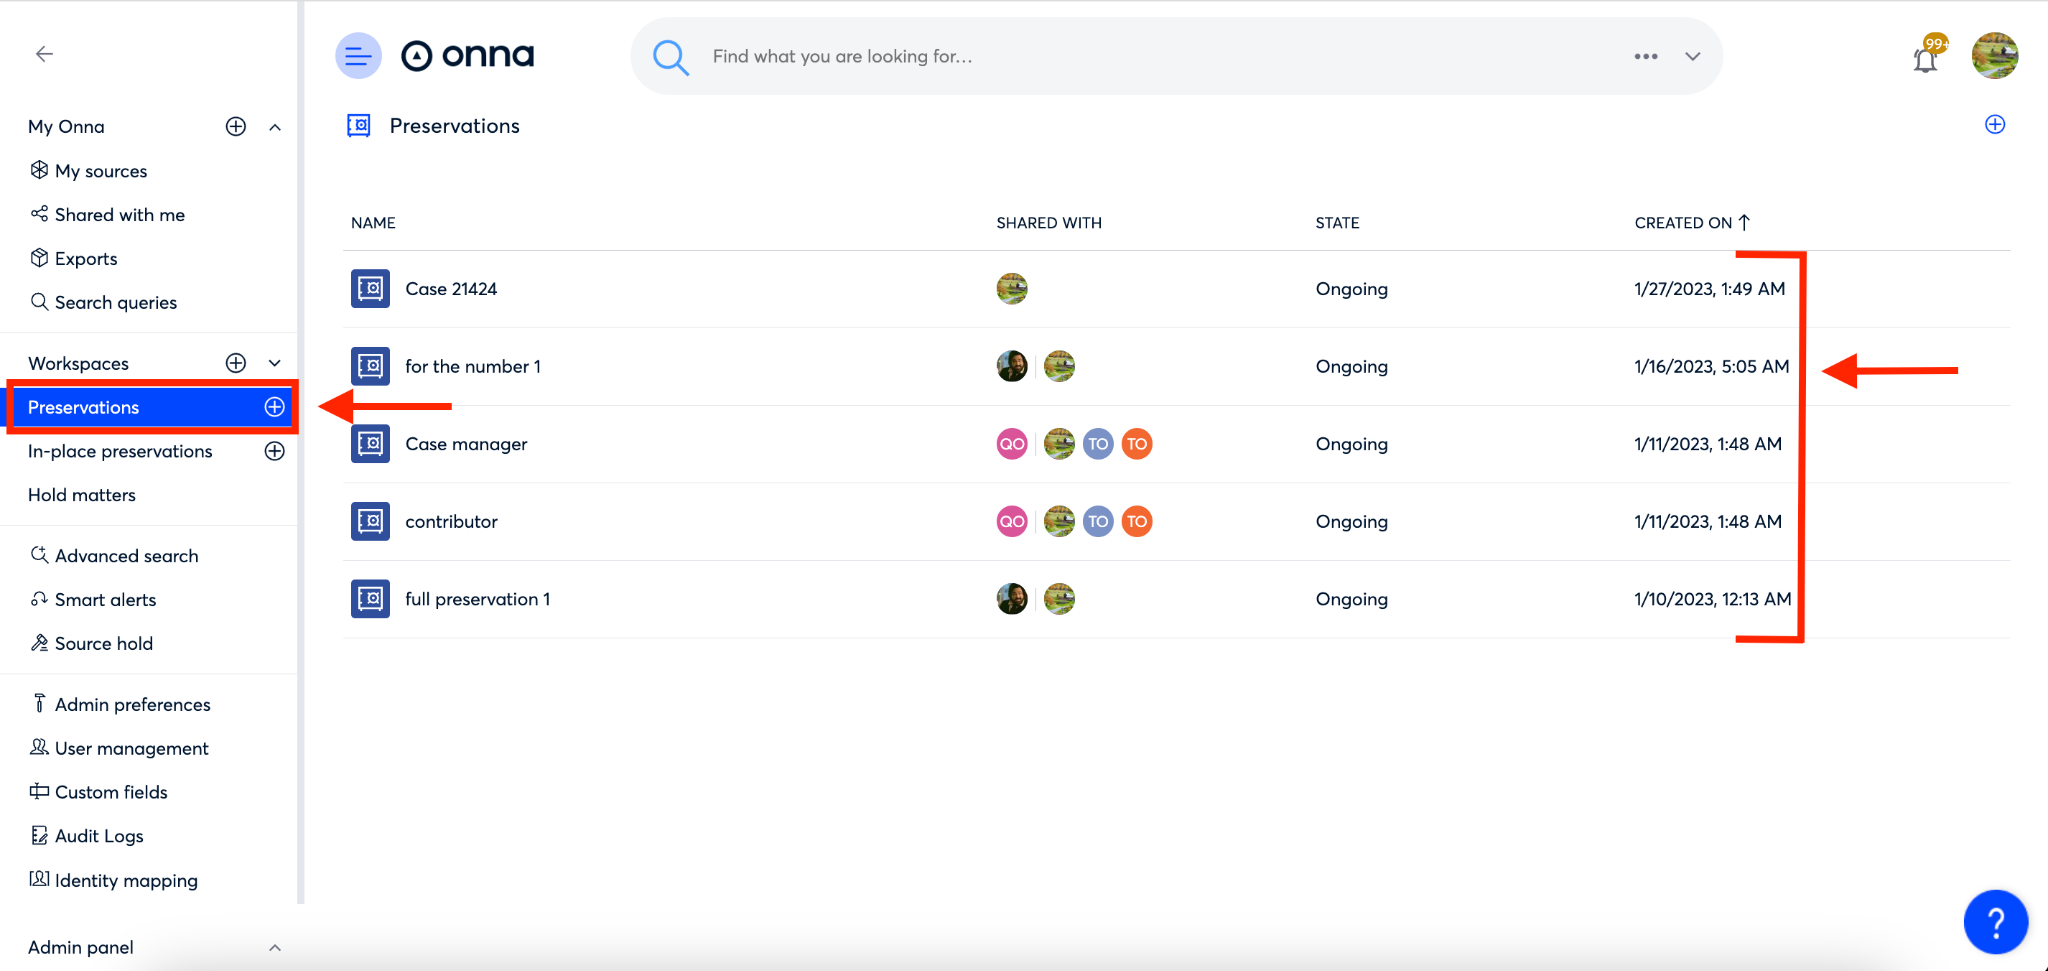
To view a preservation start by navigating to the ‘Preservations’ page from the navigation menu.
Once you’re on the ‘Preservations’ page you will see a list of all your preservations.
Step 2:
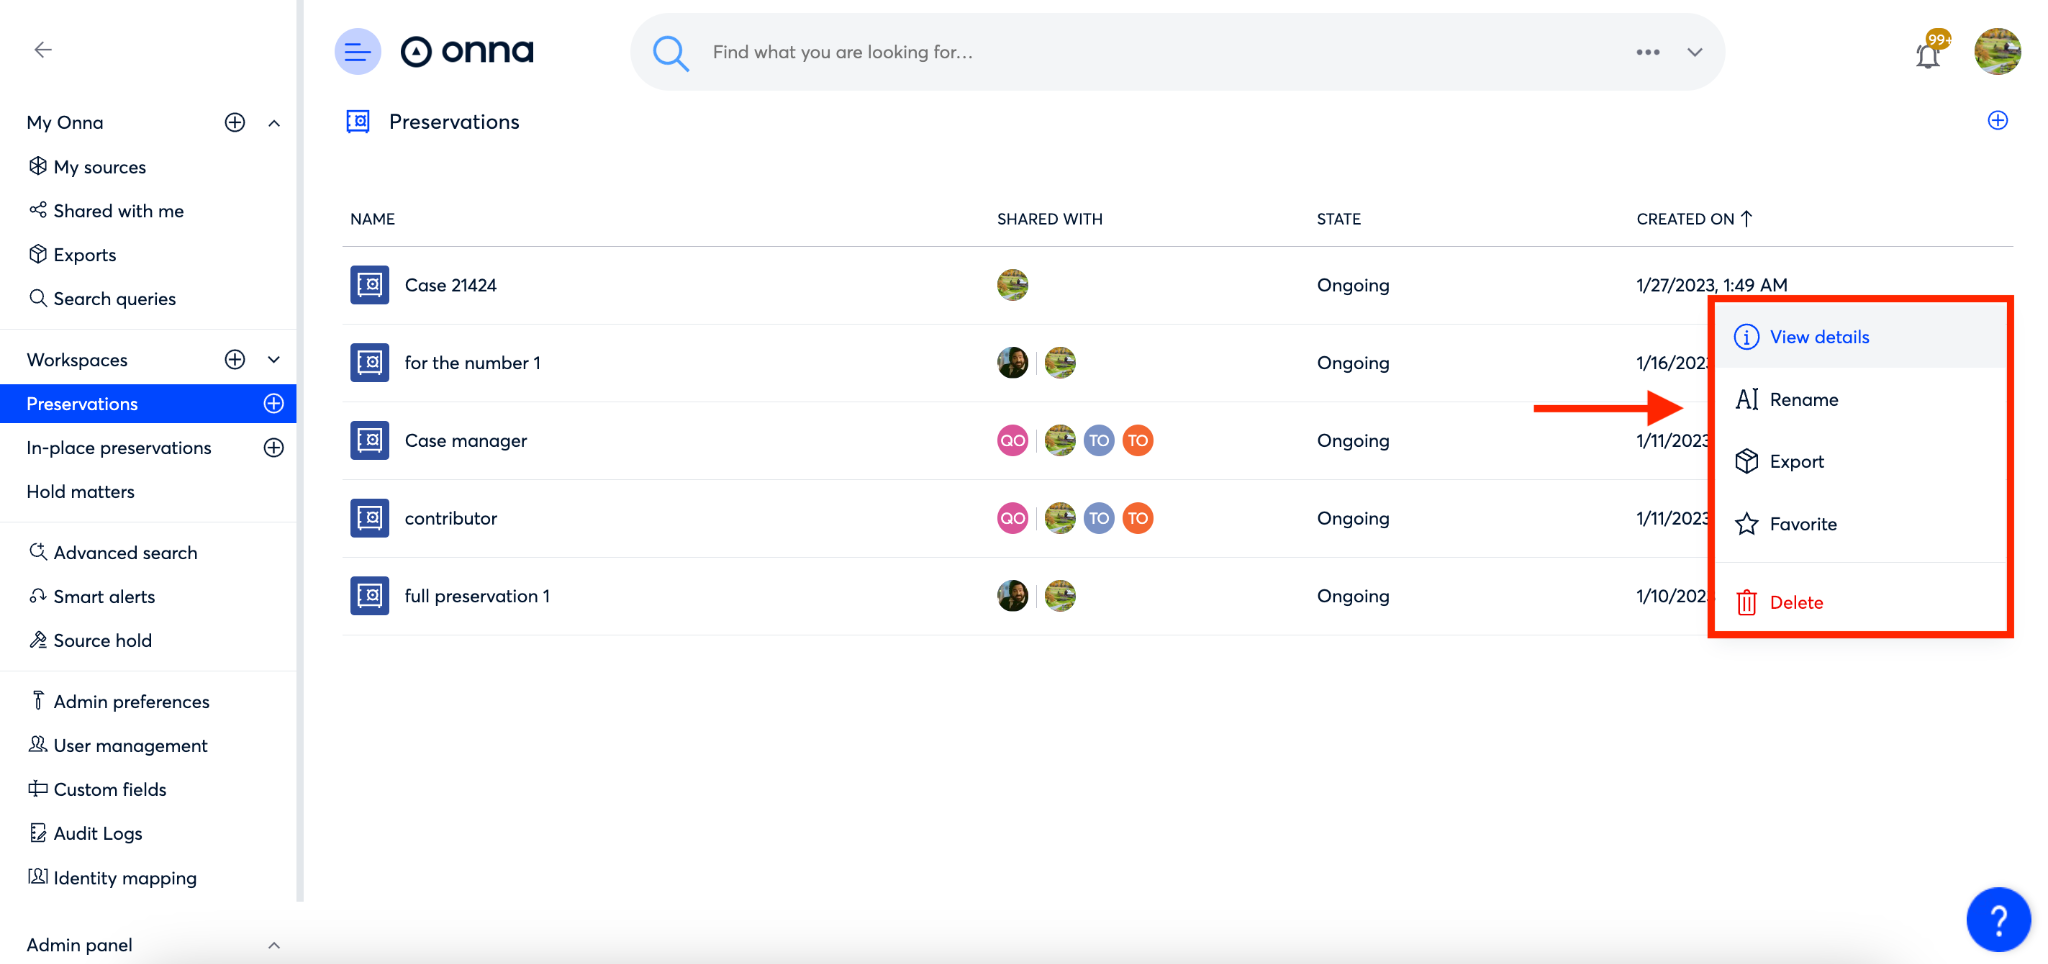
From the list you can click on the ellipsis to the right of a preservation to take certain actions:
View details
Rename
Export
Favorite
Delete*
*If you delete a preservation all data is released back to the source and the Preservation entry is deleted from the interface. If you’d like to keep the Preservation details and release the data from hold, finish the preservation.
Step 3:
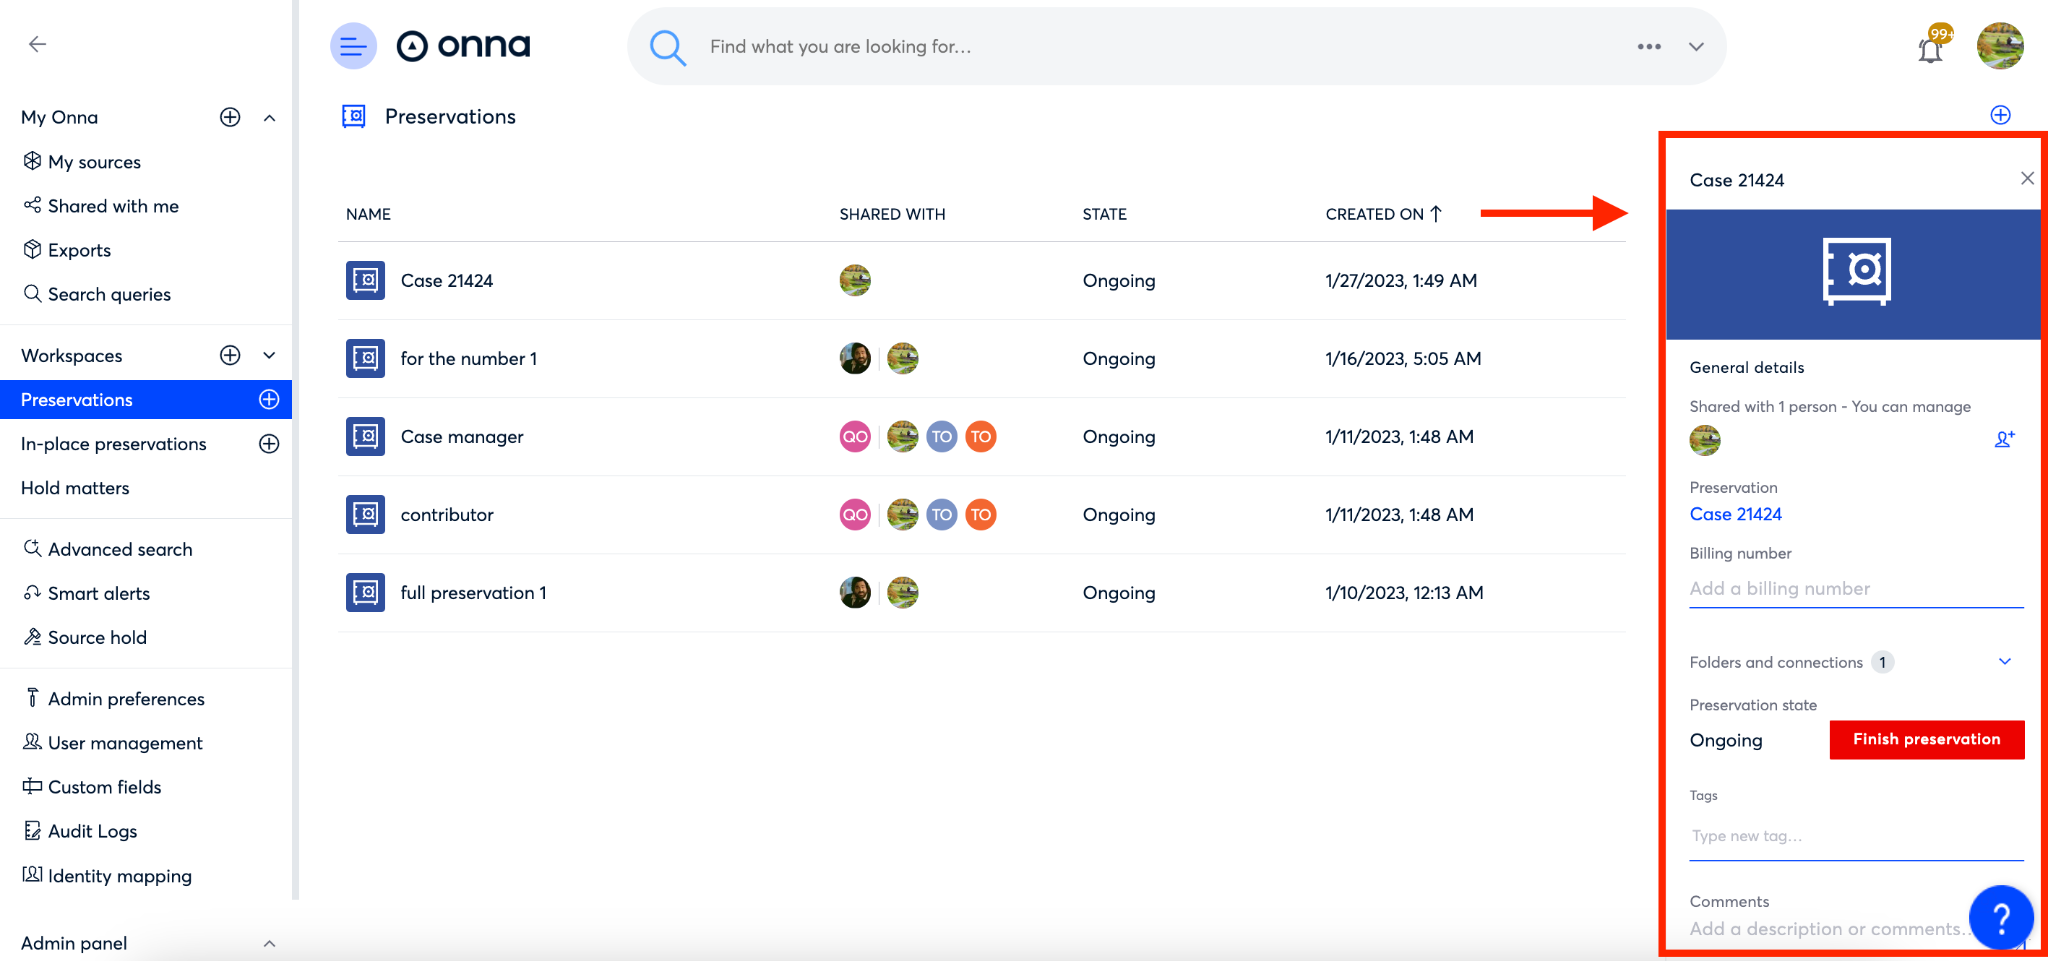
When you click on the ‘View details’ option from the dropdown (or by clicking on the ℹ️ icon from within a preservation) it will bring up a Details Panel on the right side of your screen that includes a summary of your preservation.
Step 4:
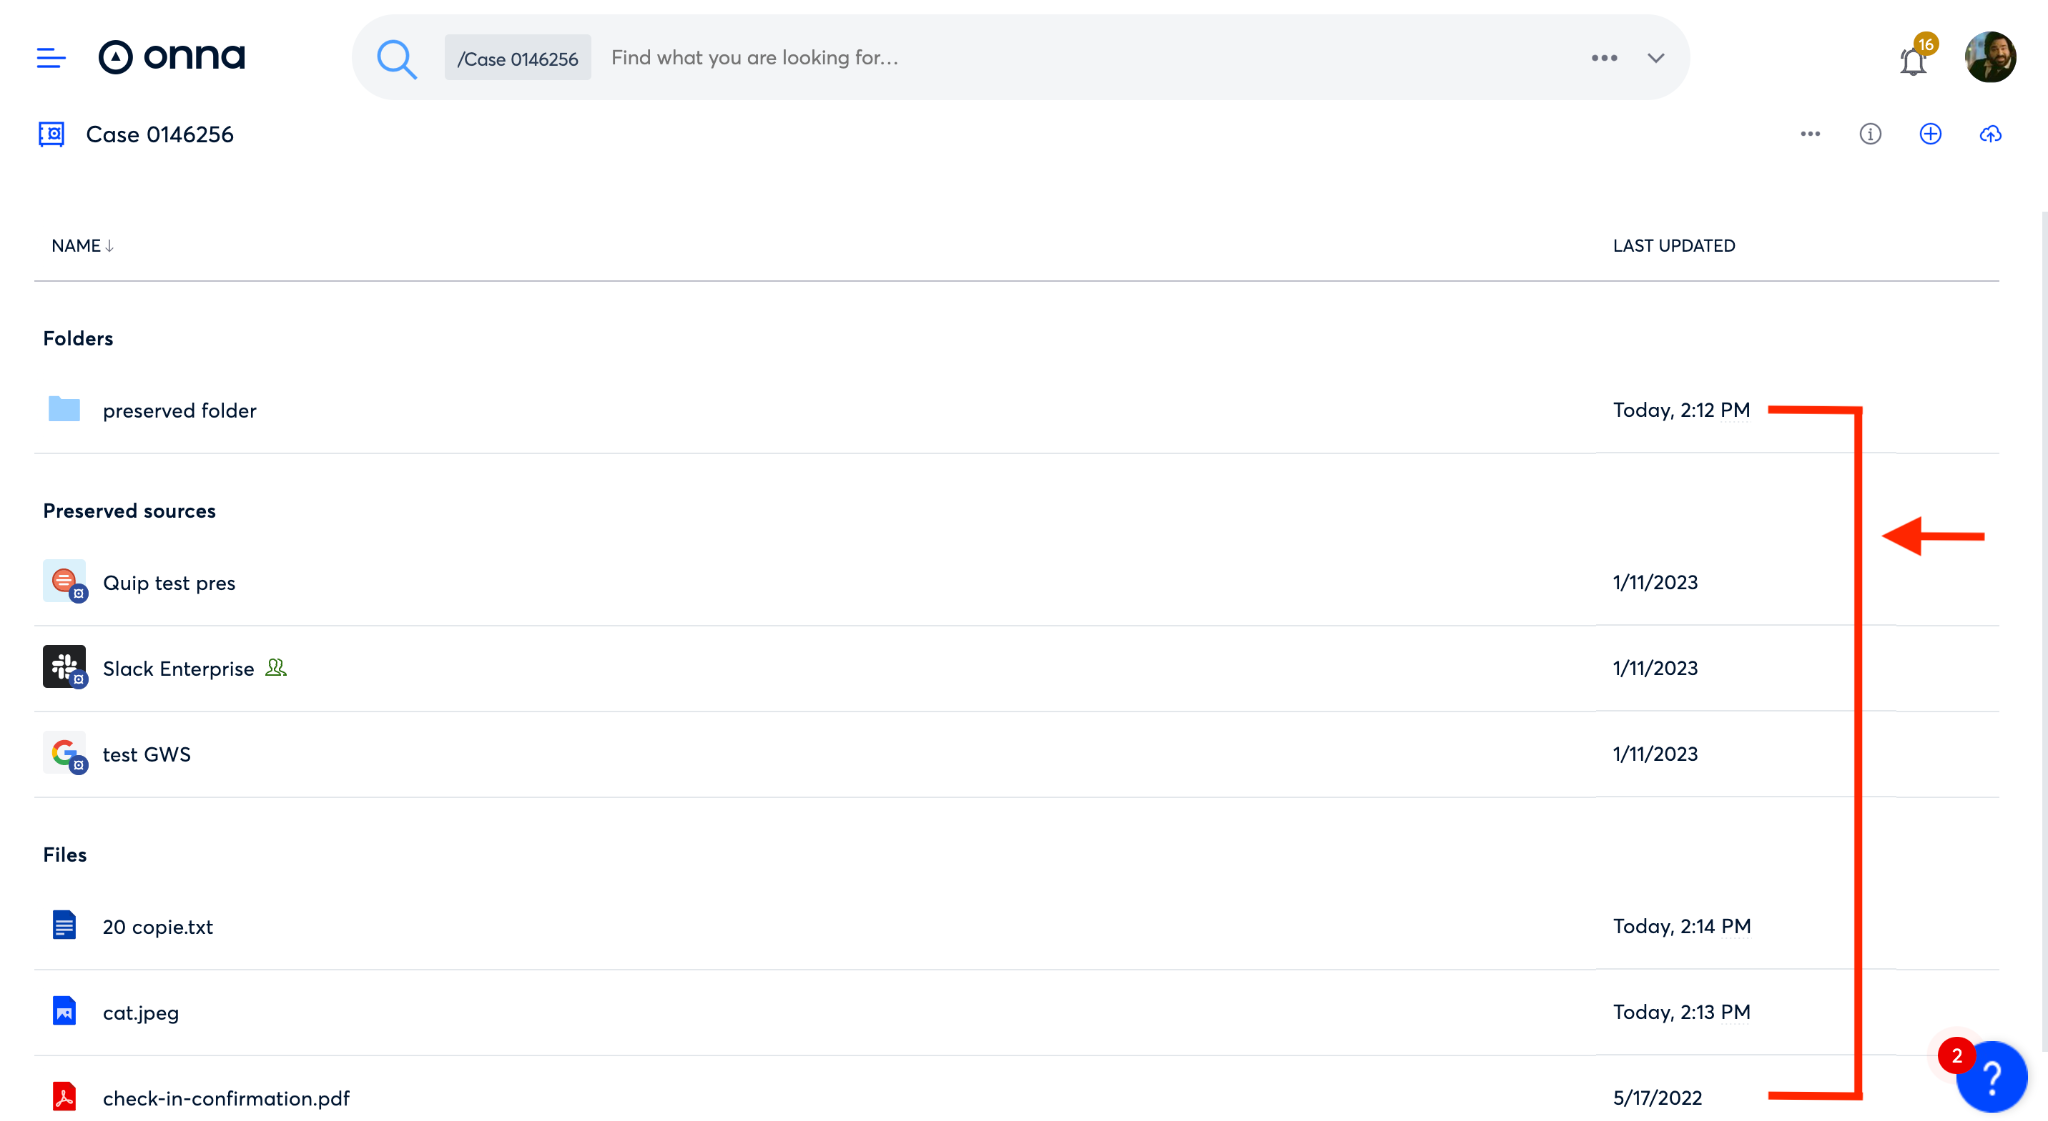
To search across an individual preservation or the sources within, start by clicking on a preservation in your list.
From inside the preservation you can see a list of all sources that are included in the preservation as well as the size of each source. From here you can search across just this preservation or individual sources included in the preservation.
Editing a Preservation
There are times when details of a matter might change and you need to adjust your preservations. To edit a preservation follow the steps below:
Step 1:
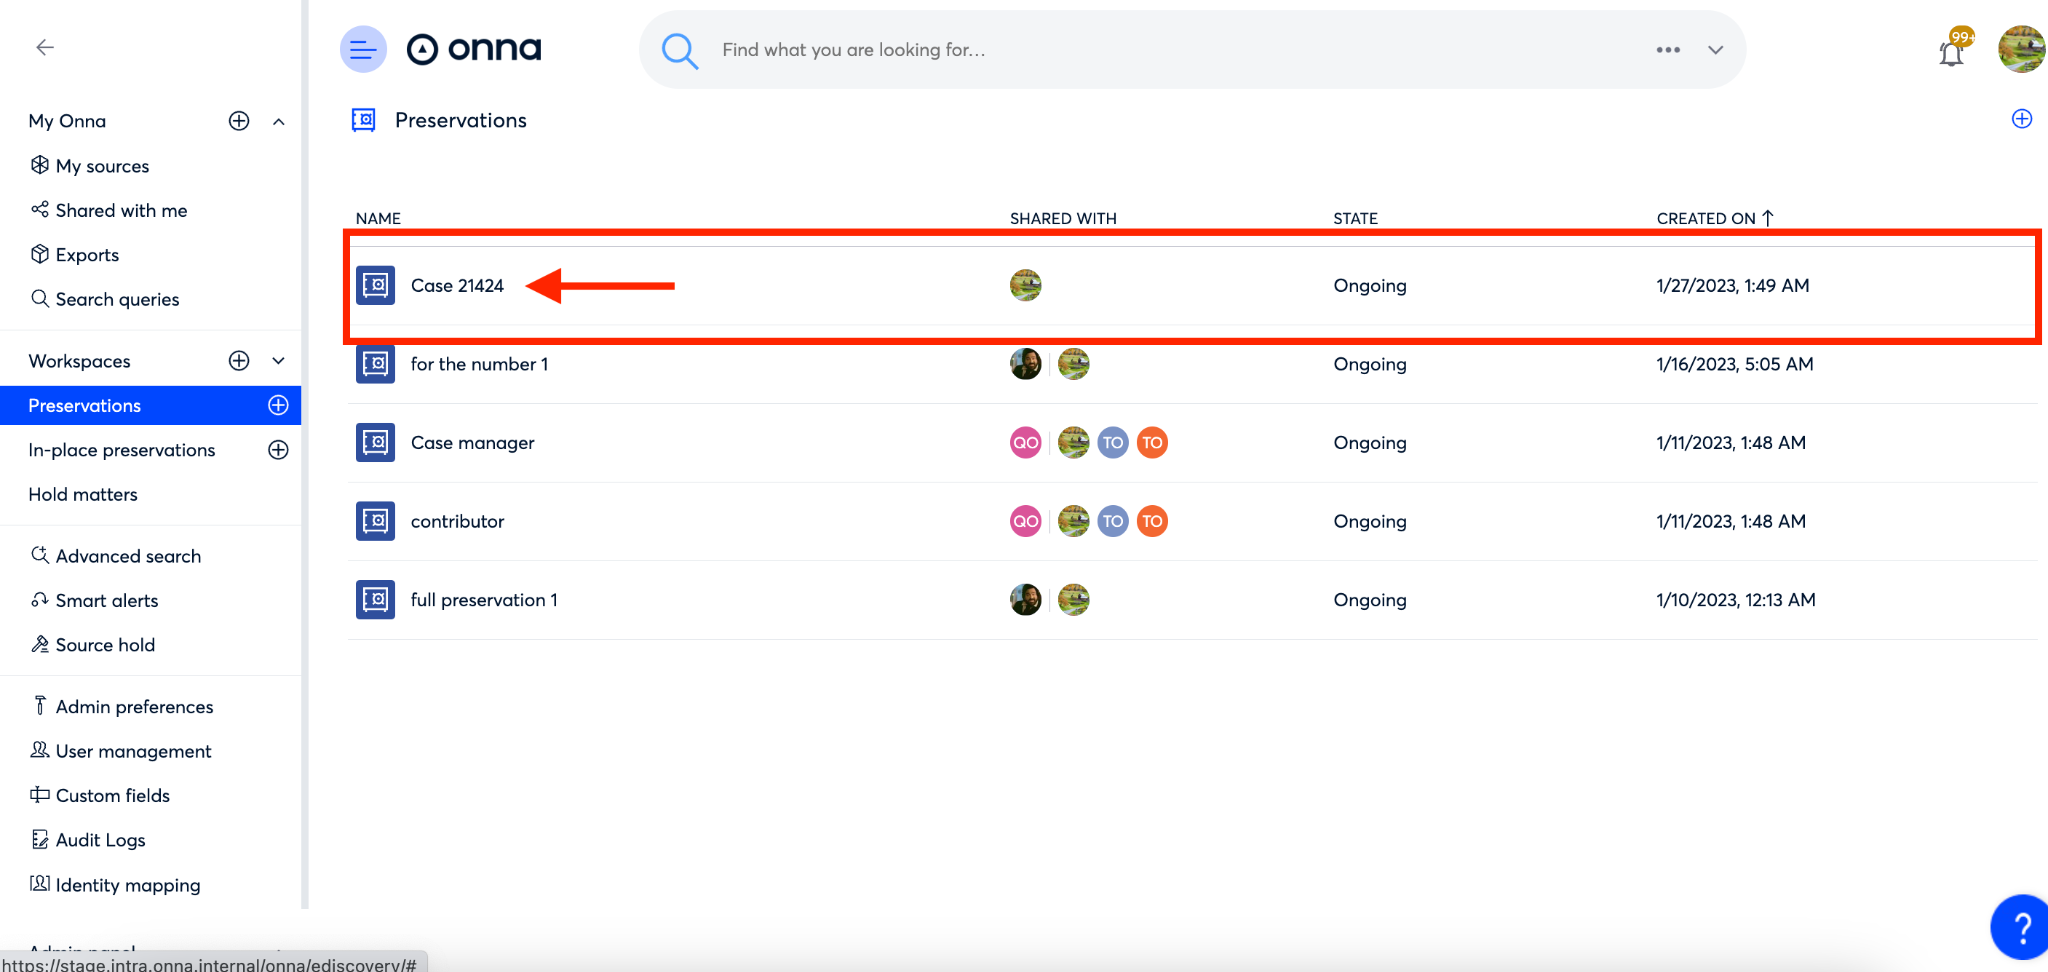
To begin editing a preservation navigate to the ‘Preservation’ main page.
On this page click on the preservation you want to edit.
Step 2:
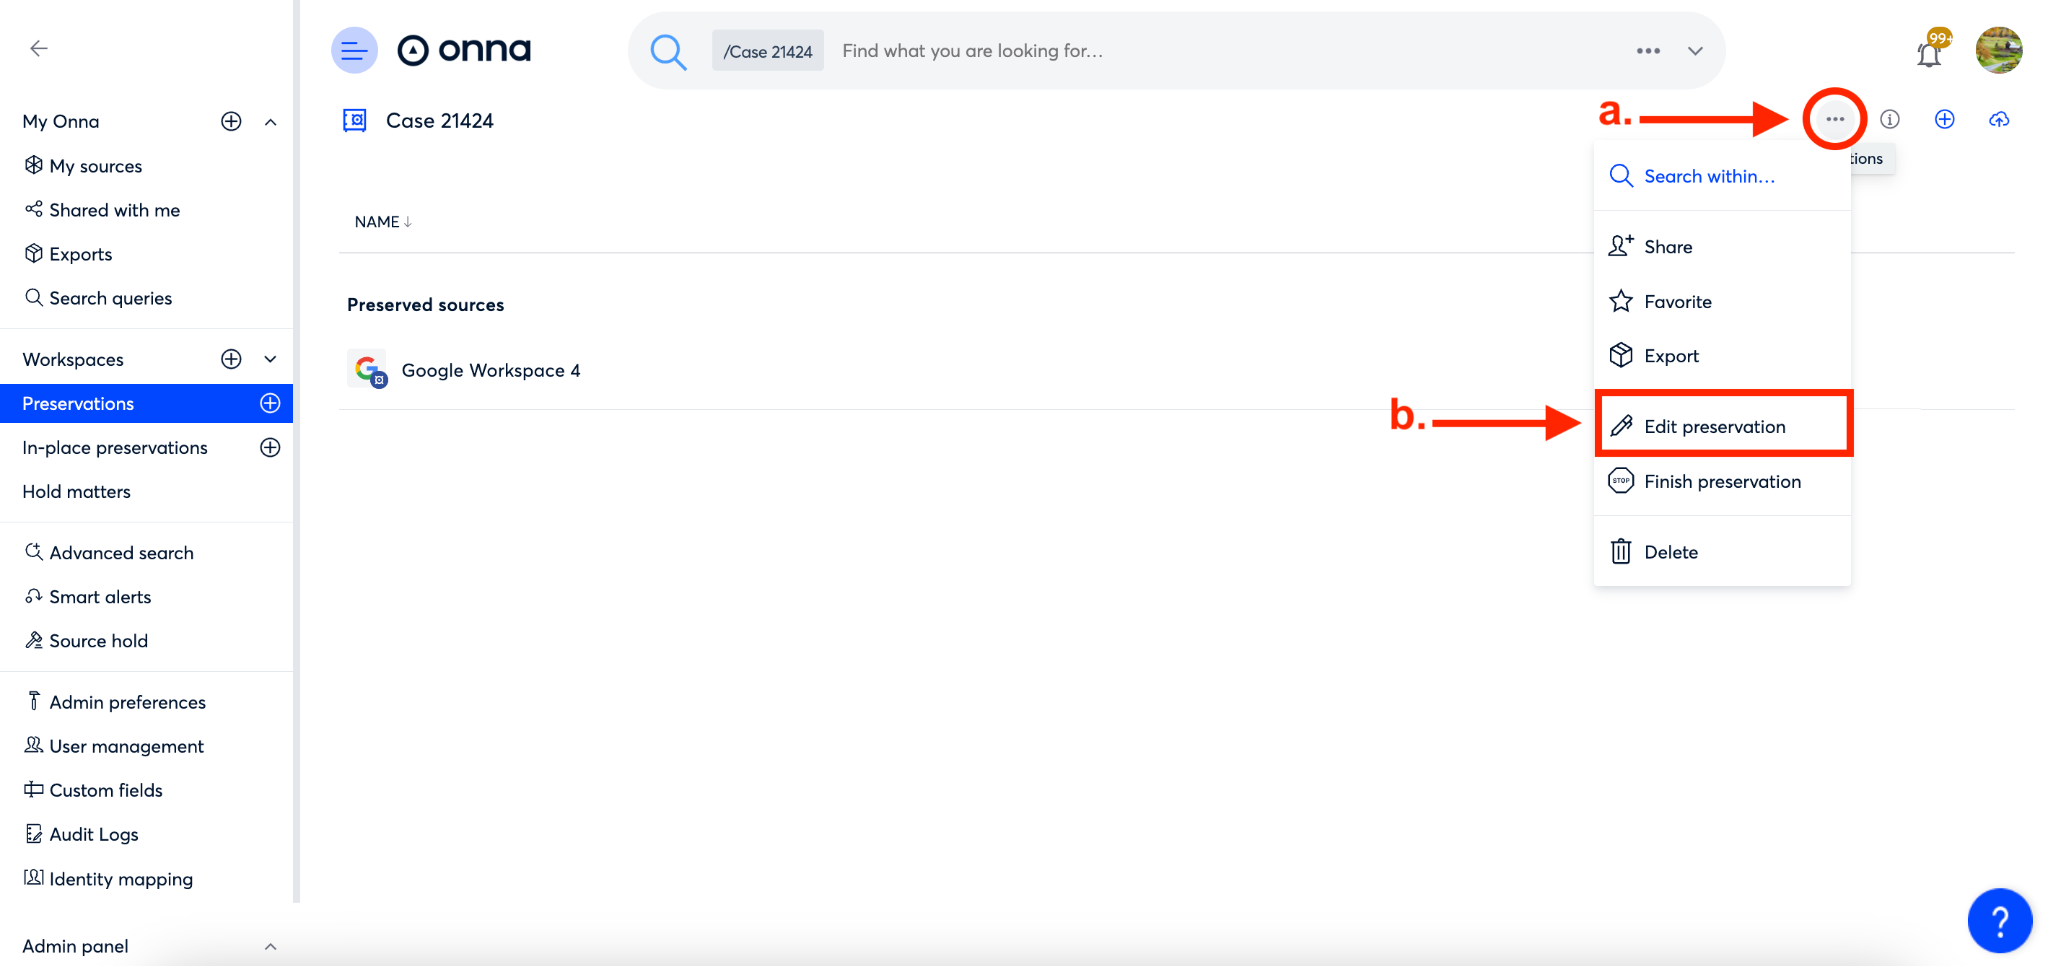
Once you’re inside the page for the preservation you want to edit you will:
Click on the ellipsis in the upper right corner of the screen.
From the dropdown that appears select ‘Edit preservation’
Step 3:
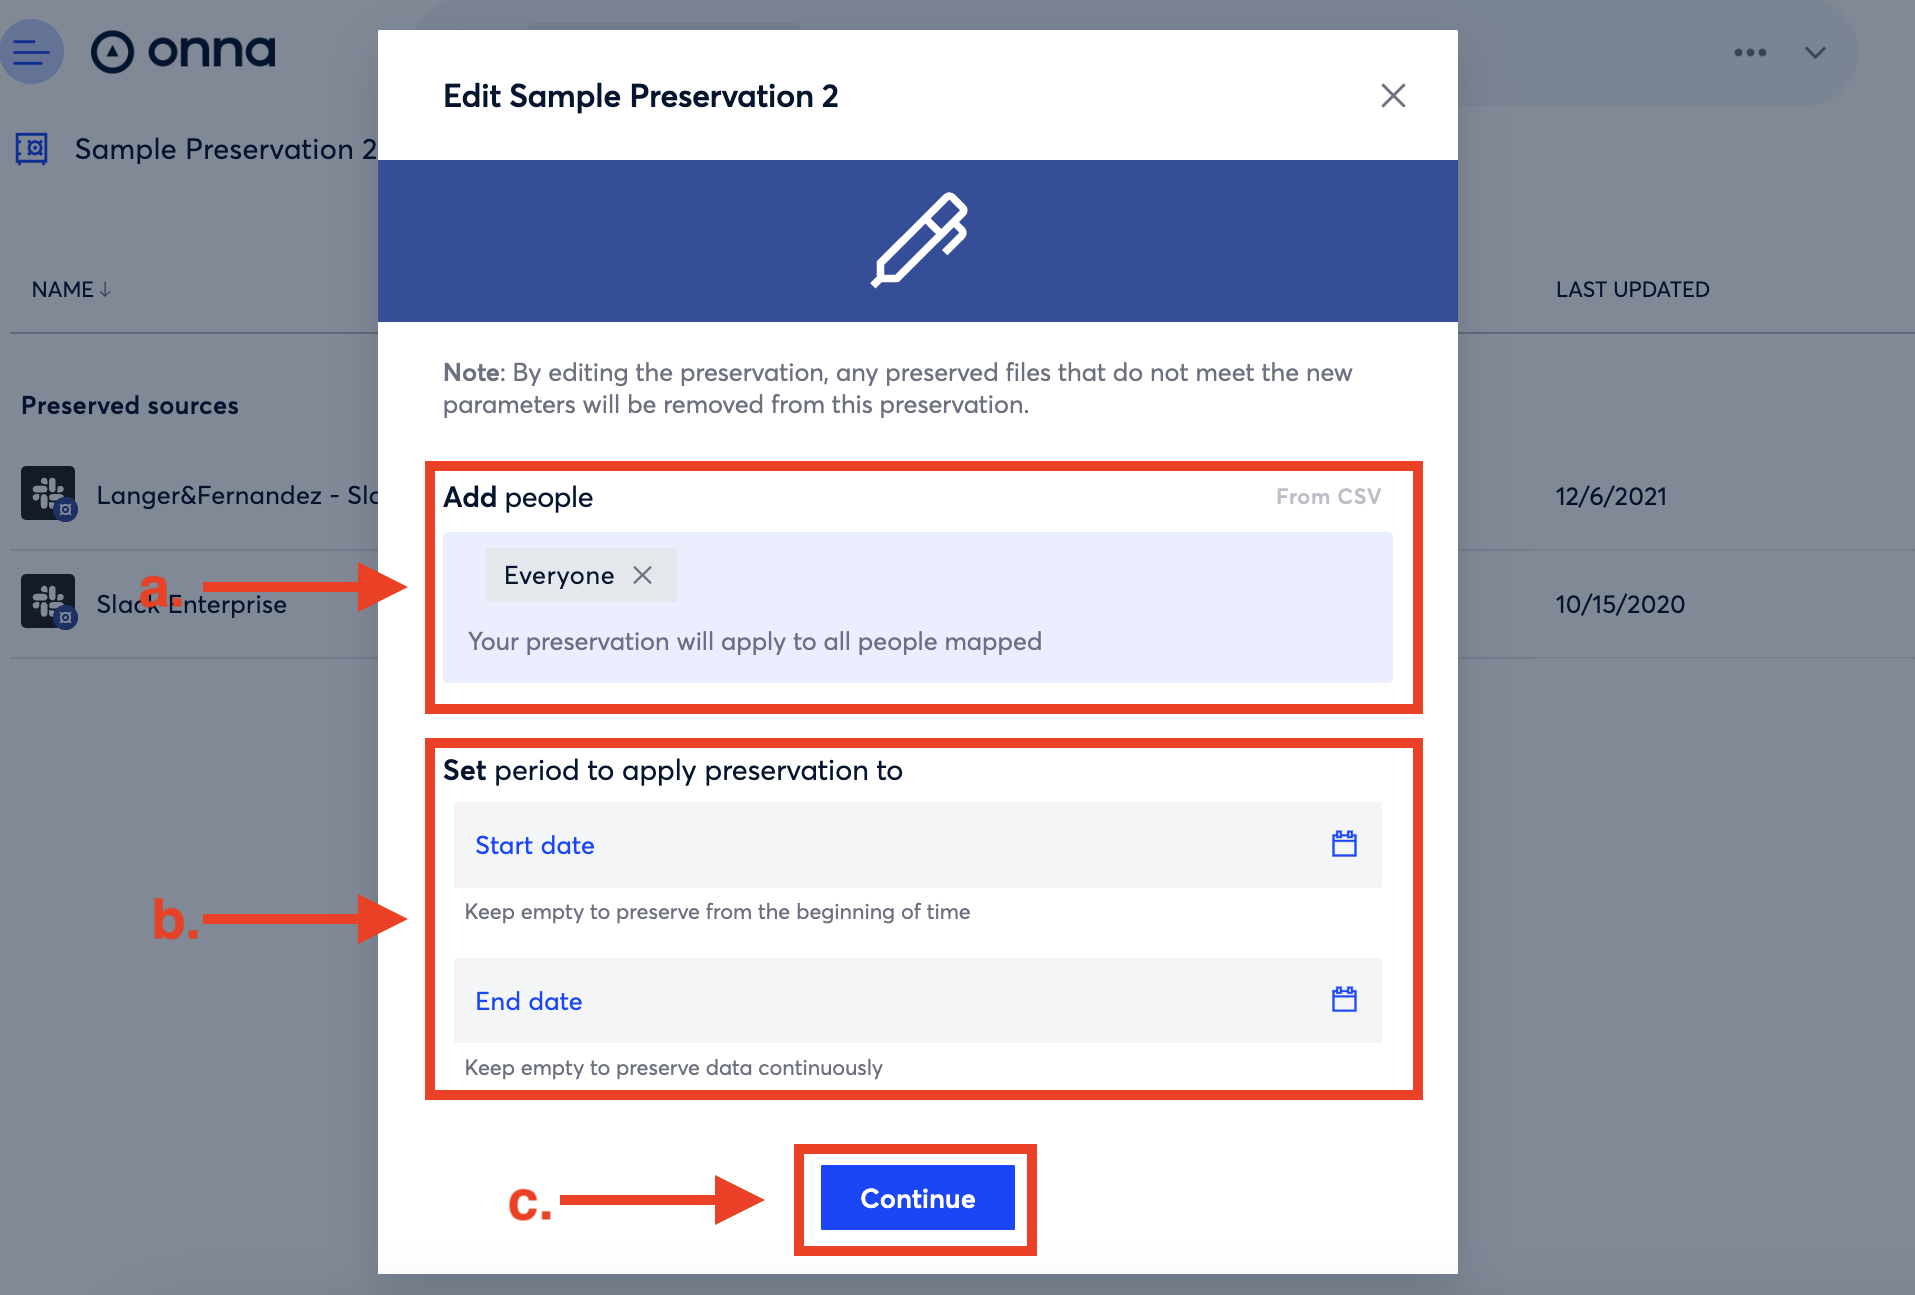
Next you’ll be taken to the first of two windows where you can edit the information included in your preservation. On this first screen you can:
Edit the people included in the preservation.
Edit the preservation start and end date.
When you’re done making the changes in this window, click the blue ‘Continue’ button.
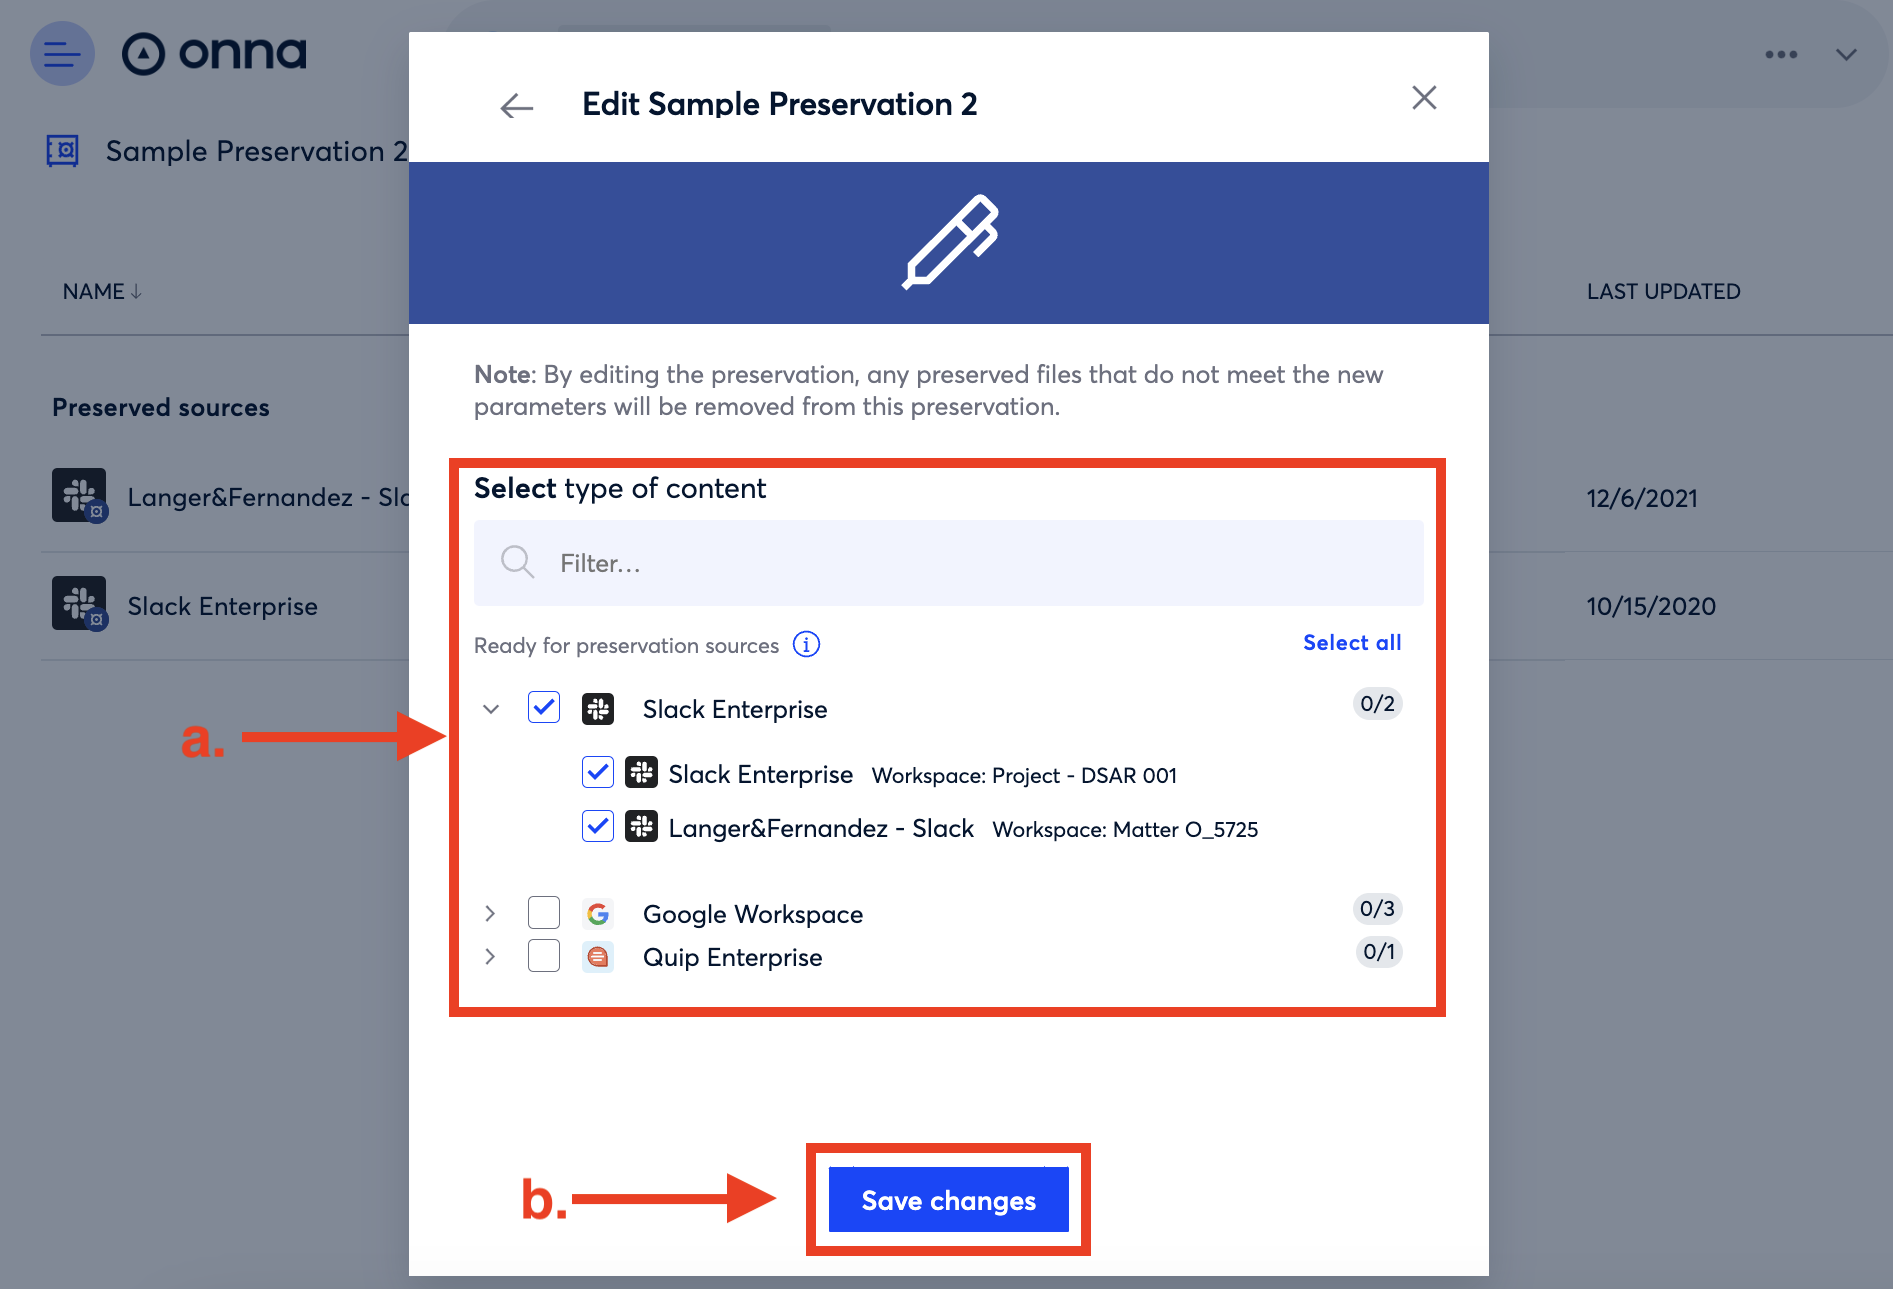
Step 4:
In the next window that appears you’ll:
Edit the content of your preservation.
Click on the blue ‘Save changes’ button to save all edits you’ve made to your preservation.
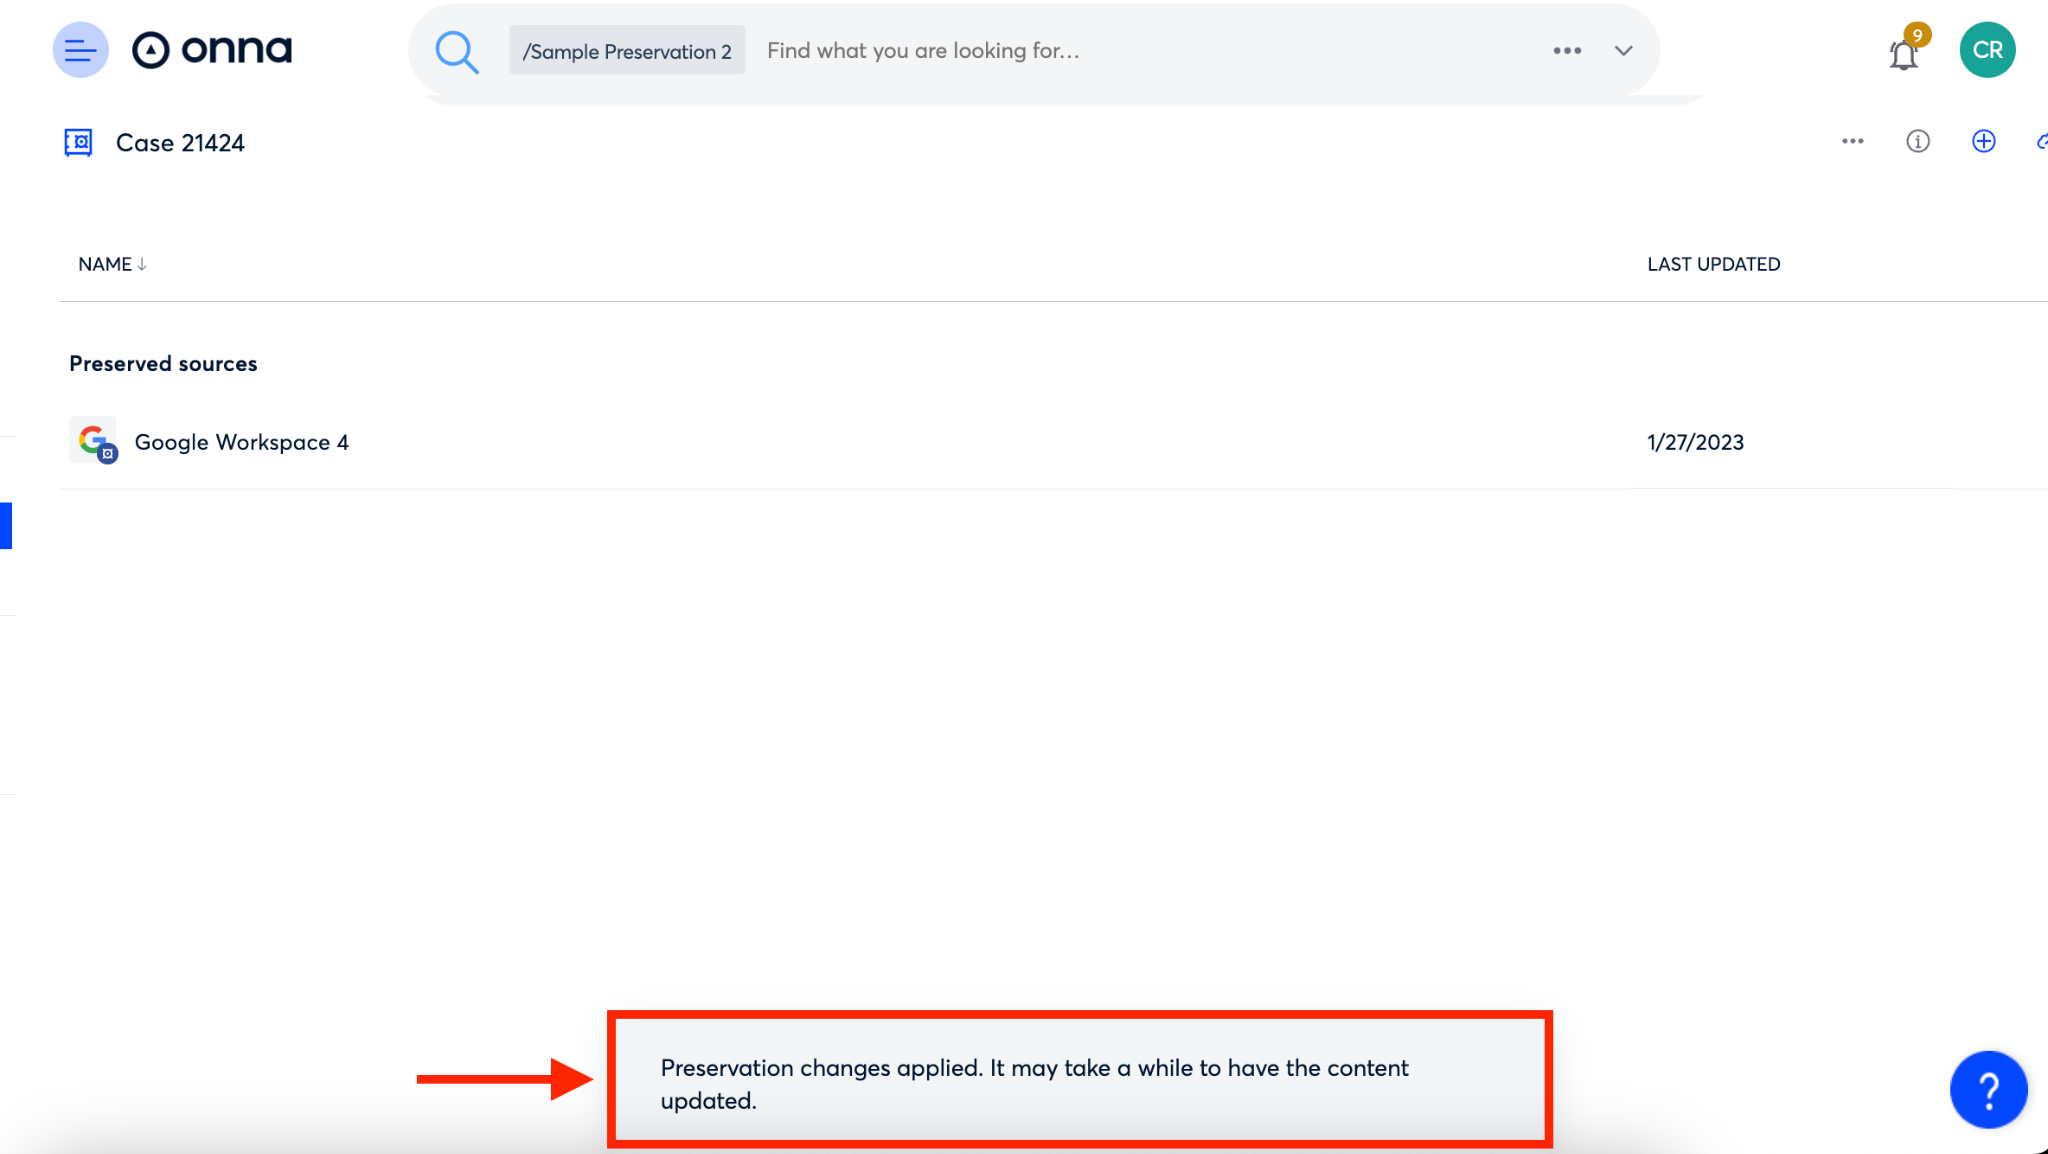
Step 5:
After clicking ‘Save changes’ you’ll see a confirmation message appear at the bottom of your screen indicating that the changes you saved have been applied.
Please note: it may take some time to update your preservation.
Exporting a Preservation
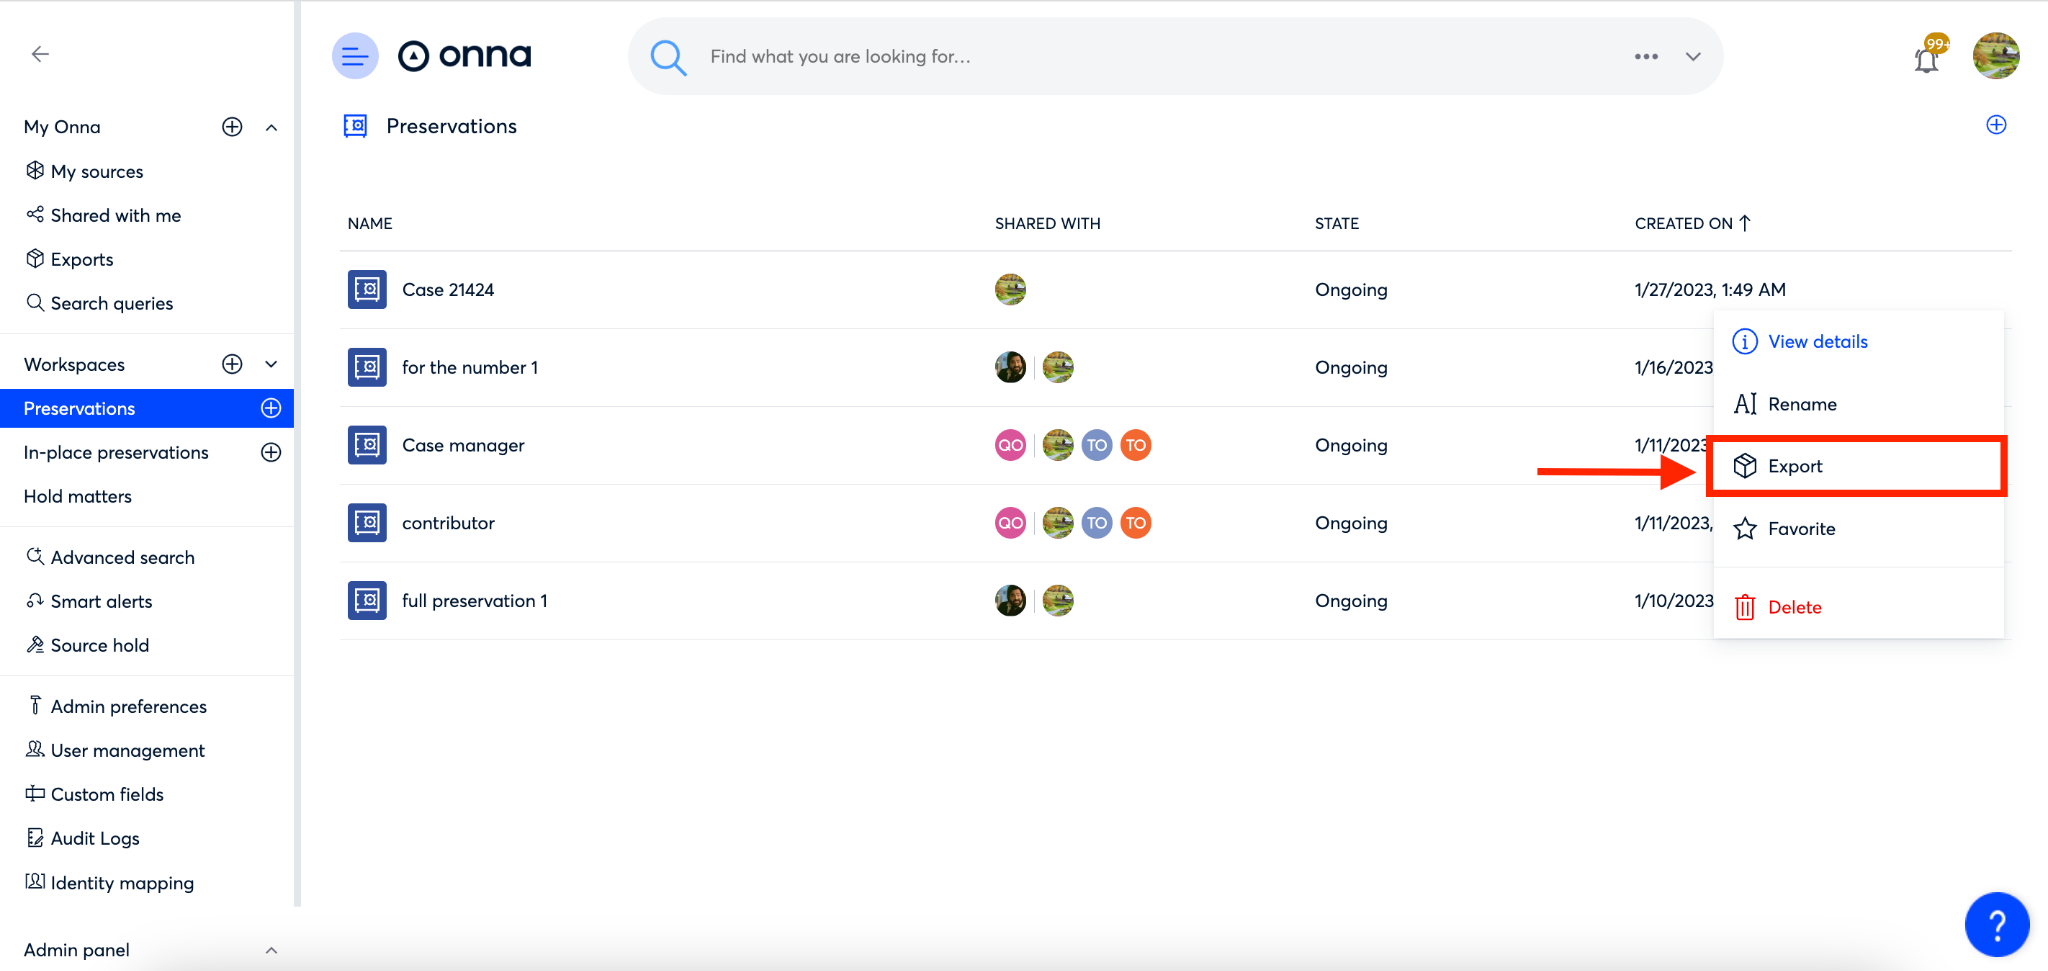
Step 1:
To export a Preservation, click on the ellipsis next to the preservation you want to export, then select ‘Export’ from the dropdown that appears. From there, continue with the export process.
Finishing a Preservation
You can finish a preservation, dropping the hold on the files within it, but keeping the preservation listed on the ‘Preservation’ page. Once a preservation is finished, it cannot be modified further. If you want to drop the hold and remove the preservation from the list of preservations on the ‘Preservation’ page, you will need to delete the preservation.
To finish a preservation:
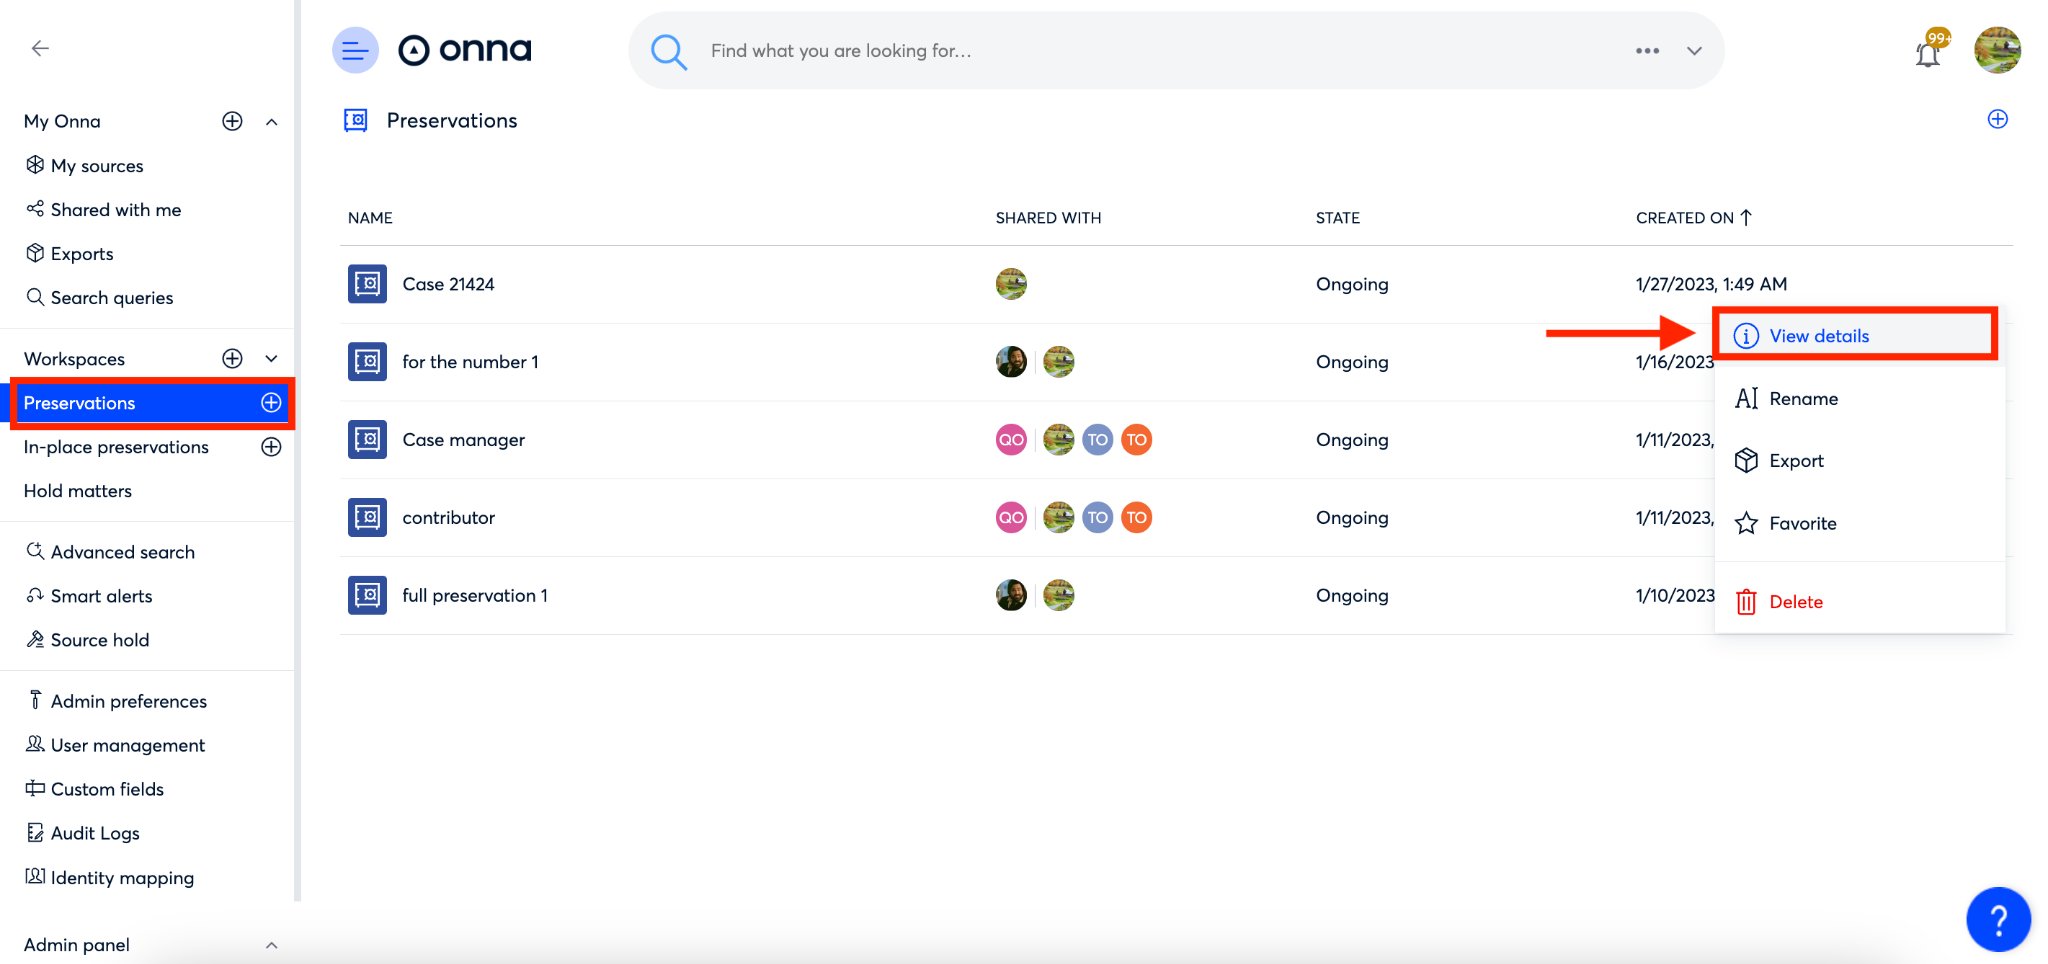
Step 1:
To start, navigate to the main ‘Preservations’ page. From here, click on the ellipsis to the right of the preservation you want to finish.
From the dropdown menu that appears select ‘View Details’
Note: You can also view details from within the preservation itself.
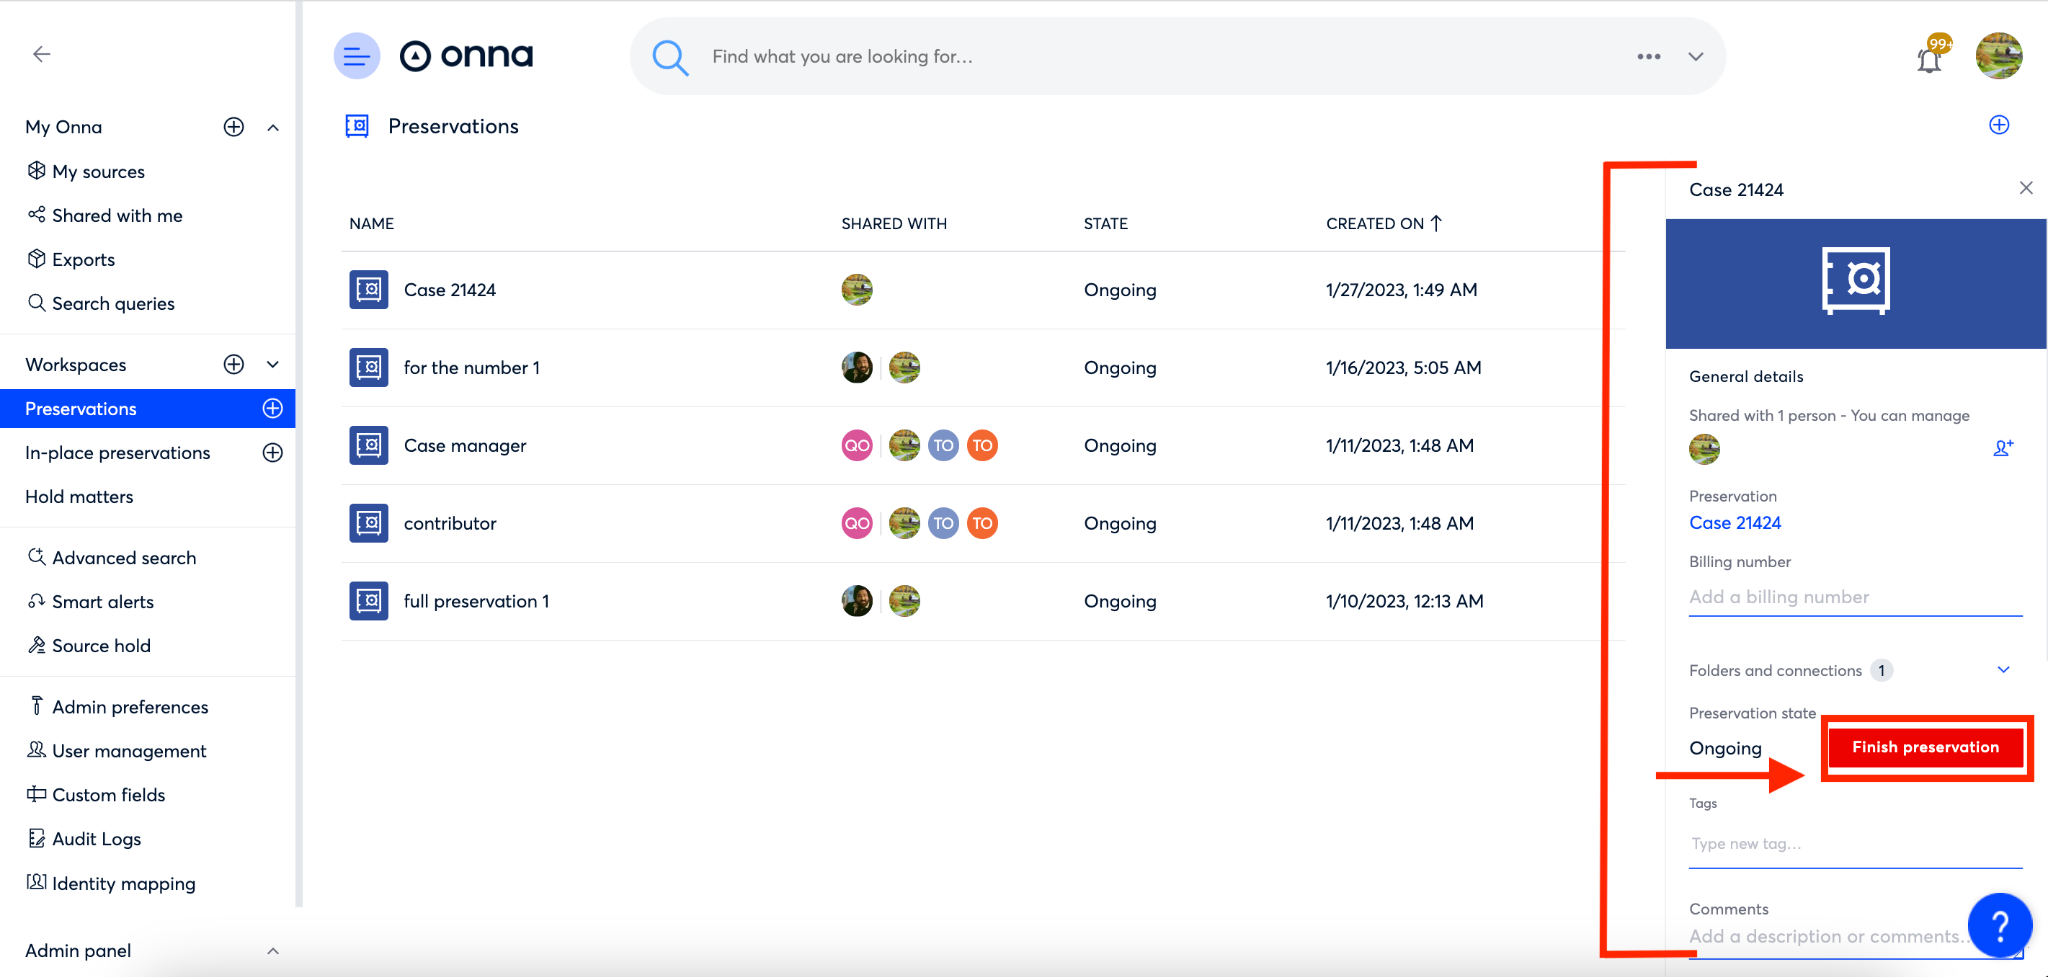
Step 2:
You’ll now see the details panel appear to the right of your screen. From here, click on the red ‘Finish preservation’ button.
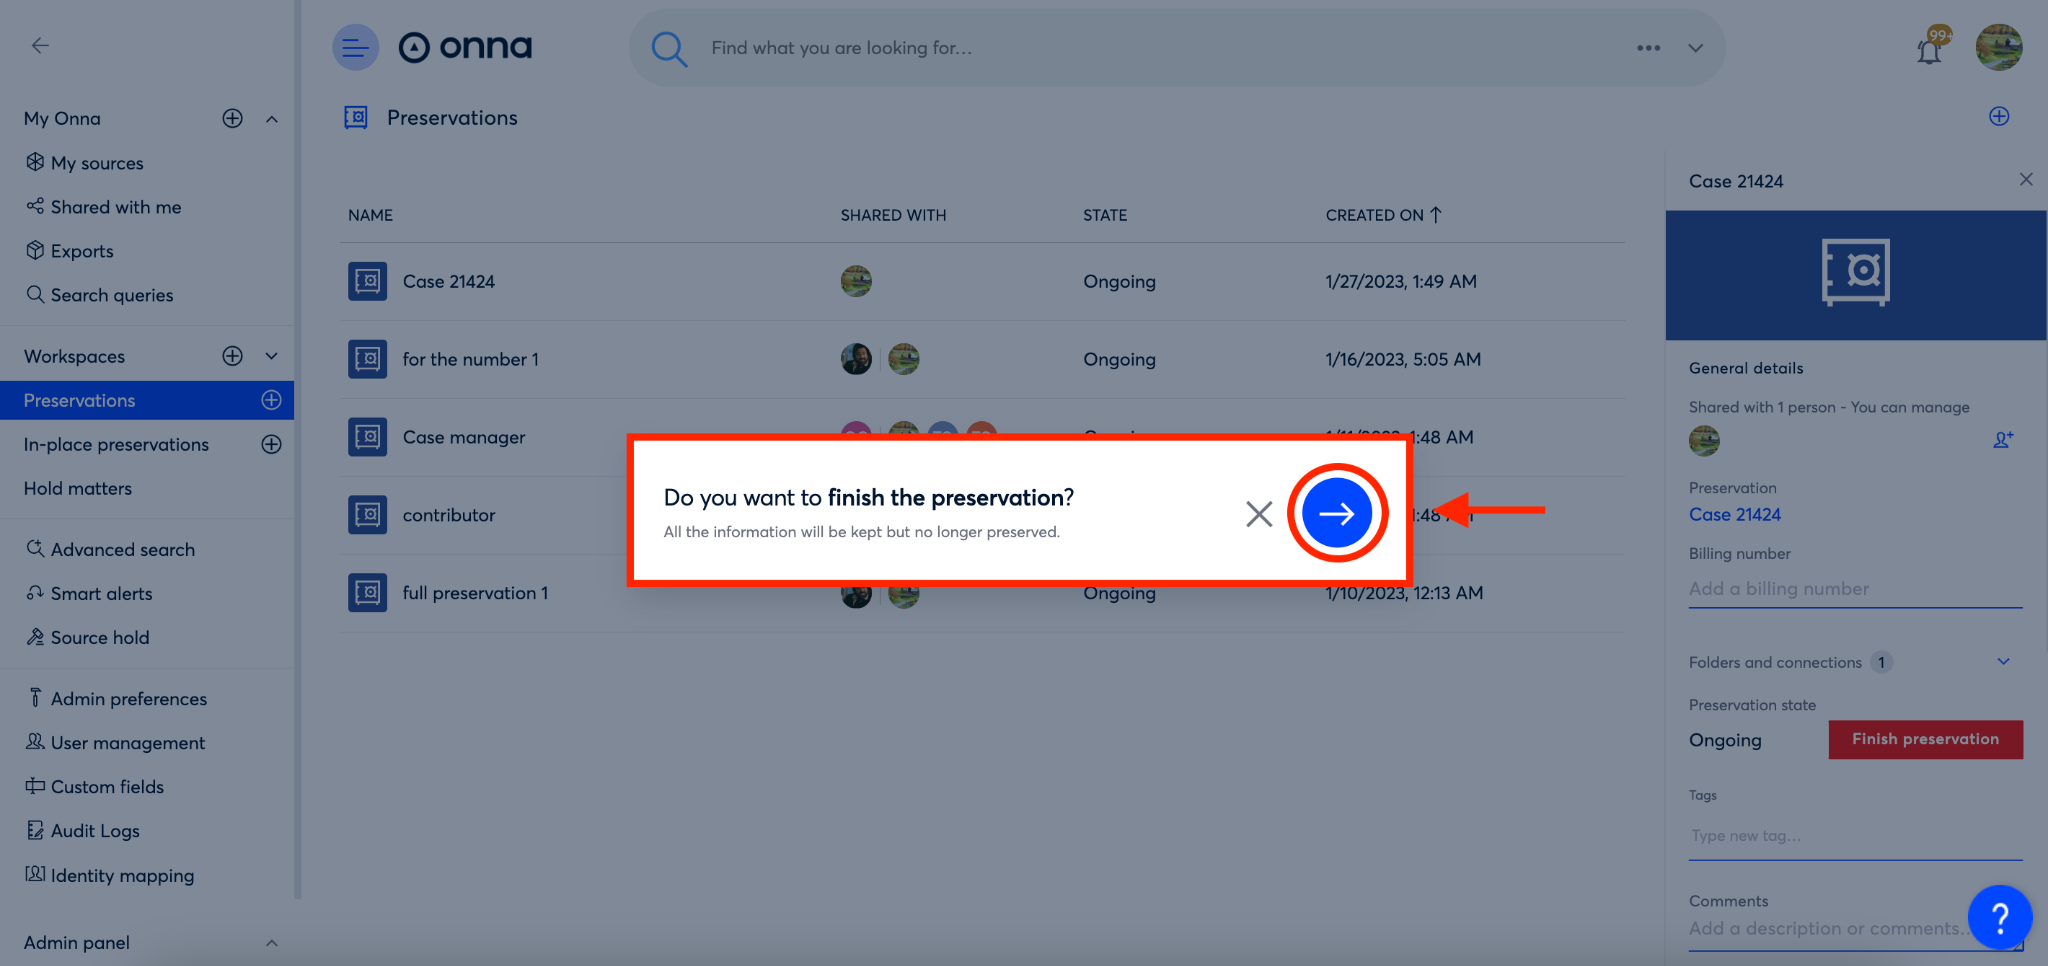
Step 3:
Finally, a pop-up will appear asking you to confirm that you want to finish the preservation. To confirm and finish the preservation click on the blue circle with the arrow inside.
Deleting a Preservation
If you would like to drop the hold on files included in a preservation and remove the preservation from your list of preservations you will need to delete the preservation. If you would like to drop the hold on files included in the preservation but keep the preservation details in the list of preservations on the ‘Preservations’ page you will want to finish the preservation instead of deleting it.
To delete a preservation please follow the steps below:
Step 1:
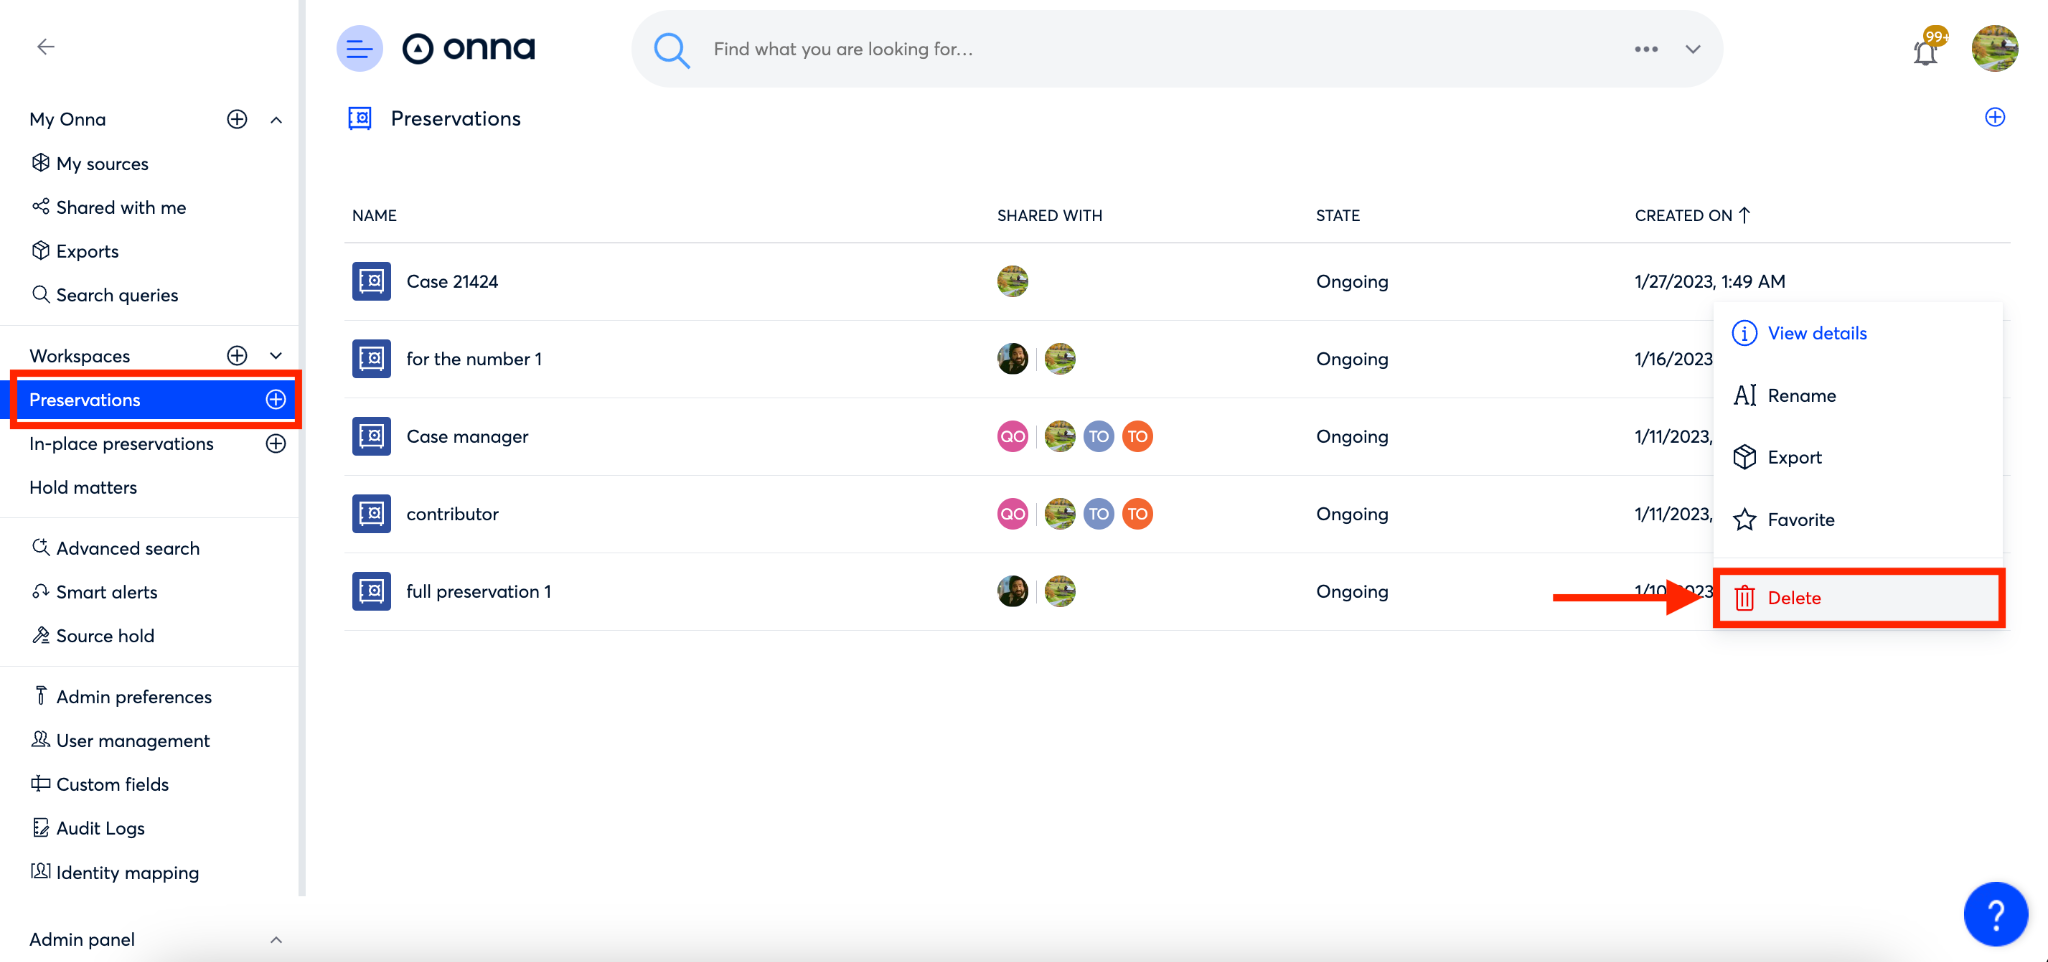
To delete a preservation you will start by navigating to the ‘Preservations’ main page.
From here you will click on the ellipsis to the right of the preservation you want to delete.
Then, select ‘Delete’ from the dropdown that appears.
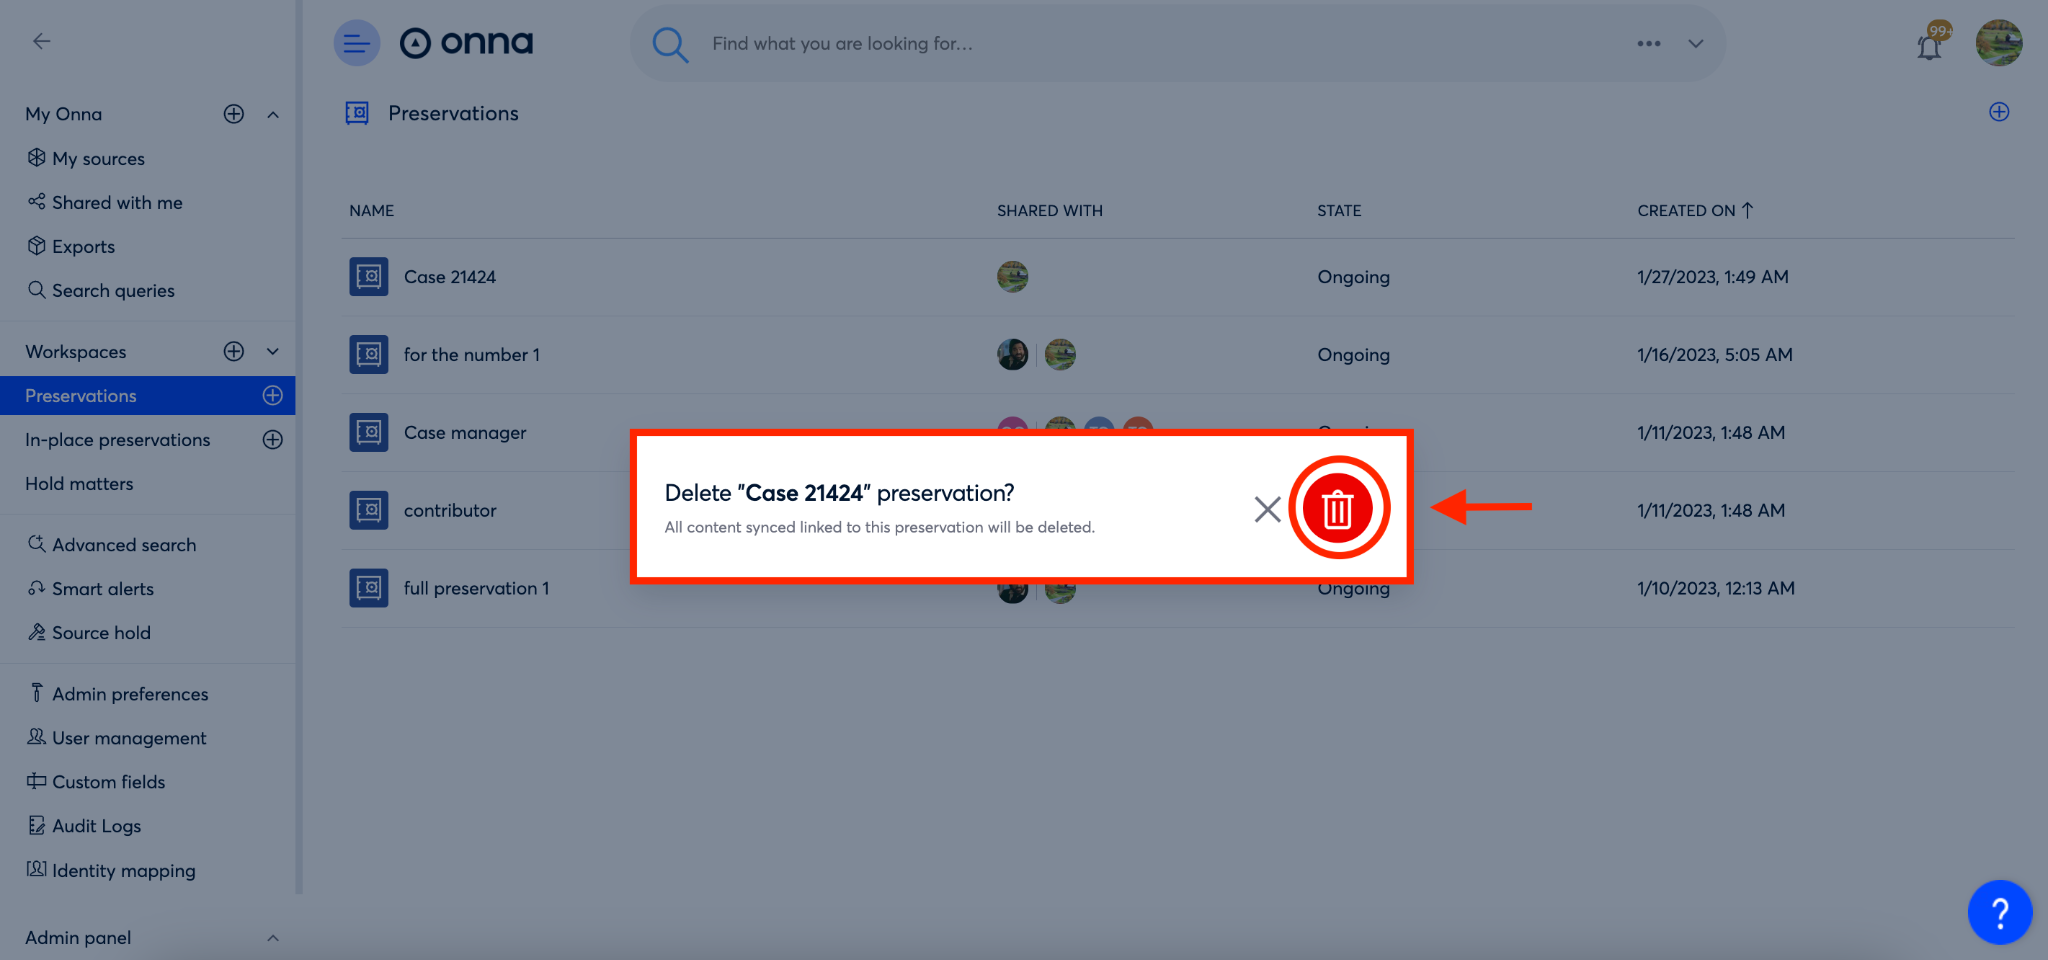
Step 2:
After clicking ‘Delete’ a pop-up will appear asking you to confirm that you want to delete the preservation. To confirm and continue deleting your preservation click on the red trash can icon.