Logikcull Public Records Requests supports single sign-on (SSO). You can turn SSO on or change your SSO settings in Settings >  SSO.
SSO.
Before you begin
This workflow requires coordination with your IT department and your identity provider (IDP).
IT Department
Your IT department should let you know whether or not you use Active Directory Federation Services (AD FS) / Shibboleth / XML metadata or instead have a Discovery URL / Client ID / Secret. This will determine whether you’ll be setting up a SAML or OpenID protocall.
IDP
Your IDP should send you the appropriate URLs and IDs to fill into specific fields. You’ll also need to send your IDP one or more links from your Logikcull instance.
Choose SSO protocol
Choose between SAML or OpenID protocols depending on your IDP’s capabilities and available configuration artifacts.
SAML
Choose SAML if you use Active Directory Federation Services (AD FS), Shibboleth, or XML metadata.
OpenID Connect
Choose OpenID Connect if you have a Discovery URL or a Client ID / Secret.
Configure and enable IDP
Instructions vary slightly depending on the protocol you’re using.
Enable SAML
Send the below two URLs to your service provider. They can be found under Service provider Details and copied using the
 copy icon.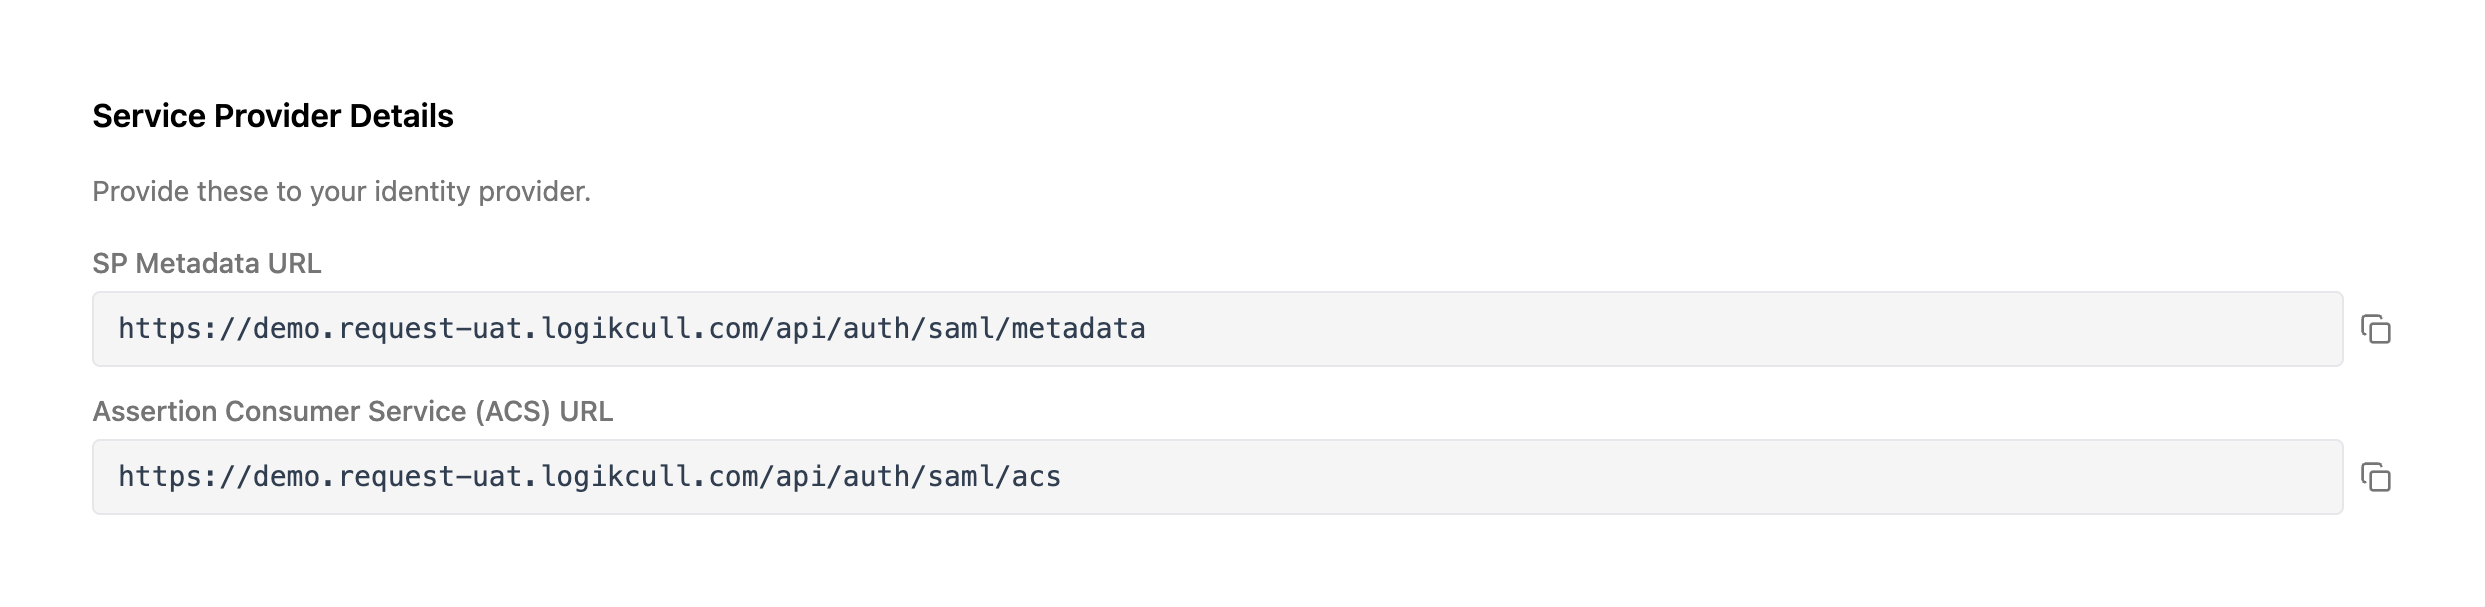
SP Metadata URL – A URL on your application that describes your SAML configuration to the identity provider, allowing the identity provider to set itself up automatically.
Assertion Consumer Service (ACS) URL – The URL on your application where the identity provider sends the user after a successful login, along with their authentication details.
Fill the Identity Provider Configuration section. Your identity provider should provide you with all the information in this section.
.png)
IdP Entity ID: The globally unique name that identifies the identity provider in the SAML exchange.
SSO URL: The identity provider’s login page URL, where users are sent to authenticate.
SLO URL: Optional. The identity provider’s logout URL, used to sign users out across all connected applications simultaneously.
Note
Not all identity providers support SLO; some applications are fine logging the user out locally. If you leave this blank, signing out will only log the user out of your application, not out of their identity provider or any other connected apps.
X.509 Certificate: A certificate from the identity provider that your application uses to verify that incoming login responses are legitimate and untampered.
Name ID Format: The format the identity provider uses to identify the logged-in user in the SAML assertion.
Click the grey
 toggle to turn on Just-in-Time provisioning (JIT), which automatically creates accounts for new users that authenticate using SSO.
Default JIT Role: Select which permission level you want to automatically provide users once their account is created through JIT. For a list of permission levels and their descriptions, please see Permission Levels: Overview.
Important
When JIT is off, new users won't automatically get an account in the application the first time they log in – someone will need to manually create it for them first. This is useful in larger organizations where identity provider access and app account setup are handled by different individuals / teams, or if it’s preferred that user roles are assigned manually.
Scroll to the top of the page and click the Enable button to turn on SSO.

Enable OpenID Connect
Send the below URL to your service provider. It can be found under Redirect UI and copied using the
copy icon.
Redirect UI – The URL on your application where the identity provider sends the user after a successful login, along with their authentication details.
Fill the Identity Provider Configuration section. Your identity provider will provide you with all the information in this section.
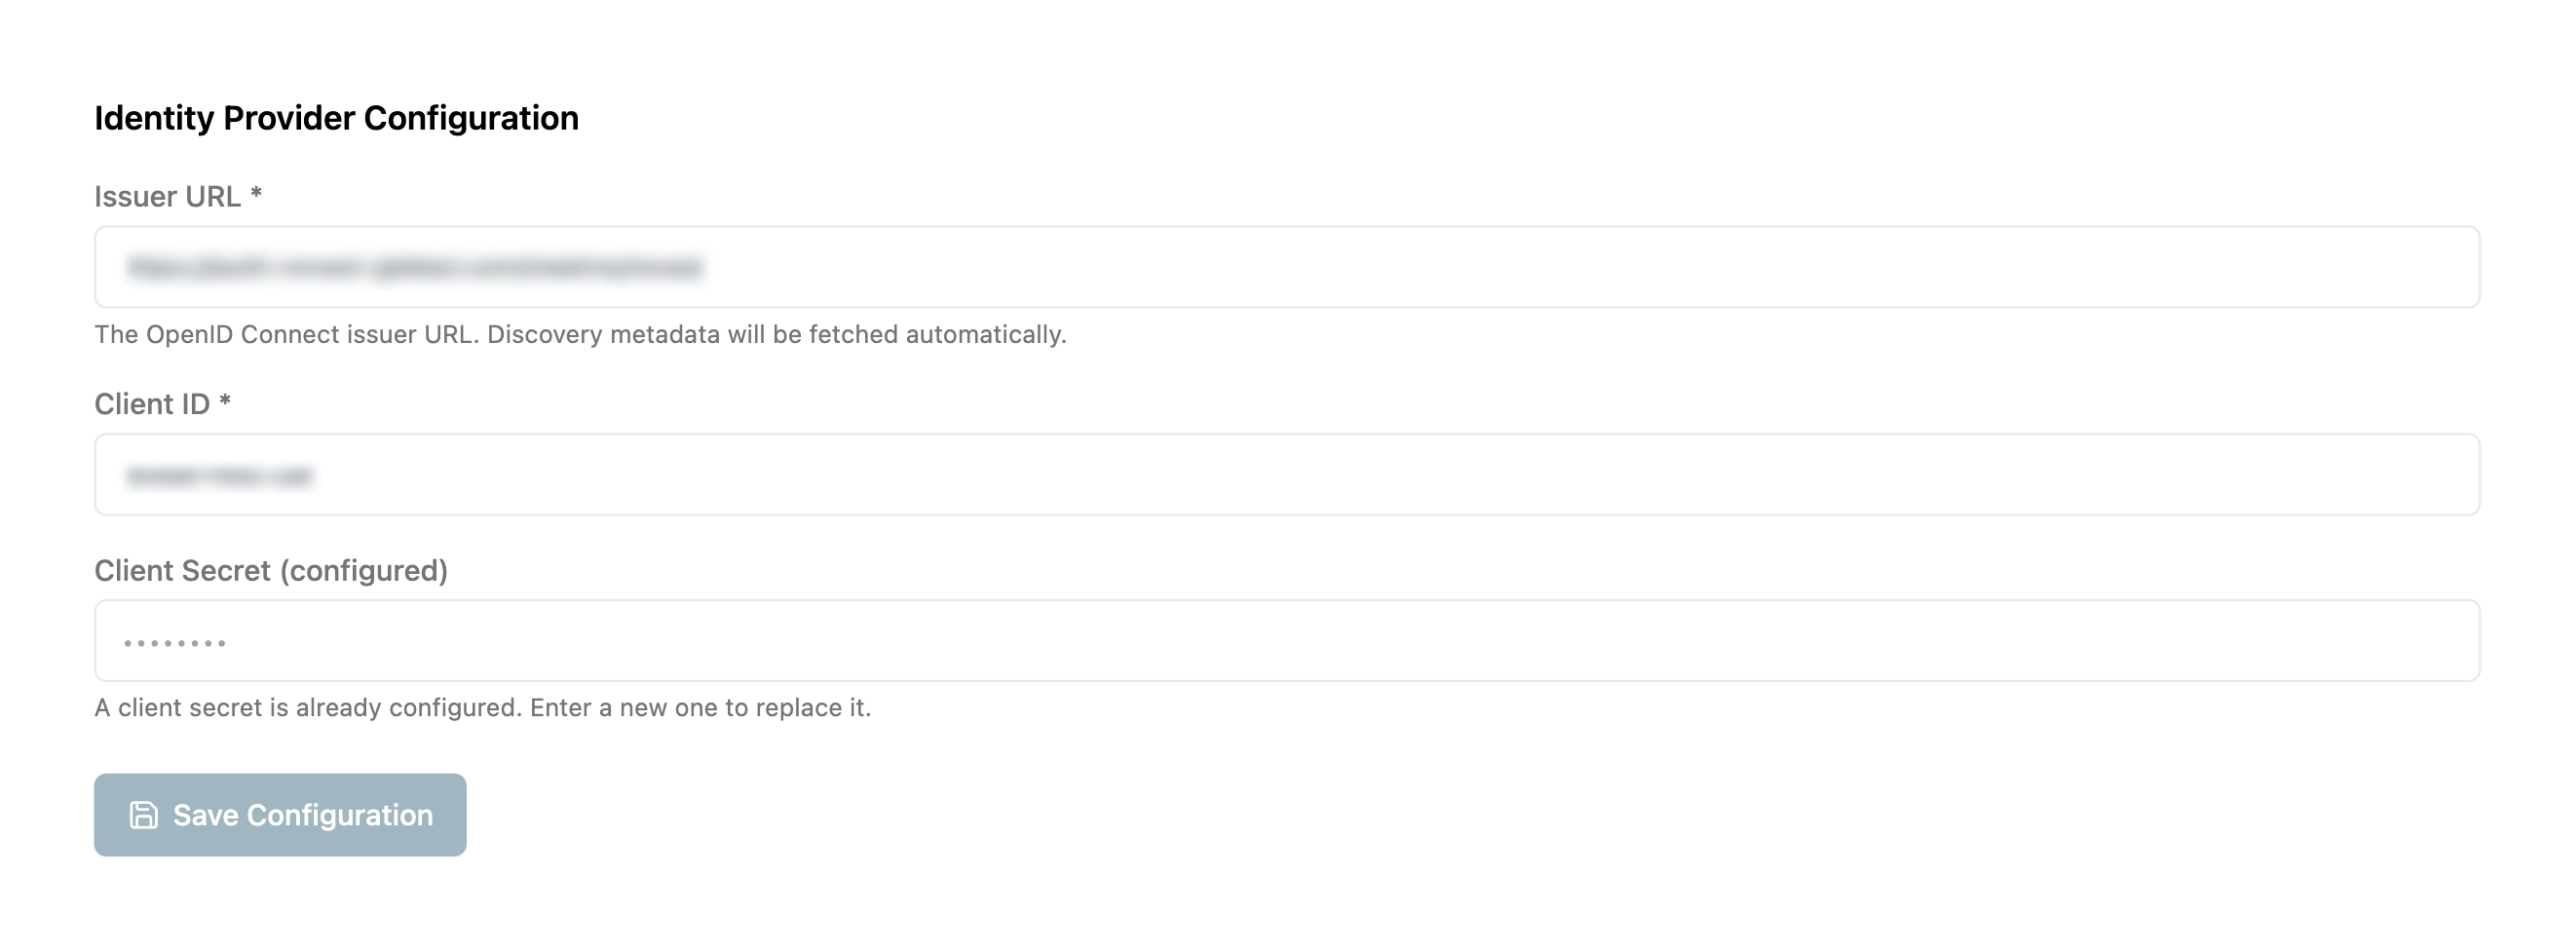
Issuer URL: The globally unique URL that identifies the identity provider in the OpenID Connect exchange.
Client ID: A unique ID the identity provider assigns to your application so it knows which app is requesting authentication.
Client Secret: A password shared between your application and the identity provider to verify that login requests are genuinely coming from your application.
Click the grey
toggle to turn on Just-in-Time provisioning (JIT), which automatically creates accounts for new users that authenticate using SSO. Default JIT Role: Select which permission level you want to automatically provide users once their account is created through JIT. For a list of permission levels and their descriptions, please see Permission Levels: Overview.
Important
When JIT is off, new users won't automatically get an account in the application the first time they log in – someone will need to manually create it for them first. This is useful in larger organizations where identity provider access and app account setup are handled by different individuals / teams, or if it’s preferred that user roles are assigned manually.
Scroll to the top of the page and click the Enable button to turn on SSO.
Disable SSO
You can disable your identity provider’s SSO by clicking the Disable button.