Important
This article is only applicable to Logikcull Storage-Based Subscription customers.
Overview
This article provides step-by-step instructions on how Logikcull subscription customers can bill back the cost of their Logikcull subscription to their own clients. This process is commonly used by law firms and Legal Service Providers (LSPs) who choose to pass along Logikcull usage fees on a per-project basis.
By following the workflow outlined below, you can generate customized, per-project PDF invoices that clearly itemize Logikcull costs for each client.
Note
This process requires the use of a Microsoft Excel macro designed to streamline the creation of individual PDF invoices.
How to Use the Excel Macro
To successfully generate invoices using the provided Excel macro, make sure the following requirements are met:
Microsoft Excel Version
Ensure you are using Microsoft 365 Excel (Version 2205 or higher).
Macro Access
Enable the Developer tab in Excel so macros can run.
When opening the macro file:
If prompted, select “Enable Editing”.
Then click “Enable Content” to allow macros.
Note
Before enabling macros in Excel, confirm with your organization’s IT or security team that macro execution is permitted under your company’s security policies. If macros are currently restricted, your IT department may need to assist in enabling them for this process.
How to Generate Bill-Back Invoices
Follow the steps below to generate individual invoices per Logikcull project.
1. Download Macro Excel
Download one of the sample Bill-Back Macro Excel files.
Open the file in Microsoft Excel, and when prompted, enable macros to run.
Note
Please reach out to your Customer Success Manager (CSM) or Account Executive (AE) to obtain the macro file that matches your subscription plan.
2. Logikcull Usage Report
Log in to your Logikcull account.
Navigate to My Account .
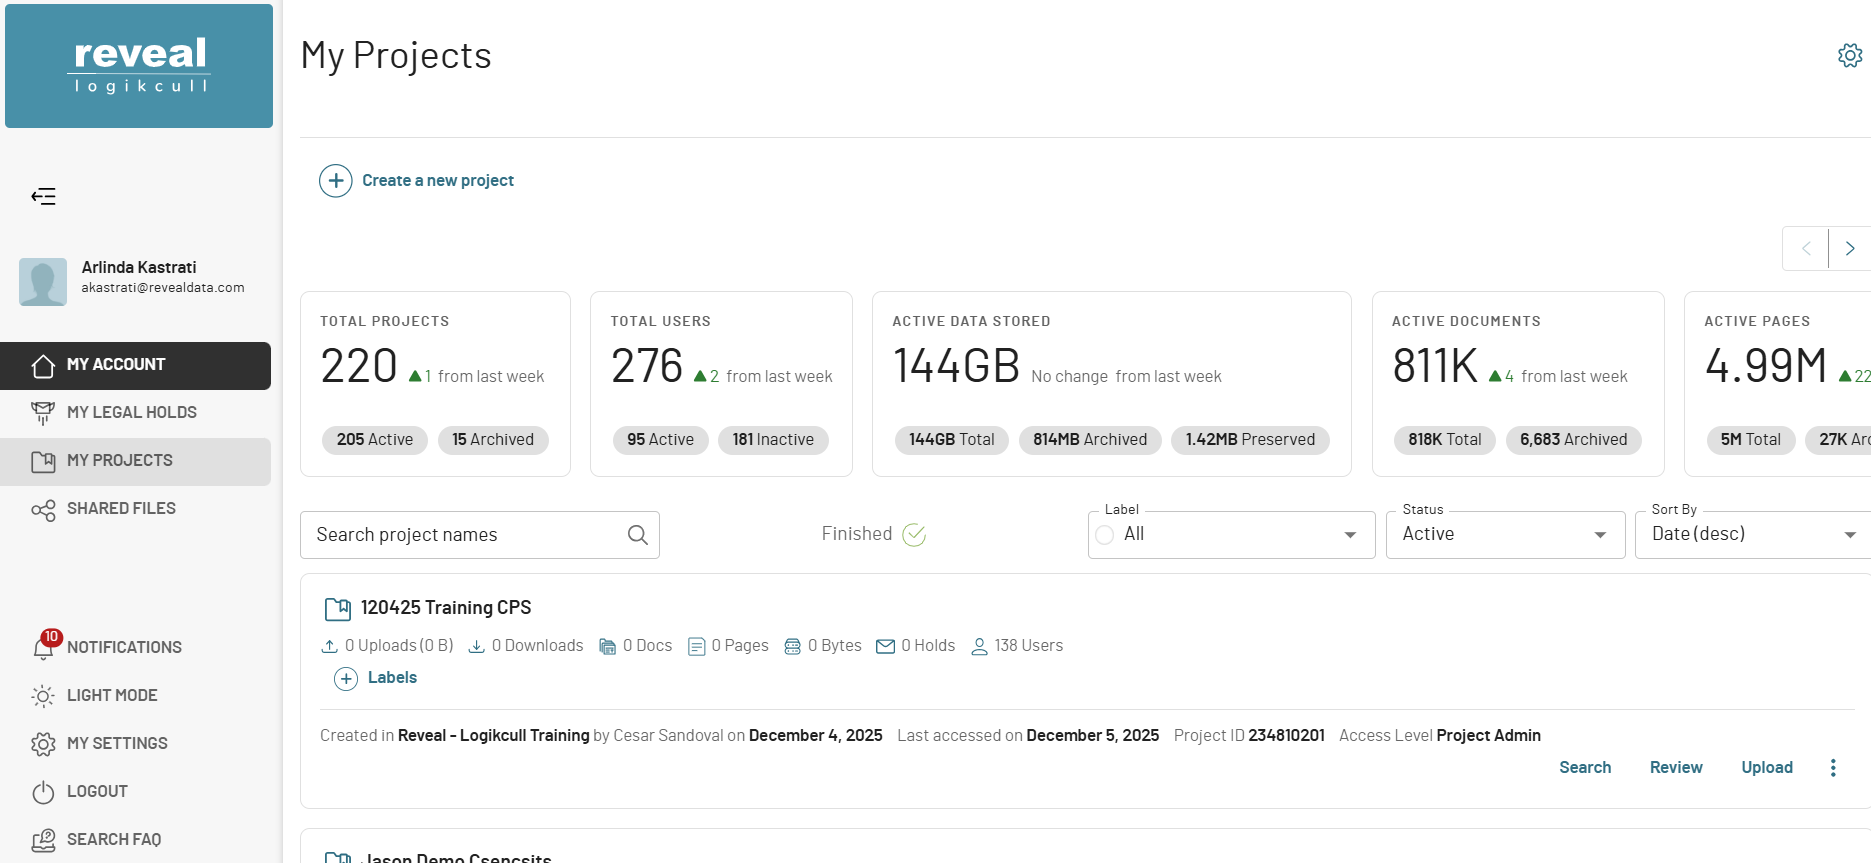
Then click on the Usage tab.
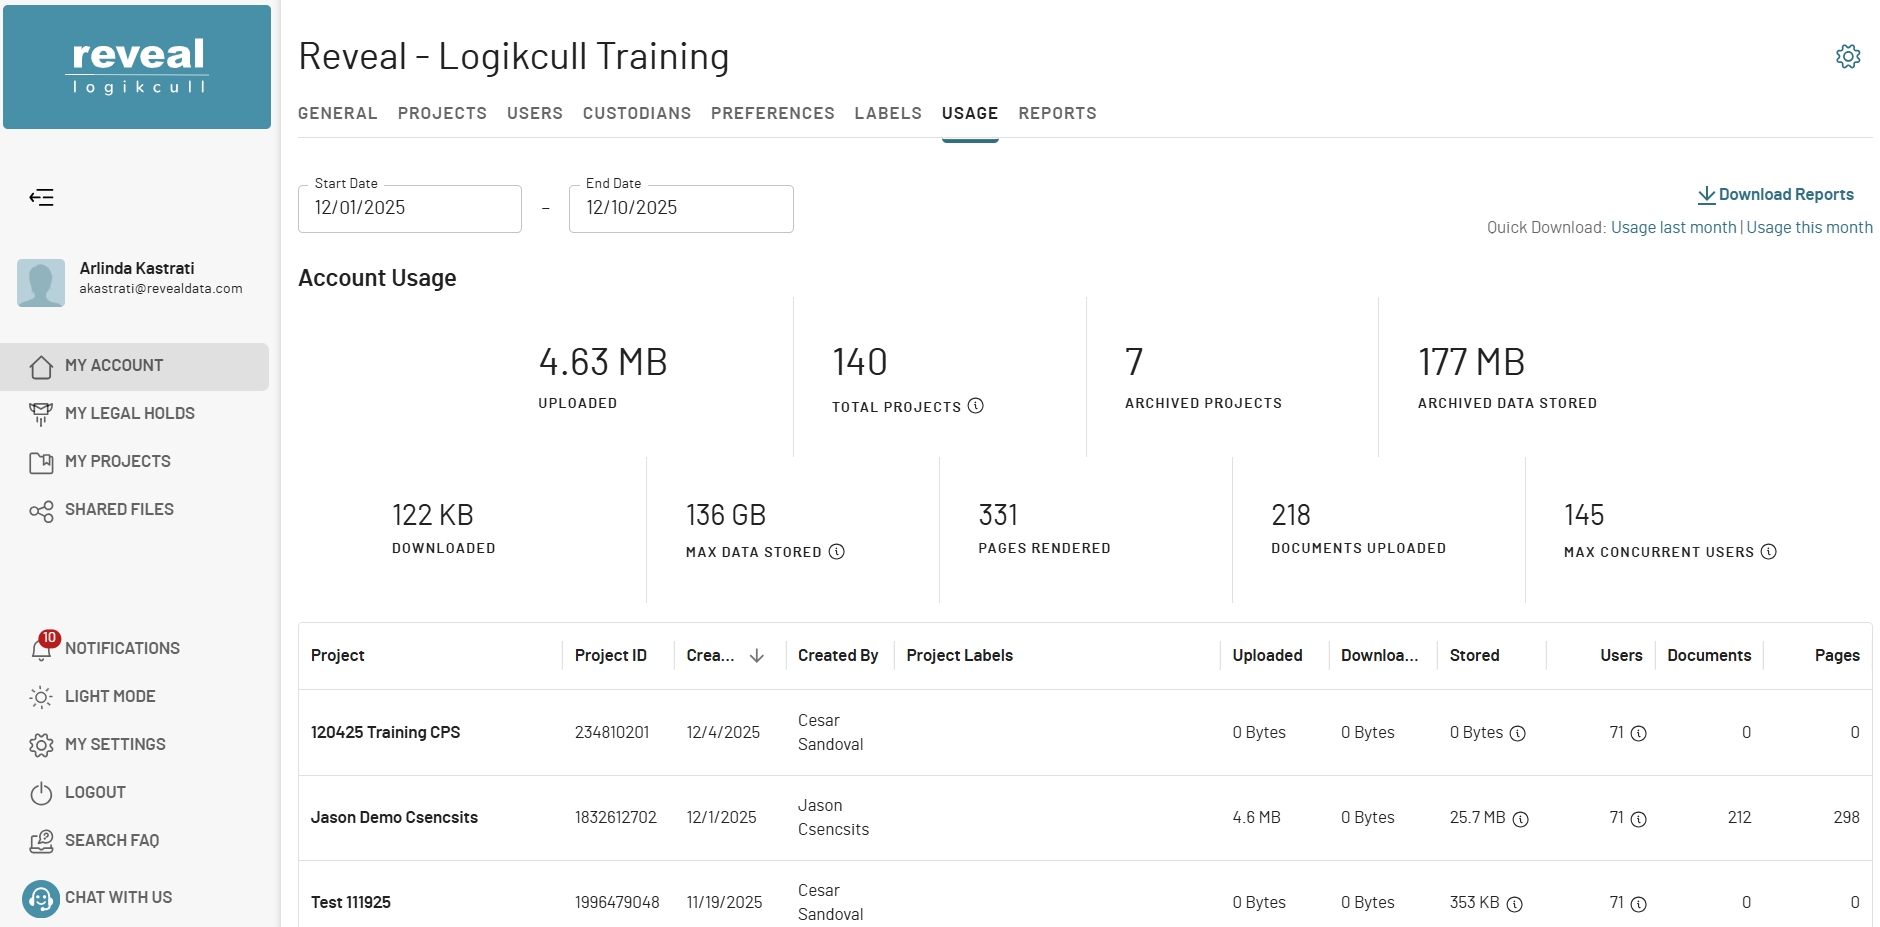
On the left side, select the Start Date and End Date for the reporting period you want to invoice for. You can choose any date range, including periods earlier than the current or previous month.
In the upper right, you will see quick links labeled Usage last month and Usage this month, which will download the corresponding usage report as a CSV file.
Alternatively, you can click Download Reports to download the usage report for the selected date range as a CSV file.
3. Prepare the Usage Data
Open the Excel Macro Template you downloaded above.
Copy all the data from the CSV, including headers and all columns.
Paste the data into the “logikcull_usage_report” tab of the Excel file, replacing the sample data.

Note
Do not modify or delete any headers or columns, as this may cause errors in the macro.
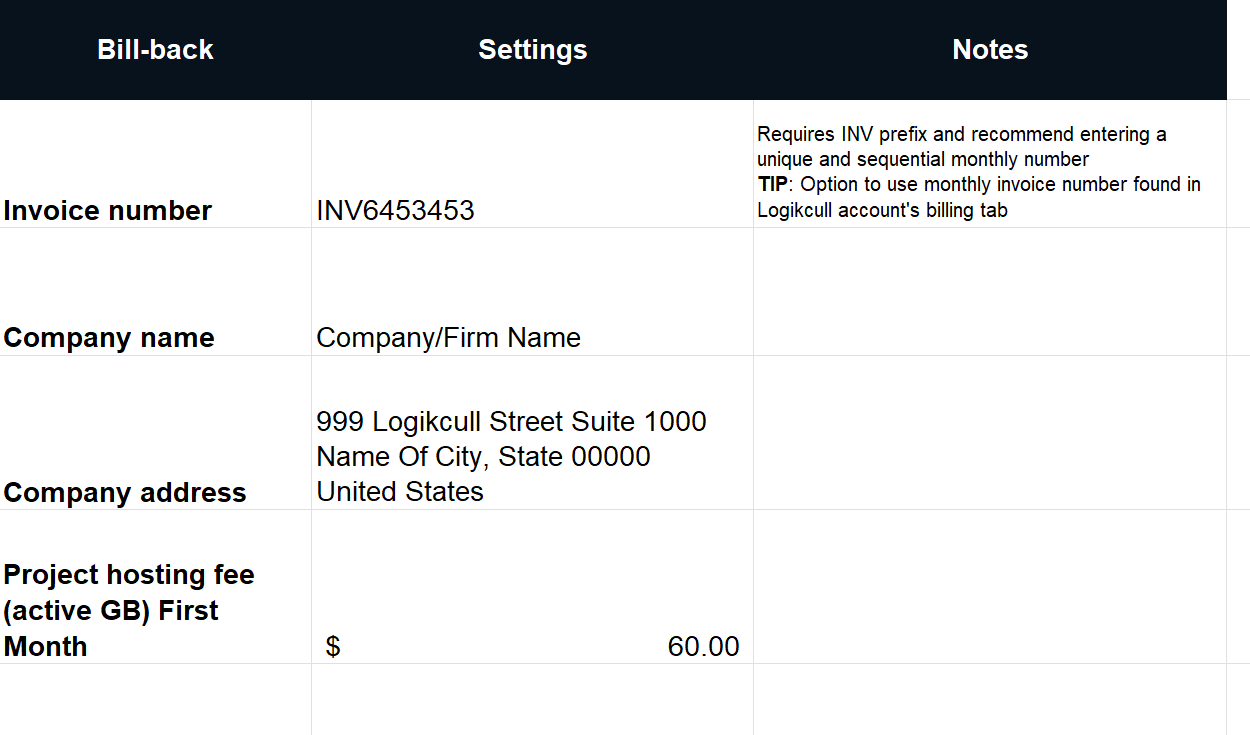
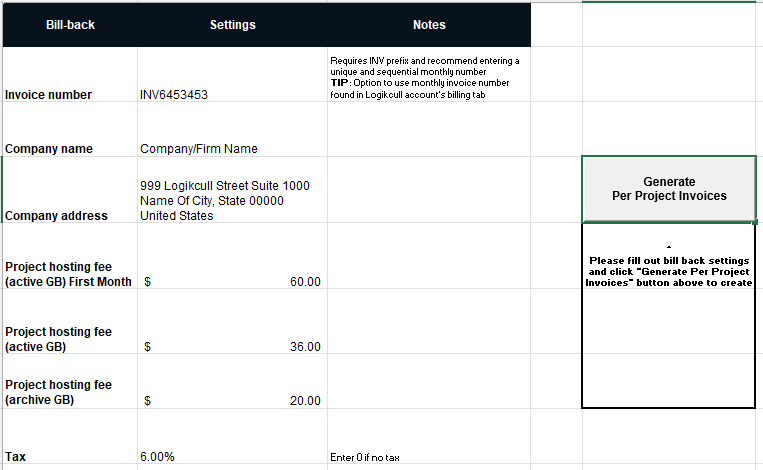
4. Configure Client and Invoice Settings
Open the Excel Macro Template you downloaded above.
Open the tab labeled “inputs”.
Enter the necessary details based on your bill-back and invoice requirements:
Invoice Number - This must include the INV prefix (e.g., INV1234, INV20250131, INV280899) for the macro to work correctly.
Recommendation - Use the invoice number from the account’s Billing tab—preferably the main (monthly) subscription invoice, if available.
Fill out other Fields as needed to ensure the invoices meet your requirements.
5. Template Modifications (Optional)
On the Excel Macro Template you downloaded above. Open the tab labeled “ppi_template”.
The tab contains the invoice layout. You do not need to make any changes to this tab unless you want to customize the format (for example, by adding your firm’s logo).
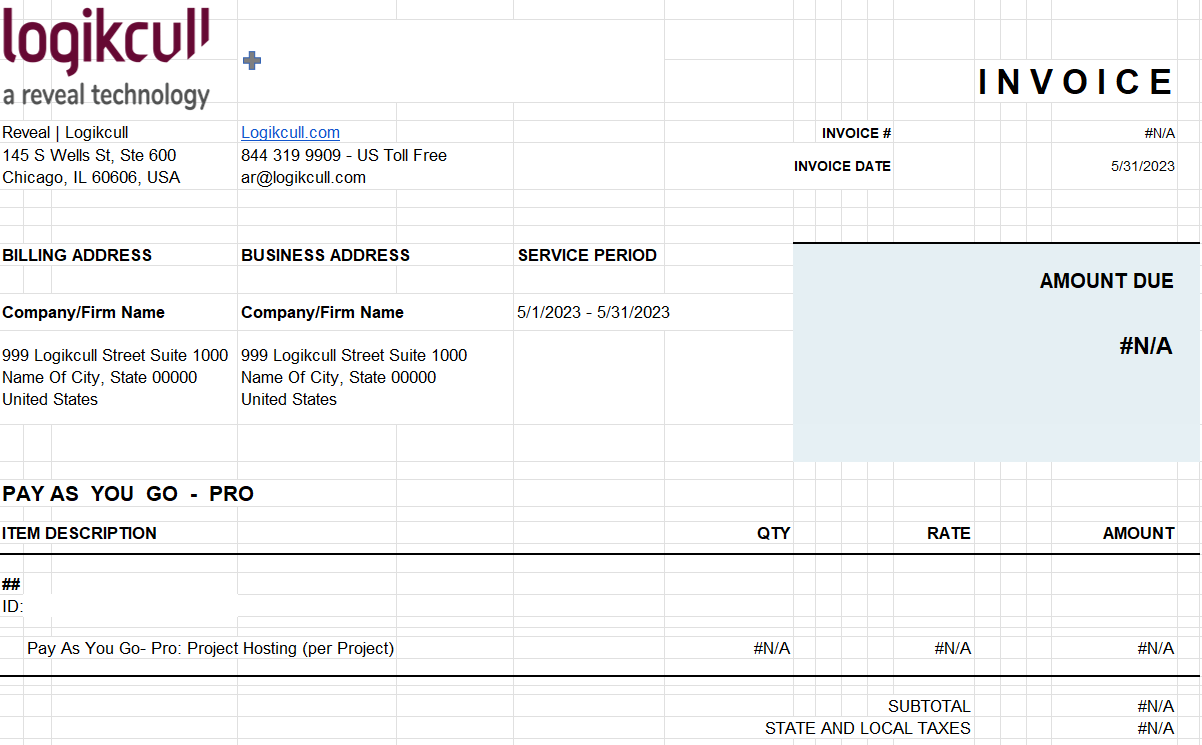
6. Generate PDF Invoices Using the Macro
After entering and reviewing all required information, navigate to the “Inputs” tab.
Click the “Generate Per Project Invoices” button to create individual PDF invoices.
A new sheet for each project invoice will be generated within the same Excel workbook and also will be saved each invoice as a PDF in the designated folder.
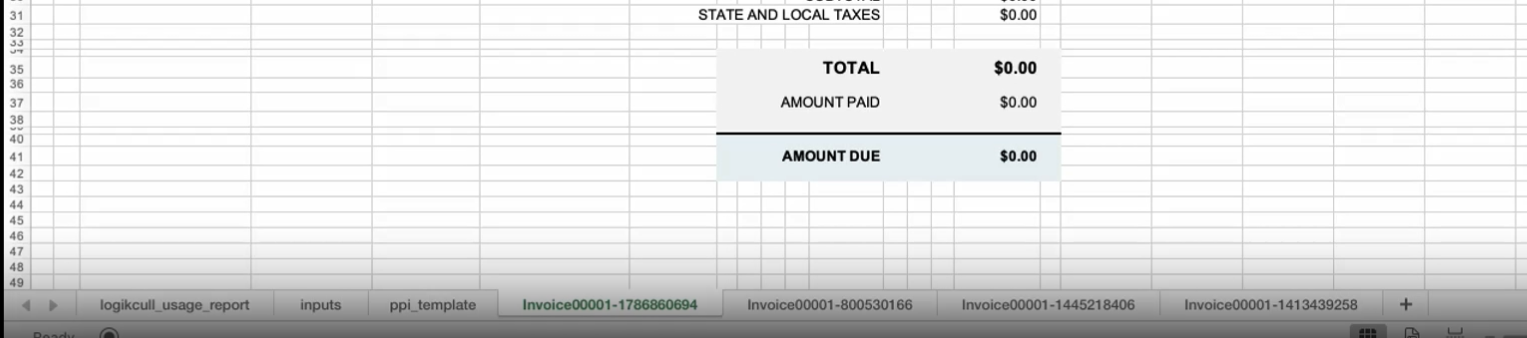
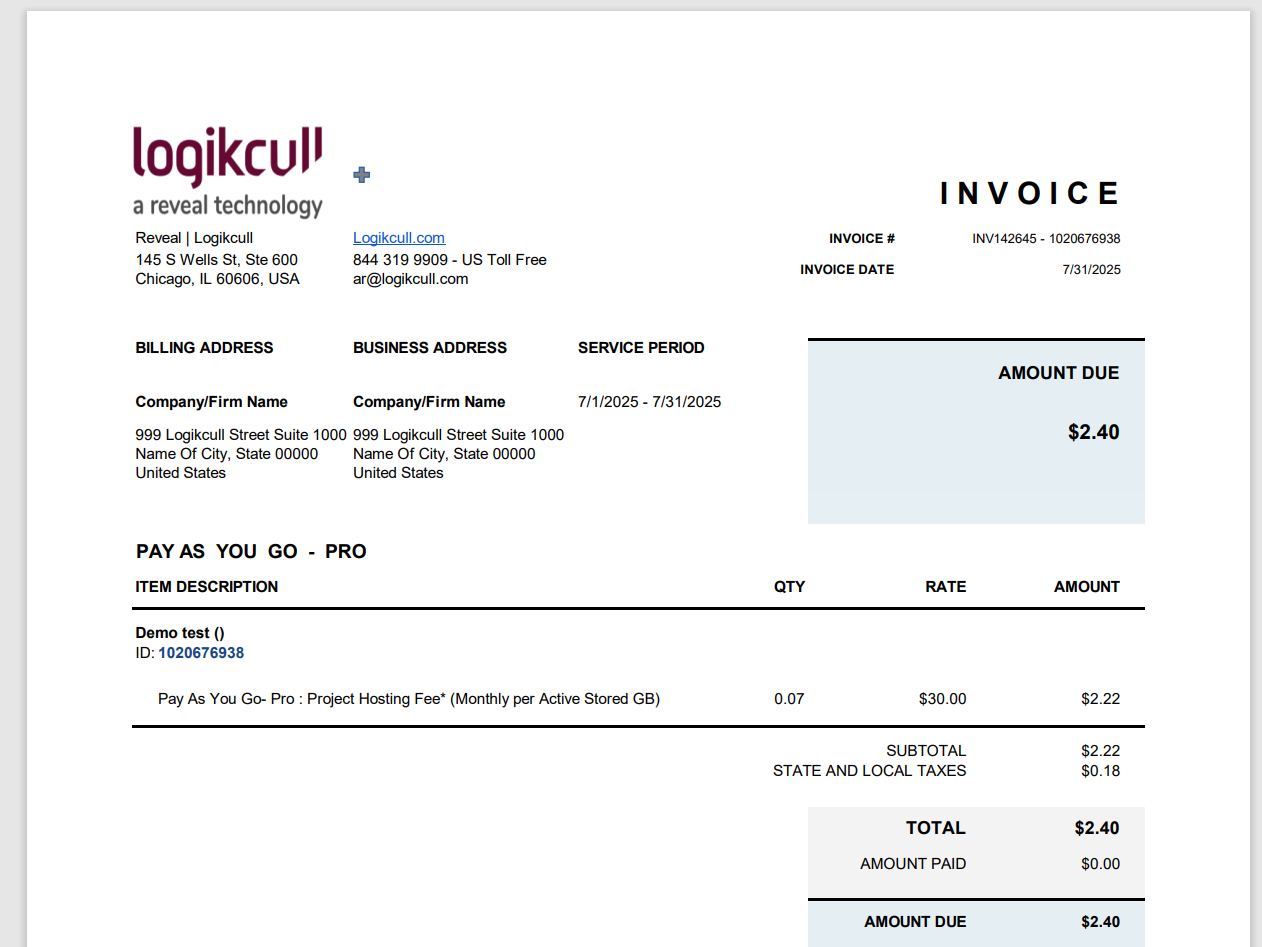
A PDF invoice will be created for each project.
7. Review and Send Invoices
Open the folder where the macro saved your PDFs.
Review each invoice, and send them using your firm’s standard billing workflow.
Troubleshooting
“Macros Are Disabled” Message
Ensure that Excel is not blocking the file:
Right-click the file → Properties → Check “Unblock” if available.
Confirm that macro settings are enabled under:
File → Options → Trust Center → Trust Center Settings → Macro Settings
Invoices Not Generating
Check if:
Required fields in the Raw Data tab are filled
Cell formats are not corrupted
The Excel version is supported
Logo Not Appearing on Invoice
Make sure your logo file is PNG or JPG and embedded properly on the Invoice Settings tab.