
In this article you will learn how to:
Create a Retention Policy
Edit a Retention Policy
Remove a Retention Policy
How to Create a Retention Policy
It is possible to set retention policies in Onna that are specific to Onna and separate from your source application. These retention policies are set globally at an account level through options only available to admins on an account.
This feature does not mirror the retention policies within the source; it is its own Onna-specific retention policy. These source specific rules delete files in Onna after a set time expires.
Retention policies can now be based on one of two date bases:
Added to Onna (default) — the date the file was ingested into Onna. This is how all retention policies worked prior to September 2026 release, and any policy created before this change continues to use this basis.
Source creation date — the date the resource was originally created at the source, rather than when Onna collected it. This option is only available for data source types where the connector reliably provides a creation date; where it isn't supported, this option won't be selectable.
Choose your date basis carefully: for a backfilled or historical data source, these two dates can differ significantly, and the wrong choice can delete content you meant to keep (or keep content you meant to purge).
To add a new retention follow the steps below:
Step 1:
From the Admin preferences page, navigate to the Sources tab.
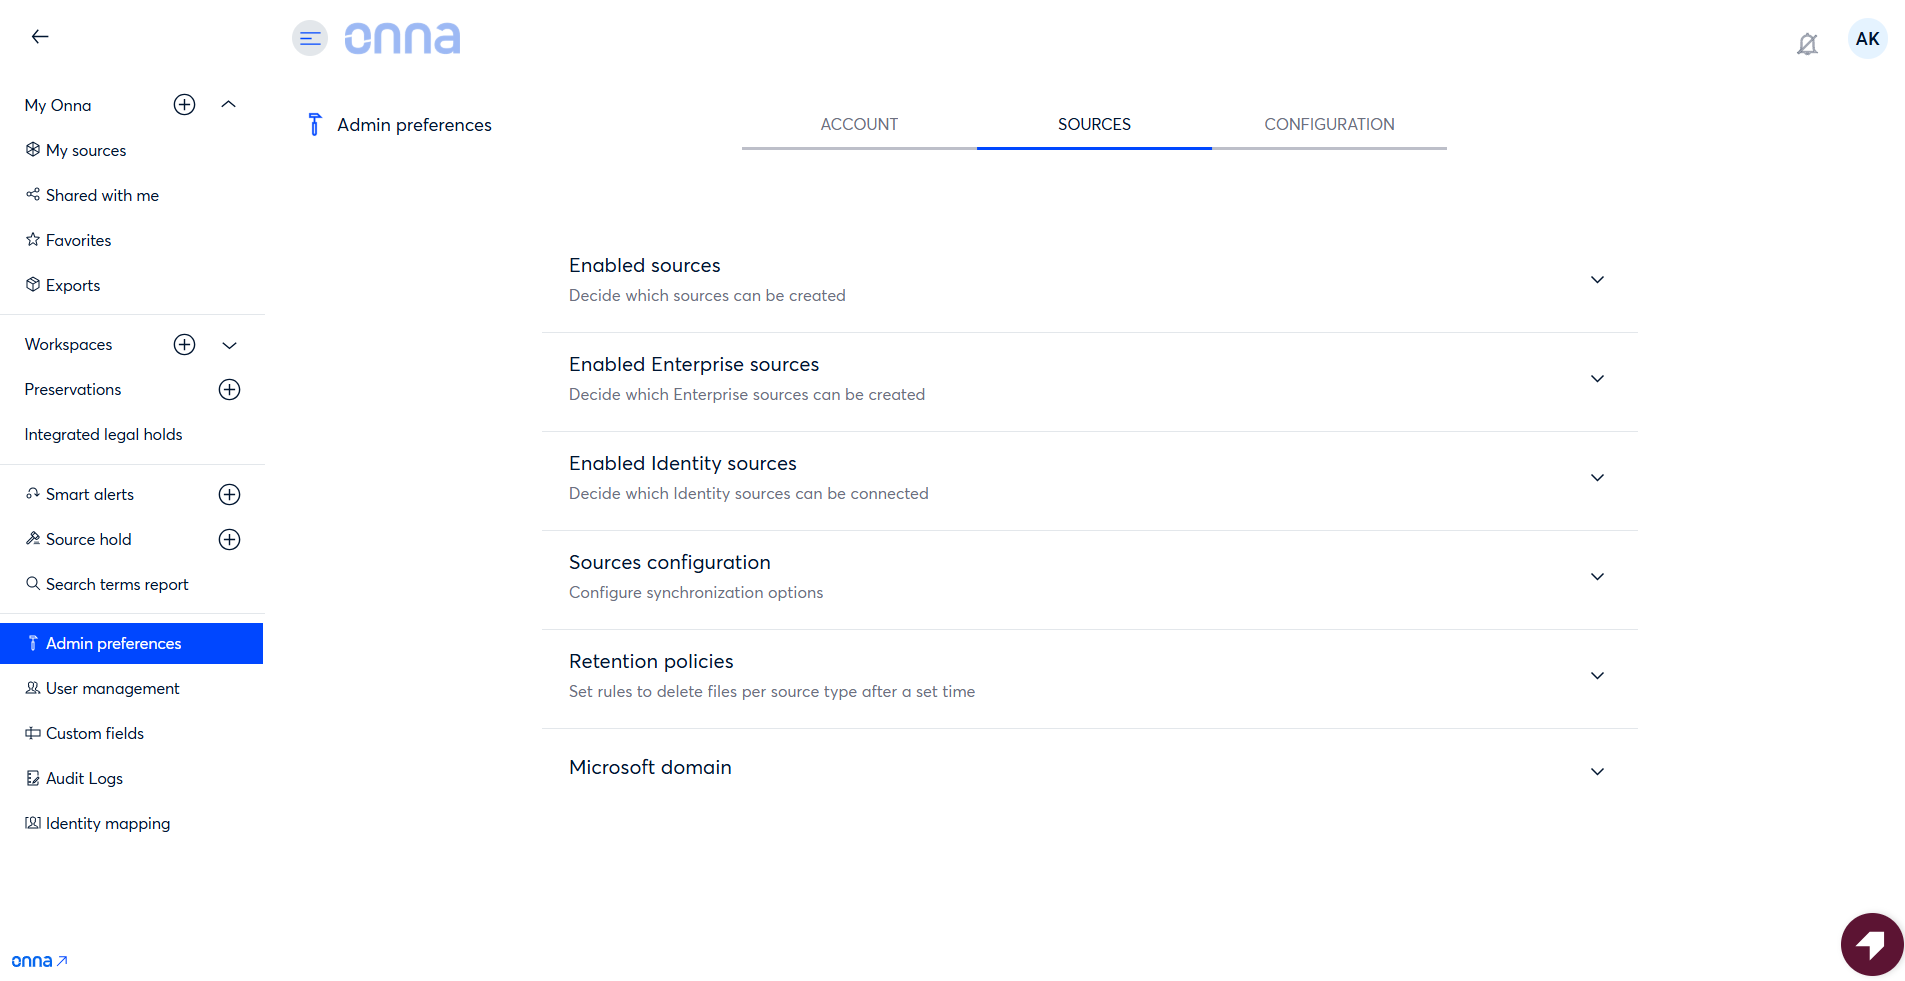
Step 2:
On the sources page:
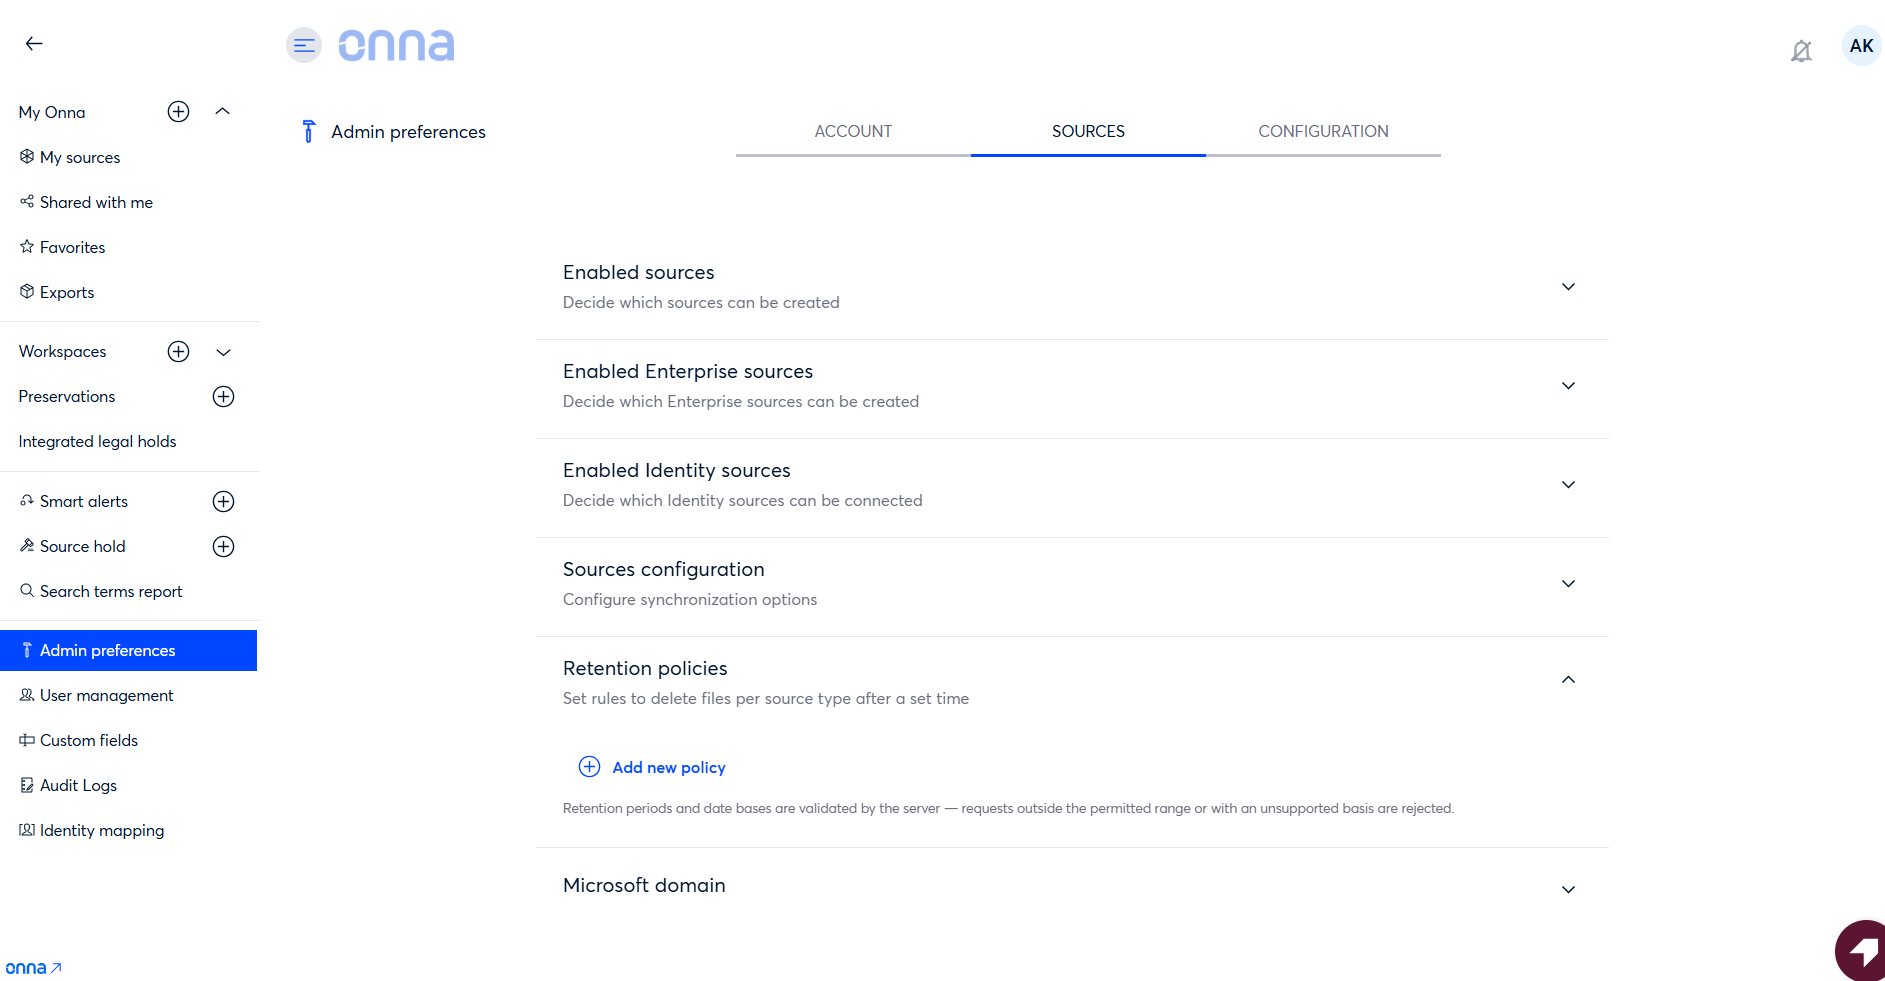
Click on the arrow next to Retention policies to expand the section. Then,
Click “+Add new policy”
Note
You may see policies already in existence listed here as well.
Step 3:
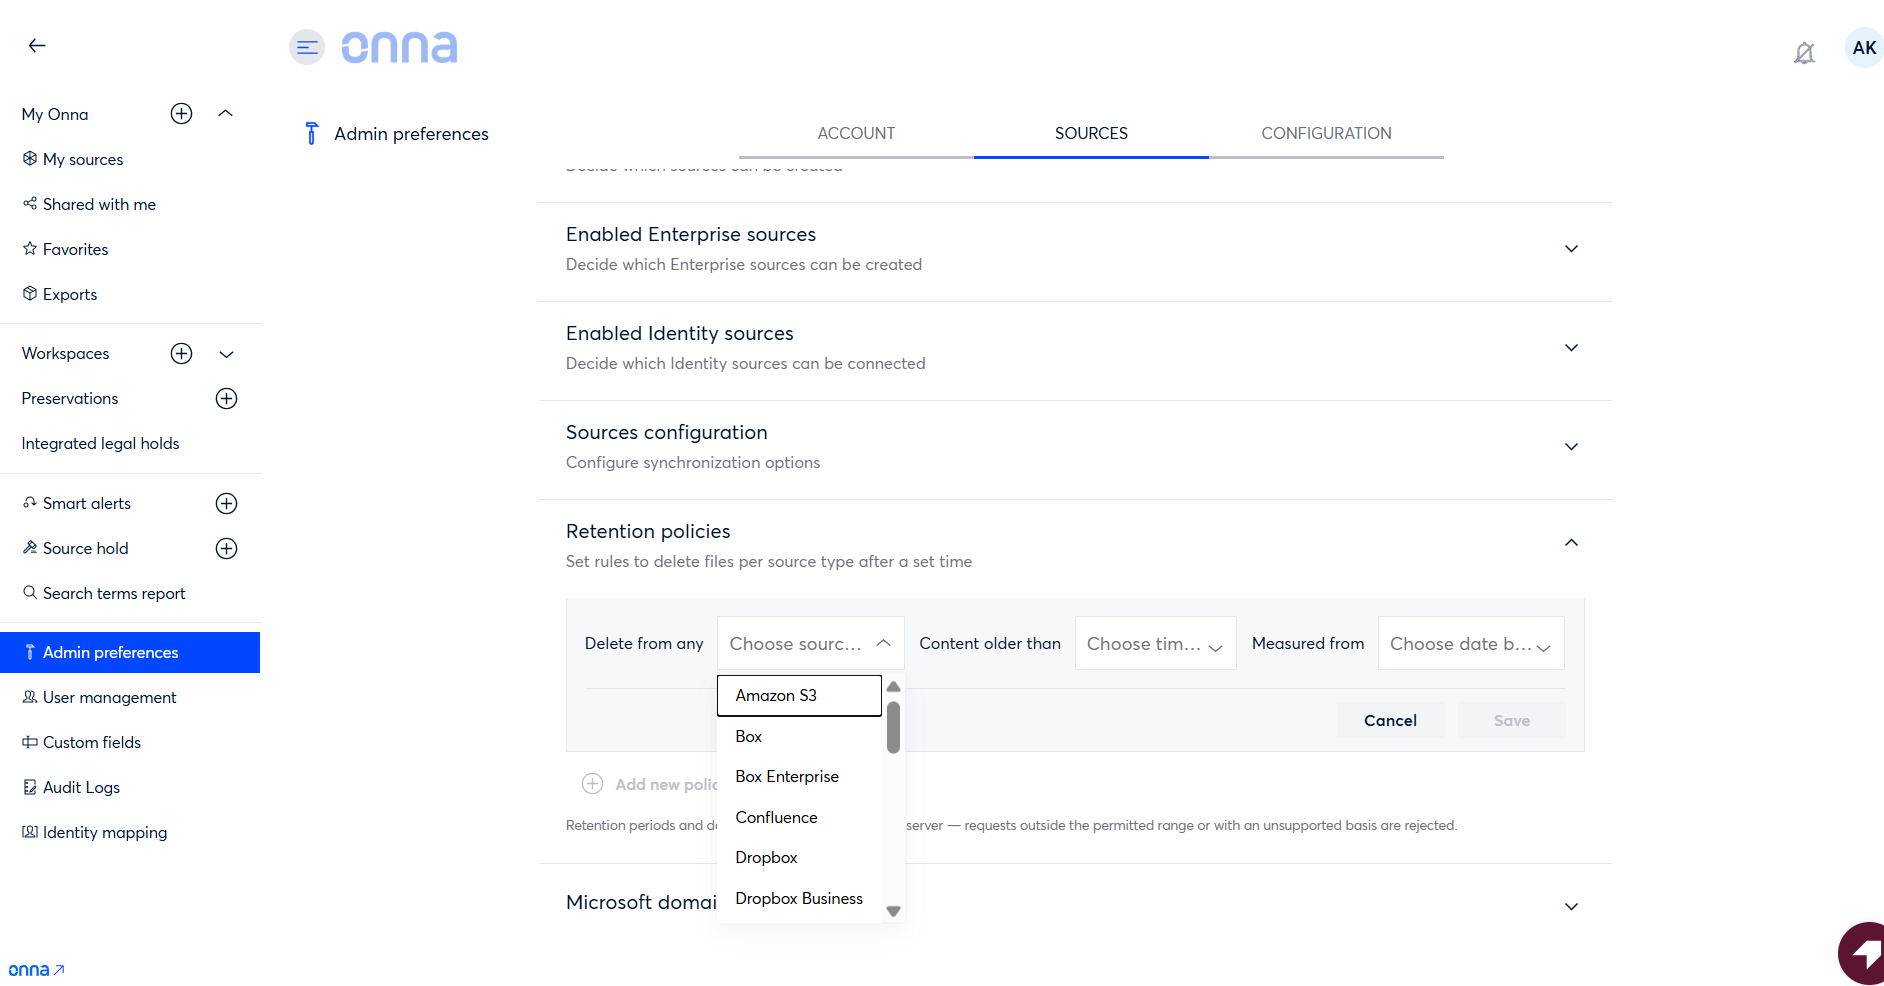
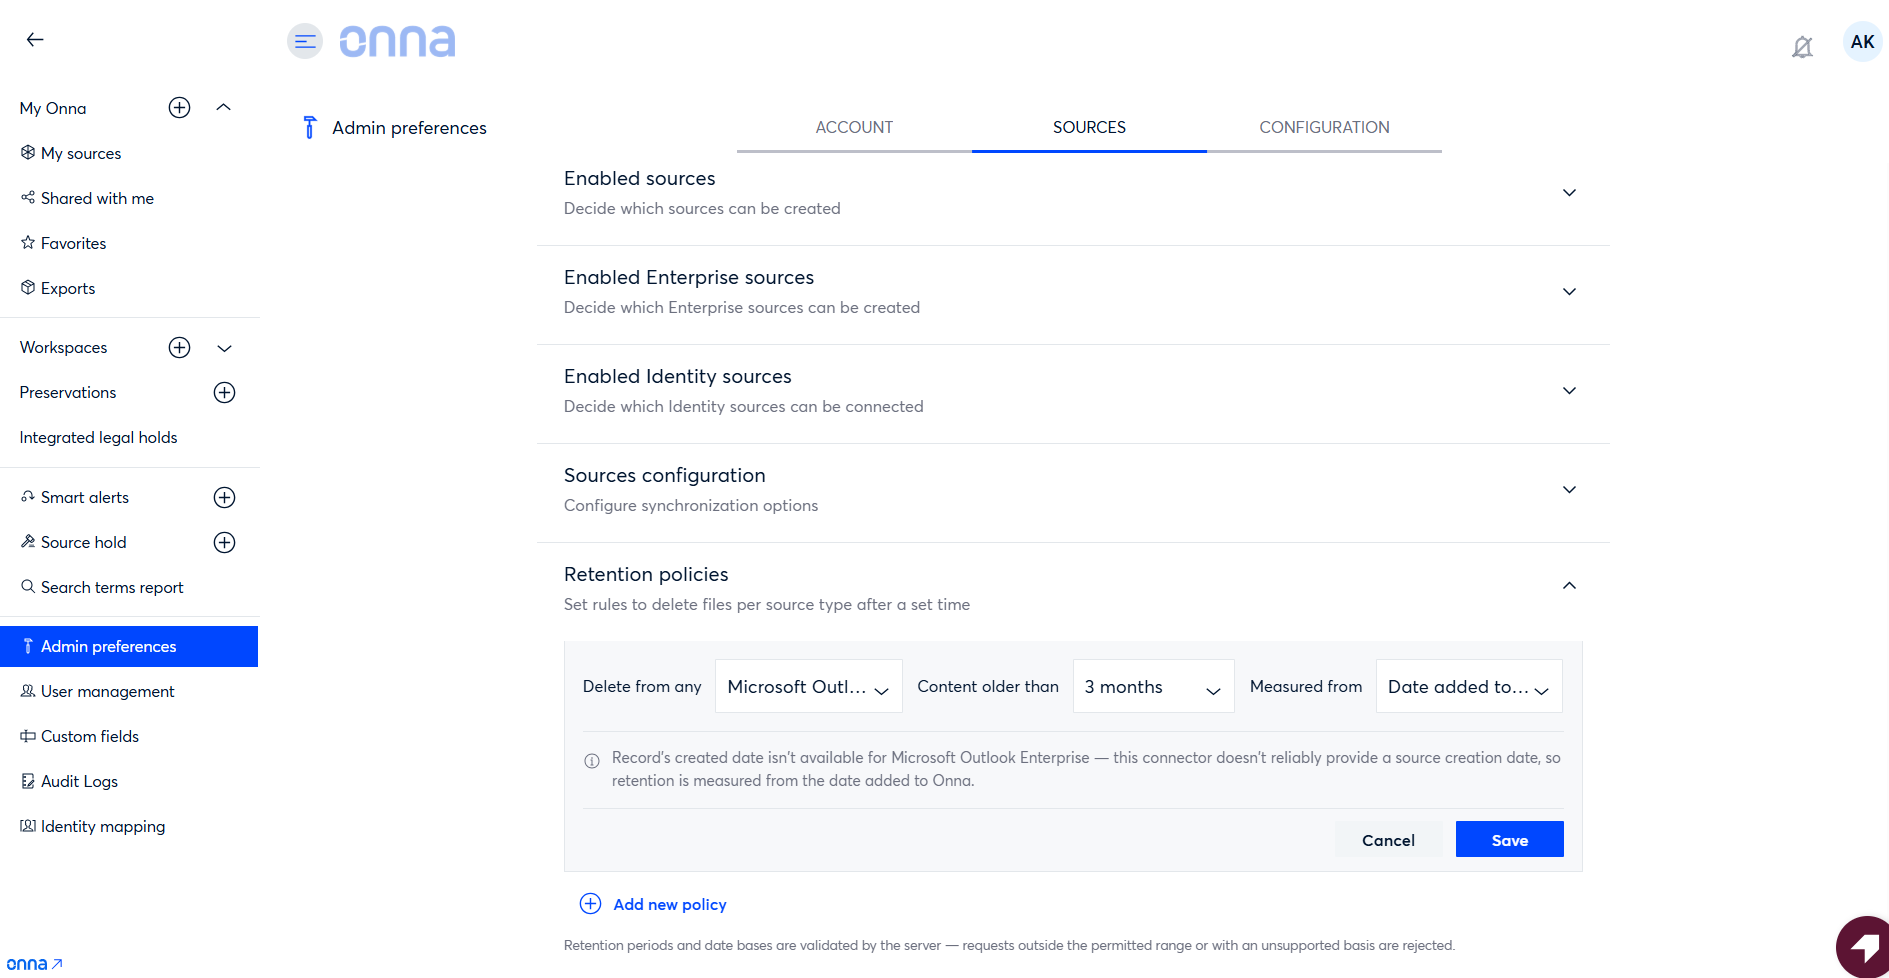
You’ll now see a new row appear. Your next step is to select the data source you want to set a retention policy for.
Note
Retention policies for Zoom, Okta, Miro, Gemini, and other connectors are set per connector. A policy for one connector applies only to that connector’s data.
Step 4:
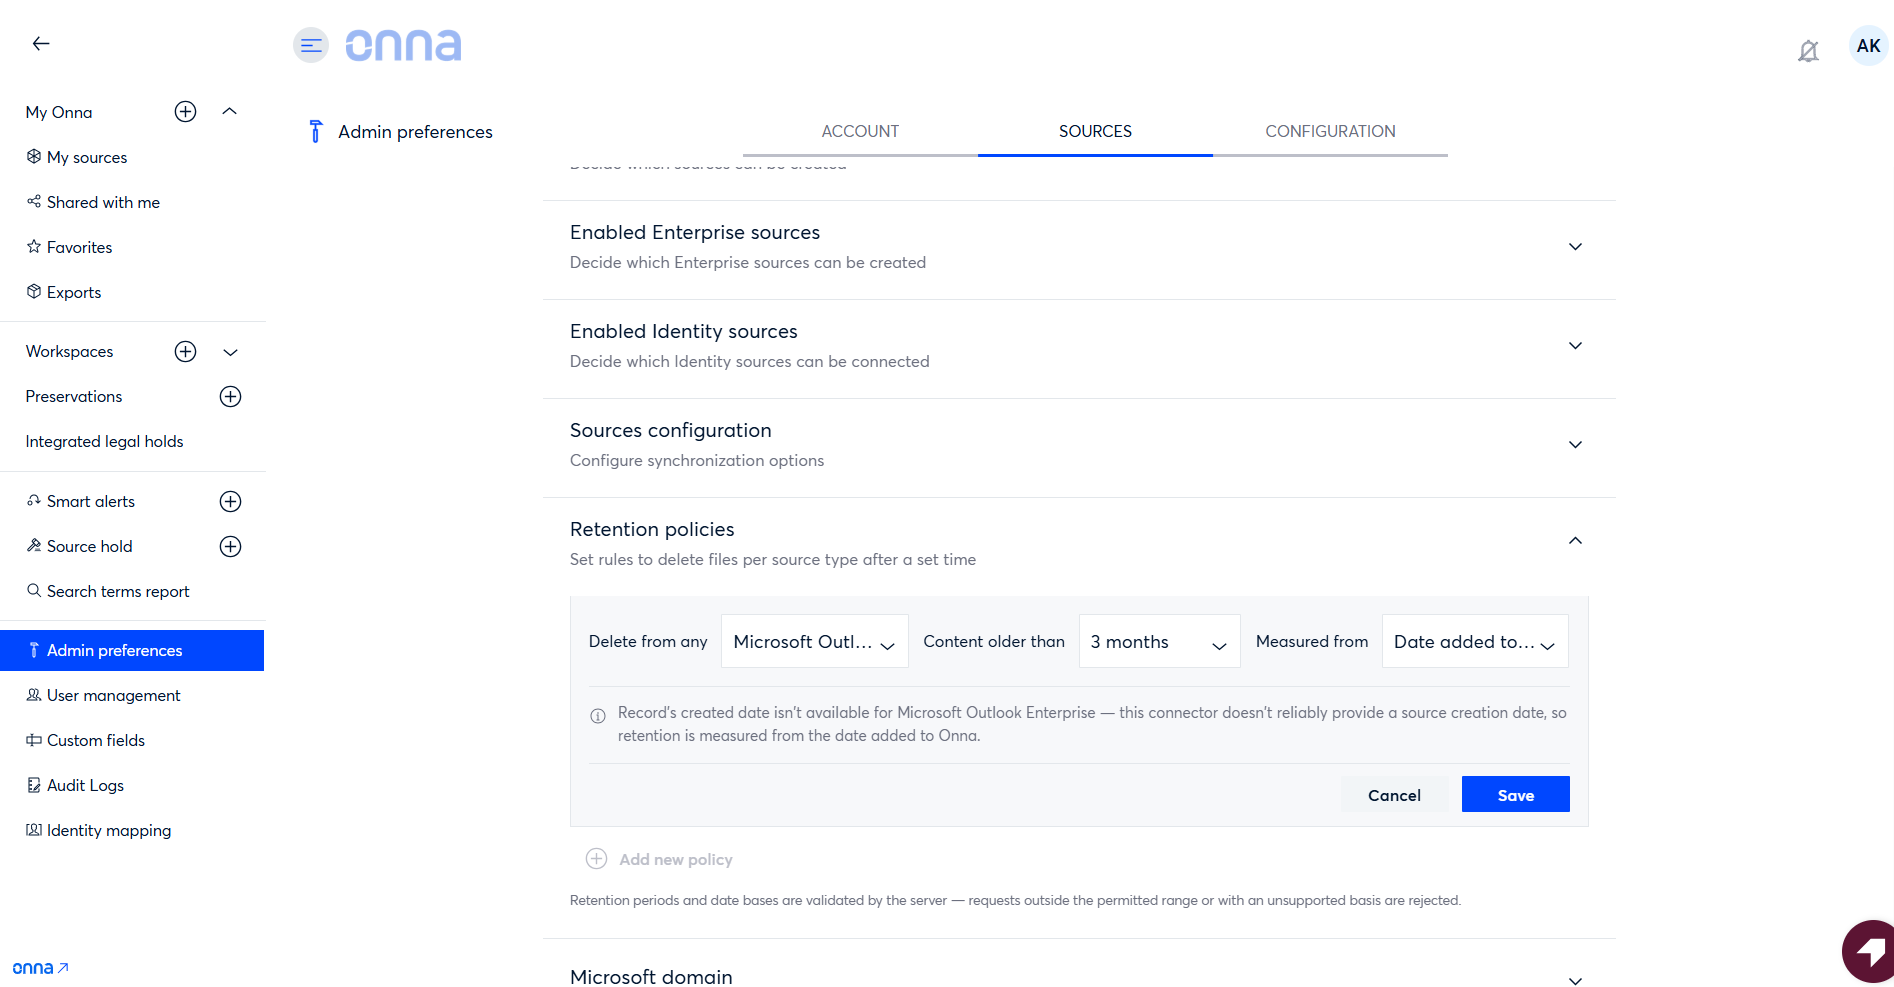
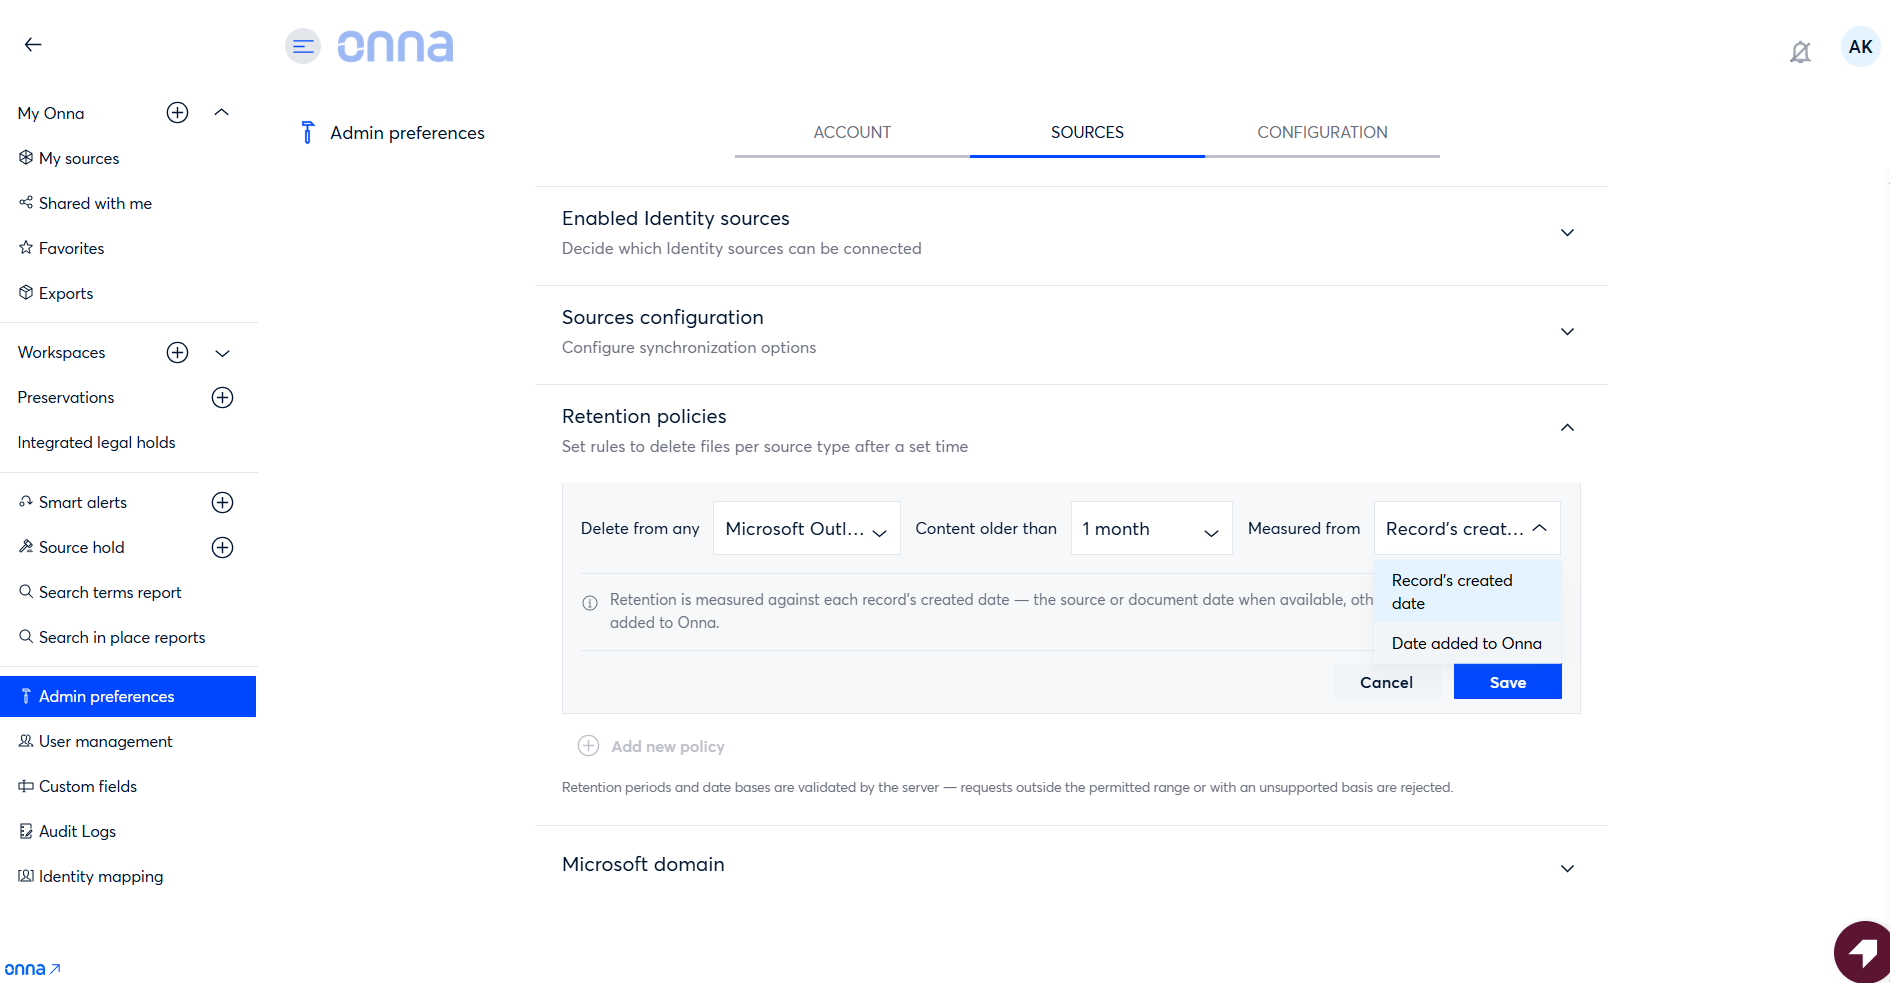
Now, select the time frame you want to set a retention policy for from the second drop down menu.
Step 5:
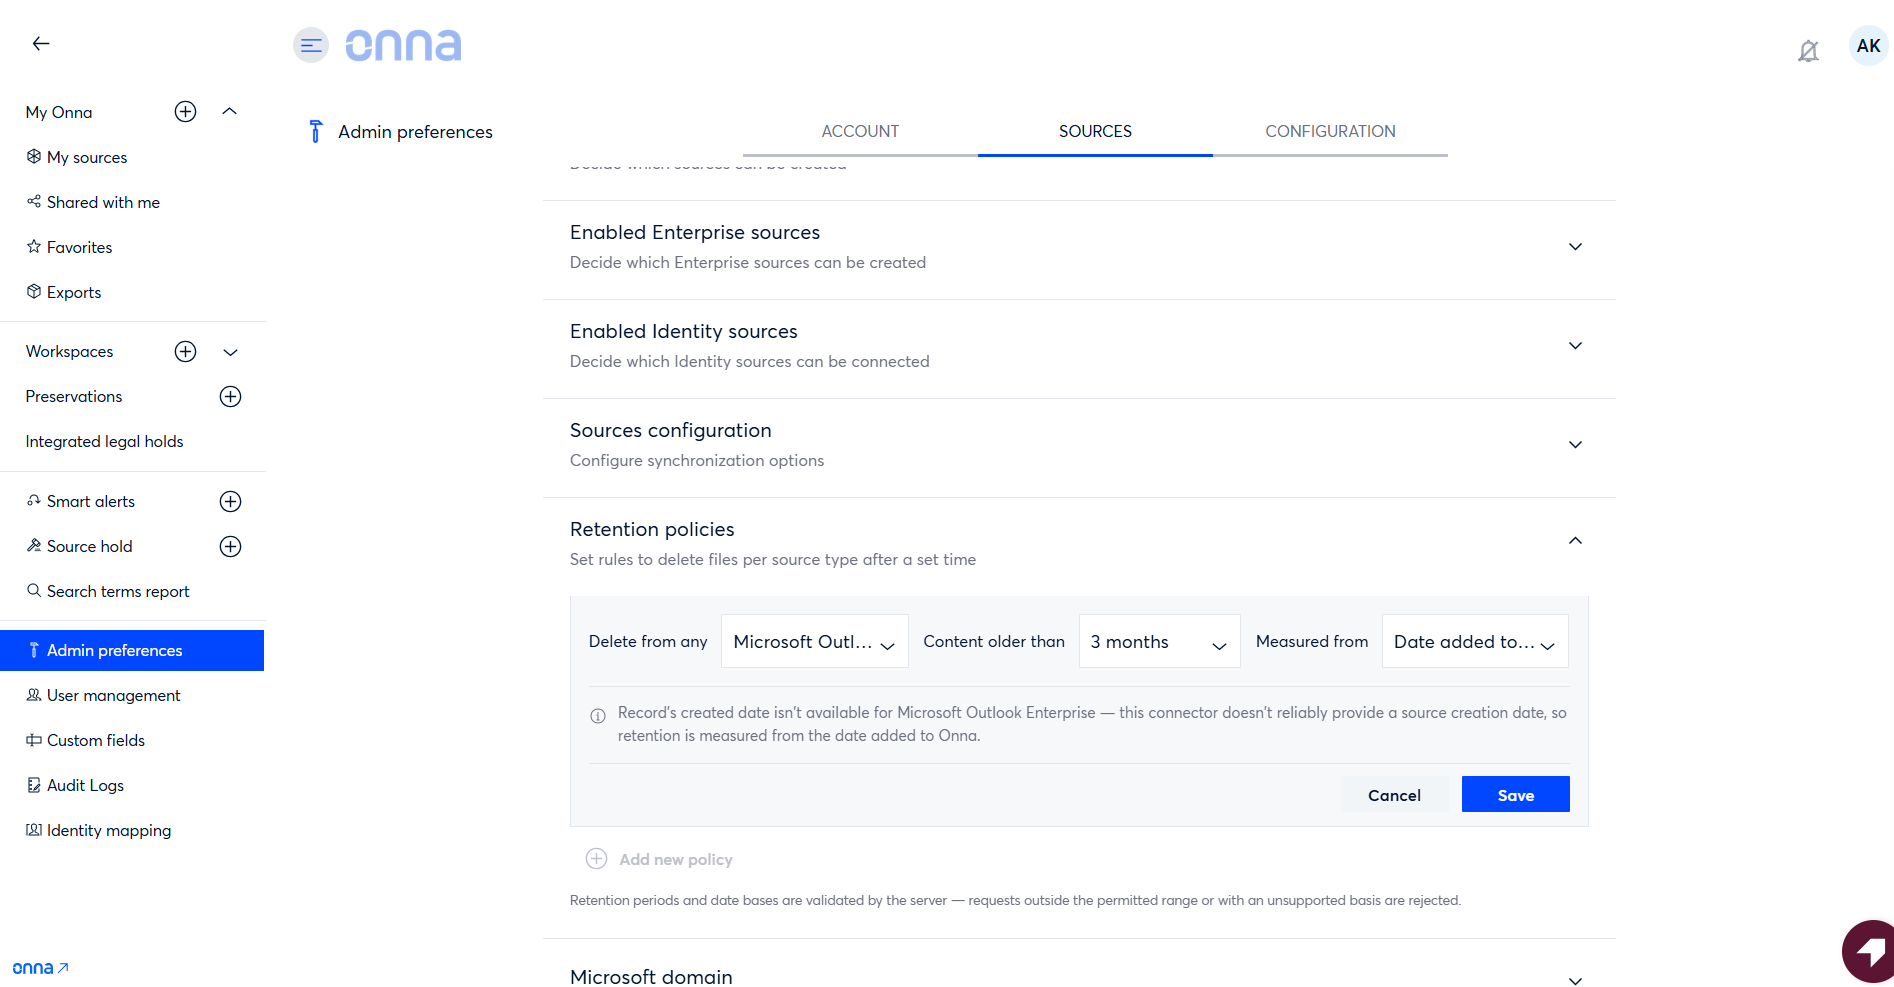
Choose the date basis. Select Record’s created date or Date added to Onna. If the connector doesn’t reliably provide a source creation date, the Source creation date option can’t be selected.
Step 6:
Finally, click on the blue arrow to confirm your retention policy.
Step 7:
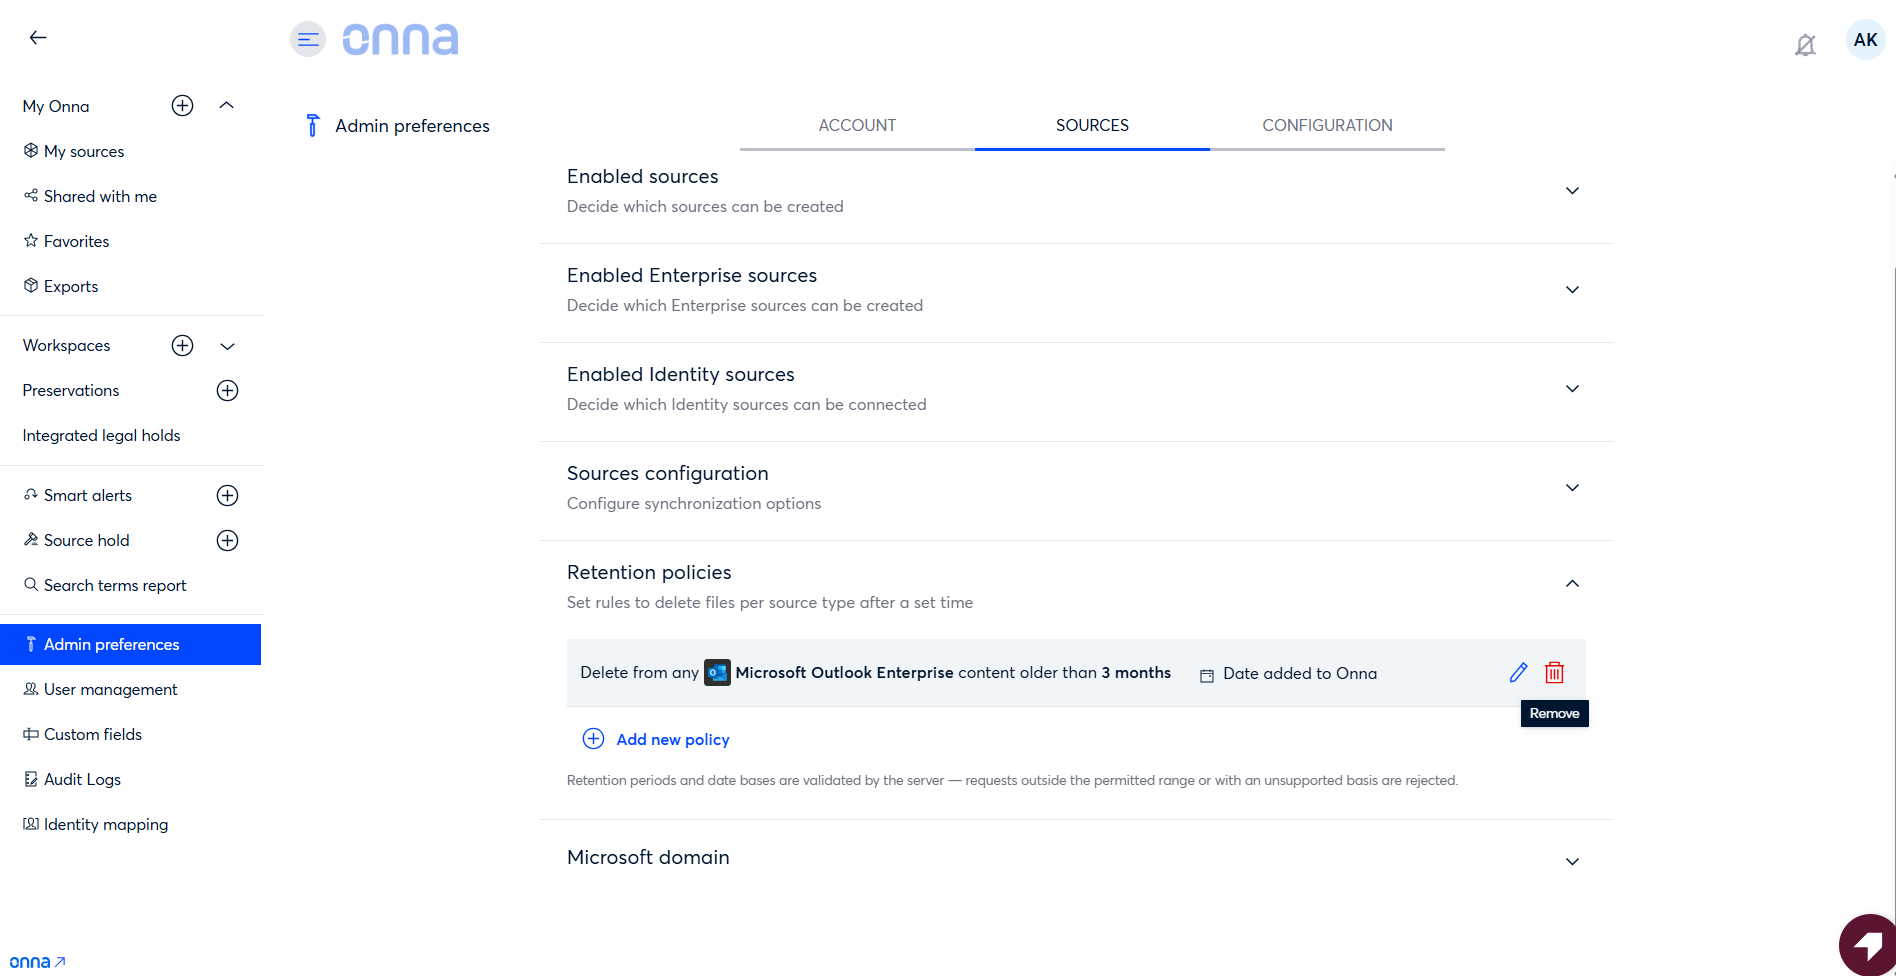
You will now see your new retention policy appear in your list of retention policies. If you set more than one policy, they will be listed alphabetically by connector.
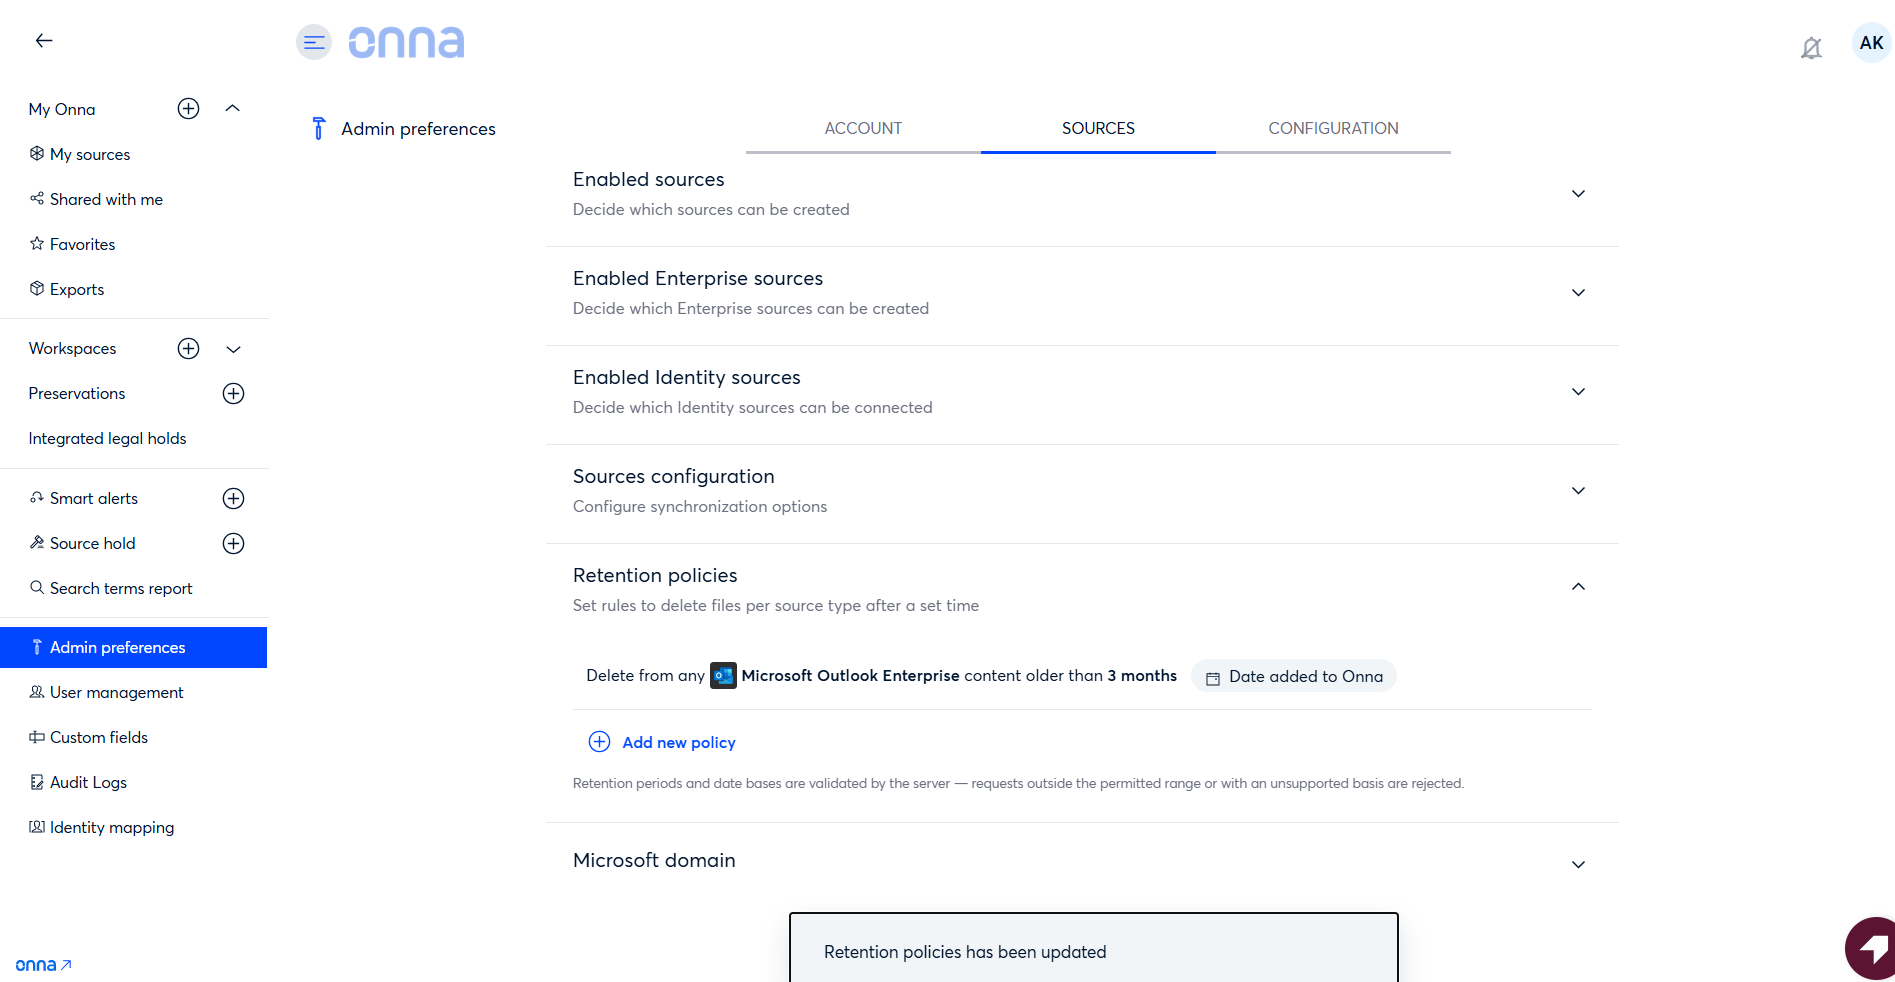
Each policy in the list shows its date basis. Policies created before the September 2026 release are shown as Added to Onna.
How to Edit a Retention Policy
There may be times when your retention policies need to be updated. To edit a retention policy follow the steps below:
Step 1:
From the Admin preferences page, navigate to the Sources tab.
Step 2:
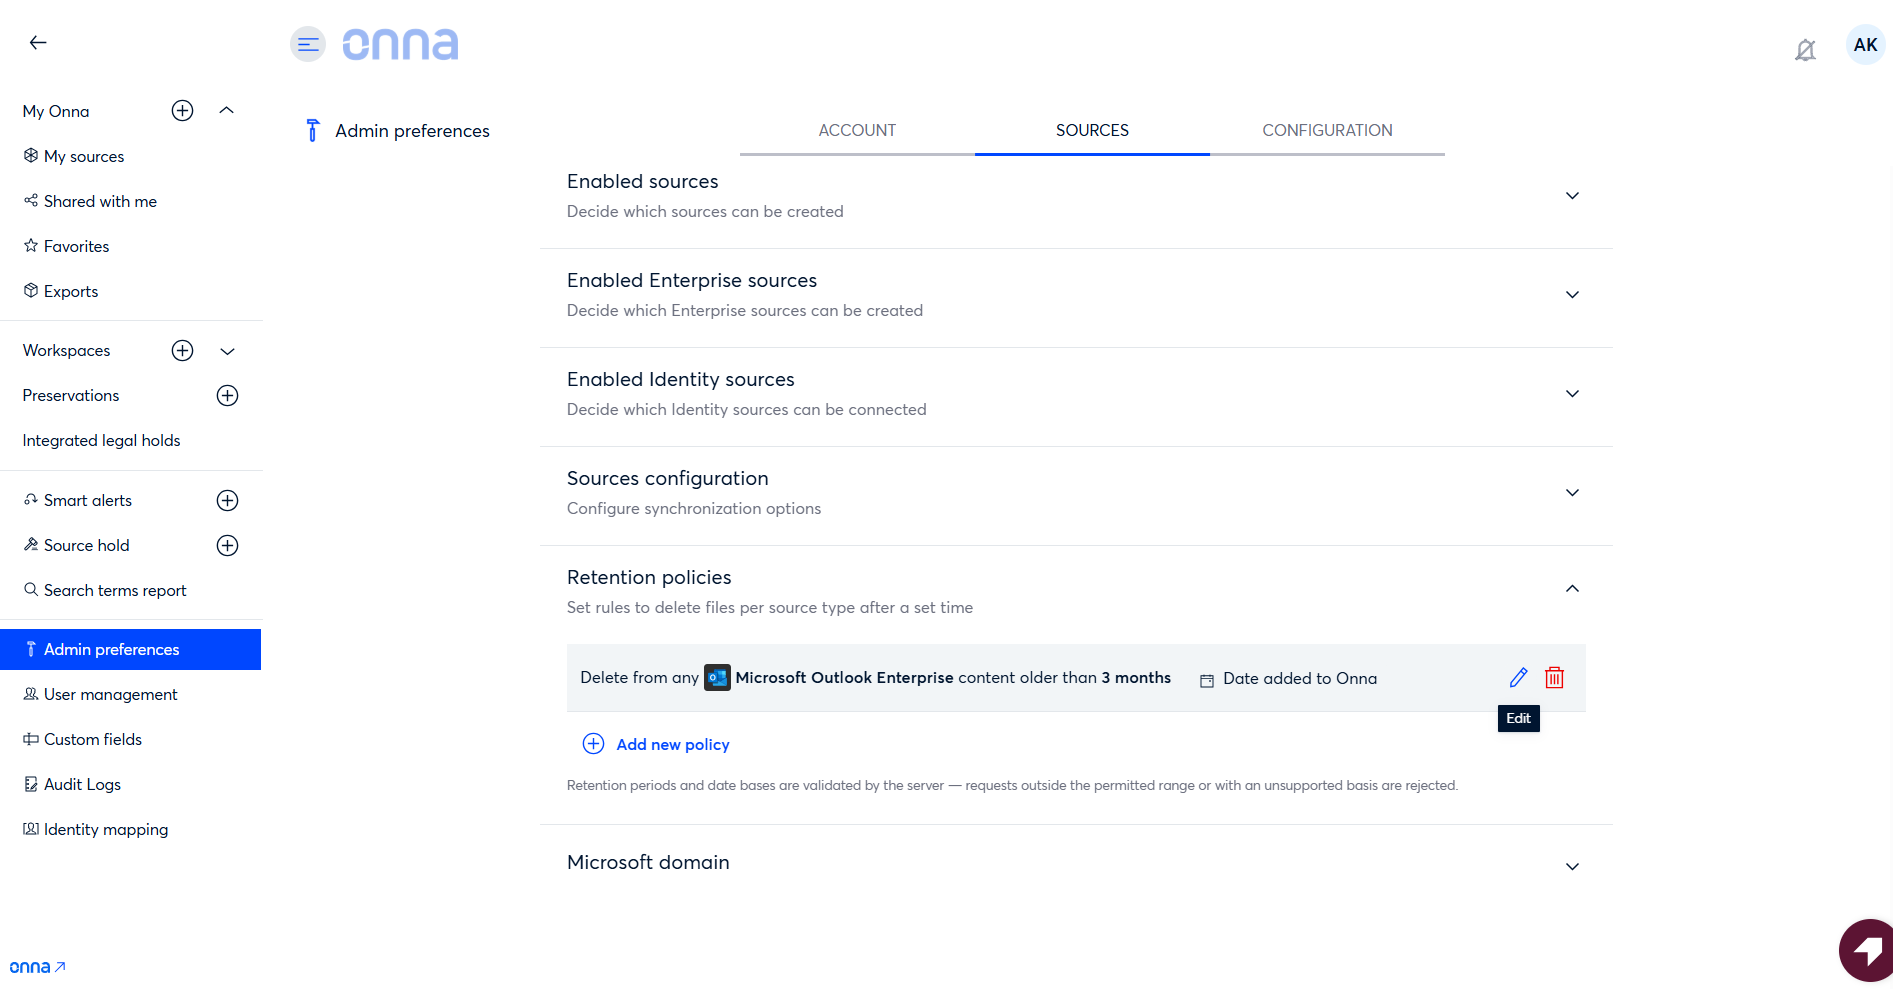
On the sources page, click on the arrow next to Retention policies to expand the section. Find the retention policy you want to edit and click on the Edit icon to the right of the policy.
Step 3:
You can now edit the length of your retention policy for data from your chosen connector by selecting a new time and measure from the dropdown menus. Then, click the blue Save button to confirm your changes.
How to Remove a Retention Policy
If you no longer need a retention policy you can remove it by following the steps below:
Step 1:
From the Admin preferences page, navigate to the Sources tab.
Step 2:
On the sources page, click on the arrow next to Retention policies to expand the section. Find the retention policy you want to edit and click on the Remove icon to the right of the policy.
Step 3:
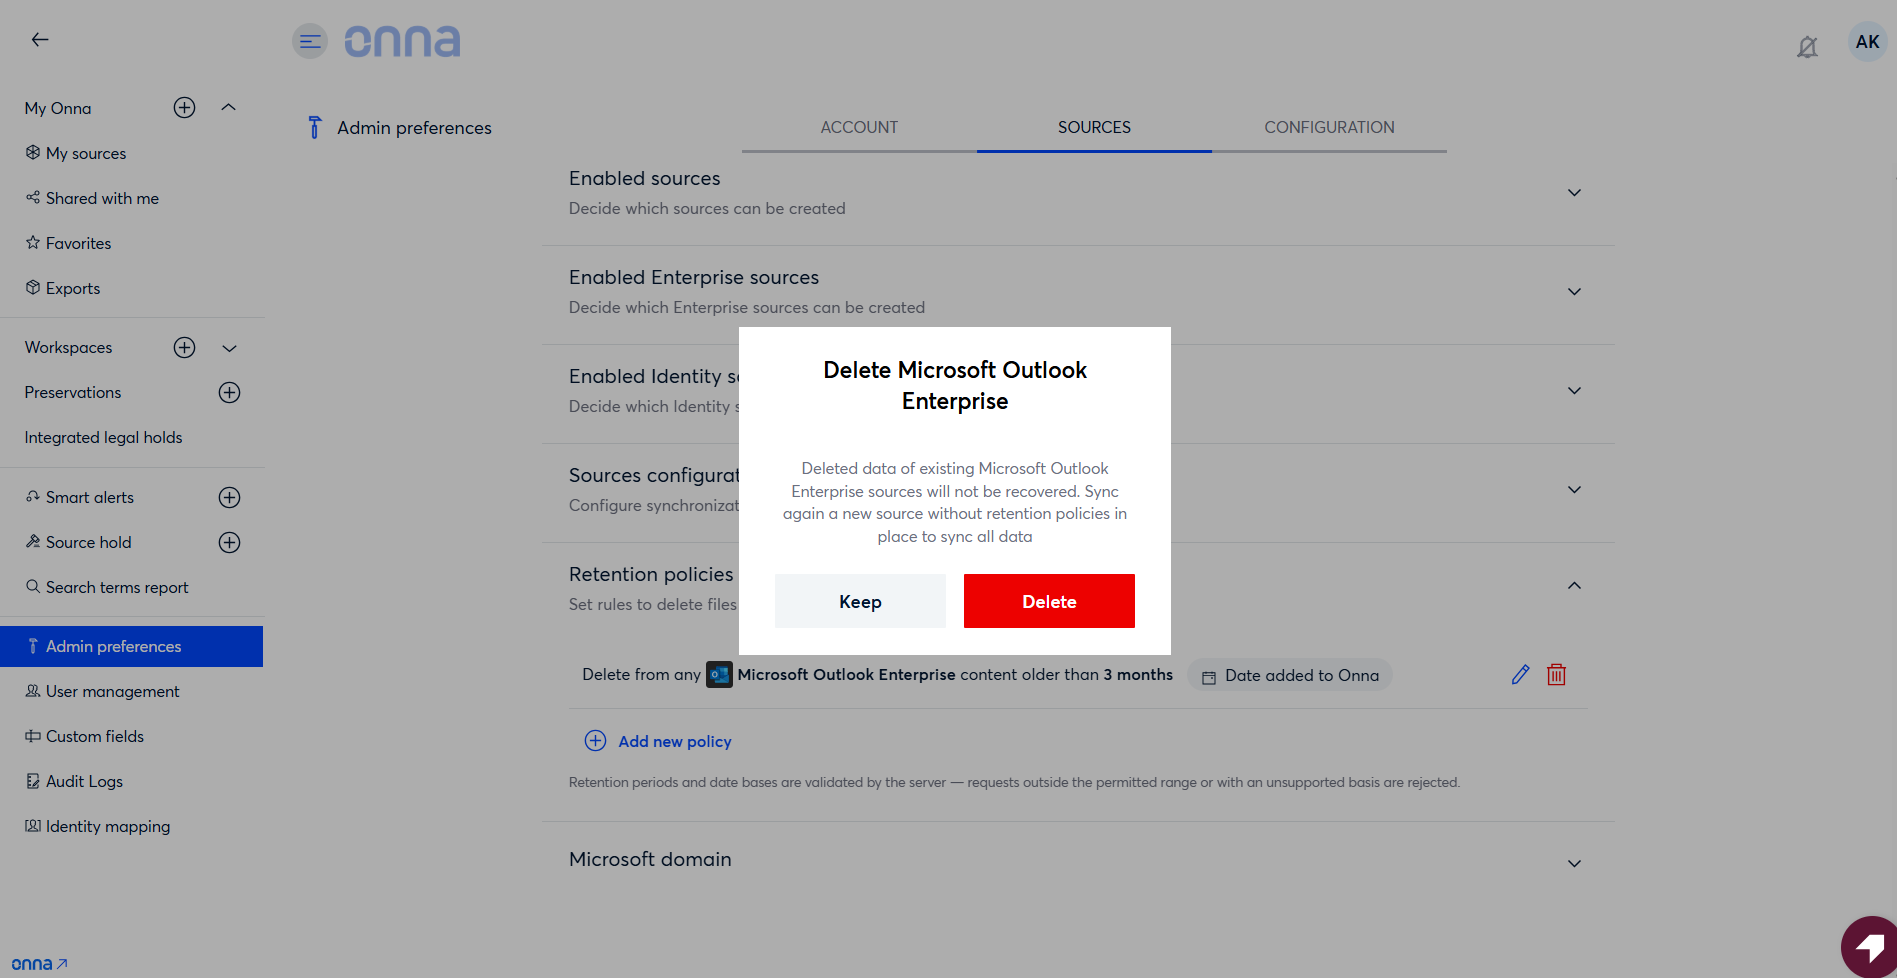
You will then see a pop up appear asking you to confirm that you want to delete your retention policy. To confirm and remove your retention policy, click on the red Delete button.
Note
Deleted data from the existing sources will not be recovered.
FAQ
What types of sync mode does the retention policy work with?
The retention policy will work with all sync modes: one time sync, auto sync and archive.
What happens to the children of a file impacted by a retention policy?
If the file has children (attachment, image, etc…) Onna will not separate them. The children will be deleted only when the parent is.