
Overview
The Transfer Ownership feature in Onna allows administrators to reassign ownership of Data Sources, Workspaces, and more from one user to another. This ensures data continuity and maintains proper access control when team members leave or change roles.
Note
This action can only be performed by Administrators.
All transfers are logged for auditing purposes, and email notifications are sent to confirm successful transfers.
Getting Started
I. Access the Ownership Transfer Interface
Log in to your Onna account.
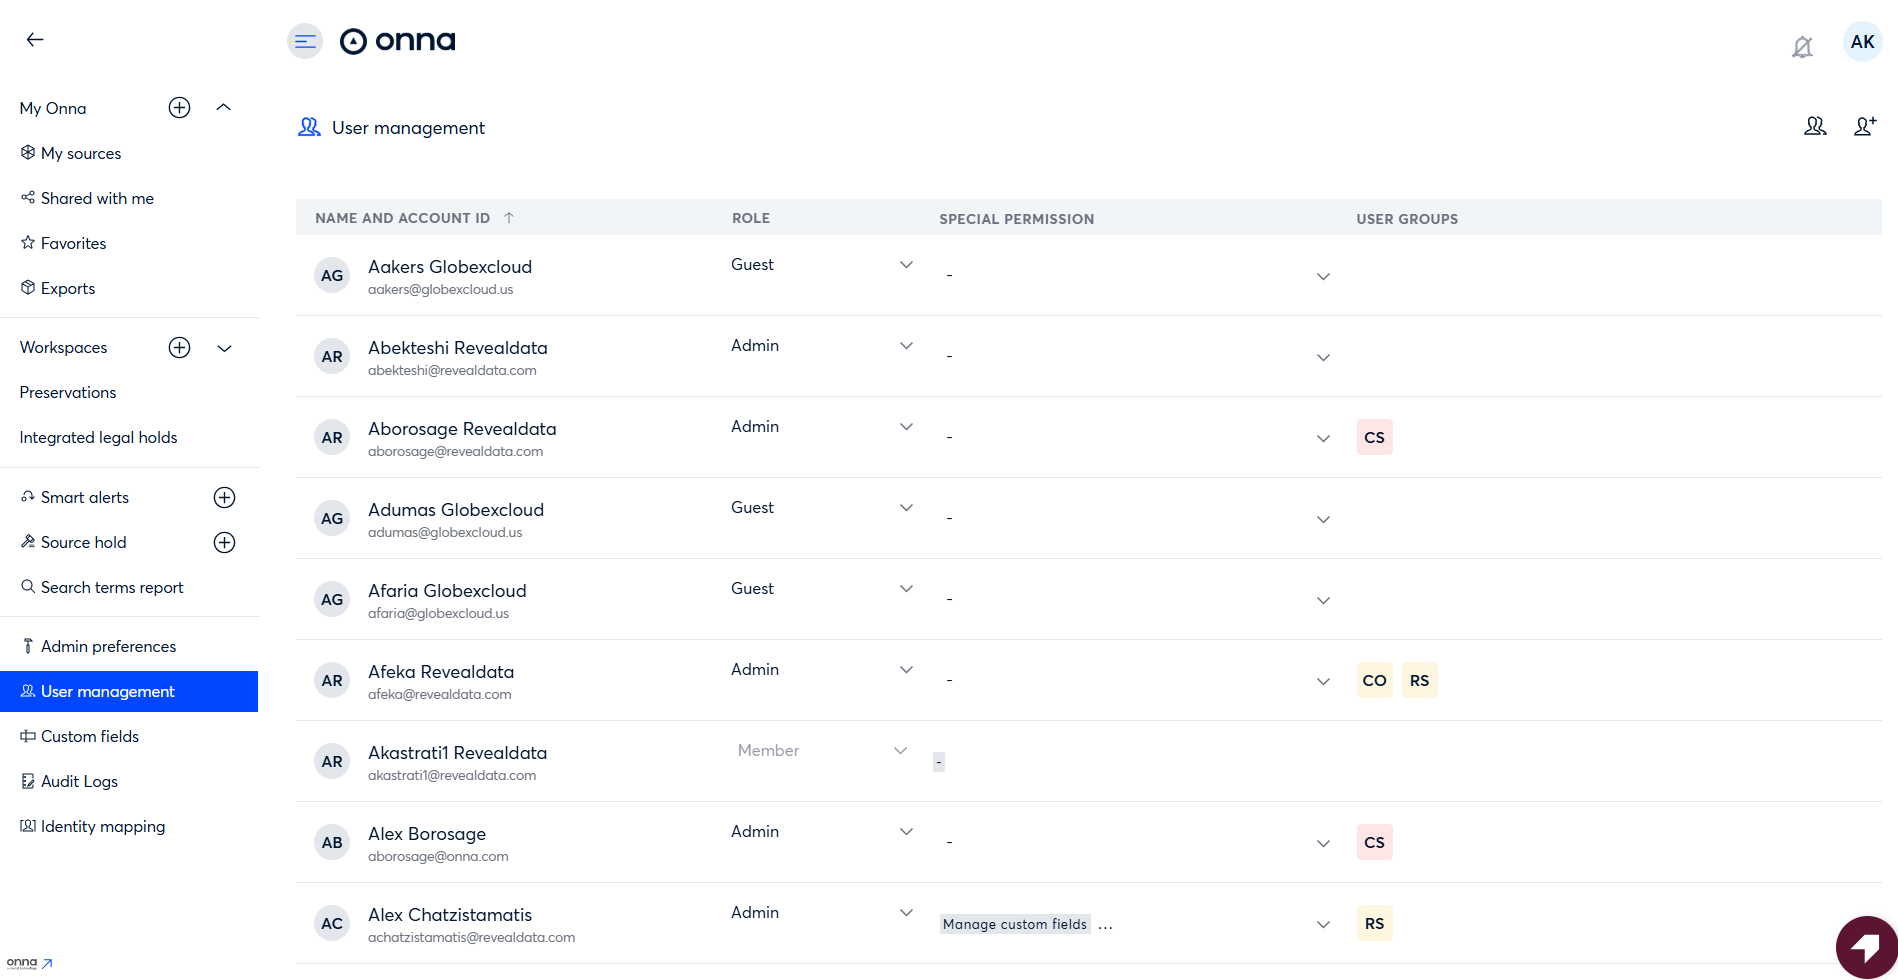
Navigate to User Management.
Locate the user whose data you want to transfer ownership from.
II. Initiate the Transfer
Find the user in the list.
Click the icon X next to the user you want to transfer ownership from.
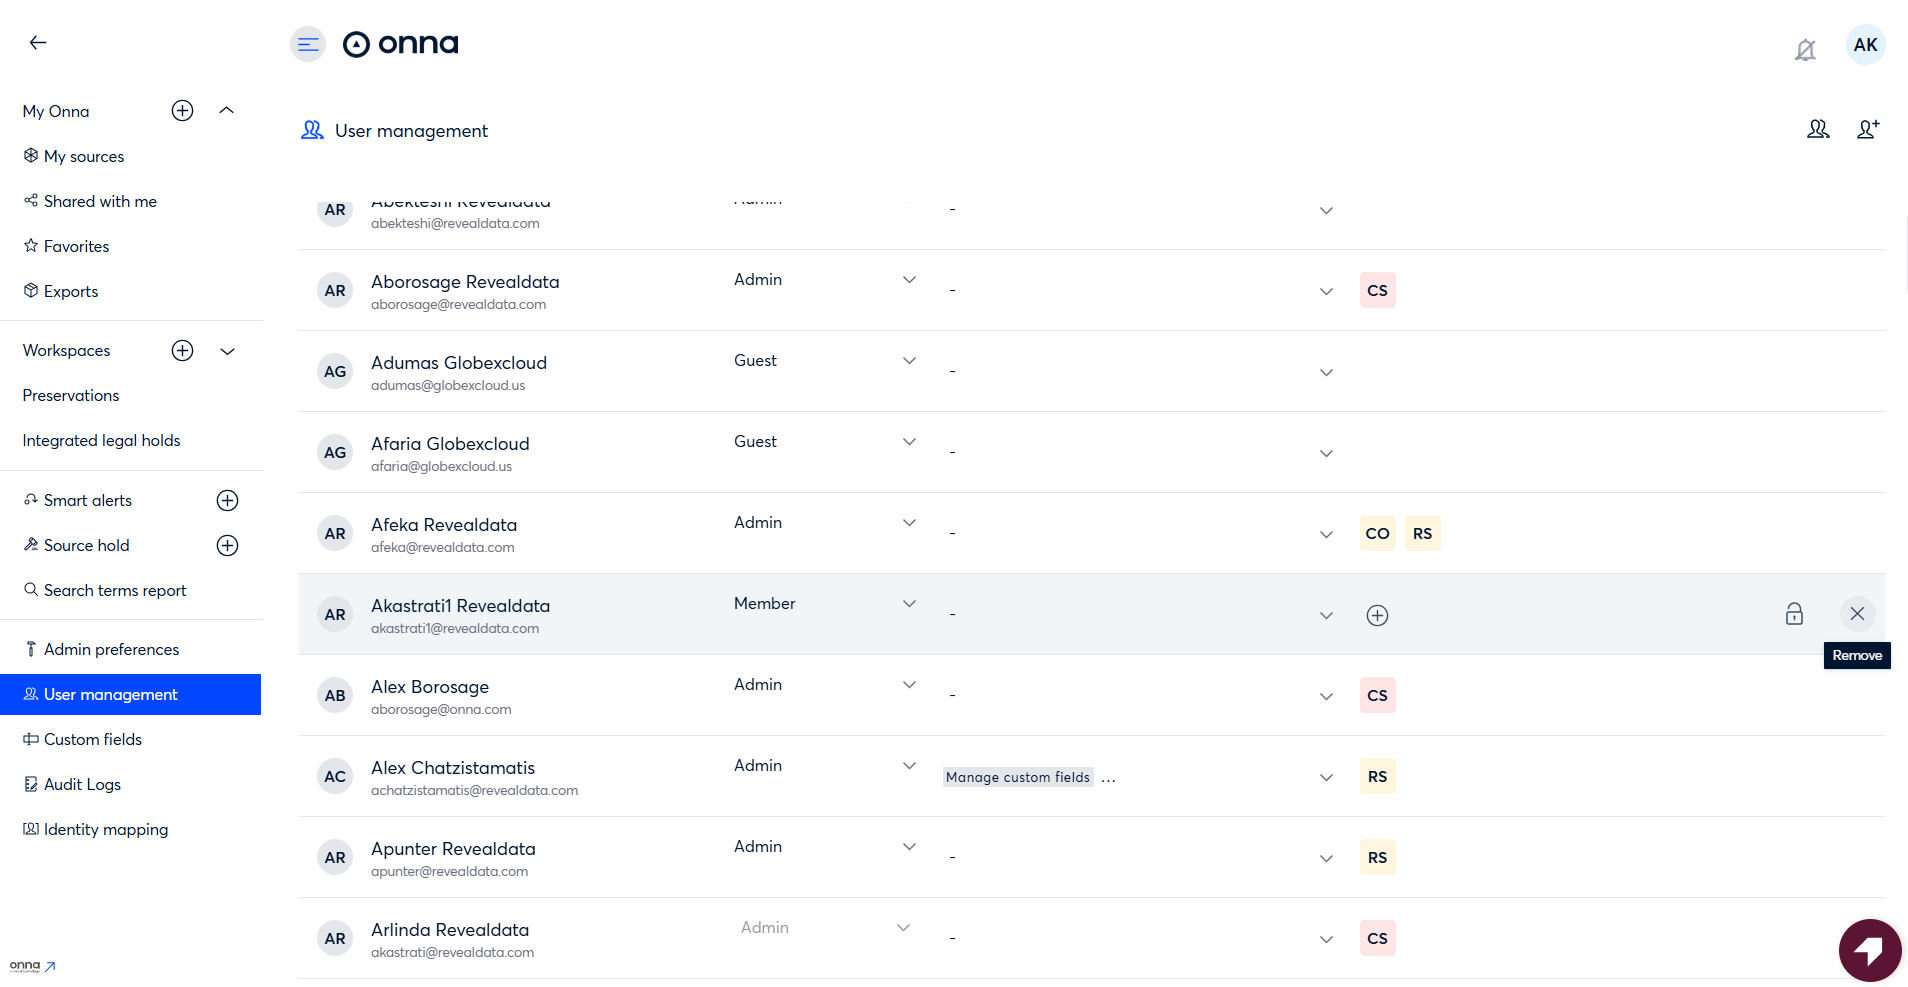
A new page will open with the transfer options.
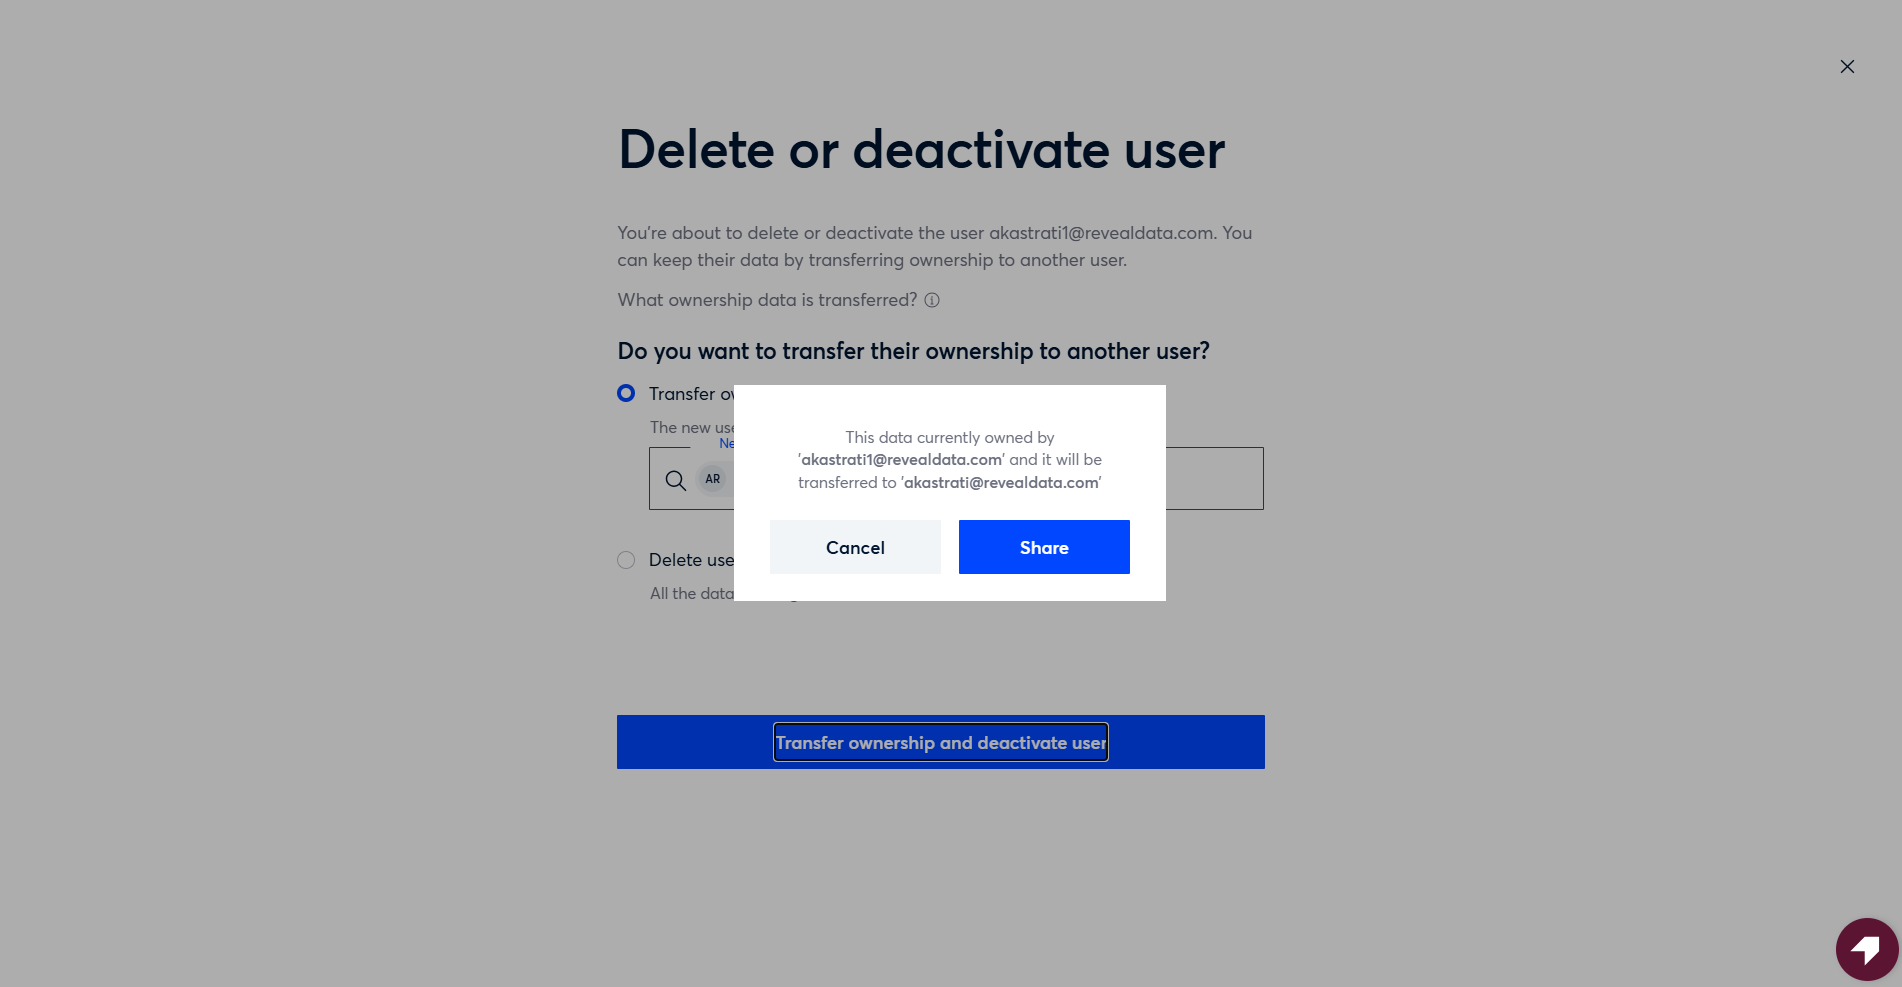
III. Select the New Owner
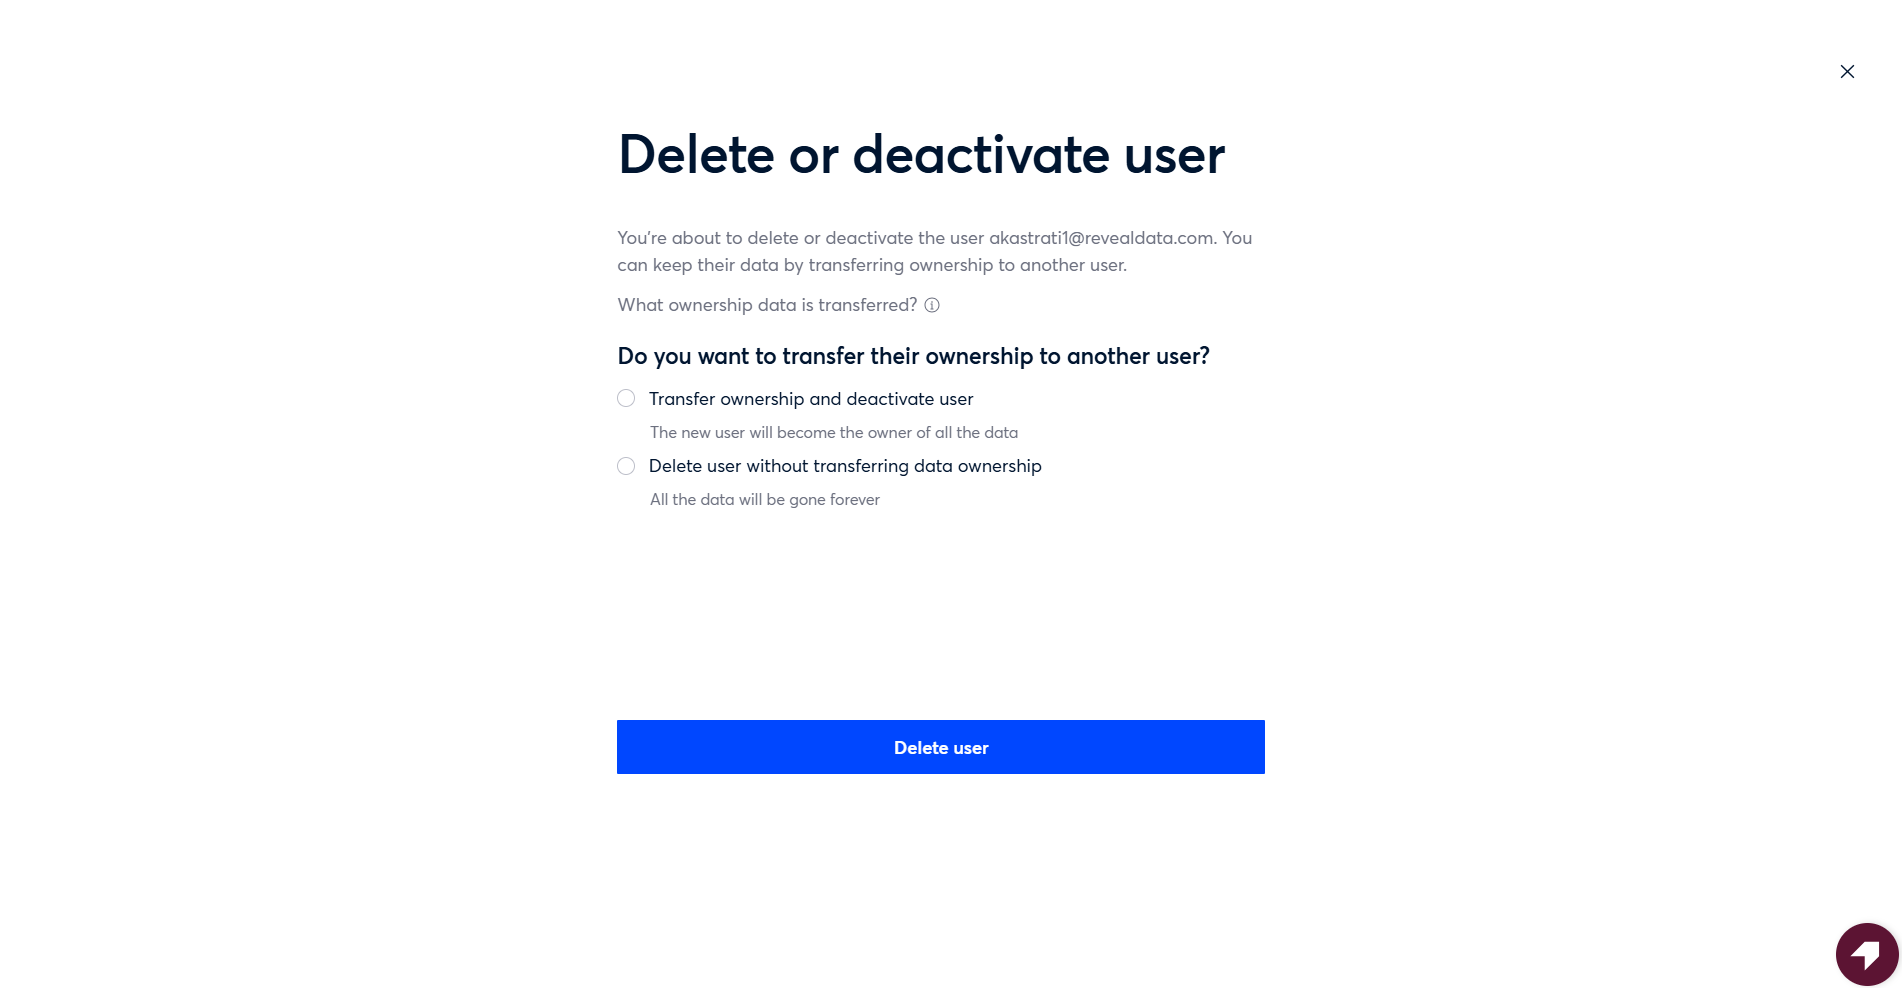
On the transfer page, you will se two options:
Transfer ownership and deactivate user — the selected new user will become the owner of all the data.
Delete user without transferring data ownership — all data will be permanently deleted.
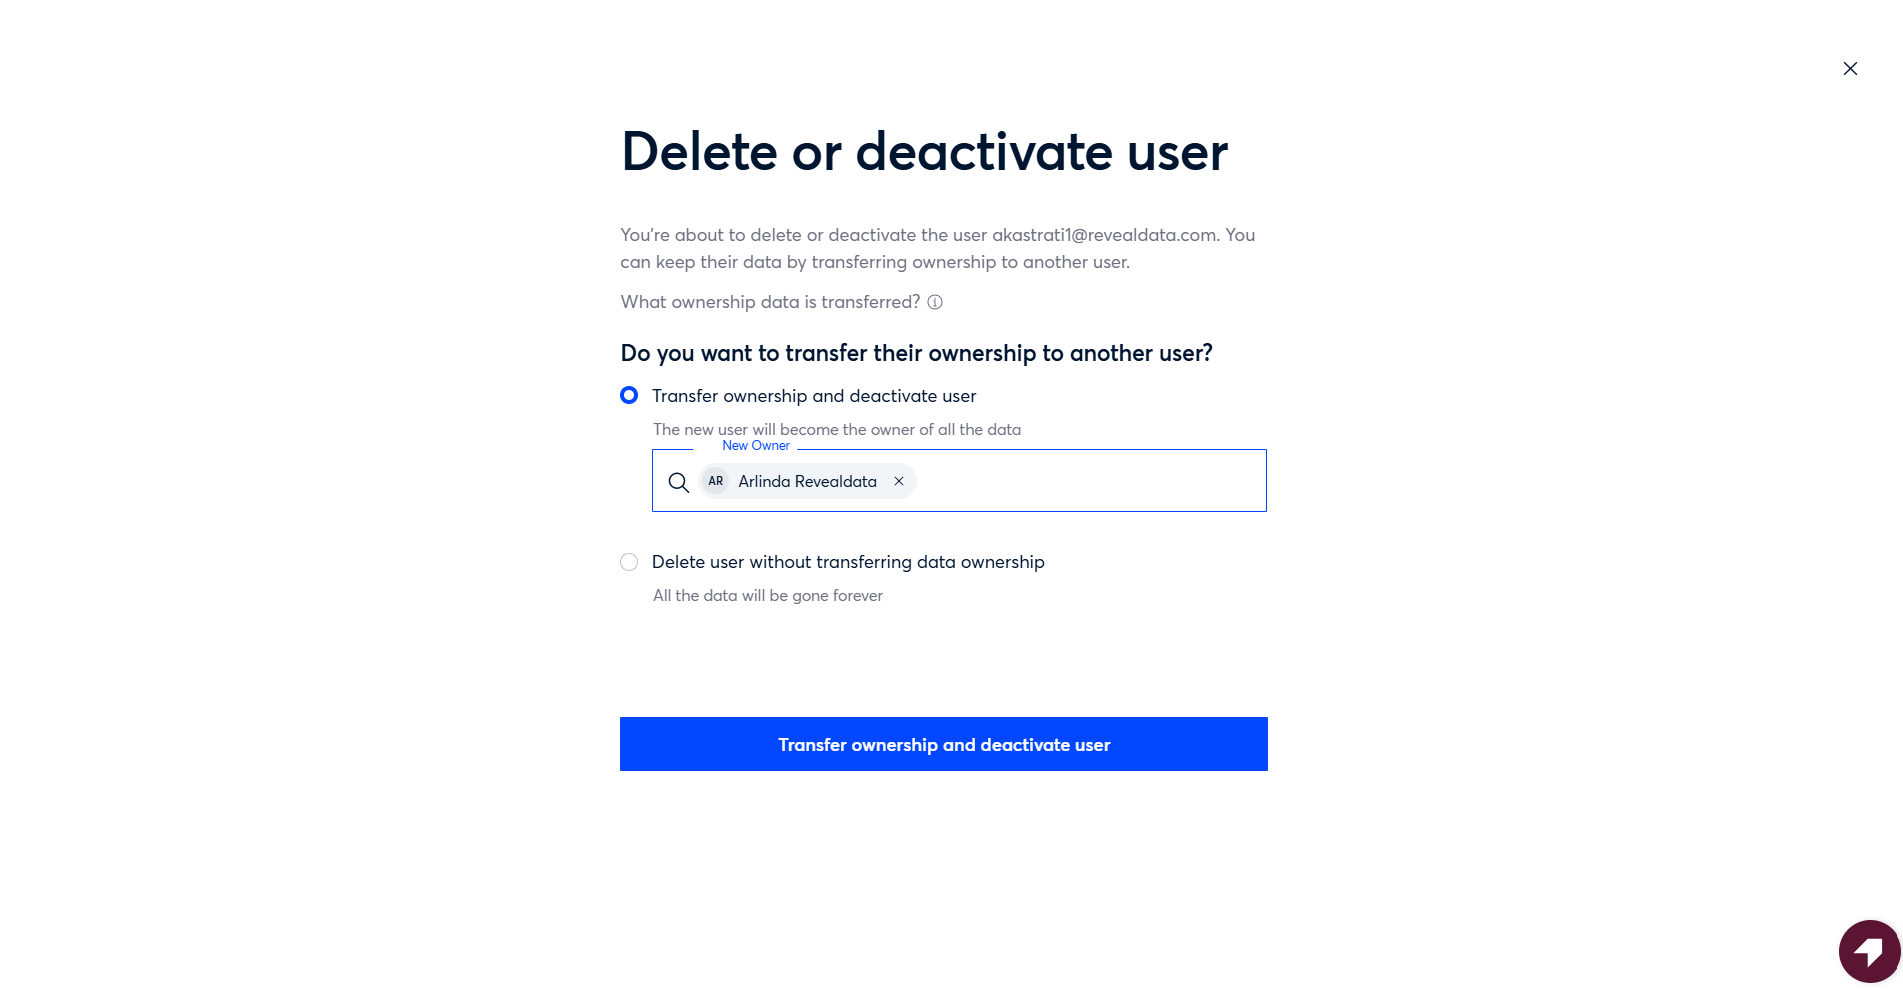
Select Transfer ownership and deactivate user to preserve the data.
Choose the active user you want to assign ownership to.
Important
If you select Delete user without transferring data ownership, all data associated with that user will be permanently lost and cannot be recovered.
IV. Complete the Transfer
Click Transfer ownership and deactivate user to confirm.
Click Share to finalize the transfer.
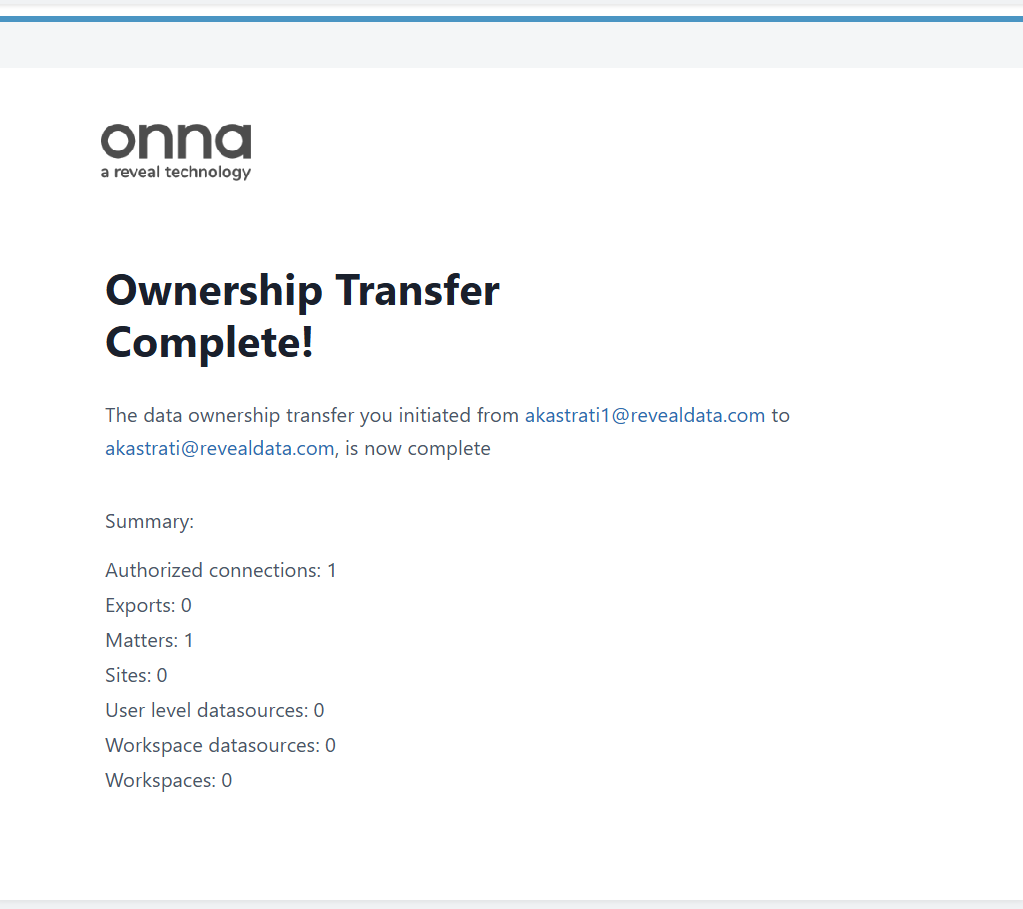
You will receive a confirmation once the transfer is complete, along with a summary of all transferred items.
Note
Once confirmed, ownership will immediately update, and the new owner will receive a notification.
Audit and Notifications
All ownership changes are logged in the Audit Logs for future reference.
Notifications are automatically sent to the new owners to confirm the change.
Best Practices
Audit Logs — Regularly check the audit log to verify ownership changes.
Notifications — Ensure users check their notifications to avoid missed updates.