Overview
Reveal Hold supports integration with Google Suite for in-place preservation and data collection. This document describes the prerequisites for integrating Reveal Hold with Google Suite.
Information Required for Integration
Reveal Hold Google Suite connectors integrate with Google Suite through APIs and require a service account.
Create a Service Account
Follow the below steps to provide create a service account with required role permissions:
Navigate to https://console.developers.google.com/ with a user having Admin privileges.

Figure: Dashboard - APIs and Services
Click on dropdown next to Quickstart as shown below to create a project and click on New project.
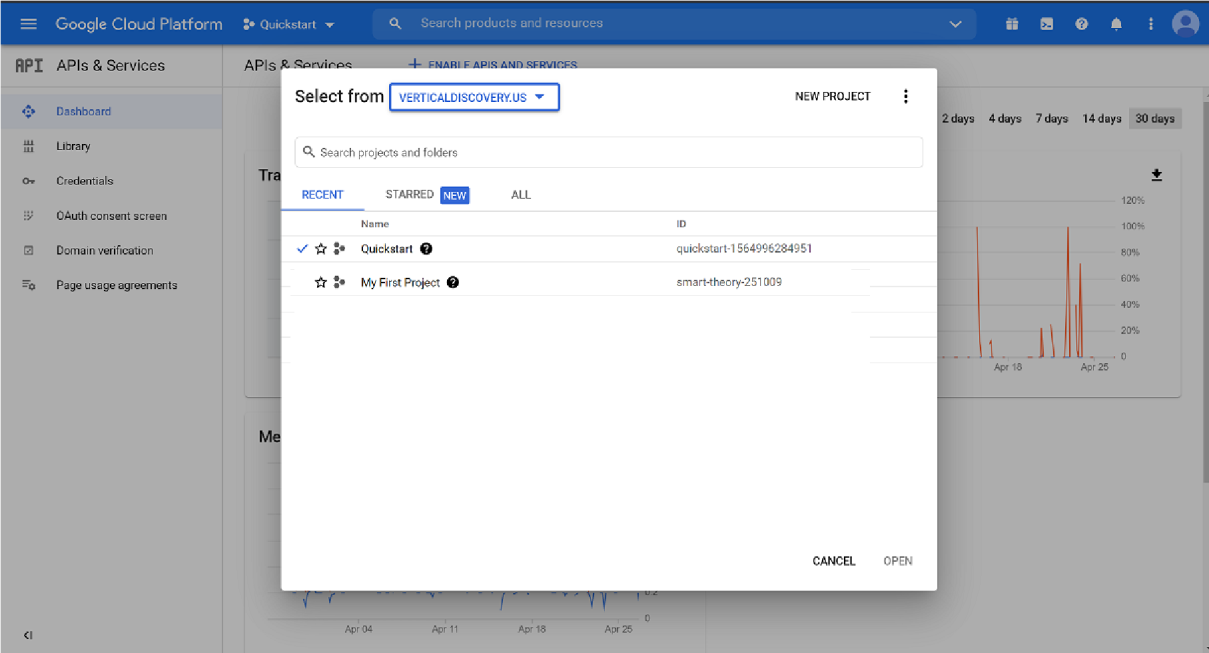
Figure: Quickstart
Enter the Project name as Reveal Hold-Project and select the Location.
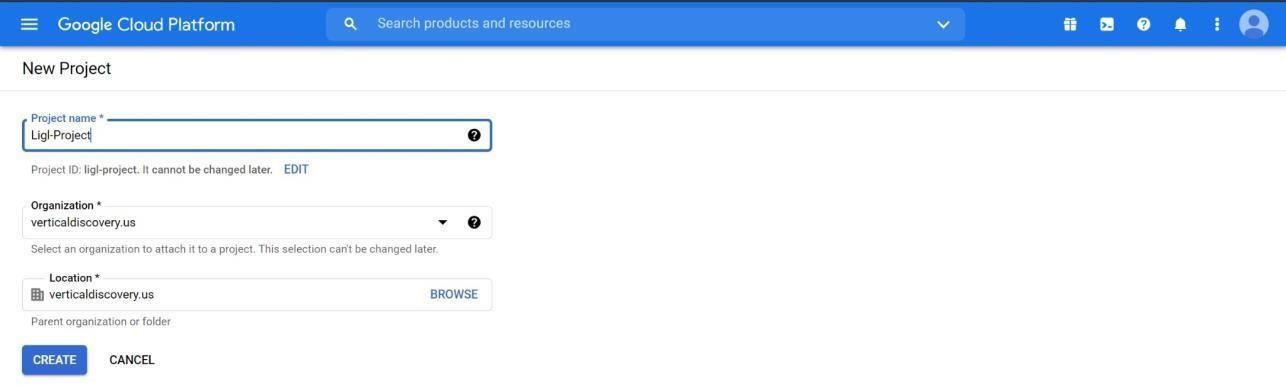
Figure: New Project
Click on Create to create the project.
Once the project is successfully created, select Credentials from the left menu.
Click on Create Credentials and select Service account.
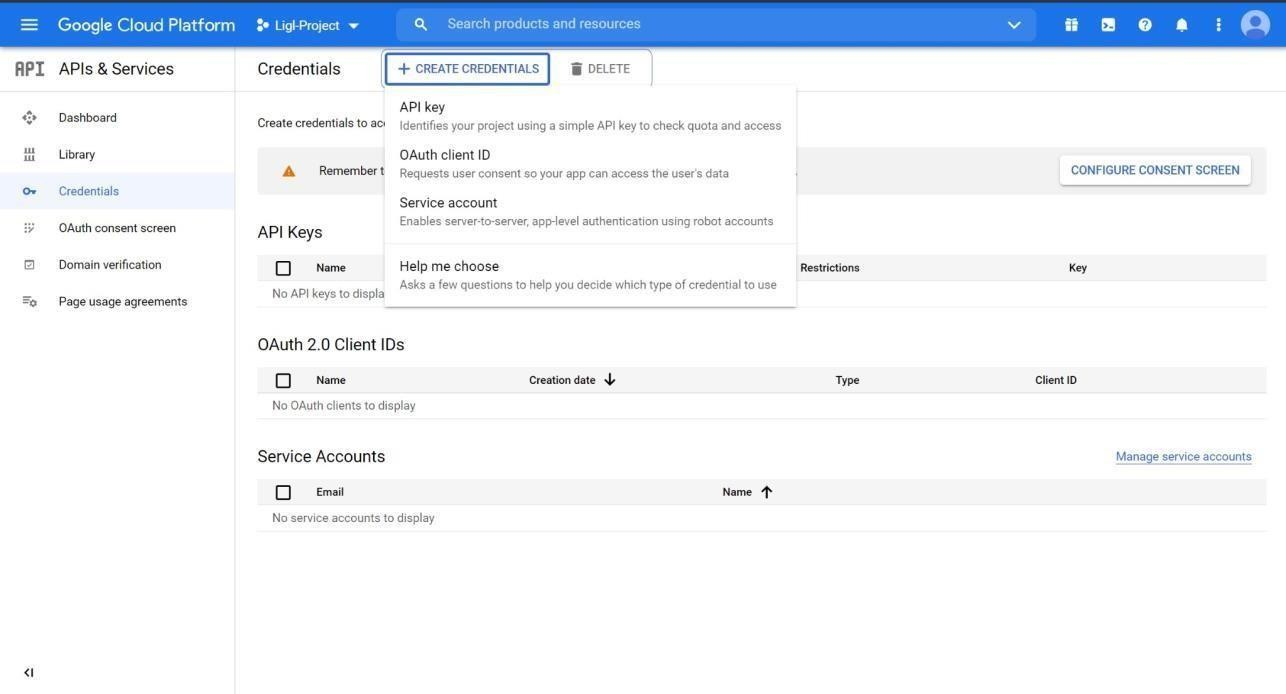
Figure: Create Credentials
Enter the service account name and click on Create and Continue.
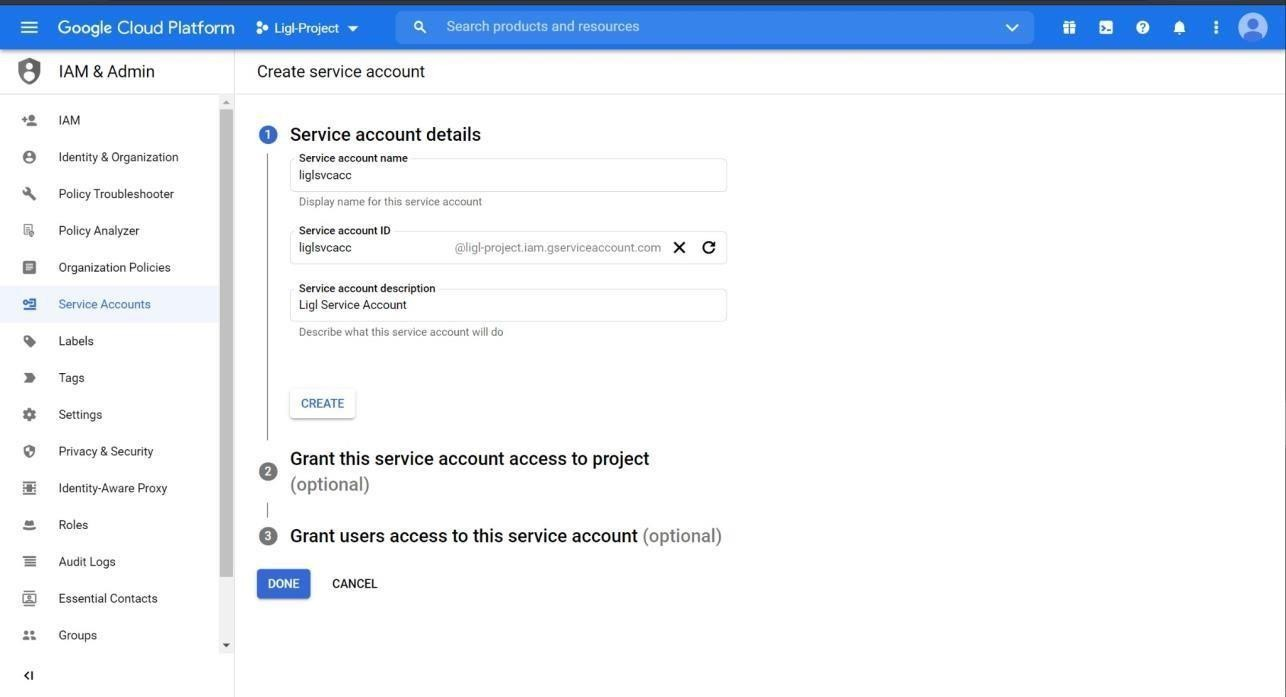
Figure: Create Service Account
Select the role as Service Account User and click on Done.
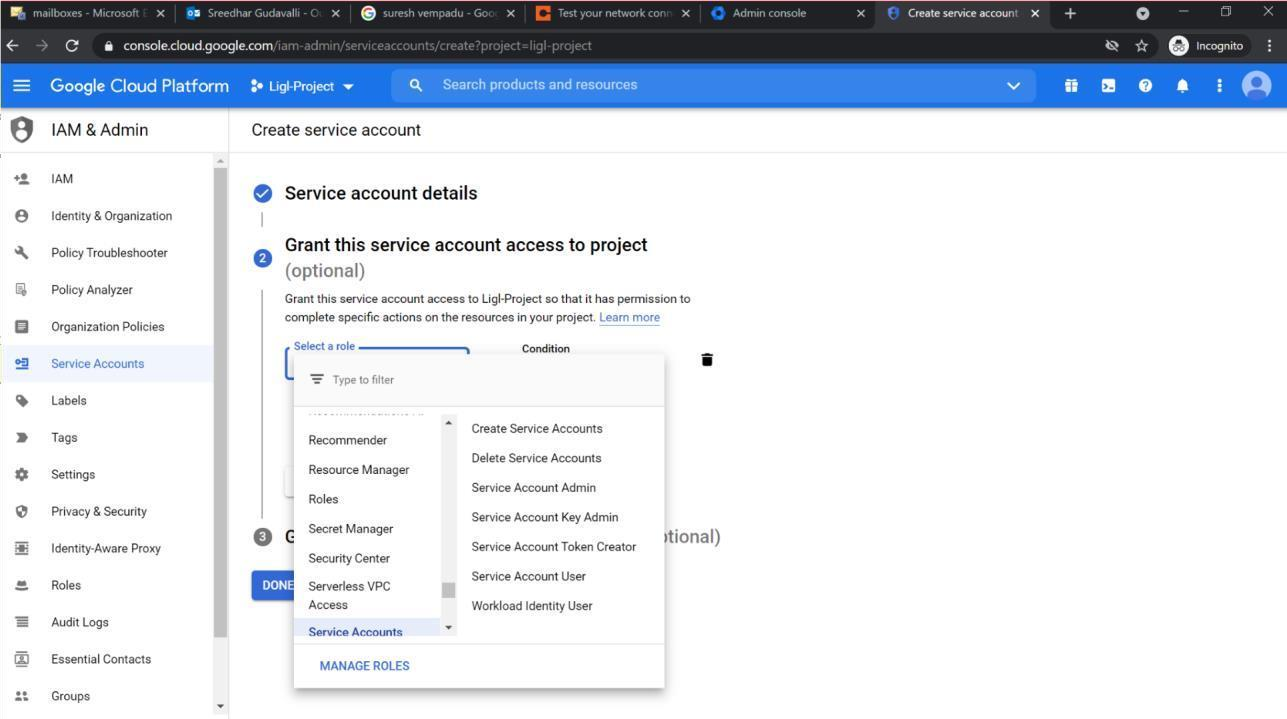
Figure: Select Role

Figure: Grant Users Access to Service Account
Select the service account created and click on Edit.
Note down UniqueID value and click on Enable Google Workspace Domainwide Delegation. Click on Save.
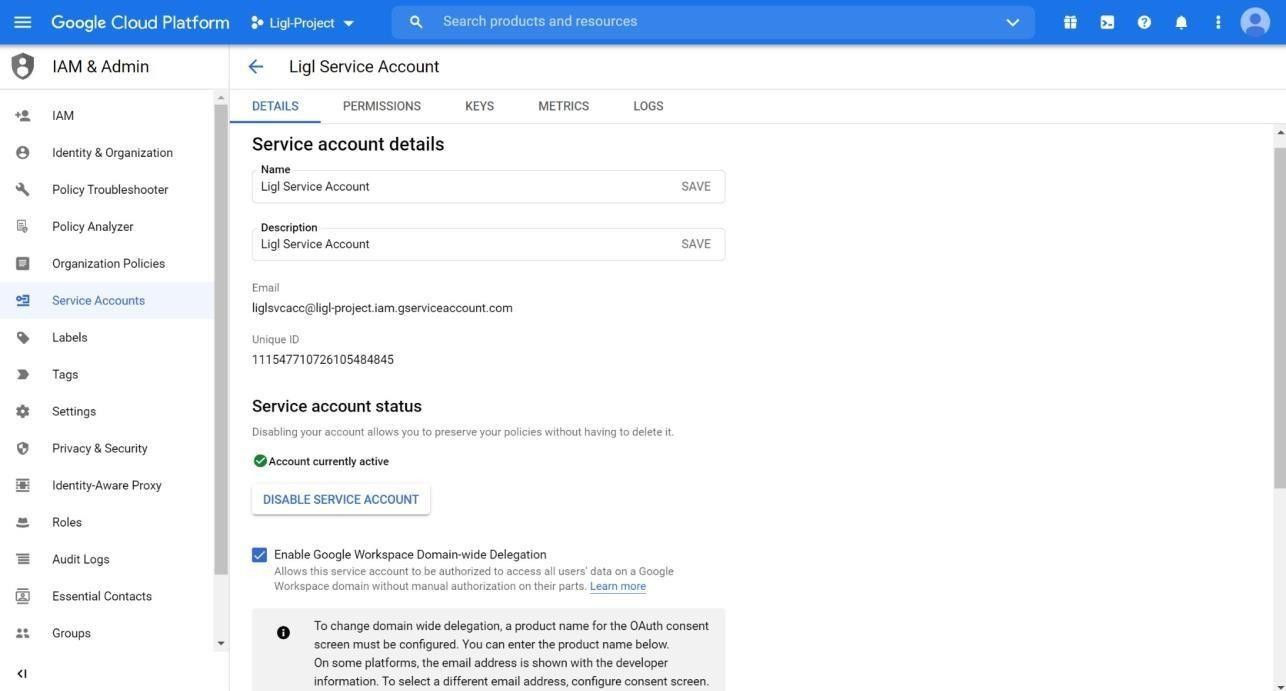
Figure: Enable Google Workspace Domain-wide Delegation
Select Keys, click on Add Key, and select Create New Key.
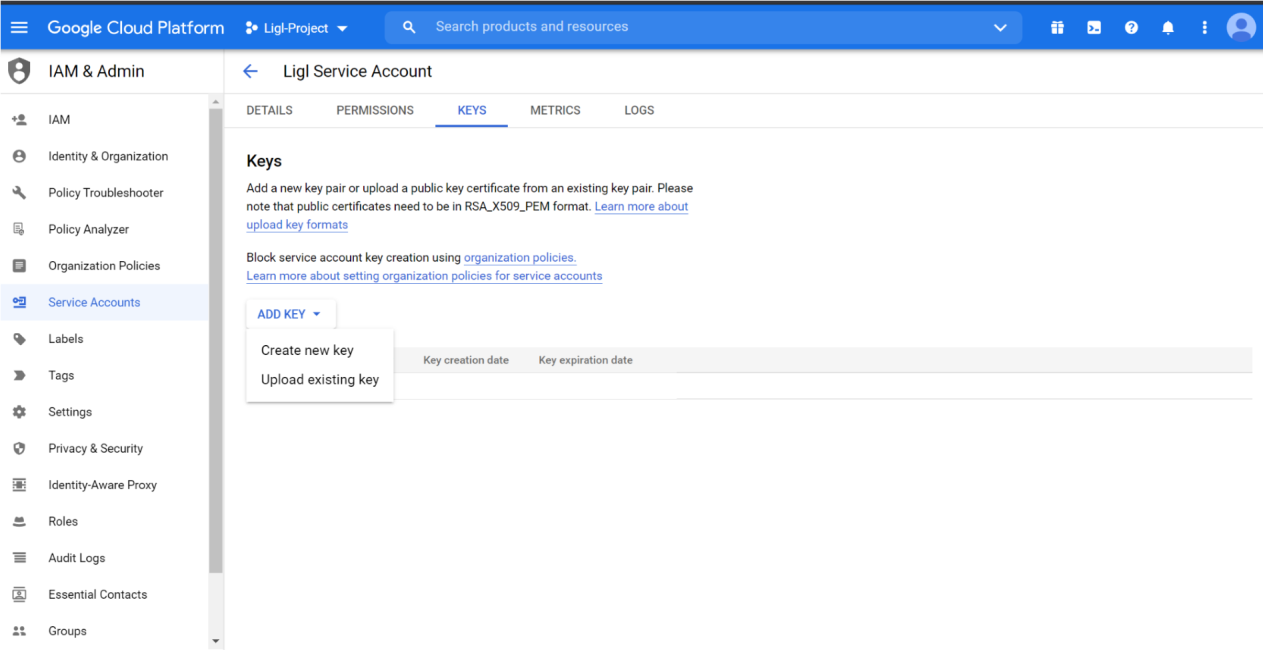
Figure: Create New Key Option
Select P12 and click on Create. Download the P12 file.
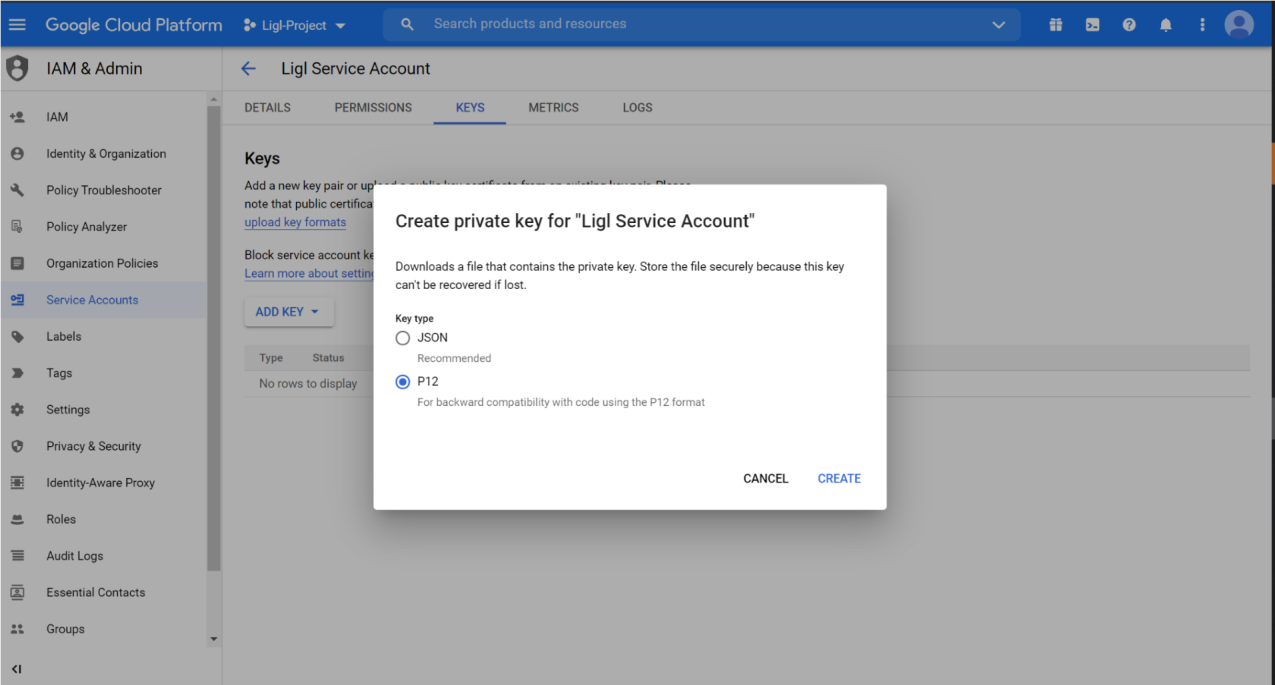
Figure: Create New Key
The created key will display on the page with the date of creation and expiration.
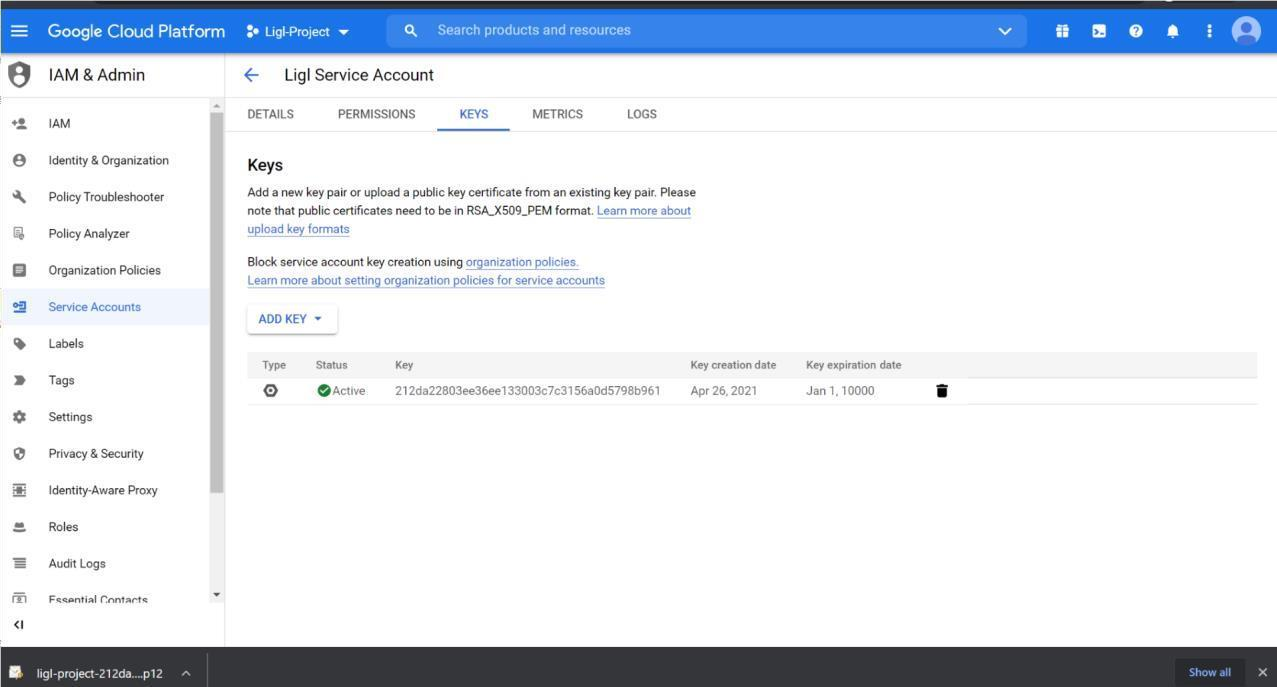
Figure: Created Key Displayed
Navigate to Admin Console https://admin.google.com/verticaldiscovery.us/AdminHome?hl=en&pli=1&fral=1 with the admin service account credentials and click on Security.

Figure: Admin Console
Select API controls from the Security page.
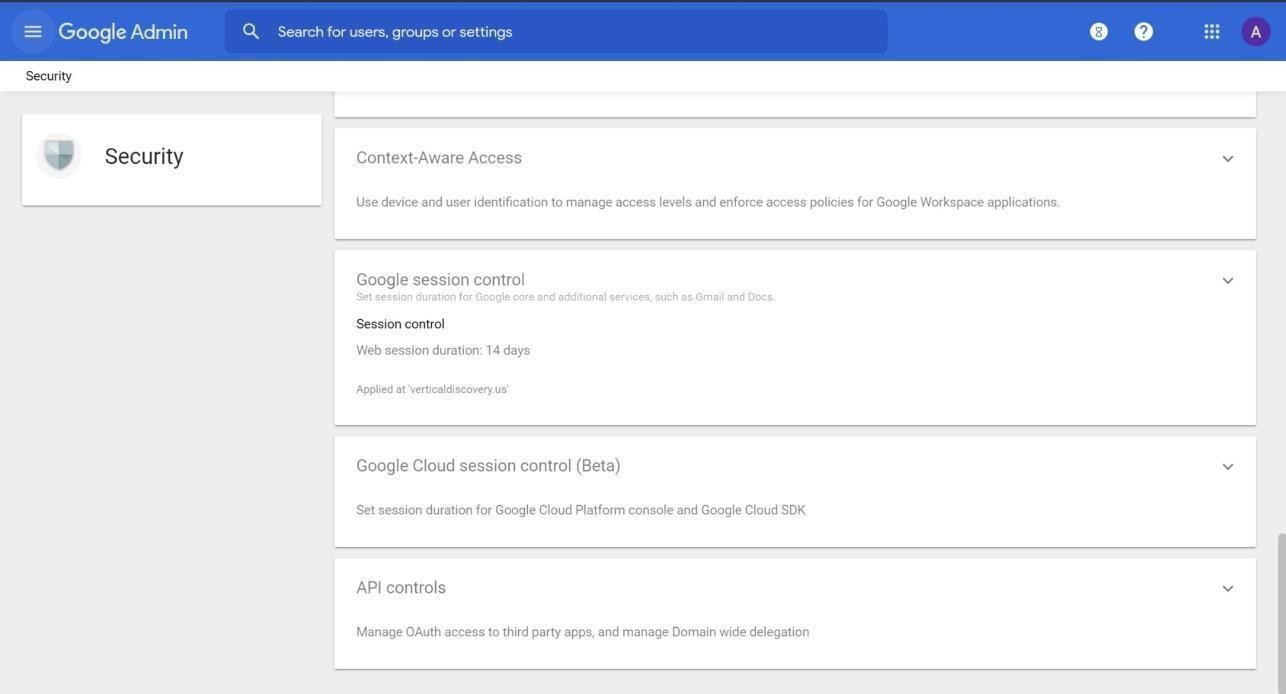
Figure: API Controls
Click the checkbox for Trust internal, domain-owned apps and click on Manage Domain Wide Delegation.
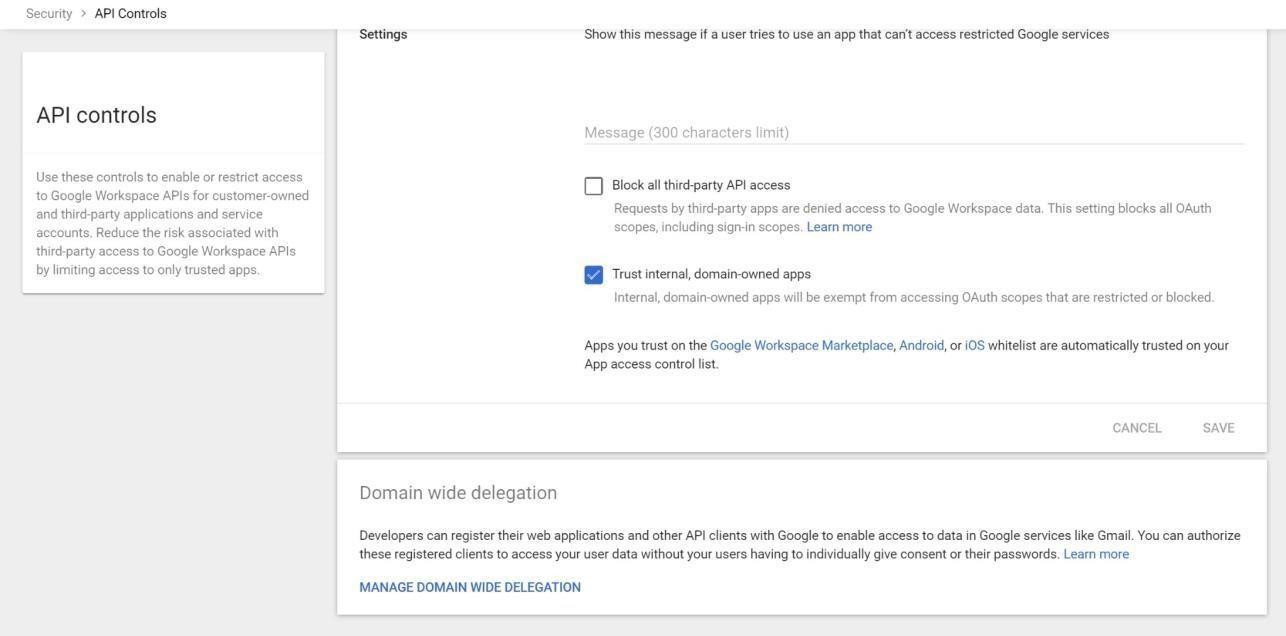
Figure: Select Internal Domain-owned Apps
Select Add new from the Domain wide Delegation page. An Add a new client ID popup appears.
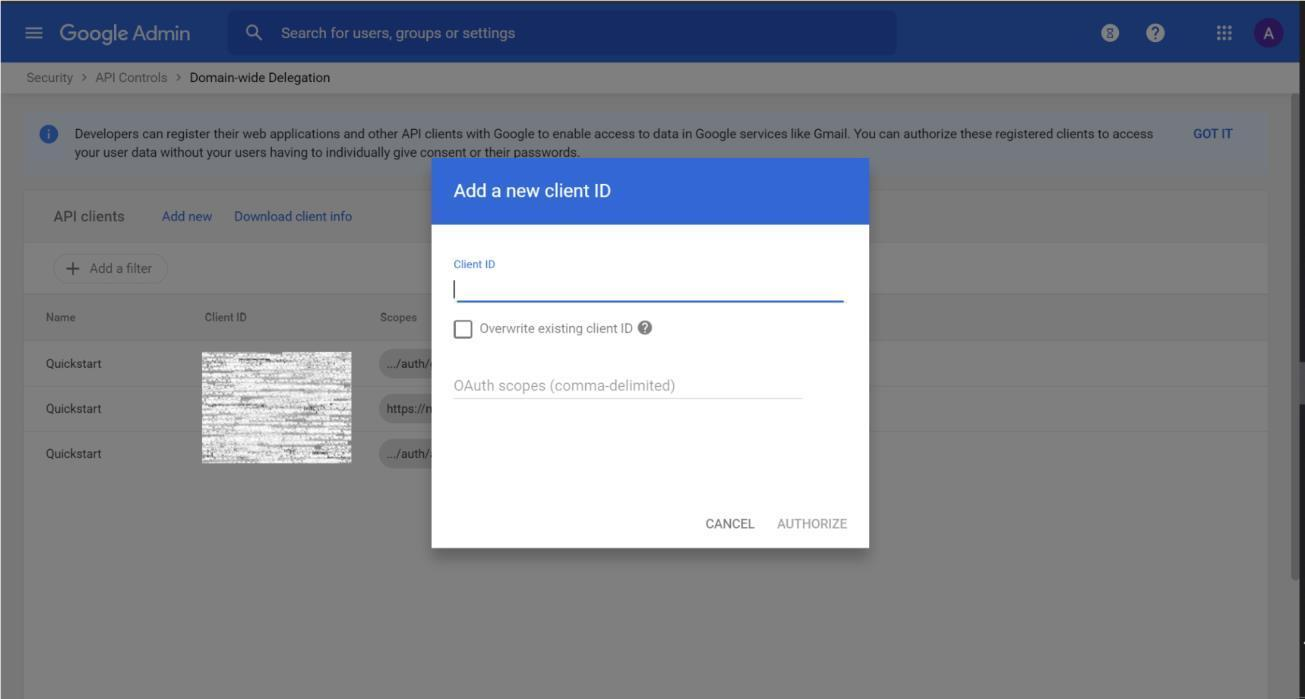
Figure: Add New Client ID Modal
Enter the below values and click on Authorize.
Client ID: Enter value of the UniqueID
One or more API Scopes:
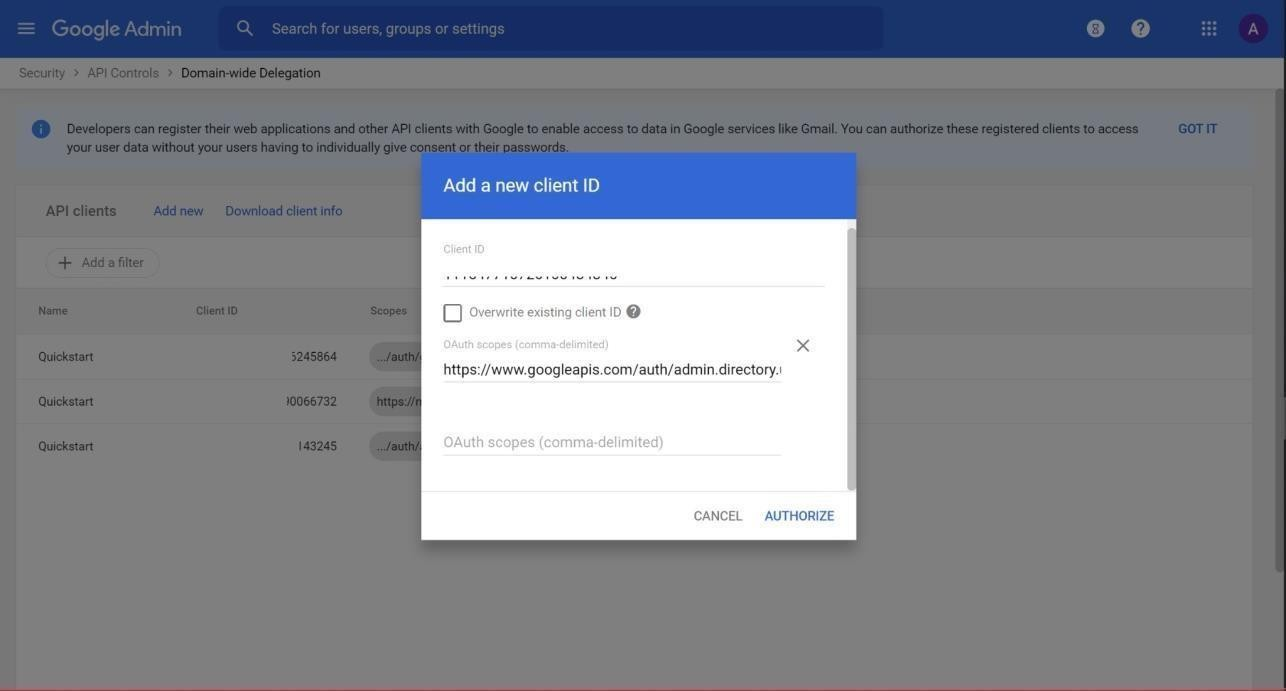
Figure: Add OAuth Scope
The authorized API client is displayed on the screen.

Figure: Authorized API Clients
Enable APIs for Project
To enable APIs for the project,
Login to https://console.cloud.google.com/ and select the project.
Click on the APIs & Services option as shown in the below image.

Figure: APIs & Services
Click on +Enable APIs And Services option seen on top of the page and add highlighted APIs from the below image that need to be enabled:
G Suite Vault API
Admin SDK
Cloud Storage
Google Cloud Storage JSON API Suite Vault API
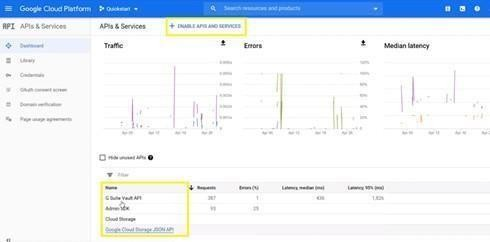
Figure: Enable APIs and Services
After clicking on +Enable APIS and Services, the page is redirected to the Search APIs page in which the user can search the required API name and enable it.

Figure: API Library Page
For example, if the user needs to enable G Suite Vault API, search with API name and select it. The user will get an enable option. Click on it and the required API gets enabled.
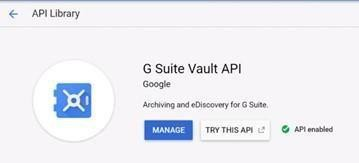
Figure: G Suite Vault API Example
Assign Role to User Account
Reveal Hold requires a user account with an eDiscovery Admin role for configuration.
Login to https://admin.google.com and click on Users.
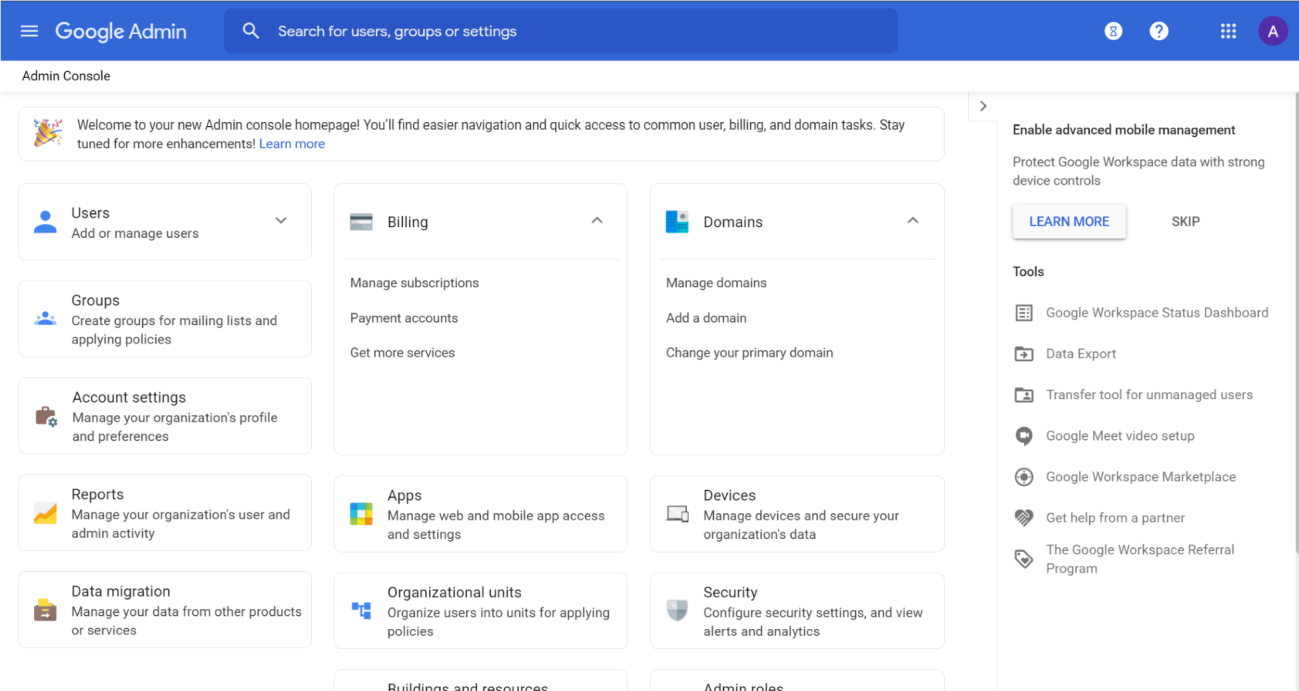
Figure: Users
Create a new user or select the existing user (this needs to be configured in Reveal Hold G Suite configuration) for whom the role needs to be configured.
Select the user and click on the Admin roles and privileges section.

Figure: Admin Role and Privileges
Assign the eDiscovery Admin role to the selected user.

Figure: Assign Role
Following are the EDiscovery Admin role privileges:
Admin Console Privileges
Organization Units
Read
Read
Read
Services - Google Vault
Manage Matters
Manage Holds
Manage Searches
Manage Exports
Manage Retention Policies
View Retention Policies
Manage Audits
View All Matters
Admin API Privileges Organization Units
Units
Read
Users
Read

Figure: Admin Console Privileges