Client Administrators set up redaction labels and assign them to users and teams for the redaction of project images via profiles in the Redactions Project Admin screen.
Log in to Reveal as an Administrator or Client Administrator.
Select a project from the Project Hub.
Click Admin.
In Project Manager, go to Redactions.

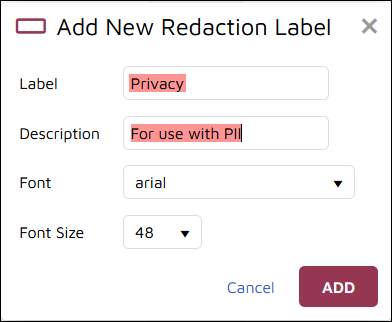
Under Redaction labels pane at screen left, click +Add new label to create a redaction.
Label is the text that will be displayed on the redaction.
Description is optional.
Font defaults to Arial.
Font Size defaults to 48 point.
Click ADD to create.
On the right side of the screen, first select or add a new Redaction profile.
Settings is where you share access with selected user(s) or team(s).
You may also enter a checkbox to make redactions Updatable for this profile, which allows redaction settings to be modified interactively by profile users and team members.
You may insert redaction labels into the profile in one of two ways:
Click or Ctrl-click one or more labels and select Insert in profile; or
Grab the six-dot handle to the left of a label
 and drag it across to the profile pane.

Note
Among other use cases, Redaction Profiles may be created for specific productions. In this way, preparing a redaction profile that is specific to the current production allows users to select and apply a different set of document redaction labels to documents that may be produced in multiple productions. In the below example, a Production01 Redaction Profile has been prepared, and the new labels PII, PSI and SSI have been added in anticipation of a production addressing privacy and security issues.
