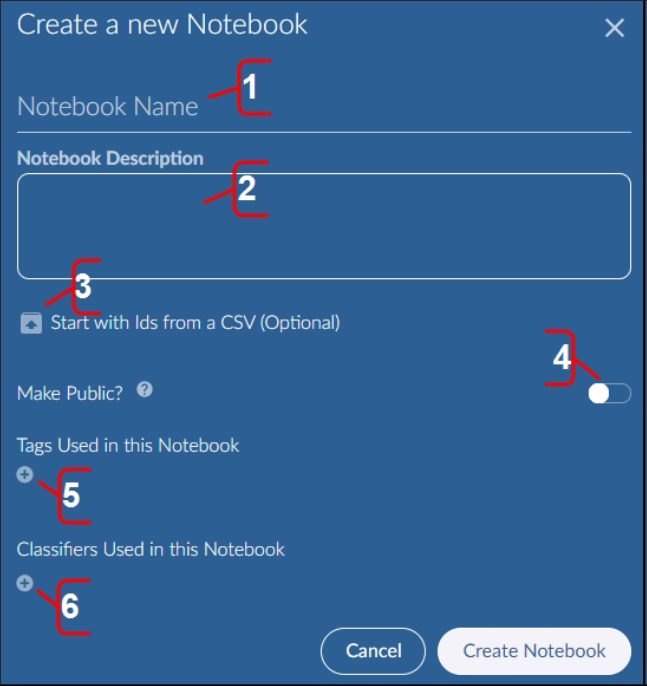
After opening the Notebooks screen and clicking the New Notebook button, the Create a New Notebook dialog will open. The Create New Notebook dialog includes the following features:

Enter the notebook name.
Describe the purpose of and any additional important details about the notebook.
You have the option to upload IDs from a *.csv file to add specific documents to the notebook. Notebooks may otherwise be created or added to using a search or a Focus.
Change notebook status from private (default) to public to make the notebook generally accessible. All Brainspace users can view and modify the contents of public notebooks in a dataset. Private notebooks can only be viewed and managed by the notebook creator and by Admins. Although you can change a private notebook to a public notebook at any time, you cannot change a public notebook to a private notebook.
Optionally select existing dataset tags to be highlighted in the notebook.
Optionally select existing classifiers to sort the documents in the notebook.
Create Notebook to complete the process.
After creating the notebook, you can add documents to the notebook while using any of the Analytics features in Brainspace and after creating new classifiers. You can edit the notebook setting at any time, and you can remove documents from the notebook in the Notebook dialog.