Creating a Nuix Connector
To create a Nuix Connector, follow the steps below:
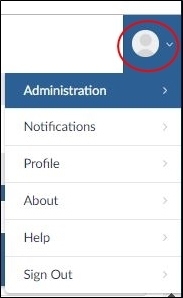
In the user dropdown menu, click Administration, the Datasets screen will open.
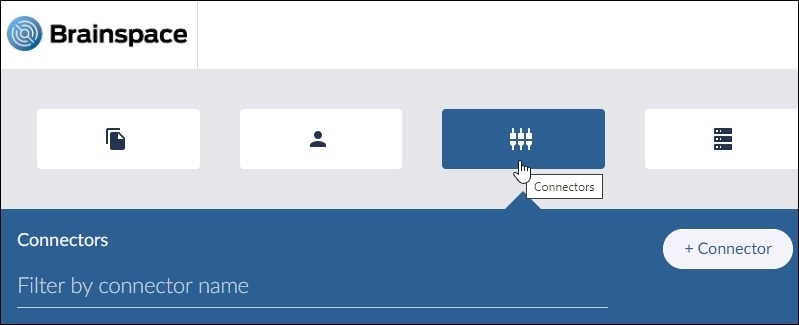
Click the Connectors button, the Connectors screen will open.
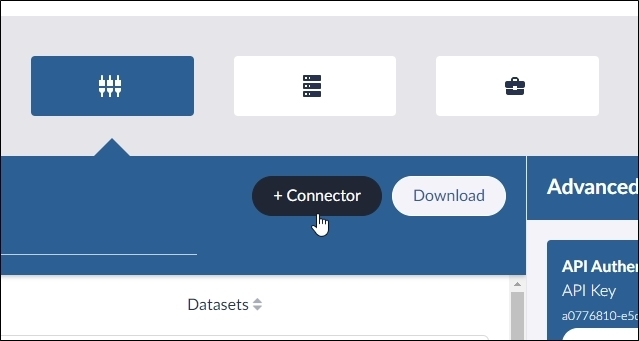
Click the Add Connector button, the Connector menu will open.
Click the Nuix option in the menu.
The Nuix connector dialog will open.
In the Connector Name field, type a name for the connector.
In the Nuix REST API Hostname field, enter the fully qualified domain name that points to the Nuix Workstation server that has the Nuix RestAPI installed and running.
In the Nuix REST API Port field, enter the Port the REST service is using – 8080 by default. Toggle HTTPS Enabled to ON if https is required.
New in 6.5, click Advanced to enter the number of Nuix Workers to reserve.
By default, this is set to 0. This does not require changing if using individual eDiscovery Workstation or Web reviewer licenses. The number of workers may need to be changed to 1 when using a Nuix Pool license or a Nuix “Cloud License Server”.
Click the Test Connector button.
After the connector test is successful, click the Create Connector button. The new Nuix connector will be added to the Connectors screen.
After creating a Nuix connector, you are ready to create a dataset.
Nuix Connector Performance Considerations
After Brainspace ingests data from Nuix, document counts can be lower in Brainspace than in Nuix.
Nuix introduced a change between v7.6 and v7.8. To see the brainspace metadata profile, place the metadata profiles in C:\Program Files\Nuix\Nuix RESTful Service\nuix-engine\user-data\Metadata Profiles