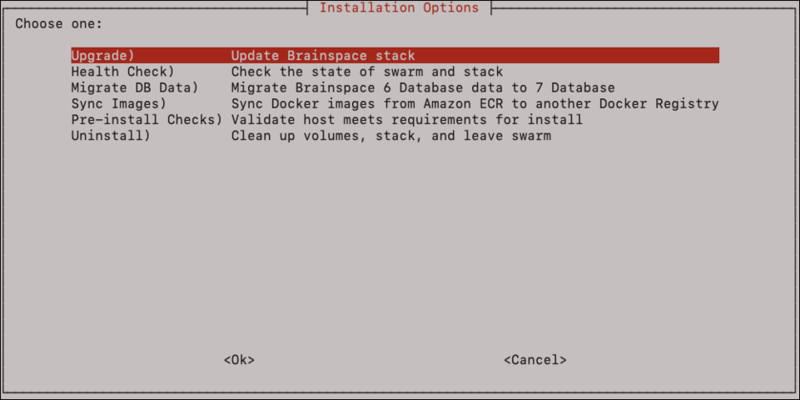
The standard installation of Brainspace is done on 3 Linux hosts, also called “nodes” in some contexts. The collection of Docker hosts/nodes where the Brainspace services/containers are running is called the Docker Swarm Cluster.
Most of the setup can be performed on the primary host, which we will call the “Application” host for the purposes of this document, and Docker calls the “Leader”, while the other 2 hosts will be called the “analytics” hosts (Analytics and On-Demand Analytics). Optionally, a 4th host can be provisioned to run the database, and additional hosts can be provisioned to add analytics hosts to the cluster.
Once the other Linux hosts have joined the Docker Swarm cluster, they can be controlled and monitored from the application host. Except in some rare cases, an administrator should not need to ssh to the other hosts to perform administration tasks.
Prerequisites
All prerequisites must be satisfied before installing Brainspace software. If you have any issues verifying that you have satisfied these prerequisites, please contact Reveal Support before the scheduled installation.
The following are pre-requisites for the system:
Three or more Linux machines/VMs running any modern Linux distribution.
Docker installed on each machine.
AWS CLI installed on each machine.
Amazon credentials for accessing ECR.
File shares setup for /data and /localdata.
/var must have 100GB minimum for each Application Server, Analytics Server and On Demand Server.
Install Docker
Installing Docker will be a little different based on the Linux distribution chosen but should be straightforward using the appropriate Linux package manager.
To install Docker Community Edition, refer to: https://docs.docker.com/engine/install/
Note
Only the 'docker-ce' package needs to be installed, the other packages are optional.
To install a paid and supported version of Docker Swarm, refer to: https://www.mirantis.com/software/swarm/
The following ports must be available and allowed in the network according to the Docker Swarm docs:
Port 2377 TCP for communication with and between manager nodes
Port 7946 TCP/UDP for overlay network node discovery
Port 4789 UDP (configurable) for overlay network traffic
Ensure IP protocol 50 (IPSec ESP) traffic is allowed.
Important
-> Very Important
If uninstalling the Docker Engine from an existing environment for any reason, do NOT follow the instructions to delete the /var/lib/docker directory (instructions for Ubuntu, for example: https://docs.docker.com/engine/install/ubuntu/#uninstall-docker-engine).
When you set up a Docker volume for an NFS share, it creates a mount point down in /var/lib/docker. This means if you have set up a Docker volume for the NFS data/localdata shares and you run the command to delete that directory, it will also delete the entire Brainspace dataset, and all data contained in those shares.
You must unmount those shares under /var/lib/docker prior to deleting the contents of that directory.
File Sharing Setup
Customer personnel who will be involved in the installation must have root access to all three servers and administration credentials for any third-party applications involved in the installation.
It is assumed that file shares have been set up for the /data and /localdata filesystems. In order to use the NFS install option, both of these shares must come from the same NFS server, unlike Brainspace 6. It is recommended that this NFS server be an external NAS or the application server.
chown -R 1604:1604 /data/brainspace
chown -R 1604:1604 /localdata/brainspace
Important
Note that /data and /localdata shares must be created with owner and group 1604:1604. This applies to both the NFS and "Bind Mounts" configuration.
Alternatively, file shares can be set up on all the host machines and bind mounts can be used to give the containers access to those file shares. To use this configuration, see section: “Configuring File Shares using Bind Mounts”. This is only recommended for environments that are not using a supported file sharing protocol, or where the file shares can only be set up on the host machines and details of the file share configuration are unknown.
Run the Docker Swarm Install
Download the .tar file that contains the Brainspace 7 deployment descriptors and install scripts.
Untar the archive, ‘cd’ into the subdirectory and run the install script as the ‘root’ user:
# switch to the root user
sudo su -root
# run the installer
./install.sh
This will bring up the Brainspace 7 Install UI.
At this point you’ll be presented with the ‘Installation Options’ screen:
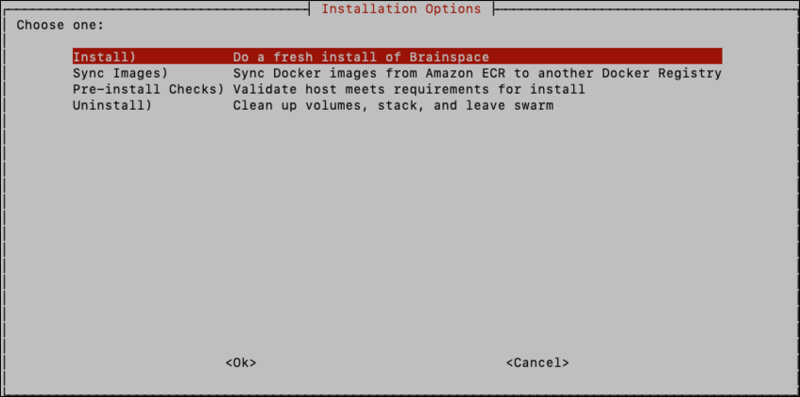
For new installs, select the Install option. Steps for upgrades and uninstall will be presented in later sections. Prior to installing for the first time, select the option Pre-Install Checks to ensure there are enough resources to run Brainspace 7.
Next, you will be presented with a list of options for obtaining Docker Images. If using images hosted by Reveal in our Amazon ECR registry select ‘Amazon ECR’.
If you have already configured the Docker registry on the host machines, including authentication, you can select Skip.
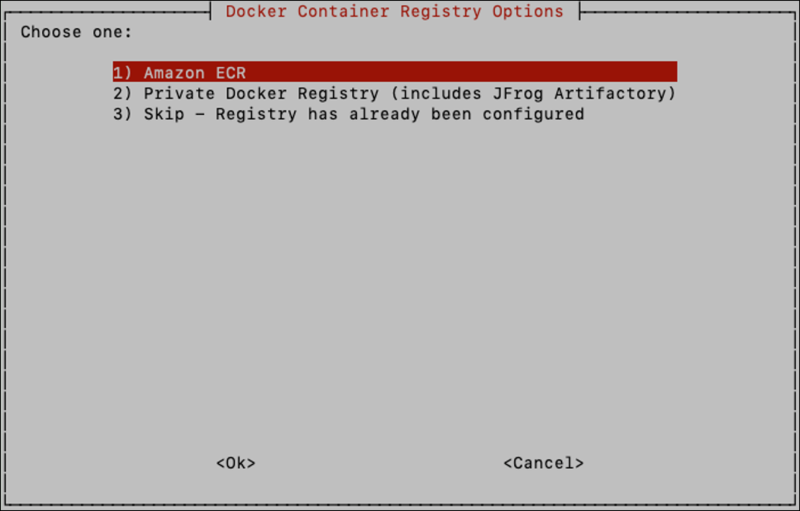
If Amazon ECR was selected, you’ll be asked to enter your AWS access key and AWS secret, which should have been provided to you by Reveal customer service.


Enter the access key and secret key twice and click <Ok>. The UI will attempt to validate them using the credentials to access the Reveal Amazon ECR registry which contains the Docker images.
Choose whether you want to store the Amazon ECR creds in a file in the root user’s home directory.
Note
Storing creds will make it easier to administer the swarm later but choosing 'Yes' here stores the AWS secret key in a plain text file.

The next step is configuring the volume mount options. This step determines how the "data" and "localdata" shares are configured.
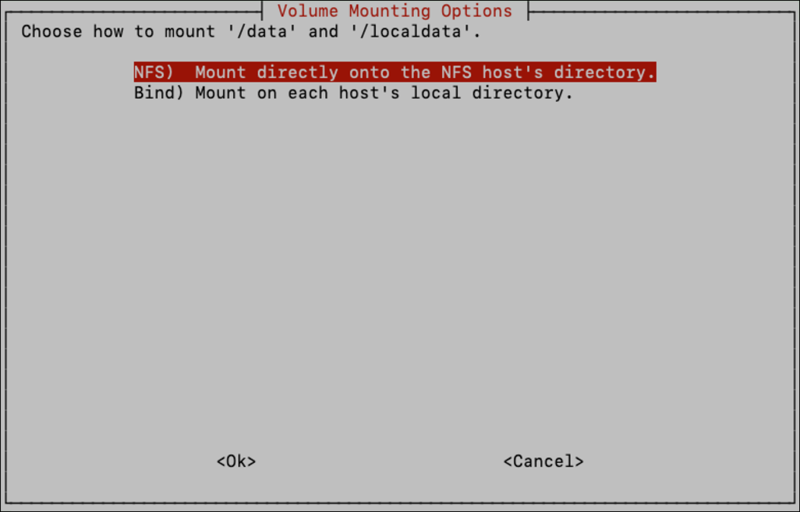
If using something other than the default (NFS), such as CIFS, GlueFS, or you just want to set up the file shares on the host machines and use bind mounts to give the containers access, select the Bind option and see section: “Configuring File Shares using Bind Mounts.”
If using the recommended NFS configuration, select the NFS option. If the NFS server is setup on the application host, the IP address would be the IP address of the current host where the installation is being performed. You can find the host’s IP address using the command:
ip addr
Note
Be sure to choose the IP address associated with the interface that is connected to the network, don’t use the loopback interface or ‘localhost’.
Next enter the source locations of the shares on the NFS device. This is the directory location where the data and localdata shares exist in the NFS server, not the mount points of data and localdata if they happen to be mounted on the application host.
If using the NFS option, it is not required that data and localdata be mounted on the hosts, as is required in Brainspace 6. It is required, however, that all the hosts be configured in the NFS server /etc/exports file. Even if the application server is hosting the NFS shares, it’s IP address must be listed in the /etc/exports file in order for the Docker containers to have permission to mount the NFS shares.


Enter the IP address or hostname of the server that is hosting the NFS file shares:

After entering the IP address, the UI will attempt some minimal validation to try to ensure the NFS server is up and accepting connections, if Check NFS is selected.
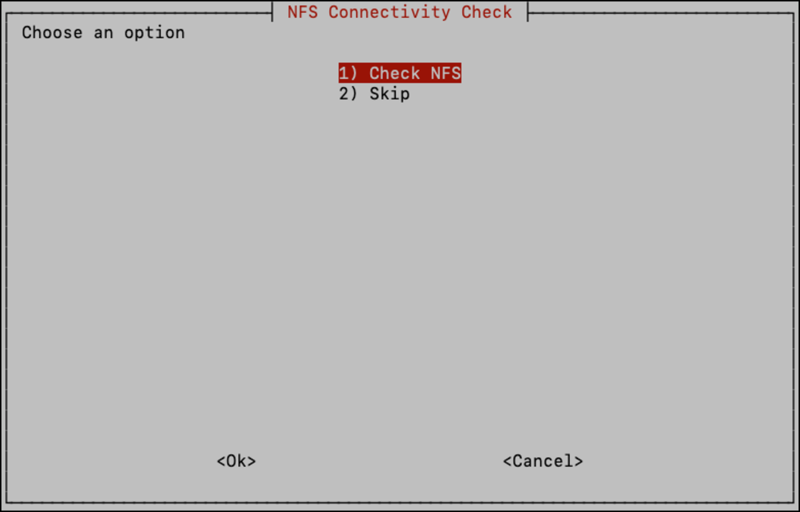
Next enter the database password of your choosing, twice to ensure it was typed correctly. The database password will be stored in a Docker Secret so it is properly protected.
WARNING
It is critical that the database password for the instance be saved off in a password manager so that it can be recovered later, if needed. If the Swarm becomes unstable, the Docker secret could get lost and there is a risk of losing ALL database data if the DB password is not backed up somewhere else.

The next step is choosing the host deployment option. The options are presented in the menu with an explanation of which services will be deployed on each host.

One – All services run on a single host.
Two – Host 1: Application + Database + Messenger + UI / Host 2: ANA + ODA
Three – Host 1: Application + Database + Messenger + UI / Host 2: ANA / Host 3: ODA
Four - Host 1: Application + UI / Host 2: Database + Messenger / Host 3: ANA / Host 4: ODA
Custom – if the deployment doesn’t match one of the above configurations, use this option and refer to section “Custom Host Deployment Option”.
Typically, the ‘Three Host’ deployment option will be selected, but other options are available.
Note
The default configuration is a 3-host install, with Postgres and RabbitMQ running on the application host. If you want to deploy the database on a different host, go to section: “Configuring a separate database host”.
If using more than one host, the next step is to add the other hosts to the swarm. To do this copy the command that is presented in the UI and paste it into a terminal running on each of the other hosts. In the example below, the command is:
docker swarm join –token SWMTKN-1-59782iohybaolpqn2ja1d34knz9bqj7ik072ov1kvsf6jh6cc1-8sepnocscoplxadzgkq2l1ip6 10.224.64.19:2377.

Back on the application host, you will see a progress bar that will update as each host is added to the swarm:

Your hosts (aka Docker nodes) have now joined the cluster and are ready to be assigned a specific role that determines which services the host will run.
You will need to choose which host will serve as the Analytics (ANA) host and which will serve as the On-Demand Analytics (ODA) host. You should be able to recognize the hosts by the hostname provided in the UI. Since the host where the installation is being performed is the Application host, it cannot be selected as an ANA/ODA host. If you wish to deploy the Analytics and On-Demand Analytics services on the application host, use option One on the previous screen.
Select the ID associated with the hostname you wish to assign to be the ANA host:
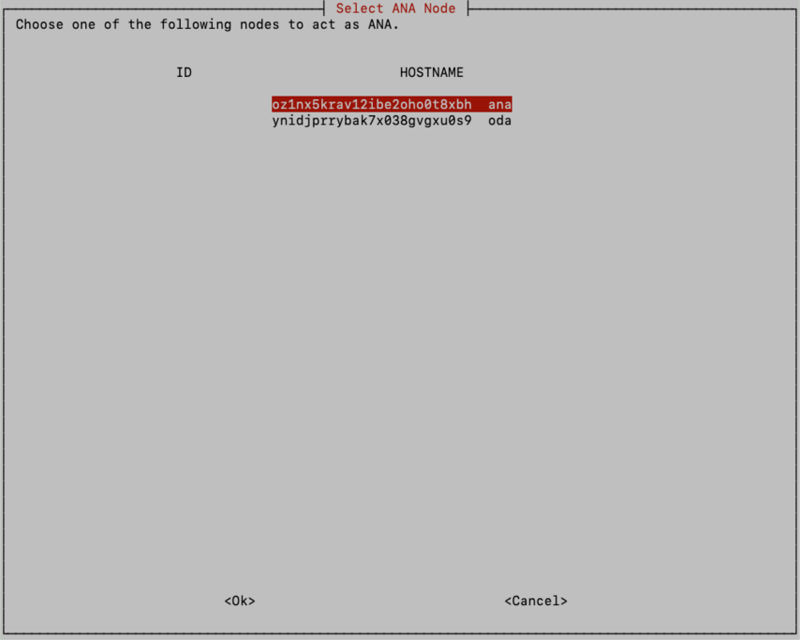
Do the same for the ODA host.
Finally, review the configuration to ensure it is correct, and select <Yes> to start the Brainspace deployment. If anything looks incorrect, select <No> and the installer will exit.
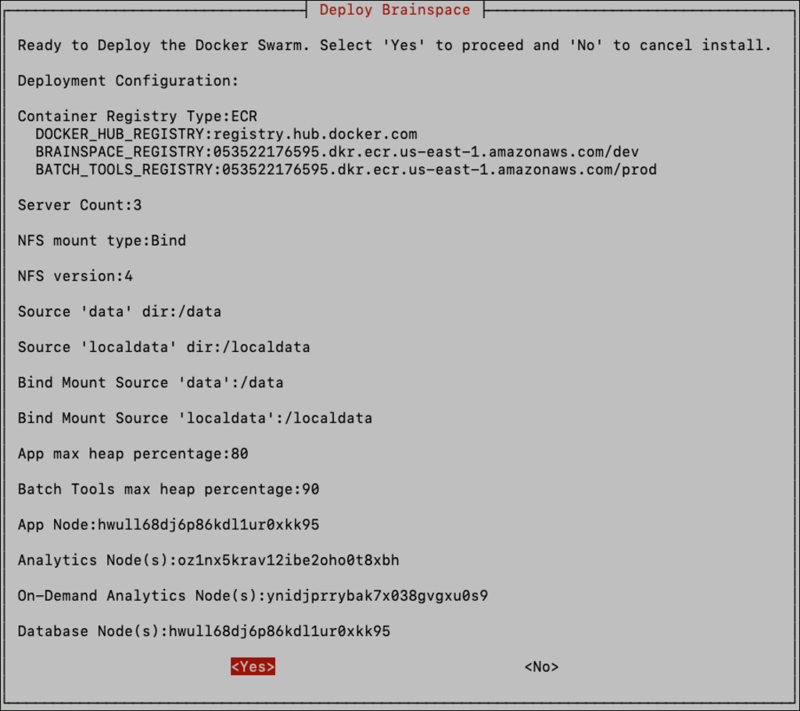
If you choose <No> here you can resume the installation where you left off by simply running the install.sh script again and choosing the “Continue Install” option.
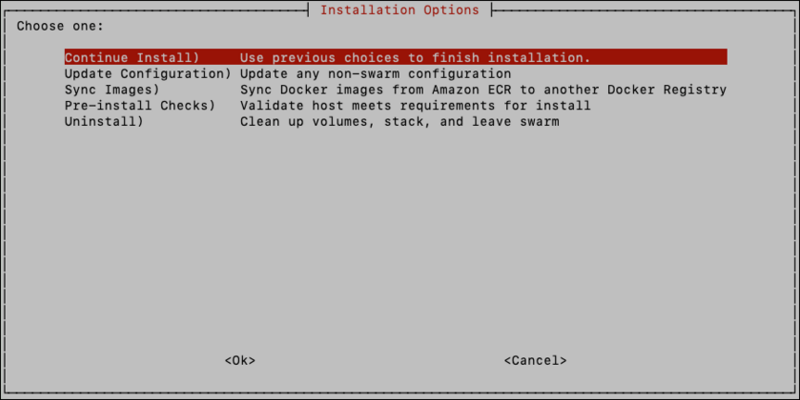
This is convenient if you need to edit the default values in the swarm.env file, like NFS protocol version, or if you need to edit the swarm.env to configure an external Postgres database.
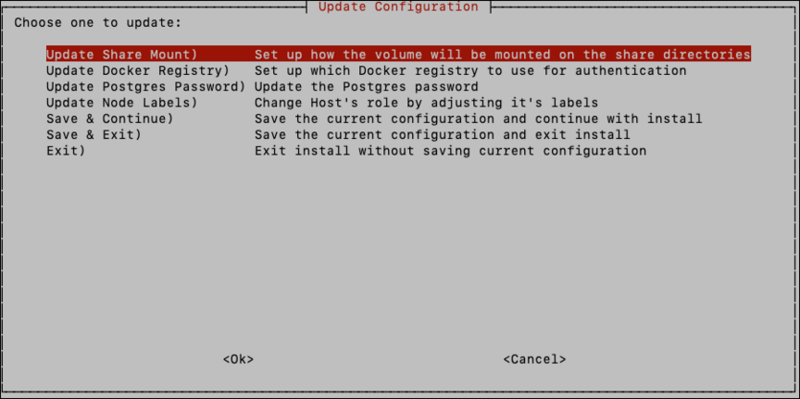
Additionally, if you need to change any of the previous choices made, you can choose the “Update Configuration” option here, and update only those configuration options that need to be changed:
Note
You must select one of the save options after making updates to ensure the updated configuration is persisted. By selecting “Save & Continue” you will be brought to the “Docker Container Registry Options” screen again. You can choose <Skip> here if you’ve previously configured the container registry and it doesn’t need to change.
After proceeding, you’ll be taken back to the Deploy Brainspace screen where you can review choices again to ensure they are correct.
When you select <Yes> on the Deploy Brainspace screen, the deployment will begin.
After the deployment starts, services will begin to come up. Use the “Health Checks” option in the install UI to check the state of the Brainspace deployment and see the state of the services in the Brainspace stack:
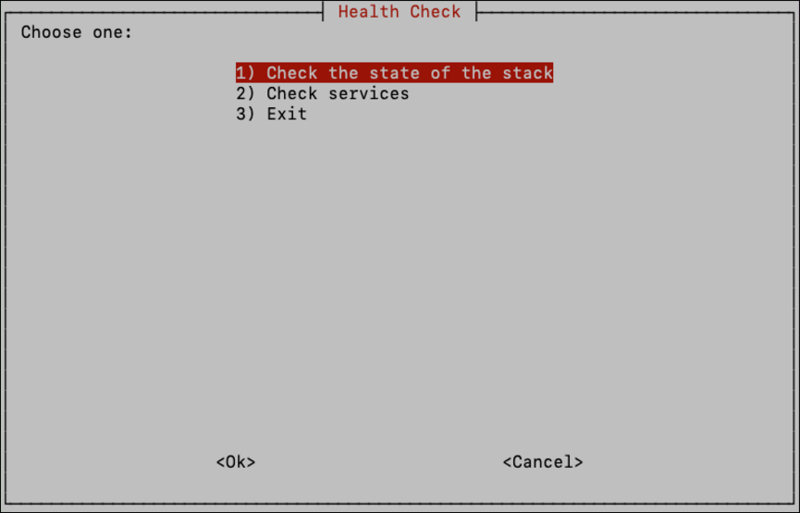
Checking the state of the stack will show all services, their current state, and any errors the services may have encountered:

Alternatively, you can use the following command to see the state of the services:
docker stack ps <stack name, ex: brainspace>
Some useful flags:
To see just running services: docker stack ps -f 'desired-state=running' brainspace
To see full details about errors: docker stack ps –-no-trunc brainspace
Note
If the “batch_tools” services are still in the “Running” or “Preparing” state this means the batch tools images, which are quite large are still being downloaded and batch tools has not been fully set up yet.
The Brainspace UI should be available as soon as the ‘brains-app’ service is “Running” so you can proceed with setting up the system, you just won’t be able to do any analytics builds until the batch tools services have finished. After some time, the batch_tools services should enter the “Shutdown” state, which is expected and means that batch tools has been set up and the system is ready to run analytics builds.
This long startup period only applies to the first time deploying a stack with a specific version of the software on a host.
Very Important
If uninstalling the Docker Engine from an existing environment for any reason, do NOT follow the instructions to delete the /var/lib/docker directory (instructions for Ubuntu, for example: https://docs.docker.com/engine/install/ubuntu/#uninstall-docker-engine).
When you set up a Docker volume for an NFS share, it creates a mount point down in /var/lib/docker. This means if you have set up a Docker volume for the NFS data/localdata shares and you run the command to delete that directory, it will also delete the entire Brainspace dataset, and all data contained in those shares.
You must unmount those shares under /var/lib/docker prior to deleting the contents of that directory.
First Login & Updating the License
The first time you login, use the default credentials:
support@brainspace.com / system1
Upon logging in for the first time, you will be prompted to change the default password immediately.
Brainspace ships with a small, temporary license. To obtain a license for your instance, first capture the “Instance ID” from the: Services -> Application -> License modal in the UI.
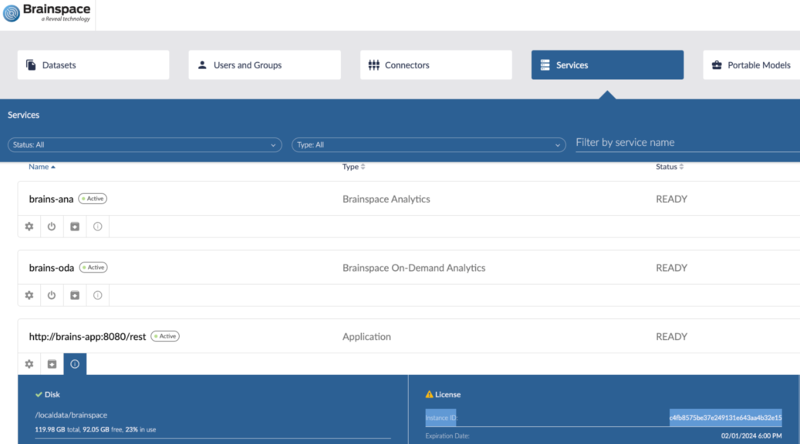
Contact Reveal Customer support team and provide the “Instance ID” captured from the UI and the CSM team will send you a permanent license that can then be uploaded via the UI. From the Services page, use the Upload License button at the top right and select the license that was provided by the Reveal CSM team.
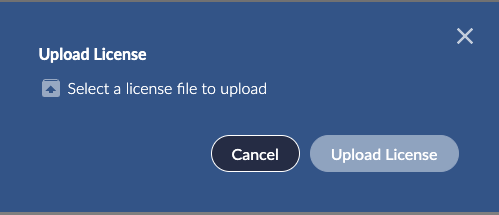
After refreshing the page, you should see the new license details under the License modal for the Application service.
Uploading a Custom Certificate
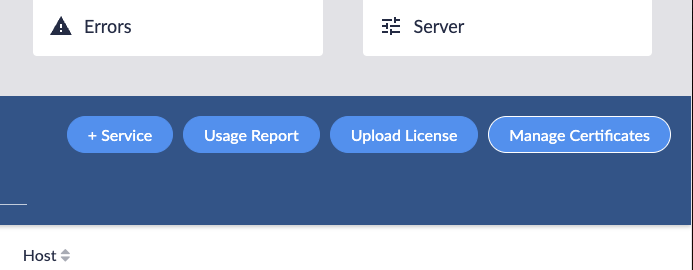
You can now upload a custom certificate for the Brainspace 7 instance via the UI. Navigate to the Server tab and locate the “Manage Certificates” button at the top right most part of the page:
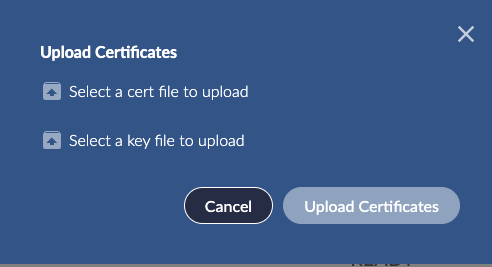
Next, use the modal to browse and locate the certificate PEM file along with the associated certificate key file:
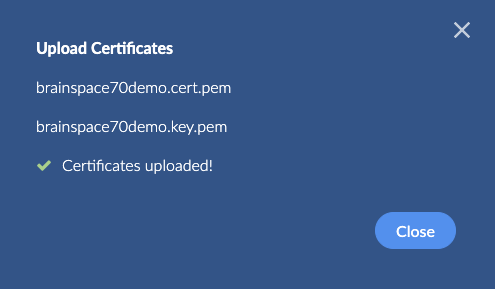
Some minimal verification of the certificate file and the key are done after uploading:
Finally, you will need to restart the brains-ui service in order for the UI to start using the uploaded certificate:
docker service update --force brainspace_brains-ui
You should now see the certificate presented in the browser in the Brainspace UI.
Note
If there was an issue with the certificate file and/or key file, and the brains-ui service won’t start, you will likely see errors in the UI log file. To view the log file:
docker service logs brainspace_brains-ui
To recover and revert to the default self-signed certificate, delete the files in the following directory on the application host:
~/.brainspace-configs/custom_certs
And then restart the brains-ui service:
docker service update --force brainspace_brains-ui
Configuring SAML Authentication
For details on how to set the properties below, refer to document: “Brainspace-SAML-Configuration”.
Instead of configuring SAML using the brainspace.properties file in step 4 of the document, uncomment and edit the SAML configuration lines in the file: custom.yml in the following location: ~/.brainspace-configs
BRAINS_APP_PROP___authentication__type=SAML
BRAINS_APP_PROP___saml__brains_url=https://brainspace7.domain.com
BRAINS_APP_PROP___saml__identifier=brainspace
BRAINS_APP_PROP___saml__federation_metadata_xml_url=https://some.domain.com/realms/brainspace-corp/protocol/saml/descriptor
BRAINS_APP_PROP___saml__redirect_login_url=https://some.domain.com/realms/brainspace-corp/protocol/saml
After setting up the configuration in custom.yml you will need to redeploy the Brainspace stack by running the ./install.sh script and selecting the “Upgrade” option.
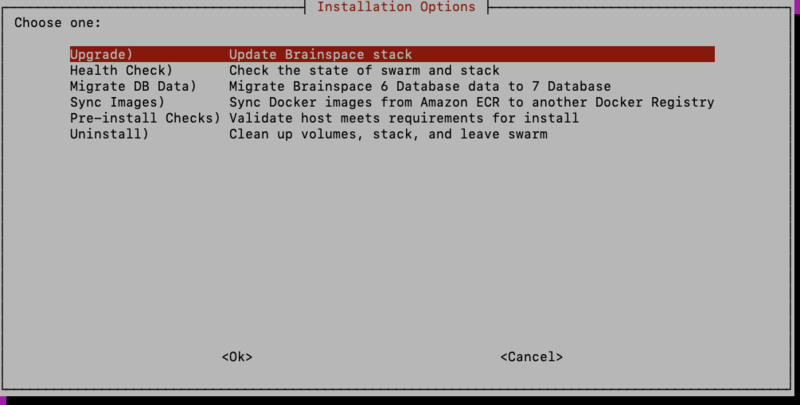
This option can be used whenever configuration changes are made from command line and the services need to be updated to use the new configuration.
Now navigate to the Brainspace UI and you should be redirected to the IDP configured in the SAML settings.
Building the Sample Dataset
Once the ‘batch_tools’ service on each host has prepared and is in the “Shutdown” state, you can build a dataset.
The Brainspace 7.0 installer comes with a small Enron DAT file containing 10k documents. To build the dataset in Brainspace you’ll first need to copy the DAT file into the application container.
If the application host is also the NFS server this can be done by simply copying the DAT file to the /data/brainspace directory
If the application host is not the NFS server, an external NAS for example, you will need to copy the DAT file into the container using the following steps:
Find the container ID of the application using:
docker ps
Copy the DAT file into the container:
docker cp ./enron-10k.dat <CONTAINER ID>:/data/brainspace
You should now be able to build a dataset using the DAT connector to load the enron-10k.dat file that was copied into the container.
(Optional) Setup Portainer
The Docker Swarm deployment of Brainspace can be managed and monitored entirely from the command line, but if you would like to use a graphical user interface, we recommend using Portainer.
Portainer CE is an open-source tool that can be used to monitor and administer a Docker Swarm. It is completely optional to use with Brainspace but could be useful for administrators who would prefer a GUI interface over the command line. There is also a paid version of the tool that provides support and additional features, but the community edition is sufficient for most cases.
To install Portainer with the UI, see: https://docs.portainer.io/start/install-ce/server/swarm/linux.
Download Portainer stack config files.
Deploy the Portainer stack and visit the UI at https://<BRS 7 hostname>:9443 to get started.
If you install Portainer on the application host, it should have access to the Brainspace Docker Swarm cluster automatically.
A single Portainer UI can be used to monitor several Brainspace 7 instances. If you’d like to see all of the Brainspace instances monitored on a single UI, you just need to add the additional clusters to the Portainer UI setup above.
To add additional Brainspace Docker Swarm Clusters to the Portainer UI, deploy the Portainer agent on the other clusters’ application host (leader), and then add a new “Environment” through the Portainer UI.
To install just the agent on a different cluster, use the config file in the Brainspace deployment zip file named portainer-agent-only.yml:
docker stack deploy -c portainer-agent-only.yml portainer
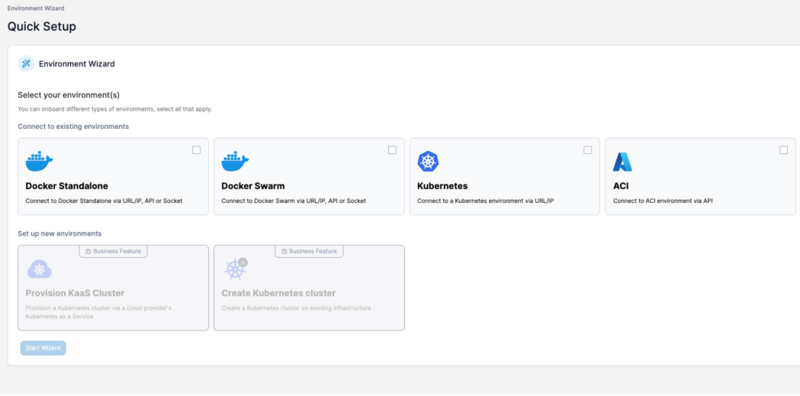
Next, add a new Environment, and select “Docker Swarm”.
Using a Private Docker Registry
First images need to be put into the private registry. There are a variety of ways this can be done, and depends on the type of private registry being used, and where the registry is located, whether it has access to the internet, etc.
The Brainspace 7 installer provides a tool to help with sync’ing images from Amazon ECR to a private registry of your choice. If you have your own mechanism for transferring images from Amazon ECR to your private registry you can skip the next section and go directly to “Using the Private Docker Registry”.
Sync Images
The process of syncing images must be done on a machine that has access to both the Amazon ECR registries as well as the private registry. If no such machine exists, then you’ll need to follow the instructions in Appendix A: Brainspace 7.0 Air-Gapped Environment Install Guide.
In addition, the machine must have the AWS CLI installed as well as Docker. The machine could be a laptop or a server running in the cloud, it doesn’t matter as long as it satisfies the criteria mentioned above.
Run the ./install.sh script and select the option “Sync Images.”
You will see the following screen which explains the setup that has to be done prior to syncing images between registries.
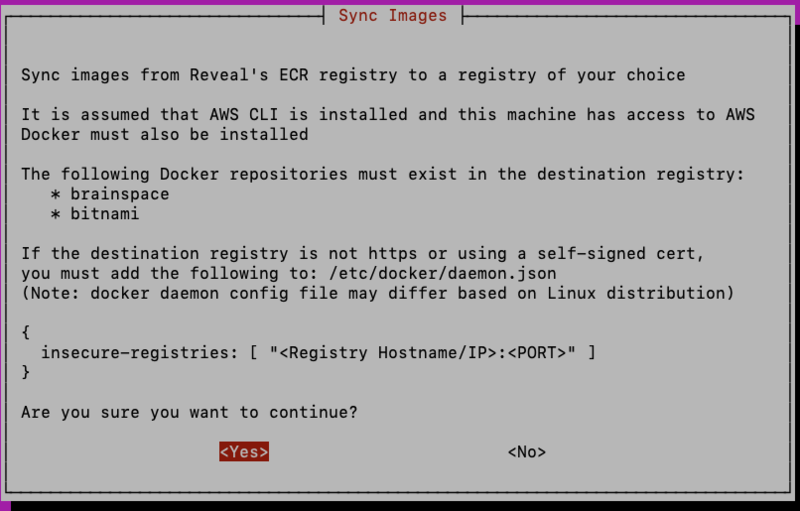
As explained in the screen above, you must create the following repositories in the private registry, prior to running the sync-images option, if you are using a Docker Registry such as Artifactory or Docker Hub. If using Artifactory, for example, this can be done using the Artifactory UI. In the administration panel select “Add Repositories” and add 2 local Docker repositories with the names: ‘brainspace’ and ‘bitnami’.
If you are running a local Docker Registry using the standard Docker ‘registry’ image, the repositories mentioned above will be created automatically when the images are uploaded. Nothing manual must be done.
After selecting ‘Yes’ to proceed, you will need to enter the hostname/IP address and port (optional) that will be used to access the Docker Registry:

If you haven’t already authenticated with Amazon ECR and saved the ECR credentials you will be asked to enter ECR creds. If your private Docker Registry requires authentication, you will be asked to enter creds for the private registry as well:

After entering the creds for Amazon ECR and the private registry, the process of downloading the images from ECR and uploading images to the private registry begins. This process could take a fair amount of time since the Brainspace images are quite large, but you should see progress indicators as the script downloads and uploads each image.
Sync Images Automated Approach
If an automated approach to syncing images between Amazon ECR and the private registry is preferred, the sync-images.sh script can be called directly:
./sync-images -r <Docker Registry hostname and ‘:’ and port (optional)>
It is assumed that you have already authenticated with Amazon ECR.
Using the Private Docker Registry
After images have been populated in the private registry, you will then need to configure the private registry during the Brainspace 7 install. Run the install.sh script on the application host and when presented with the Docker Container Registry Options, choose “Private Docker Registry”.
You will then be prompted for the hostname/IP address and port (optional) that will be used to access the private registry, both for the Docker images that come from Docker Hub like Postgres and RabbitMQ, and for the Brainspace application images that come from Reveal’s ECR repositories. If all images are intended to come from the private registry, enter the same hostname & port information for both:


Next you will be asked whether the private registry requires authentication.
Note
Only username/password authentication is supported in the installer. If another authentication mechanism is used, then select <No> here and ensure that you’ve already authenticated with the private registry prior to running the install UI.


After entering the private registry credentials, proceed with the installation.
Note
If the private Docker Registry is configured without SSL (http) or is using a self-signed certificate, you will need to configure the Docker daemon on each host to allow insecure-registries.
On Ubuntu, this means adding the following to the Docker daemon config file at: /etc/docker/daemon.json
{ insecure-registries: [ "<Registry Hostname/IP>:<PORT>" ] }
And then restart the Docker service:
systemctl restart docker
Configuring File Shares Using Bind Mounts
The “bind” mount volume option is useful for installations where the data and localdata shares are non-standard, for example if they are setup using a protocol other than NFS, or if the protocol is unknown. Another possible use of bind mounts is when encryption of the file shares is being done by a process running on the host machine. Bind mounts can also be useful for single-host installations, where the data and localdata shares are setup using local disk on the host machine.
The idea behind the bind mount option is very straightforward. As the name suggests, this option uses Docker Bind Mount Volumes under the hood to present the data and localdata directories to the Brainspace containers directly from the host machine. This means that the data and localdata shares must be mounted on all of the Brainspace host machines (APP, ANA, ODA).
Once the data and localdata mounts are setup on each host machine, select the “Bind” option on the volume mounting option screen in the installer:
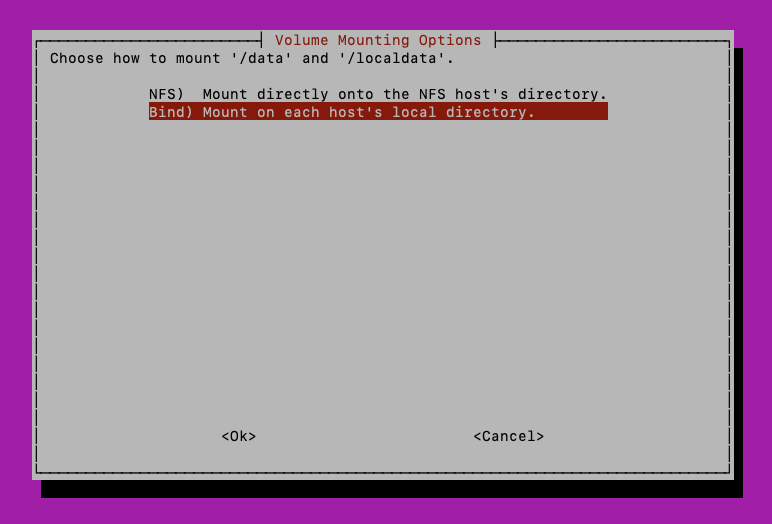
The following screens allow you to configure the location on the host machine where data and localdata shares reside, in case they reside someplace other than /data and /localdata.
The first two screens allow specifying the location of the data and localdata volumes on the application host:


The next 2 screens allow specifying the location of the data and localdata volumes on the analytics host, both the ANA and ODA hosts must be setup the same:


Adding Custom File Paths to the Application Container for DAT Files
In some environments, you may choose to store DAT files on a separate file share that gets mounted to the application host. For example, your DAT files might be accessible at a path like /mnt/dat-files on the host system.
To allow the Brainspace application container to access these files, you’ll need to set up a bind mount that connects the host directory to a path inside the container.
Configuration Steps
Open the configuration file: ~/.brainspace-configs/custom.yml
Add the following column mapping under the brains-app service:
services:
brains-app:
volumes:
-/mnt/dat-files:/brainspace/dat-files
When creating your DAT connector, use dat-files as the offset path to reference this mounted location.
Custom Host Deployment Option
The “Custom” host deployment option allows the user to choose exactly which services are deployed on each host. This is an advanced option to configure more complex or non-standard deployments. If your deployment doesn’t fit one of the pre-defined 1, 2, 3 or 4 server deployments, you can use the custom option to deploy almost any other possible host configuration.
For example, if you are running multiple ANA or ODA hosts, use this option. If you’re running the Postgres database completely external to the Brainspace cluster, use this option as well.
Pre-requisites
Use of the custom deployment option requires one additional package to be installed on the application host only, the package: ‘jq’.
Install jq using the appropriate package manager for that Linux distribution. For example, on Fedora-based distros use:
dnf install jq
For Debian based distros, like Ubuntu, use:
apt-get install jq
Any version of jq should work fine.
If you cannot install jq for some reason, there are alternatives available for setting up complex deployments, they just involve some extra manual work. Contact Reveal support for details.
Using the Custom Option
The custom option will work for any number of hosts, so the first step in the process is to join the Docker Swarm from all the hosts that will participate in the Brainspace deployment. You will need to open a terminal with an interactive shell on each of the hosts to enter the docker swarm join command.
On the first screen after selecting the custom option, you will see the command to use on the other hosts to join the swarm. Copy and paste this command on to every host, and when finished choose “Yes” to indicate that all hosts have successfully joined the swarm.

On the next screen you should see the list of hosts/nodes that have joined the swarm, with the node ID on the left and the node’s hostname on the right:
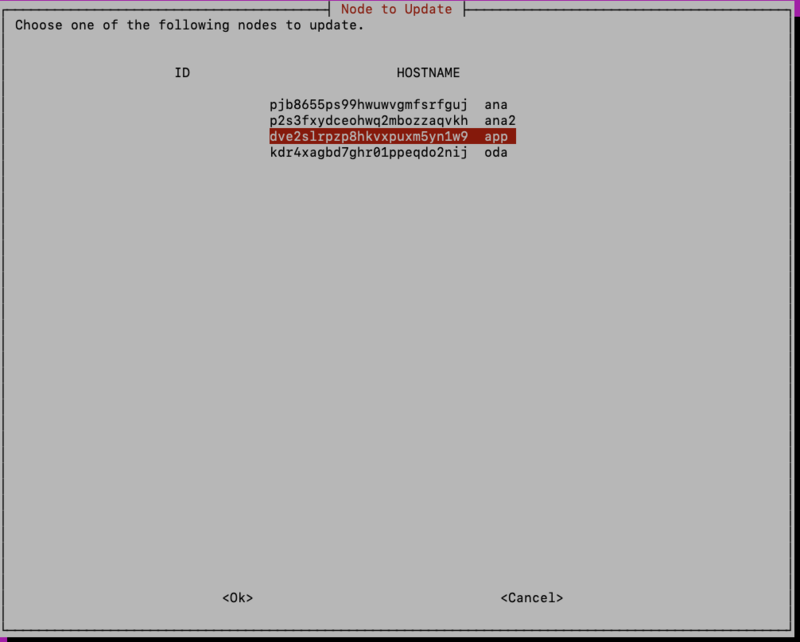
Choose the first host you wish to configure, and you will be asked to choose the “tools” or services that you wish to deploy on that host.
For example, if using a Postgres database that is completely external to the Brainspace cluster, such as when using a hosted Postgres solution like Amazon RDS, the application node should have the “Application” and “Messenger” roles, and not the “Database” role. Use the arrow keys and the spacebar to select/deselect roles:
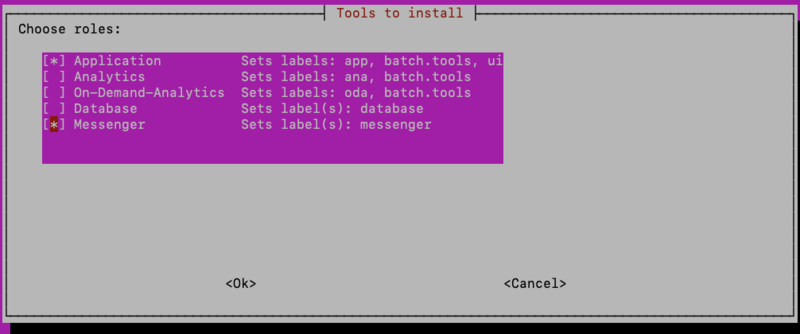
By assigning a role to a node, the installer will set all the labels required to fulfill that role, including any dependent labels.
Using another example where there are multiple ANA or ODA hosts, or both, for each node that is to run the ANA/ODA, select either the “Analytics” or “On-Demand-Analytics” role:
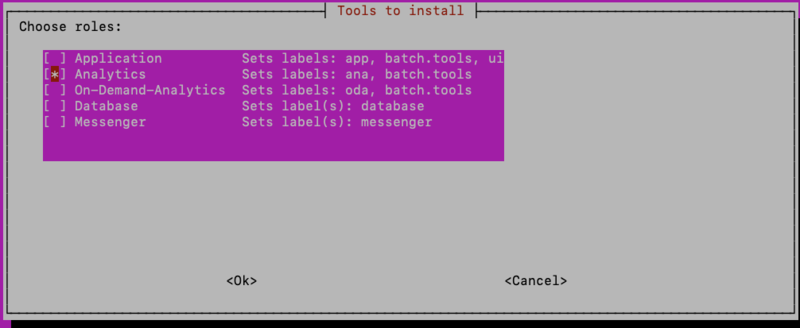
Then select <Ok>.
Once all nodes have been configured, you will be taken to the “Deploy Brainspace” screen where you can review the role selections for each node:
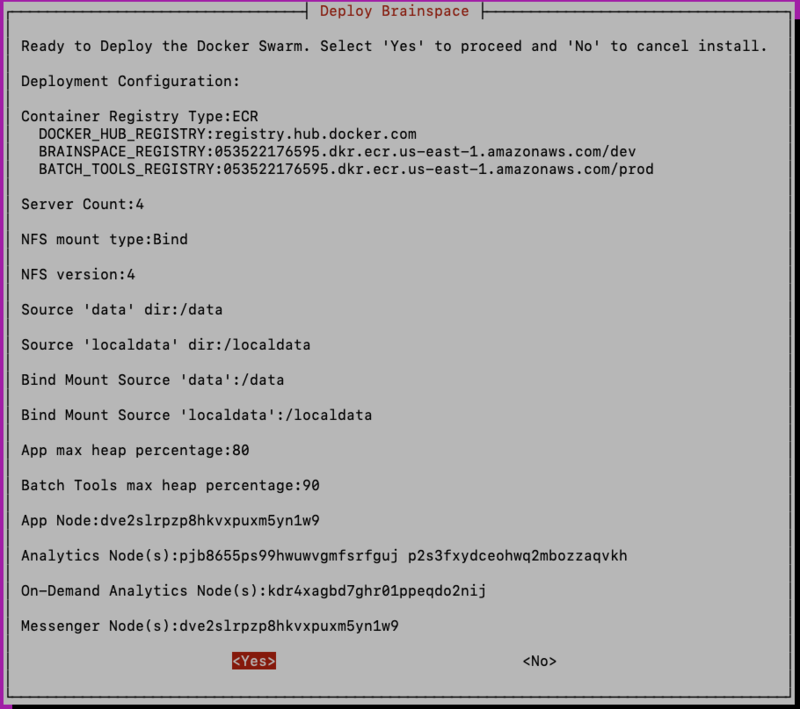
Note
It is the responsibility of the user to ensure that all the necessary roles have been correctly assigned. The software will not check that all of the required roles have been assigned to a node. In order to ensure a working Brainspace instance gets deployed, the user must confirm that this is properly implemented when using the custom option.
Configuring a Separate Database Host
If you want to run Postgres inside of the Brainspace cluster, but on its own host, use option Four in the “Host Deployment Options” screen and follow the directions for adding the database host. The steps should be nearly identical to the steps for adding an analytics host.
If you’re using a database instance that is running external to the cluster or is hosted in Amazon (Amazon RDS for Postgres), use option Five: Custom Option and refer to section “Custom Host Deployment Option”. When using a database host that is external to the cluster, you should not set any of the hosts to have the role of “Database”.
In addition, you will need to configure the properties of the external database in the swarm.env file that is located in the extracted Brainspace install directory. If you’ve already started the installation, you can exit the install UI just prior to deploying the swarm, edit the swarm.env file, then resume the installation where you left off using the “Continue Install” option in the install UI.
The database properties that need to be configured in swarm.env are:
postgresql_host=<name of host where Postgres is running>
postgresql_port=5432
postgresql_ssl=true
postgresql_ssl_factory=org.postgresql.ssl.NonValidatingFactory
postgresql_ssl_mode=prefer
If the external Postgres server is configured for SSL (recommended) set postgresql_ssl to ‘true’ and set postgresql_ssl_mode to ‘require’. The Postgres database password should be set using the install UI, since it will be stored in a Docker Secret and should not be put into the swarm.env file for security reasons.
Useful Docker Commands
You can interact with the application containers either using the docker service commands from the Docker Swarm leader node, or you can interact with the Docker containers directly, and use the docker ps command to find the container you’re interested in.
To interact with the docker container, to get a shell for example, you must be on the host where the container is running, that is the one caveat to using the container commands vs. the service commands.
List stacks in cluster
This will show the name of the stack used in subsequent commands:
docker stack ls
Status a Docker Stack
docker stack ps <stack name> --no-trunc
List Services
This will show all the services in the stack, running or exited, along with their service IDs used by other commands:
docker service ls
Inspect a Service
This will show properties of the service, as well as environment variables, IP address of the container, information about attached volumes, and more:
docker service inspect <service ID/name>
View logs of a service
docker service logs --follow <service ID/name>
Note
The --follow argument is optional.
Restart a Service
The best way to restart a service is to use the update command:
docker service update <service ID/name>
Or you can restart the container associated with the service in which you are interested. The container name should match the service name. The docker service update command will pull a new version of an image, if one is available and matches the image tag, whereas the docker restart command will not.
List all containers running on a particular node:
docker ps
Then restart the container:
docker restart <container ID>
Connect to a Running Container
First find the container ID on the Docker host where the service is running:
docker ps
This will give you shell (command line) access to the running container:
docker exec -it <container ID> bash || sh
Show Process Details of Container Processes:
docker top <container ID>
Copy a File into a Container
docker cp <host filepath> <container ID>:<destination filepath>
example:
docker cp ./enron-10k-2.0-docs.dat ed61ca93addc:/data/Brainspace
Upgrades
To upgrade a Brainspace 7 instance to a newer version, for example from 7.0.0 to 7.0.1 (patch version) or 7.0.0 to 7.1.0 (minor version), the procedure is always the same:
Obtain the installation bundle for the new version from Reveal Support.
Extract the installation bundle to a location on the application host.
Run the ./install.sh script to enter the Brainspace Install UI.
Select the “Upgrade” option.
Because previous installation choices were persisted in the home directory of the user performing the install, those decisions will be used when performing an upgrade. It is important to use the same user that performed the installation to do the upgrade, which in most cases will be the root user.
In most cases this will be enough to upgrade all the Brainspace containers to the new version, assuming that the new images exist in the Docker Registry. If using Amazon ECR, this happens automatically, if using a private Docker Registry, refer to the section on using a private Registry to first transfer the new images to the registry before running the procedure above.
If there are additional options associated with the release that need to be configured at install time, this should be apparent from the Release Notes along with information about how to set those new options.
APPENDIX A - Brainspace 7.0 Air-Gapped Environment Install Guide
This guide describes the process of installing Brainspace in an environment that is either physically disconnected from the internet or does not have internet access because of firewall settings or other security policies.
This guide assumes that the Docker registry used in the production environment will be a local, private registry running on the application host.
This guide was inspired by the Docker documentation for creating a private, local Docker registry for Docker Swarm installs, described here: https://docs.docker.com/engine/swarm/stack-deploy
Process Outline
At a high level, the process involves the following steps:
Download all of the necessary components to install and run Brainspace using a computer with internet access. This includes the Brainspace installation and configuration files and the Docker images that are hosted on the internet, either in ECR or Docker Hub.
Transfer the downloaded components to the environment without internet access.
Create a private Docker Registry in the closed environment.
Load the Docker images from the tar file that was transferred to the closed area into the private Docker registry.
Proceed with the Brainspace installation and deployment using the private Docker Registry that was created in step 4..
Included in the Brainspace 7 Installation bundle are a couple of scripts to help with the process.
Step 1 – Save Images
The first step needs to be done from a computer that has internet access and has Docker and the AWS CLI installed, if you are pulling Brainspace images from the Reveal ECR repositories in AWS.
If using a different Docker registry for the Brainspace images, the process is identical except for the initial step of authorizing with the Docker registry. This computer can be a laptop, or a server running in the cloud, either will work as long as the machine satisfies the criteria above.
Once the Brainspace Swarm installation bundle is unpacked, authenticate with the Docker Registry that contains the Brainspace images. If pulling images from Reveal’s Amazon ECR registries you can use the following script to authenticate with ECR:
./aws-ecr-authenticate.sh
After authenticating with the Docker Registry, start the process by running the following script:
./save-images.sh
This will download, in tar format, all of the Brainspace application images from ECR as well as the standard Docker images for Postgres and RabbitMQ that are hosted in Docker Hub.
In addition, this script will download the Docker image needed to create a private Docker registry.
This can take a bit of time as some of the images are quite large.
Images will be saved in the 'images' subdirectory. See Video for this step.
Step 2 – Transfer Installation Bundle
Tar and compress the entire directory where the Brainspace installation was extracted, including the Docker images that were downloaded in the previous step.
Now transfer the tar file to the closed area.
Step 3 – Load Images
On the application host in the closed/air-gapped environment, un-tar the file created and transferred in previous step. See also a Video reviewing this step.
Initialize the Docker Swarm by running the 'docker swarm init' command manually if needed; note that this will otherwise happen automatically when running the script to load images.
Run the load images script:
./load-images.sh
This script will initialize the Docker Swarm, load all the images that were stored in the tar files, create the private Docker registry and publish all of the necessary images to that private Docker registry.
Note
Port 5000 will need to be open in the closed area to allow images to be transferred to the different hosts in the Swarm.
Ensure that the images have been published to the local registry:
curl http://app:5000/v2/_catalog
It would be a good idea to run this command from each host to ensure connectivity.
That's it! Now proceed with the standard Brainspace installation.
Step 4 – Install
Use the "Join" command when running the install script to perform a fresh install but instead of initializing the Swarm, join the existing swarm that was created during the process of loading images. See Video reviewing this step.
Also, select “Private Docker Registry” when choosing the Container Registry. When prompted for the registry hostname and port, use:
<application hostname/IP>:5000
And choose <No> when asked if the registry requires authentication.
After the installation is finished and all services are running or are in the "Complete" state, you can tear down the local private Docker registry that was previously created. To do this, run the following:
docker service rm registry
Note
You must wait until the batch_tools images are in the 'Complete' state before tearing down the registry or the analytics and on-demand analytics containers will not have the files needed to perform analytics builds.
APPENDIX B - Commonly Used Docker Commands
Check that Docker is running and was installed correctly:
docker info
docker run hello-world
See system usage:
docker system df
See resource statistics on a particular node (MEM, CPU IO):
docker stats
Swarm Commands
A Docker “Swarm” is a cluster of hosts/servers that can deploy containers that are all in the same network.
To initialize a swarm:
docker swarm init
Leave a swarm:
docker swarm leave --force
Show the command that allows a host to join the swarm:
docker swarm join-token manager|worker
Join an existing swarm:
docker swarm join <details from above command>
A node is a host/server participating in a Swarm.
List nodes in a Swarm:
docker node ls
Show configuration of a Node:
docker node inspect <self | node ID>
To see labels for a given node in JSON format:
docker node inspect <node id> --format '{{json .Spec.Labels }}'
See resource statistics on a particular node (MEM, CPU IO):
docker stats
Stack Commands
A docker “stack” is collection of services in a Docker Swarm cluster. Each cluster can have multiple stacks. In the Brainspace deployment, the name, by default, of the stack that runs the Brainspace services is ‘brainspace’. Other stacks could exist in this cluster, for example, if installing Portainer, there will be another stack named ‘Portainer’.
To list running stacks in the cluster:
docker stack ls
Status of the Brainspace stack:
docker stack ps brainspace --no-trunc (optional: don't truncate output)
-- which should show all services in the stack, the number of containers running, the state of each, and any errors present.
In some cases, it may make sense to completely remove the Brainspace stack, to recover from errors and clean up the Docker environment. As long as the Docker volumes (see below) are not removed as well, Postgres data, logs, etc. will remain intact after removing and recreating a stack.
Remove the Brainspace stack:
docker stack rm brainspace
Service Commands
A service is a set of a particular type of container, where each container in a service is typically running on a different node/host.
List services (across all hosts/nodes in a swarm):
docker service ls
Show configuration of a service:
docker service inspect <service name>
Show service logs:
docker service logs <service name>
Follow service logs (similar to tail):
docker service logs -f <service name>
To capture logs from a container/service to a file, example using the brains-app service:
docker service logs brainspace_brains-app>& ./brains-app.log
Restart a service:
docker service update <service name> --force
Stop the container, and let Docker Swarm restart it automatically:
docker stop <container name/id>
To remove a service, usually so it can be re-added with an updated configuration:
docker service rm <service name>
Then if you redeploy the stack using the “Upgrade” option, the service will be recreated with the new configuration.
Note
Removing a service is the only way to effectively stop the service in Docker Swarm.
Container Commands
A container is a member of a Docker service that is running on a particular Docker host/node. Commands that deal with containers must be run on the host/node where the container is running.
List running containers on a particular host:
docker ps
List processes running in a container:
docker top <container ID|name>
Get a shell into the container:
docker exec -it <container ID> bash
To run a container that had previously shut down, for example the batch-tools containers:
docker run -it --rm <image ID> bash || sh
Volumes
Docker Volumes are where Docker stores persistent filesystem data. Filesystems inside of a container are temporary and will be deleted when the container restarts, unless that filesystem is a part of a Docker Volume.
Be careful when deleting volumes since that is where important data is stored, such as Postgres DB data, and logs.
Note
If you delete an NFS volume, it will NOT delete the associated data contained in the NFS share.
List volumes on a host/node:
docker volume ls
Show volume details – useful for debugging NFS volume issues:
docker volume inspect <volume name>
To delete all volumes on a host with the given string in the name:
docker volume rm $(docker volume ls -q | grep <stack name>)
(Use with caution)
Important
-> Very Important
If uninstalling the Docker Engine from an existing environment for any reason, do NOT follow the instructions to delete the /var/lib/docker directory (instructions for Ubuntu, for example: https://docs.docker.com/engine/install/ubuntu/#uninstall-docker-engine).
When you set up a Docker volume for an NFS share, it creates a mount point down in /var/lib/docker. This means if you have set up a Docker volume for the NFS data/localdata shares and you run the command to delete that directory, it will also delete the entire Brainspace dataset, and all data contained in those shares.
You must unmount those shares under /var/lib/docker prior to deleting the contents of that directory.
Images
List images on a host/node:
docker images
Clean up
It’s important to periodically clean up unused Docker components to prevent errors, improve performance, and free up disk space.
Remove unused Docker components (images, containers, volumes, networks, etc.)
docker system prune --force (optional)
Delete all Docker components.
Caution
Only use this after doing a complete uninstall of Brainspace.
APPENDIX C - Troubleshooting Common Issues
Fix or Update a Docker Configuration Setting
Note
The Brainspace 7.0 Install UI stores install choices made into a file in the user's home directory at: ~/.brainspace-configs/swarm-configuration.env. Brainspace 7 upgrades rely on this file so that file should NOT be deleted and should ideally be backed up periodically. When an uninstall is performed, this file gets renamed with a .bak extension in case you need to recover it.
Because installation choices are stored in a file on disk, if you need to alter a previous choice made or to make a change to the Docker Swarm compose file, you can edit a file and then update the stack. To do this, you can edit either one of the files (using vi for example):
~/.brainspace-configs/custom.yml - contains overrides to the docker-compose.swarm.yml configuration that will survive upgrades.
~/.brainspace-configs/swarm-configuration.env – contains choices made during the process of running the Install UI.
swarm.env inside of the extracted tar directory - contains default values used when deploying Brainspace via Docker Swarm. Here you can set things like NFS protocol version, prior to running the Brainspace 7 installation.
After editing the file, run the install UI again. Select the “Upgrade” option, and the Docker stack will get updated with the new setting. This is a good way to work around any issues related to the installation process, such as the incorrect NFS protocol version used.
Note
If making a change to the NFS volume configuration, it is not always enough to just update the config file and redeploy the stack, you may need to delete the volumes that contain the incorrect configuration from each docker host, using the docker volume rm command prior to running the update.
Common issues
Machines with multiple interfaces/IPs
Error:
Error response from daemon: could not choose an IP address to advertise since this system has multiple addresses on different interfaces (10.0.2.15 on eth0 and 192.168.33.10 on eth1) - specify one with --advertise-addr
To resolve this, set the ENV variable SWARM_IP to the IP address associated with the network interface you want the other hosts to use when joining the Swarm. Add this ENV var to /etc/profile to make it persist through sessions and restarts.
Or you can initialize the Swarm manually prior to running the install and use the “join” option in the install UI:
docker swarm init --advertise-addr <IP address to use>
Connectivity Issues Between Containers
If encountering 502 errors when using the app and seeing errors like “No route to host” in the brains-ui service logs, or seeing connection timeouts between containers, try doing a “docker system prune” on each node, then restart the brains-ui service.
If that doesn’t work, restart the Docker service itself using “systemctl restart docker”.
Problems downloading Images from ECR
If, when status’ing the stack, you see errors like “No such image: 053522176595.dkr.ecr.us-east-1.amazonaws.com” or if services are taking an excessively long time in the “Preparing” state, this can be indicative of problems authenticating or connecting to the Amazon ECR registry. A good debugging strategy in this situation is to try downloading one of the images manually using the ‘docker pull’ command.
The batch-tools image can be quite large, and on slow networks, this can cause problems when the Brainspace stack is starting up. To mitigate this, you can download the batch-tools image manually prior to running the install, so it will be in place during the stack deployment.
Note
This needs to be done on each Brainspace host, except on the DB host if using a separate DB host.
To do this, first authenticate with the Docker Registry you are using. If using ECR use the script:
./aws-ecr-authenticate.sh
…then pull the batch-tools image by itself:
docker pull <batch-tools image from docker-compose.swarm.yml>
For example:
docker pull 053522176595.dkr.ecr.us-east-1.amazonaws.com/prod/brainspace/batch-tools:line.r12.1-githash-1e14f0f
HTTP 401 Errors due to Server Time Synchronization Issues
Error:
Users may encounter HTTP 401 Unauthorized errors in communication between the application and the ANA/ODA (Analytics/On Demand Analytics) servers when the server times on the host machines are not properly synchronized.
The application and ANA/ODA servers use a short-lived JWT (JSON Web Token) with a 2-minute expiration for HTTP communication. If the system times on the respective host machines are not closely synchronized, token validation may fail, resulting in authentication errors.
Resolution:
Check the system times on all relevant host machines.
If the time difference between any two machines exceeds 2 minutes, resynchronize their system clocks.
Verify that time synchronization services (e.g., NTP) are properly configured and running on all hosts.
After ensuring time synchronization, restart the affected services if errors persist.
To prevent these errors, ensure that the system times on all host machines running the application and ANA/ODA servers are synchronized. We recommend using a reliable time synchronization method to maintain accurate time across all systems.
While the 2-minute threshold is based on the token’s expiration time, it’s best practice to keep system times synchronized as closely as possible to prevent other potential timing-related issues.
Dataset Startup Failed
Error:
While trying to start a dataset in Brainspace, the following error is encountered:
java.lang.NullPointerException: Cannot invoke "com.purediscovery.batchtools.util.OutputConfig.contains(com.purediscovery.batchtools.util.Output)" because "this.outputConfig" is null
Resolution:
This error means that Brainspace couldn’t find a file it needs to startup the dataset, specifically:
/localdata/brainspace/datasets/<dataset UID>/output.config
If this occurs after a migration from a Brainspace 6 environment, check to ensure that all dataset data from the ‘localdata’ share has been rsync’ed to the correct location in the new ‘localdata’ share.
If this is not a result of an incomplete/incorrect Brainspace 6 migration, it’s possible that the process of deploying the dataset was interrupted. Inspect the files in the directory above and note any that appear to be missing. To workaround this case you can use the “Force Deploy Dataset” option under the dataset’s build options.
NFS Related Issues
Important
Very Important
If uninstalling the Docker Engine from an existing environment for any reason, do NOT follow the instructions to delete the /var/lib/docker directory (instructions for Ubuntu, for example: https://docs.docker.com/engine/install/ubuntu/#uninstall-docker-engine).
When you set up a Docker volume for an NFS share, it creates a mount point down in /var/lib/docker. This means if you have set up a Docker volume for the NFS data/localdata shares and you run the command to delete that directory, it will also delete the entire Brainspace dataset, and all data contained in those shares.
You must unmount those shares under /var/lib/docker prior to deleting the contents of that directory.
In some cases, the installation will complete successfully, and the “brainspace” Docker Stack will have deployed, but one or more services may fail to startup due to incorrect NFS configuration. In this case, the NFS errors can usually be seen when you issue the following command:
docker stack ps brainspace --no-trunc
Below is a list of common errors and their resolutions.
Error:
failed to mount local volume ... permission denied
Resolution:
Ensure that all 3 hosts are defined in the /etc/exports file. Even if data and localdata are shared from the app host, the app host’s IP address must be listed in the /etc/exports file so that the brains-app container running on the application host has permission to connect to the NFS share.
Error:
error mounting /data or /localdata ... invalid protocol
Resolution:
Check to ensure that the NFS server protocol is version 4.0. If it is version 3 or 4.1 or anything other than 4.0 you will need to configure the same protocol version in the swarm.env file, and then completely uninstall and reinstall Brainspace, being sure to remove the data and localdata volumes on each Brainspace host.
If /data and /localdata are mounted on the Brainspace hosts, you can check the NFS information using:
cat /proc/mounts
For example:
:/data/var/lib/docker/volumes/brainspace_data/_data nfs4 rw,relatime,vers=4.0
Note the vers attribute should match the following attribute in swarm.env:
nfsVers=4
Error:
error mounting /data ... no such file
Resolution:
Check the location of the data and localdata shares on the NFS server. This is the path where the data and localdata shares reside on the NFS server, not on the local host, if the shares are mounted locally. The path to the data and localdata shares on the NFS server can be configured during the install process, by setting the correct values when asked: “Enter the NFS source directory for ‘localdata' or 'data’ share”.
If /data and /localdata are mounted on the Brainspace hosts, you can check the NFS information using:
cat /proc/mounts
Example:
ip-10-224-66-52.ec2.internal:/brainspace_shares_data /data nfs4 rw,relatime,vers=4.1,rsize=1048576,wsize=1048576,namlen=255,hard,proto=tcp,timeo=600,retrans=2,sec=sys,clientaddr=10.224.66.223,local_lock=none,addr=10.224.66.52 0 0
In the example above, the source directory that needs to be configured for the data share during installation is: /brainspace_shares_data since this is the location of the data share on the NFS server.
Last Resort
Finally, if you’ve tried all of the above and still can’t figure out the issue with configuring the NFS share inside of Docker, then mount the /data and /localdata shares on each Brainspace host (app, ana, oda) and then use the “bind mount” option when performing the install.
Enable Docker Debug Logging
Enable Docker daemon debugging
echo "
{
"debug": true
}" > /etc/docker/daemon.json
Restart Docker:
systemctl restart docker
Daemon logs can be found in:
/var/log
/var/log/syslog
Example:
app dockerd[11191]: time="2024-03-01T23:47:05.294006696Z" level=debug msg="app(ebfb10ae5359): Bulk sync to node 79fc270f87dd took 9.239315ms"
Mar 1 23:47:05 app dockerd[11191]: time="2024-03-01T23:47:05.403770163Z" level=debug msg="pull in progress" current=129209785 image="053522176595.dkr.ecr.us-east-1.amazonaws.com/prod/brainspace/batch-tools:line.r2024.3-githash-4bf7b9b@sha256:4f57d9171d29dae852329ba51a4a47d3a16921666655e033b1b63f8cf82b923a" status=Downloading total=13180108894
Maintenance
Run Docker system prune occasionally.
Clean up and archive log files in log volumes.
Backup /var/lib/docker occasionally and before minor version upgrades.
Restart Docker Daemon if errors persist.
If errors remain, try removing the stack and then reinstalling it using the Upgrade / Continue option. If you do not delete the Docker volumes your data won’t be deleted.
APPENDIX D - Brainspace 7 Backups
Critical Changes from Previous Versions
Important
Backups are strongly recommended before any version update (minor or major).
Automatic backups are not performed during upgrades.
Customers are now responsible for all backup operations.
How Backups Work in Brainspace 7
Unlike Brainspace 6, where a backup was performed as part of every upgrade using the Brainspace upgrade scripts, the install/upgrade script for Brainspace 7 does not automatically create backups of any data. This is now the responsibility of the customer.
It is recommended that a backup of the Brainspace 7 environment be performed prior to performing a minor/major version update of the software, just in case something goes wrong during the upgrade and the environment needs to be rolled back.
Required Backup Components
Configuration Files
Location: ~/.brainspace-configs
Back up all files in this directory
Docker Swarm Data
Location: /var/lib/docker/swarm
Contains essential Swarm configuration data, Docker secrets, etc.
Critical for system recovery
PostgreSQL Database
Important
Data cannot be recovered without the database password. It is critical to follow the password requirements detailed below.
Database Password Requirements:
Store the database password securely in a password manager.
This password is required for data encryption in the PostgreSQL volume.
If user has no access to their database password.
Extract from Docker Secrets (requires stable Docker Swarm)
Retrieve from a file inside any of the running services: brains-app, brains-ana, or oda.
Backup of /var/lib/docker/swarm content.
Note
This method is possible, but not guaranteed.
Choose one of the backup methods below:
Database is running: Use pg_dump
Database is not running: Backup /var/lib/docker/volumes/vol-pgsql
Data Shares
For both data and localdata shares, follow your organization’s backup policies and verify backups before proceeding with updates.
