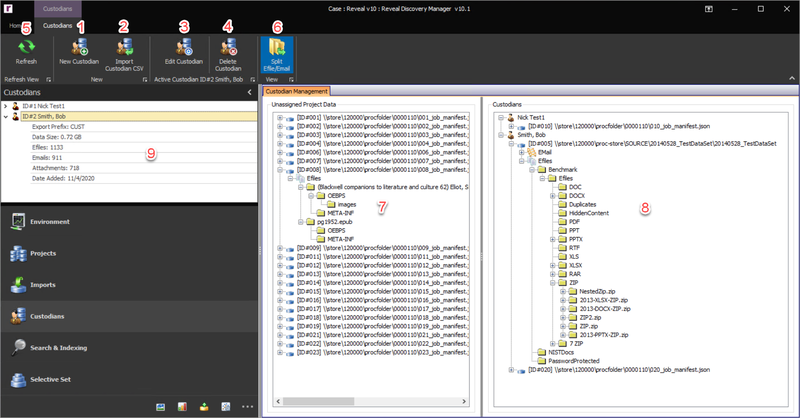
This article provides instructions for creating, importing, editing, and deleting custodians within the Custodians Module.

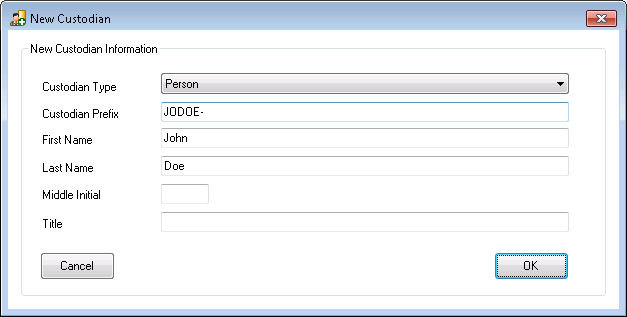
New Custodian – Click the New Custodian button in the Custodians Ribbon and the form below will appear for adding a custodian. There are two Custodian Types that can be created. The input of a Custodian Prefix for labeling that custodian's content is optional as of Release 10.3: one of the settings in Export is Custodian Prefix Incremental when it comes to numbering the files. This will add the Export Prefix onto the number for files pertaining to the custodian within any scope.

Person – This is the default Custodian Type. The minimum information for a Person Custodian is the First Name and Last Name. After filling out the New Custodian form, click OK, and the
 icon will appear in the Module Navigation and the Custodian Management section within the module form.
Entity – The other Custodian Type is Entity. This Custodian Type allows for only one name if necessary. To create an Entity Custodian, click the Custodian Type drop-down, change it to Entity, and enter the Entity Name. After filling out the New Custodian form, click OK, and the
 icon will appear in the Module Navigation and the Custodian Management section within the module form.
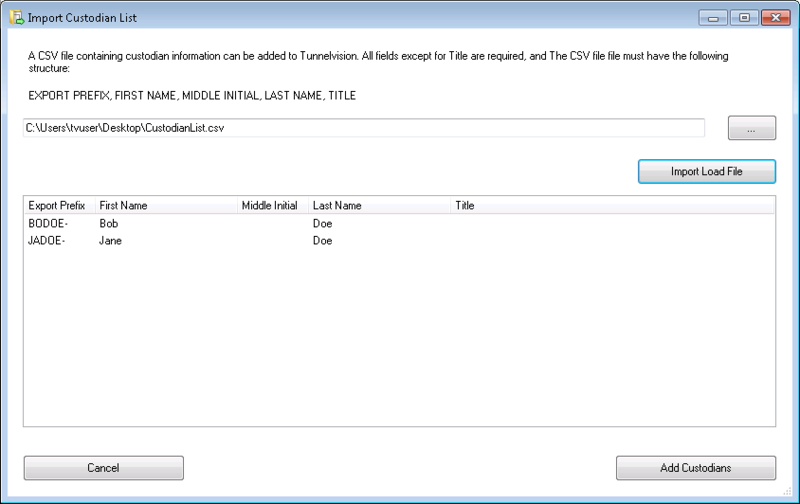
Import Custodian CSV – To import multiple custodian names via a CSV file, click the Import Custodian CSV button in the Custodians Ribbon and the form below will appear. The minimum information for the CSV file is the Export Prefix (Column A of CSV), the First Name (Column B of CSV) and Last Name (Column D of CSV) of the custodian. One of the settings in Export is Custodian Prefix Incremental when it comes to numbering the files, which will add the Export Prefix onto the number for files pertaining to the custodian. After browsing to the CSV file, click the Import Load File button, review the results displayed in the table, and if correct click the Add Custodians button. The
 icon will appear in the Module Navigation and the Custodian Management section within the module form for each custodian.
Edit Custodian – To edit a custodian after creation click the Edit Custodian button in the Custodians Ribbon.
Note
This setting can be used to reset the Export Prefix for the Custodian Prefix Incremental numbering.
Since the Custodian Prefix Incremental numbering always picks up from the last number used during export, the recommended way to reset this number back to 1 is to change the Export Prefix to a new prefix. Otherwise, you would need to delete all previous exports for this custodian from Discovery Manager.
Delete Custodian – To delete a Custodian first select the Custodian in the Custodians Module Navigation and then click the Delete Custodian button in the Custodians Ribbon.
Refresh – Click the Refresh button to refresh the Custodians Module to show new Custodians created as well as previously unassigned data that has been assigned to a Custodian and to update the Custodian group’s statistics.
For assigning and managing data sources to a custodian, see Assign Data to a Custodian.