The Review Grid and the Document Review screen contain tools to customize the presentation of data to the preference of the individual user. We will review how to modify each of these spaces.
Customize the Review Grid
For a new project, a default field profile is automatically applied to the grid and contains standard settings available in Reveal’s database, visible to all users. This default profile can be changed by Project Managers for a specific project. For more information on default field profiles, see Manage Fields.
Project managers can also create field profiles to change which columns appear in the grid, allowing for a customized view of data tailored by task (e.g., “Review Tracking”) or individual preference.
Personalize Field Profile
You can customize your field profile using the Field Profile dropdown to the right of the Review Grid.
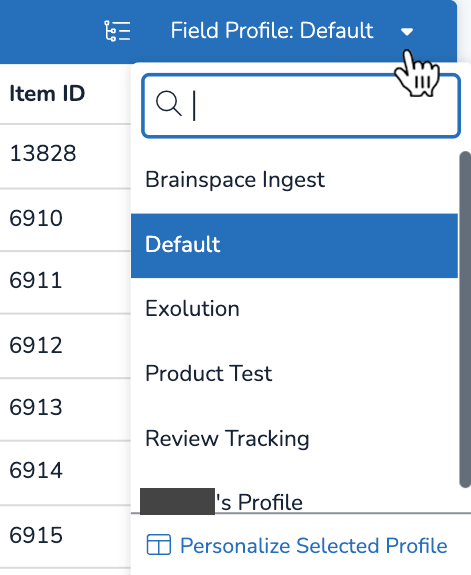
Click the dropdown.
Click Personalize Selected Profile to open the Personalize Field Profile. The profile currently in use will be what you edit.
Personalize your settings
To edit both visibility and field order, click the Customizable tab. Use the sliders (6 grey dots) to move the fields up and down, or you can type a new number in the text box to the right of each field profile. Toggle the “eye” on/off to view or hide the profile.
To only edit visibility, toggle the “eye” on/off for each profile in the Fixed tab.
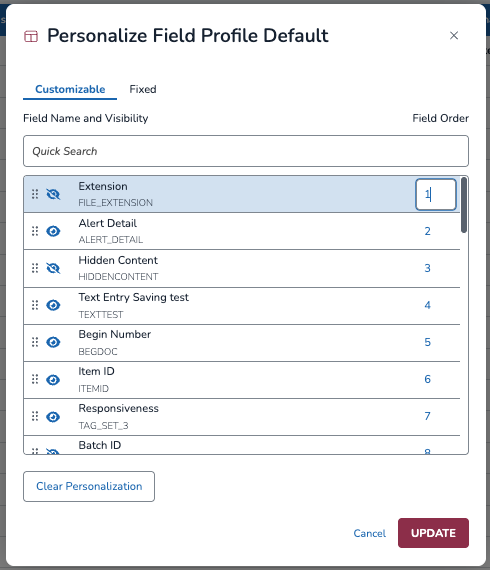
Click UPDATE to save your settings.
Click Clear Personalization to remove your settings.
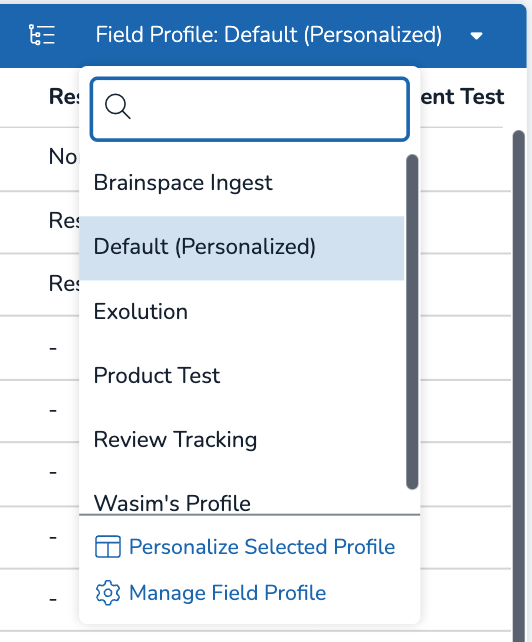
Personalizing a field profile via the above workflow will not affect what other users see. Once a field has been personalized, it will have a new “(personalized)” label to remind you it has been edited.
Note
Unless you are a Project Admin, or have been given permission, you cannot add fields to a personalized profile — only toggle what is visible or invisible.
Manage Field Profiles
Project Admins can manage field profiles under Field Profile (dropdown) > Manage Field Profile.
I. Open the modal.
From the Field Profile dropdown, select Manage Field Profile.
In the top dropdown, select which field profile you want to edit. Alternatively, you can create a new profile entirely by pressing the [+] icon to the far right of the dropdown.
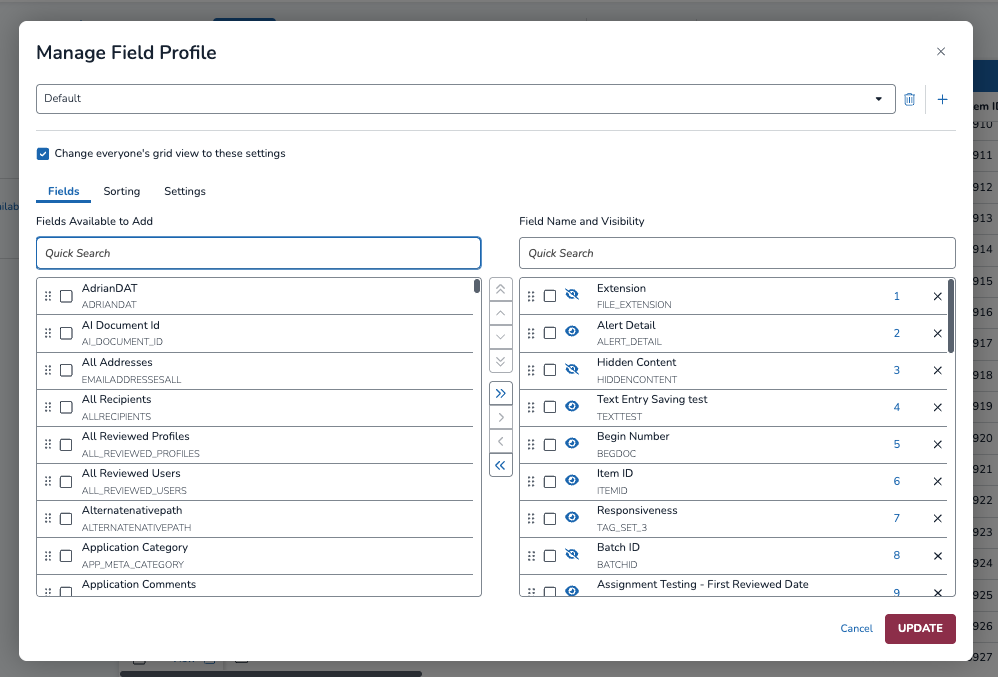
II. Under the Fields tab…
Edit your profile.
Use the sliders, or [^] and [⌄], to change the order of your fields
The double up and down arrows will move a field profile to the very top or very bottom of the list.
Use [>] and [<] to add or remove fields from the Field Name and Visibility box.
The [>>] and [<<] buttons will add or remove ALL profiles at once.
Toggle the eye on/off to show or hide fields in the profile. A hidden field will still remain part of the field profile, and can be toggled on/off by all users regardless of permissions.
III. Under the Sorting tab…
.png)
Use the same sliders and/or arrows to change the sort logic.
Sort logic determines the order in which documents are displayed in the grid, and fields at the top of the list trump those below it. In the above example, documents are sorted by Begin Number, and then First Reviewed Date.
IV. Under the Settings tab…
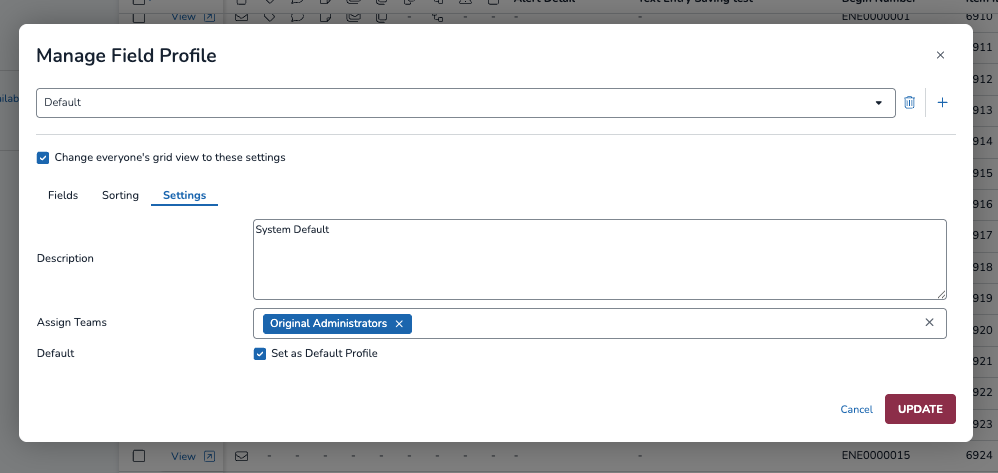
Add or edit the description to your profile.
Change the teams assigned to your profile.
Toggle whether or not the profile is default for all assigned teams.
V. Save your updates.
At the top left of the Fields, Sorting, or Settings tabs, decide whether to change everyone’s grid view to these settings.
Press UPDATE to save your changes.
Customize the Document Review Screen
Click to open a document in the Document Review screen from the Grid or the Results Pane.
Document Review will open with arrows on either side of the Viewer to open or close a coding pane.

Expanding the left coding pane by clicking the arrow shows all panels for this document (all collapsed in this view except for Family Members). The panels will include all existing relationships, including Email Threads, Near Duplicates, Duplicates and Relational Documents, along with Tags, Folders (including any available Work Folders and Transcript Folders), Notes and Fields.
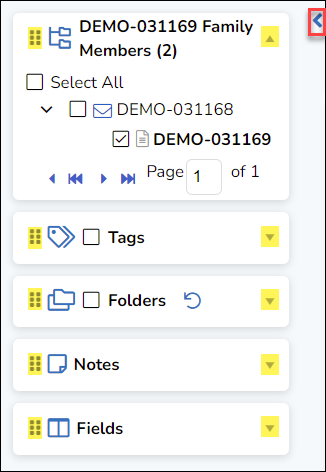
Expand the right coding pane by clicking its arrow to open.
Grab the six-dot handle at the left of the panel you wish to move and drag it to the right coding pane. Do this for each panel you wish to move.
Click the down-arrow at the right of each panel to expand. In the illustration below, Notes has just been moved between Folders and Fields.

Document Review will retain the updated settings automatically, though on login to a new session the right coding pane may first appear as collapsed.