Logikcull lets Account Owners, Account Admins, Project Admins, and Pro Users create their own custom fields to aid in the review project. You can choose from a variety of available custom field types including text boxes, dropdowns, dates, and hyperlinks.
Custom fields are viewed and managed in Project Settings > Fields tab.
.png)
You can rearranged your custom fields in the table by using the .png) sliders. This will alter the display order of the Fields in the Document Viewer Fields panel.
Create a custom field
Custom fields can be created in two places:
Project Settings > Fields tab > + Create new field
Document Viewer > Fields panel > Add Fields +
Both locations open the Create Field popup.
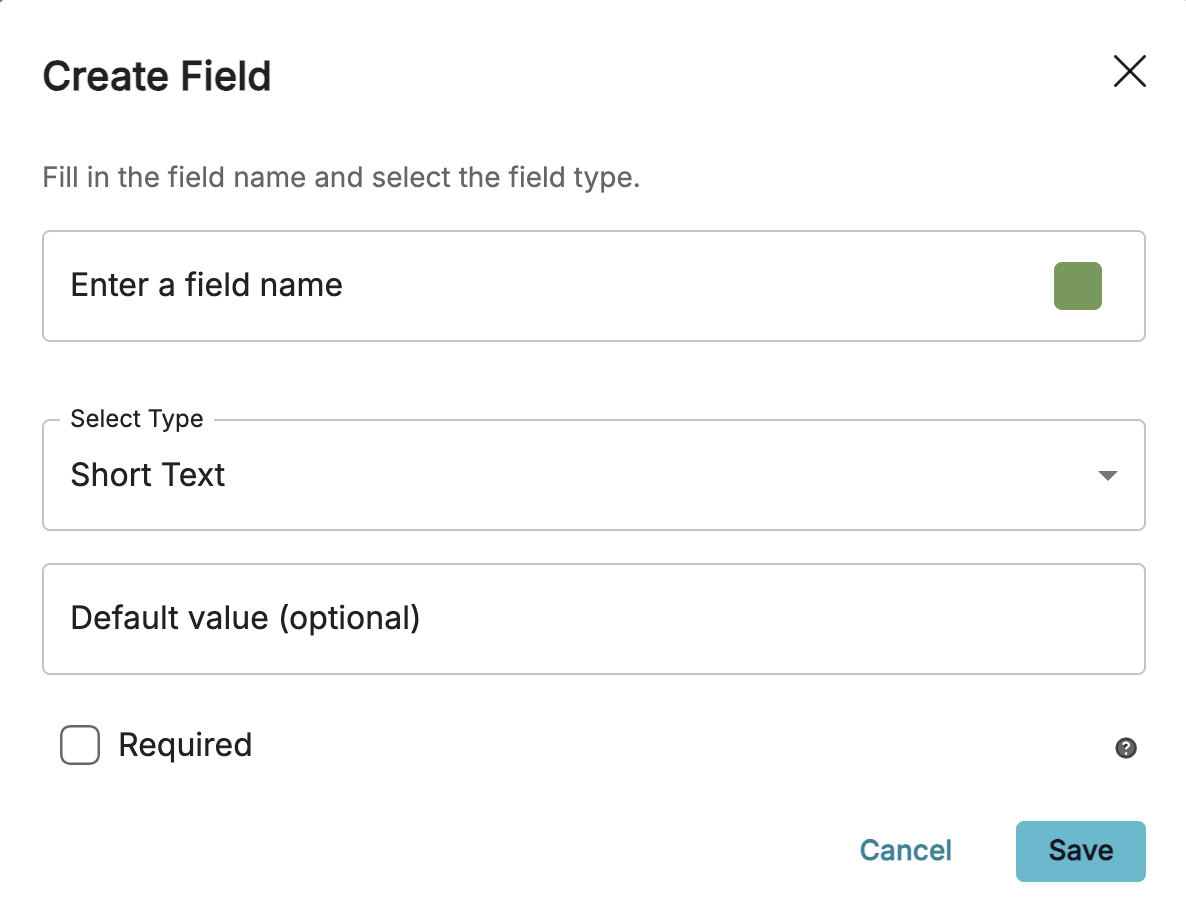
Enter a field name: Create a name for your new field.
To the right of your field name, select a color for your new field.
Select type: From the dropdown, choose one of the below field types that you want to create.
Warning
Field types cannot be changed after they’re created.
Short text – A text box capped at 255 characters.
Placeholder text: Optional. Add grey placeholder text that will appear inside the field before a reviewer begins typing inside of it.
Note
Placeholder text is visual only. If no text is entered, the placeholder will default to “Add text”.
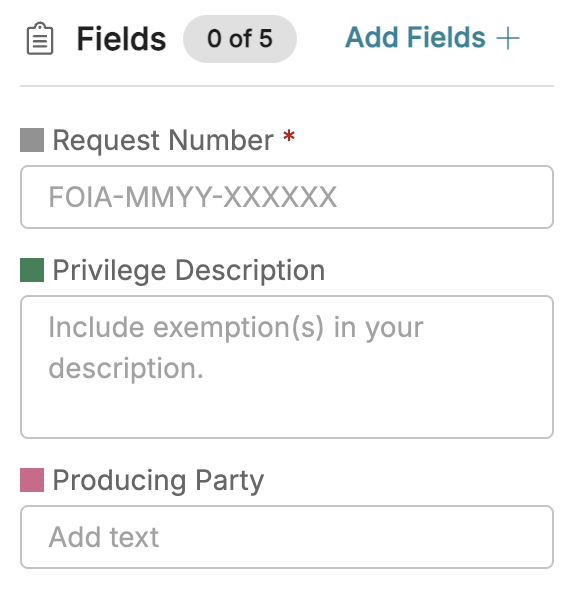
Long text – A multi-line text box capped at 10,000 characters.
Placeholder text: Optional. Add grey placeholder text that will appear inside the field before a reviewer begins typing inside of it.
Single-select dropdown – A dropdown of custom values limited to one selection only.
Type in each option and rearrange the order using the
sliders. Once created, you can rearrange the order later, or add new values. But existing values cannot be deleted after you’ve saved your new field.
Multi-select dropdown – A dropdown of custom values that lets you select one or more options.
Type in each option and rearrange the order using the
sliders. Once created, you can rearrange the order later, or add new values. But existing values cannot be deleted after you’ve saved your new field
Date – A date field.
Note
The Date field has a YYYY-MM-DD format when exported and is not affected by time zone.
Hyperlink – A field to store URLs, useful for attaching reference documents or records requests to data directly.
Required: Check the box to make the field required. This presents users with a warning if the field remains empty as they move to the next document, but won’t stop users from continuing review.
Applies to: Choose whether to apply the requirement to all documents, or just documents with a specific tag / characteristic (e.g. Privileged, Exempt, etc.)
Click Save to create your custom field.
Important
Fields created before the Custom Field Type update (October 1st, 2026) will convert to a text field:
If the values in the field are 255 characters or less, the field type will change to short text.
If values in the field are greater than 255 characters or contains an actual line break (e.g., pressing the “enter” key), the field type will change to long text.
Edit and delete custom fields
You can also perform the following actions in the fields list:
Edit custom field
Change custom field color
Delete custom field
Edit custom field
You can change the name of any existing custom fields. For single- or multi-select dropdown fields, you can also view, rearrange, or add additional values.
In the Fields table, locate the row with the field you want to edit.
To the very right of that row, click the
 pencil icon. An Edit Field popup will appear.
Enter a field name: Change your field’s name.
Options: For dropdown fields only. Rearrange the order using the
 sliders. Click + Add option to add additional values to your dropdown selection.
Click Save.
Important
Renaming a field changes only its display name. The field's search ID, which was created by Logikcull off the field’s original name (e.g. custom.original_field_name) stays the same.
Change custom field color
In the Fields table, locate the row with the field you want to edit.
Under the Colors column, click the colored box.
Select a new color from the list.
Delete custom field
In the Fields table, locate the row with the field you want to delete.
To the very right of that row, click the
 trash icon. A Delete Field popup will appear, telling you how many documents currently have values in your field.
Field name: Type the name of your field to confirm you want to delete it.
Click Delete.
Warning
If you delete a custom field, all populated data will be lost. Deleting a custom field is permanent and irreversible.
The Updated By and Updated At table columns can be used to see who last changed a field’s name or color, and when the change was implemented.
Enter data into a custom field
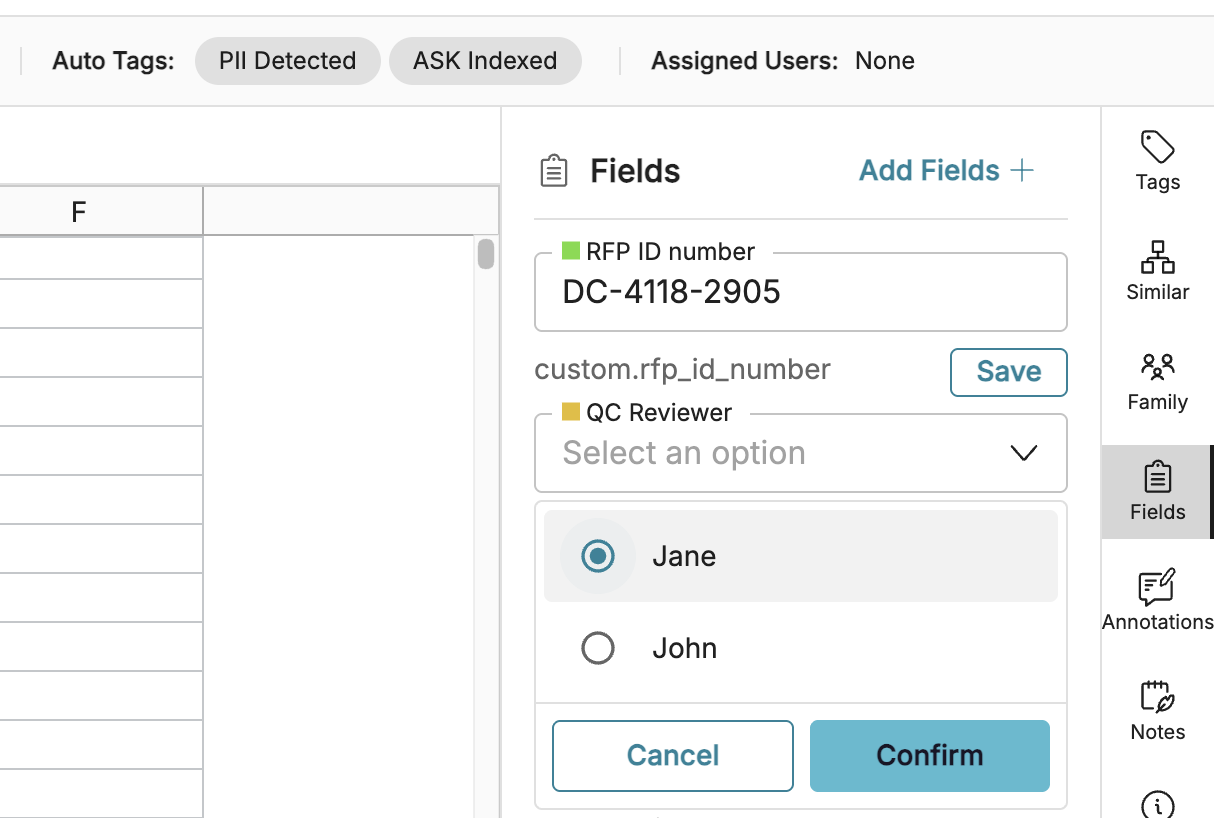
Custom fields can be populated with data from the Fields panel in the Document Viewer. Just type or select your values, then press Save or Confirm to update your changes. The Save or Confirm buttons will only appear if you are actively changing the field value.
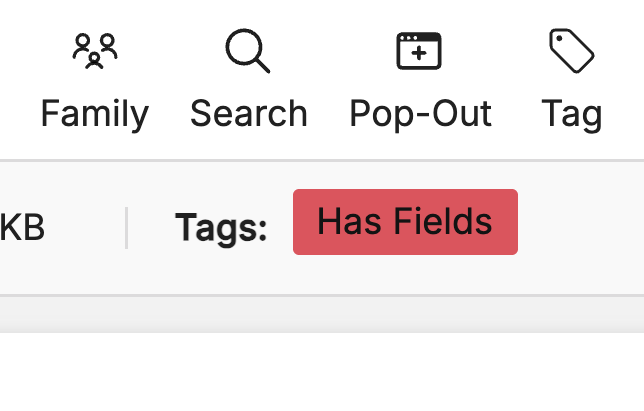
After one or more of your custom fields is populated, Logikcull will tag the document with the Has Fields tag, which can be used in the filter carousel and search bar for filtering.
Search custom fields
We've made searching your Fields easy! You can either use the advanced search builder, or you can use the direct search syntax.
custom.example_new_field:Test

Export custom fields
When creating a Download, locate your custom Field in the list of available fields when creating a new template.

Custom Fields will be prefixed in the list of available field options with "Field:" (which is a great way to filter for them quickly!).
