In this article:
How to configure the Onna to Logikcull Cloud Transfer
How to create an export using the Logikcull integration
How to view the exported dataNew in Logikcull
I. How to Configure the Onna to Logikcull Cloud Transfer
Before exporting data, you must configure a Cloud Transfer connection between Onna and Logikcull.
Prerequisites
To configure a Cloud Transfer connection, the user must:
Be an Admin, or
Have the Manage Enterprise Sources permission.
Log in to Onna
Log in to your Onna environment. Enter your credentials and sign in to access the platform.
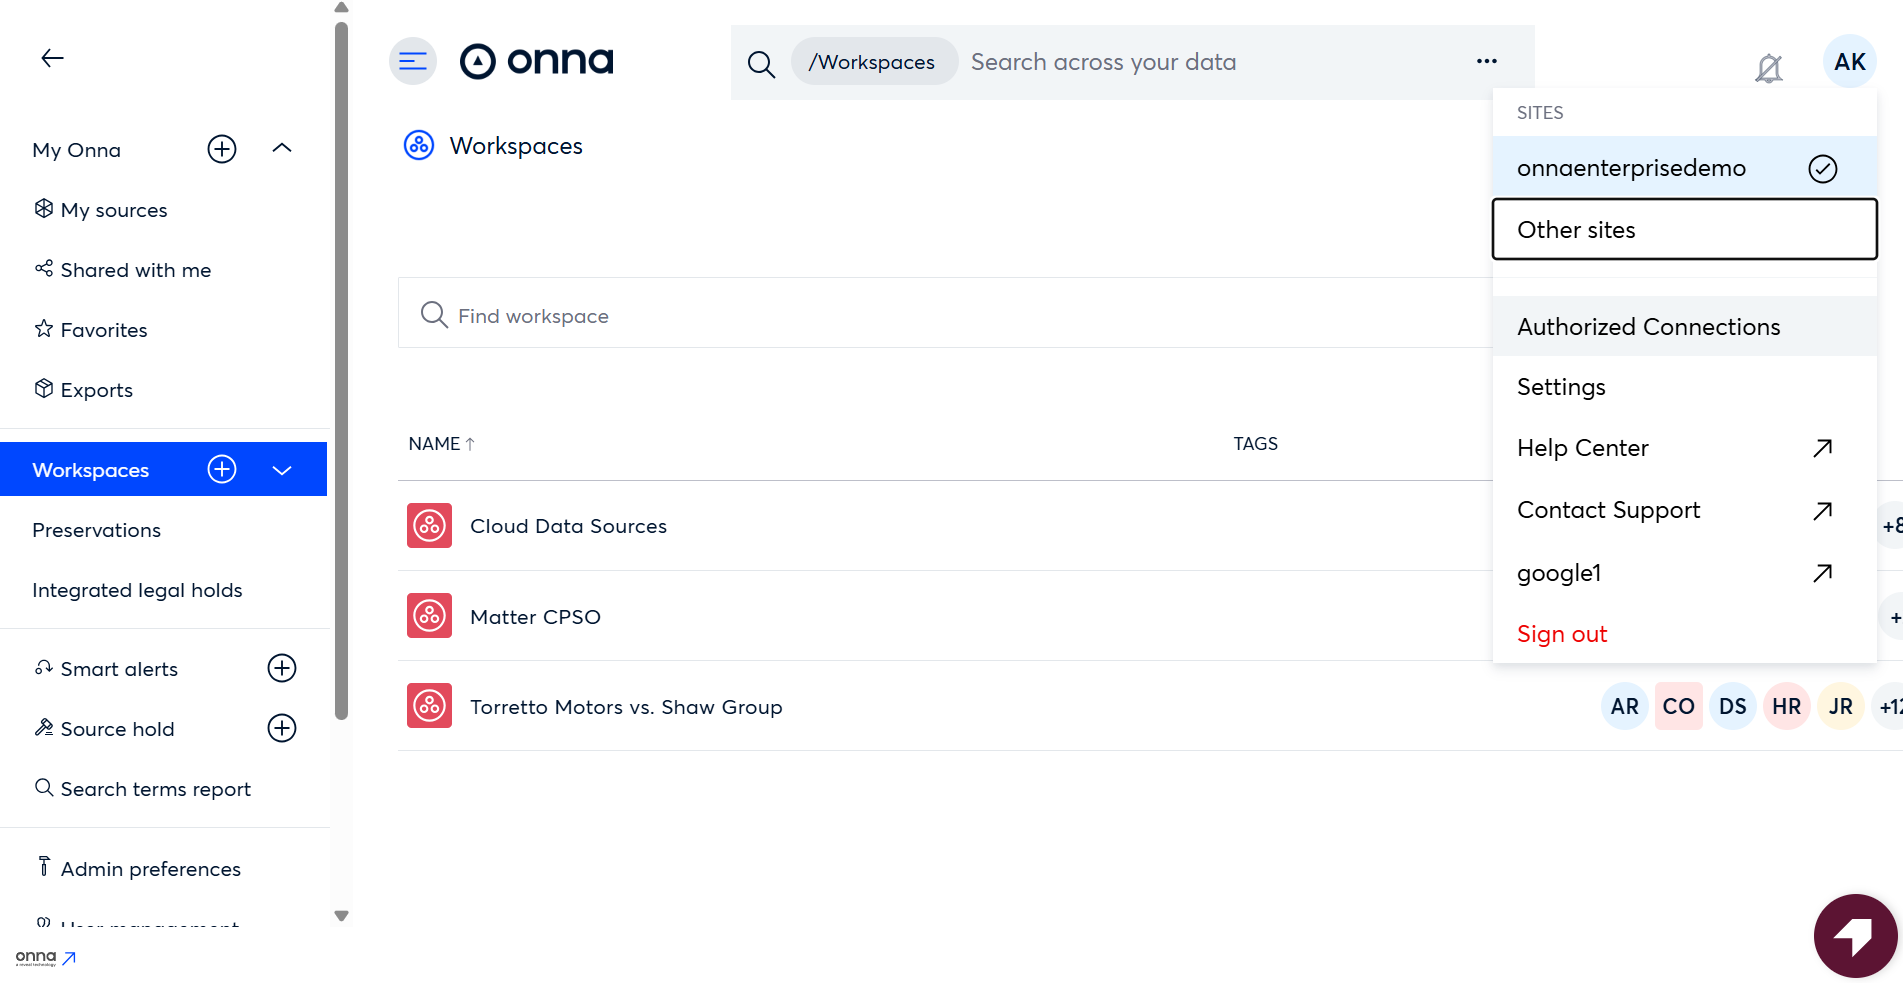
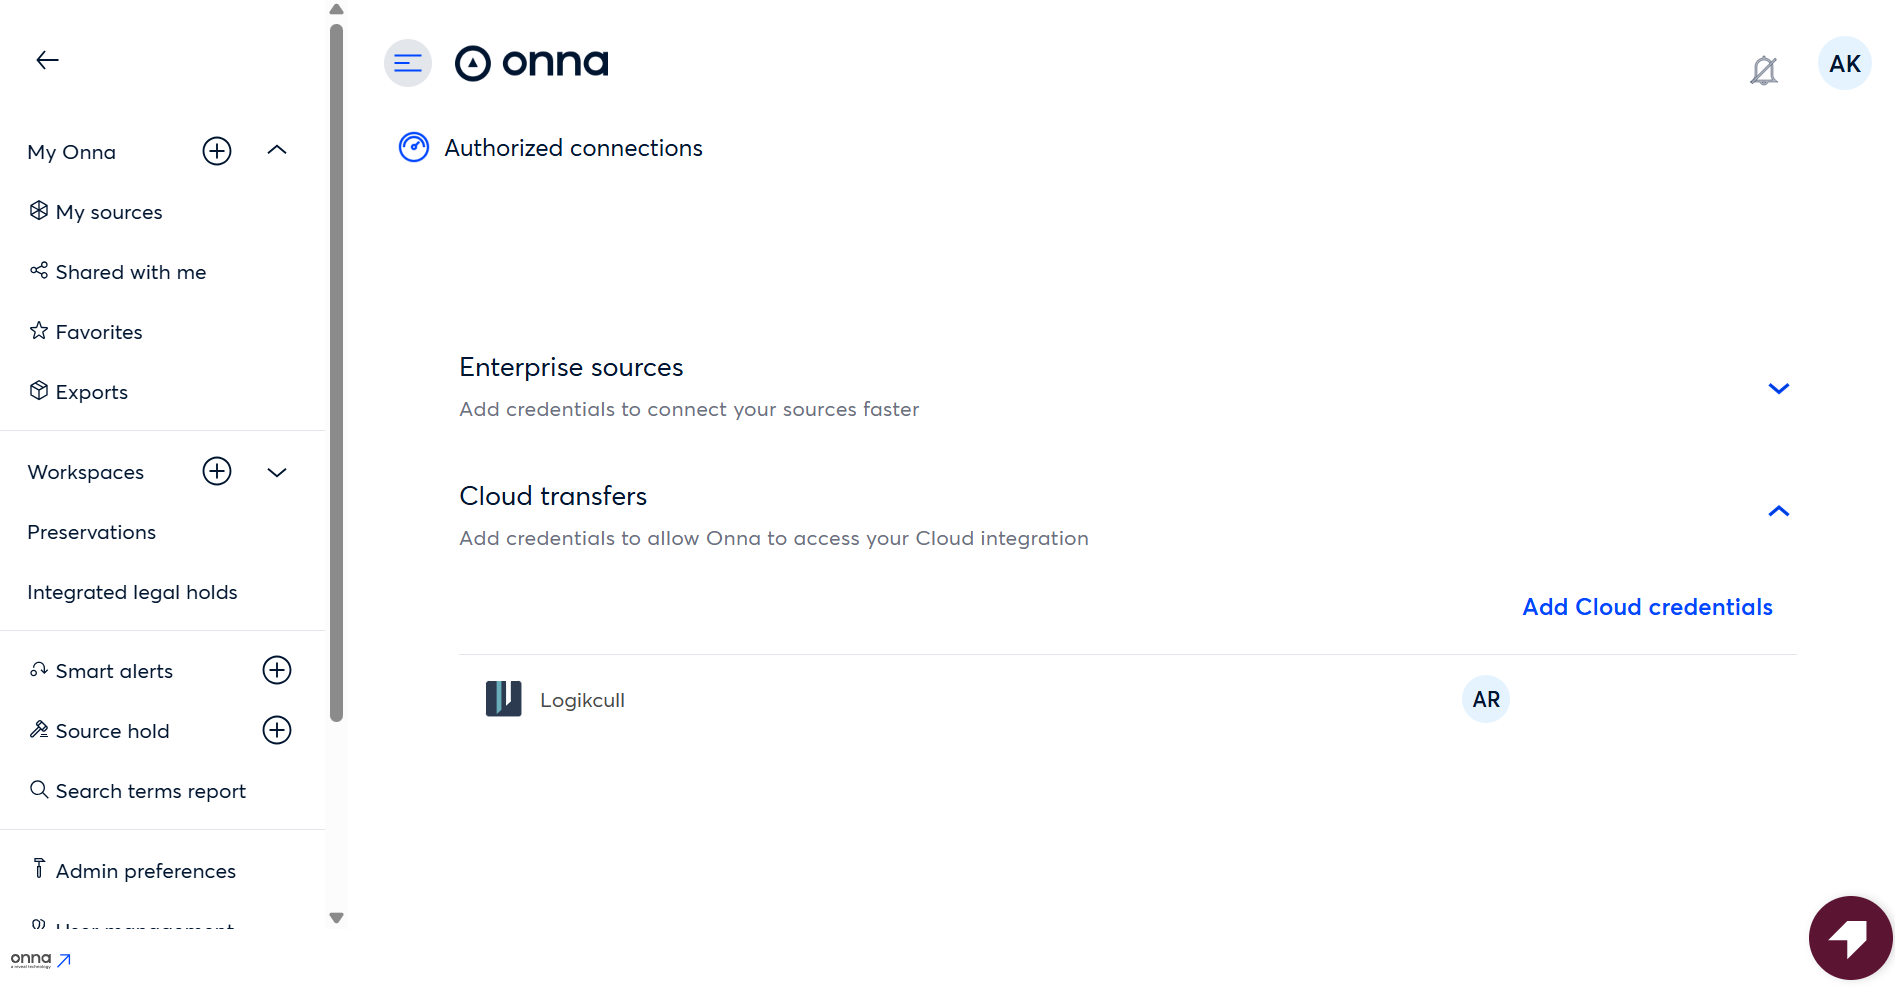
Navigate to Authorized Connections
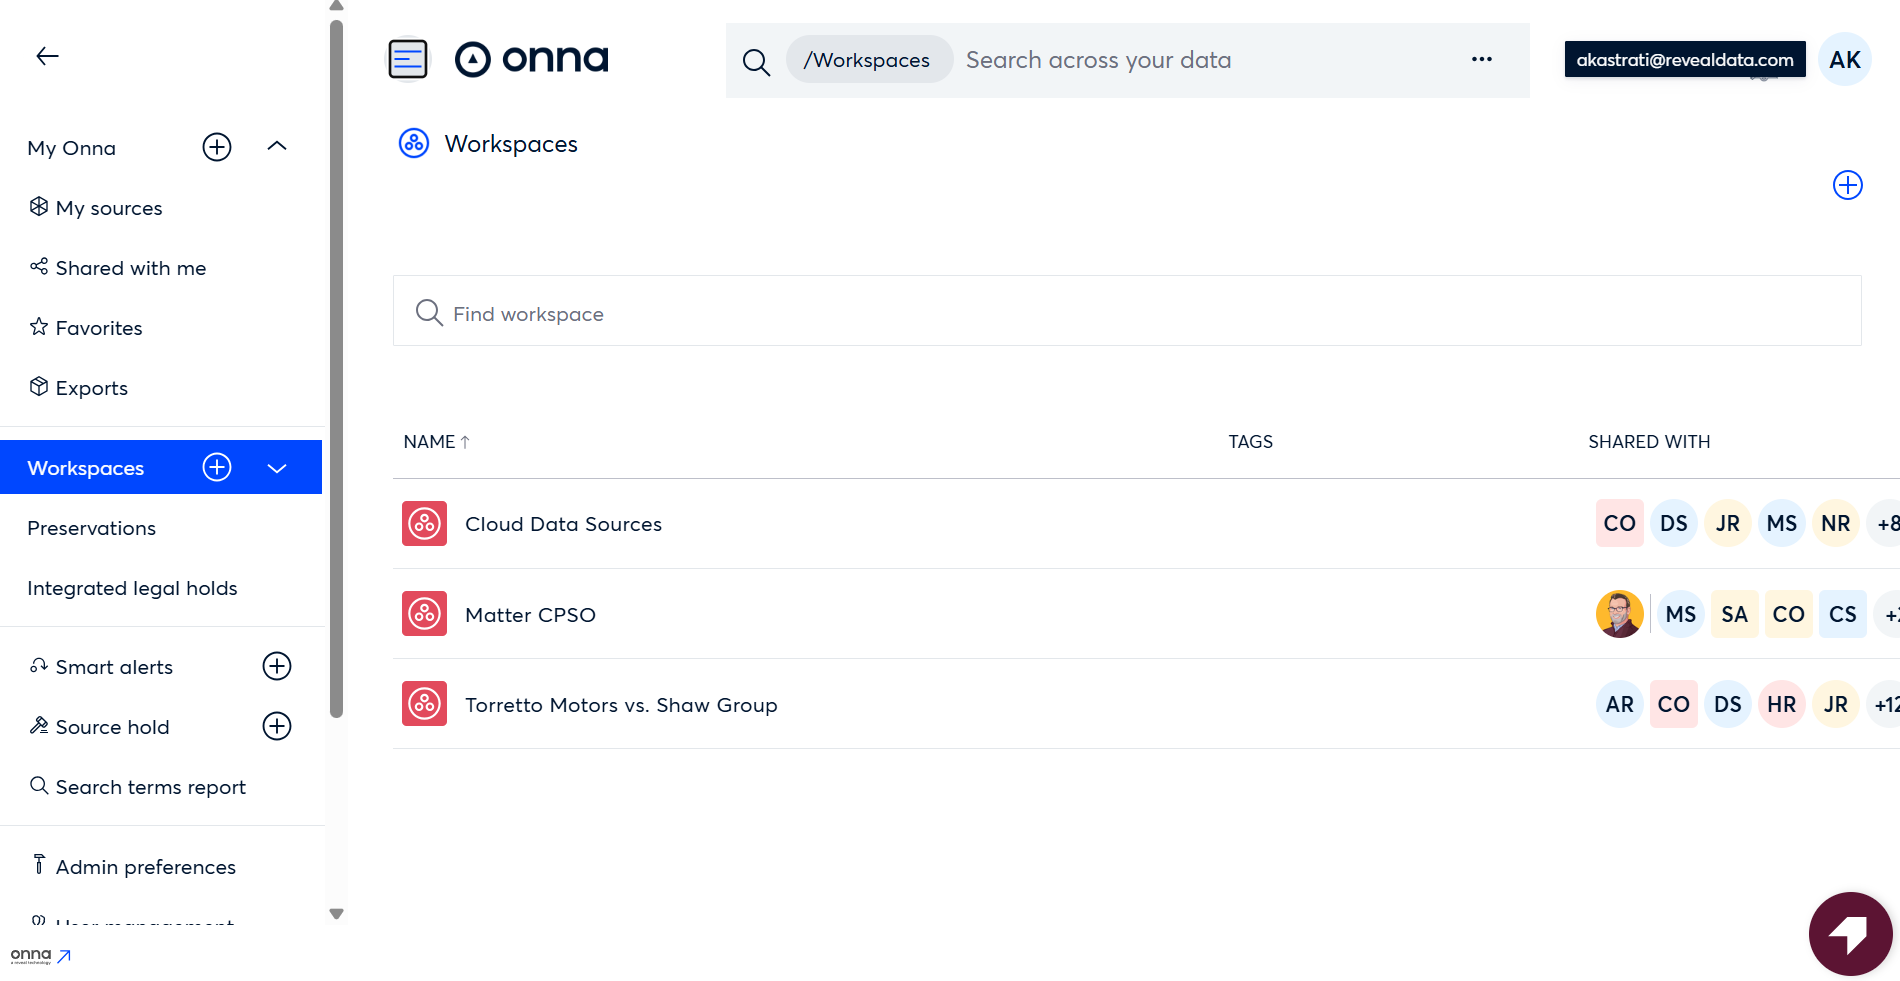
Select eDiscovery.
In the upper-right corner of the screen, click the profile icon (circle with your initials).
Select Authorized Connections.
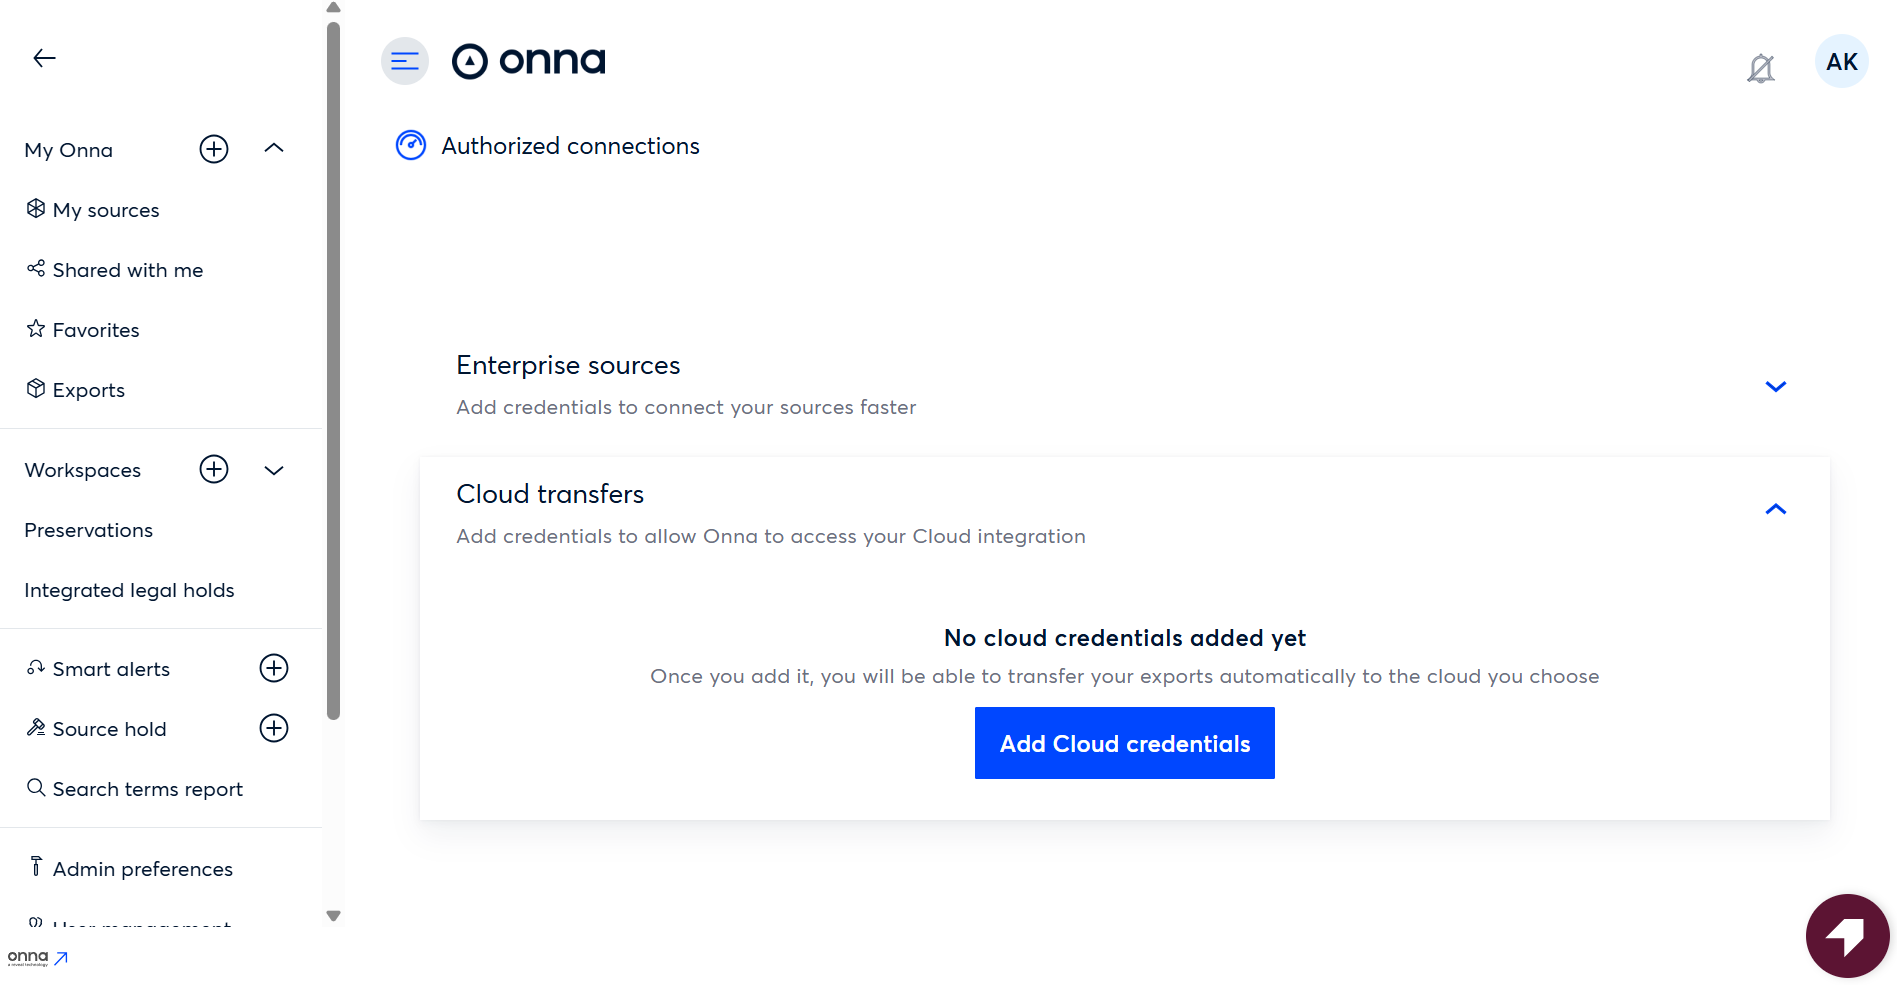
Add Cloud Transfer Credentials
Locate the Cloud transfers section.

Click Add Cloud credentials.
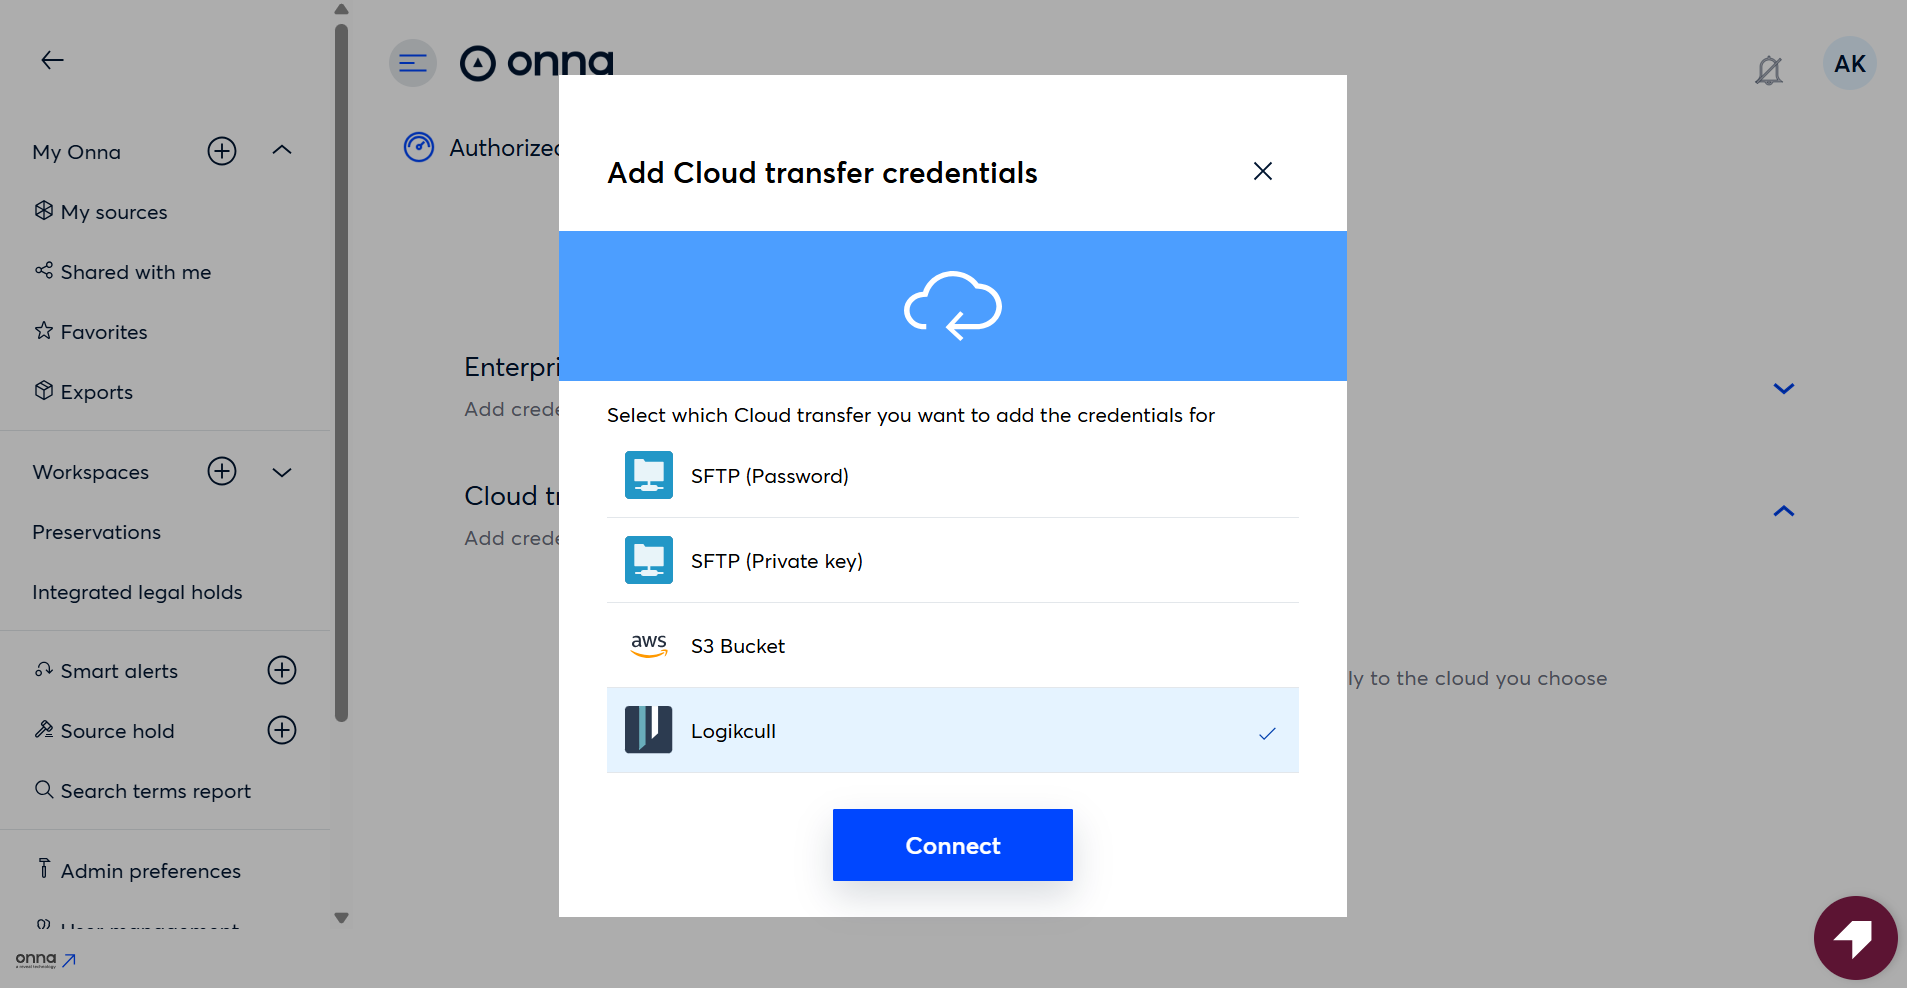
Connect to Logikcull
From the list of cloud services, select Logikcull.
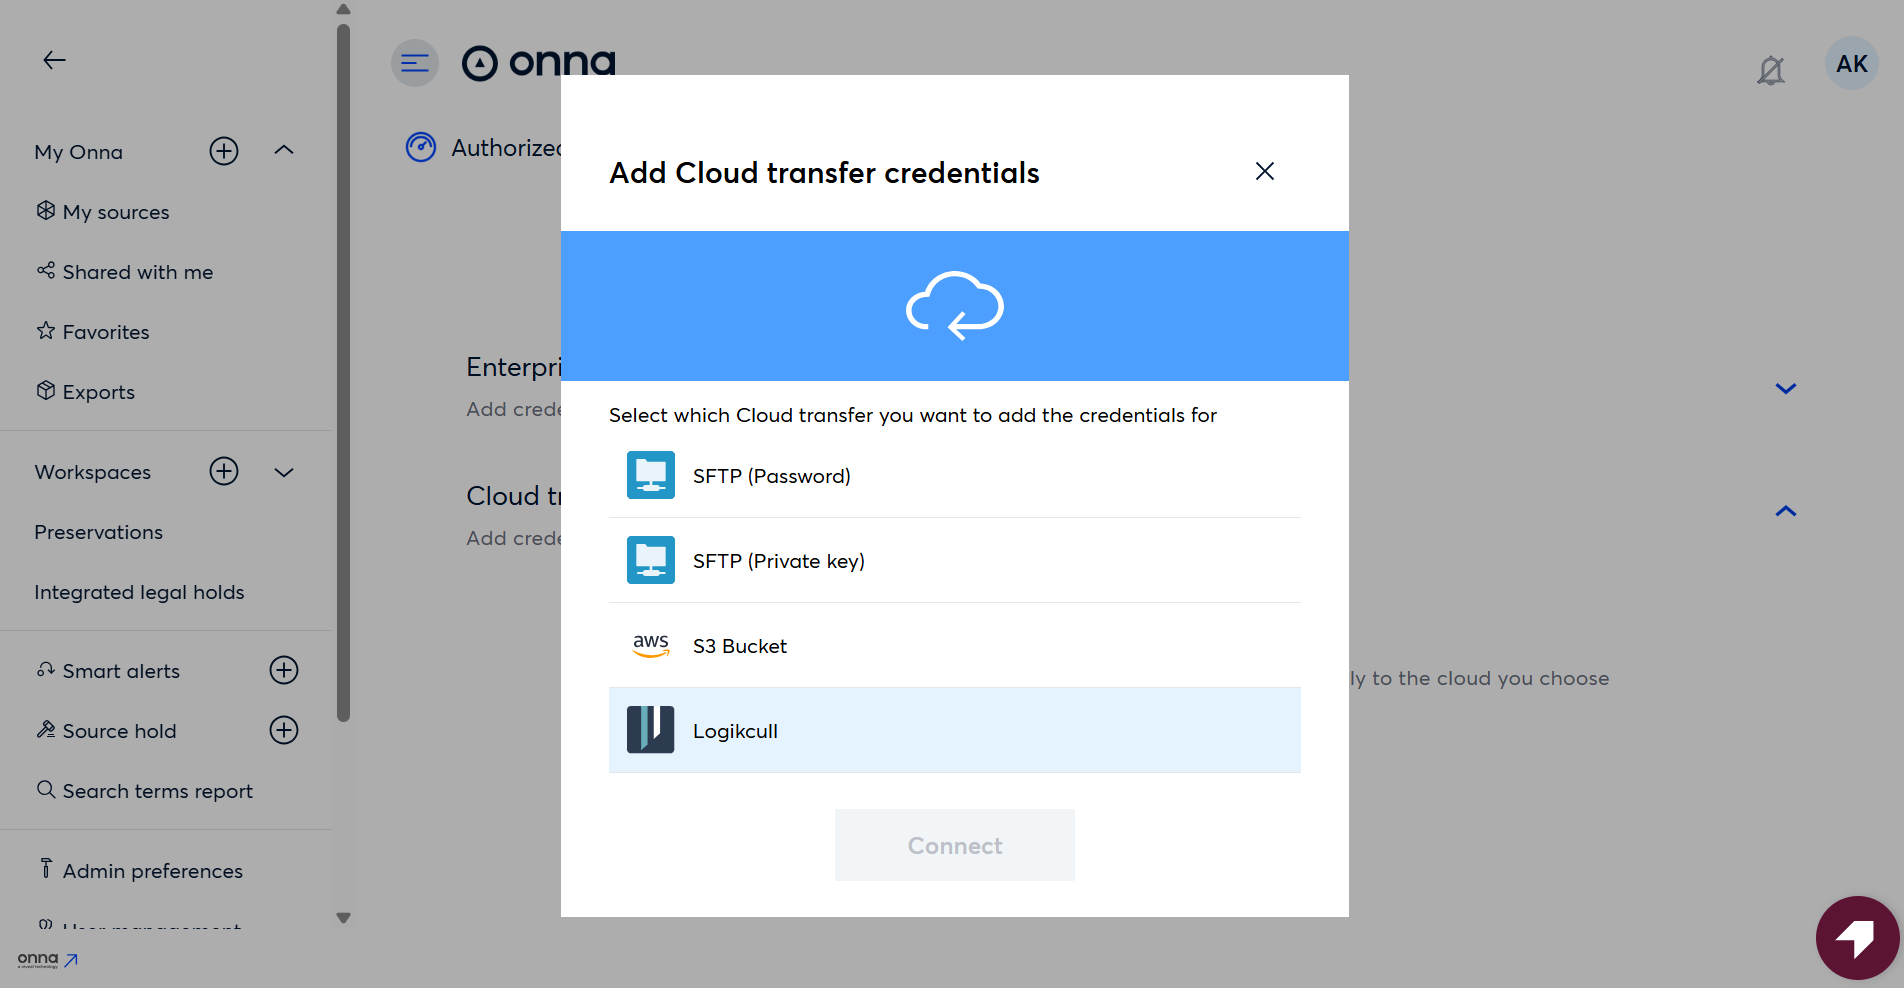
Click Connect.
Configure the Credential
Enter a Credential Name.

This name will appear during the export process when selecting the Cloud Transfer destination.Click Save.
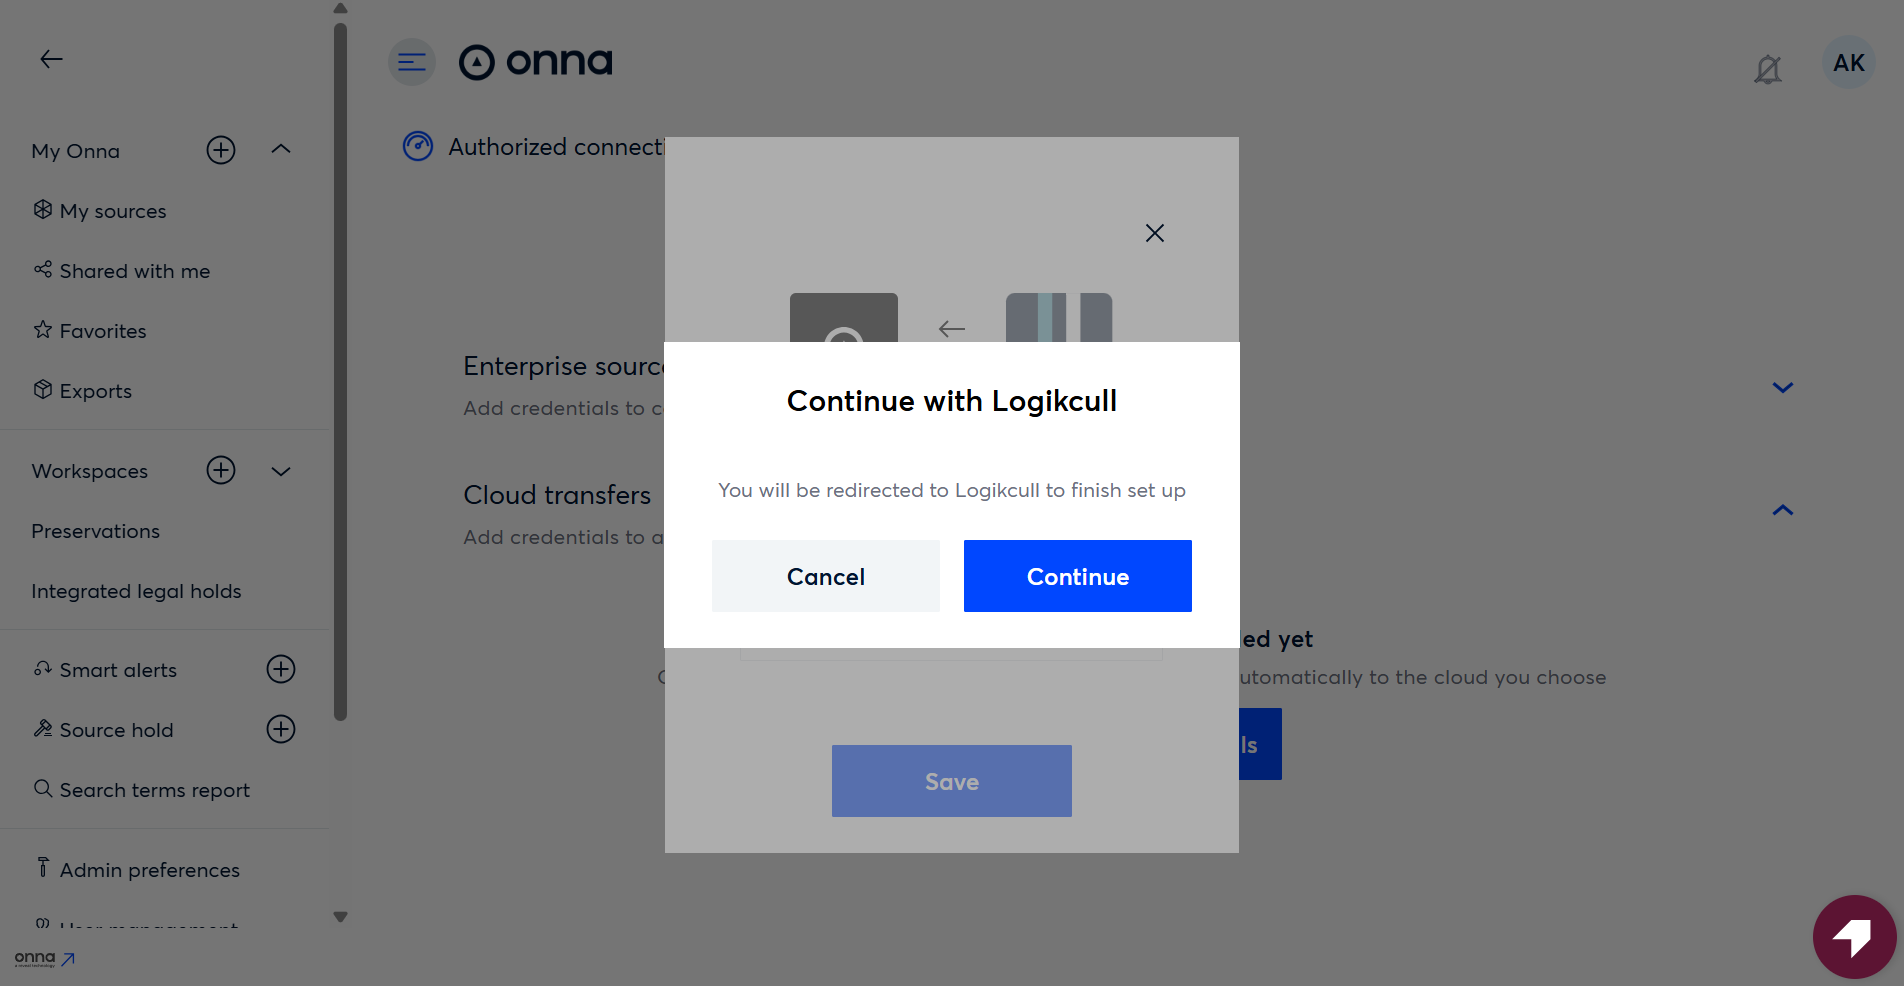
After saving, a “Continue with Logikcull” prompt will appear and redirect you to the Logikcull sign-in page.
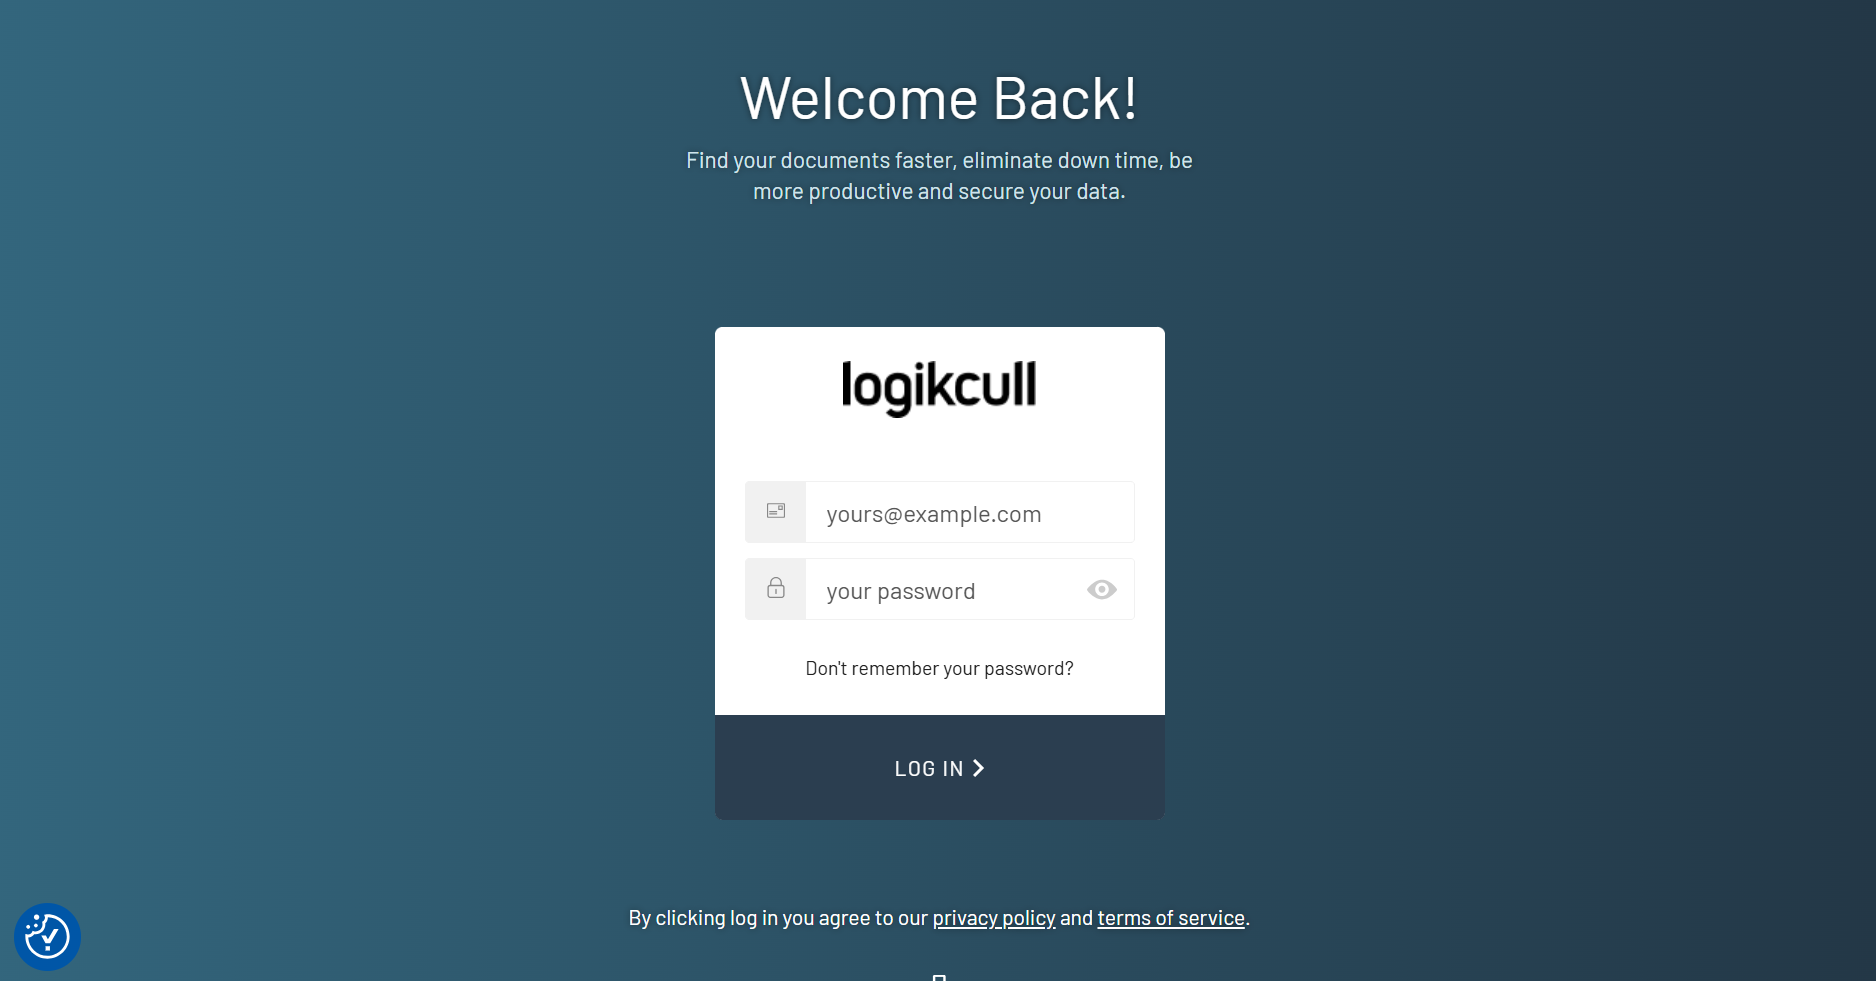
Authenticate with Logikcull
Sign in using your Logikcull credentials.
Once authentication is complete, the browser will redirect you back to Onna.
If the connection is successful, you will see a notification confirming that the admin credentials were successfully added, and the Cloud Transfer will appear in the list.
Note
You can configure multiple Logikcull Cloud Transfers in Onna, allowing different users to create and manage their own transfer credentials.
II. How to Create an Export Using the Logikcull Integration
Once the Cloud Transfer connection is configured, you can export data from Onna to Logikcull.
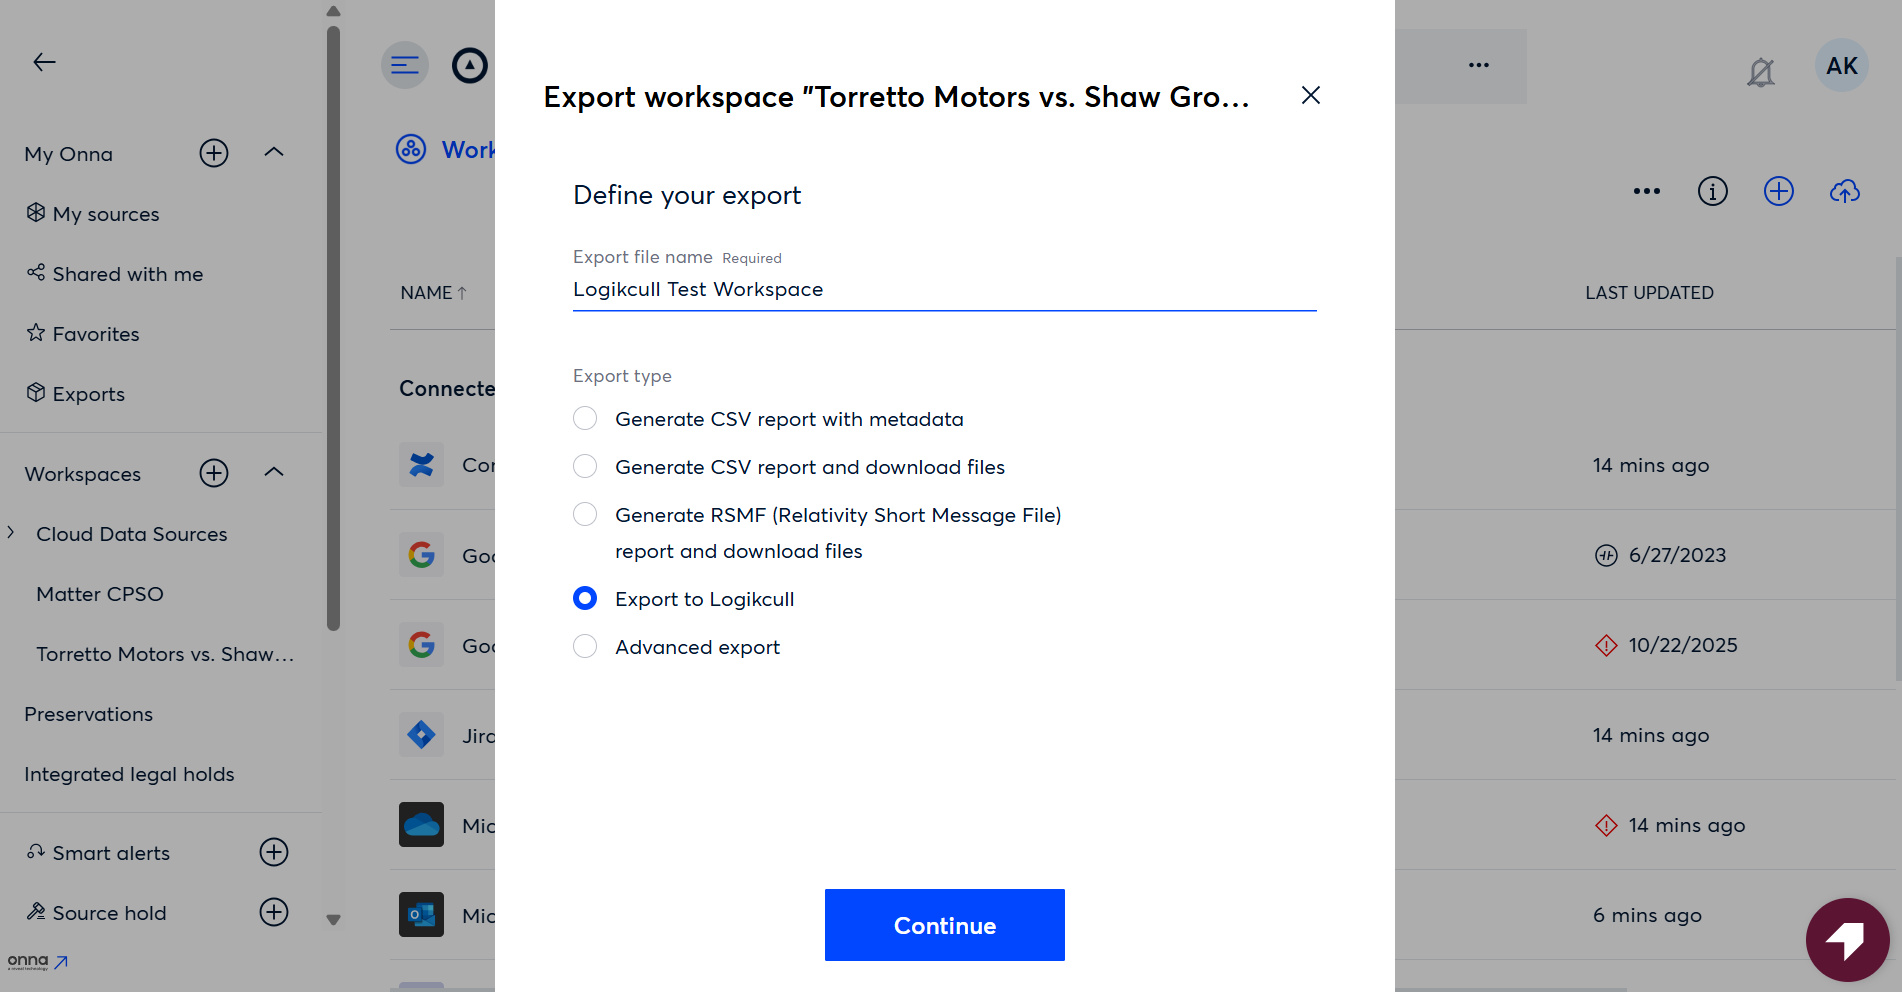
Start an Export in Onna
Select the data you want to export.
Start the Export workflow.
Choose Export to Logikcull as the export destination.
Select the Logikcull Project
On the next screen:
Onna will automatically detect the available Logikcull projects associated with the selected Cloud Transfer.
Select a project from the Logikcull destination project field.
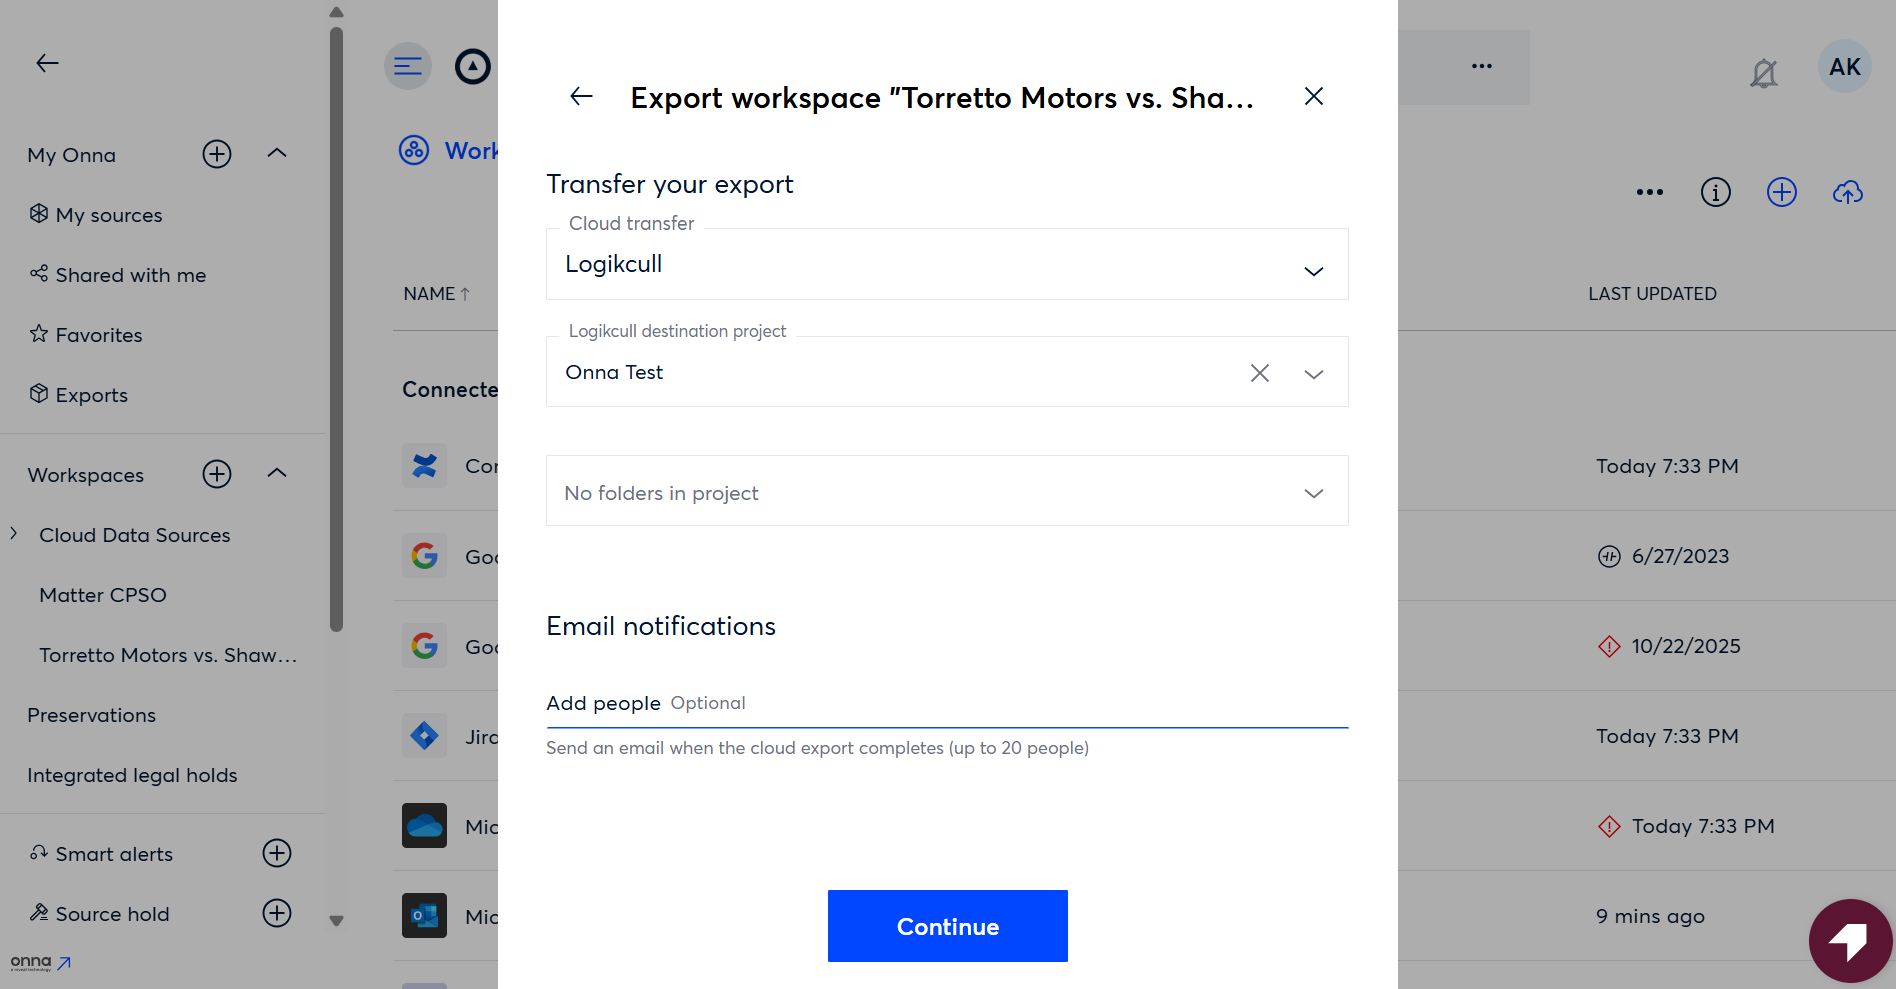
You can also:
Choose an existing project, or
Create a new project directly from Onna.
Select or Create a Folder
You can choose where the export will be stored within the Logikcull project:
Select an existing folder, or
Create a new folder for the export.
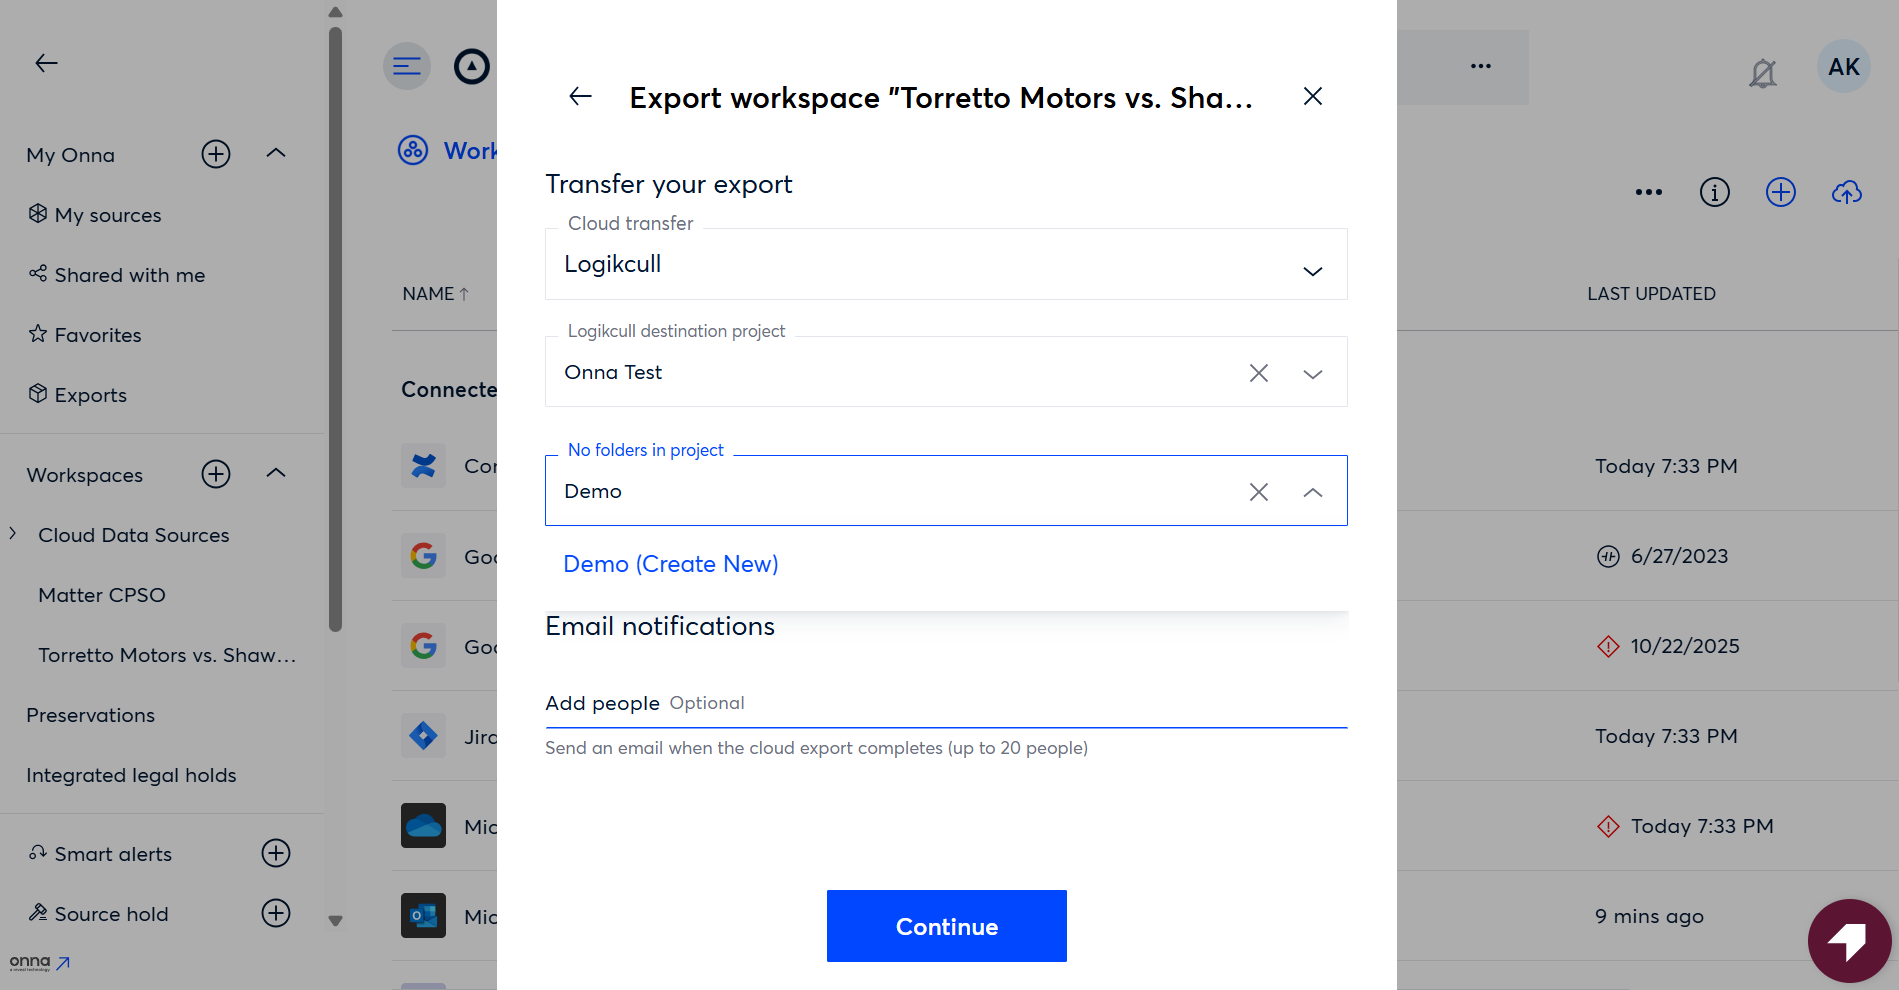
You can also add email addresses of users who should be notified when the export completes. The export creator will automatically receive a notification.
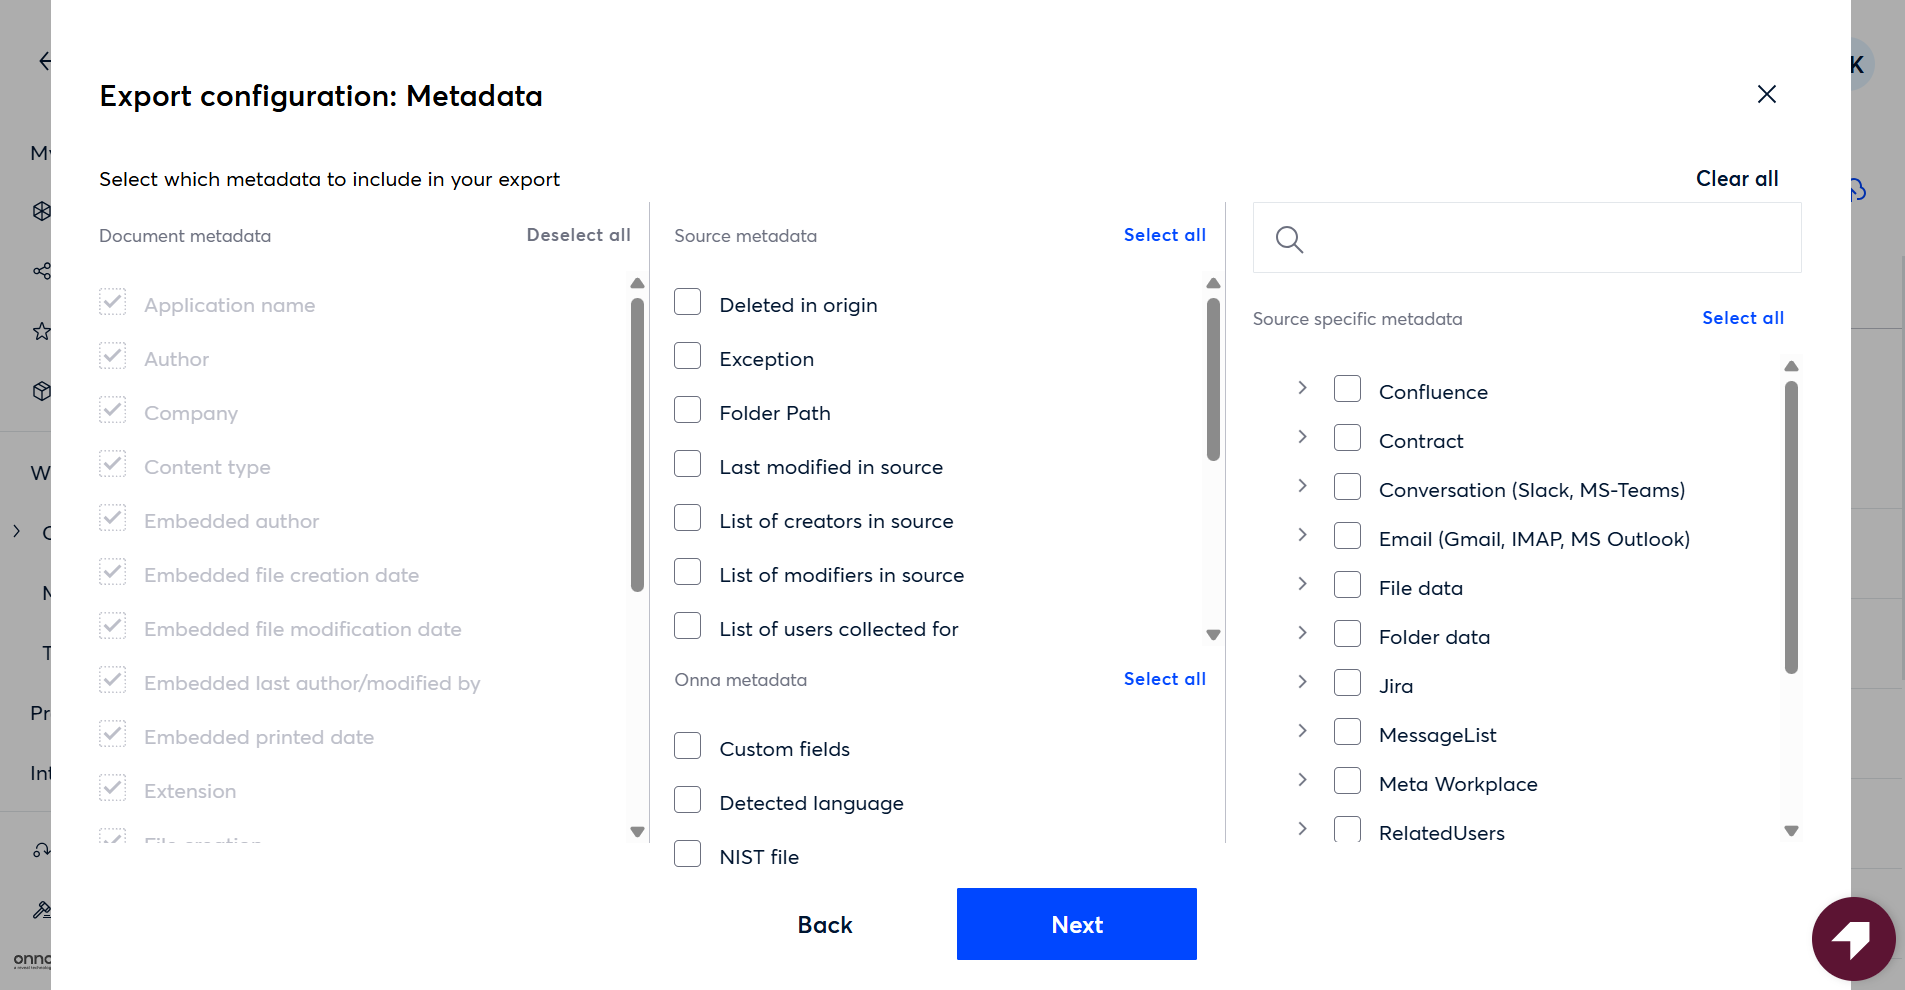
Configure Metadata
The next screen allows you to configure metadata for the export.
Document metadata is included by default.
Additional metadata fields will automatically map to fields in Logikcull or create custom fields if needed.
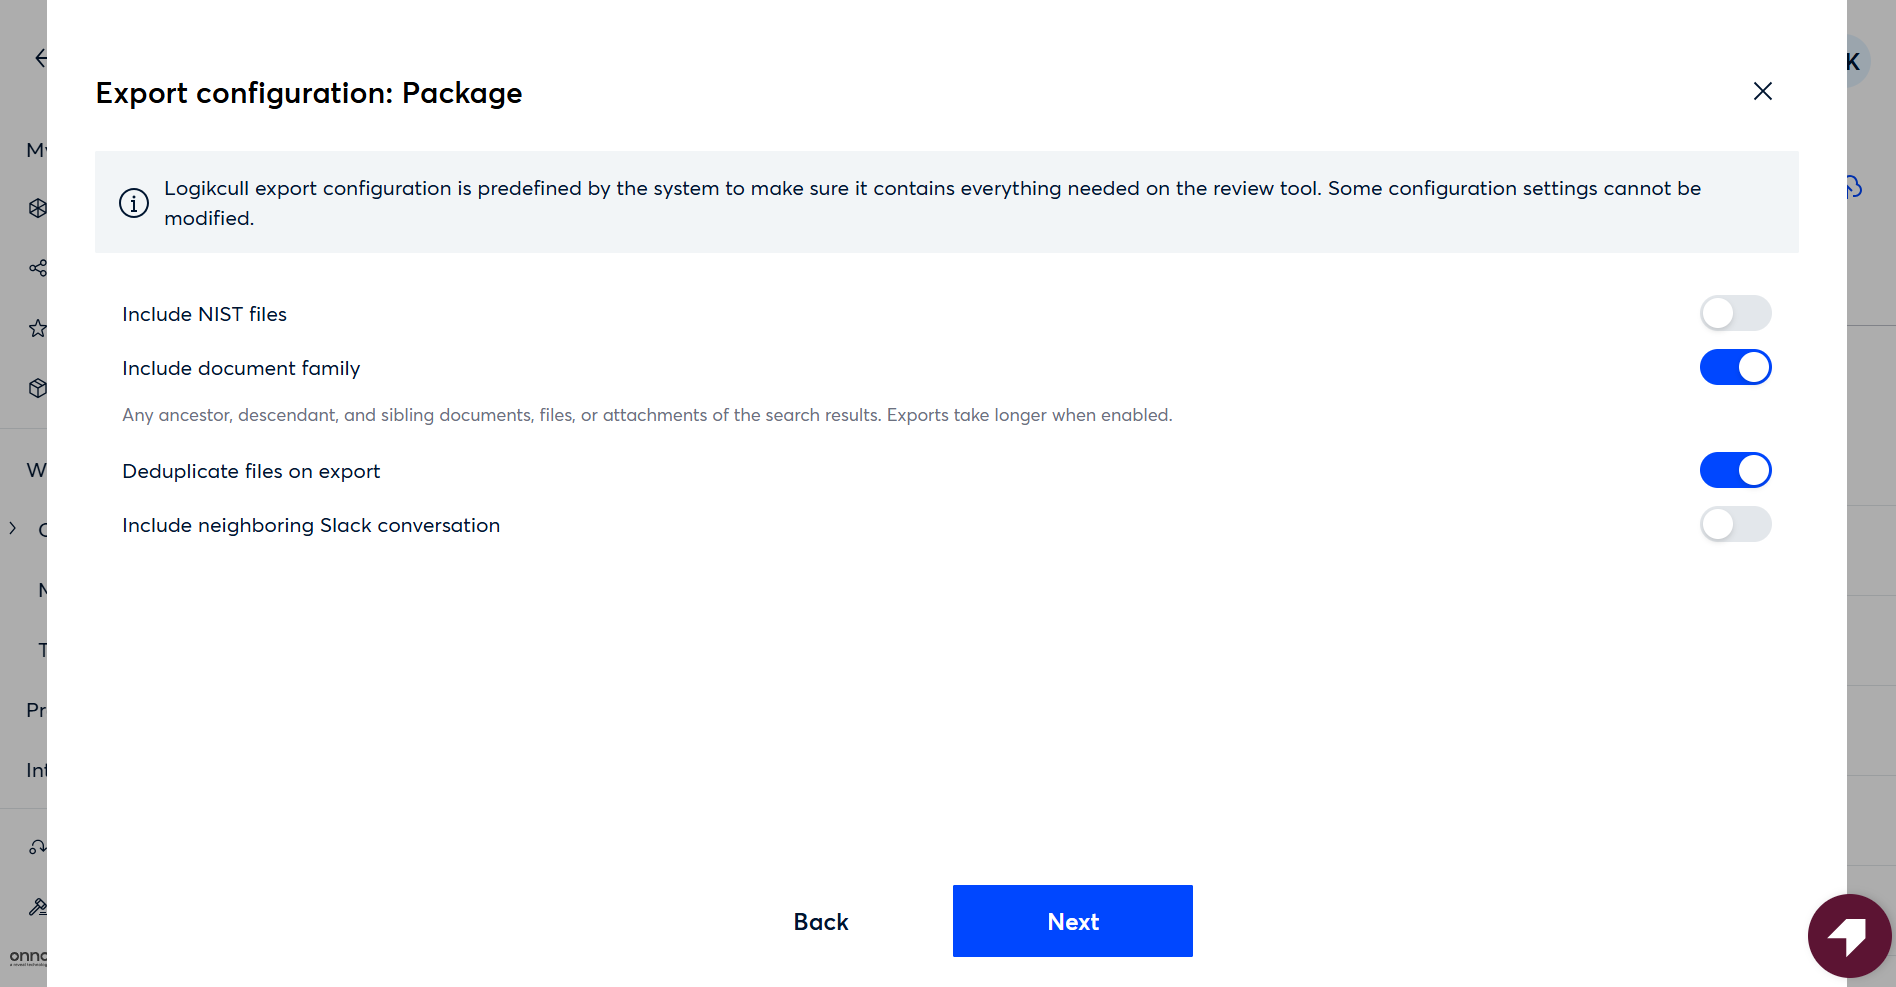
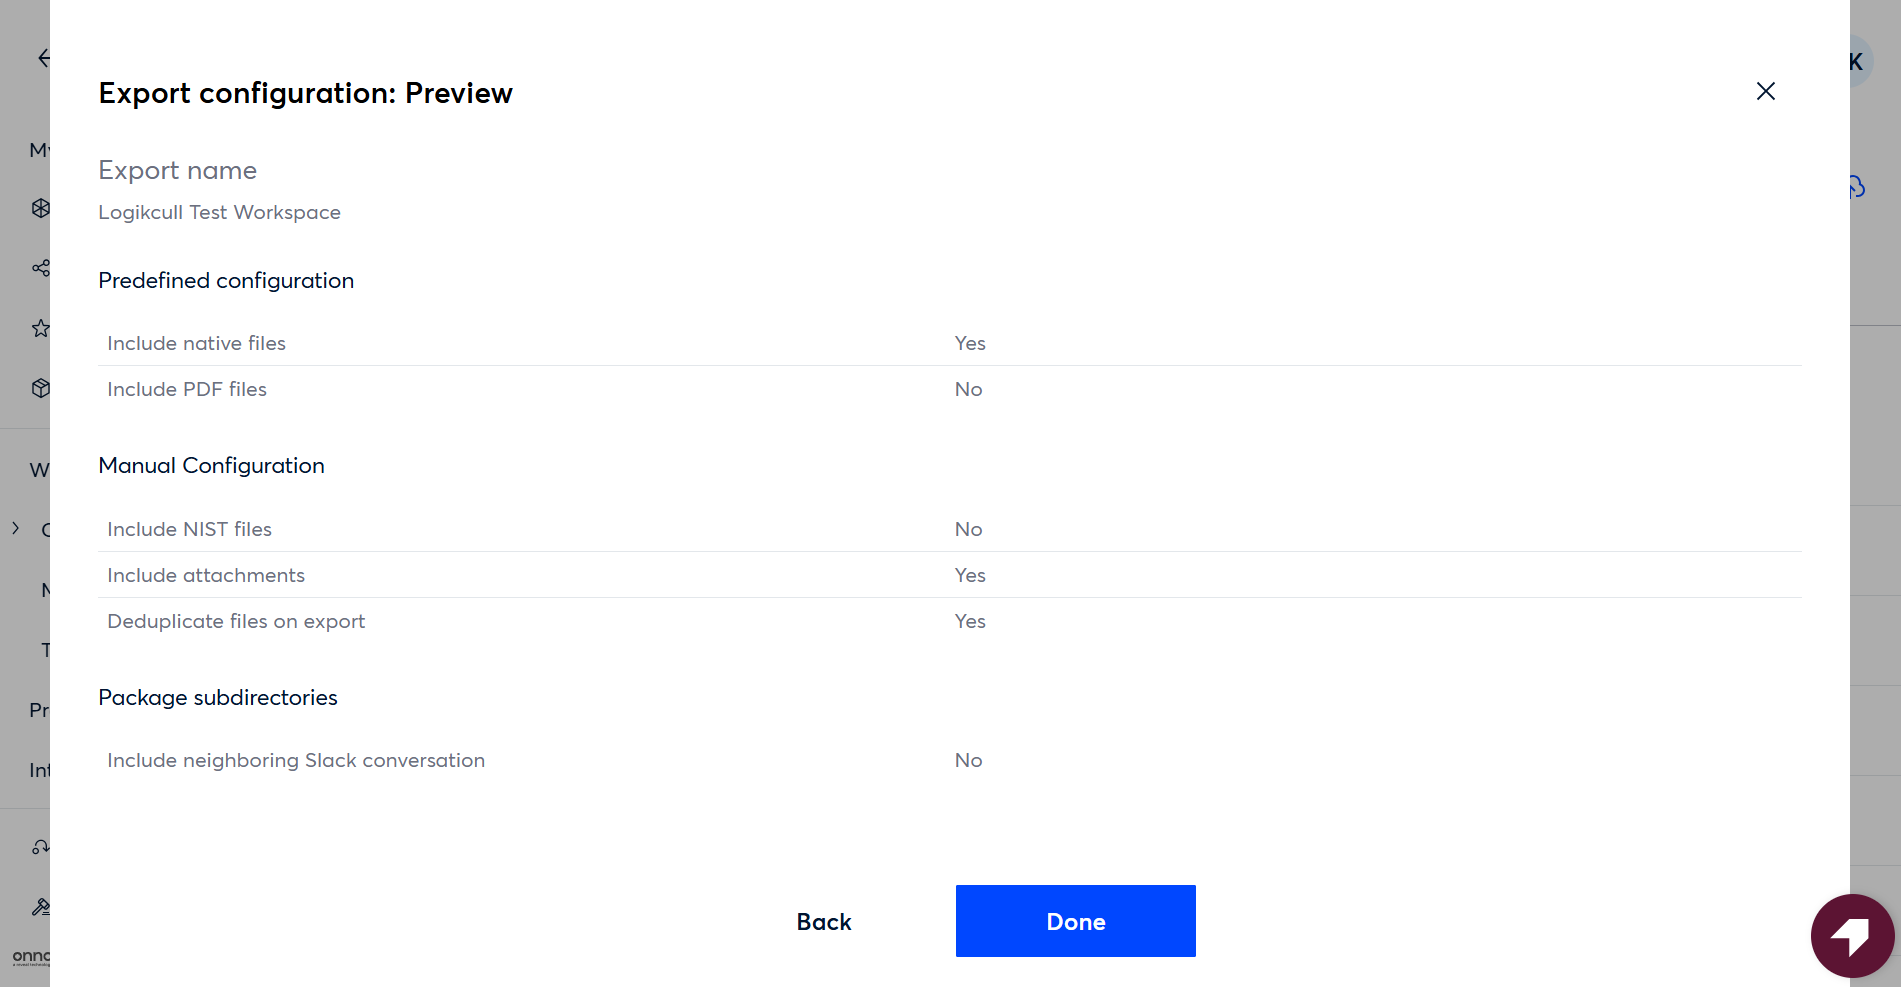
Review Export Settings
The final screen displays:
Export configuration options
A summary preview of the export settings
Click Done to initiate the export.
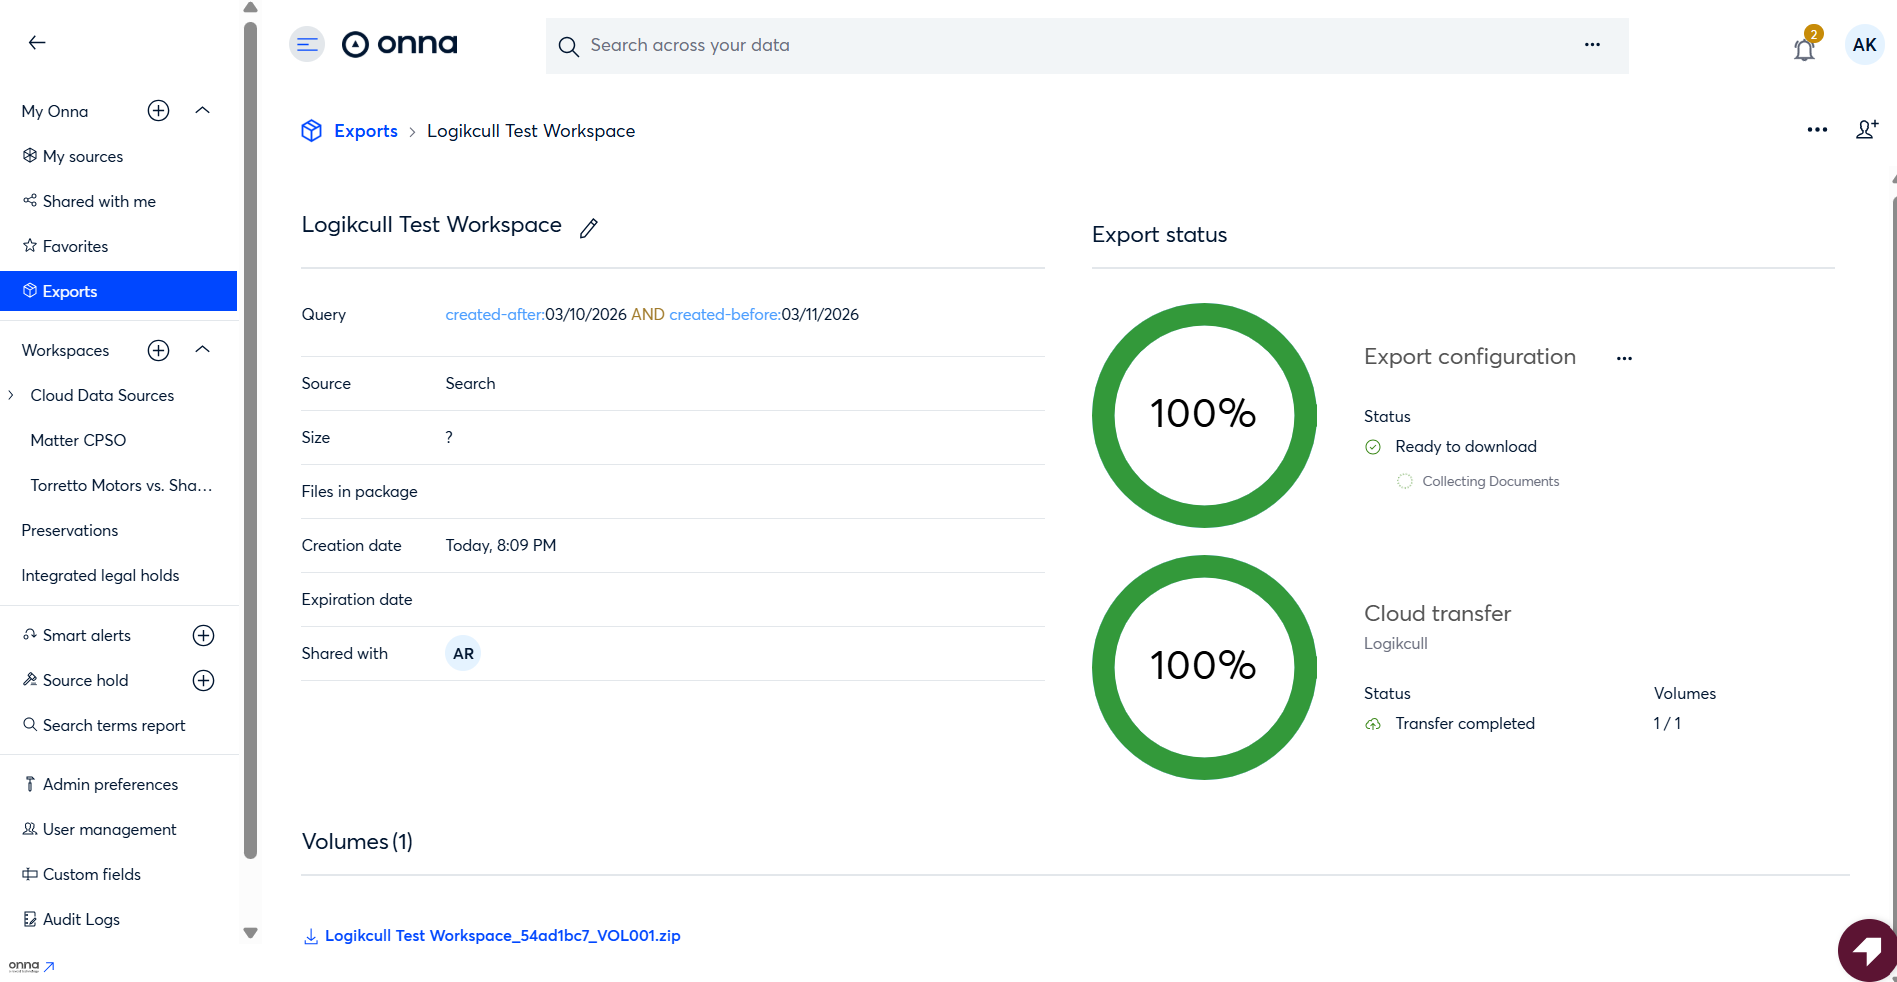
Monitor the Export
Once started:
The export will process in Onna and transfer the files to Logikcull.
Export duration depends on the size of the dataset.
You do not need to keep Onna open for the transfer to complete.
III. How to View the Export in Logikcull
After the transfer completes:
Log in to Logikcull.
Navigate to the project selected during export.
The exported data will appear and go through the standard Logikcull processing workflow.
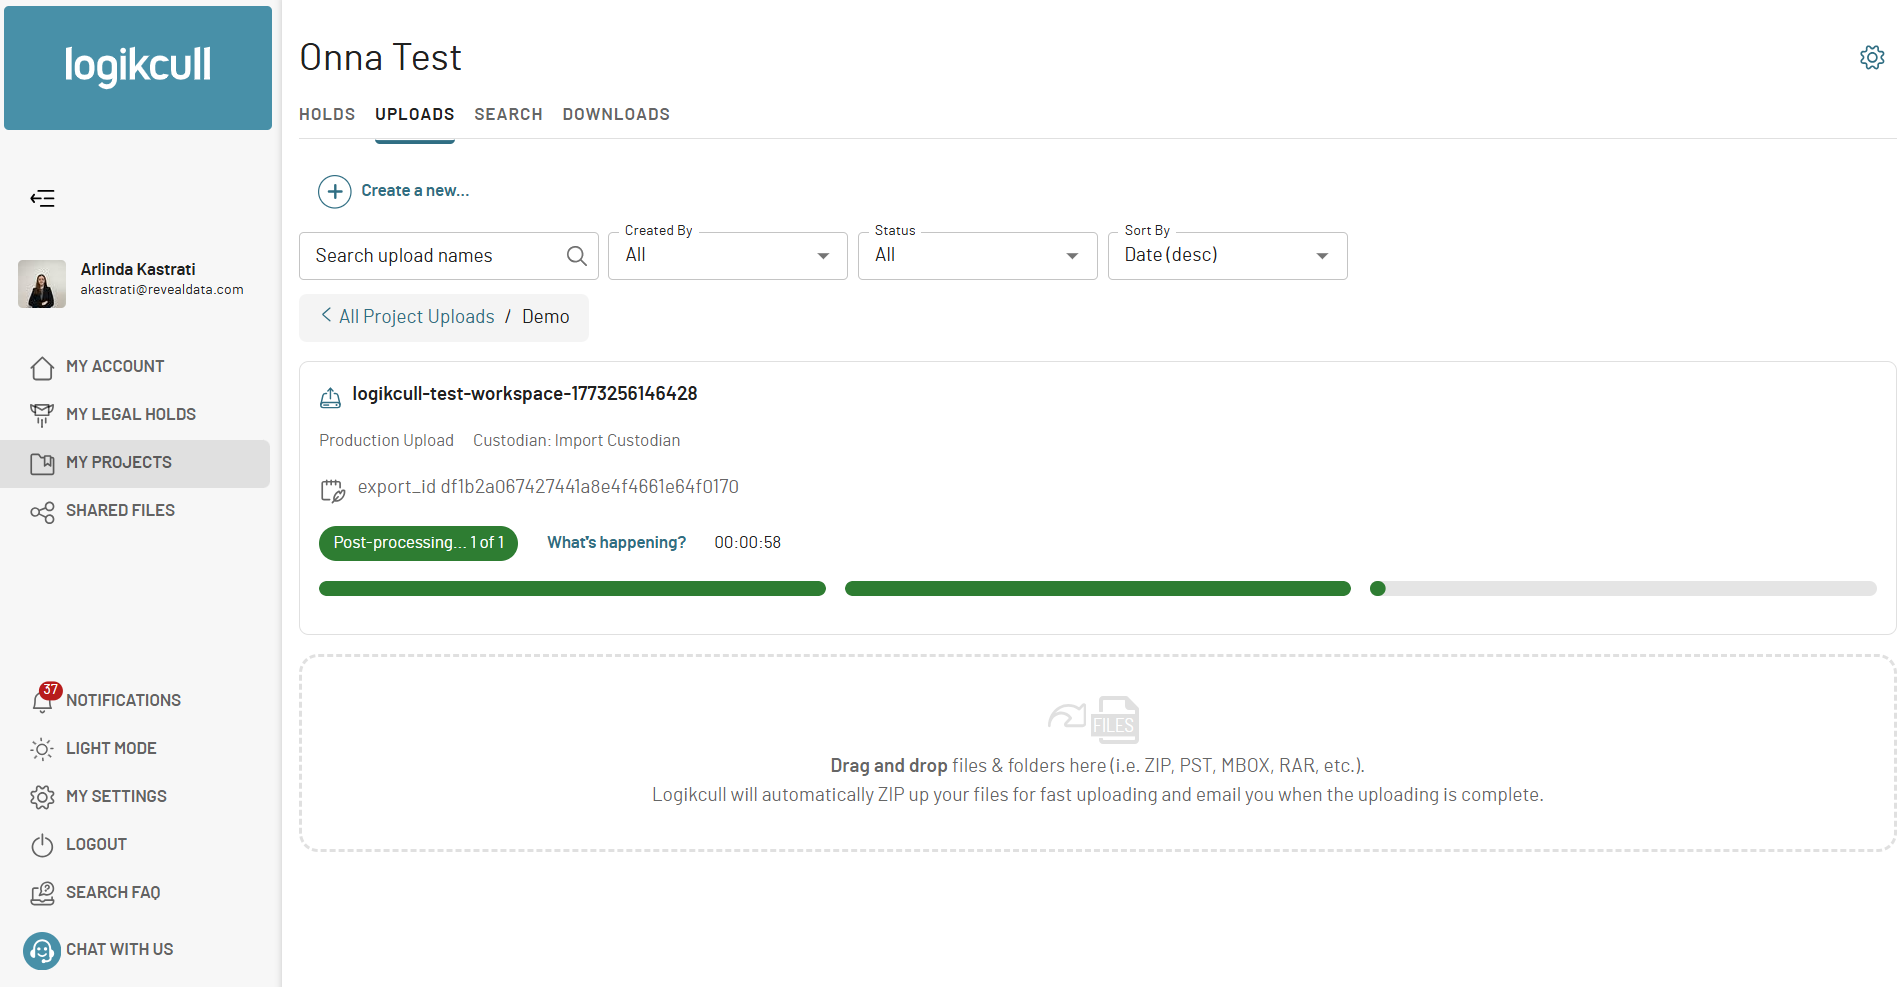
Once processing is finished, the documents will be available for review and analysis inside Logikcull.