SAML 2.0 Integration
Onna offers Single Sign On (SSO) integration through SAML 2.0 (Secure Assertion Markup Language) with a variety of compliant identity providers, allowing you to leverage your existing user base and authentication mechanism to use the platform. There are only a few steps required to configure your Identity Provider (IdP) using the Onna Admin dashboard.
This guide walks you through setting up Onna as a Service Provider (SP). You will fill-in information about your Identity Provider (IdP), the external 3rd party which your users will sign-in through, and will return credentials back to Onna in the form of a SAML assertion. On the other end, you will also need to configure your IdP to establish communication with the Onna SP. By default, provisioning is enabled for your account. The default role in Onna for users created by provisioning is ‘user’. In the event you wish to turn off provisioning for an account please contact the Onna Support Team.
Once provisioning has been turned off, if a user has not been provisioned in Onna and attempts to use SSO identity to sign in, they will have no permissions until an Onna admin configures an Onna user for this identity.
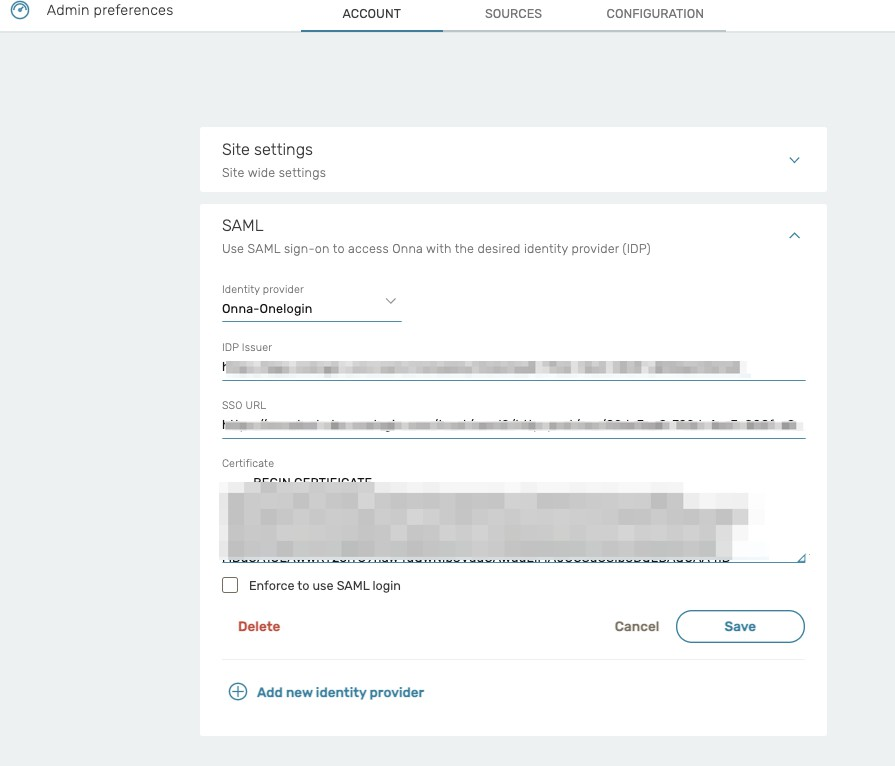
To get started, open the Admin Preferences → Account → SAML with the proper administrator user:
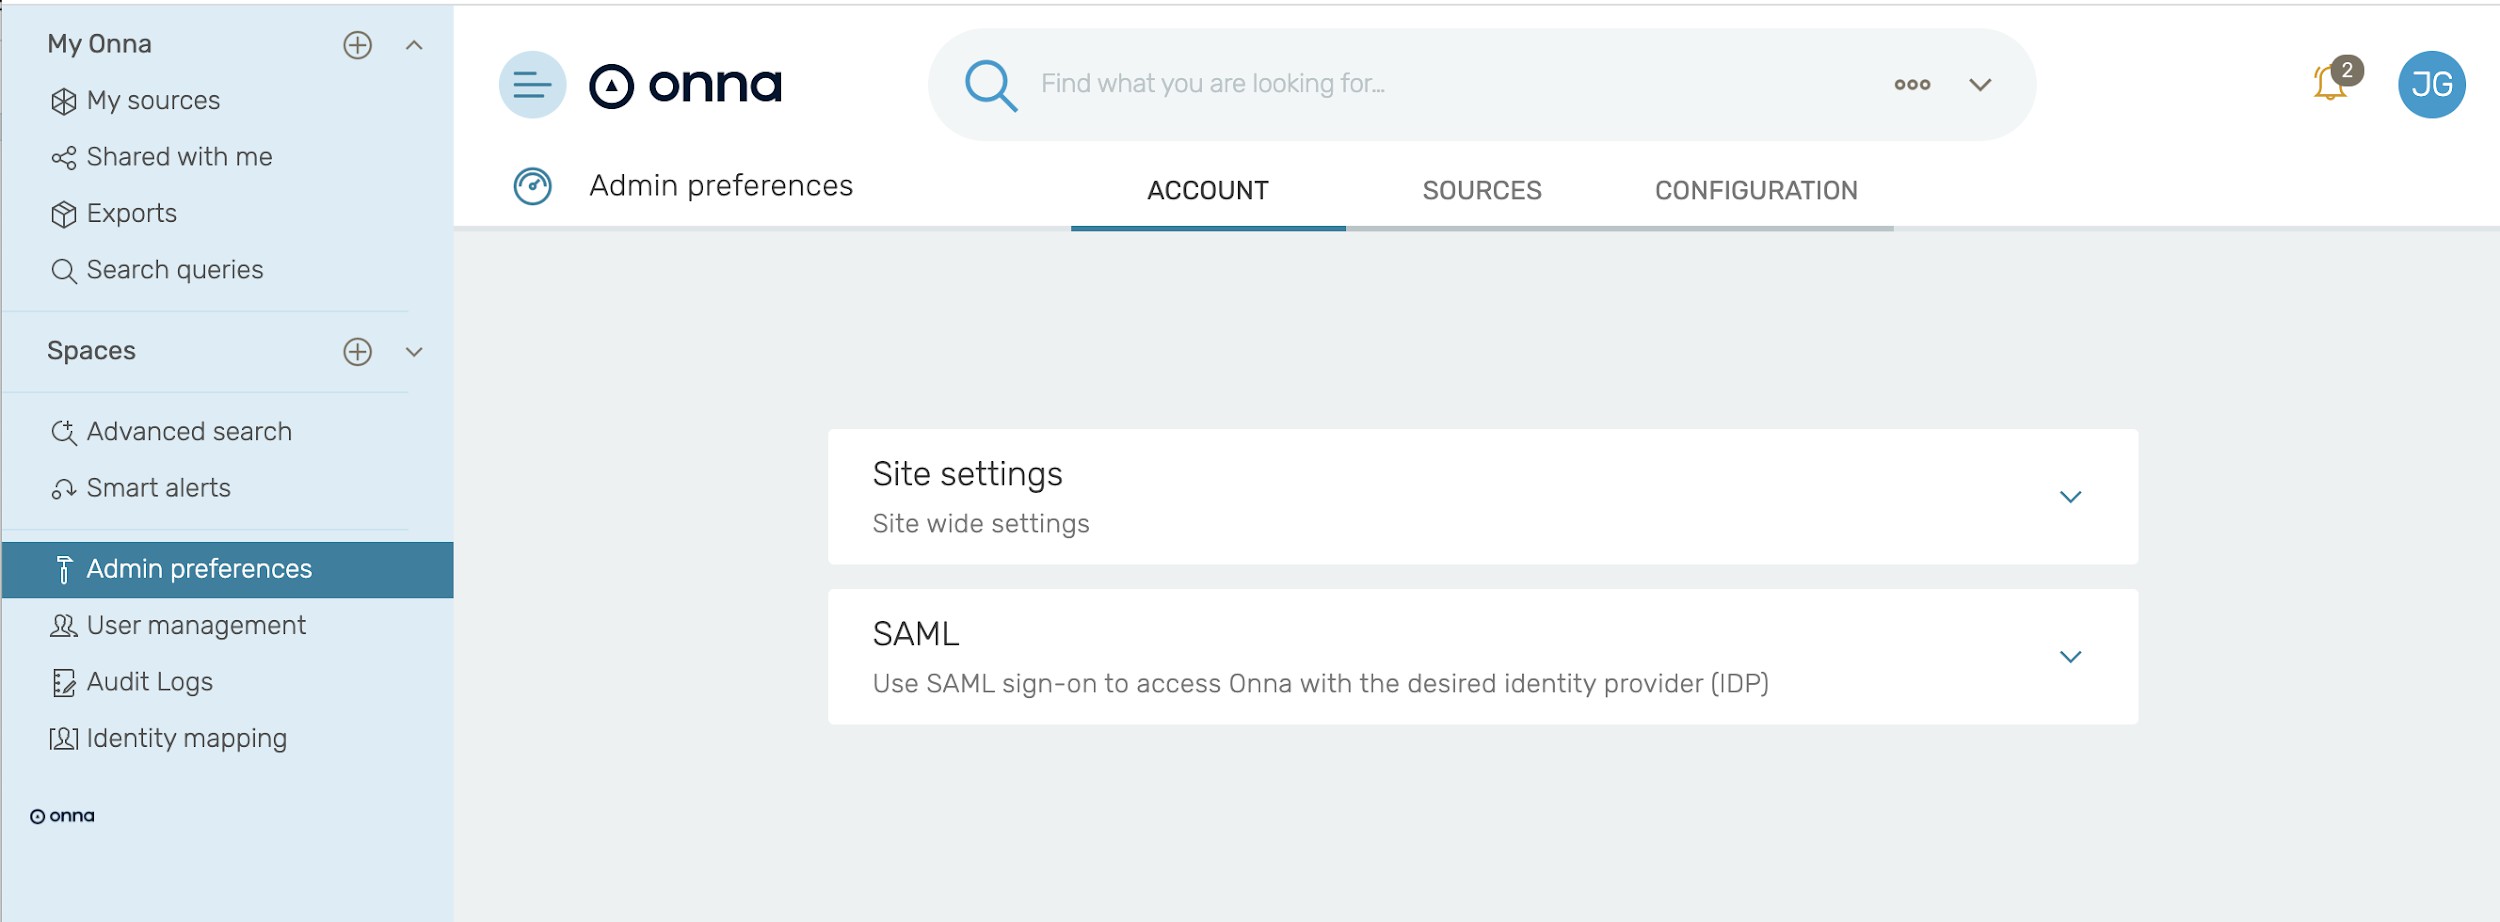
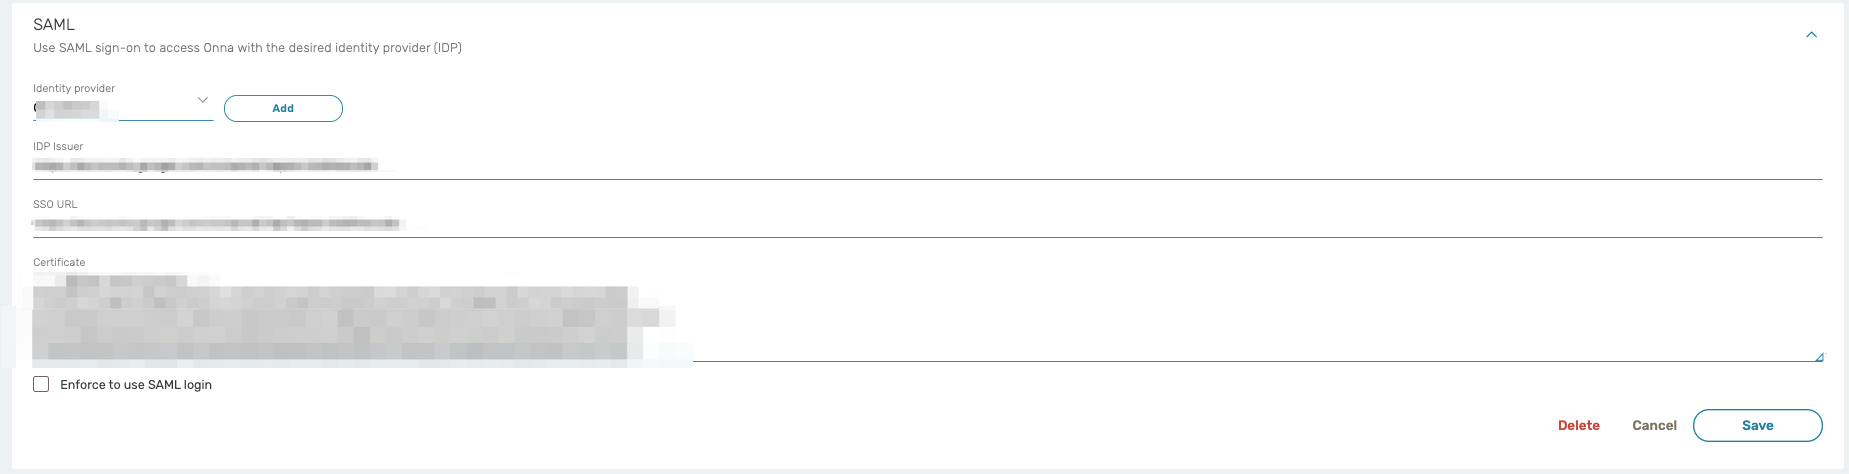
The following settings are configurable under the SAML section.
IdP ID / {IdPName}: Choose any name that you prefer to identify this Identity Provider (IdP). We’ll refer to this value as {IdPName} in the rest of the document.
This name will be displayed to the users in a selection box should you have more than one IdP. We suggest providing the ID in the following format:
youraccountname-identifyprovider
Example of how the IdP ID / IdPName should look: companyname-okta
IdP Issuer: The identity provider’s URL
SSO URL: The single sign-on URL of the SAML Identity Provider Login page that your users will be redirected to for logging in.
Certificate: The public x509 certificate of the SAML Identity Provider.
The next step is to configure your IdP so that it can establish communication with the Onna service provider. Below are the items that need to be configured. There are only a few items you need to fill in with the main ones shown below:
Onna Audience Restriction URL:
https://enterprise.onna.com/auth/oauth/saml/metadata?idpId={IdPNam e}
{IdPName} needs to be replaced with the name you chose to identify your IdP.
Onna SAML Assertion Consumer Service:
https://enterprise.onna.com/auth/oauth/saml/?acs
Name id format:
The required nameid format is "urn:oasis:names:tc:SAML:1.1:nameid-format:emailAddress", so an email address is needed to identify the user in the system.
The email address must match exactly to the case for the user’s authentication to work. If the user was created in Onna with an all lowercase email, the id sent from your identity manager must also be lowercase. In Okta, you can use this expression, such as String.toLowerCase(user.email).
All attributes listed below are required to complete the SAML configuration with Onna.
user_id : email address
sn: last name
cn: first Name
email: email address
Enabling Sign in through IdP
In order to use an Okta ‘chiclet’ or similar solution, you must provide a value for the Default Relay State.
Default Relay State:
https://enterprise.onna.com/youraccount/signin?scopes=youraccount&idpId=IdPName
{youraccount} needs to be replaced by the account name in your Onna URL.
{IdPName} needs to be replaced with the name you chose to identify your IdP.
Setting up OneLogin:
Here is a sample workflow using OneLogin as an Identity Management tool.
To get started, log in to OneLogin and navigate to Apps. Click on Add Apps and search for SAML.
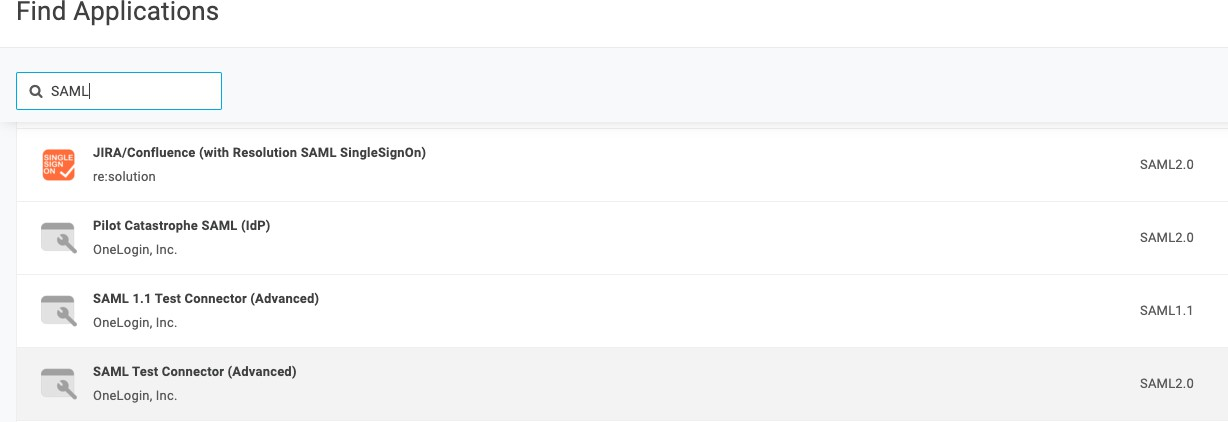
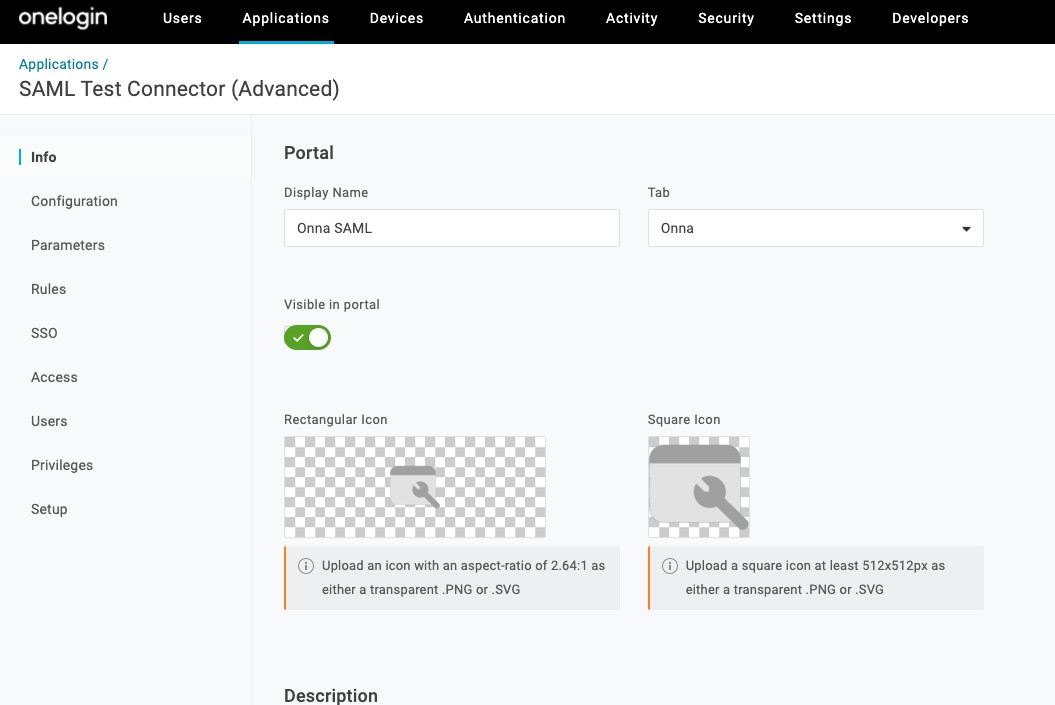
Select SAML Test Connector (Advanced). Here you can give your app a name and add the Onna icon that was provided.

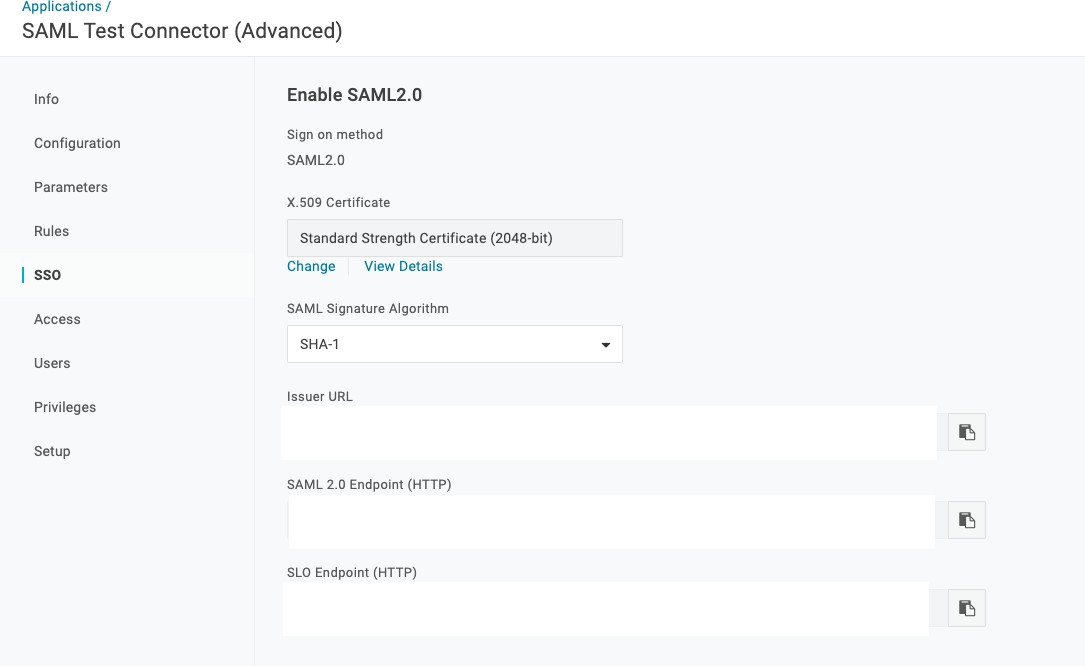
Once you have saved the changes to the new app click on SSO found on the left-hand side.
Use the values to complete the SSO setup in your Onna configuration.
In Onna, the completed configuration:
Note:
Do not enable Allow to login only with SSO until you verify you are able to login via SSO.
Within the recently created SAML app in OneLogin, click on Configuration. There are only a few items you need to fill in with the main ones shown below.
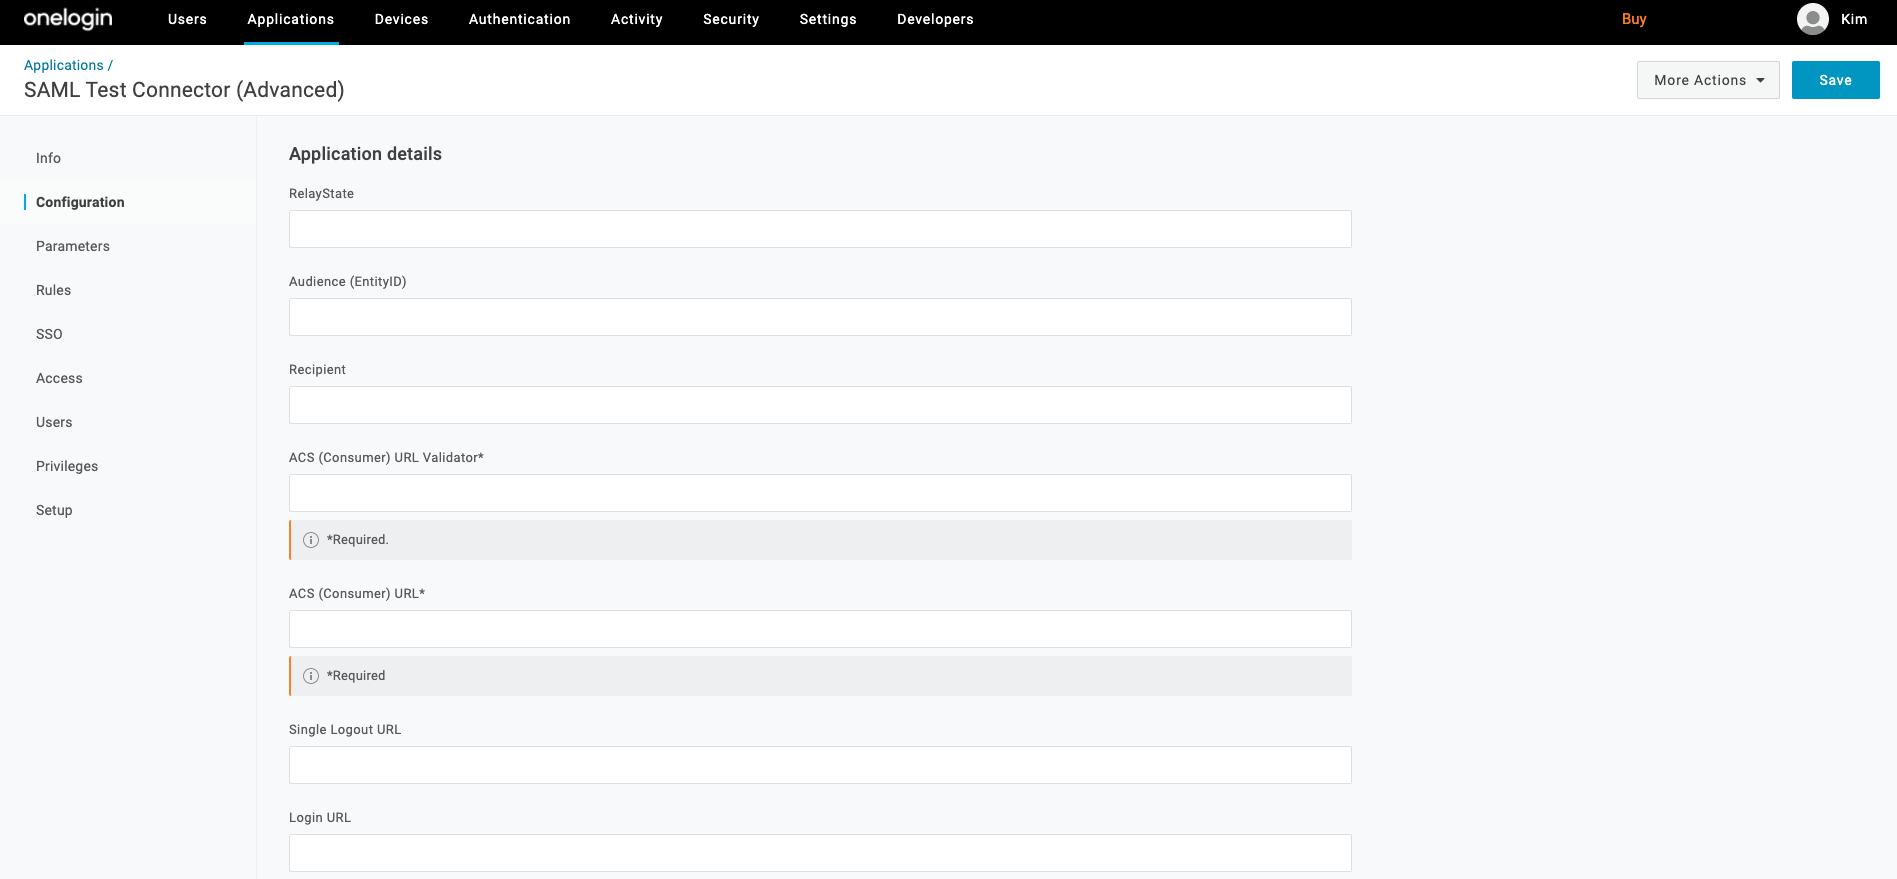
Relay State: https://enterprise.onna.com/youraccount/signin?scopes=youraccount&idpId=IdPName
{youraccount} needs to be replaced by the account name in your Onna URL.
{IdPName} needs to be replaced with the name you chose to identify your IdP
Audience: https://enterprise.onna.com/auth/oauth/saml/metadata?idpId={IdPName}
{IdPName} needs to be replaced with the name you chose to identify your IdP
ACS(Consumer) URL Validator:https://enterprise.onna.com/auth/oauth/saml/?acs
ACS (Consumer) URL: https://enterprise.onna.com/auth/oauth/saml/?acs
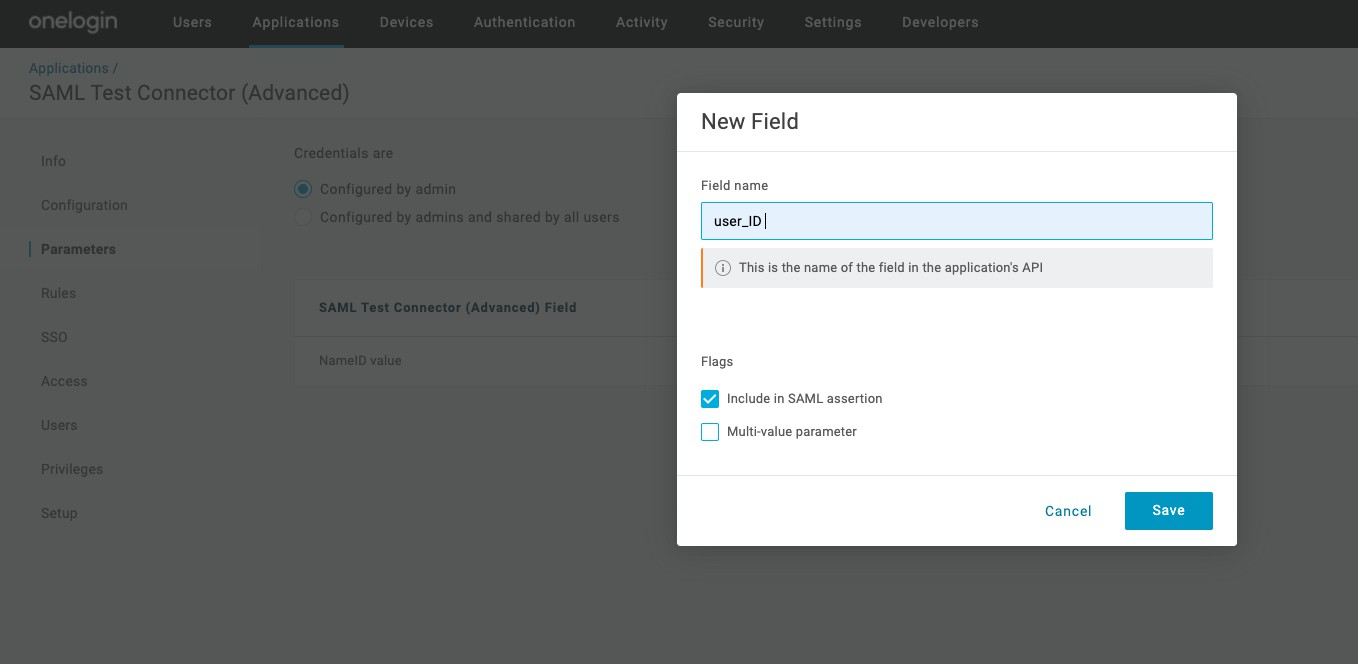
Once you have completed the above save the changes and click on Parameters.

You can select if Credentials are: Configured by admin or Configured by admins and shared by all users.
Only the attributes listed below are required to complete the SAML configuration with Onna.
user_id : email address
sn: last name
cn: first Name
email: email address
When creating each attribute in OneLogin, check the flag Include in SAML assertion.
Note:
The email address must match exactly to the case for the user’s authentication to work. If the user was created in Onna with an all lower case email, the id sent from your identity manager must also be lower case.
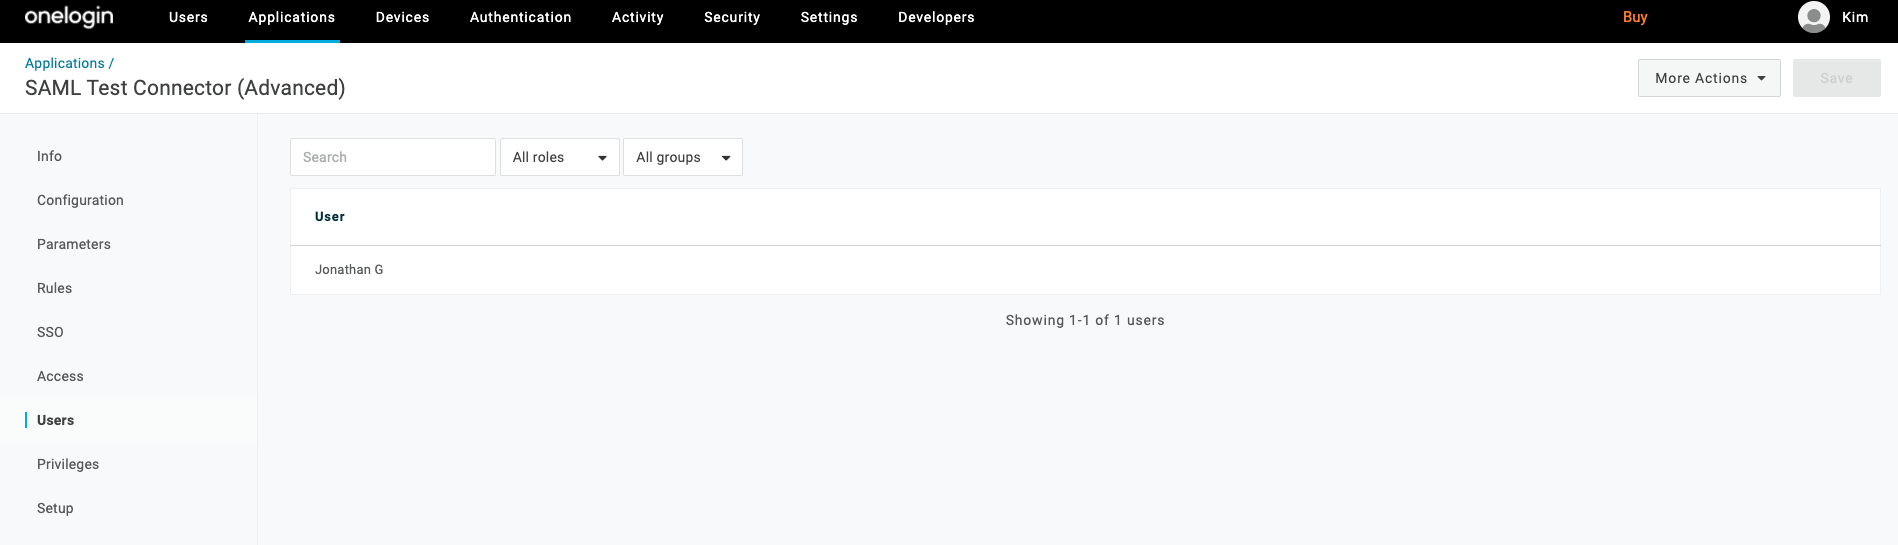
Finally, you will need to ensure the appropriate role or users have been granted access to Onna. You can view which users have been granted access so far by clicking on Users on the left-hand side.
Delete SAML and SSO:
You can delete your own SAML and SSO configuration in Onna from the Admin preferences.
To get started, open the Admin Preferences → Account → SAML with the proper administrator user.
Click on Identity Provider and from the dropdown select the configuration you would like to remove.
At the bottom of the screen, click Delete to permanently remove the SAML configuration in Onna.