Users in Reveal are accounts accorded permissions to manage or access defined aspects of the review workflow, including access to selected projects. Once a new Reveal project is created within a Company, Users' accounts within that company may then be assigned to the projects and given appropriate role permissions. This guide will set out how to create a user. For instructions on how to manage the account and its access to projects and role permissions, see the article Manage Users.
Important
If you are a SaaS Customer, it is recommended that you follow the Web-Based instructions below to create and manage Users within your Reveal instance. If you are an On-Prem customer, you may only have the option to create and manage Users using the Non-Web Based option. If the Web-Based option is not available within your instance, please follow the Non-Web Based instructions instead.
Web-Based Instructions
Instructions for creating a user from the Users page.
Create a User (Users)
The creation and management of Users is done by project managers and administrators either in the Users screen within Reveal web interface. This Users screen can be navigated to in a few different ways. Creating a user accomplishes the same result no matter how the Users screen is navigated to. The only difference is the context of how the user is being created, which in turn, presents a few minor differences in various areas of the user creation interface.
For example, if a company was selected (navigating from the Companies page) there is a toggle button to create a user for only the currently selected company, or to create a user for all companies. If no company was selected (navigating directly from the landing page) this toggle is not shown during user creation. Details about these differences are noted through this guide.
Getting Started
Below shows the landing page as an Instance Administrator. The buttons shown under the Discovery and Admin sections will differ depending on the users level of access for a Company or Project.
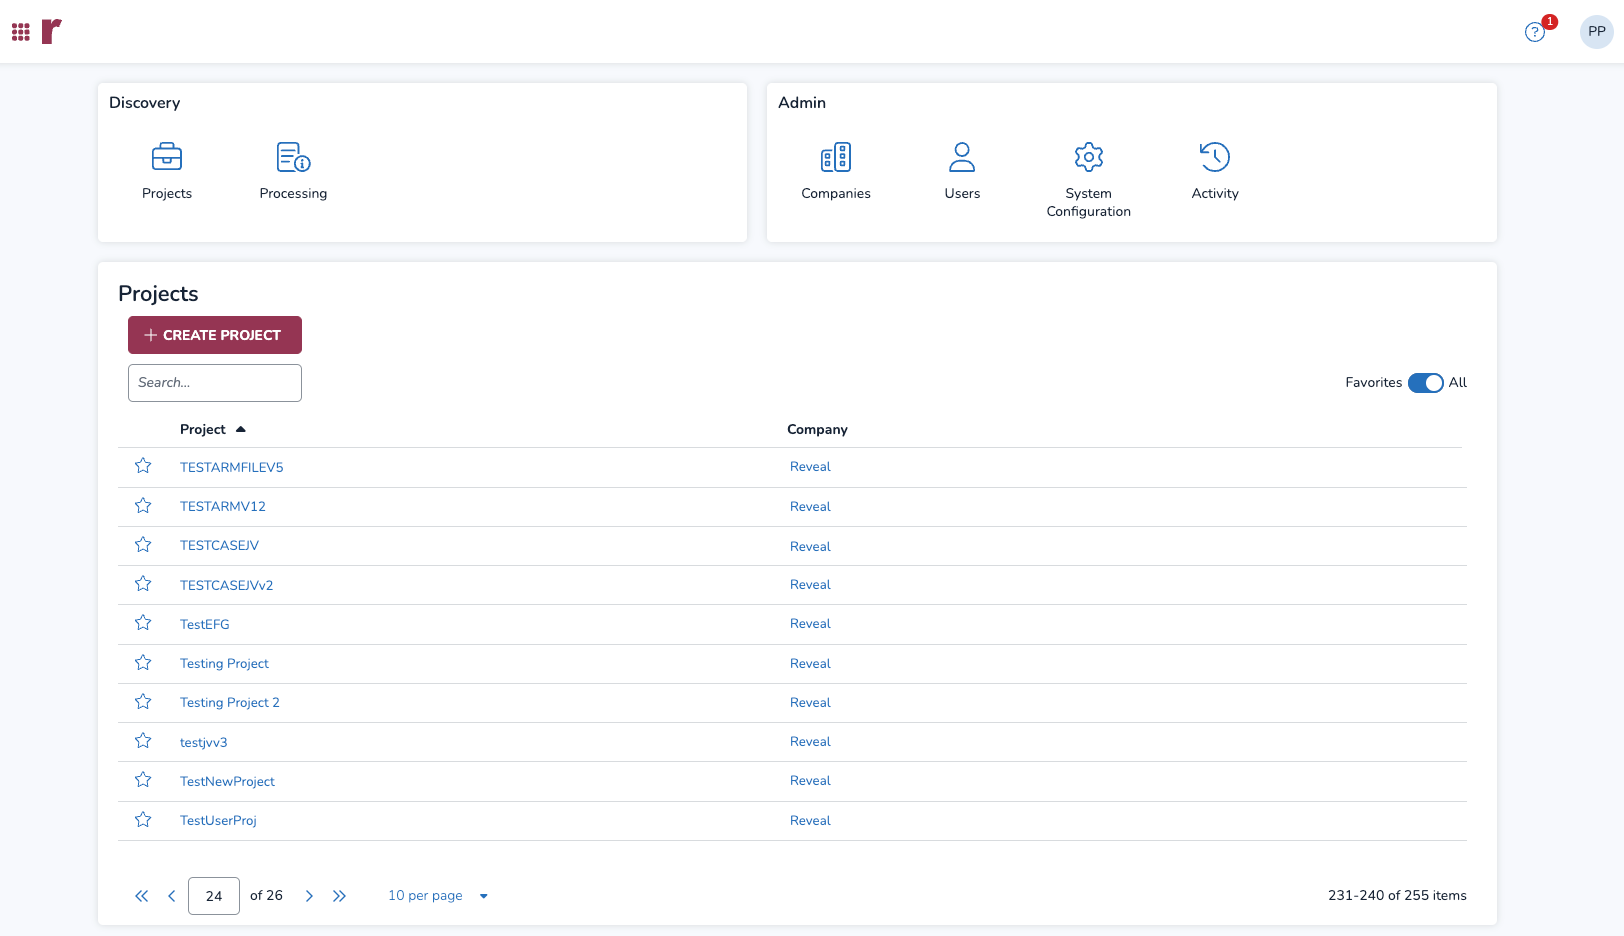
Accessing Legacy Company Admin
Previously projects were created and managed under the Company Admin. Users can access that interface from the landing page, then clicking on Companies. To the top right there is a Legacy Company Admin button to launch the previous style interface. Instructions on creating projects in this manner are described in further detail in the Non-Web Based Instructions section below.

Setting Up Users
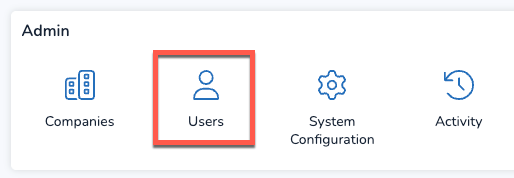
Open Users under the Admin area of the landing page.
Note
If the Users button is not available under Admin (due to permissions) , click on Companies instead. From the Companies screen, click Users to the right of the company to create users for all companies, or click on the company name to add and create users for that company.

The Users screen will display, listing all available users. The screenshot below is how the screen appears after selecting a company, then clicking Users from the sidebar navigation (in this example, the company named “Reveal” was selected. User information and controls on this page are described in further detail below.
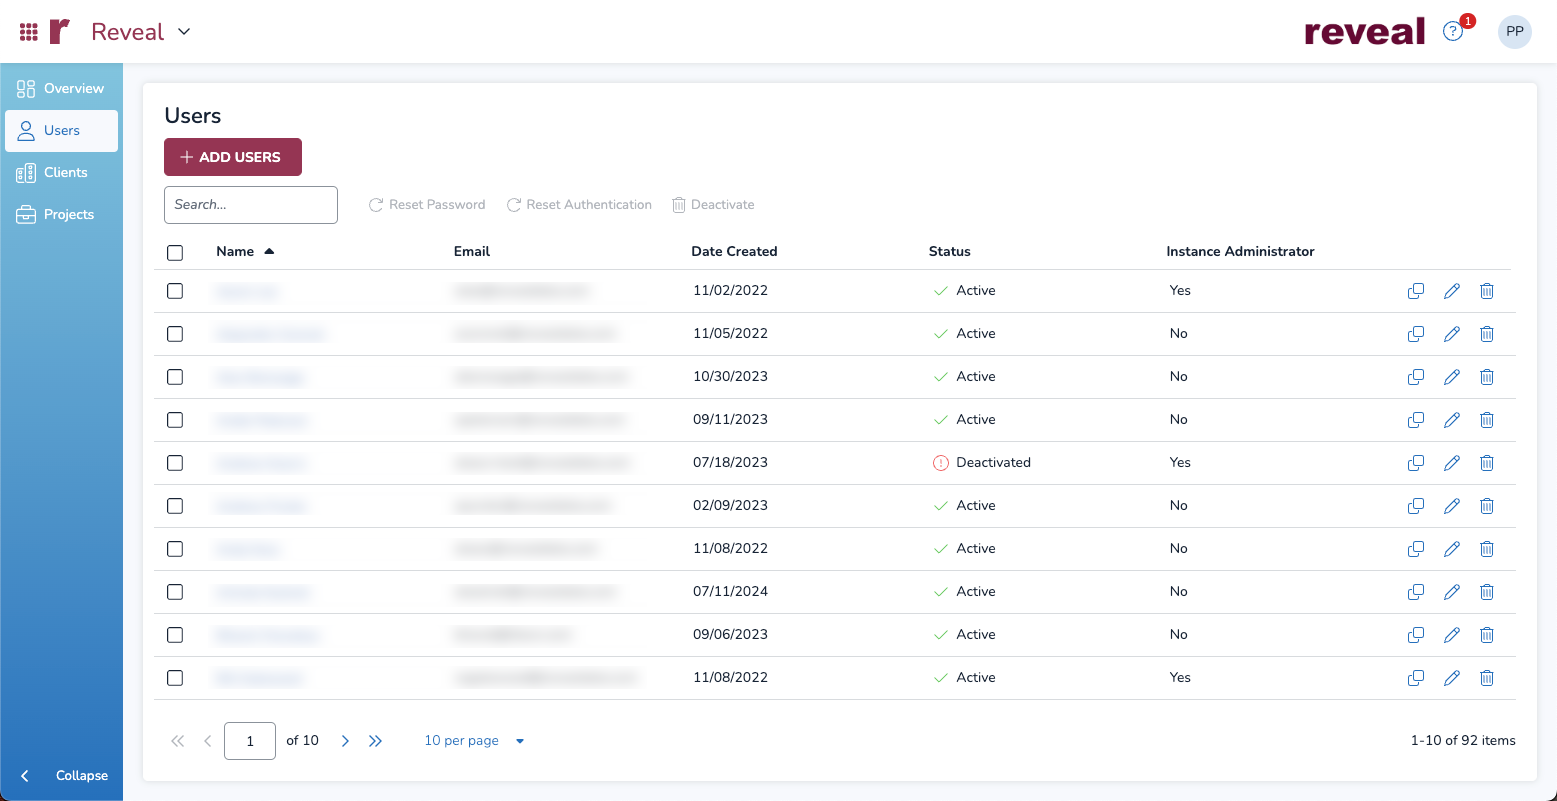
User Information Fields
Name
Email
Date Created
Status (Active or Inactive)
Instance Administrator (Yes or No)
User Search and Authentication

Search filter to focus the list of users through Name, Email, Date Created, Status, and Instance Administrator.
Multiple Selection checkboxes to perform actions on multiple users at a time.
Reset Password control for selected user accounts.
Reset Authentication control to address possible multi-factor authentication problems in selected accounts.
Deactivate control for selected accounts.
User Creation and Management

Duplicate control to create a new user with the same project permissions; this opens a Create User window similar to that in Item 3 below, but all projects and permissions for the new user are cloned from those of the current user.
Edit control to edit the user permissions and information.
Delete to remove the user account.
+ ADD USERS button
 to add or create new users for a company.
Note
Only an Instance Admin has the Users button available to navigate to the screen directly from the landing page.
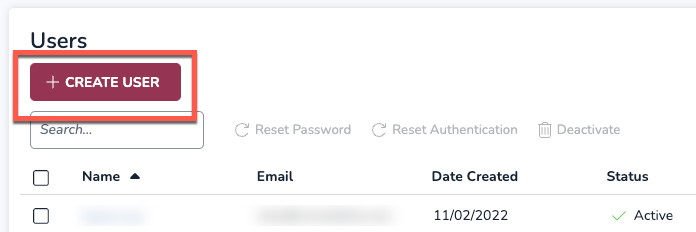
When navigating to the Users screen in this manner, the + ADD USERS button is instead, the + CREATE USERS button.
Click + ADD USERS to open the Add Users window.
Click + CREATE USER to open the Create User dialogue. If navigated to the Users screen directly from the landing page, the + CREATE USER button is available to click without going to the Add Users window first.
In the Account tab, enter the following:
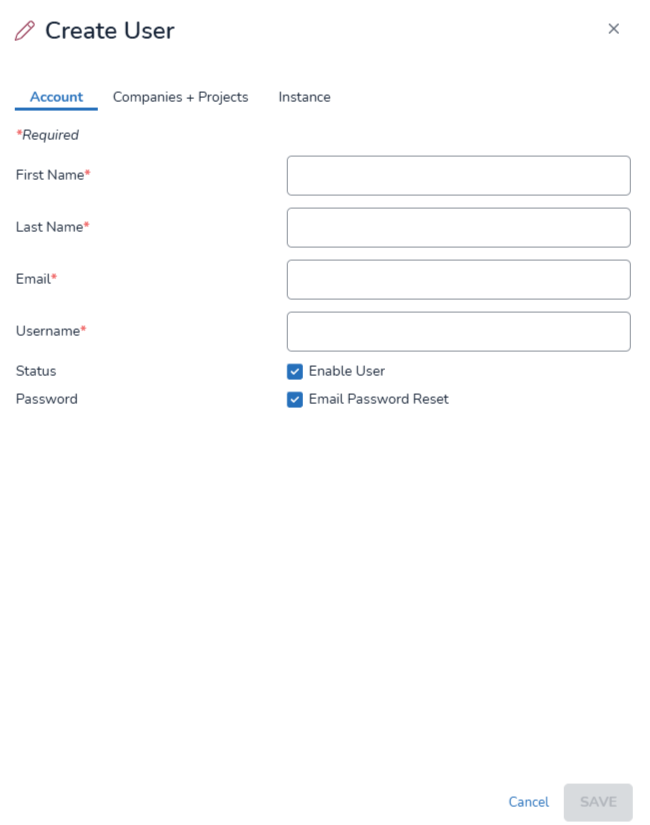
First Name
Last Name
Email – should be unique.
Username – generated from the Email entry by default.
Status – Enable User is checked by default.
Email Password Reset – It’s checked by default. You can uncheck so the user does not receive email on resetting the password. In that case, the client will take over the password handling themselves.
In the Companies + Projects tab, specify the level of access for the user being created. The access dropdown button determines the access and permission for the User across the company’s projects.
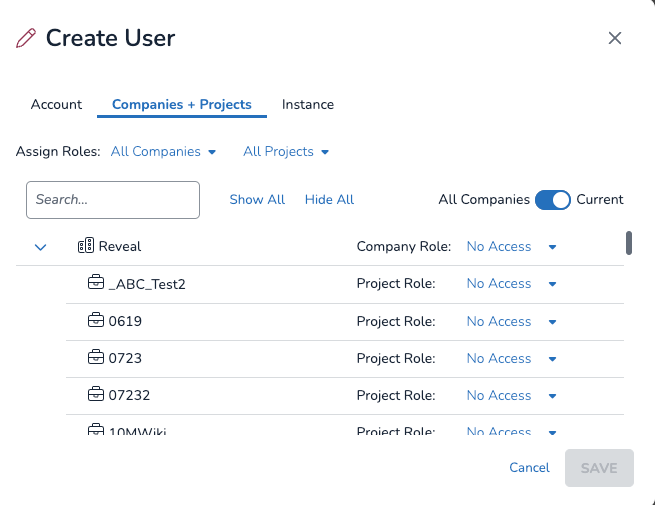
All Companies – Role for all companies in the instance. The user’s Company Role is displayed and selectable at the top (company) level of the Access listing for projects.
Member – has access to projects subject to project role permissions.
Company Admin – rights to administer all projects for company, automatic project administrator rights to be forthcoming with company admin project favorite setting.
No Access
All Projects – Role for all listed projects in instance or projects filtered by search. Project Role is displayed and selectable for each project.
Administrator – Full management rights for project; automatically sets Member status for project’s Company.
Client Administrator – Review management rights for client project.
Power Reviewer – Reviewer with enhanced bulk action and public item management permissions.
Reviewer – Basic Reveal Review, foldering, tagging and redaction capabilities.
[Custom] – Any custom roles defined in a listed company project may be applied to other projects for the user.
The Instance tab has a single checkbox option to make the user an Instance Administrator, which grants the ability to create companies.
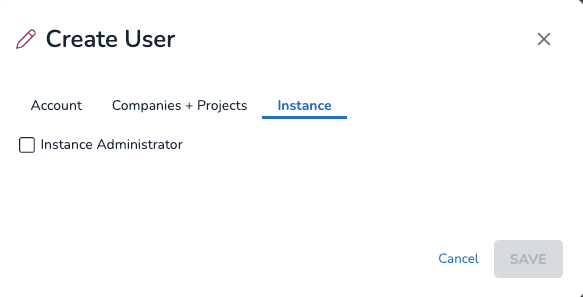
Click Save when finished specifying settings.
Non-Web Based Instructions
Instructions for creating users in Review Manager (RM), and from the Legacy Company Admin page.
Create User (RM & Company Admin)
Users in Reveal are created under the Company and are assigned to Projects. The creation and management of Users is done by project managers and administrators either in Reveal's Review Manager application or in Company Admin section within the web. Here are the steps to setting up a new User, first under the Users tab in Company Admin, then in Reveal Review Manager. User accounts may also be managed under the Company screen in the Users sub-tab.
Note
The Company Admin section may be available in different areas for the Non-Web Based Instructions prior to 2024.11 release.
Create a User in Review Manager
Log into Review Manager as an Administrator.
Open the Project Setup Pane.
Click Users.
The Users work area opens to the Users by Project tab. All existing Users for the project are listed. (There is also a tab for Projects by User which displays each user's projects.)
Select Project from the dropdown list of all projects with which to initially associate the new user.
Choose Add to add users to the case. The User List appears.
Select any existing users from the list for a project by placing a check mark next to each name.
Use the Create New button to create any new users if needed.

In the Create a new User ID window, enter the proposed User Name and select Check ID to make sure that ID is not already taken. If the User ID is available, then the rest of the fields (except Project, which may not be selected here) become active, allowing you to complete the creation process; all below are required fields that are marked with a red asterisk.
Company Name: Select the company from the list under which this User account will be created. If the company instance does not yet exist, it may be created using the option [...] button at right.
E-Mail Address: For notifications and messaging.
Language: Sets the default language for the User's interface.
Group Name: Assigns the users to a role group, setting permissions for the initially assigned project.
Choose Create to complete the process.
Back in the Users List, click Add to populate the project with users.
Assign the added users to an initial Role Group; at least one Administrator will be needed to open and manage the project.
Create a User in Company Admin (Legacy)
Log in to Reveal as an Administrator.
Select Company Admin from the Navigation Panel.
Company Admin will open to the Users screen, listing current Users.
To create a User, click Create User at the upper left corner of the Users table.
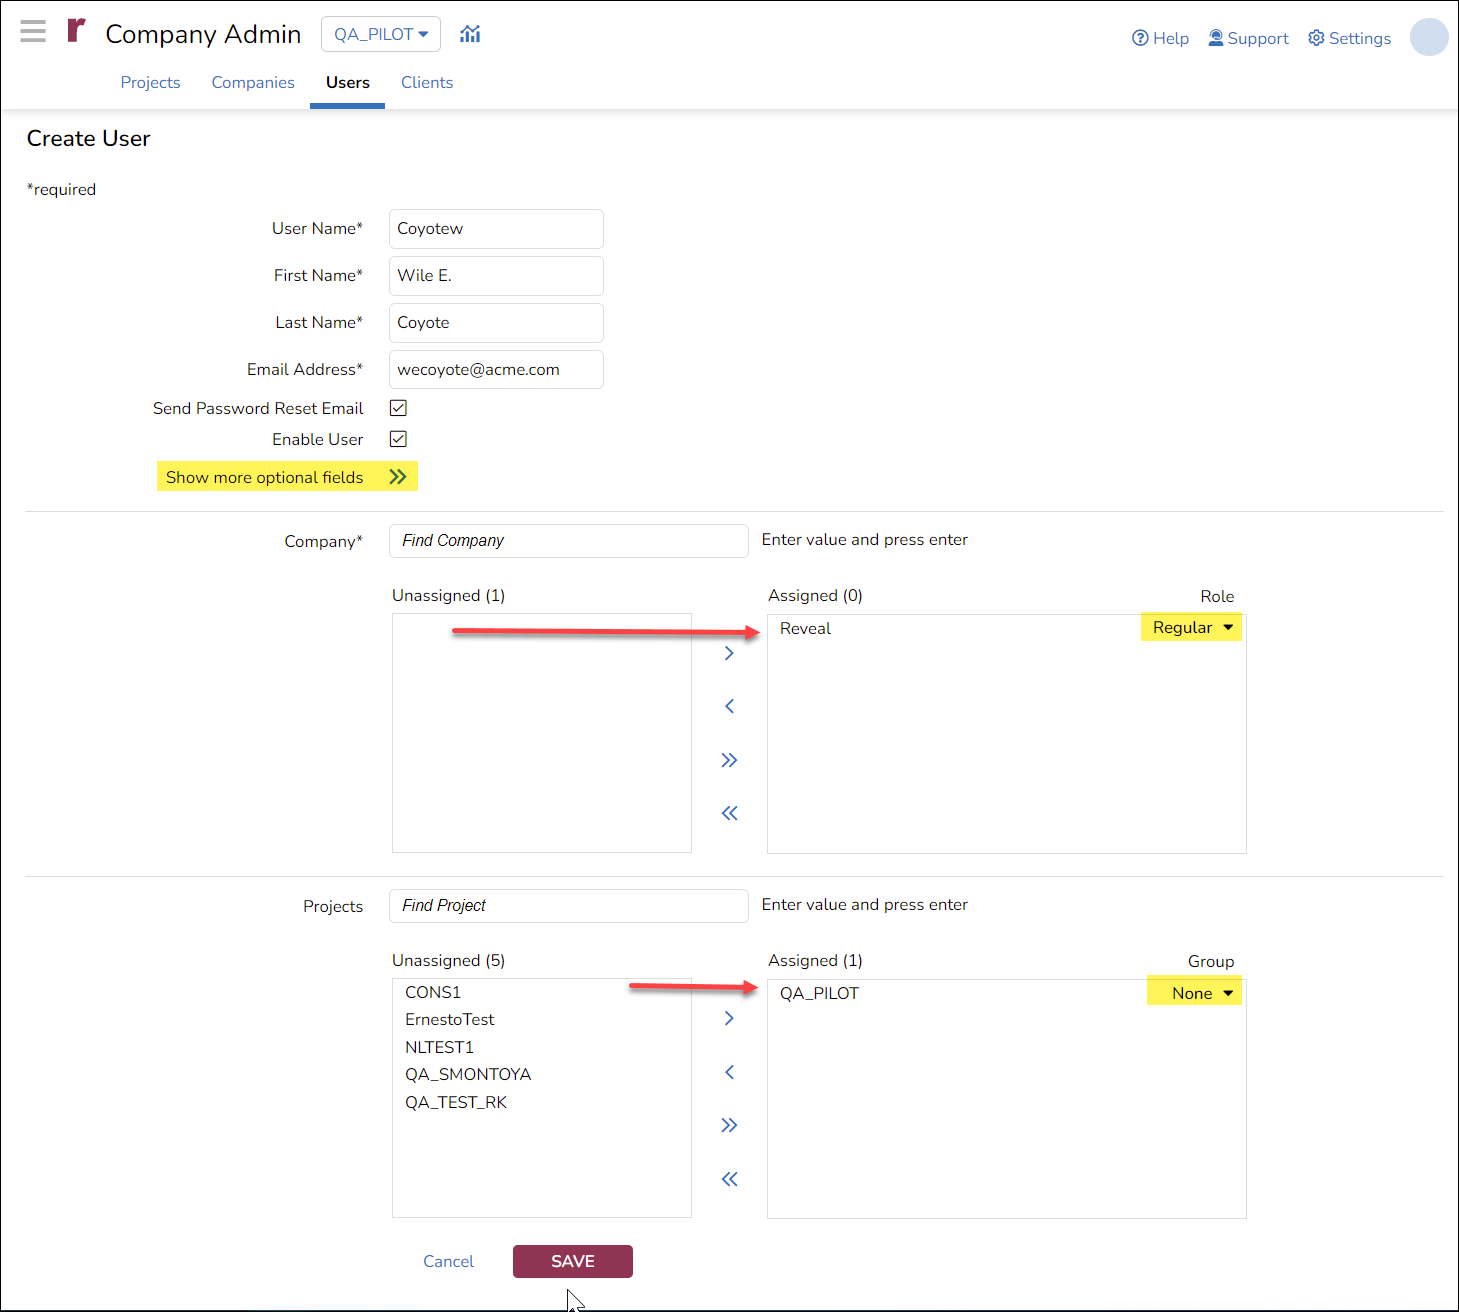
User Name must be unique (required).
First Name (required).
Last Name (required).
Email address (required).
Send Password Reset Email is checked by default and is the only option for setting passwords.
Enable User is checked by default when a user is created.
You may Show more optional fields for capturing language information for the User.
Next assign the User to a Company by selecting a Company and moving it to the Assigned window at right.
Can designate User as Regular or a company Admin in the Assigned window.
The User may be assigned to one or more Projects from this screen as well by selecting one or more Projects to move to the Assigned window at right.
In selecting a project, be sure to select the Group in which the User should be placed for that project.
Click Save when done.