A Client is a partition within a Company instance where multiple projects may be created. More than one Client may exist per Company.
The term Clients is used in Reveal to designate specific entities that manage a Company's projects and their primary contact information. The Clients may be multiple outside counsel in a corporate instance, or client companies in a service bureau instance. Each Client would typically manage multiple legal Projects within the Reveal Instance. An alphanumeric number designated with the Client Name is a unique identifier so that cases can be tracked and billed easily; this number may contain up to 100 characters.
A company is required to create a new Reveal project, and each company will have at least one client (itself by default) required to create a project. Clients may also be created within the company to facilitate billing reporting.
The creation and management of Clients is done by project managers and administrators either in the back-end Reveal Review Manager or in the Company Admin section of the Reveal web interface.
Important
If you are a SaaS Customer, it is recommended that you follow the Web-Based instructions below to create and manage Clients within your Reveal instance. If you are an On-Prem customer, you may only have the option to create and manage Clients using the Non-Web Based option. If the Web-Based option is not available within your instance, please follow the Non-Web Based instructions instead.
Web-Based Instructions
Instructions for creating and managing a client from the Companies page.
Create and Manage a Client (Companies)
Getting Started at the Landing Page
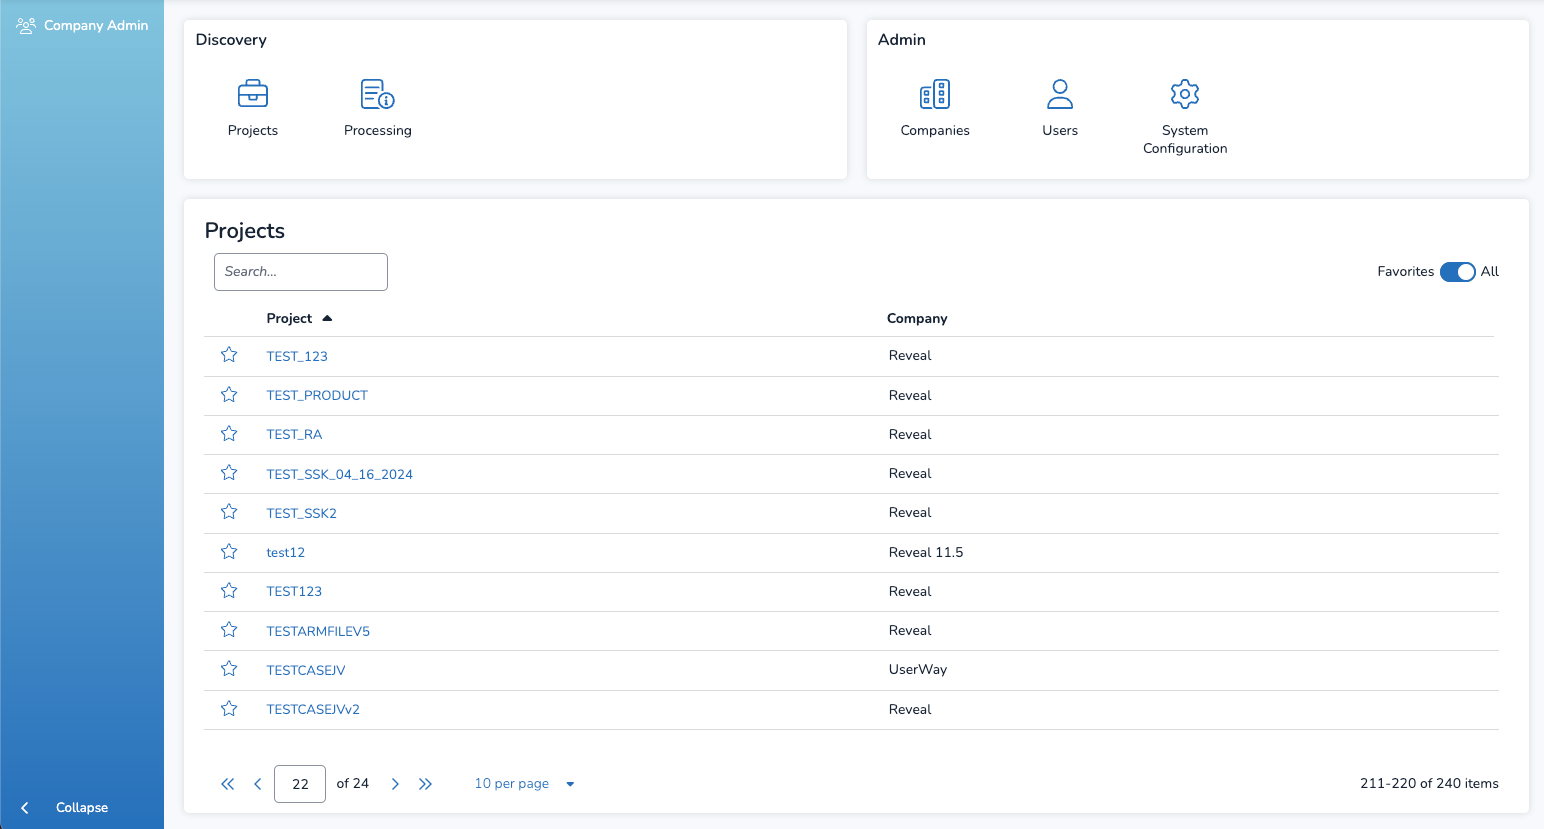
An Instance or Company Administrator will open Reveal to this landing page, containing sections to administer Projects (under Discovery), Companies and Users (under Admin), as well as a table of projects for the current instance or company.

Setting Up Clients
Open Companies in the Admin box and follow the directions below.
To the right of the Company Name label in the Company screen, click Clients. If there is only one entity managing a company’s projects, only one client will need to be defined.
The Clients screen will display. You may click Create Client to enter the following information:

Name – An identification of the client for administrative and billing purposes.
ID – An alphanumeric identifier that may be up to 100 characters in length.
General Contact information, including:
Country
Address (Line 1 and Line 2)
City
State
Postal Code
Fax
Primary Contact specific person responsible for client contact information:
First Name
Last Name
Title
Department
Primary Phone
Secondary Phone
Other Phone
Notes
Save when completed.
Users can filter by Name, ID, Contact, and Phone through the Search bar to find what they need.
Managing Clients
The only options in the Clients screen are:
Edit to update any of the above information.
Click to open the Client details, which simply reports the contact details as entered.
Non-Web Based Instructions
Instructions for creating and editing a client in Review Manager (RM), and from the Legacy Company Admin page.
Create and Manage a Client (RM & Company Admin)
Notice:
The Company Admin section may be available in different areas for the Non-Web Based Instructions prior to 2024.11 release.
Create and Edit Clients in Review Manager
Log into Review Manager as an Administrator.
Open the Instance Setup Pane.
Click Clients.
The Clients tab appears in the work area. All existing Clients are listed in the top window. Each column may be filtered to display only selected values.
Add New is the tab where new clients are entered in the bottom pane, which it shares with the default Edit / Delete.

To create a new Client, select the Add New tab.
The Add New tab contains fields:
Client Name – the name of the client (required).
Client Number – a unique alphanumeric number or short name that you assign to this client. All data are organized by client number, so it is important this value is unique. This number may be up to 100 characters in length (required).
Company Name - selected from the dropdown list. If the Company does not exist, use the [...] button to open a window to create it.
Use the Optional Values button to expand the window and add additional details such as contact information and addresses.
Once you add these, click Insert to add the new client.
Enter the required fields marked with an asterisk.
To edit a client, select the client in the top table to make any edits to the desired Edit / Delete fields and choose Update to complete the changes.
Create a Client in Company Admin (Legacy)
Log in to Reveal as an Administrator.
Click Admin for any Project in the Project Hub.
In the Project Admin screen, click the Flyout Menu button in the upper left-hand corner.
Select Company Admin.
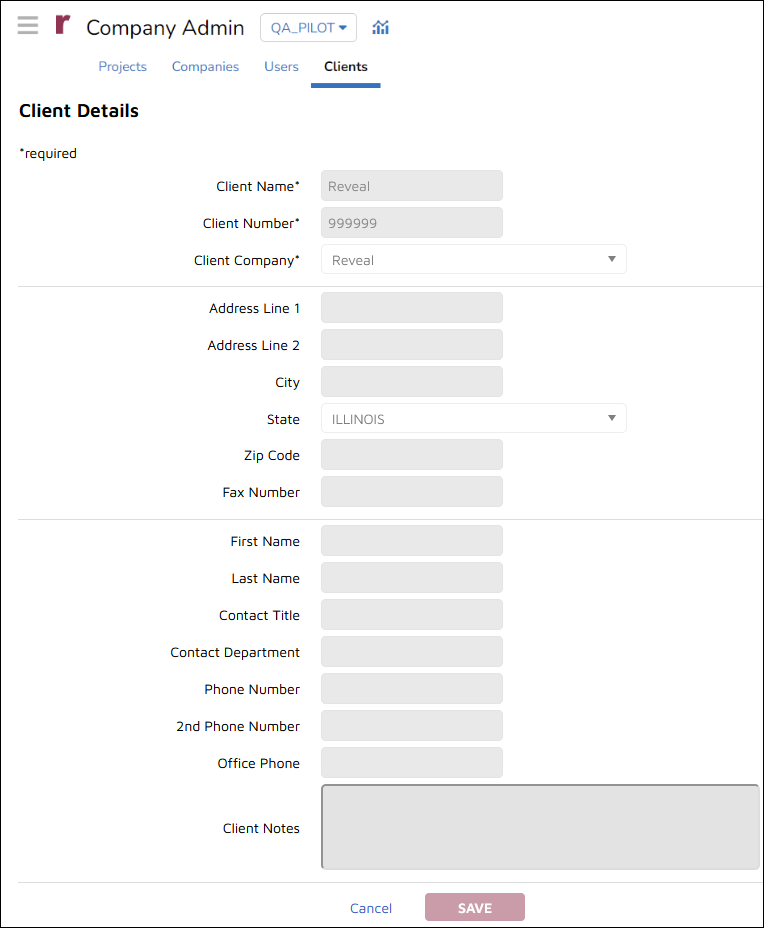
Company Admin will open to the Clients screen, listing current Clients.

Click Create Client. This will open a blank Client Details screen.
The pieces of information required to create a client are:

Client Name (required)
Client Number (required), and
Client Company (required), selected from a picklist.
Once created, these values cannot be changed.
There are fields below for client address and contact information, as well as Client Notes.
Click SAVE when complete. The screen focus returns to the Clients tab after creating or editing a client.