Note
Upload jobs created within the web interface will create a corresponding Import and Export job within Discovery Manager.
Administrators and their designees can upload and process data directly into Reveal by selecting Upload from the Navigation panel. The data uploader can accept virtually any file type, including but not limited to:
Container files, such as .zip and .pst files.
Forensic images, such as EnCase images.
HEIC images, which are converted to PDF upon indexing.
Important
Instance Administrators must have a role with appropriate permissions assigned within a project in order to use Upload.
Within a project, click the Uploads button
 from the sidebar. This will open the Uploads screen.
Click the +UPLOAD button to launch the Upload dialogue. This tool is divided into three steps: Setup, Files, and Notifications. These steps are detailed in the following sections.
Upload Job Configuration
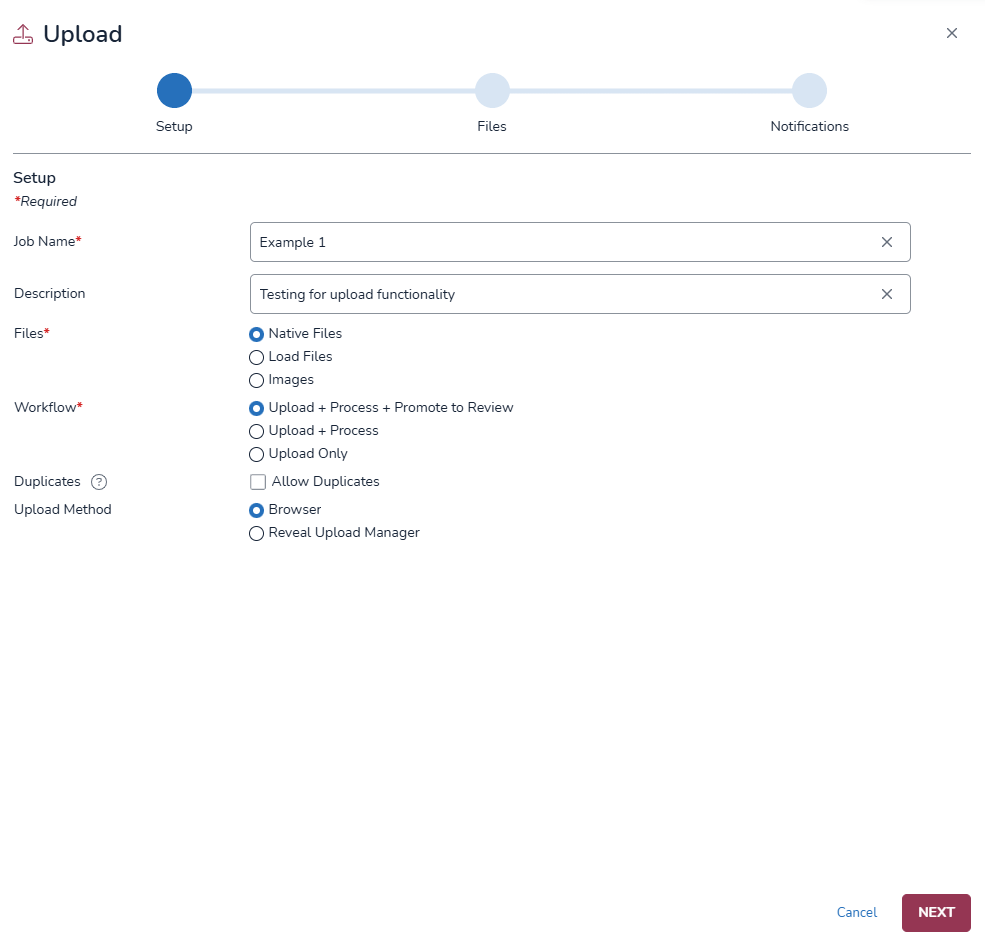
Setup
Provide information and make selections for the fields and Setup options detailed below.
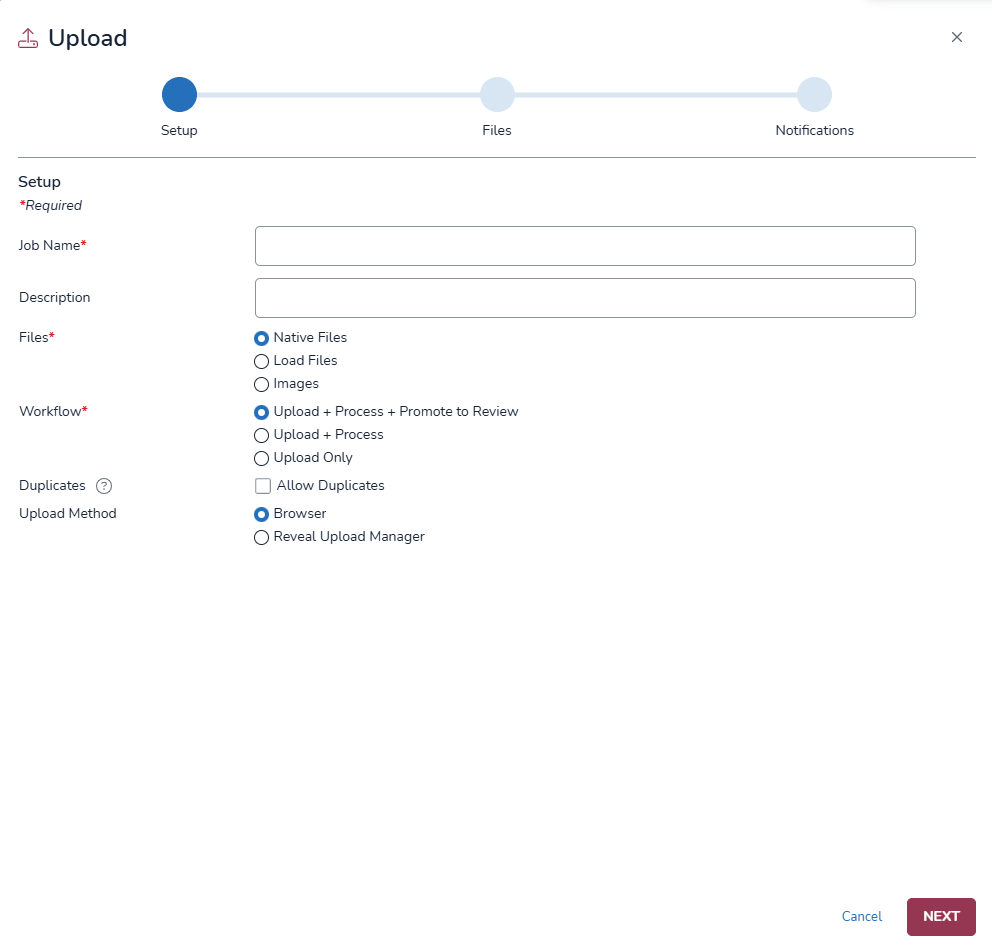
Job Name: A recognizable name for logging and tracking the upload job; this item is required.
Description: Additional information about the upload.
Files: Choose the type of the files.
Native Files: Original files in their default format, such as Word documents, PDFs, or spreadsheets.
Load Files: Files used to upload structured data which has already been processed, like CSVs or DAT files.
Images: Visual files, including JPEGs, PNGs, and other graphic formats.
When selecting Native Files.
Workflow: Choose the desire processing workflow.
Upload + Process + Promote to Review: Files will be uploaded, processed, and automatically promoted to review.
Upload + Process: Files will be uploaded and processed but not promoted to review. This allows for further actions to be ran against the data prior to promotion.
Upload Only: Files will be uploaded, not processed and not promoted to review.
Duplicates: This checkbox specifies if duplicate files will be included in the upload without any filtering or removal.
Upload Method: Choose whether you want to upload your native files through the Browser or through the Reveal Upload Manager.
Note
For uploads of more than 50,000 files, we recommend using the Reveal Upload Manager. See the Upload Native Files - Reveal Upload Manager article for more information.
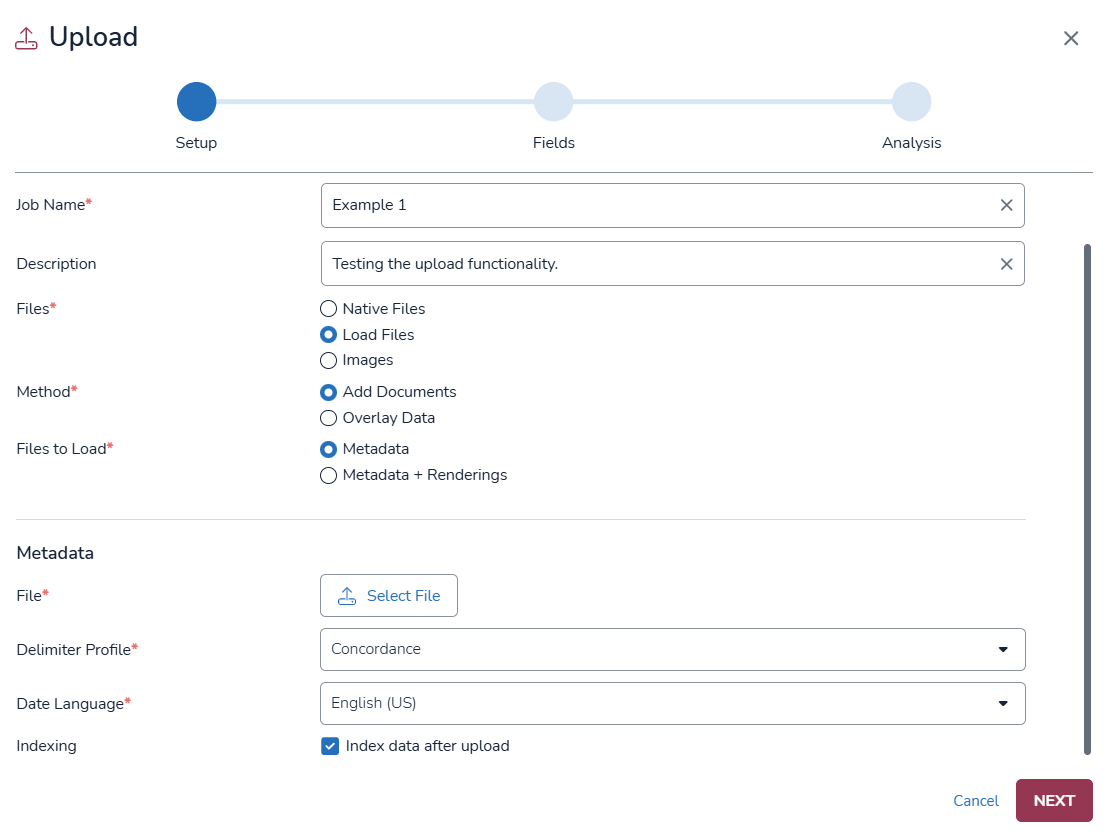
When selecting Load Files.

Method: Choose the method by which the file will be processed.
Add Documents: Add the file as a new document without affecting existing data.
Overlay Data: Overwrite existing data with the new file. The system will replace the current information with the content from the newly uploaded file.
Files to Load: Choose which parts of the file will be loaded.
Metadata: Load only the metadata associated with the file. That includes information such as file name, author, date of creation, and other document-specific details, without including the actual content or rendering.
Metadata + Renderings: Load both the metadata and the renderings (the actual content or visual representation) of the file. When choosing this capability a new Files to Source entry will be added to the Setup modal.
Files to Source: Choose if you want to source files from your computer or from an S3 folder.
If you select My Compute, a new Upload Method field will be added, which allows you to upload from the Browser or from Reveal Upload Manager application.
Note
If you choose to upload DAT files from the Reveal Upload Manager, see the Upload Load Files - Reveal Upload Manager article for more information. We recommend using this for all uploads bigger than 50,000 files.
File: Choose the file you want to upload.
Delimiter Profile: Choose the delimiter used in the file to separate data.
Concordance: It refers to mapping the fields in the loaded file to the corresponding fields in the system.
CSV: If the file is in CSV format, ensure it adheres to the standard CSV format for proper upload.
Date Language: Choose a language to determine the date format that Reveal will expect when interpreting date fields in your data, for example mm/dd for English (US) vs. dd/mm for English (UK).
Indexing: This checkbox specifies if the data will be indexed after the upload.
When selecting Images.
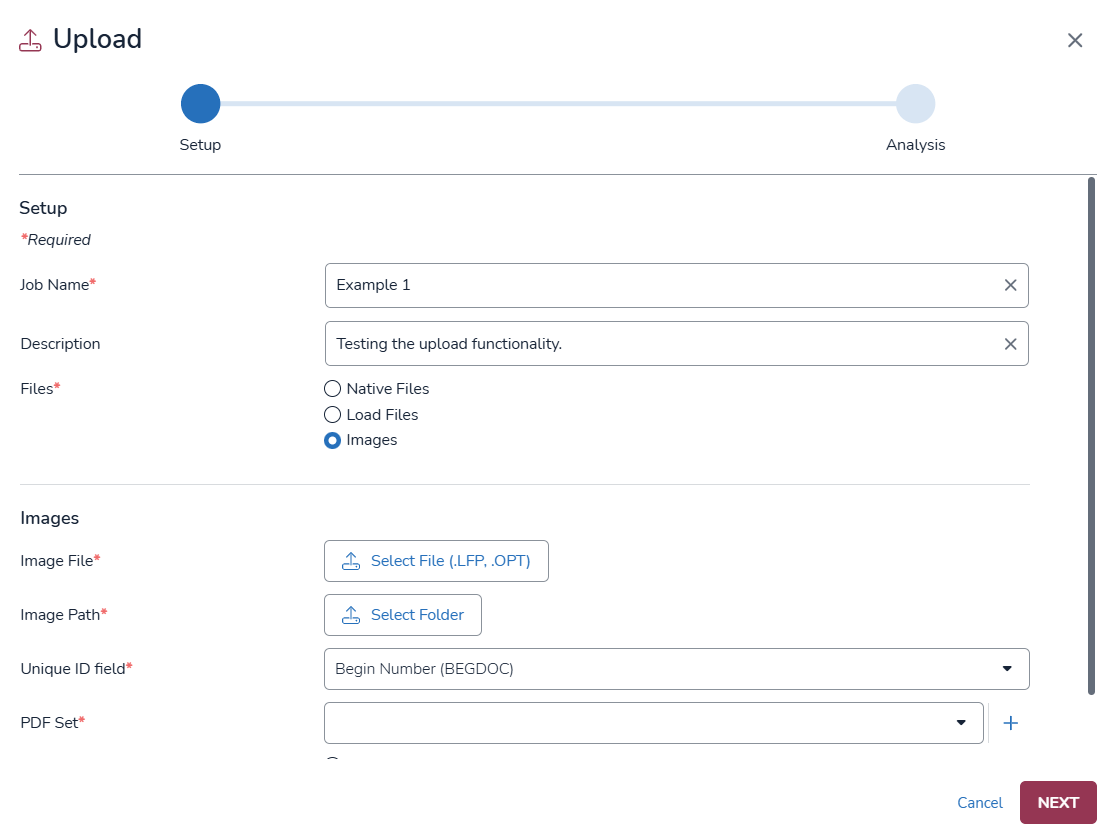
Image File: Choose the image file you want to upload. The supported formats are Opticon (.OPT) and IPro Load File (.LFP).
Note
When importing images using an OPT or LFP, only the document imagekey is captured and saved. Page imagekeys (additional pages of a document) are not captured or available for use after import.
For example, in this screenshot, the system will save only the imagekey REV00000061. Imagekeys REV00000062 and REV00000063 are not saved.
.png)
Image Path: Choose the folder that refers to the location or directory where the image is stored.
Unique ID field: Select the unique ID field that will used to assign a distinct identifier to each image, ensuring that every image can be tracked or referenced uniquely in the system.
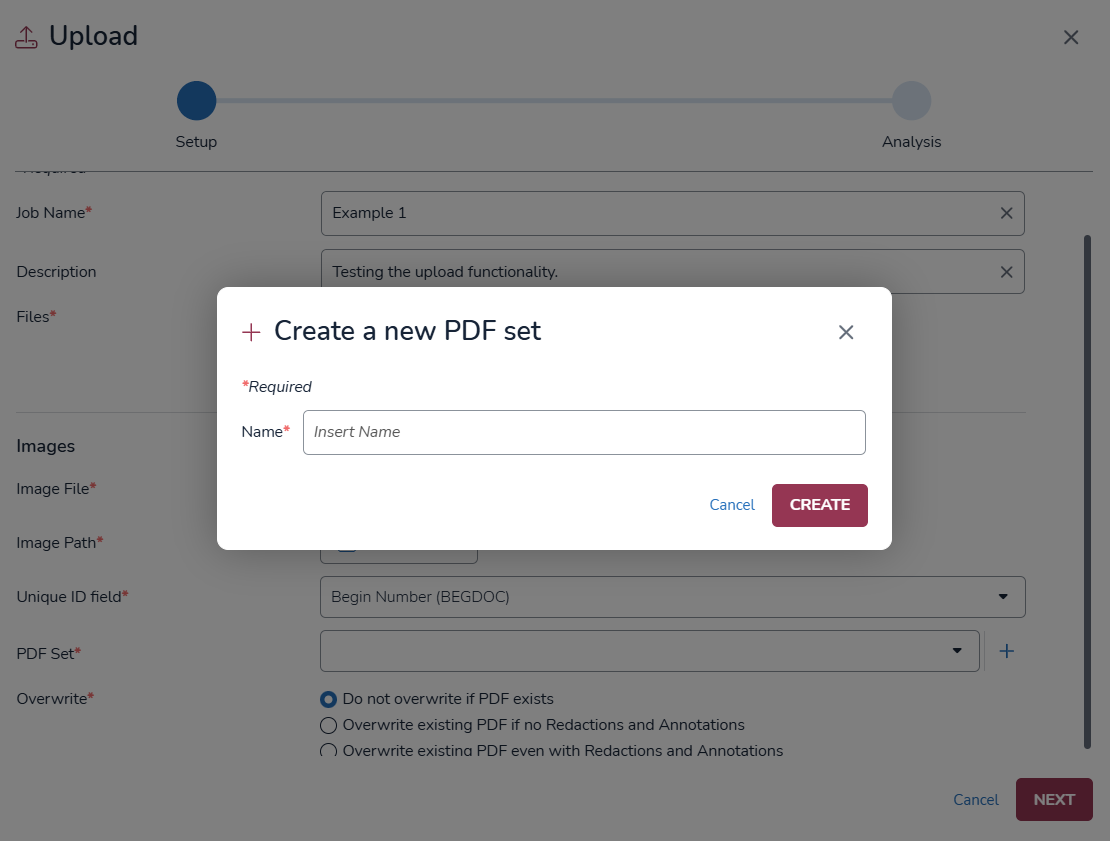
PDF Set: If the image is part of a set of PDF documents or related images, this option links the image to a PDF set for better organization or processing.
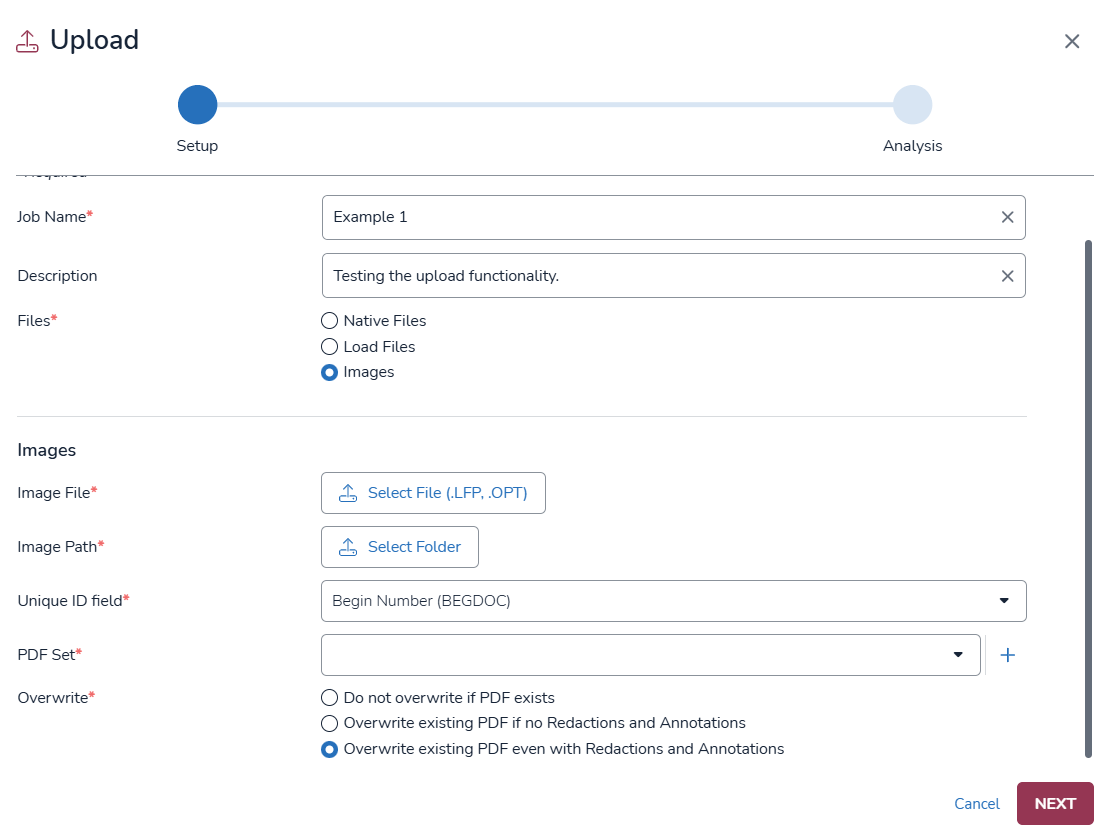
Existing PDF Set: Select the appropriate PDF set from the list to link the image to an existing set.
Create New PDF Set: If you want to create a new PDF set, click the + button next to the PDF Set field. This will allow you to create a new PDF set and link the image to that newly created set for better organization.
Overwrite: Choose how existing PDFs are handled during the upload process. It applies only if an existing PDF set is selected in the PDF Set field. These options are not applicable if you are creating a new PDF set.
Do not overwrite if PDF exists: If a PDF file of the same name already exists, it will not be overwritten.
Overwrite existing PDF if no Redactions and Annotations: If the PDF does not contain any redactions or annotations, the system will allow overwriting.
Overwrite existing PDF even with Redactions and Annotations: If the PDF contains redactions or annotations, the system will allow overwriting.
Upload Process Based on File Type
Native Files
After setup, native files go through the following steps: Files and Notifications.
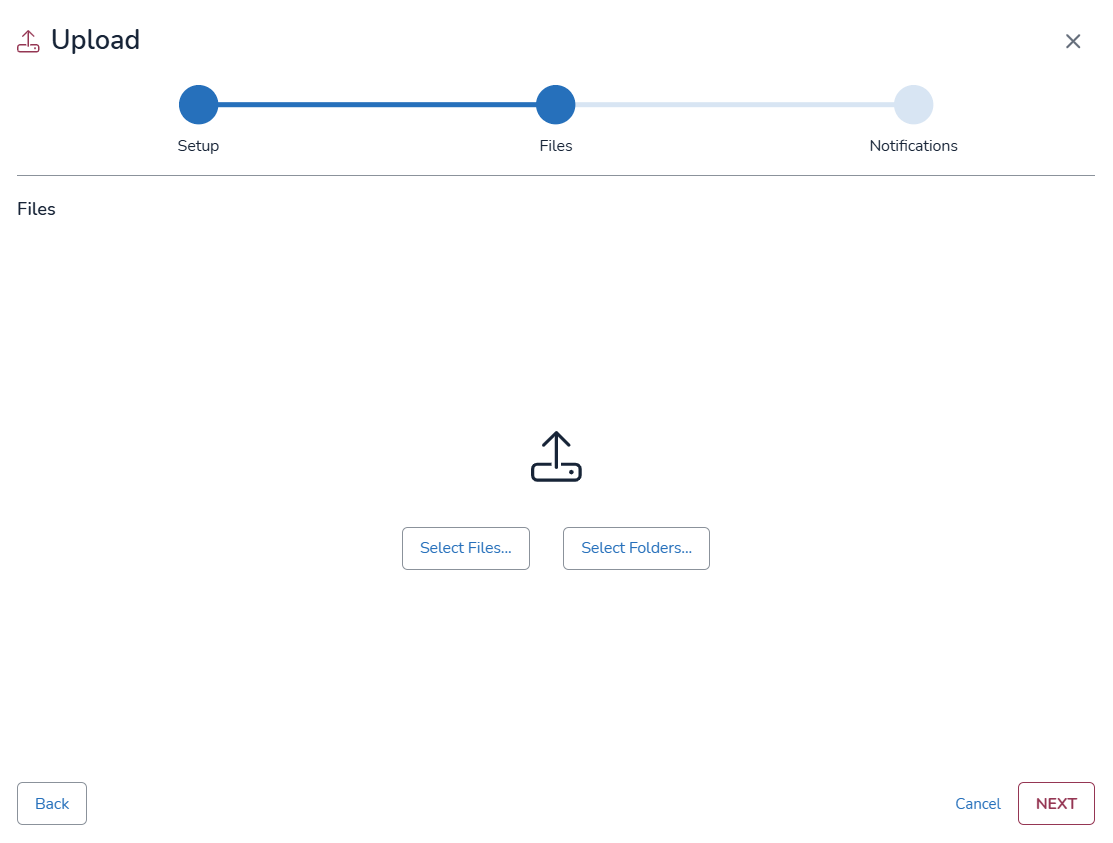
Files
The following instructions guide you on how to select and organize data for processing when Native Files is chosen during the data setup before uploading.
Selecting Folders
In the Files step, initially there is a Select Files and Select Folders… button displayed, click it to launch the local file browser.
Choose the local folders to upload. The screenshot below shows a folder named “A to F” being selected in MacOS.

After making a folder selection, there may be a permission prompt from the web browser to view files on the machine, click View files to grant permission.

Currently, multiple folders cannot be selected at a time. However, additional files and folders still be added if needed using the + Add Files or + Add Folders button after each selection.

Organizing Data
After selecting a folder, subfolders will be populated with respect to the folder hierarchy. There are three fields that can be assigned to the selected data from the dropdown: Custodian, Location, and Source.
If there are no existing entries in the dropdown, users have the option of creating them in this step. Choose Add Custodian, Add Location, or Add Source to create an entry.

Provide the information for each of the fields shown below when creating an entry.
Custodian: The entity in whose possession, custody or control a document was collected.

Location: Indicates from where a document was collected (e.g., HQ, Melbourne Branch, MG Home Office or an indicative code).

Source: Records the point of origin of the document as collected at the Location.

After creating a desired entry, it can be selected from the dropdown.

The checkbox selection specifies what data will actually be processed before the job is submitted. After making selections, click Next to procede.

Users can also add Custodians, Locations, and Sources directly from the bulk action toolbar. They can either create a new entry or select an existing one, which will then be applied to all selected files and folders.
Notifications
The third and final step is to configure notifications. The Notifications screen is where teams or users are set up to be notified after an Upload job is completed. The user submitting the Upload job is automatically selected.
In the Teams and Users tabs, select either the teams, individual users, or both to be notified when the upload job completes.

The Upload Health Check modal performs three important prior to the upload process starting.

S3 Bucket: Confirms that the storage location for this project is ready and accessible.
Project Link: Ensures a proper connection between the Processing and Review databases.
Firewall: Enables firewall access in the network, allowing files to move to storage.
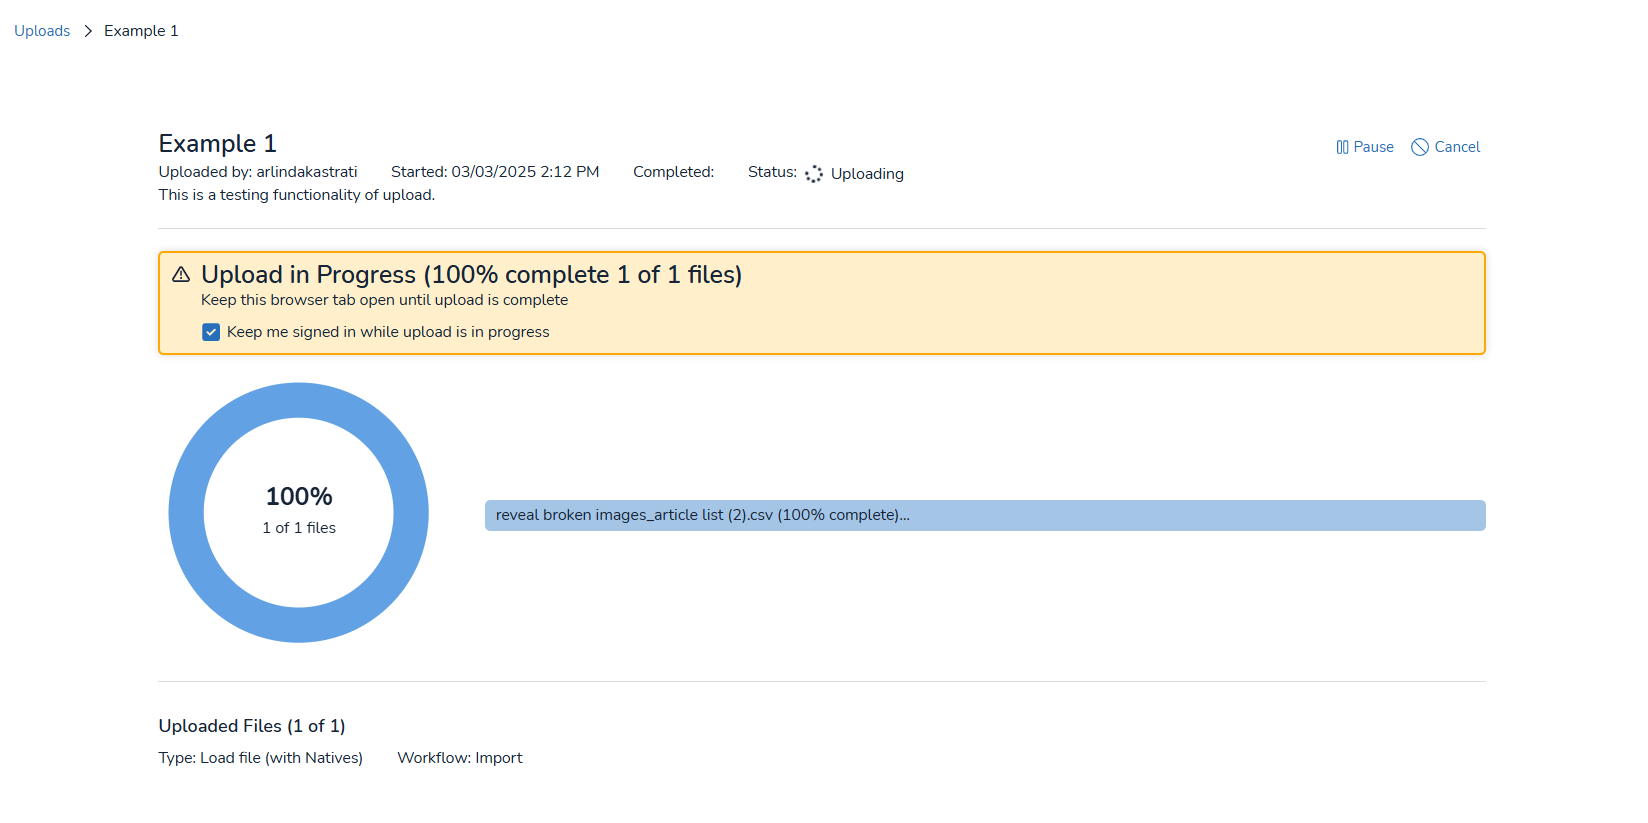
After clicking Submit, the file(s) will be added and the upload job will commence. A progress bar is displayed to provide updates. There are also controls to Pause or Cancel a job from this screen.

After the upload finishes, the Status will as Completed.

The Uploads page will also list all jobs along with the completion status.

Load Files
Load files require additional steps to ensure correct data mapping before analysis. The following steps after setup are: Fields and Analysis.
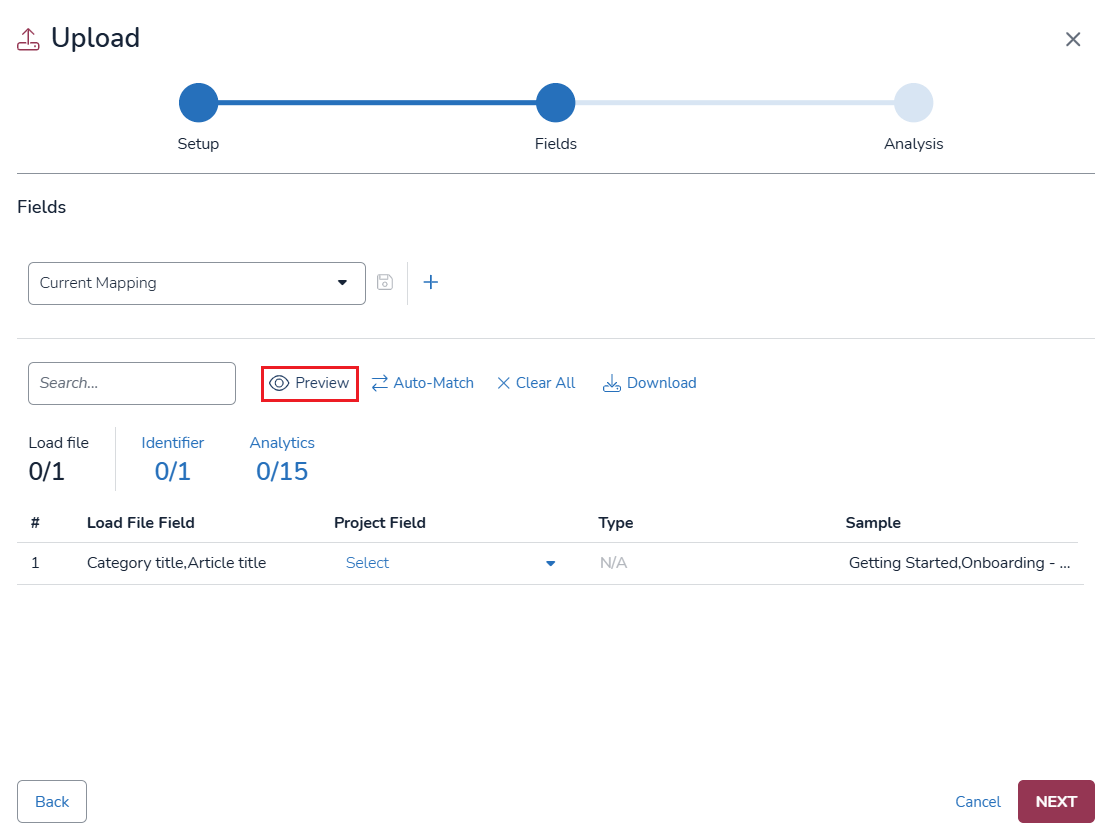
Fields
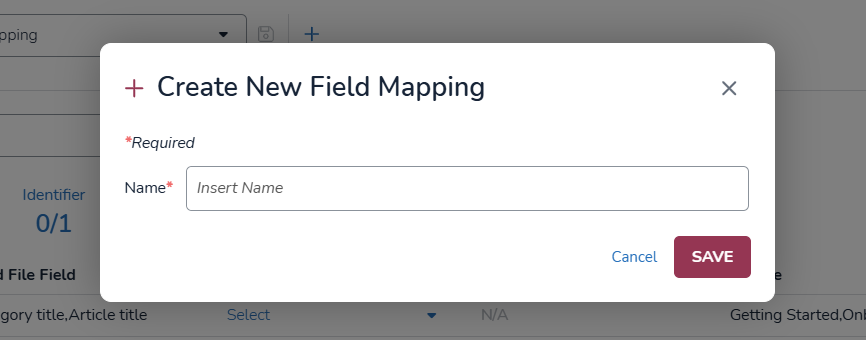
Field Mapping: In the Fields section of the Fields step, you can select a previously saved or existing field mapping template.
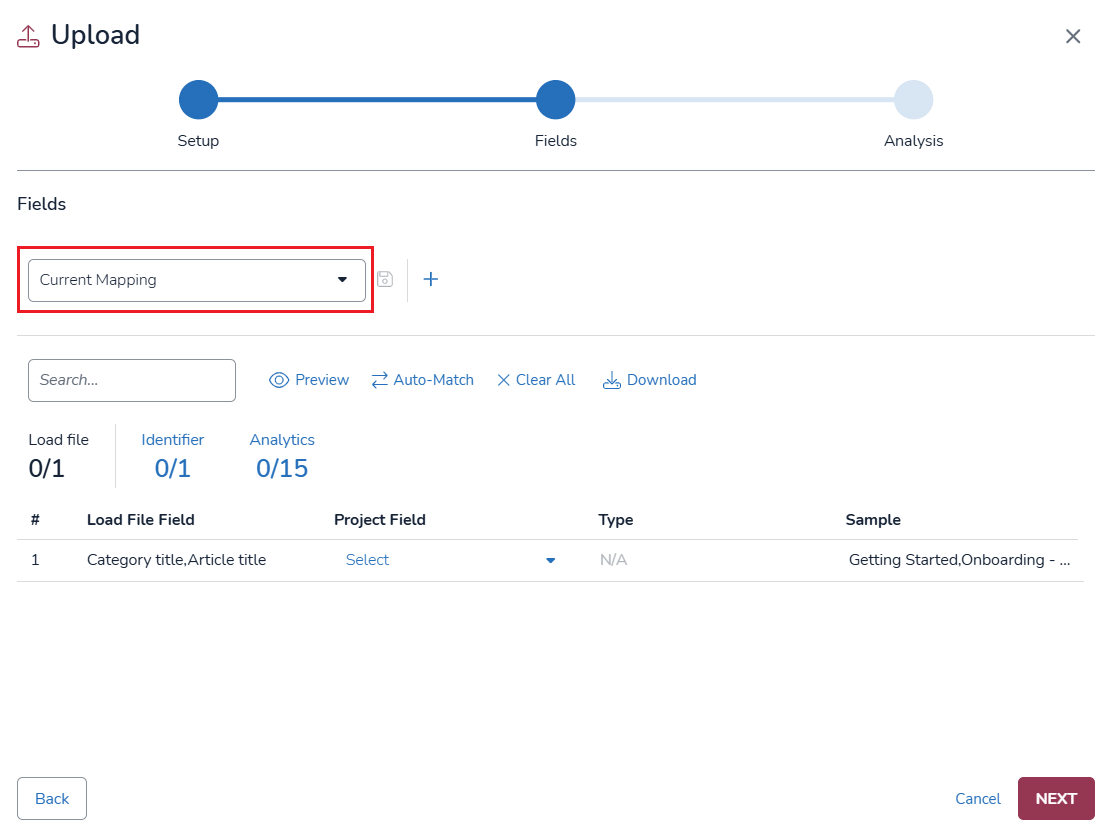
Alternatively, you can create a new mapping by clicking the "+" button.
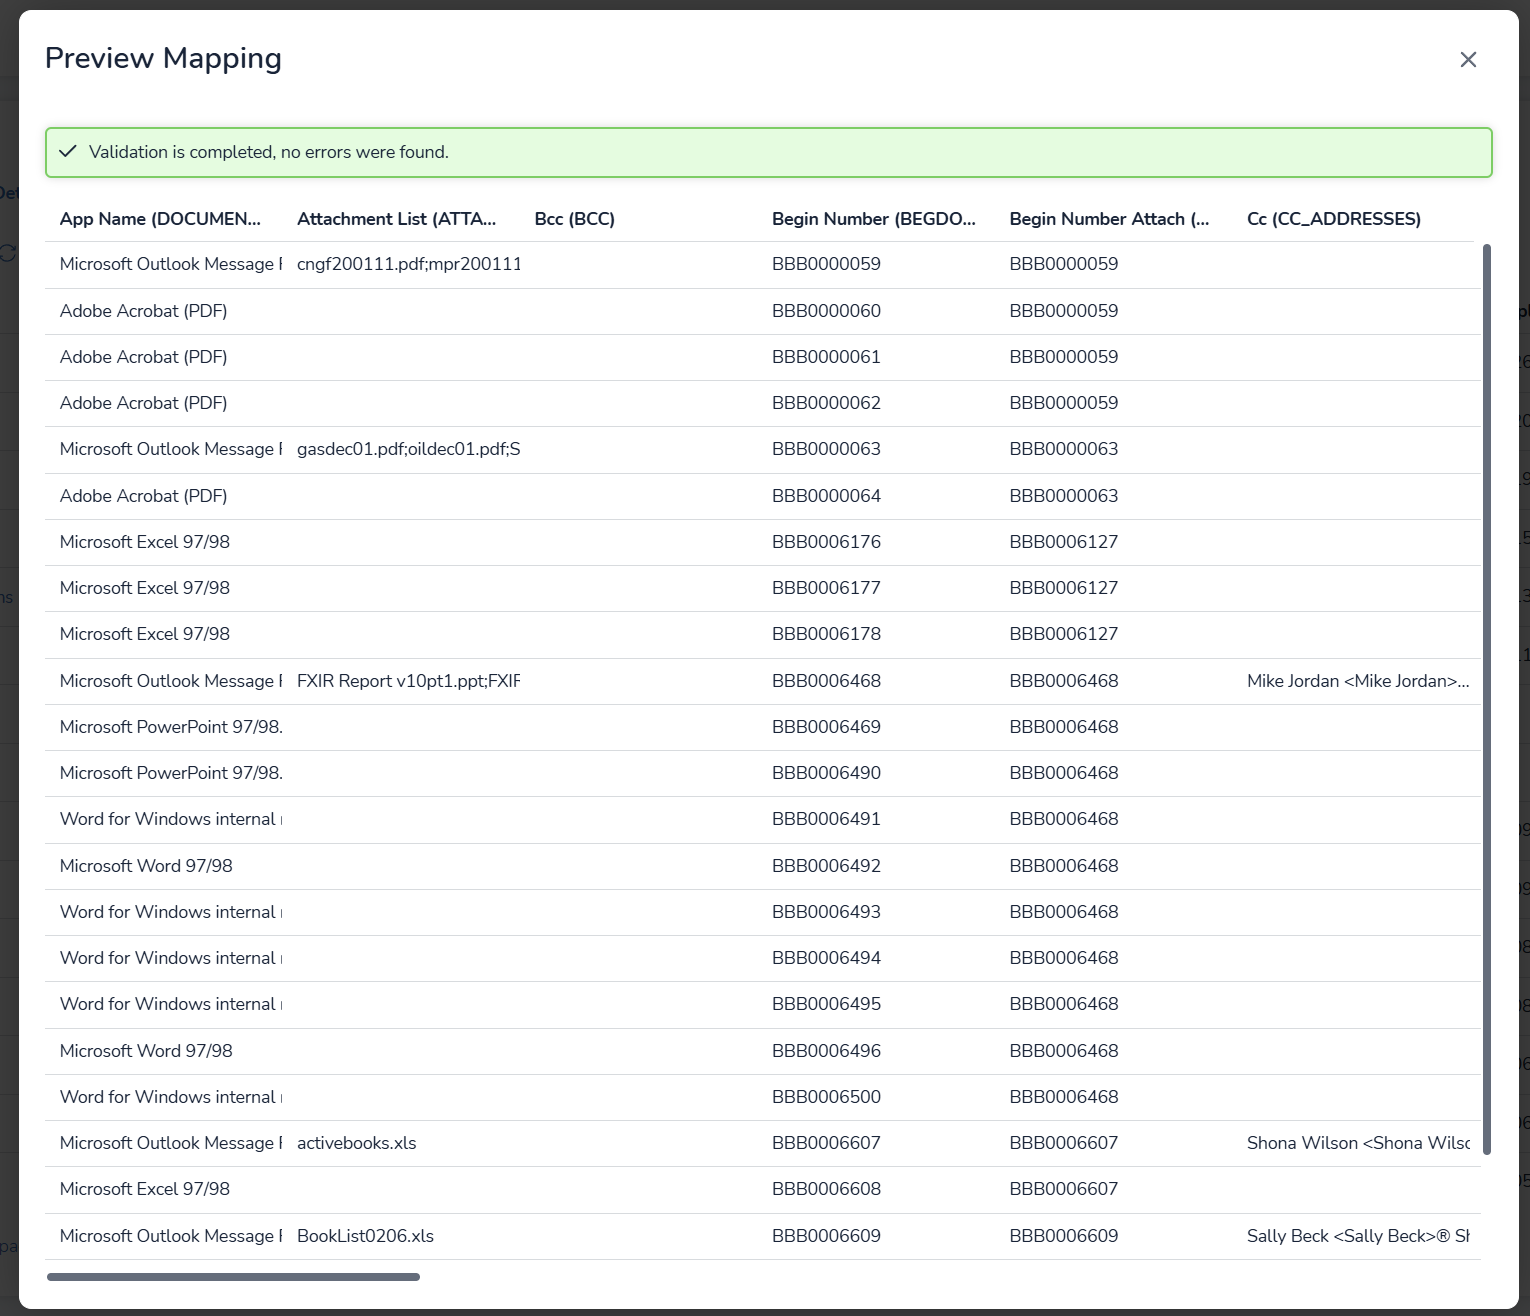
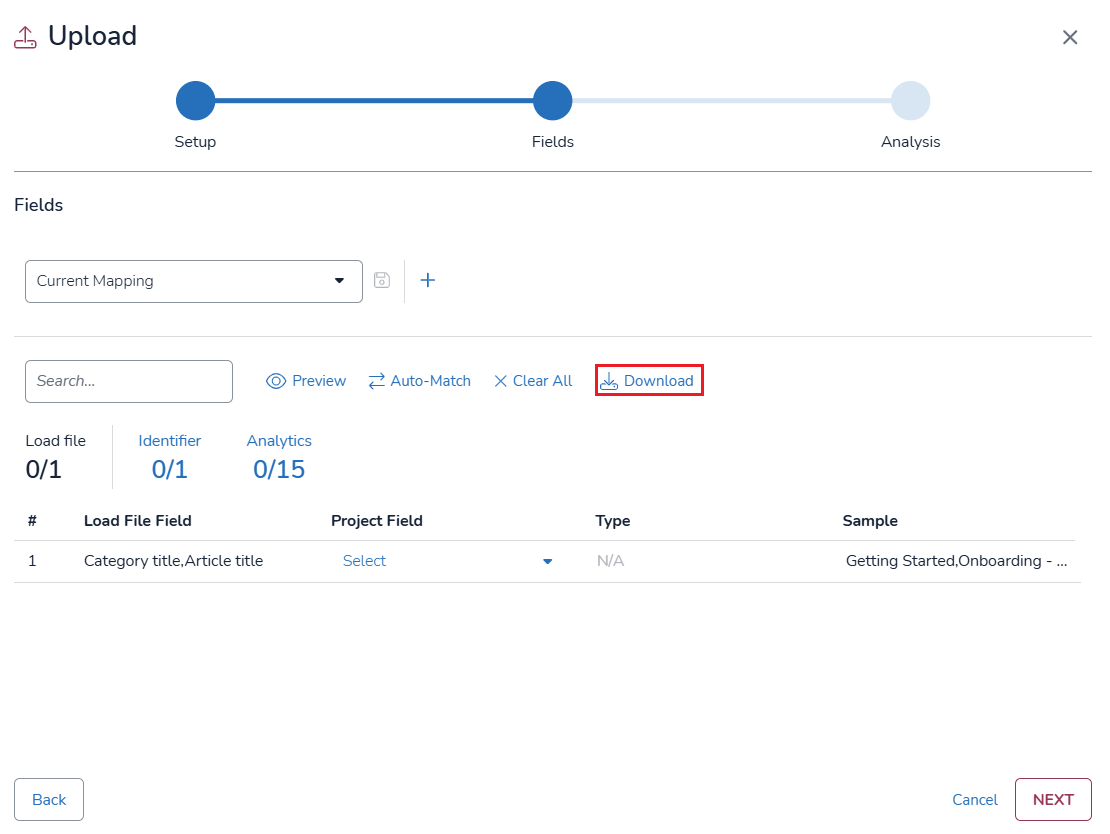
Preview: Displays a preview of how the data will be mapped before finalizing the process.
The mapped data before getting uploaded.
Auto-Match: Automatically matches fields in the uploaded file with predefined system fields.

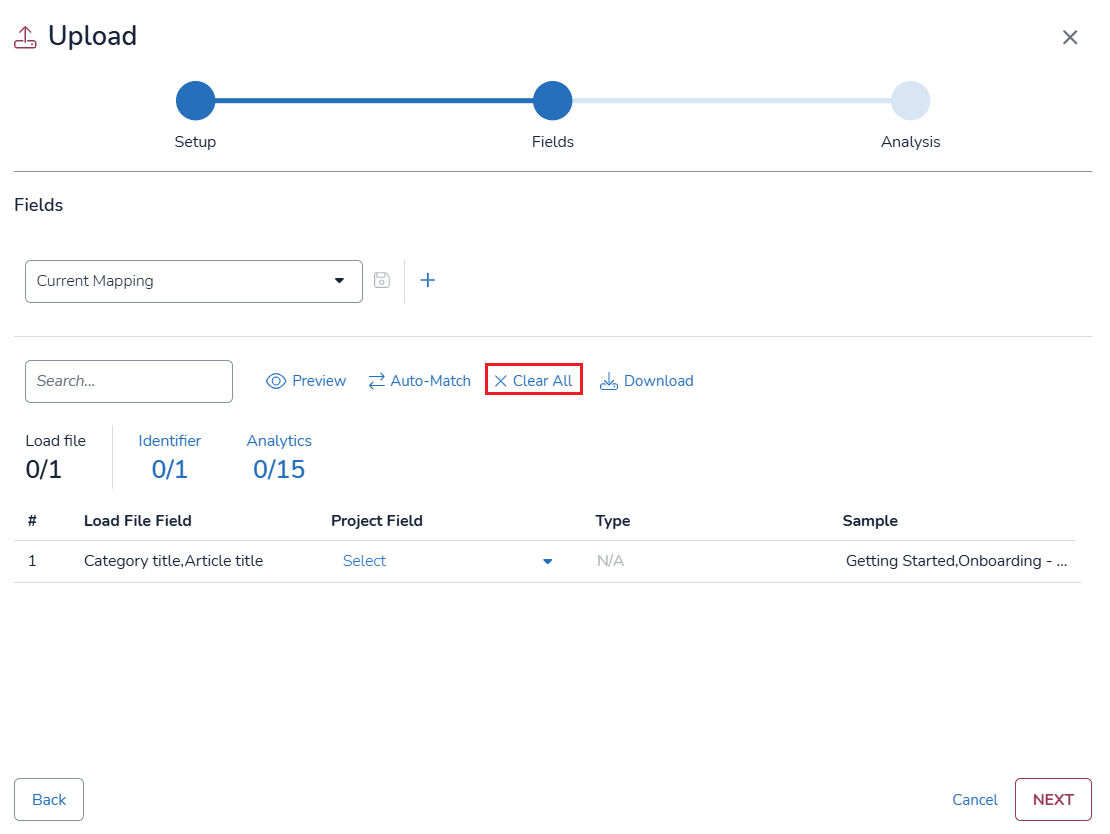
Clear All: Resets all selected field mappings, allowing the user to start fresh the configurations of the fields.
Download: Exports the current field mapping configuration as a file for future use.
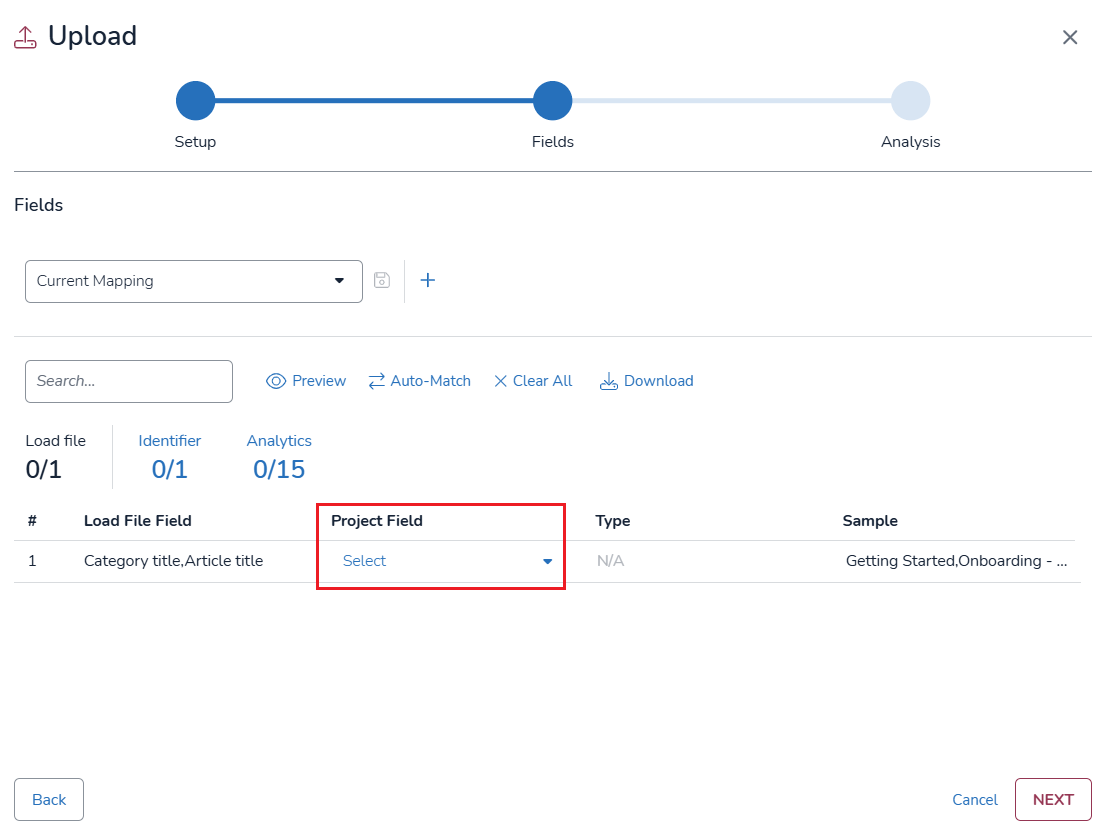
Project Field: Select a unique identifier for the file that will be uploaded.
Once the configuration of the fields is finished, you can click “Next” to the next step.
Analysis
The third and final step is the Analysis step, where the necessary fields are already configured in the system through the Fields step.
There is a notification indicating that the analysis is complete, along with two column below:
Step: The name of the file where the records will be kept.
Total: The number of rows.
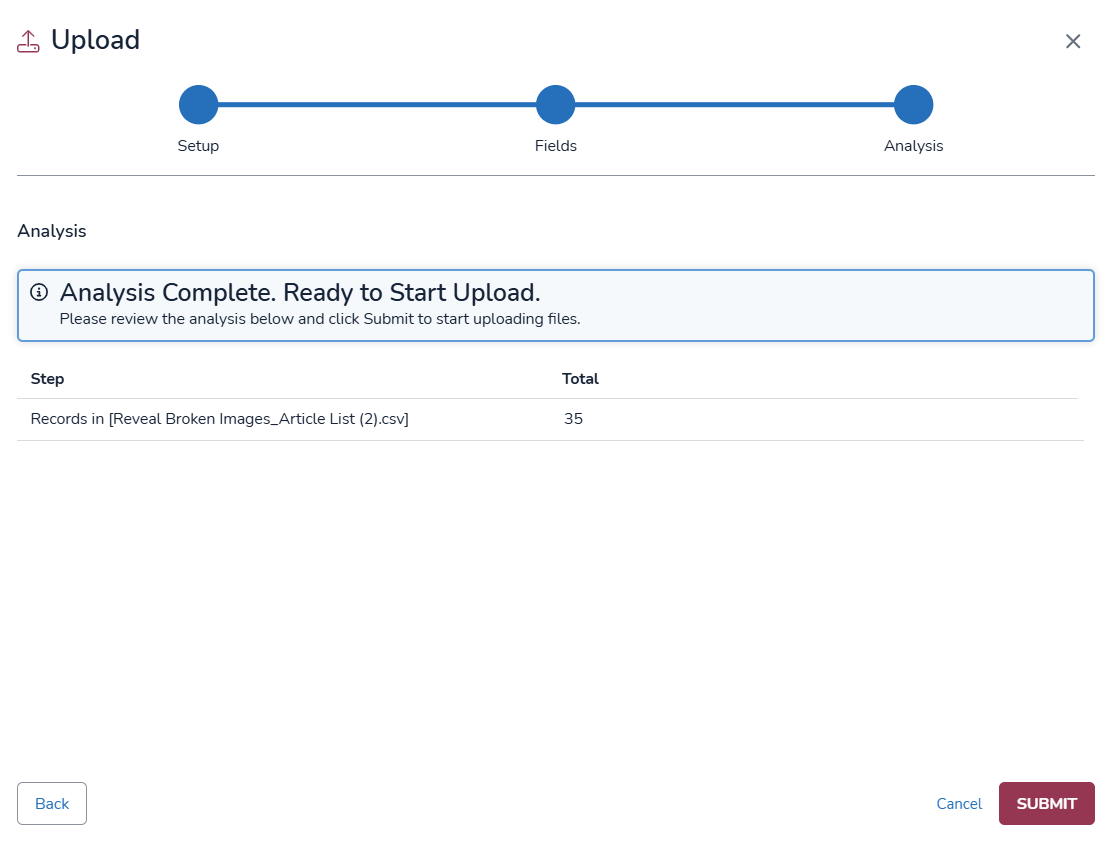
After clicking Submit, the file(s) will be added and the upload job will commence. A progress bar is displayed to provide updates.
The updated page now displays the overall status of the upload process by organizing the progress into three sections:
Uploaded Files
Preparing Documents
Indexing
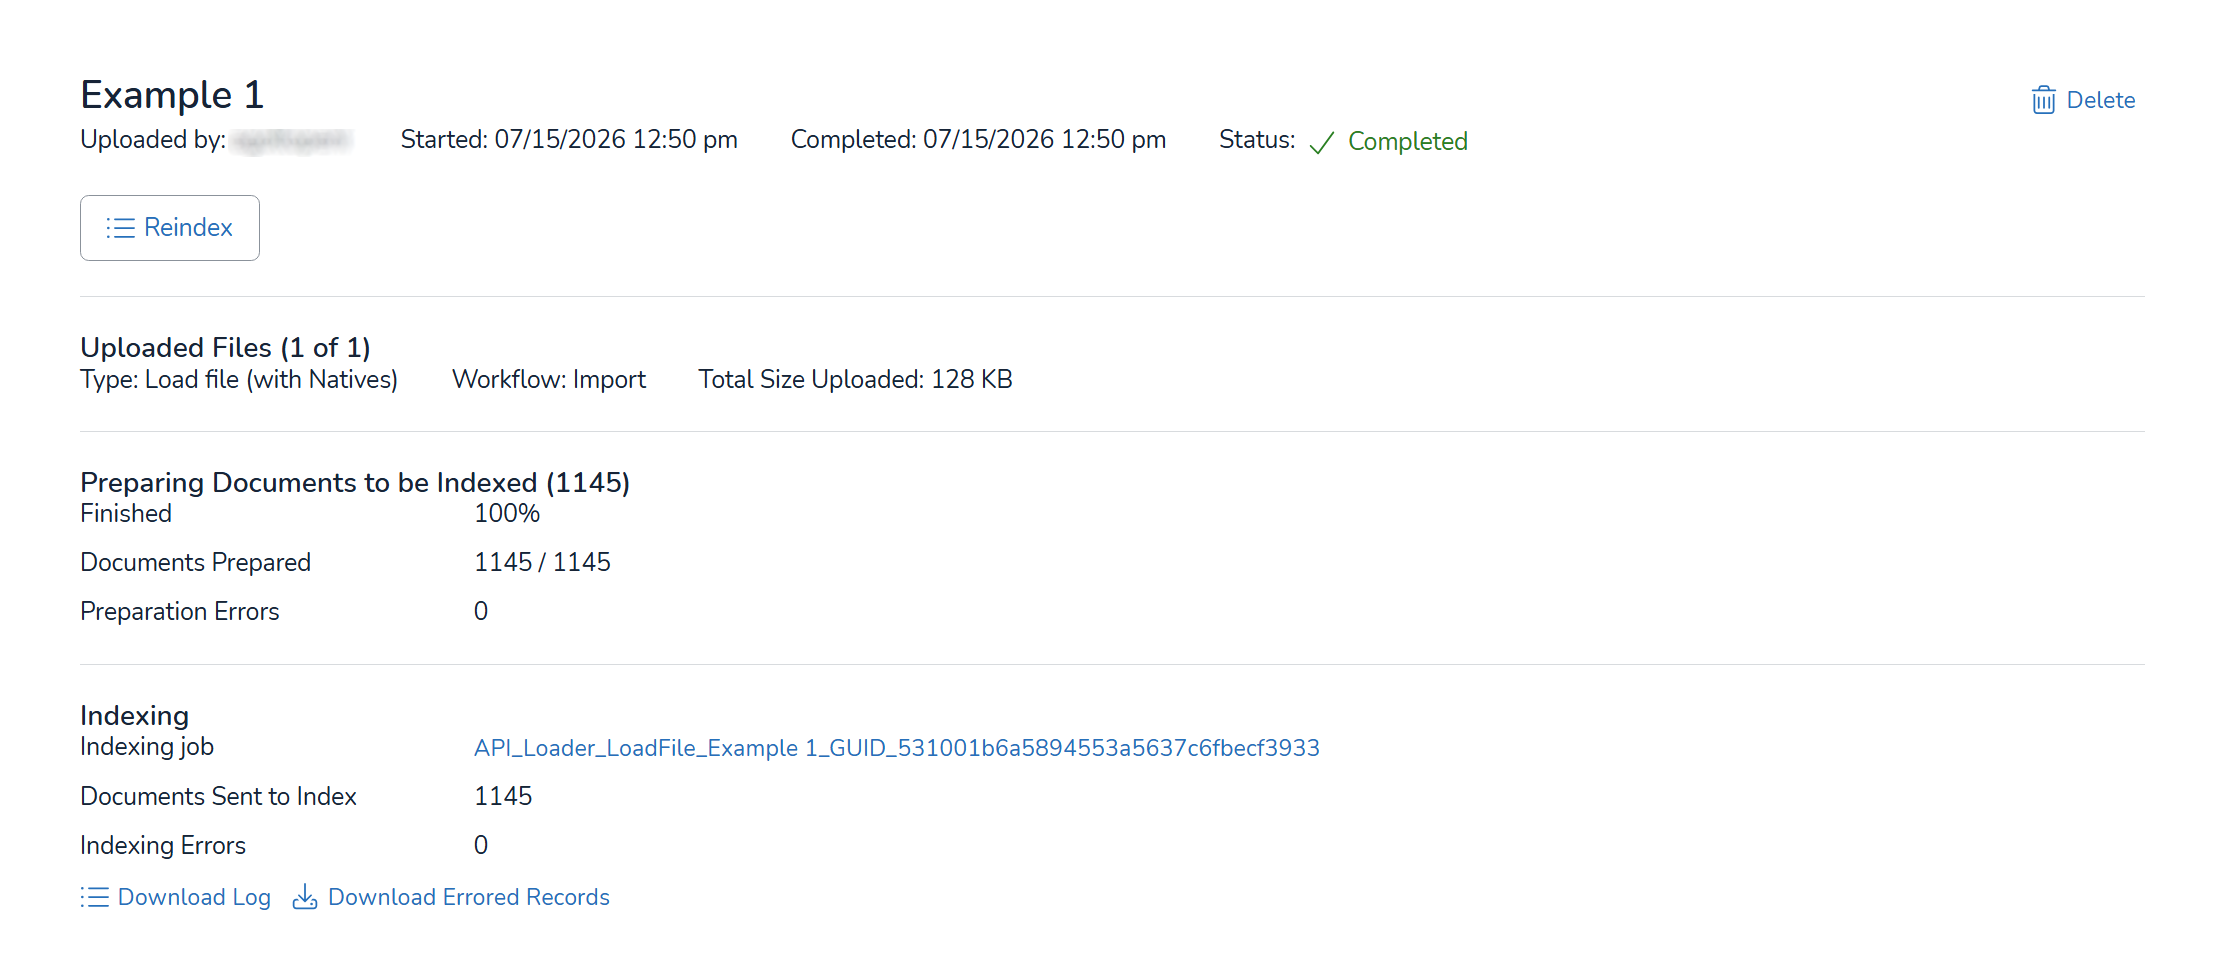
On top of the Uploaded Files, after the upload is finished, you can choose to Reindex data that could’ve been missed prior. In cases where indexing was not selected during the upload process, an Index button will appear instead.
In addition, in the Indexing section, users can see two links:
Download Log: Allows users to download a file containing the processing logs for the import, which provides an overview of the actions taken during the process.
Download Errored Records: To download the file that includes records that failed validation or import. This allows you to review and correct the issues before re-uploading the records.
Images Files
Since images do not require field mapping, the process is simpler. After setup, there is only one additional step: Analysis
Analysis
The selected images have been analyzed. A notification indicates that the analysis is complete. Clicking Submit, the file(s) will be added and the upload job will commence.
Finalizing the Upload
After completing the necessary steps for each file type and structuring the upload process this way, users can efficiently handle different file types while ensuring accuracy and consistency in data management.