You can add a supported transcript file type to an open case in EVIDENCE using any of the methods described below:
Drag and Drop
The Transcripts Explorer Ribbon Bar
For more information about supported files types and what items can be included during import, see Supported Transcript File Types.
Review the sections below to learn more about each method for adding a transcript to a case.
Drag and Drop
The easiest way to add a transcript is the drag and drop method. To utilize this method, follow the steps below:
Click the EVIDENCE tab in the left navigation panel.
.png)
Open the needed case by double-clicking the case name in the Cases table. Alternatively, you can select the appropriate case name, then click the Open Case button in the ribbon bar above the table.
.png)
Open the Transcripts Explorer.
If the Transcripts Explorer is not visible, you can open it using the Explorers dropdown in the TRIAL DIRECTOR EVIDENCE Main Menu.

Click the drop-down arrow and then click Transcripts.
Open the file location in the local file explorer.
.png)
Note:
You may also drag files directly from your desktop.
Hold left click on the file and drag the file over to the TRIAL DIRECTOR EVIDENCE Transcripts Explorer.
.png)
Release left-click to drop the file into the Transcripts Explorer.
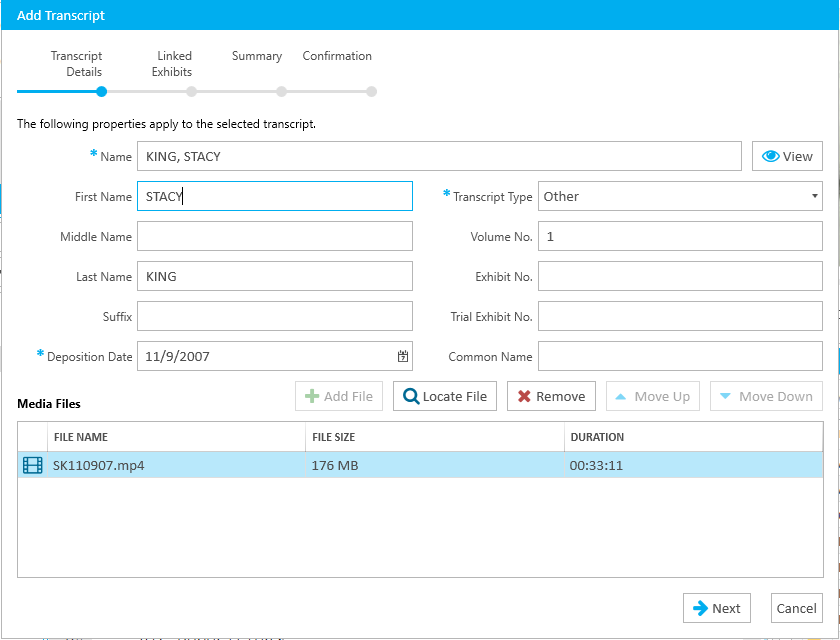
The Add Transcript wizard appears with information from the transcript file populating the fields.

Progress through the Add Transcript wizard by filling in the fields and clicking the Next button.
You can change the properties of the transcript in step one, and view linked exhibits in step two. Each step of the transcript wizard is described in greater detail below.
On the Summary step, click the Add button.
The transcript is added to the case and appears in the Transcripts Explorer.
Note:
When adding a non-deposition CMS file, the file name will be provided as the name of the transcript.
Transcripts Explorer Ribbon Bar
To add a transcript to the case via the Transcripts Explorer, follow the steps below:
Open the Transcripts Explorer.
.png)
The transcripts already added to the case appear.
Click the Add button in the explorer's ribbon bar.
.png)
The local file explorer appears.
Navigate to the transcript to be added.
.png)
Select the file.
Click the Open button in the file explorer.
The Add Transcript wizard appears with information from the transcript file populating the fields.
.png)
Progress through the Add Transcript Wizard by filling in the fields and clicking the Next button.
You can change the properties of the transcript in step one, and view linked exhibits in step two. Each step of the transcript wizard is described in reater detail below.
On the Summary step, click the Add button.
The transcript is added to the case and appears in the Transcripts Explorer.
The Add Transcript Wizard
The Add Transcript wizard is separated into the following steps:
Transcript Details - This step allows you to enter details on the transcript and add any previously synchronized media with the transcript. Only the Name field is required. Ensure the synchronized media is in the correct chronological order.
Linked Exhibits - If the digital video transcript you are importing includes linked exhibits, this step allows you to locate and link the exhibits to the transcript. Click the Locate button to find the exhibit(s) you want. Then, browse to the location of the files.
Summary - This step allows you to review the properties and settings for the transcript. If there are any errors, you can click the Edit button and fix those issues.
Confirmation - This is an automatic step that notifies you whether the transcript was successfully added to the case.