A Company is required for a Reveal project. Users assigned to projects have been designated permissions by an admin user.
Important
If you are a SaaS Customer, we recommended you follow the Web-Based instructions below to create Projects within your Reveal instance. If you are an On-Prem customer, you may only have the option to create Projects using the Legacy Web-Based option. If the Web-Based option is not available within your instance, please follow the Legacy instructions instead.
Manage a project (web-based)
Reveal projects are managed under Admin > Companies > [Company] > Projects in the user interface. There is also the legacy Company Admin area, which offers project Peak Billing Info and Case Status reports.
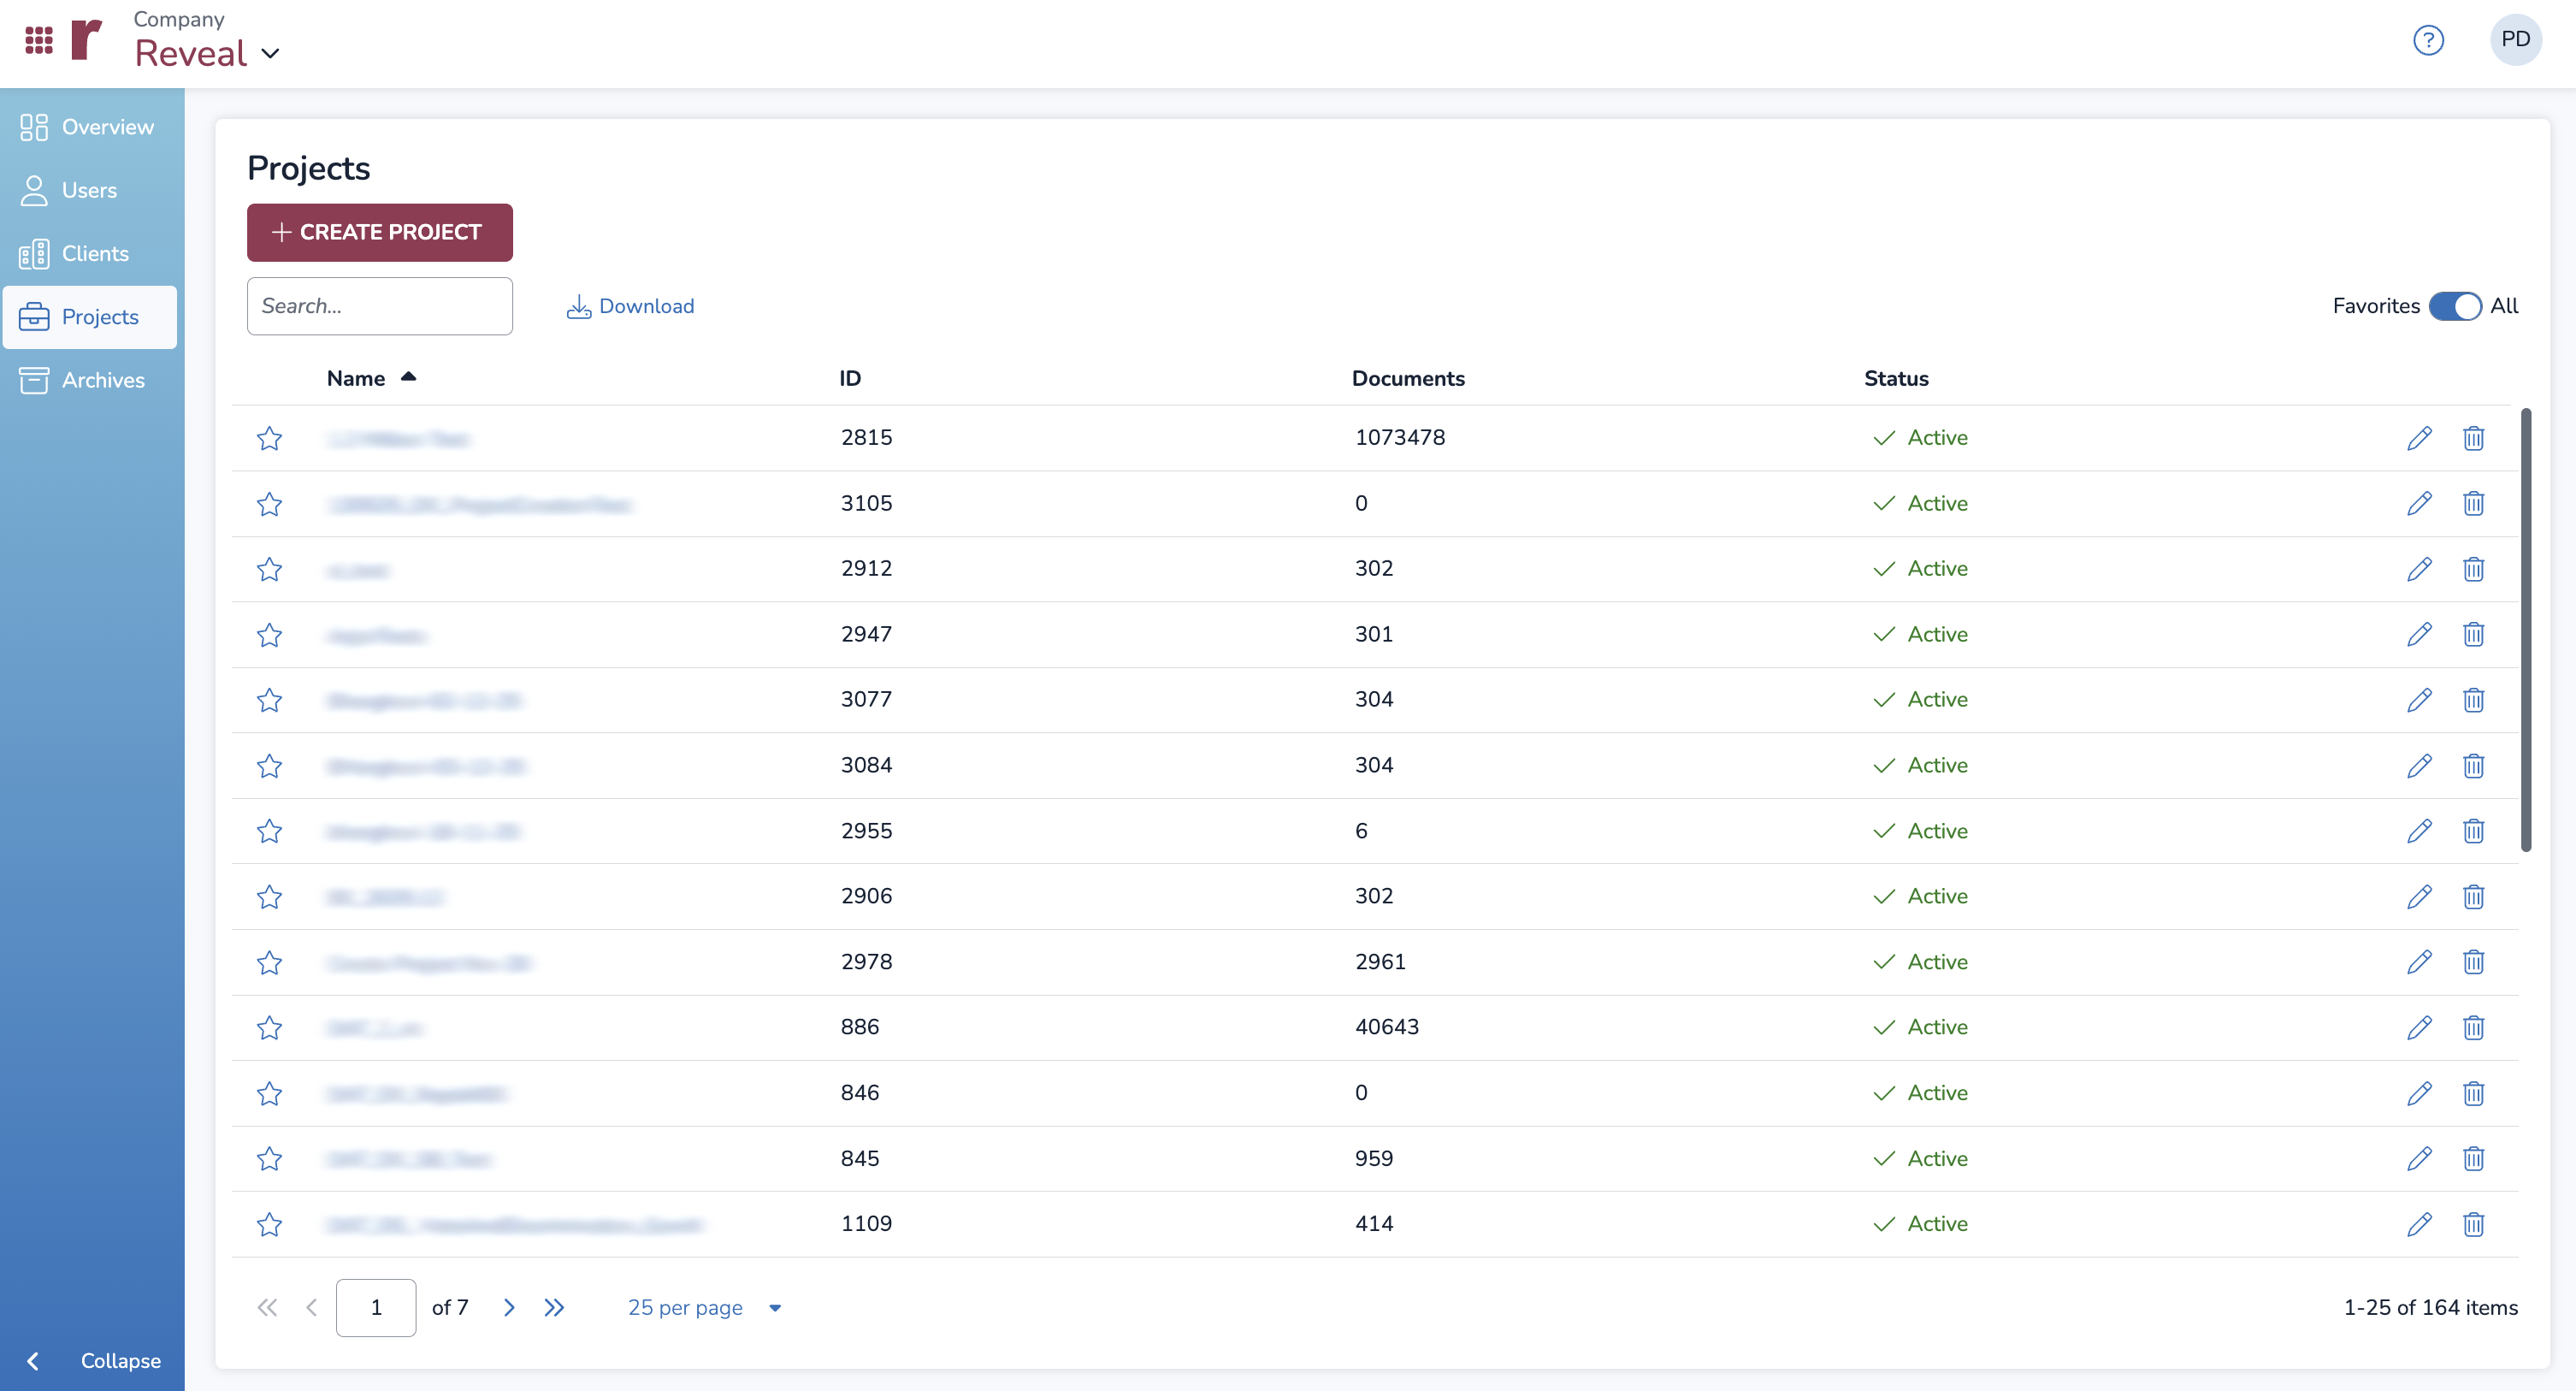
In the Projects table (above) you can view all your projects within your specific company, including their project ID, number of documents, and the project’s status – Active or Cold Storage. The search box can filter projects by Name or ID. You can also change the sort order of these columns by pressing their headers.
Usage statistics
Clicking any project’s name will take you to its individual Usage Statistics page, shown below.
.png)
The Usage Statistics graph displays the total usage statistics across the last 30 days. Clicking any of the values – Indexes, Native/Text, Images, Databases, Documents, Production, or Archives – will show you usage statistics across 30 days for that specific value.
Pressing ![]() Download will download your usage statistics as a CSV, where you can view stats by day.
Download will download your usage statistics as a CSV, where you can view stats by day.

Managing your subscription
To manage your data usage and prevent subscription overages, Reveal has various ways of managing active or inactive projects. This can reduce your overall Active Data usage and Peak Active Data for the month.
Move a project to Cold Storage – Render your project as invisible and inaccessible so it is billed at a lesser Cold Storage Rate than an active project.
Archive a project – Download your project as zipped files to offline it from the cloud. Usually, archived projects are deleted from the cloud after they have been downloaded to local storage.
Delete a project – Delete your project from the Reveal system so that you are not charged for its storage.
Cold Storage
Cold storage is a way for you to manage your projects online and reduce storage costs if a project is in a period of little to no activity. Unlike archiving a project, putting a project in Cold Storage keeps the project easily accessible if needed. Projects in Cold Storage will be billed at a lesser Cold Storage Rate than an active project.
We recommend using Cold Storage to hide an active project where work is stalled or essentially done. A project can be re-activated from Cold Storage, but there may be limitations and implications on billing depending on how often you move your project in and out of cold storage.
Note
If you’re interested in using Cold Storage, or have questions about your billing rates, refer to the applicable contract or reach out to your Customer Success Manager.
Putting a project in Cold Storage
To place a project in Cold Storage:
From the specific project’s Usage Statistics page, scroll down under the Total Usage graph.
Click Move to Cold Storage.
Press Confirm in the popup.
Once deactivated, the projects summary statistics will clear from the screen (see below), though this data still exists on the back end.

In the Projects table, projects in Cold Storage will display a ![]() Cold Storage status, and only be visible to Company and Instance Admins.
Cold Storage status, and only be visible to Company and Instance Admins.

Upon moving a project to Cold Storage, users are locked out instantly, and upon re-activation receive access with all permissions intact.
Reactivate project from Cold Storage
When reactivating a project, only a browser refresh is needed on the user’s part to re-enter the project. Usage tracking does not change, and all logs are maintained. The only thing that changes is a flag indicating whether the project was in cold storage for that day.
To reactivate your project:
From the specific project’s Usage Statistics page, scroll down under the Total Usage graph.
Click Re-Activate Project.
Press Confirm in the popup.

Reactivated projects will be fully enabled with all data, users and settings as previously.
Warning
A project will be fully billable for any part of a month in which it is Active, even if only part of a single day.
Archives
If you would like a way to fully offload your project from the platform to eliminate its storage costs, consider archiving it. You can read more in our About Archives article and Archives folder. Note that an archived project will eventually need to be deleted from Reveal in order to remove your project’s storage costs.
We recommend archiving only when you are confident the project will not need routine access, as restoring an archived project requires coordination with Customer Support.
Delete a project
Outside of Discovery Manager, Instance and Company Admins can delete a project from within its particular company under Companies > Projects using the ![]() Trash icon, which is present both to the right of each company in the list, and in each project’s Project Details screen.
Trash icon, which is present both to the right of each company in the list, and in each project’s Project Details screen.
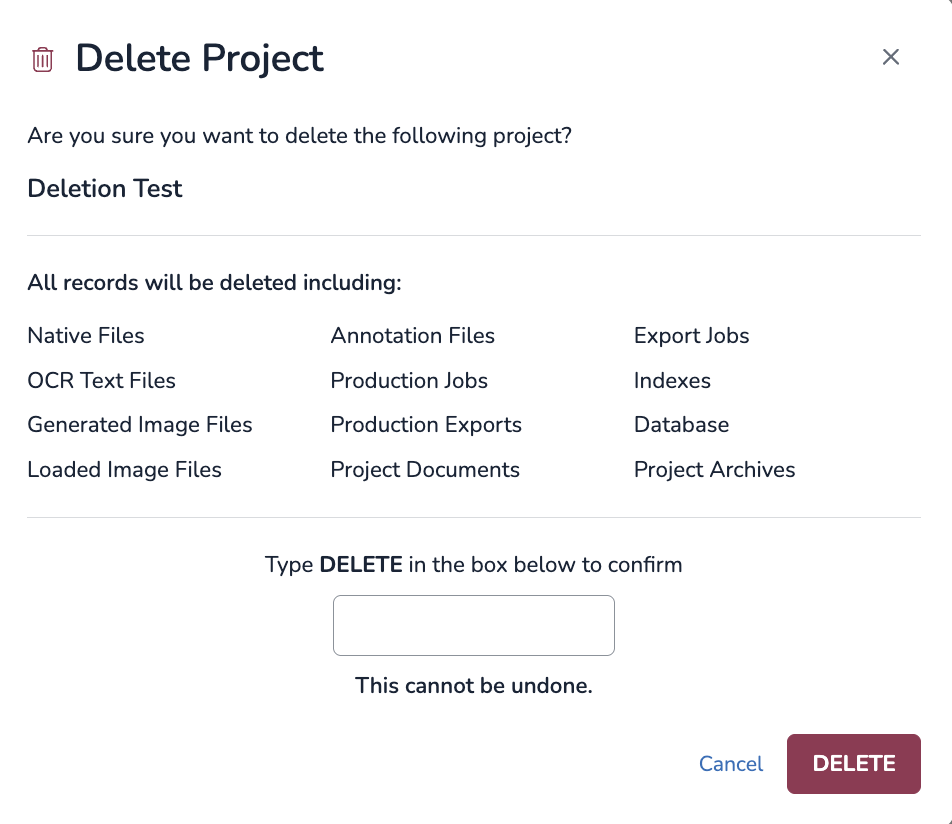
The Delete Project modal will pop up.
Type the uppercase word DELETE in the text box.
Press the DELETE button.
Warning
This action deletes a project completely. Clients should not expect to be able to restore deleted projects by any means, unless the project has been successfully archived.
Manage a project (legacy Company Admin area)
Go to Home page > Companies > Legacy Company Admin.
The opening Projects tab lists all the current projects; the Summary pane on the right provides information for the amount of data utilized. Any column in the table may be filtered by example. The columns displayed are:

ID – A unique alphanumeric identifier for the project.
Name – The project’s descriptive name is a clickable link to the project detail screen.
Company – The company under which the project was created.
Client – The company client under which the project was created.
Created Date – The date on which the project was created.
Users – The current number of users actively assigned to the project.
Timezone – The normalized time zone setting for the project; this value cannot be changed.
In addition, there are two controls above the Projects table if no projects are selected:
Create new project – Another way to access the project creation workflow described above.
Export stats – Choose which project report to generate:
Peak Billing Info – Selecting this will prompt for a Start Date and an End Date to report maximum usage over the specified period.
Case Stats – Outputs project table data plus storage statistics in each Summary category for each project.
If a project in the table is selected (or multiple projects are selected), additional controls are displayed above the table:

Create new project.
Show stats – Displays a pop-up report of storage statistics for the project(s) selected.
Details – Opens the Project Details screen, the same as clicking on the Project Name in the table.
Edit – Opens the project directly to its Edit screen for updating.
Delete – Removes the selected project(s). It is advised to apply this action with extreme caution only after verifying that no useful active data exists in the project.
To view and manage a project click on the Project Name in the Projects table. The Project details screen displays:

The case name at the top with the Case ID and Company in the header;
A listing of all Users assigned to the case with the assigned Team(s) and Role of each; and
Summary case statistics in the shaded pane to the right.
To manage project users or settings click Edit at the upper right of the screen.
In the Edit Project screen the administrator may view the Project Name, ID and Time Zone; these values may not be changed after the project is created. Items which may be edited for the Project are:

Name is the display name of the project, which cannot be amended.
ID is the internal identifier of the project, which cannot be edited.
Company selects the Company with which the Project is associated.
Client selects the Company Client with which the Project is associated.
Time Zone for the project may be viewed but not changed.
Document Access sets document level security on or off.
Artificial Intelligence sets access to AI analysis; this is set ON by default.
Users is where available users may be assigned to or removed from the project. Users assigned must have a security group specified in order to access the project. See How to Create & Manage Users for more information.
Click SAVE when modifications are complete.