Single Sign-On (SSO) allows users to access multiple applications with a single set of credentials, improving security and simplifying login management. This guide walks you through configuring SSO in Azure AD, including setup steps for both U.S. and EU Logikcull instances.
Step 01: Access Azure Portal
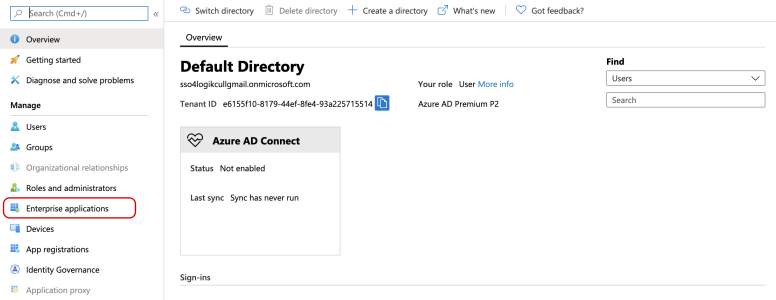
Go to https://portal.azure.com. From the Azure Services dashboard, select Azure Active Directory.

On the left panel, click Enterprise Applications.
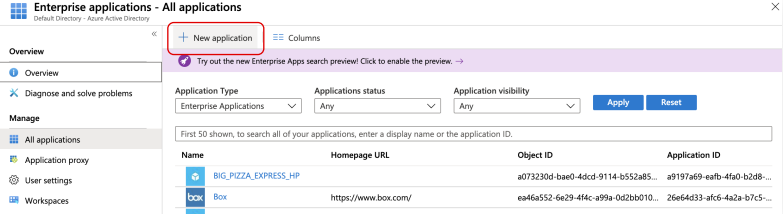
Click + New Application.
Step 02: Create a Custom Application
Select Click here to try out the new and improved app gallery (if prompted).
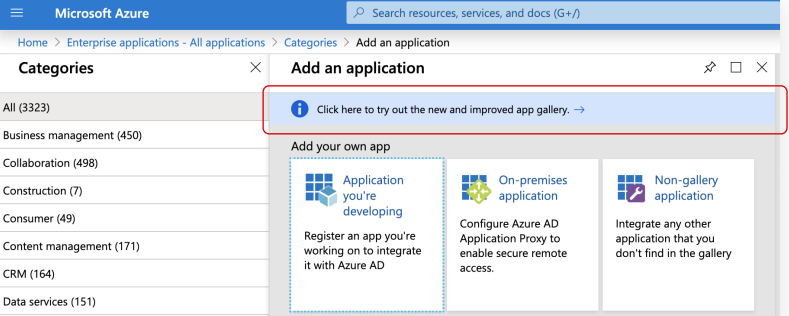
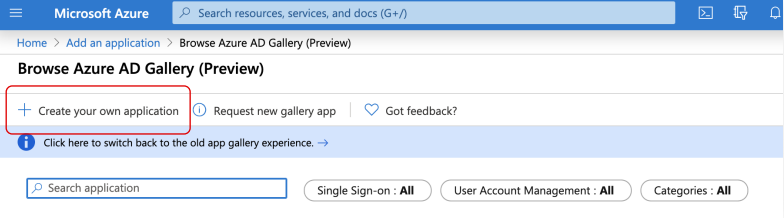
Click Create your own application.
Enter Logikcull in the application name field. Select Integrate any other application you don't find in the gallery.
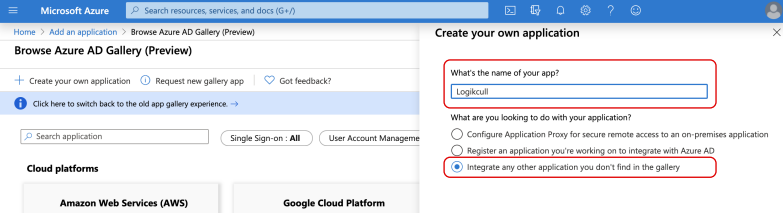
At the bottom click Create. And you will be redirected to the application.

Step 03: Assign Test User
Under Getting Started, click Assign users and groups and add a test user to the app. (This will allow you to test SSO before enabling it for all users.)

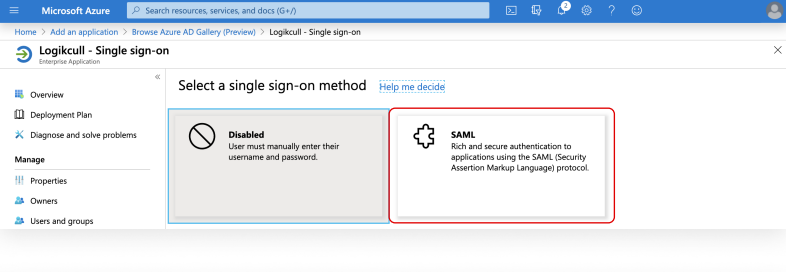
Step 04: Configure SAML
In the left menu under Manage, select Single sign-on.

Select SAML as the sign-on method.
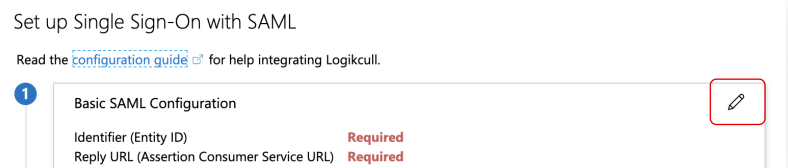
Step 05: Edit Basic SAML Configuration
Under Section 1: Basic SAML Configuration, click the pencil icon to edit.
Under Entity ID enter:
urn:auth0:logikcull:[Connection ID]Under Reply URL (ACS URL) enter:
https://login.logikcull.com/login/callback?connection=[Connection ID]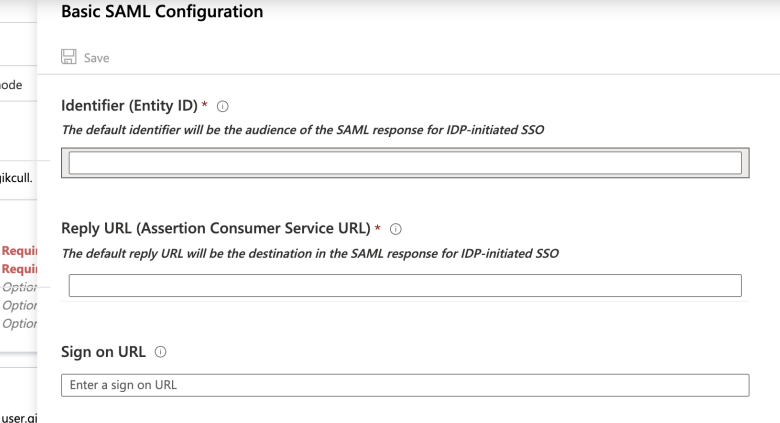
At the top left of the form, click Save then click the X in the top right corner to exit Section 1.
This message may pop up - click No, I’ll test later or simply ignore the message and scroll down to section 2.

Step 06: Edit User Attributes & Claims
Under Section 2: Attributes & Claims, click the pencil icon to edit.
.png)
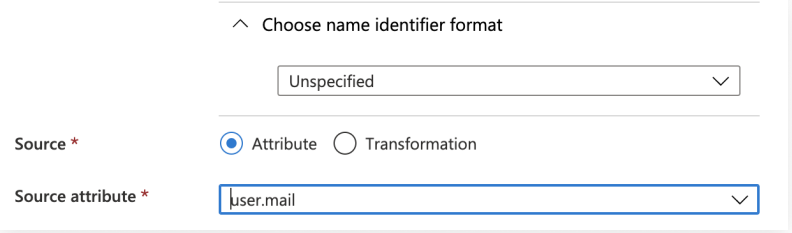
Under Required Claim, click Unique User Identifier (Name ID).

Under Choose Name Identifier Format select Unspecified in the dropdown. In Source Attribute select user.mail
Map the remaining attributes as shown below. And then click Save.
User Attributes & Claims | Unique User Identifier |
|---|---|
given_name | user.given_name |
family_name | user.family_name |
name | user.userprincipalname |
user.mail |
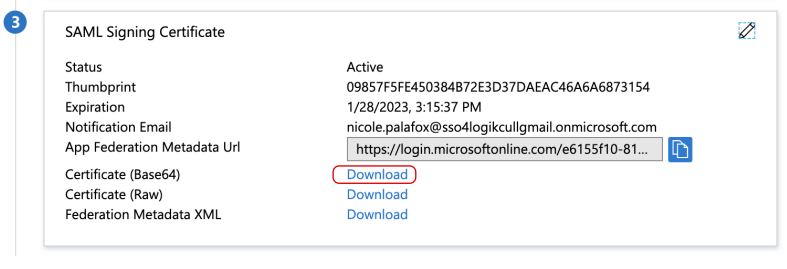
Step 07: Download Certificate & Retrieve URLs
Under Section 3: SAML Signing Certificate, click Download next to Certificate (Base64).
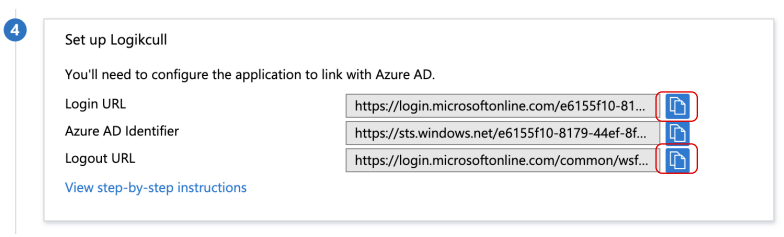
Scroll to Section 4: Set up <Application Name>. Click Copy the Login URL and the Logout URL.
Step 08: Complete Setup in Logikcull
You will need the following values to complete SSO setup inside Logikcull (Preferences → Security → SSO Settings):
Certificate (Base64) file
Login URL (SAML Endpoint)
Logout URL
Important Notes
Note
Domain user - a domain user is a user with a username/email that is managed through your company domain. e.g. if your company “Example” uses the email domain “example.com”, then “jane.doe@example.com” would be a domain user.
New domain users must be assigned to the Logikcull app in Azure AD and added to your Logikcull account in the Logikcull (https://app.logikcull.com)
All domain users will be required to login through SSO and therefore must be authorized Logikcull users in your IdP.
If you invite users to your Logikcull account that are not domain users, such as external counsel, they will log into Logikcull directly using a username and password.
If you have enforced 2FA on your Logikcull account, which is recommended, all users will be required to enter a second factor regardless of login method.