Overview
Project stages can help you track work progress across all of your projects according to your own custom workflow. Assigning a stage to your project will give it a colored marker you can reference from within the My Projects page.
.png)
Projects can also be filtered by stage using the Stage dropdown, which is set to "all" by default.
Create and organize project stages
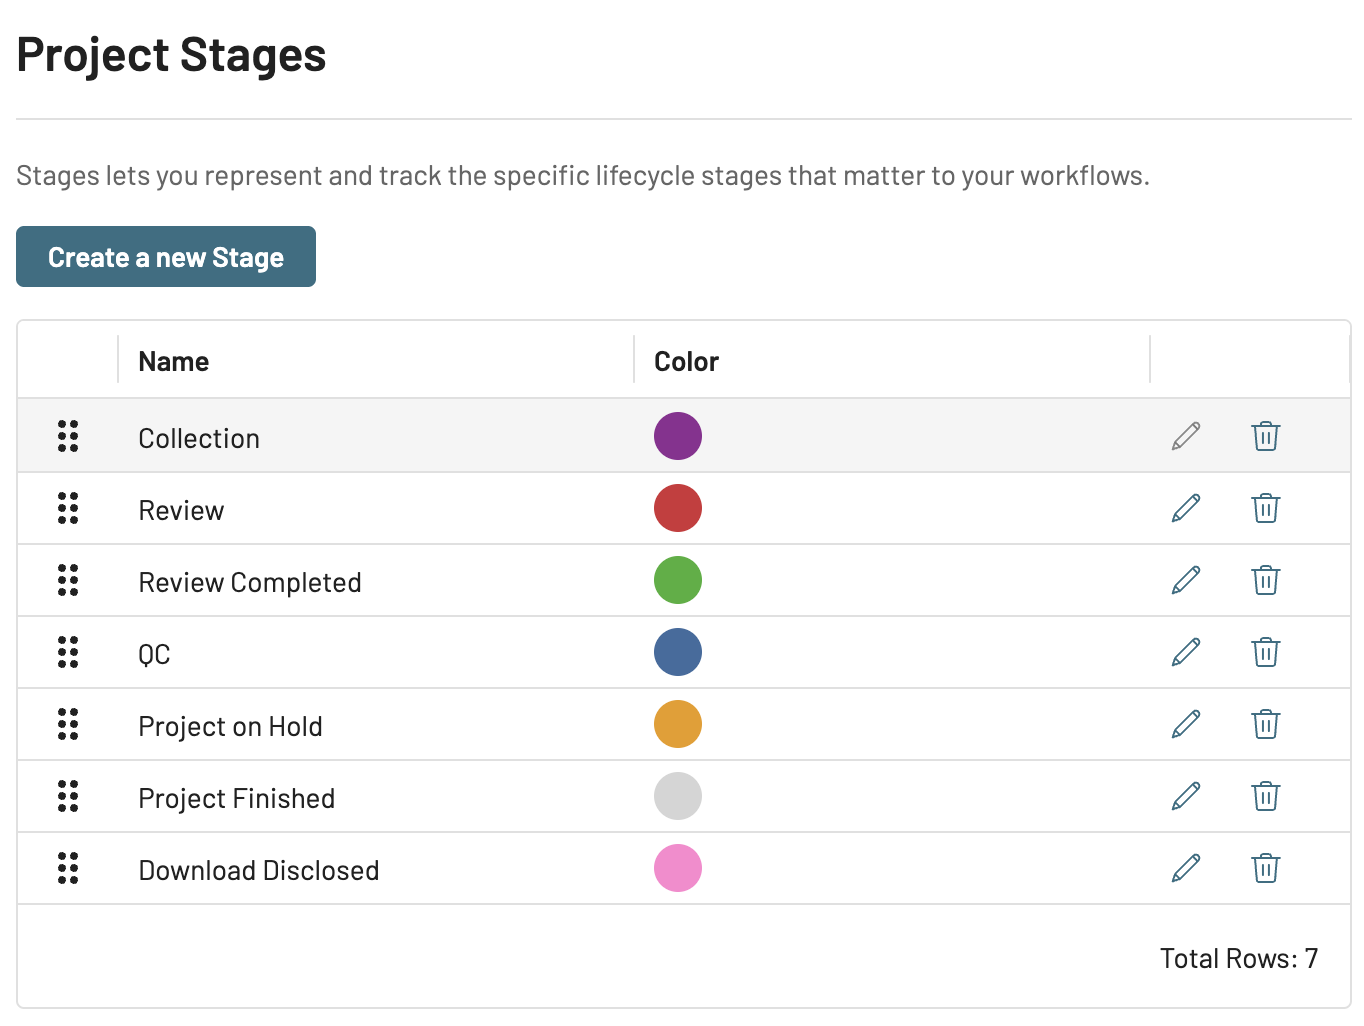
Project stages can be created, edited, and deleted from My Accounts > [your account] > Preferences.
Note
Only Account Admins can create project stages, manage stages, and assign a stage to a project.
Create project stage
From the Preferences tab, scroll down to Project Stages.
Click Create a new Stage.
In the Create Stage popup:

Stage Name: Type a name for the stage.
Click the colored box to choose a stage color.
Press Create.
The new stage will appear at the top of the stack. Use the ![]() drag icon to rearrange the order of stages.
drag icon to rearrange the order of stages.
Edit project stage
On the same row as the stage, click the
 pencil icon.
In the Edit Stage popup, adjust fields as needed according to the Create project stage section.
Click Save.
Delete project stage
On the same row as the stage, click the
 trash icon.
A Delete Stage popup will appear. Click Delete.
Assign or change project stage
Project stages can be assigned or changed from My Projects > [your project] > ![]() Project Settings > Project Info (shown below), or directly from your project card.
Project Settings > Project Info (shown below), or directly from your project card.
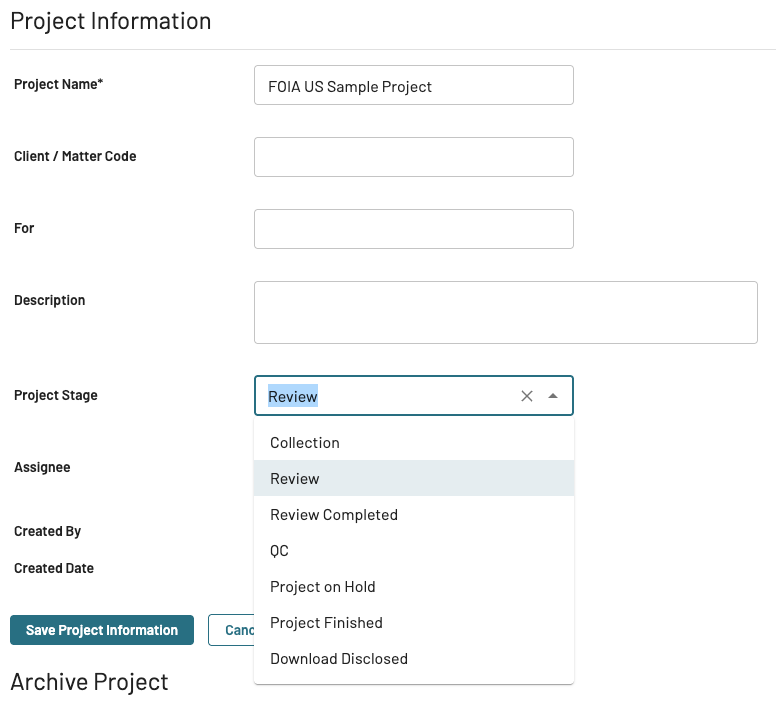
Click Edit Project Information.
In the Project Stage dropdown, select or change the project stage
Click Save Project Information.