In this article:
How to Create a Matter
How to Edit a Matter
How to Close a Matter
How to Share a Matter
How to Manage Matter Members
How to Delete a Matter
How to Create a Matter
Within Integrated Legal Holds, custodians, holds, and notifications are organized by matter. Creating a matter in the Integrated Legal Holds module of Onna is the first step to managing custodians, holds, and notifications. To create a new matter, follow the steps below:
Step 1
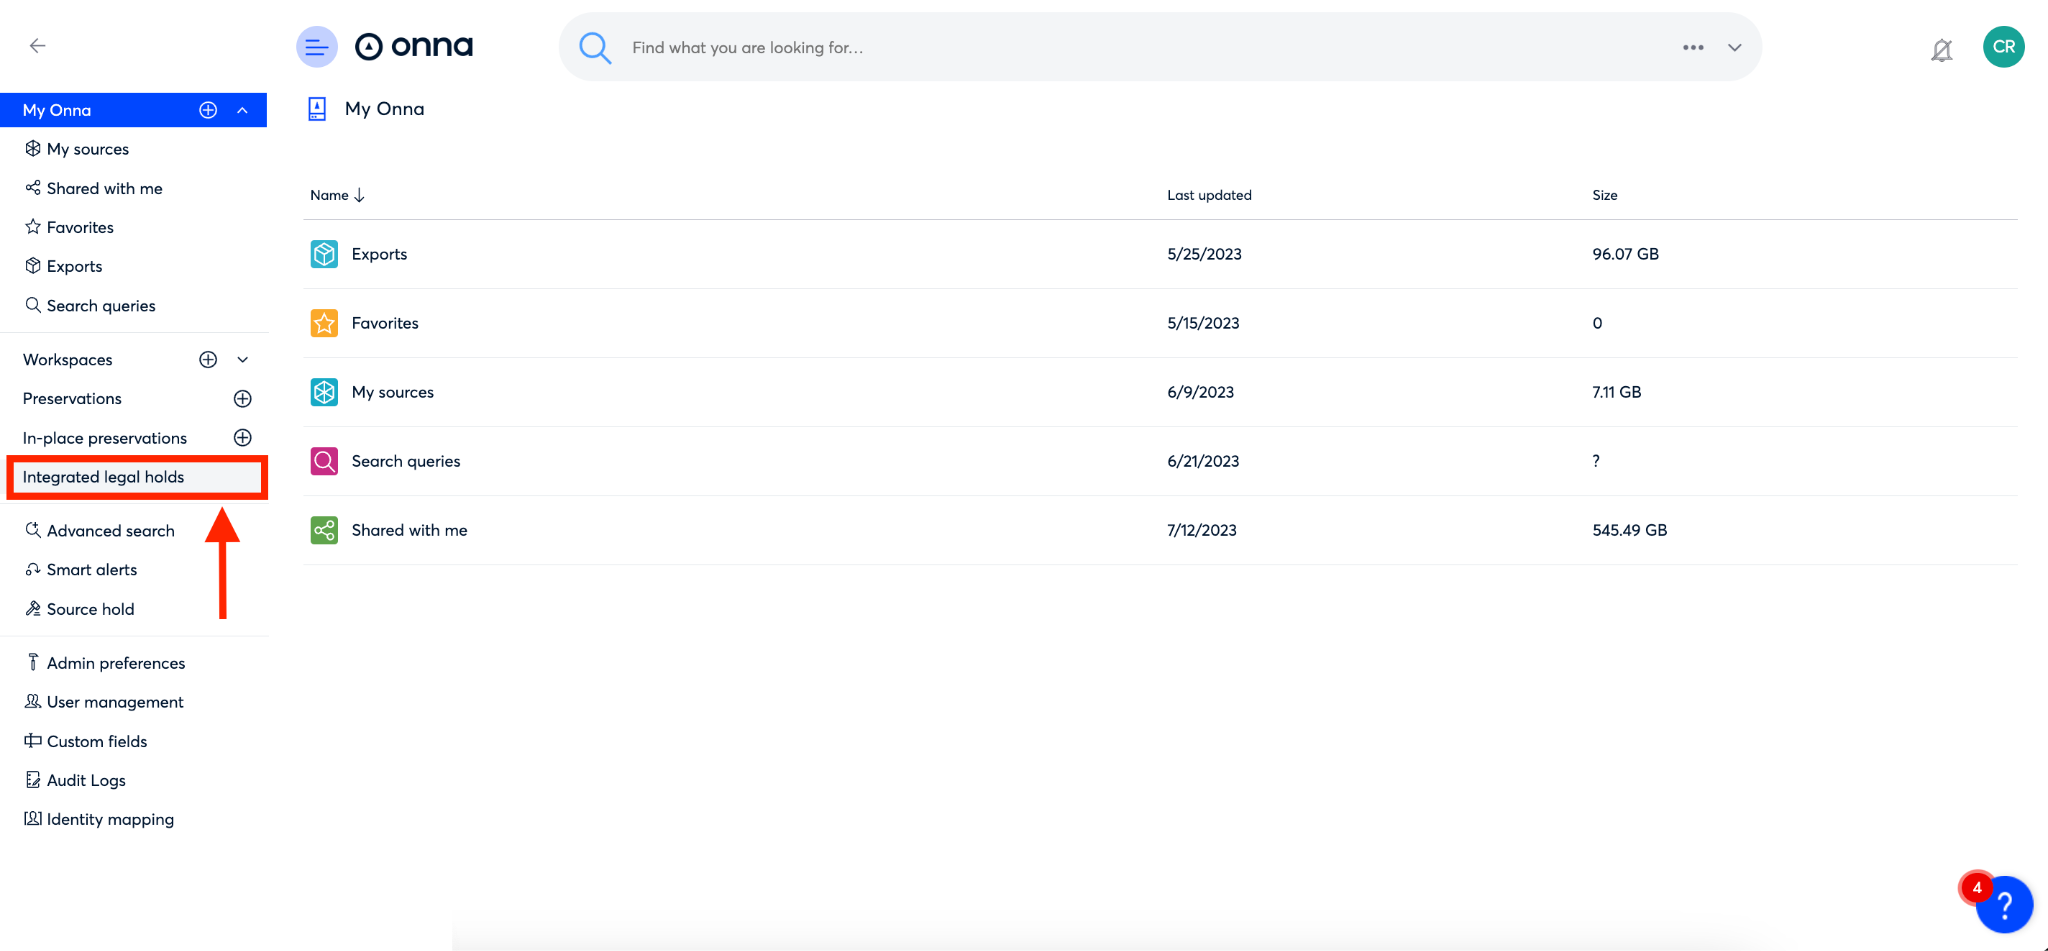
Select ‘Integrated legal holds’ from the main menu.
Step 2
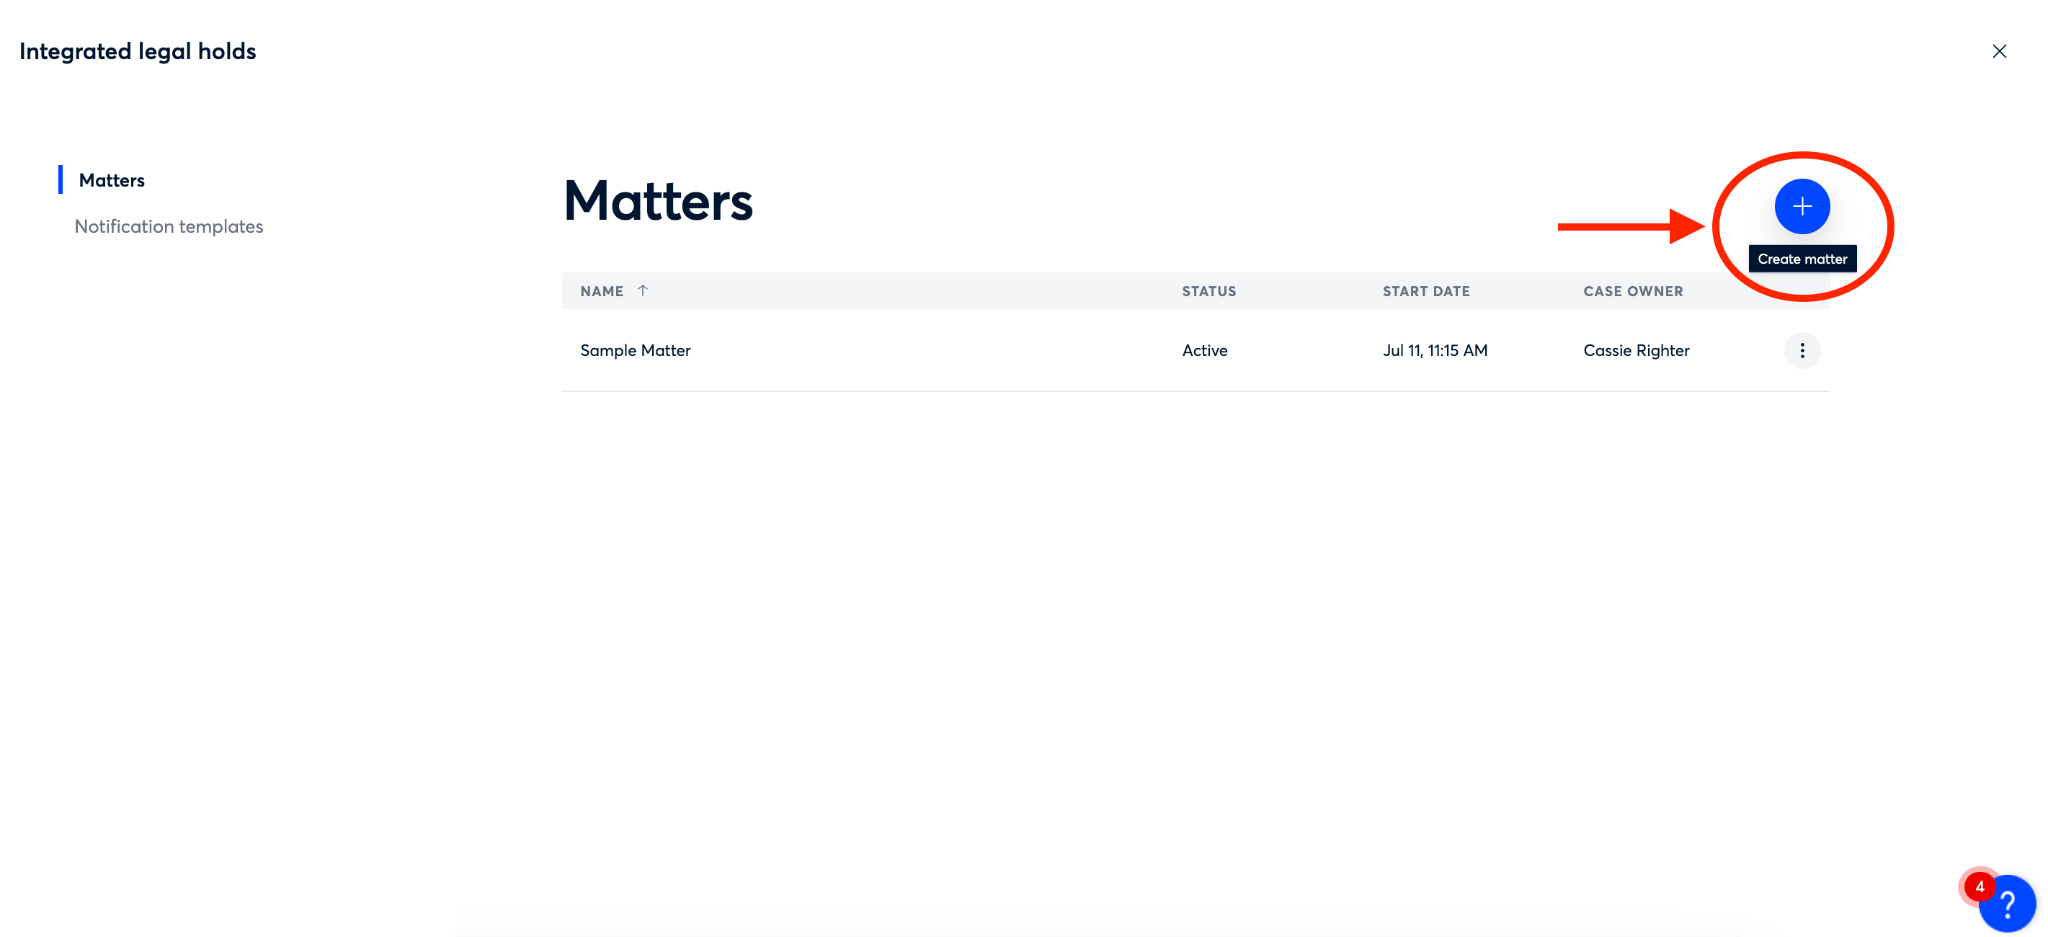
By default, you will be taken to the ‘Matters’ page within Integrated Legal Holds. From this page, click the blue ‘+’ icon in the upper right corner.
Step 3
Next, you’ll add details about the matter to create it.
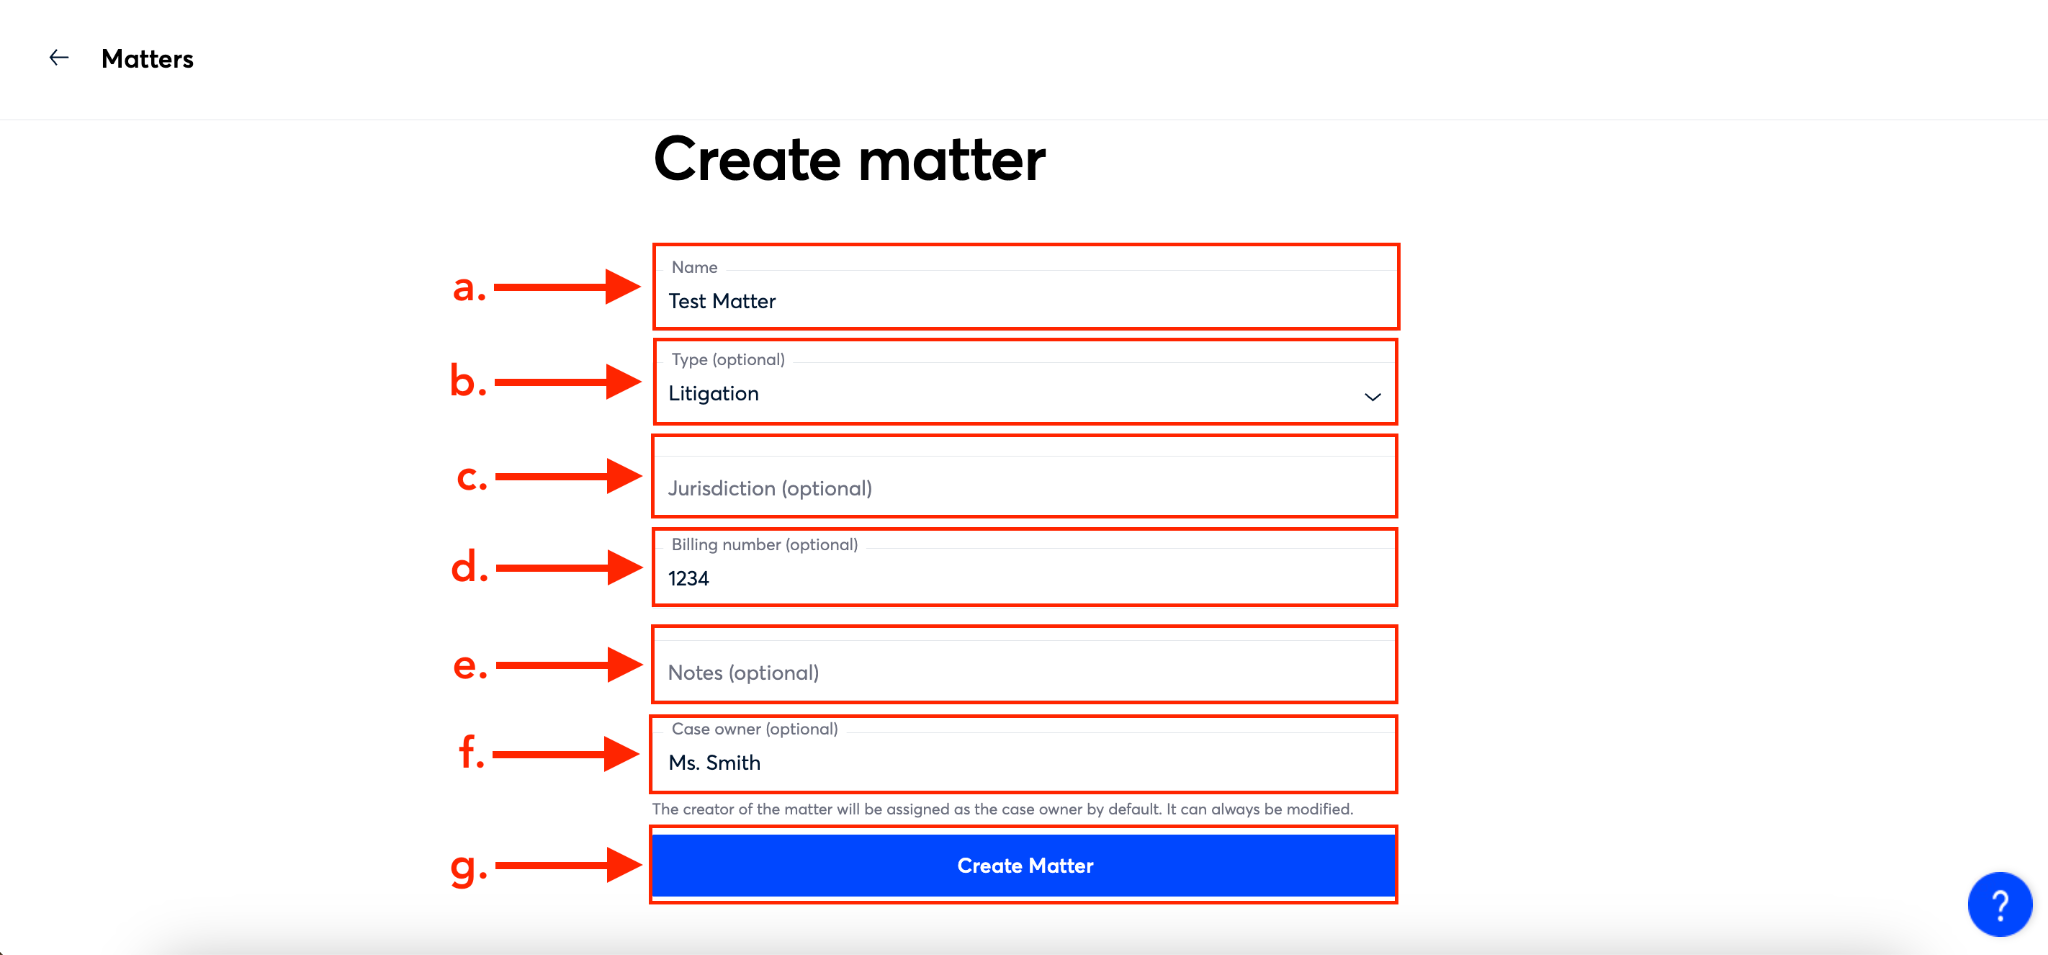
Start by naming your matter in the ‘Name’ field (a).
Next, you can (optionally) select the type of matter from the dropdown menu that appears when clicking on the arrow in the ‘Type’ field (b).
There are also additional optional fields where you can include more details about the matter. These include the ‘Jurisdiction’ field (c), ‘Billing number’ field (d), ‘Notes’ field (e), and ‘Case owner’ (f). Note: the ‘Case owner field’is NOT tied to a user in Onna, but is an open text field, which has a limit of 40 characters.
Once you’ve filled out all the details for your matter click the blue ‘Done’ button (g).
How to Edit a Matter
Once a matter is created there may be a situation where you need to edit the original details. To do so, follow the steps below:
Step 1
Select ‘Integrated legal holds’ from the main menu.

Step 2a
By default you’ll be taken to the ‘Matters’ page. From here, you can edit a matter from two places:
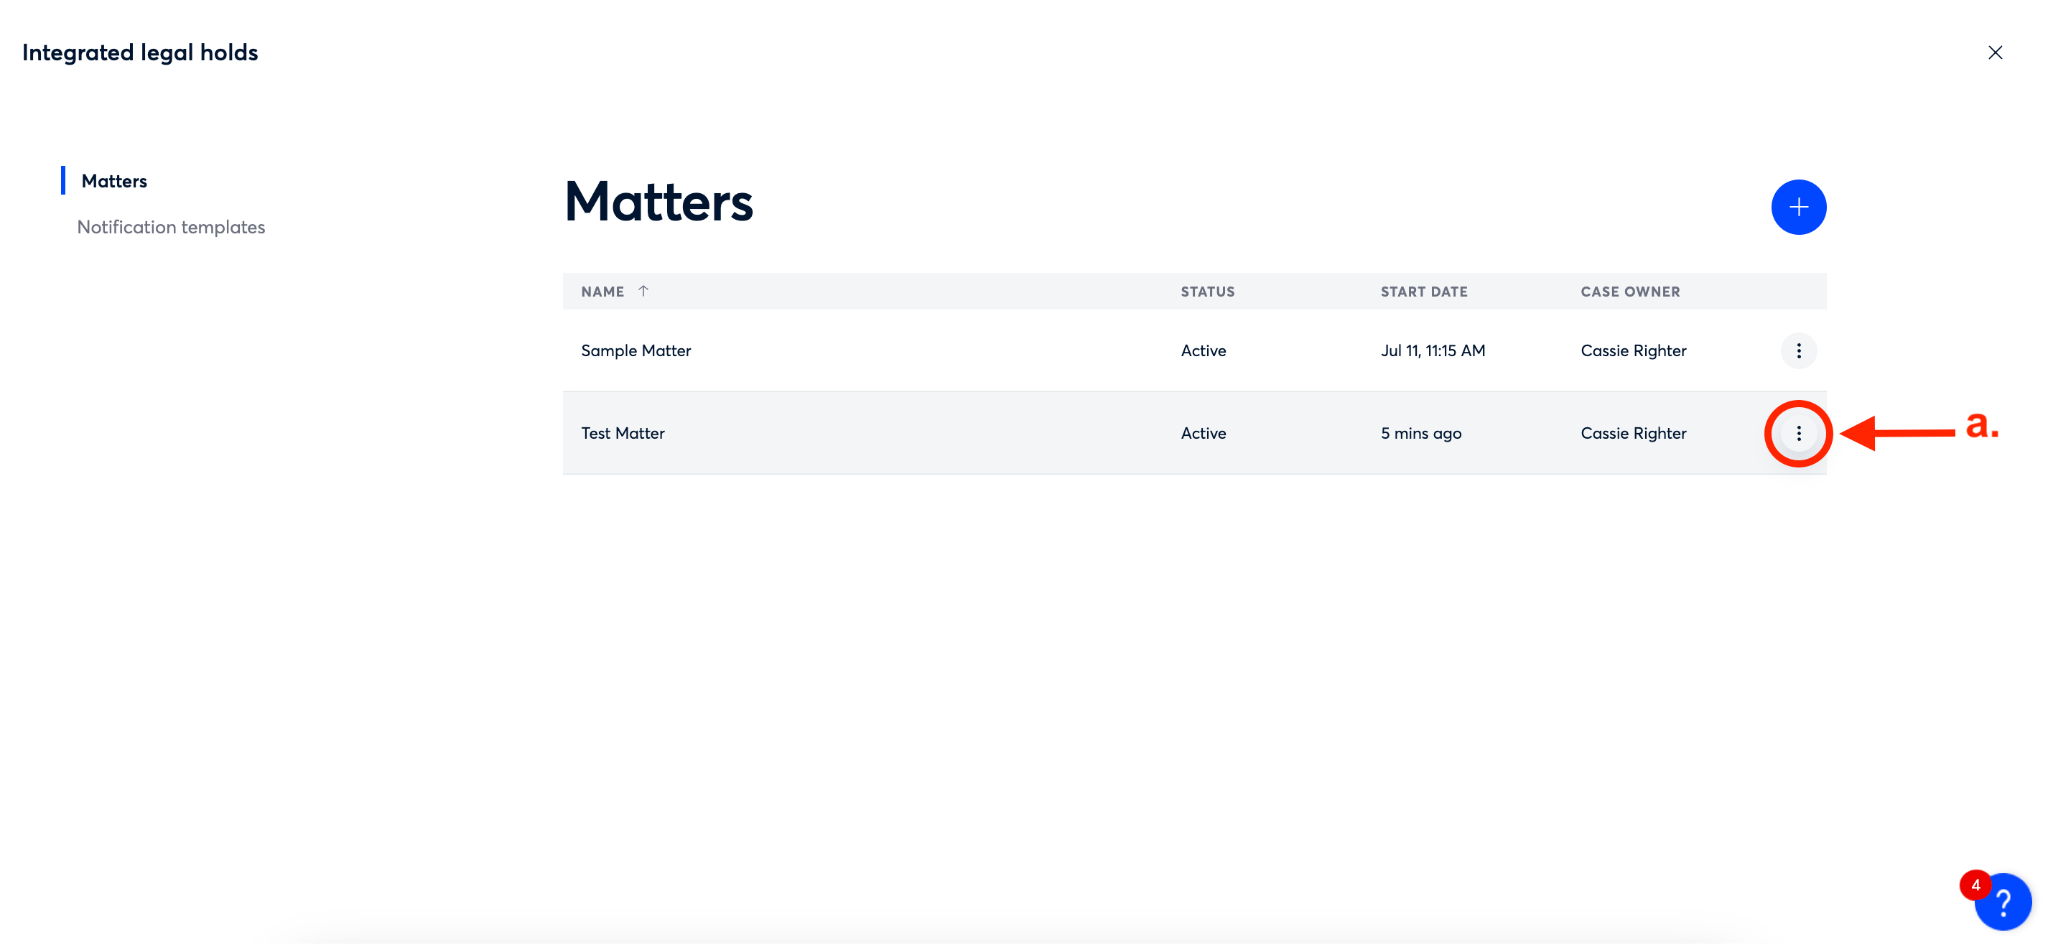
Option 1:
From the ‘Matters’ page, click on the ellipsis on the right side of the row of the matter you want to edit (a).
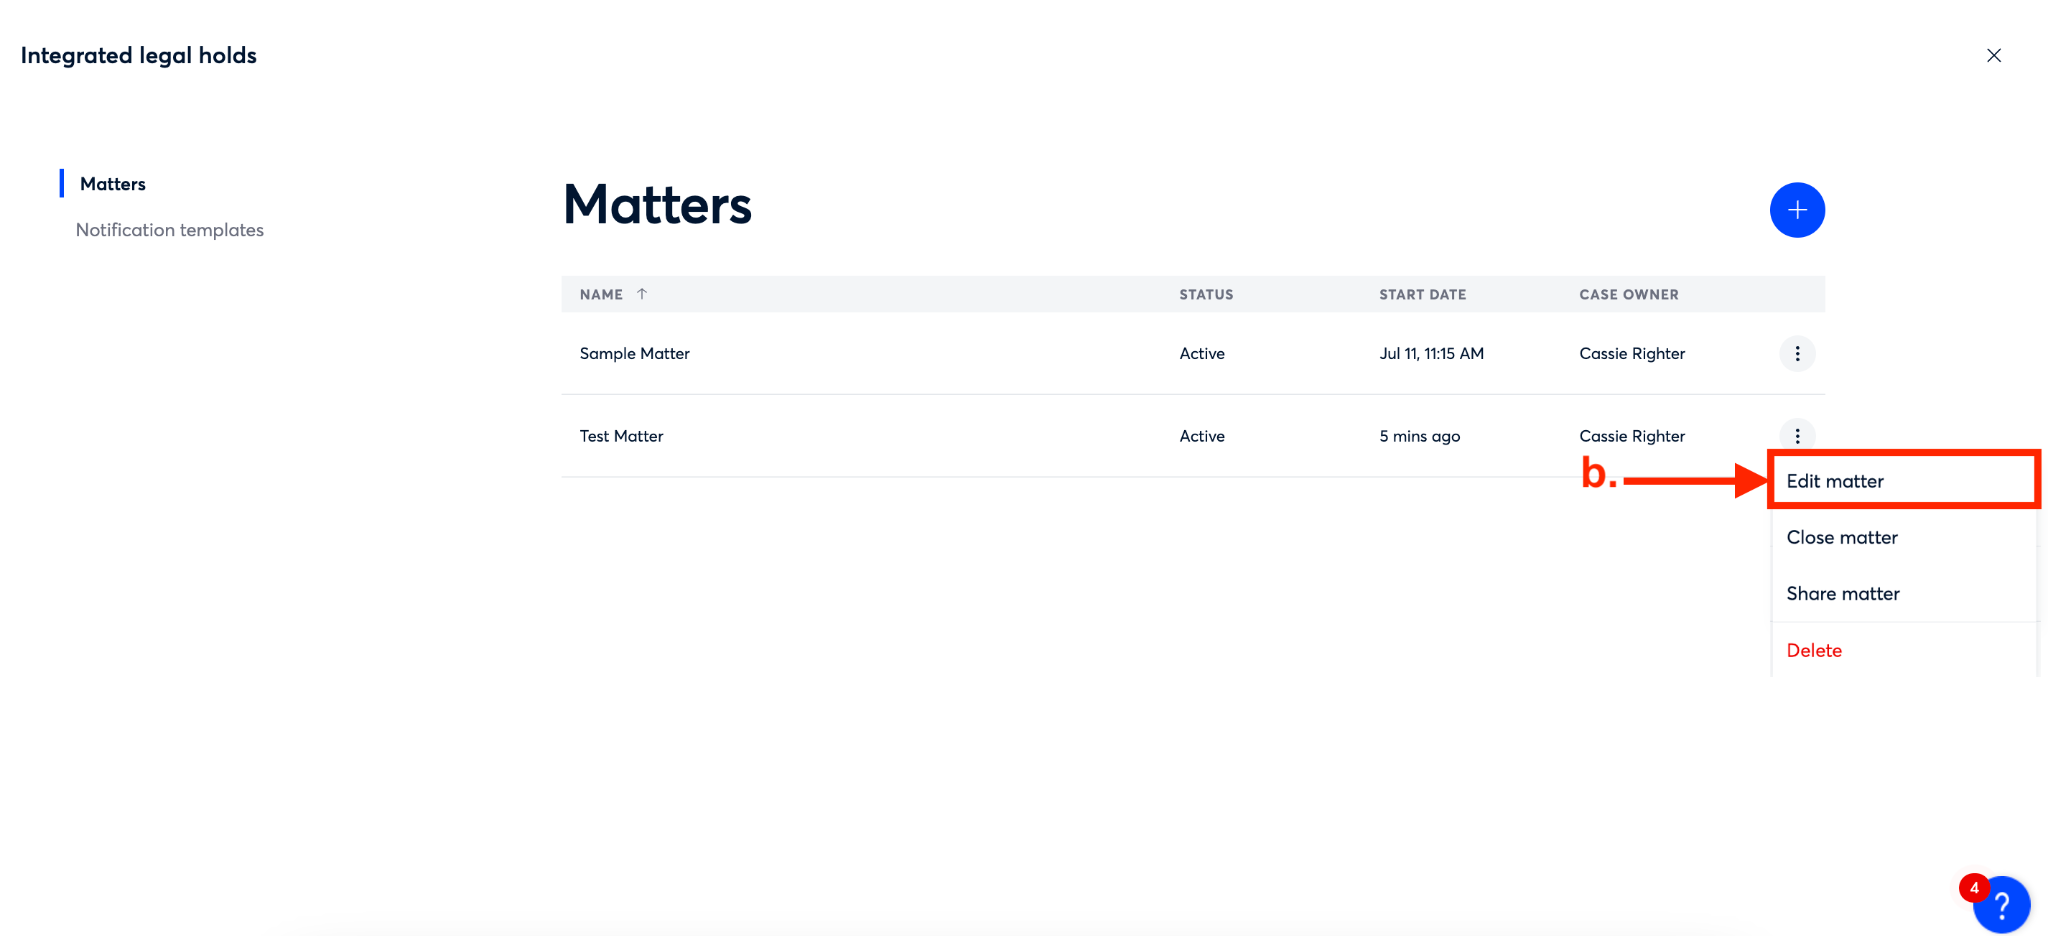
Then, from the dropdown that appears, select ‘Edit matter’ (b)
Step 2b
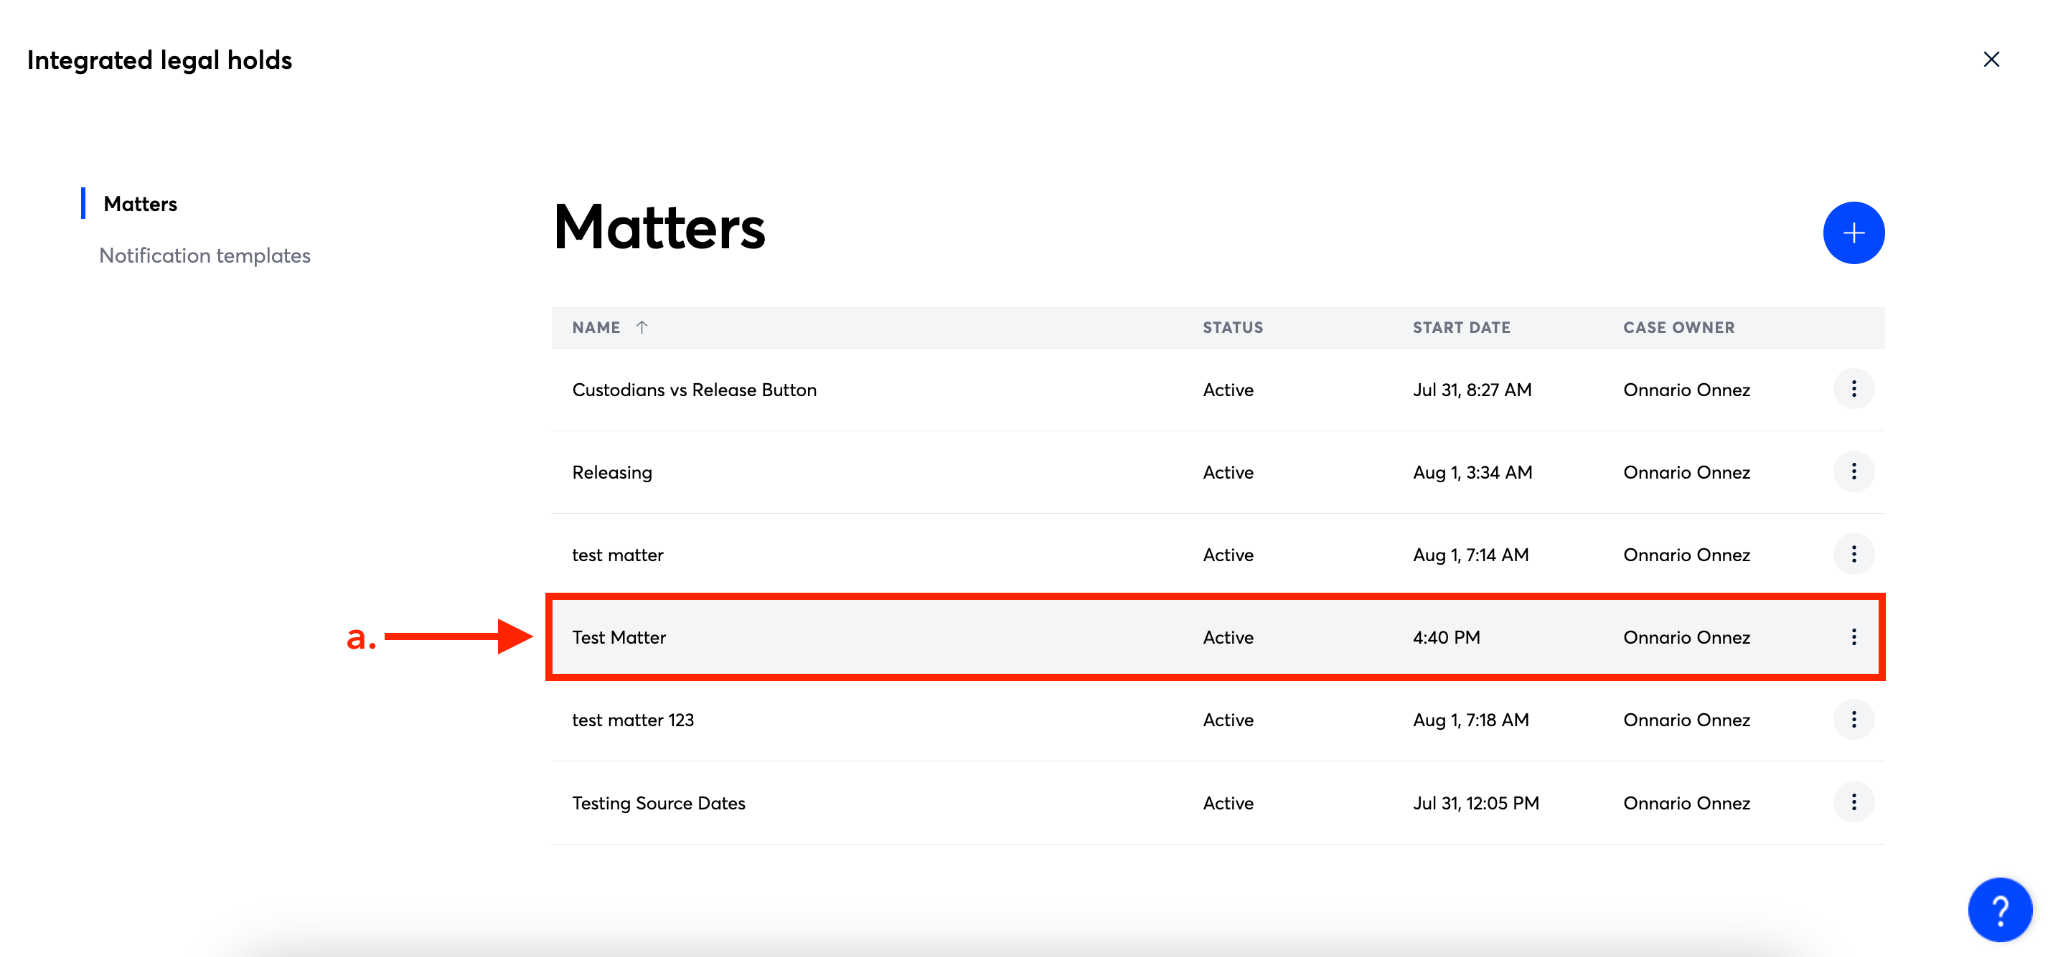
Option 2:
From the ‘Matters’ page, click on the name of the matter you want to edit (a)
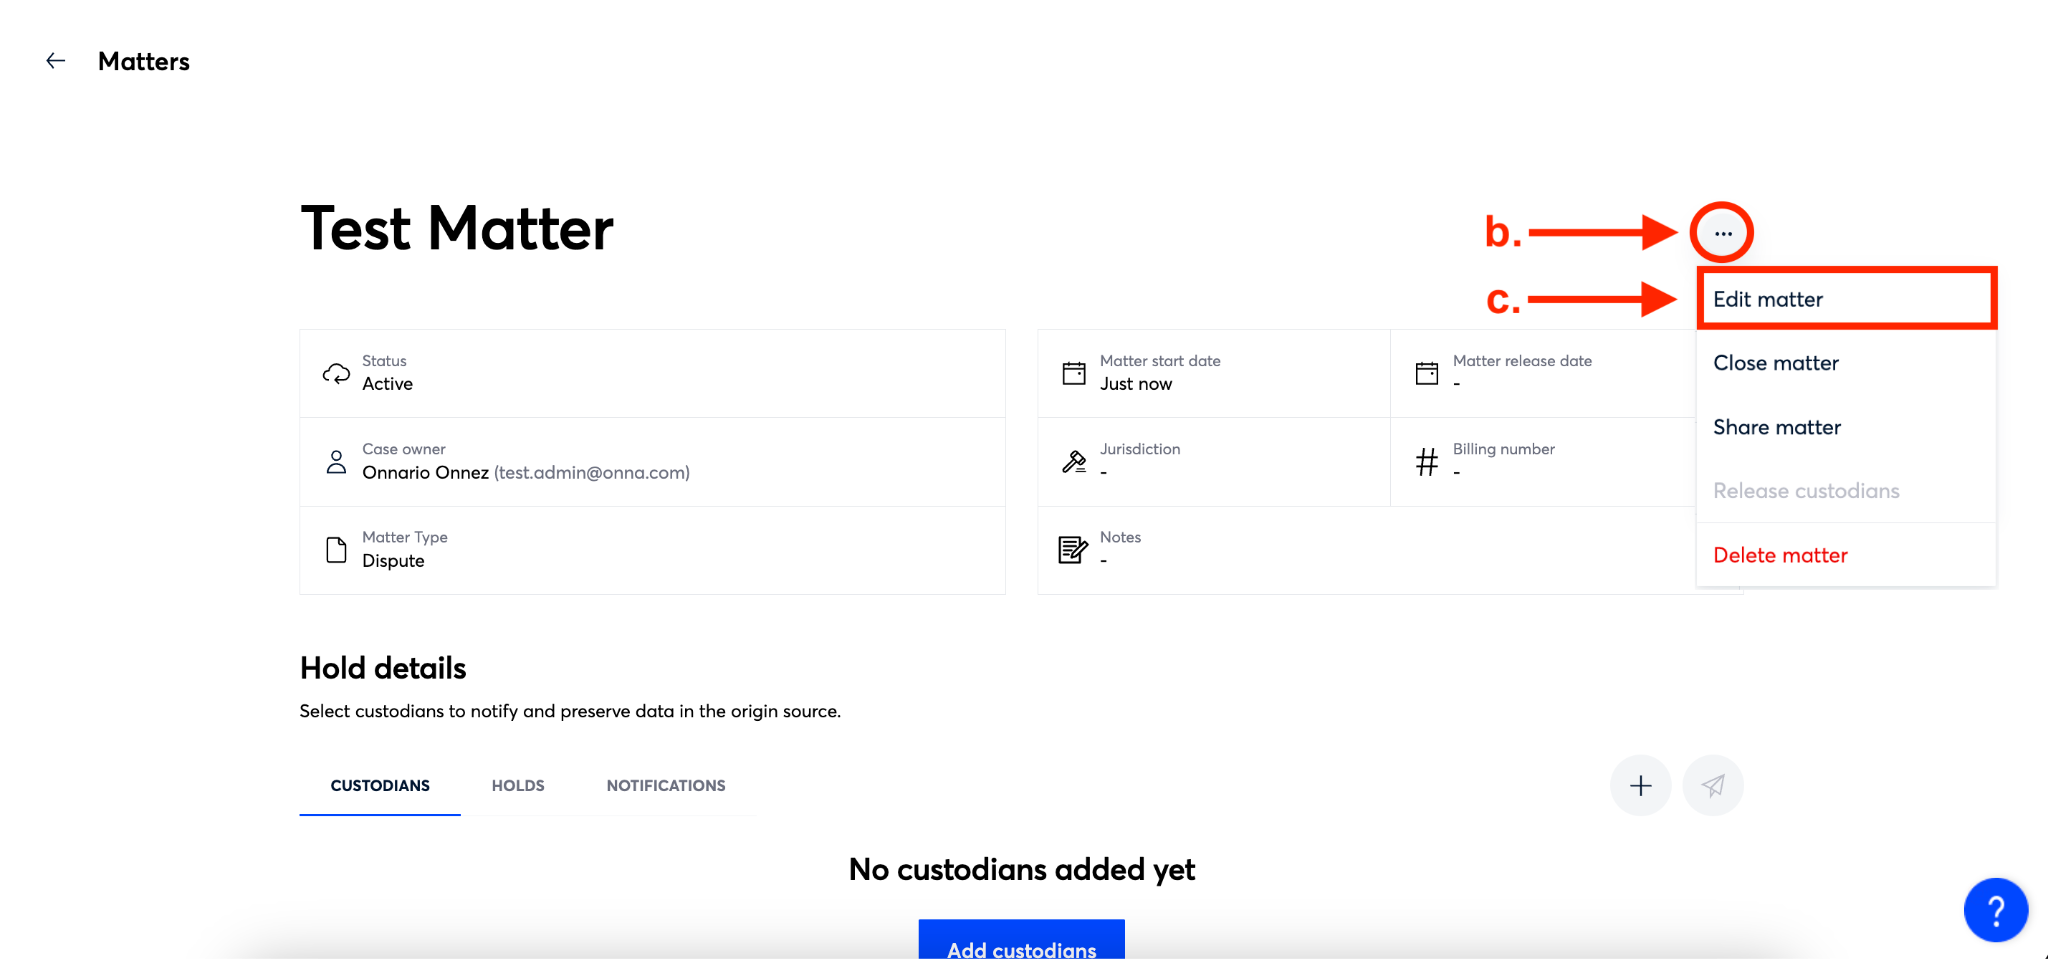
Then, click on the ellipsis in the upper right corner of the matter page (b) and select ‘Edit matter’ from the dropdown that appears (c).
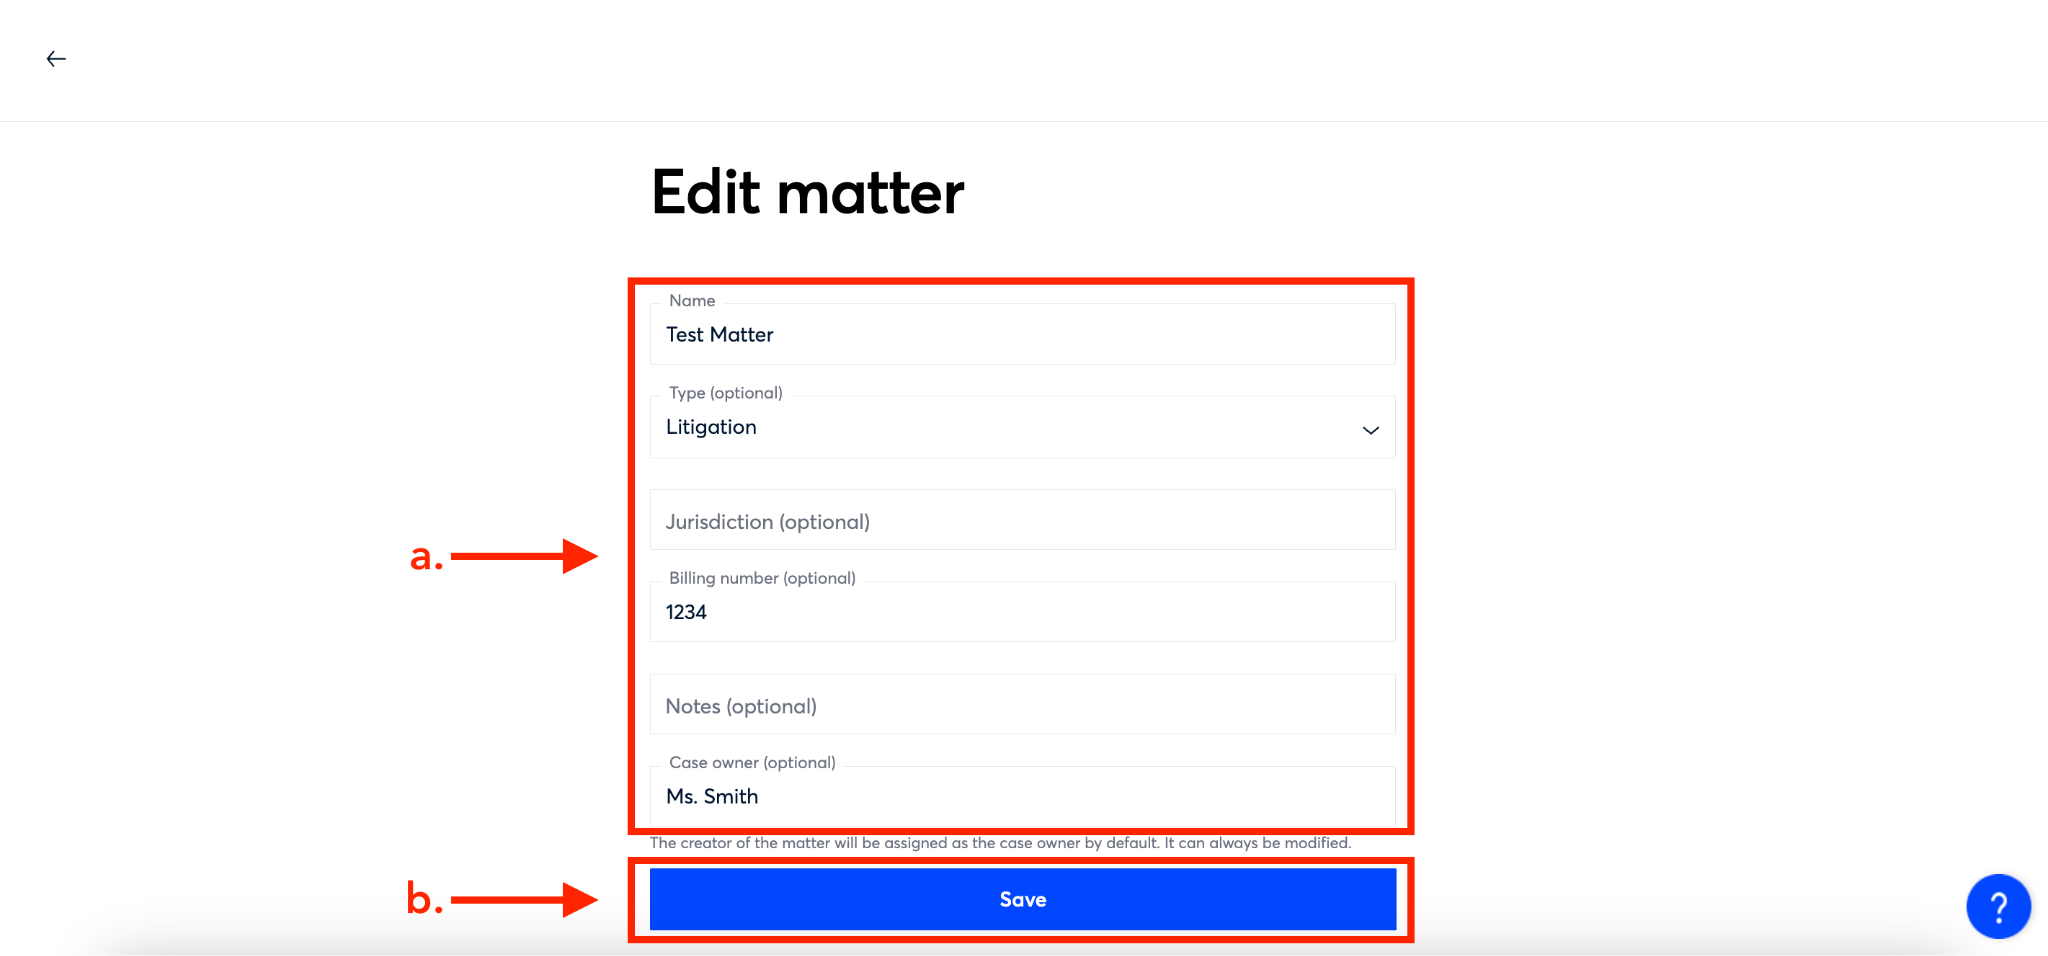
Step 4
You’ll now be able to make any necessary edits to any of the fields associated with the matter (a). Then, you’ll click the blue ‘Save’ button (b). Your edits are now applied.
How to Close a Matter
When a matter has been resolved and you’ve released all holds associated with the matter, you’re able to close the matter while still retaining the details associated with the matter for your records. To do so, follow the steps below:
If a matter contains any active holds, you will not be able to close the matter. You must release all of the holds within the matter before closing the matter. |
Note that once a matter is closed it cannot be reopened or edited. However, the details of the matter will remain visible. |
Step 1
Select ‘Integrated legal holds’ from the main menu.

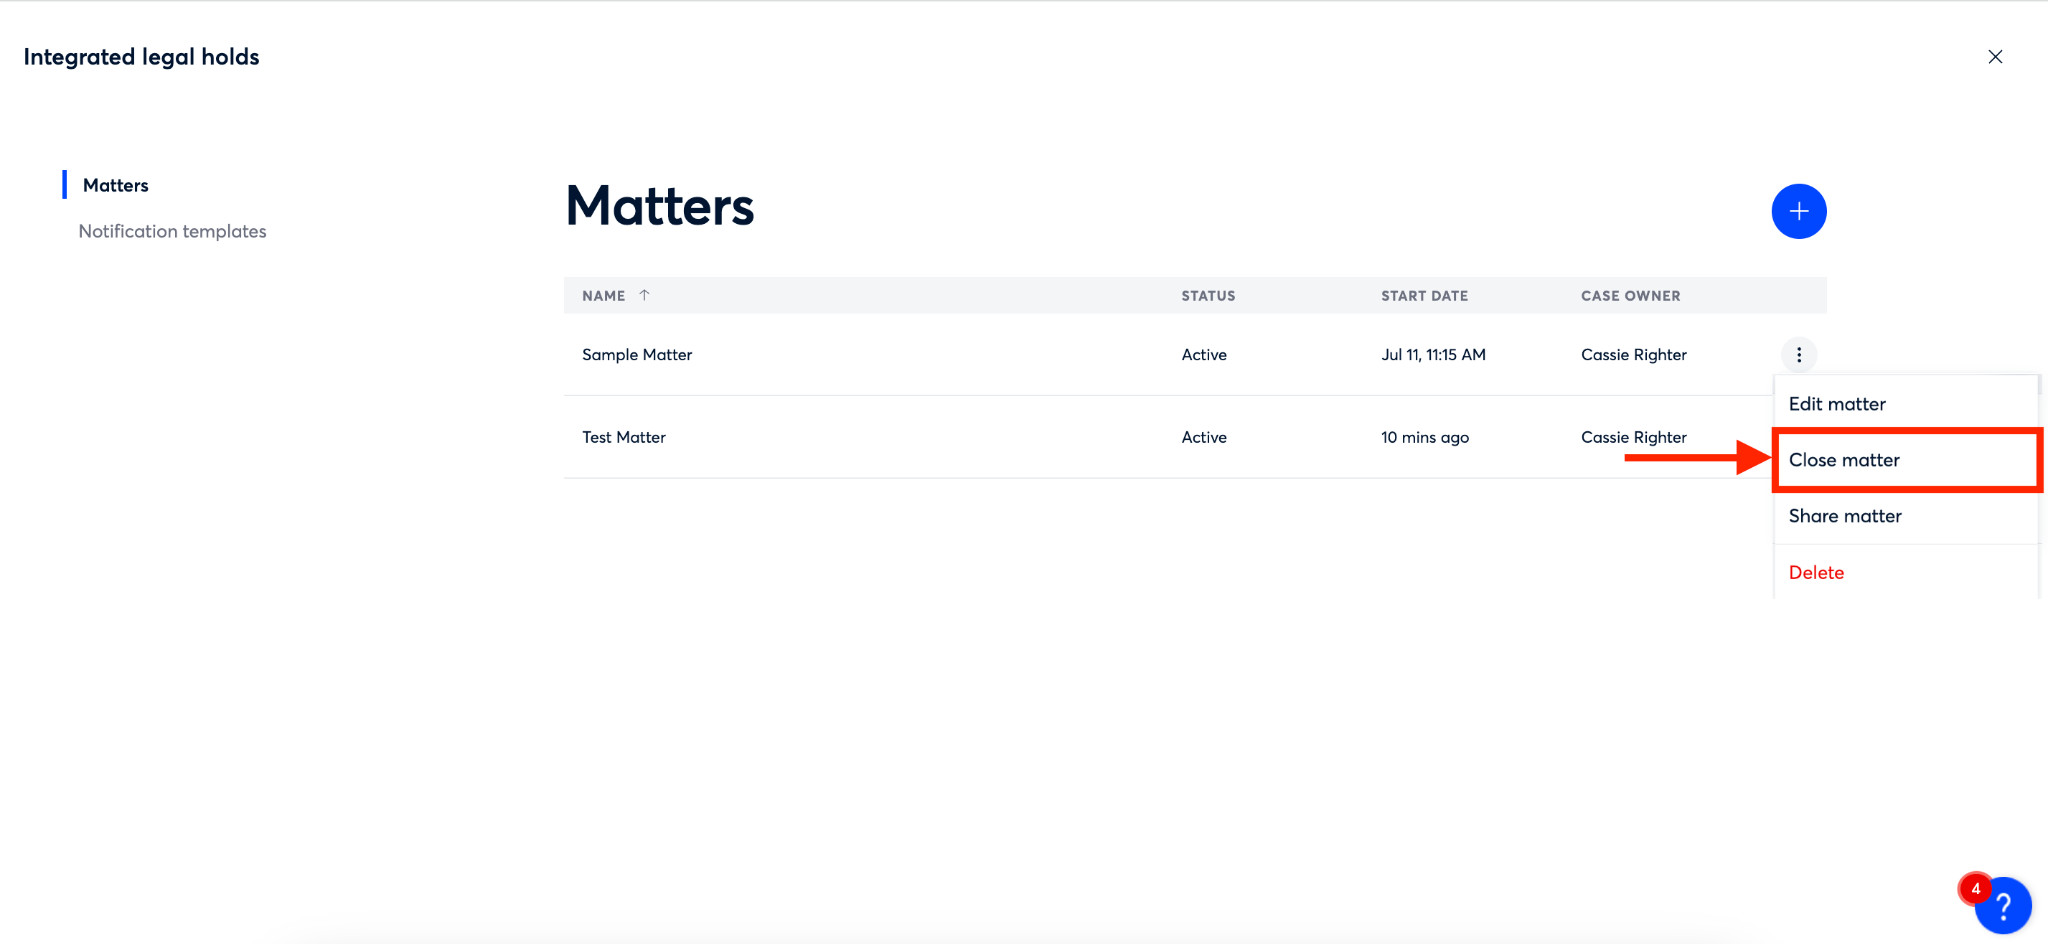
Step 2
By default you will be taken to the ‘Matters’ page within Integrated Legal Holds. From this page, click on the ellipsis on the right side of the row of the matter you want to close.

Step 3
From the dropdown menu that appears, select ‘Close matter’.
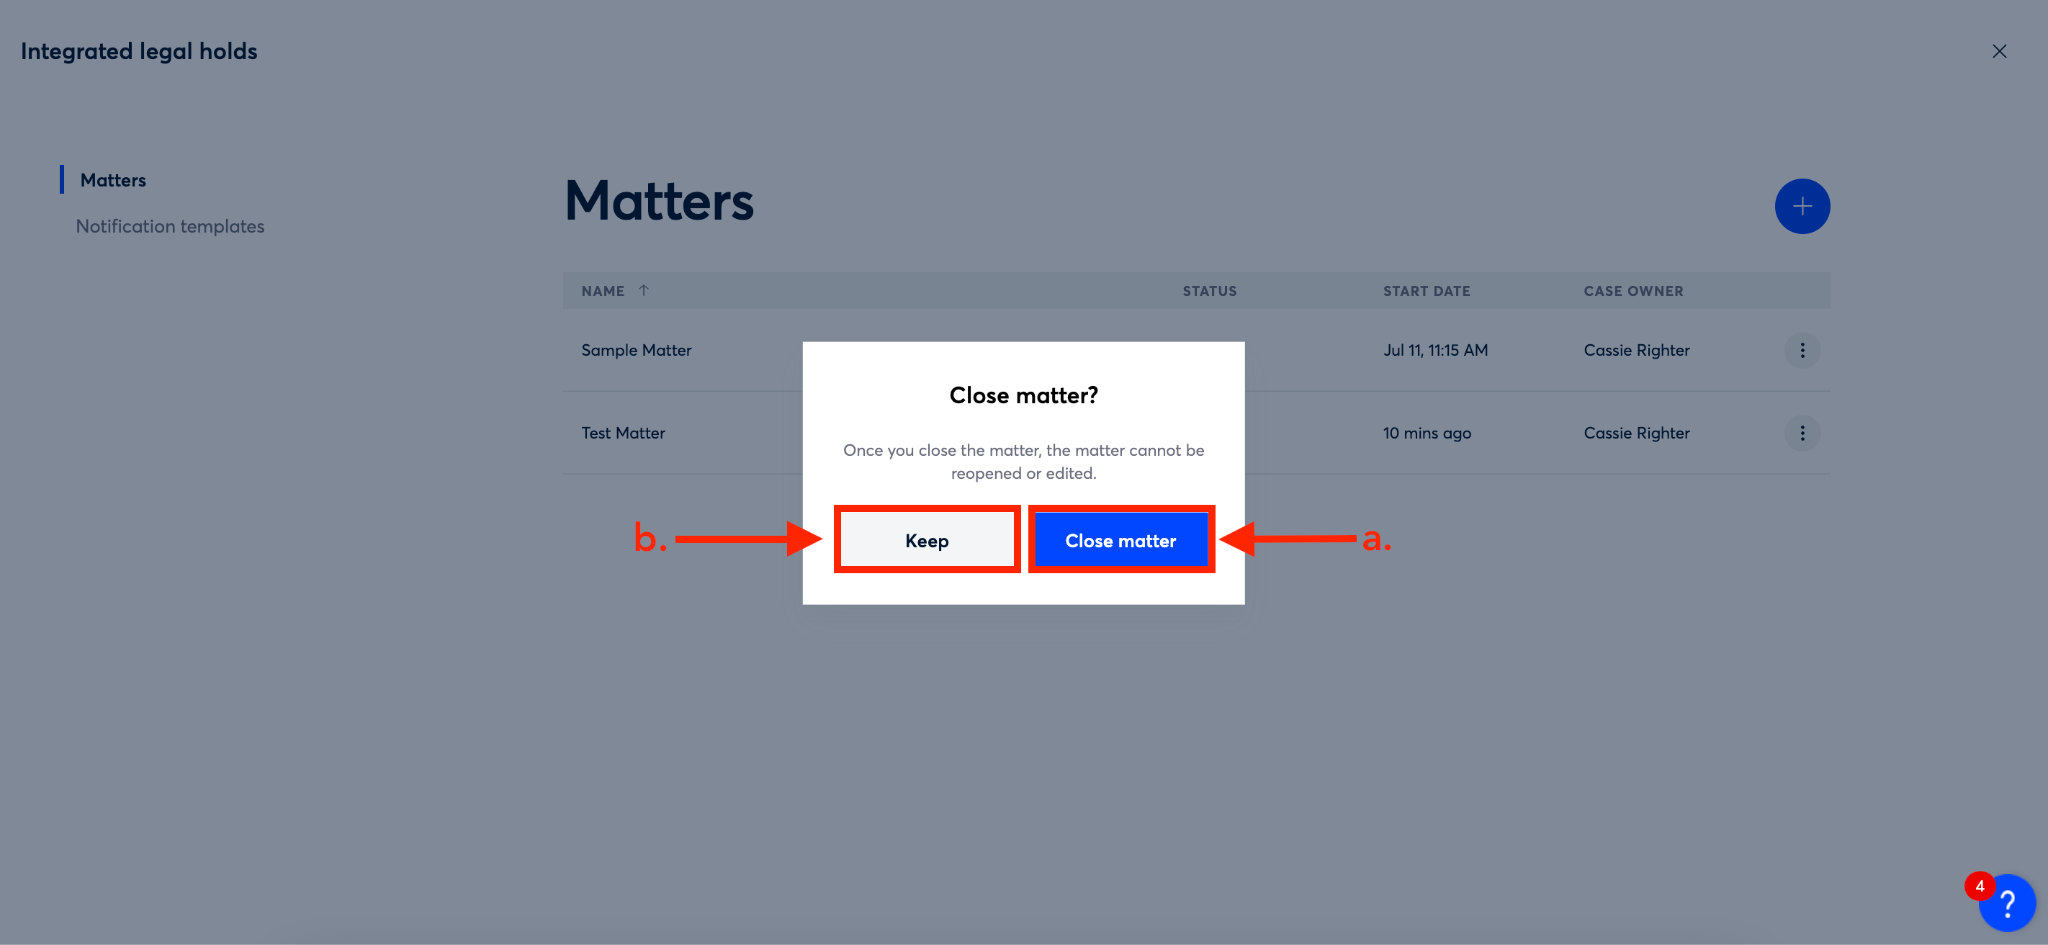
Step 4
You’ll now see a confirmation pop-up appear asking you to confirm closing the matter. To confirm and close, click the blue ‘Close matter’ button (a). If you need to keep the matter active, click the gray ‘Keep’ button (b).
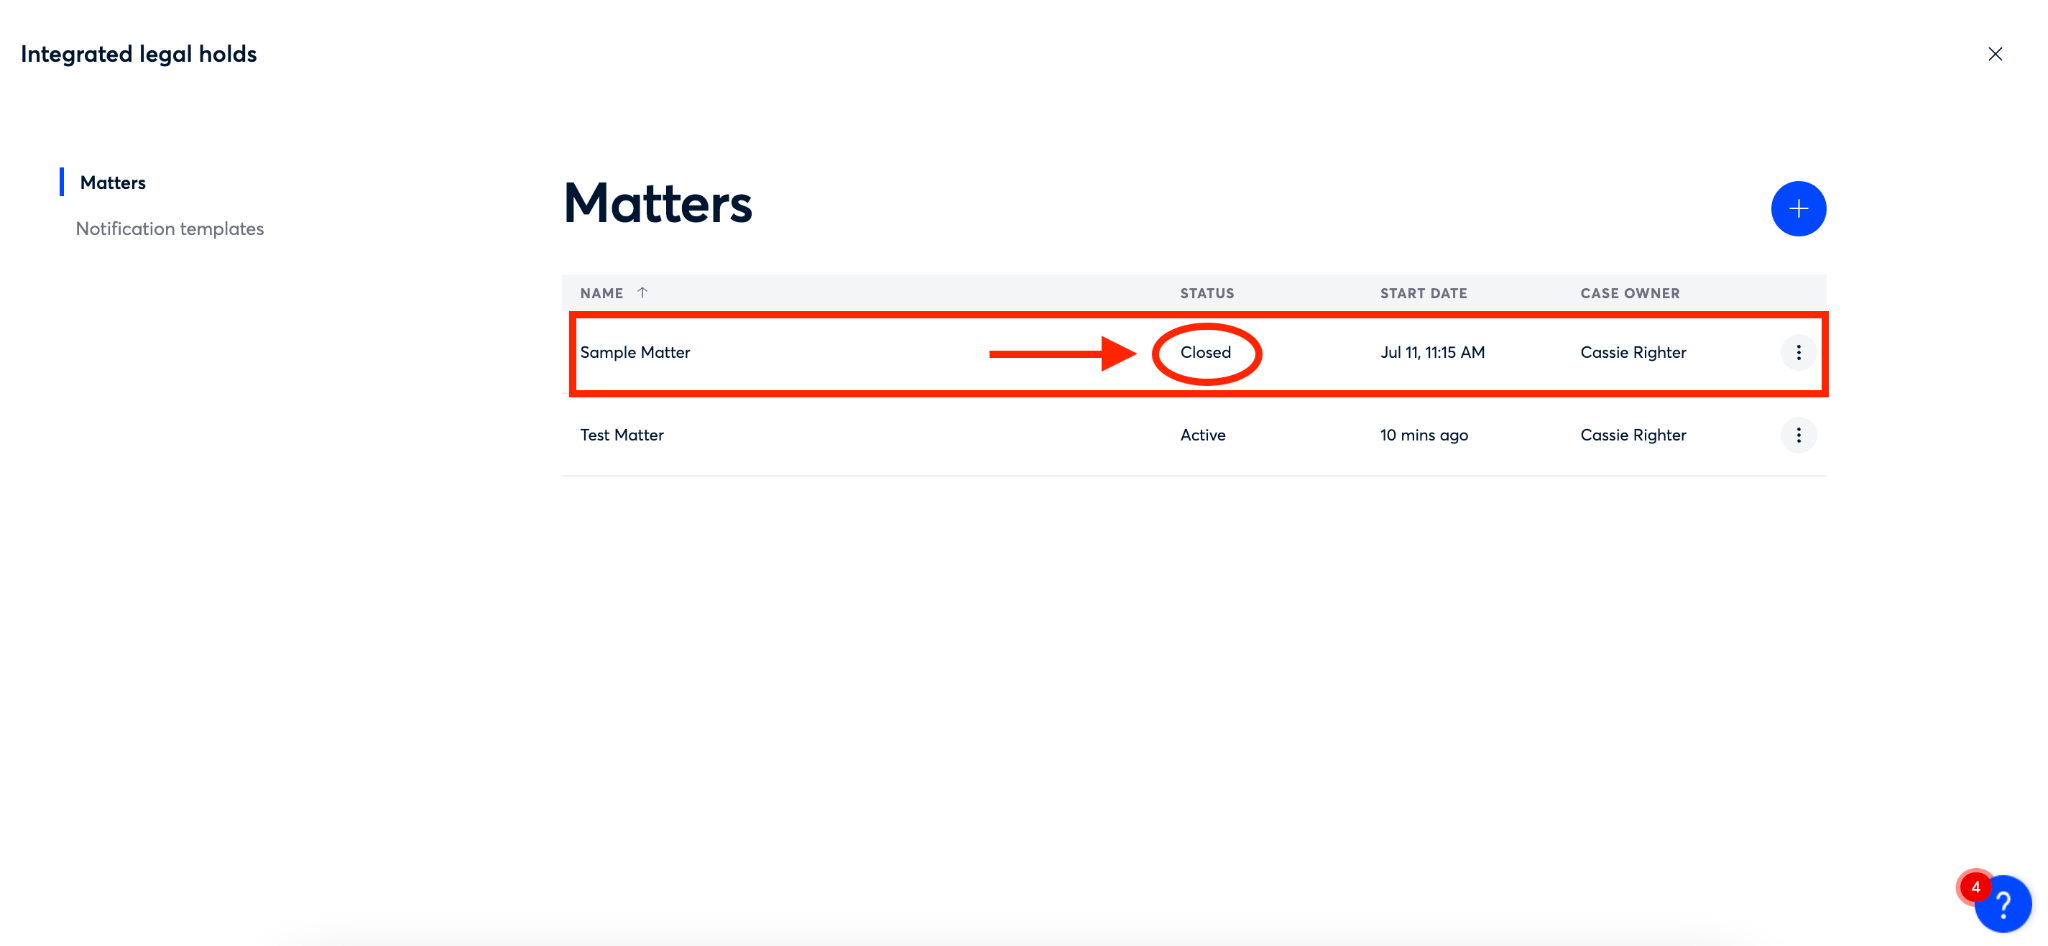
Step 5
Once you close your matter you will see the status of your matter change from ‘Active’ to ‘Closed’ on the list of all your matters.
How to Share a Matter
There may be times when the person who creates a matter needs to share that information with another Onna user. This is possible if the user you would like to share with meets the following criteria:
Has an admin role in Onna OR has the special permission to “Manage Legal Holds”
Has access to the Integrated Legal Holds feature
Once you’ve confirmed that the user you want to share with meets the above criteria, you can share a matter that you’ve created by following the steps below:
Step 1
Select ‘Integrated legal holds’ from the main menu.

Step 2a
By default you’ll be taken to the ‘Matters’ page. From here, you can share a matter from two places:
Option 1:
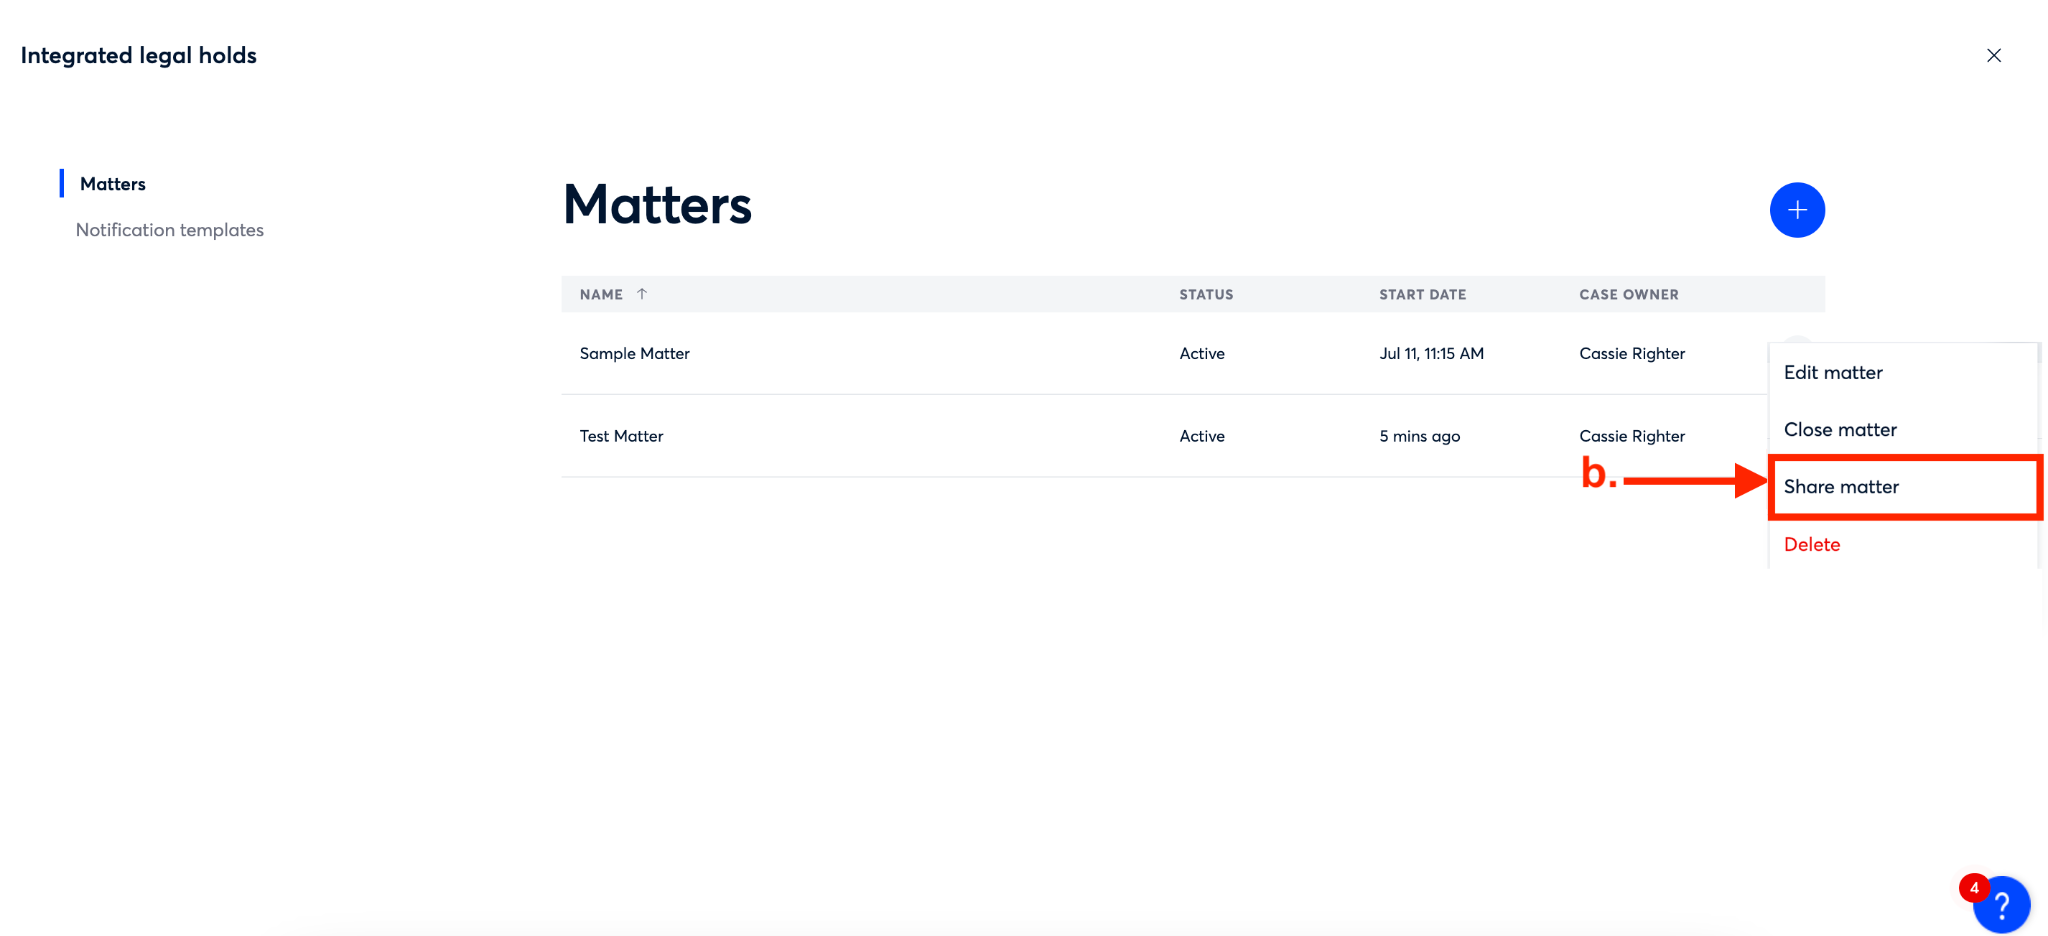
From the ‘Matters’ page, click on the ellipsis on the right side of the row of the matter you want to share (a).
Then, from the dropdown that appears, select ‘Share matter’ (b)

Step 2b
Option 2:
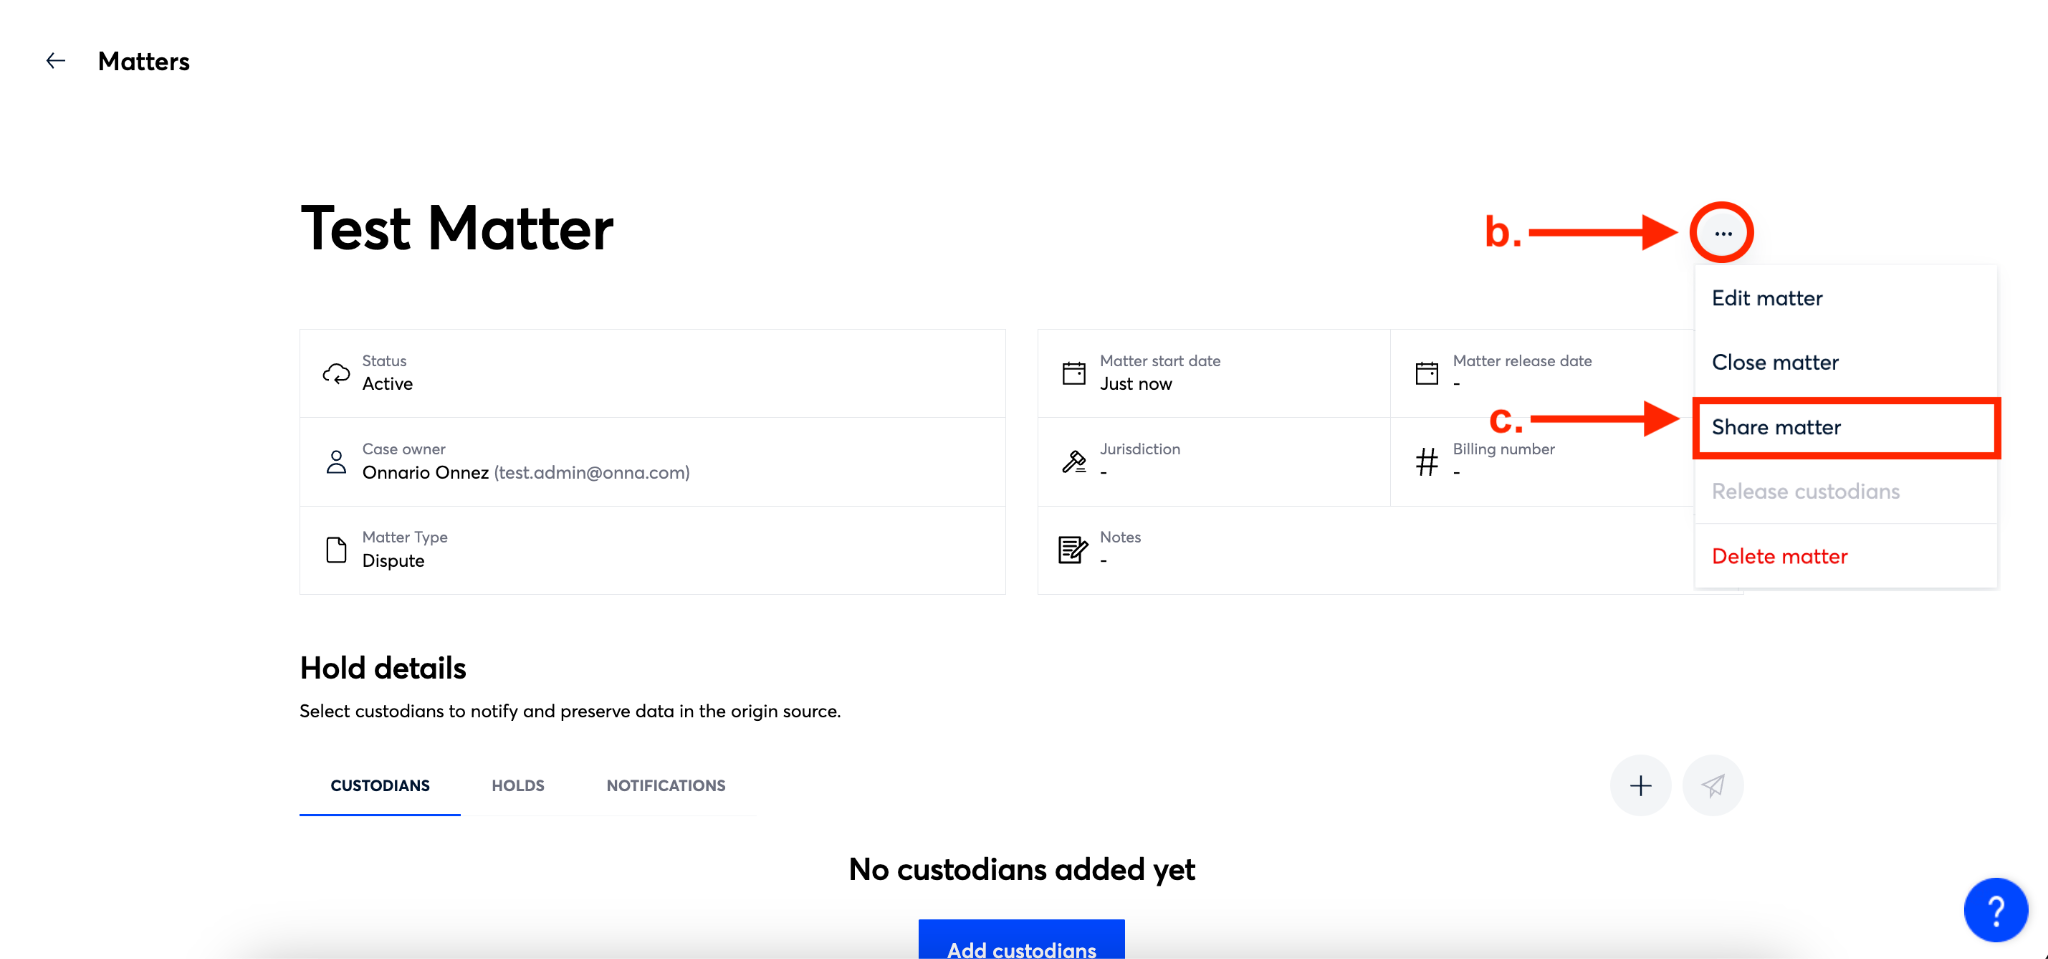
From the ‘Matters’ page, click on the name of the matter you want to share (a)
Then, click on the ellipsis in the upper right corner of the matter page (b) and select ‘Share matter’ from the dropdown that appears (c).


Step 3
You’ll now see a ‘Share’ window. From here, you’ll enter the user you want to share the matter with in the ‘Add member’ field (a). Then, select the permissions you want that user to have for this matter from the dropdown menu in the ‘Select access permission’ field (b).
Finally, click the blue ‘Share’ button (c) to share the matter.

Matter Access Permissions
There are three levels of access you can assign when sharing a matter. Each access level gives the user different permissions within the matter. Blow is a list of access levels and associated permissions available to users you share a matter with.
How to Manage Matter Members
There may be times after adding a member to a matter that you need to update permissions or delete the member. You’re able to do this by managing matter members.
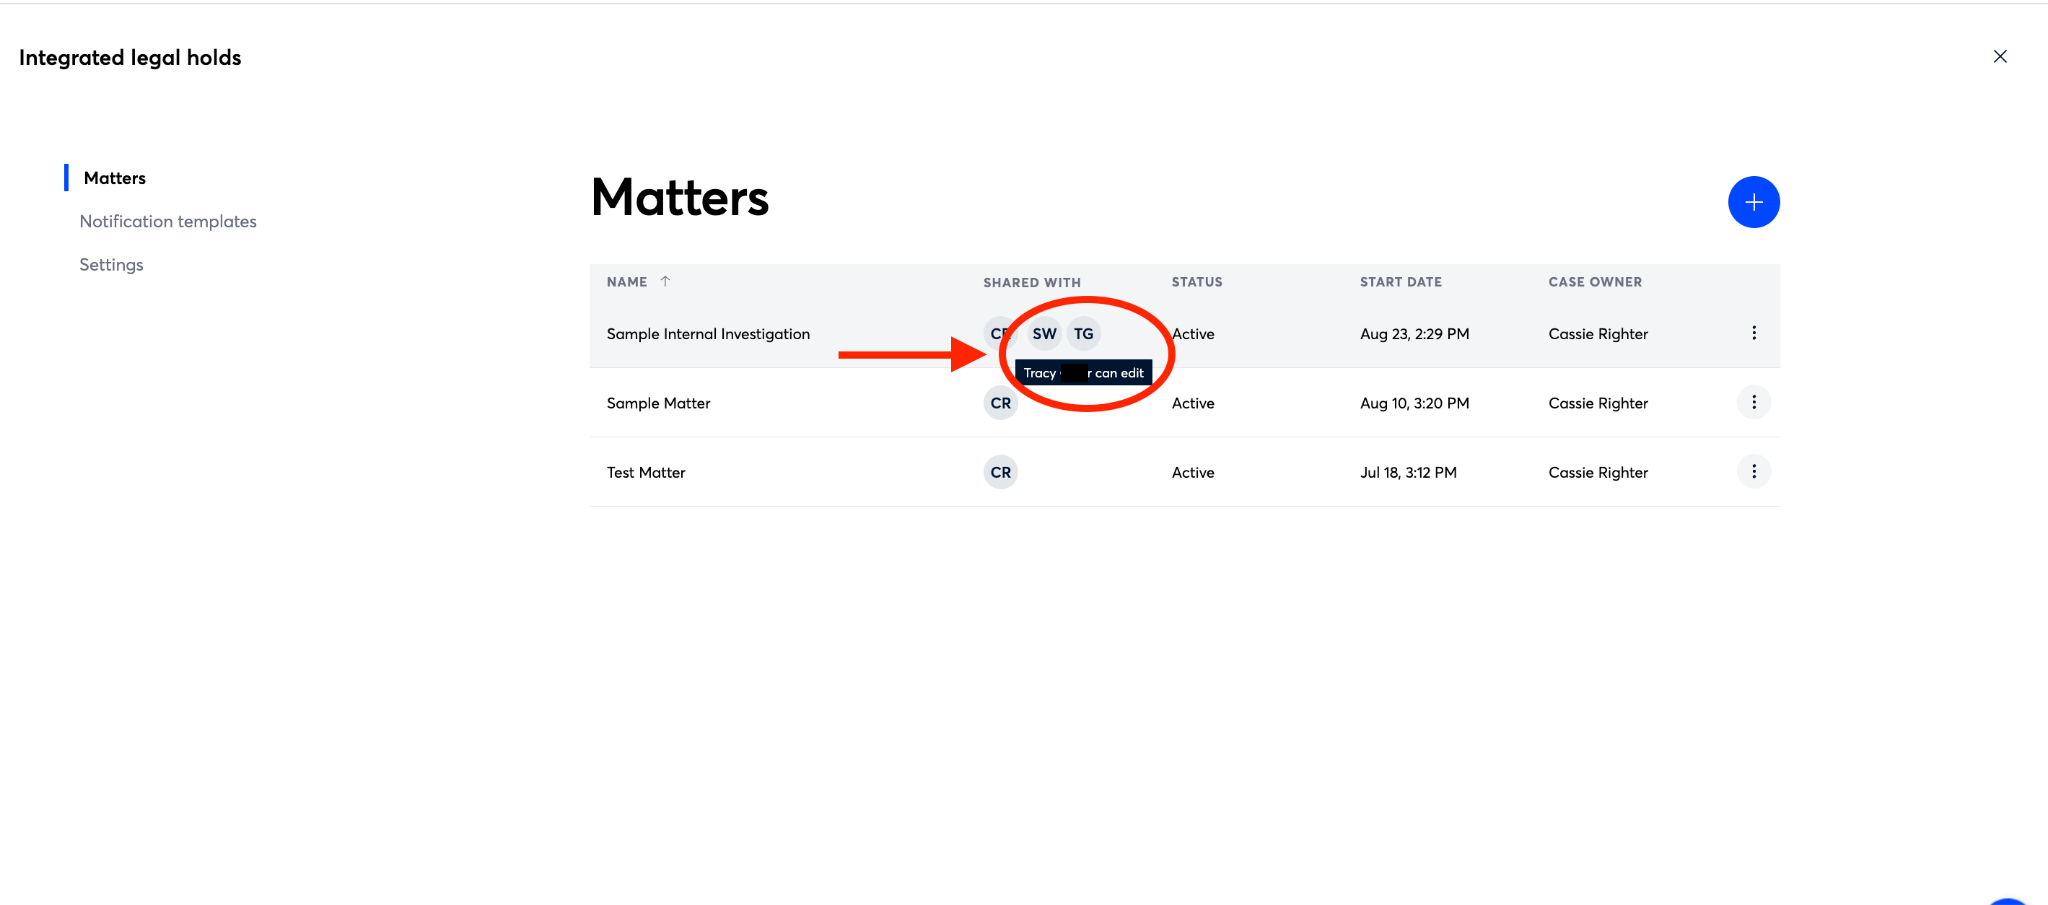
Viewing Member Permissions
At any point you are able to view the permissions associated with matter members by hovering over their initials in the ‘Shared with’ column on the matter main page.
To manage the members of your matter, follow the steps below:
Step 1
Select ‘Integrated legal holds’ from the main menu.

Step 2a
By default you’ll be taken to the ‘Matters’ page. From here, you can manage matter members from two places:
Option 1:
From the ‘Matters’ page, click on the ellipsis on the right side of the row of the matter you want to manage members for (a).
Then, from the dropdown that appears, select ‘Share matter’ (b)


Step 2b
Option 2:
From the ‘Matters’ page, click on the name of the matter you want to manage members for(a)
Then, click on the ellipsis in the upper right corner of the matter page (b) and select ‘Share matter’ from the dropdown that appears (c).

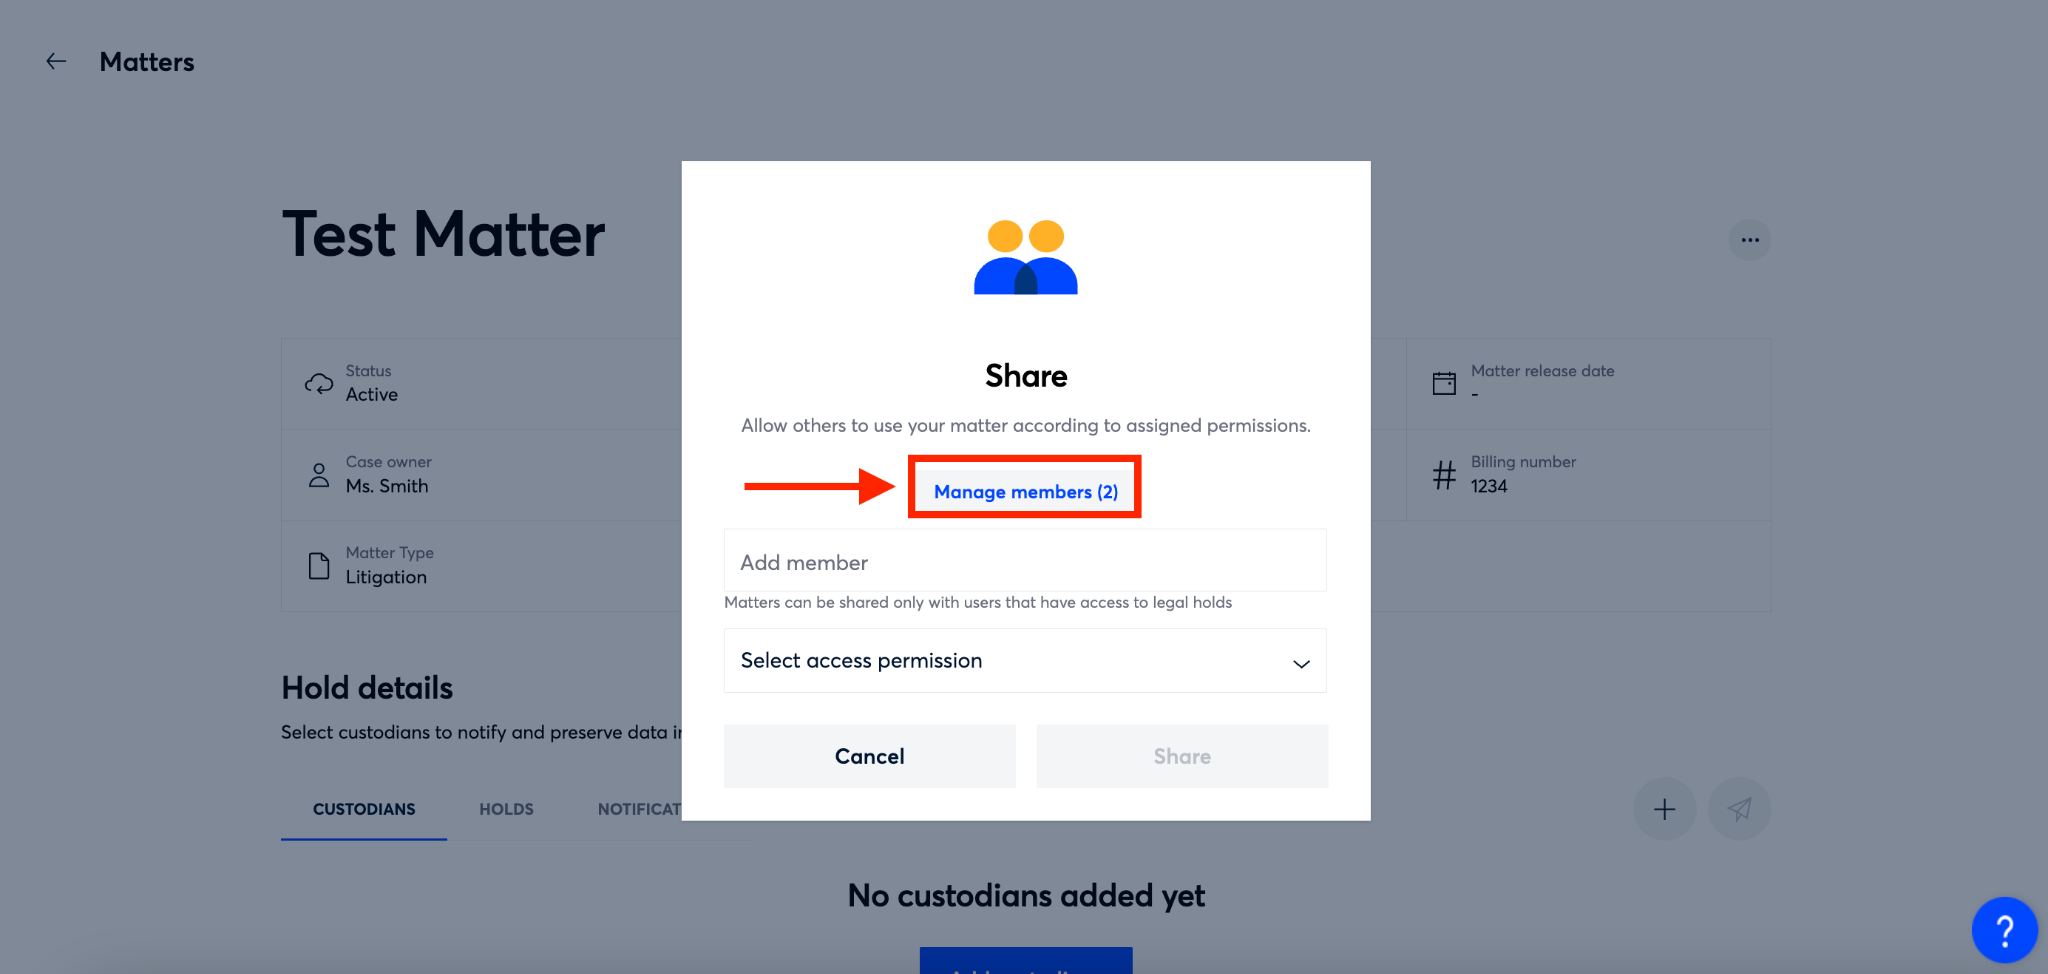
Step 3
Once the ‘Share’ window appears, click ‘Manage members’.
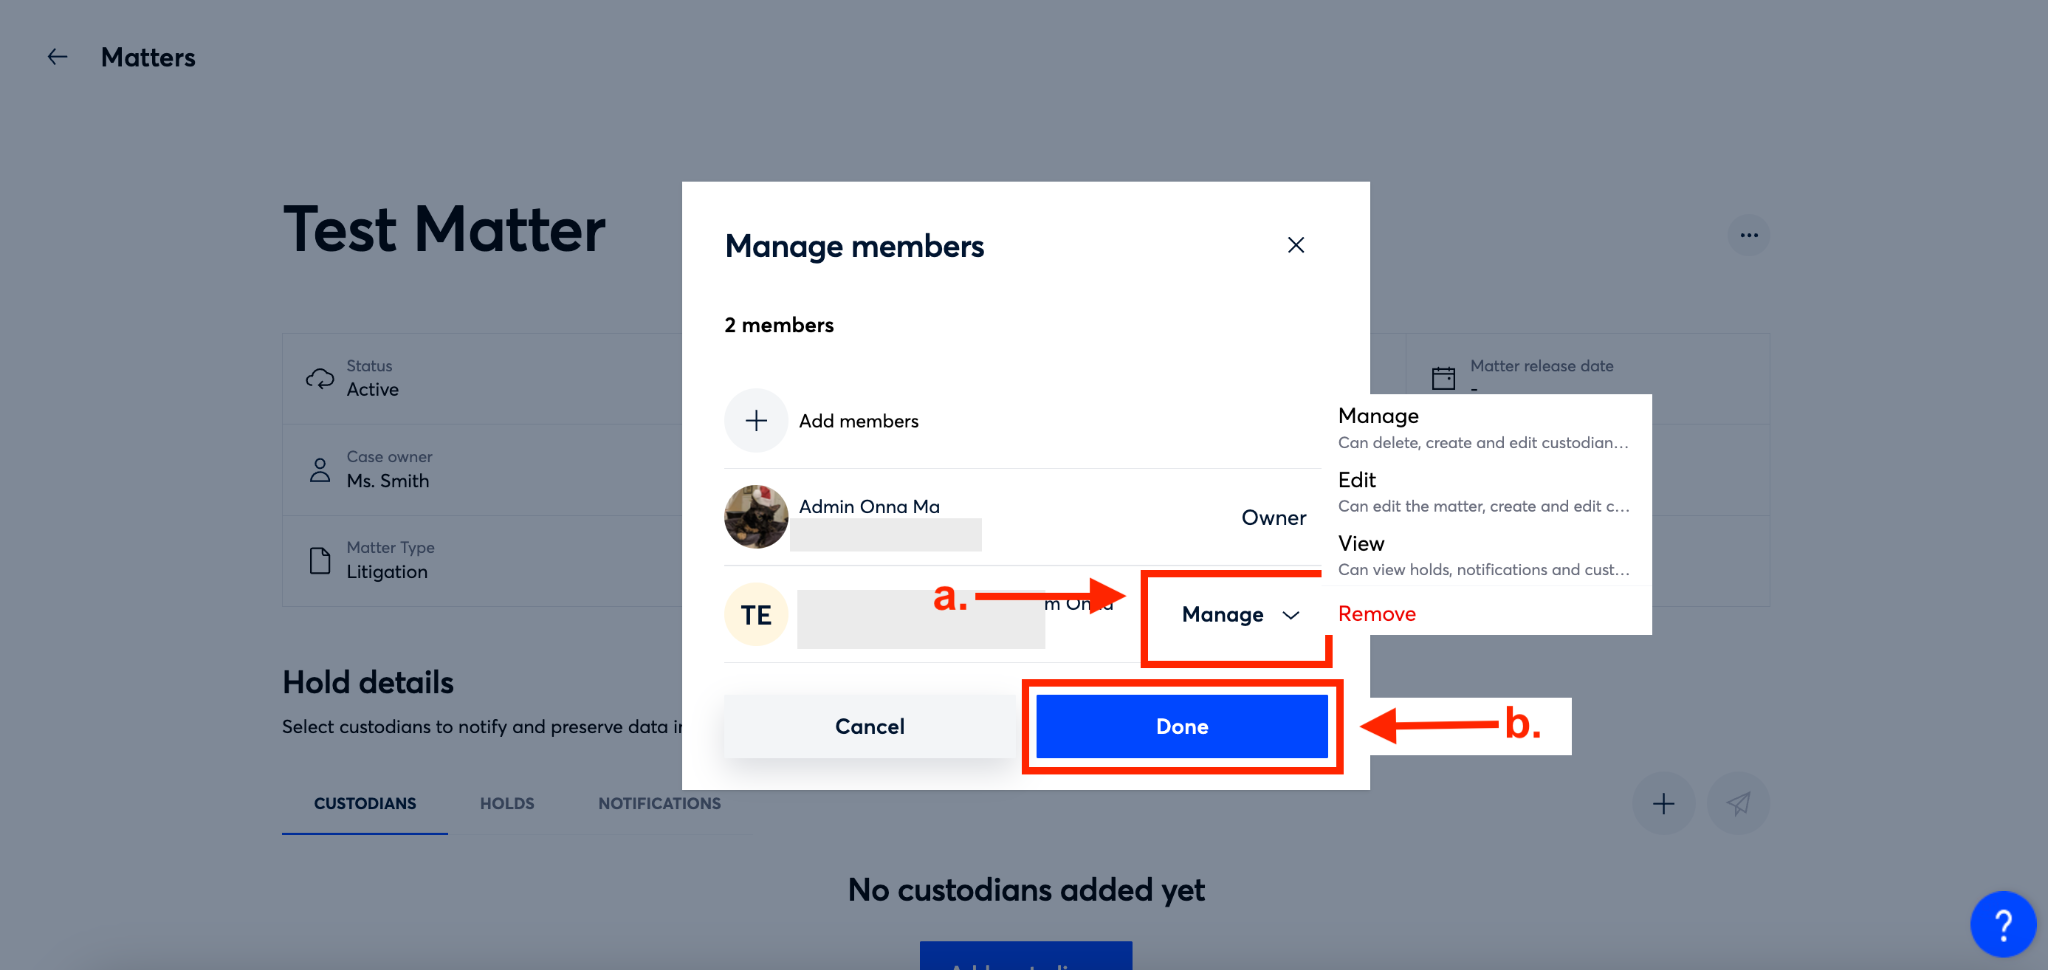
Step 4
The ‘Manage members’ window will now appear. From here click the dropdown next to the user you want to manage and select the permission you’d like the user to have or delete from the dropdown menu that appears (a). Then, click the blue ‘Done’ button (b).
How to Delete a Matter
If your matter is complete and you no longer need the details in Onna, you are able to delete the matter from your list of matters. If, however, the matter is finished and you need to keep the details visible you should close the matter instead of deleting it. If you no longer need the details and you’ve released all holds associated with the matter, you can then delete your matter by following the steps below:
Note that once you delete a matter all details will be gone from our systems and it is not possible to recover them. However, the audit log retains details of the matter activities even after the matter is deleted. |
Step 1
Select ‘Integrated legal holds’ from the main menu.

Step 2
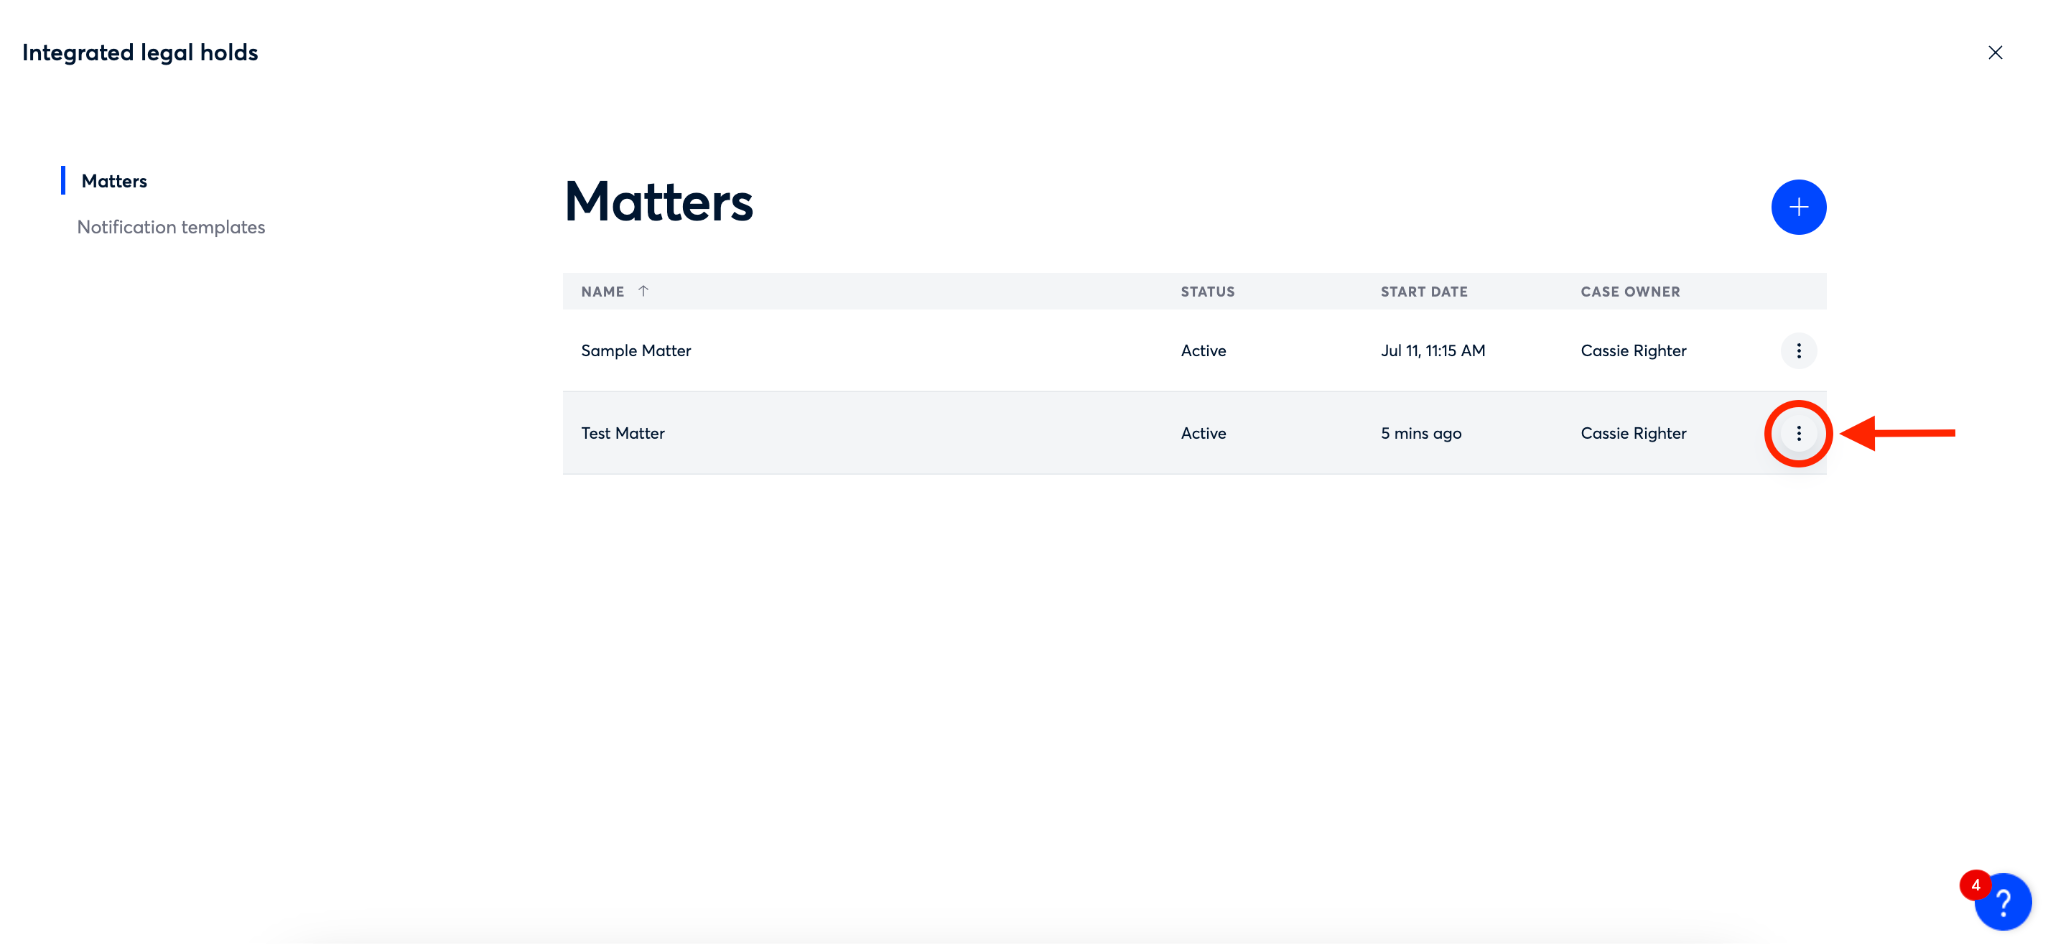
By default you will be taken to the ‘Matters’ page within Integrated Legal Holds. From this page, click on the ellipsis on the right side of the row of the matter you want to delete.
Step 3
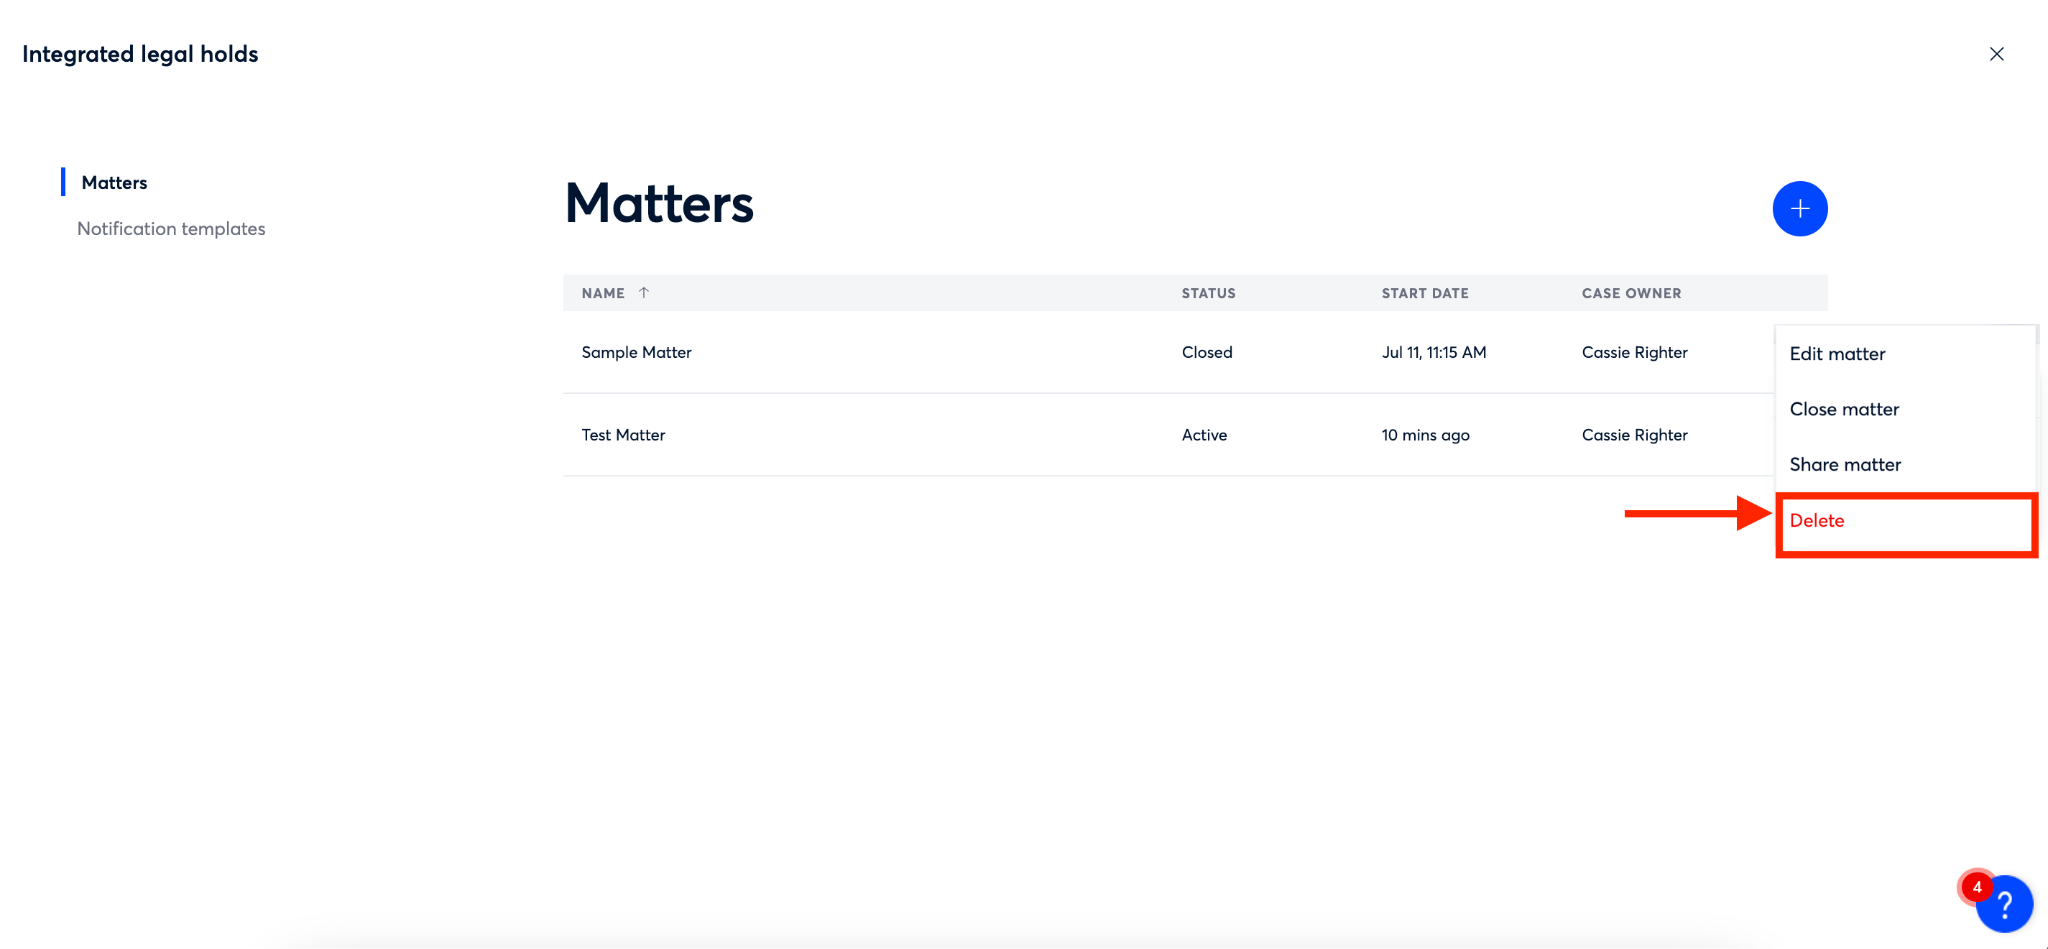
From the dropdown menu that appears, select ‘Delete matter’.
Step 4
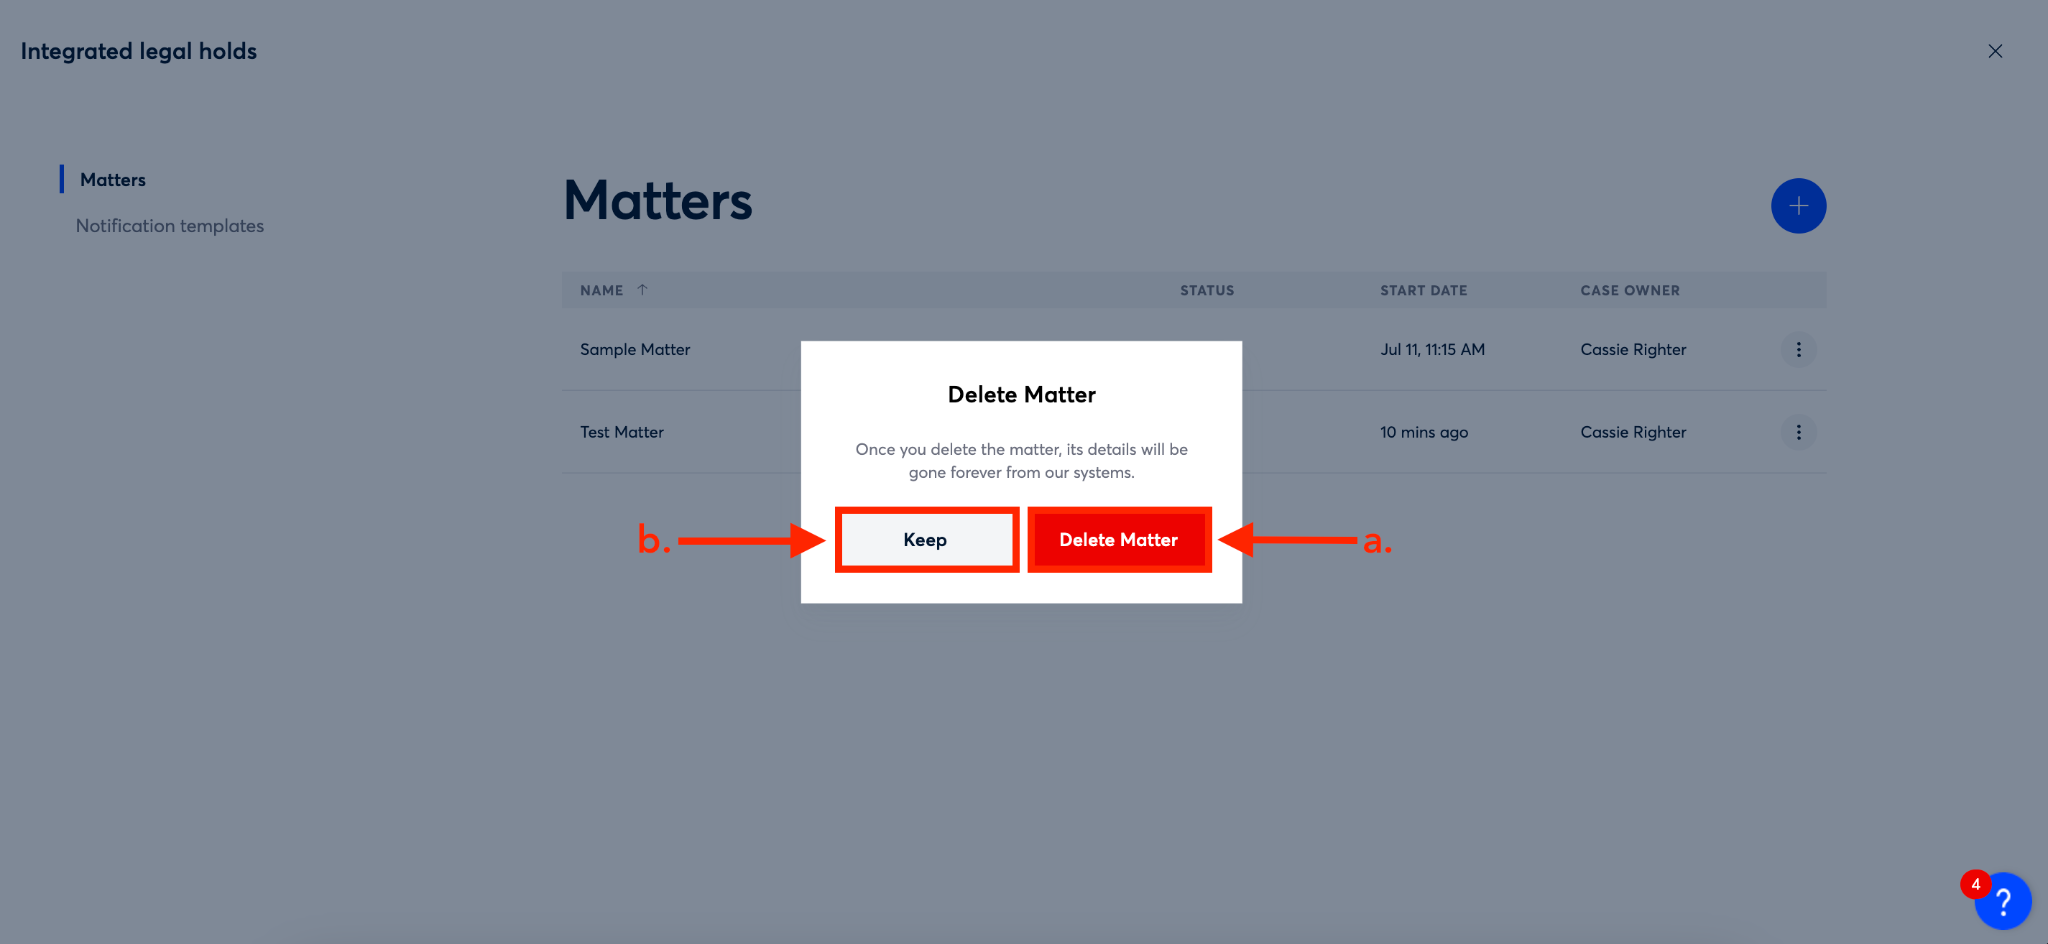
You’ll now see a confirmation pop-up appear asking you to confirm you want to delete the matter. To confirm and delete, click the red ‘Delete matter’ button (a) and your matter will be removed from your list of matters. If you need to keep the matter details, click the gray ‘Keep’ button (b) and your matter will remain closed and visible in your list.