Quick Overview
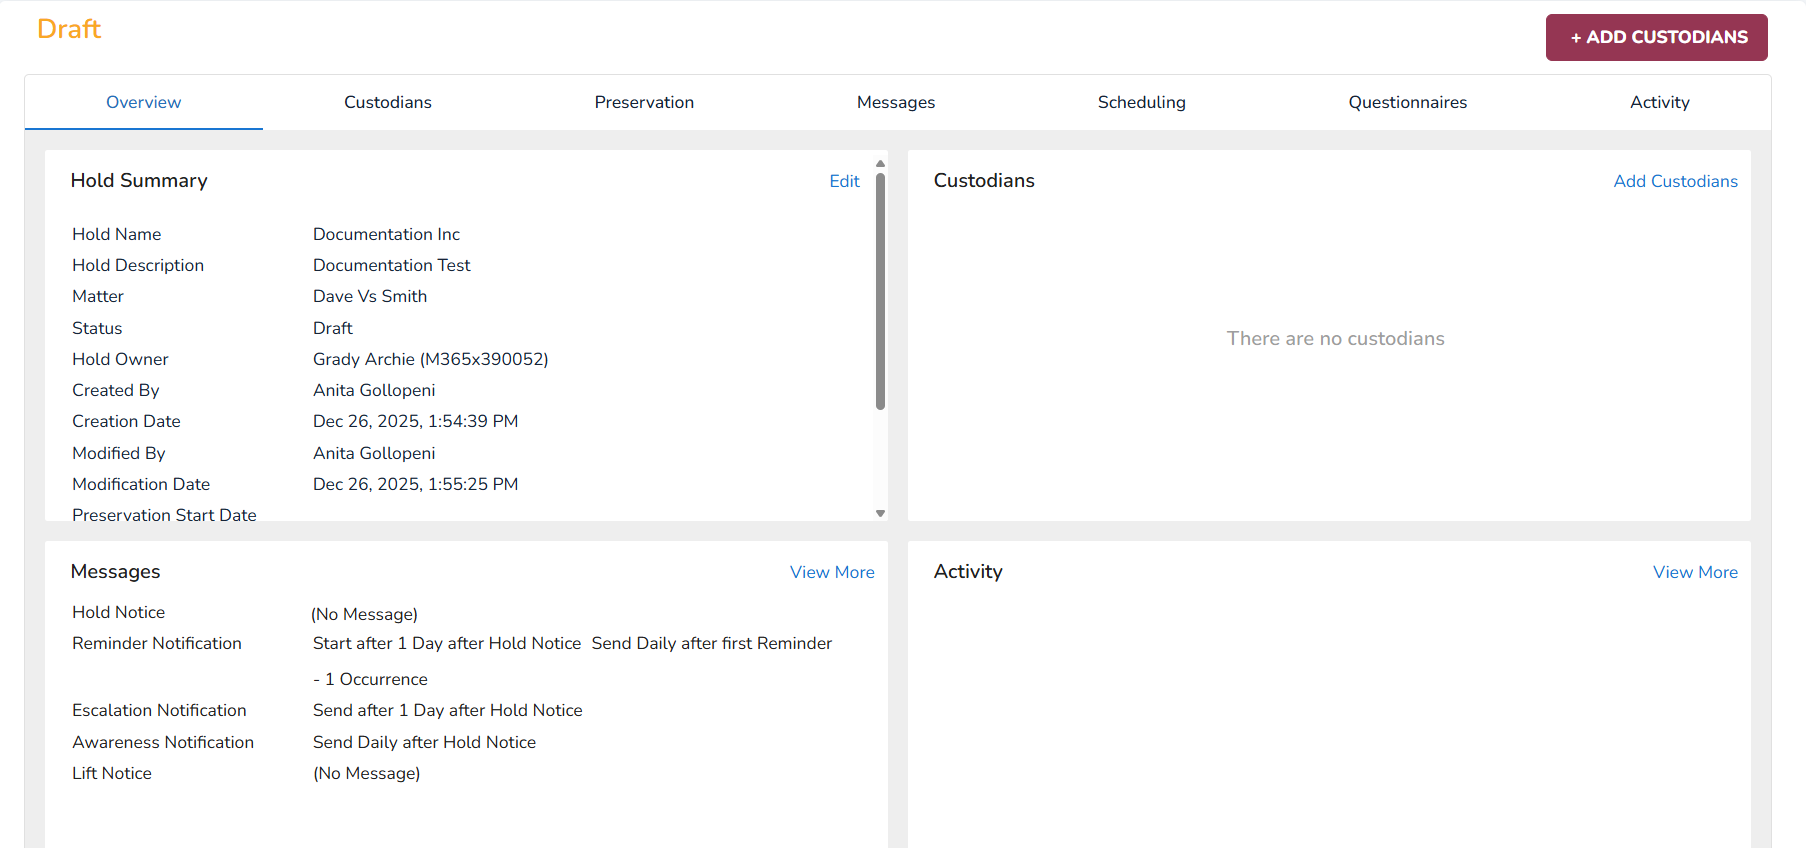
Quickly view the main settings of a hold and edit them.
Create and Issue a Hold
Note:
Rule 37(e) of the FRCP states that a party must ensure that no electronically stored information, which may be relevant to the litigation, is lost during the period in which reasonably could be anticipated that litigation would happen. There are some exceptions for unreasonable depth to the discovery and some details to the scope and the limitations of the discovery. What matters most is the safekeeping of all relevant data before litigation may ensue, which creates the need through legal obligation to start a hold.
On the Hold Management page, select
 .
. Define the Legal Hold Details.
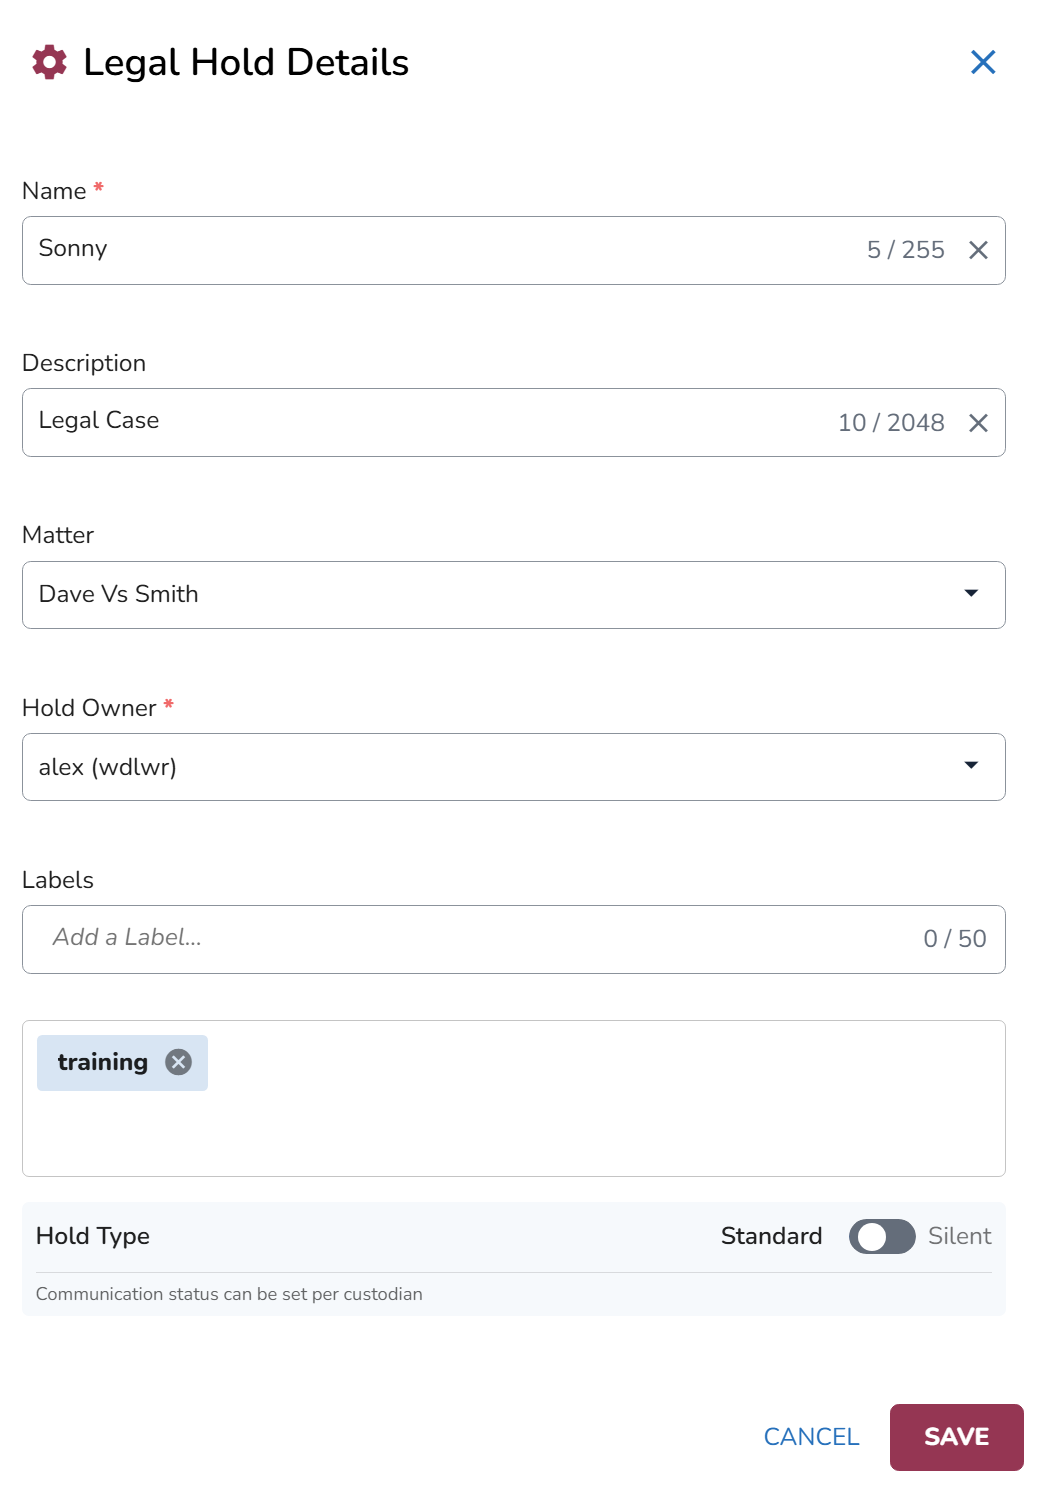
Define a Name (mandatory).
Define a Description.
Select or create a Matter.
When you create a new matter, click on Show More to add Users or Groups.
Select the Hold Owner (mandatory).
Hold Owner selection lists are filtered for users that have been assigned with a Global Hold Manager or Global Hold Viewer role. This makes it easy to quickly select a Hold Owner.
Create or add labels for this hold.
Switch the Hold Type toggle to Standard or Silent. The Silent hold type prevents errors from setting the communication status custodian by custodian, ensuring no notifications are sent for the entire Hold.
Click Save.
The Overview tab of the Hold appears.
Select the action button in the top right corner to add custodians.

You can also add custodians via the button in the Custodians tab or via the Add Custodians link in the Overview tab.

The Add Custodians pop-up screen appears.
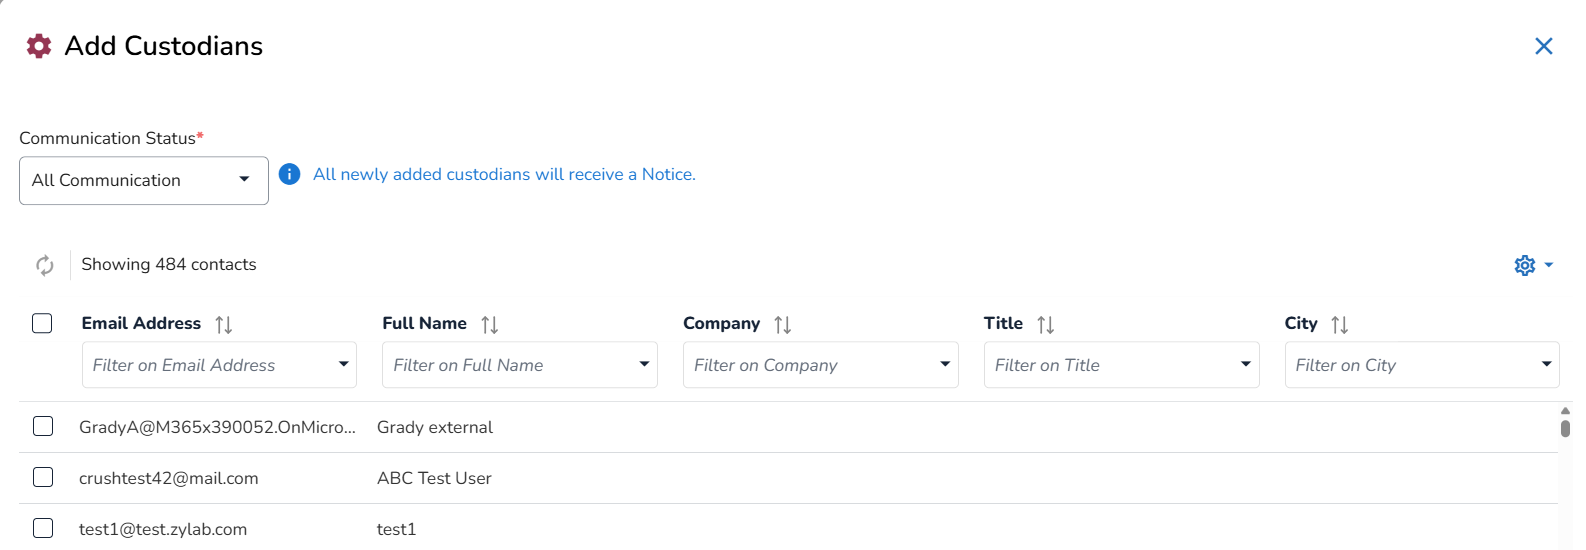
Sort, filter and select the custodians you want to add to this Hold.
All custodians listed here, are imported from the Address Book. When contact information needs to be updated, you need to do that in the Address Book.By default all custodians are added with the Communication Status set to All Communication. You can change that here or after adding the custodians.
The communication status determines whether only the Hold Notice and Lift Notice will be sent (Notice Only), or all messages (All Communication). A silent communication status means that custodians will not be notified of the hold.
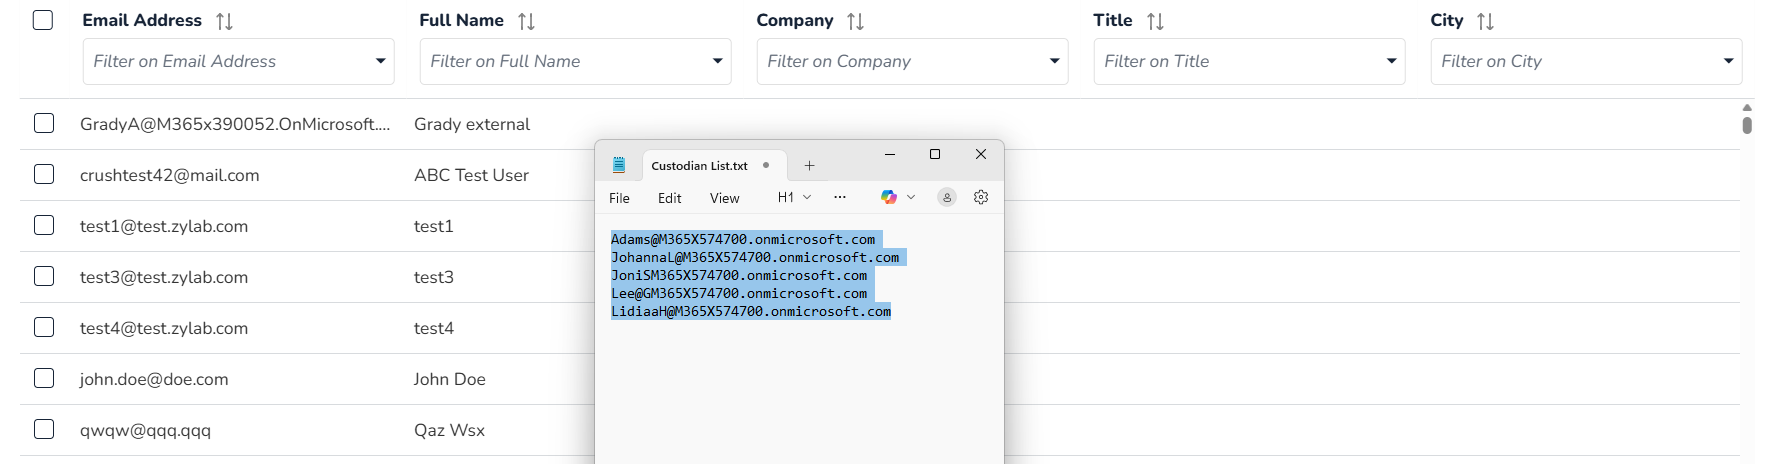
You can also filter on custodians by copy/pasting a list of email addresses in the Filter on Email Address field.
Click Add in the bottom right corner of the pop-up.
In the Custodians tab you can filter/sort and perform some actions. Please note that the available actions differ based on the status of the hold.
When the Hold is still in draft, the below shown actions are available. Once a hold has been issued, you cannot delete custodians anymore.
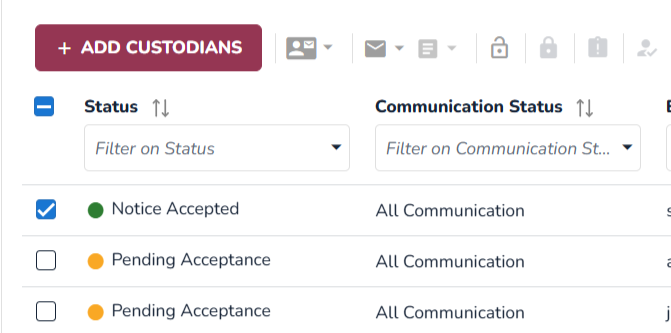
The next recommended step is to define the Messages. Select
 or, select the Messages tab and define a new message/select a Message Template for the Hold Notice. For all other messages, default templates have been selected already. Click Select to create a new message, edit the selected template, preview the message, or save the new/edited message as a new template.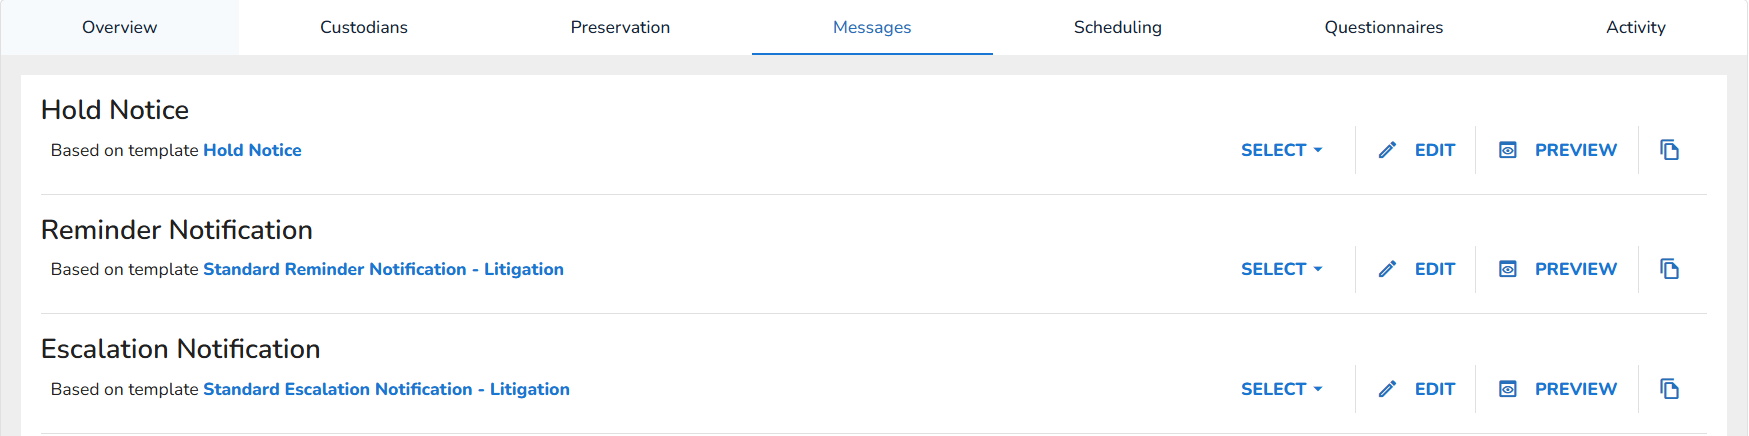
After the requirements for issuing the hold have been met, you will see actions buttons on the top right, based on the configurations made in Settings.
If you selected:
Direct issue only – Only
 action button will appear. Select it to issue the hold directly without an approval workflow. Hold notices are sent to all custodians unless they have a silent communication status.
Approval optional – Select
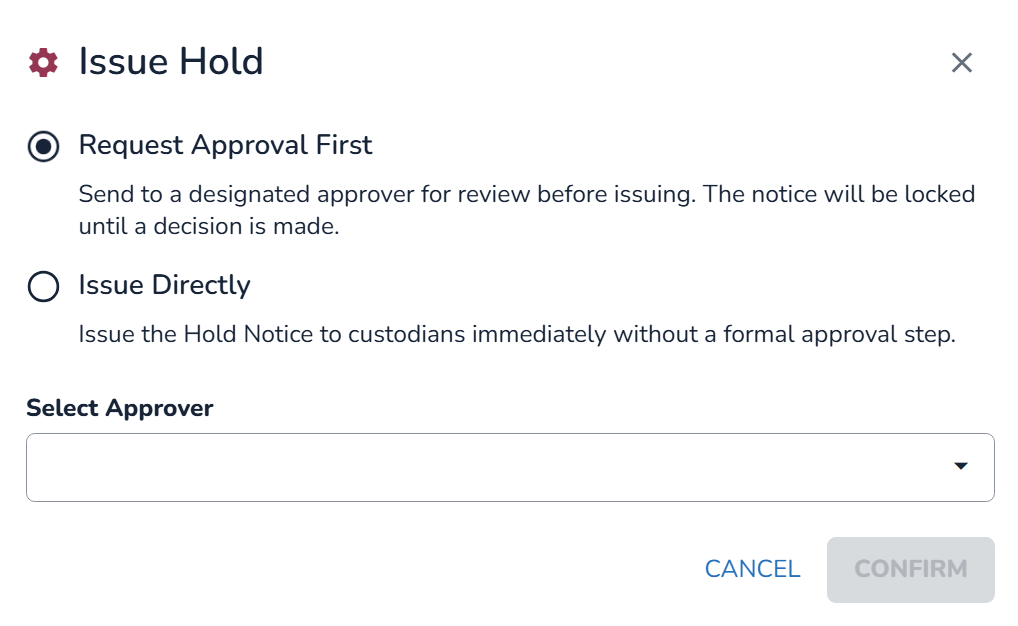
to open a modal where you can choose to: Issue Directly: Issue the hold without requesting approval.
Request Approval First: Request approval before issuing the hold. Select an approver from the Select Approver field and click Confirm.
Require approval before issuing hold notices – The Request Approval button appears in the upper-right corner and approval is required before the hold can be issued.
Select
 .
.Select an approver from the Select Approver field. The available approvers depend on whether the Approval Workflow is configured to allow all eligible approvers or only approvers from a predefined list.
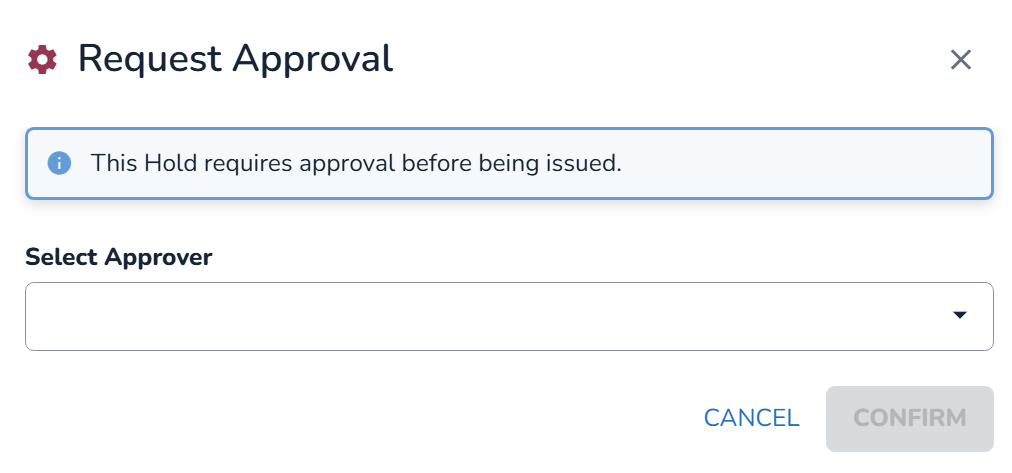
Once the request is approved, the hold is issued automatically. In cases where an approval request is still pending, the requester can reassign it to a different approver if the original approver is unavailable.
If the request is rejected, the approval request is closed and the hold returns to Draft status. The requester can then edit the hold and submit a new approval request.
Note
Not able to issue the hold? Make sure Email Sending is enabled. You might want to contact your Microsoft Entra ID Administrator.
Please note that you might want to add questionnaires or change the scheduling scheme of the messages first. You can do this in the Questionnaires and Scheduling tabs.
