Reveal Hold provides features to ensure the security of projects. Each project has an approval workflow as well as features to set roles and responsibilities of various users and maintain confidentiality, especially during a sensitive investigation. This feature is optional and can be turned off.
There are two main sections in the Security module:
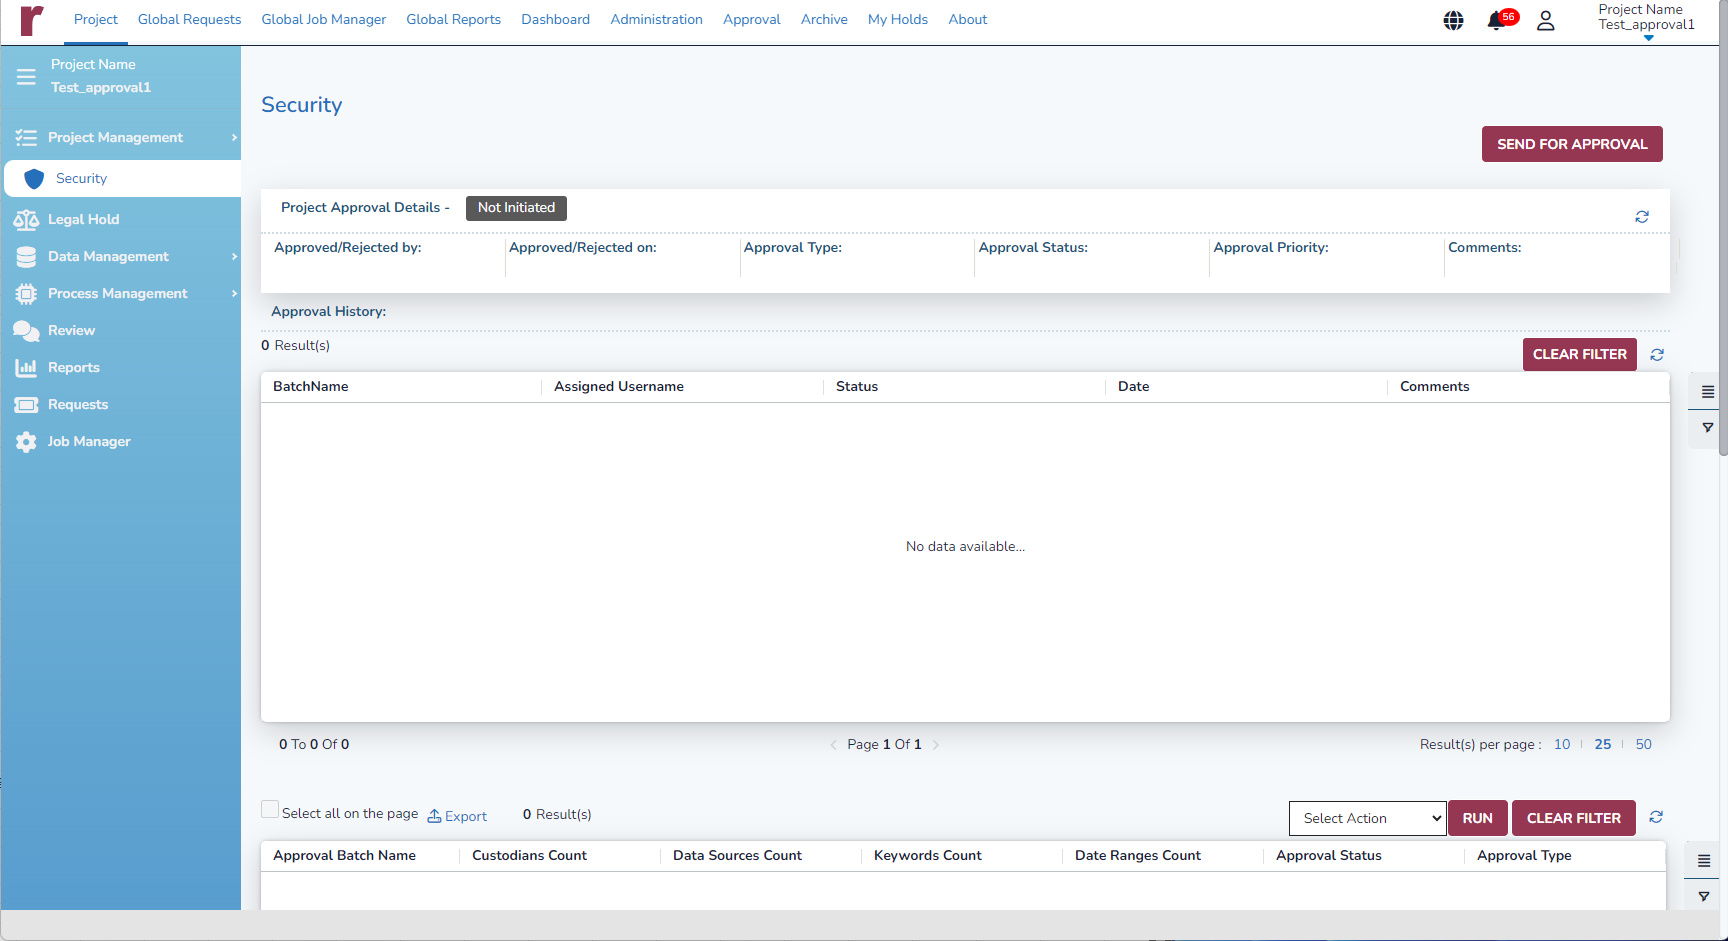
Security: This part covers the creation and sending of an initial request for approval, and three tables:
Project Approval Details shows who approved or rejected the overall project, with Approval Date, Type, Status, Priority, and Comments.
Approval History lists approval date and status at the batch or job level with comments and assigned username.
Action table allows selected batches or jobs to be Revoked or Reassigned; Select Action for checked batches and click Run.
View/Modify Permissions: To Assign or Unassign permissions by either Role or User. Clicking Edit to make changes shows Save and Cancel buttons.
Once the project is created and configured/scoped out, the Legal User must initiate the approval process to have the project scope/configuration approved.
To send a project for approval
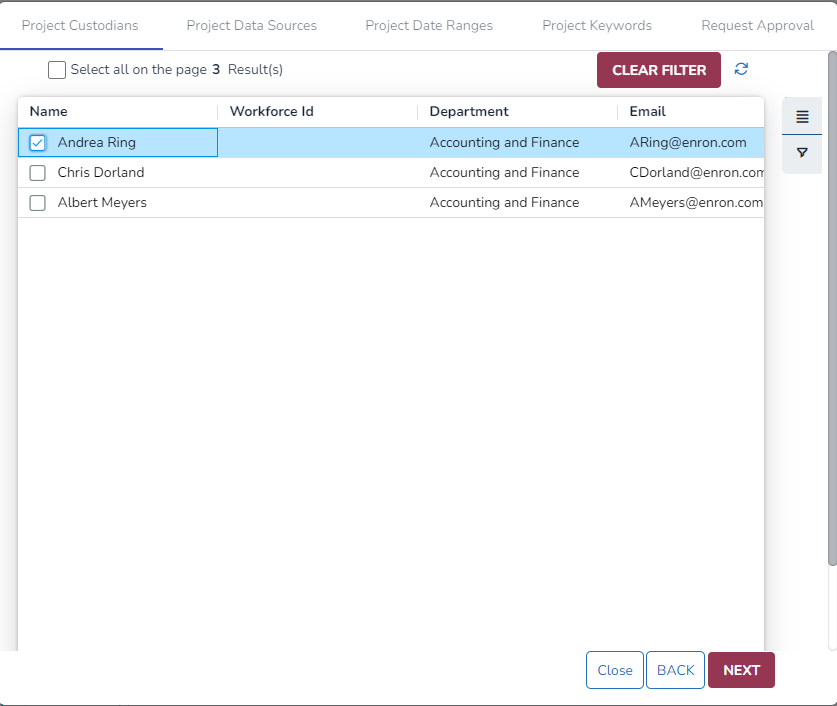
Navigate to the Security Module within the Project and select the Send for Approval button. This will populate a Pop-up Window with a list of your custodians and configure what you are requesting to be approved for processing within this project.
Select the Custodians you are requesting to be approved and processed within this project then click Next.
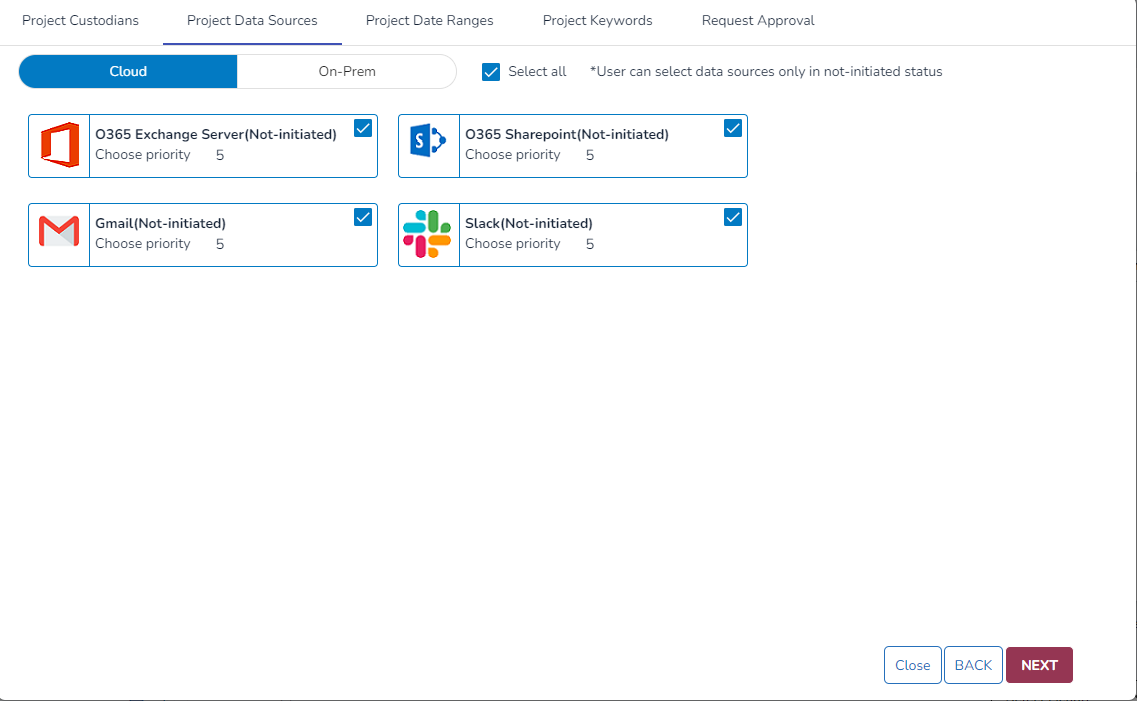
Data Sources are not pre-selected by default. Ensure to check each Data Source you want to approve for processing. The Data Sources can be toggled between Cloud, On-Prem, & O365.
Request for Project Approval Pop-up Window
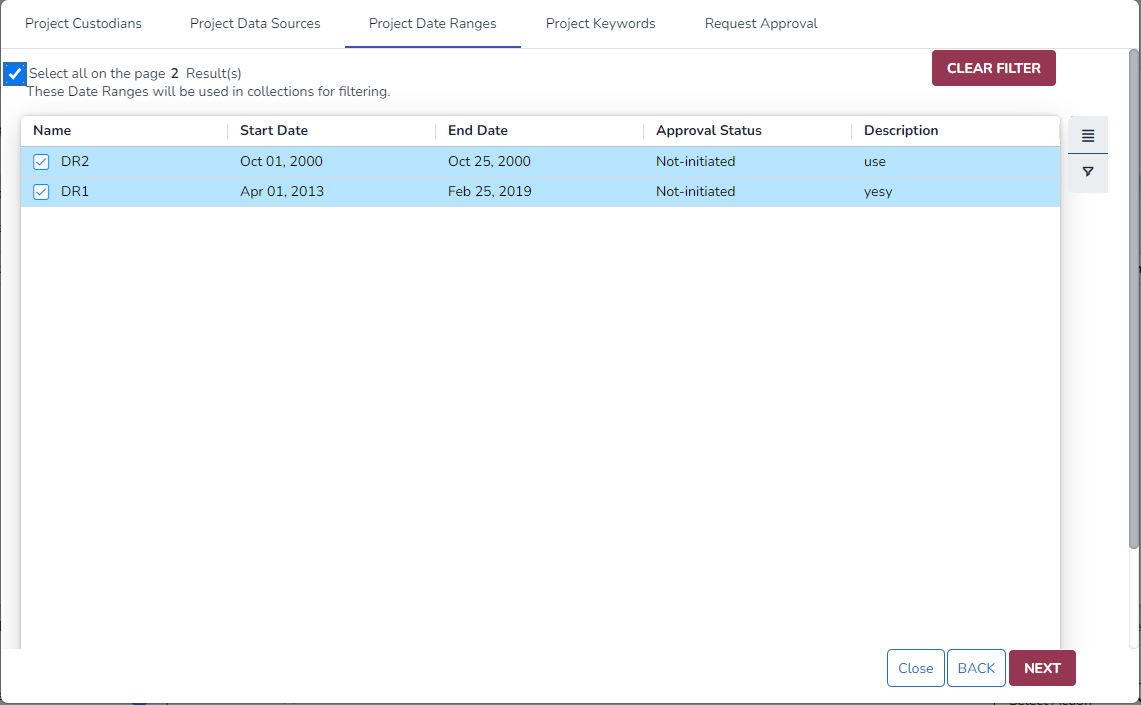
Date Range Approval Pop-up Window
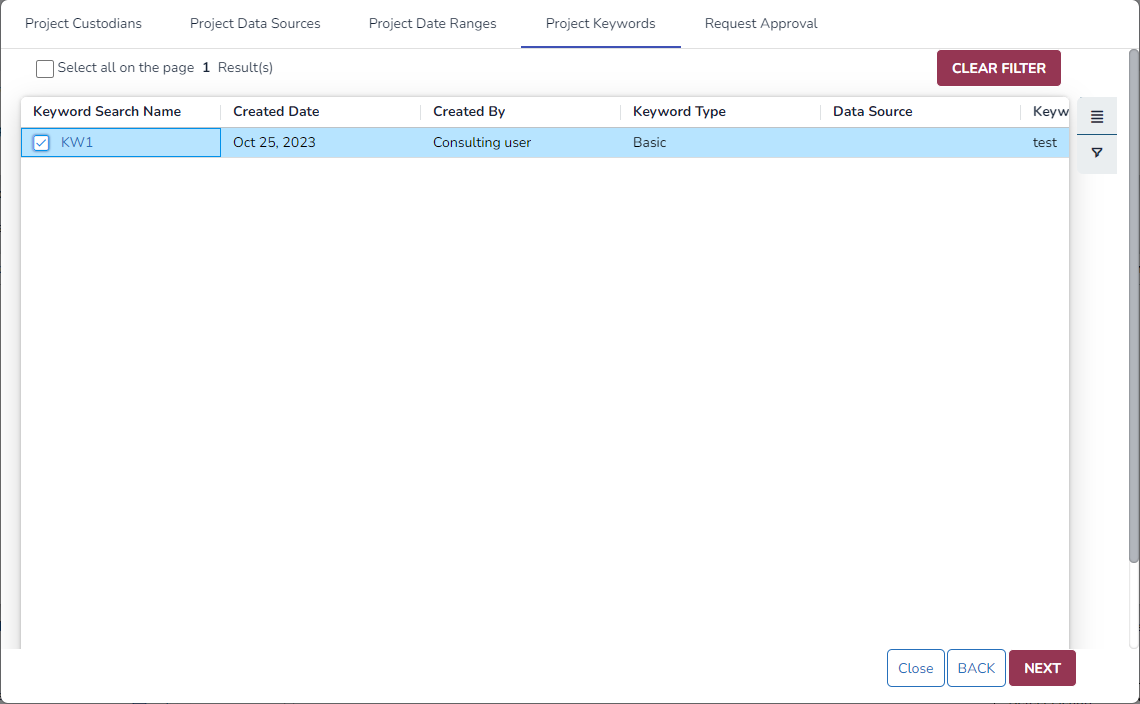
Project Keywords for Approval Pop-up Window
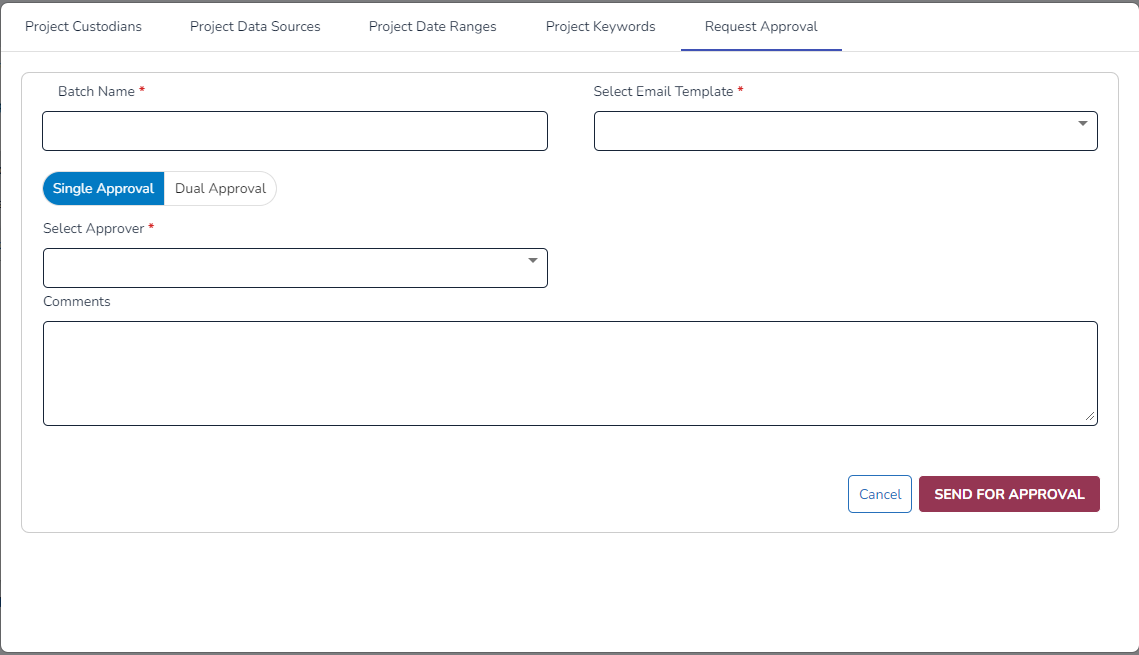
Request Approval Pop-up Window / Required Fields
Comments: Enter comments, if any.
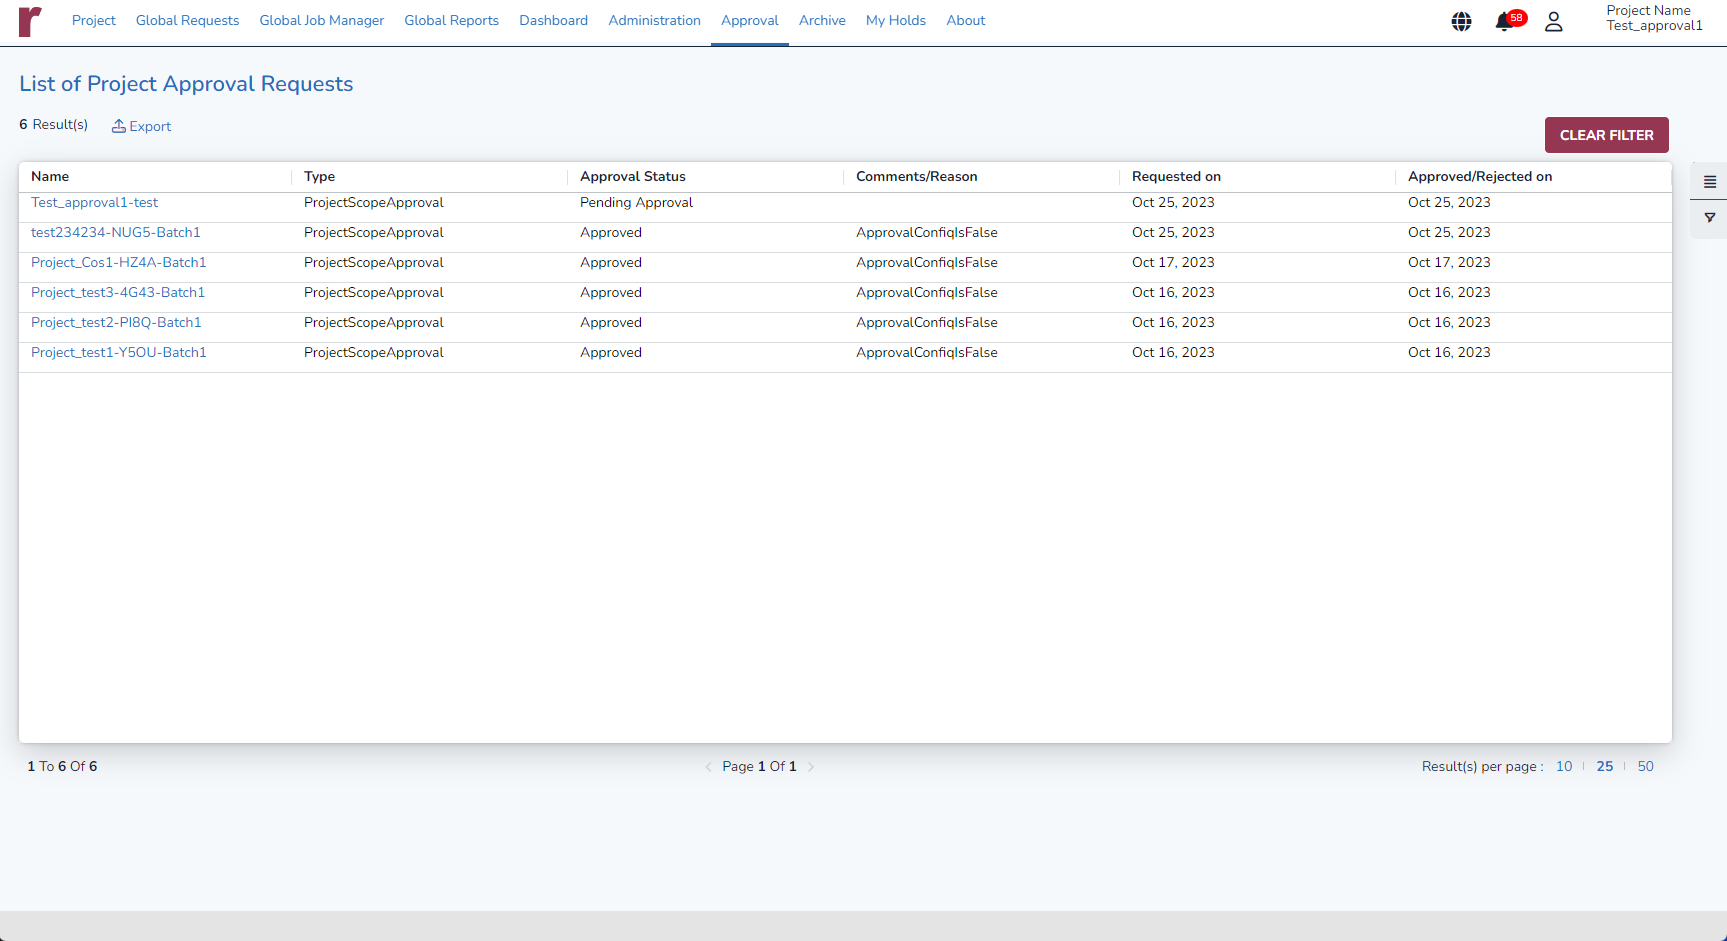
Click the Send For Approval. The project is sent for approval and the status of the project is displayed as Pending Approval. The approver gets an email notifying him/her to review the project details and approve it. When the project is rejected or approved, an email with the approver’s comments is sent to the user who created the project and the user who sent it for approval (usually the same user).
Clicking on Cancel closes the Pop-up Window without sending the project for approval.
Approval user can then approve by selecting the approval request in their approval page view.