Graph API Connector Prerequisites for SharePoint
Overview
Reveal supports integration with SharePoint for in-place preservation and data collection. This document describes the prerequisites for integrating Reveal with SharePoint.
Information Required for Integration
The following details are required for configuring O365 Office connector in Reveal.
Service account username and password which has been assigned the following roles:
eDiscovery Manager
Note:
Disable Multi factor Authentication for the service account.
Client ID and Tenant ID of the registered application in Azure.
Client secret generated for the application.
The below sections describe the steps to be carried out in o365 Office for integration with Reveal.
Create a Service Account in Office 365
To create a new Office 365 user, go to Users >Active users in the Office 365 admin center and click on Add a User.
Enter the details of the new user and click Finish Adding. The user will now appear in the list of active users.
Navigate to Permissions - Security & Compliance (office.com). Select eDiscovery Manager and click on Edit.
Search for the service account to be added under eDiscovery Manager. Choose the service.
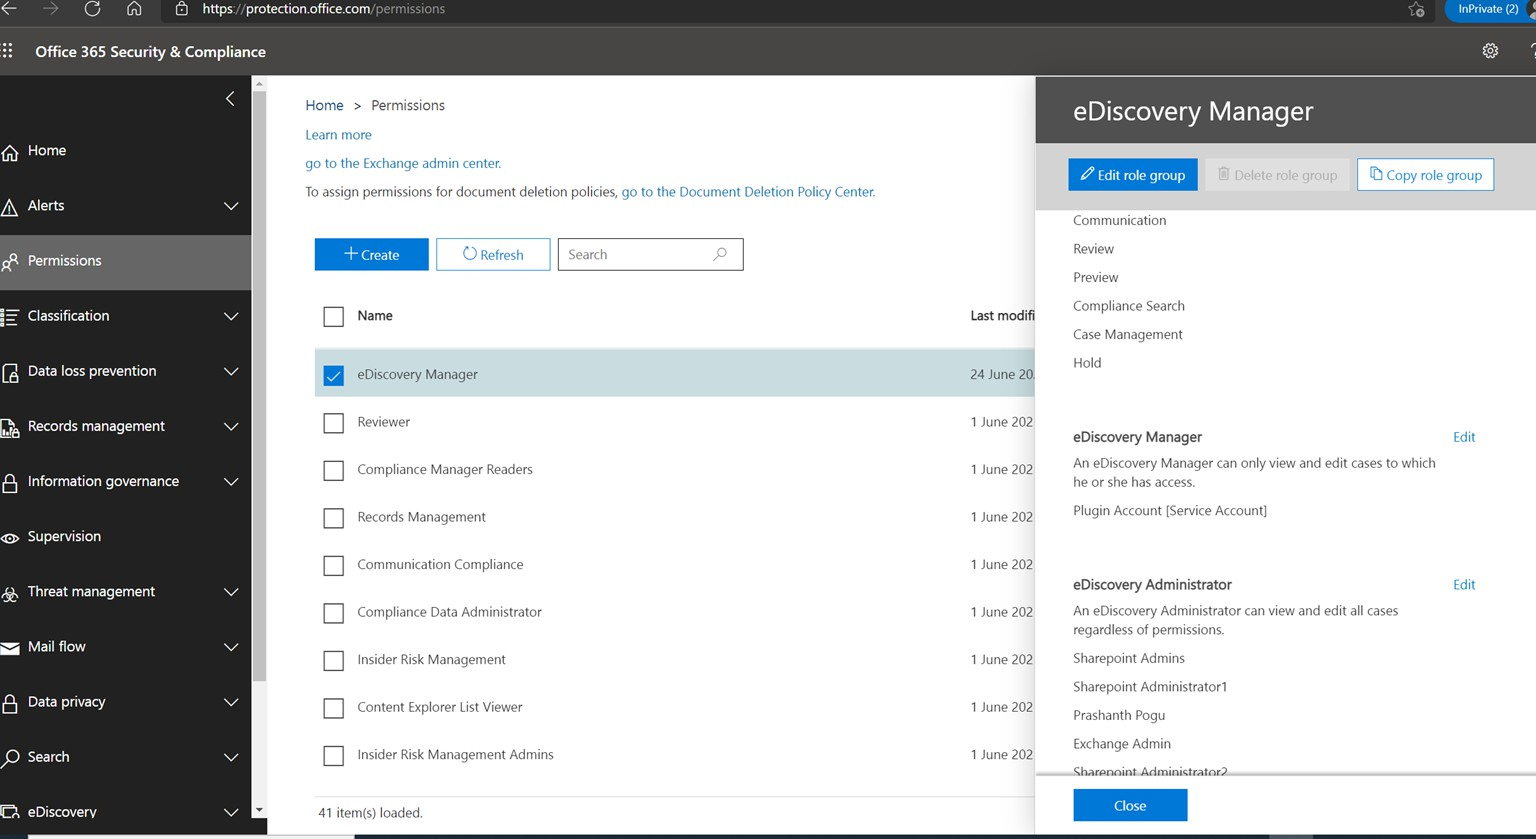
Figure: Edit eDiscovery Manager
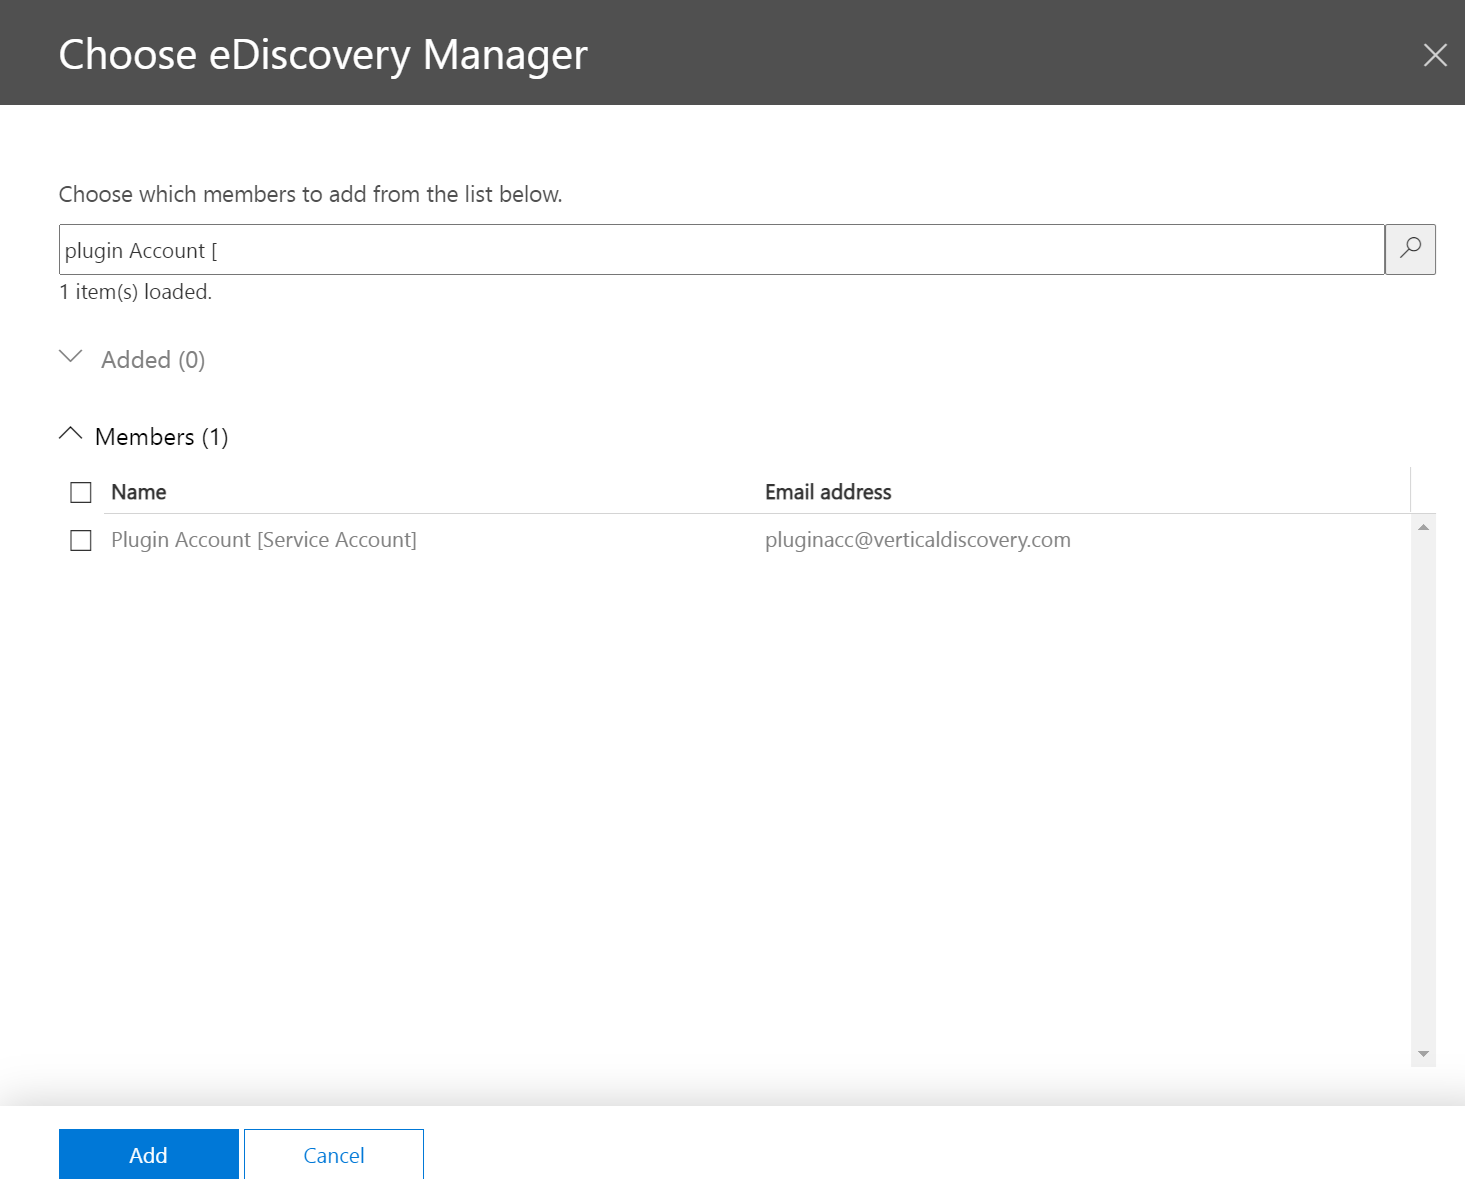
Figure: Add Service Accounts to eDiscovery Manager
Register Application in Azure
Registering an application establishes a trust relationship between the app and the Microsoft identity platform. The trust is unidirectional: the app trusts the Microsoft identity platform, and not the other way around.
Follow the steps given below to create the app registration:
Sign in to the Azure portal.
If access to multiple tenants is available, from the top menu, use the Directory + subscription filter to select the tenant in which the application is to be registered.
Search for and select Azure Active Directory.
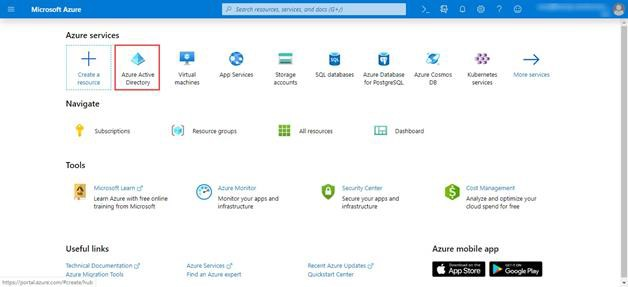
Figure: Microsoft Azure Services
Under Manage, select App registrations > New registration.
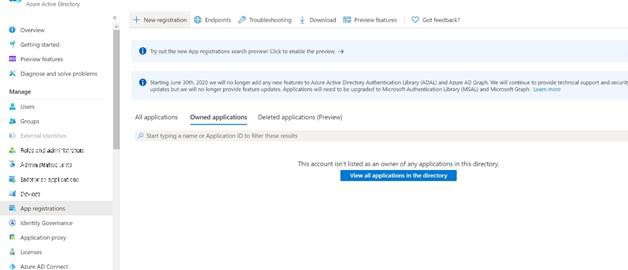
Figure: New Registration
Enter a Display Name for the application. Users of the application might see the display name when they use the app, for example during sign-in. The display name can be changed at any time and multiple app registrations can share the same name. The app registration's automatically generated Application (client) ID, not its display name, uniquely identifies the app within the identity platform.
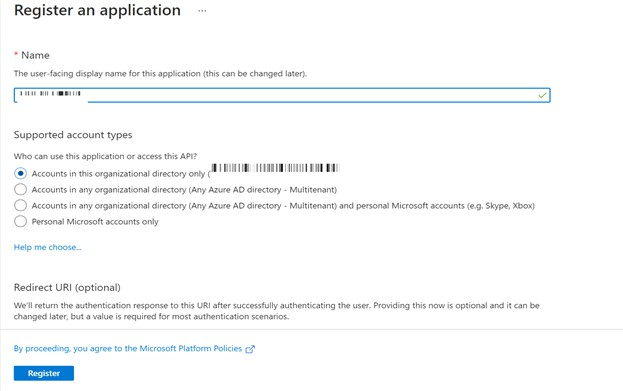
Figure: App Registration - Part 1
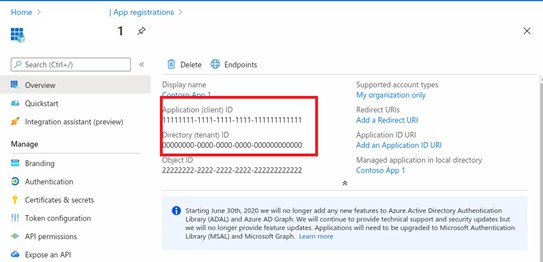
Figure: App Registration - Part 2
Specify Accounts in this organizational directory only can use the application. In some cases it is known as Sign-in audience.
Do not enter Redirect URI (optional). The following section describes how to configure a redirect URI.
Select Register to complete the initial app registration.
Add a Redirect URI
A redirect URI is the location where the Microsoft identity platform redirects a user's client and sends security tokens after authentication. In a production web application, for example, the redirect URI is often a public endpoint where the app is running.
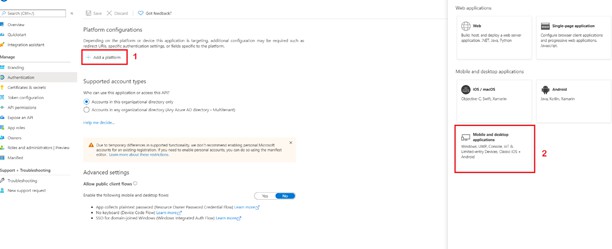
Figure: Redirect URI
Mobile and Desktop Applications
Select one of the suggested redirect URIs. For desktop applications using embedded browsers, https://login.microsoftonline.com/common/oauth2/nativeclient needs to be checked.
Select Configure to complete the platform configuration.
Add a Client Secret
The client secret is also known as an application password. It is a string value the app can use in place of a certificate to identify itself. The client secret is the easier of the two credential types to use.
To add a Client Secret, first select the application from App registrations in the Azure portal. Then follow the steps given below.
Select Certificates & secrets.
Select New client secretAdd a Description and an Expiry for your client secret.
Select Add..
Record the secret's value for use in the client application code.
This secret value is never displayed again after leaving this page.

Figure: Certificates and Secrets
Add Permissions to Access Microsoft Graph
Configure delegated permission to Microsoft Graph to enable the client application to perform operations on behalf of the logged-in user such as reading their email or modifying their profile. By default, users of the client app are asked when they sign in, to consent to the delegated permissions configured for it.
To configure permissions:
Choose API permissions to view the options.
Select Add a permission > Microsoft Graph.
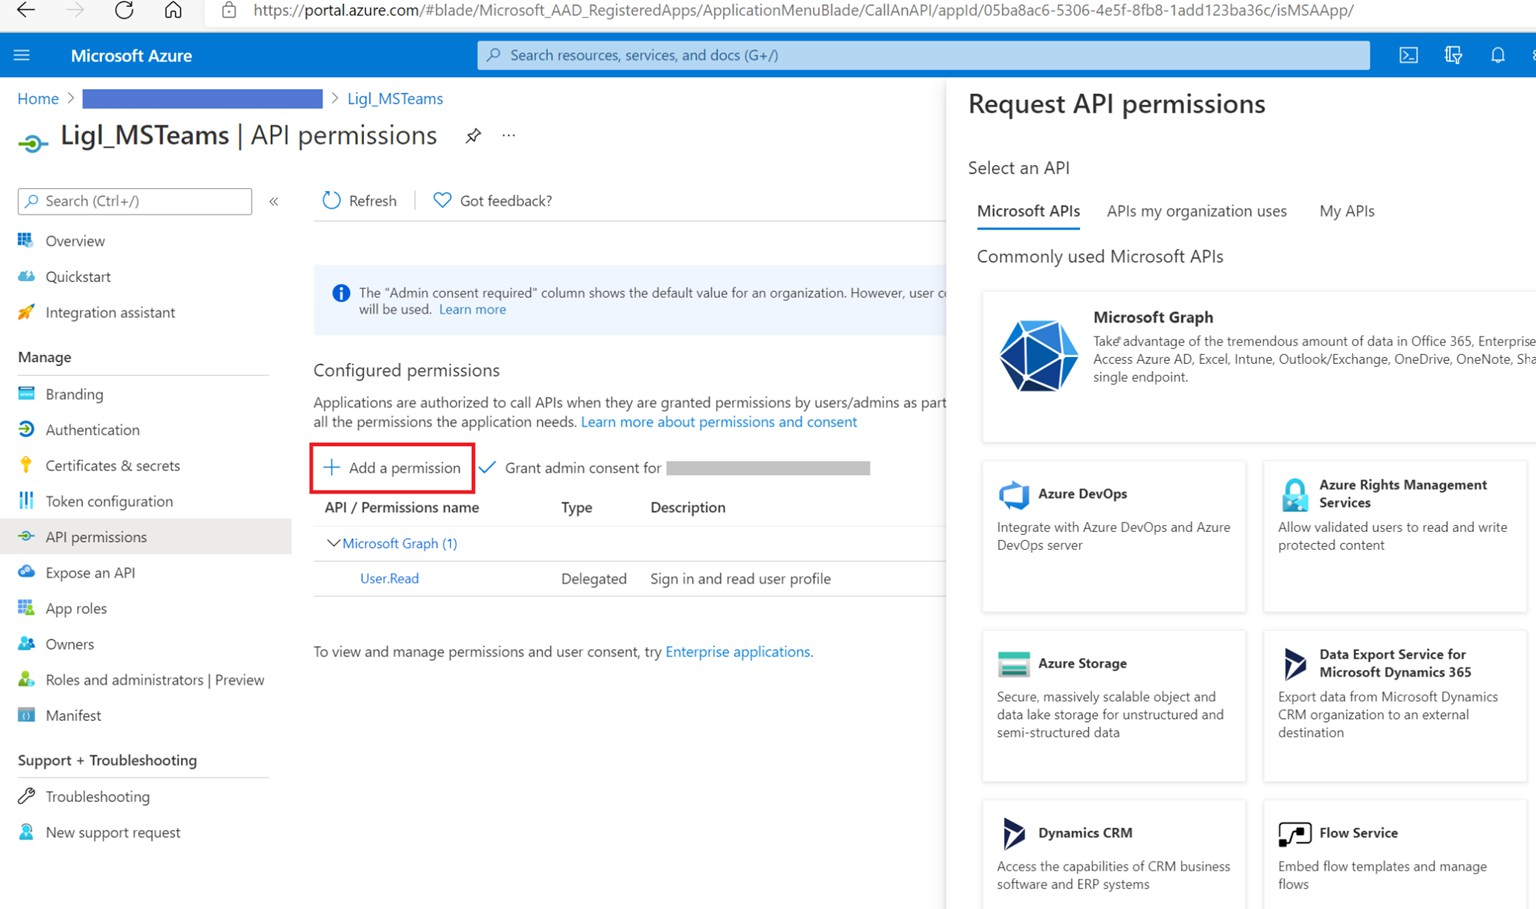
Figure: Add Permission - Microsoft Graph
Select Delegated permissions. Microsoft Graph exposes many permissions, with the most commonly used shown at the top of the list.

Figure: Delegated Permissions
Under Select permissions, select the following permissions and navigate to Application. Permissions adjacent to Delegated permissions to Select Application permissions listed in below table.
API / Permissions name
Type
Description
Admin consent required
User.Read.All
Application
Read all users' full profiles
Yes
Sites.Read.All
Application
Read Items in All Site
Collections
Yes
EDiscovery.ReadWrite.All
Delegated
Read and Write All
eDiscovery objects
Yes
EDiscovery.Read.All
Delegated
Read Case, Custodian Data
Yes
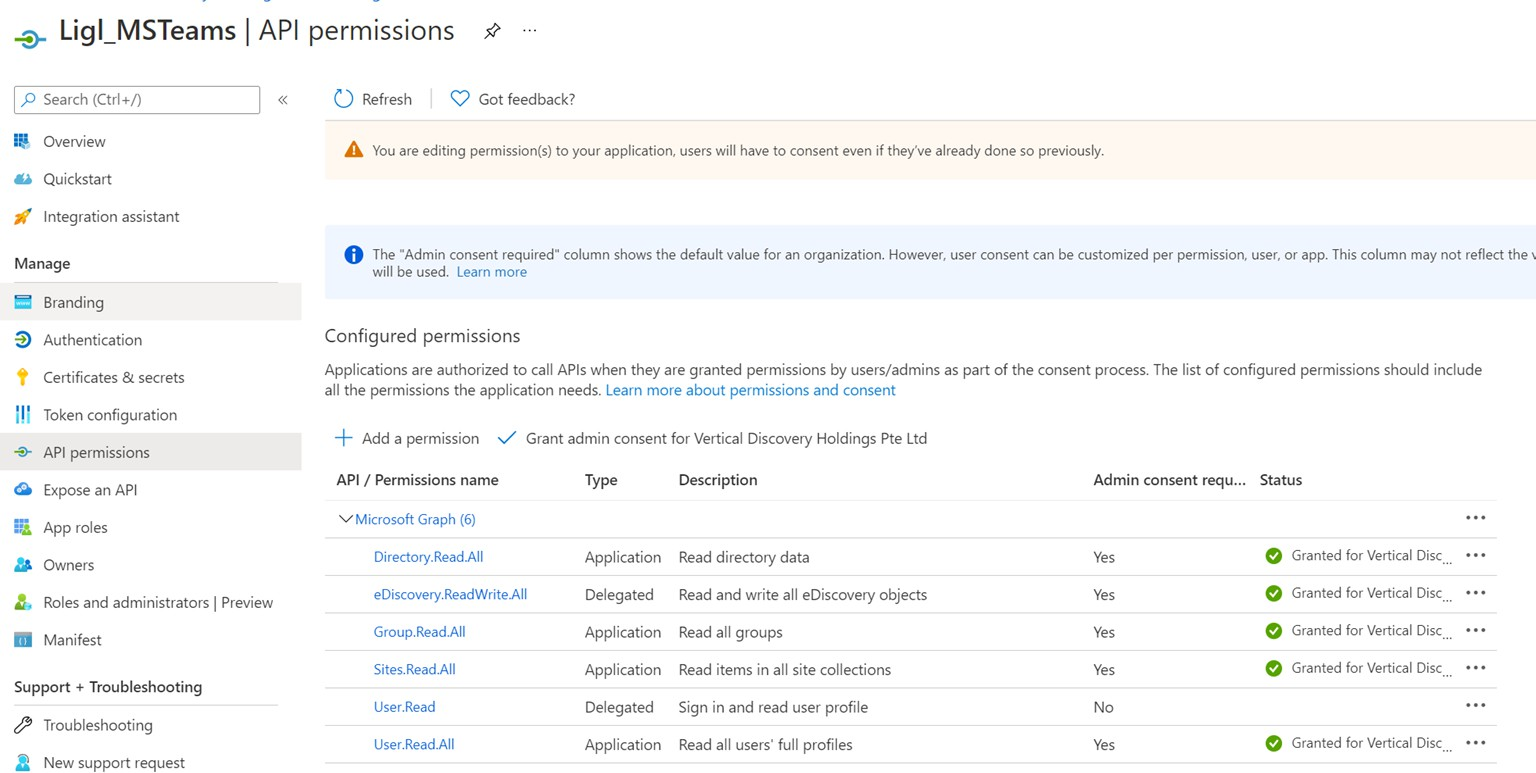
Figure: Configured Permissions