A Company is required to create a new Reveal project. Users assigned to the company may then be assigned to projects created within that company and given appropriate role permissions. Clients may be created as well within the company to facilitate billing reporting.
This article will set out how to create a company and how to manage its projects, users and statistics in Reveal. The creation of a company takes place under an Instance of Reveal, which is a secure digital location containing all of an organization’s project-related data, user accounts, and application settings. These are handled by an Instance Administrator.
Important
If you are a SaaS Customer, it is recommended that you follow the Web-Based instructions below to create and manage Companies within your Reveal instance. If you are an On-Prem customer, you may only have the option to create and manage Companies using the Non-Web Based option. If the Web-Based option is not available within your instance, please follow the Non-Web Based instructions instead.
Create and Manage a Company in Reveal
Getting Started: Reveal
An Instance or Company Administrator will open Reveal to this landing page, containing sections to administer Projects (under Discovery), Companies and Users (under Admin), as well as a table of projects for the current instance or company.

This is the workflow to create or manage companies:

A Company Administrator may open Companies to manage existing companies (see Managing A Company below). A Company Administrator has administrator role permissions in all projects for that company.
An Instance Administrator has administrator role permissions for all companies in that instance and their projects. An Instance Administrator, in addition to managing Companies residing in the instance, may create a company.
Click CREATE COMPANY.
The simple Create Company dialog box contains two fields:

Name – A company name may contain up to 100 upper or lower case alphanumeric characters, including spaces.
Logo - You may select and upload a Logo image for the company. This will be displayed in the upper right heading of the Reveal screen, and will soon also be displayed with its entry on the Companies page.
Submit when complete.
The Company has been created. It may now be populated with Users, Project and Clients.
Populating a Company: Reveal
Each Company entry on the Companies page has a unique ID number that is auto-assigned when the company is created. It also has three controls:
Users – Reveal accounts accorded permissions to access selected company projects. See How to Create and Manage Users for further details.
Clients - A Client is a partition within the Company instance where multiple projects may be created. More than one Client may exist per Company. The term Clients is used in Reveal to designate specific entities that manage a Company's projects and their primary contact information. The Clients may be multiple outside counsel in a corporate instance, or client companies in a service bureau instance. Each Client would typically manage multiple legal Projects within the Reveal Instance. An alphanumeric number designated with the Client Name is a unique identifier so that cases can be tracked and billed easily; this number may contain up to 100 characters. See How to Create and Manage Clients for further details.
Projects - Projects in Reveal are databases often equivalent to a specific legal matter, investigation or analytical assessment. See How to Create and Manage Projects for further details.
Managing a Company: Reveal
With a Company open, you may select the Switcher button [![]() ] in the upper left corner at any time to select another Company. You can also filter on Name and ID through the Search bar to find what you’re looking for.
] in the upper left corner at any time to select another Company. You can also filter on Name and ID through the Search bar to find what you’re looking for.

When you click on a Company Name hyperlink, it opens a company details screen, where you have access to the company Overview, Users, Clients, Projects, and Archives tabs.
Overview

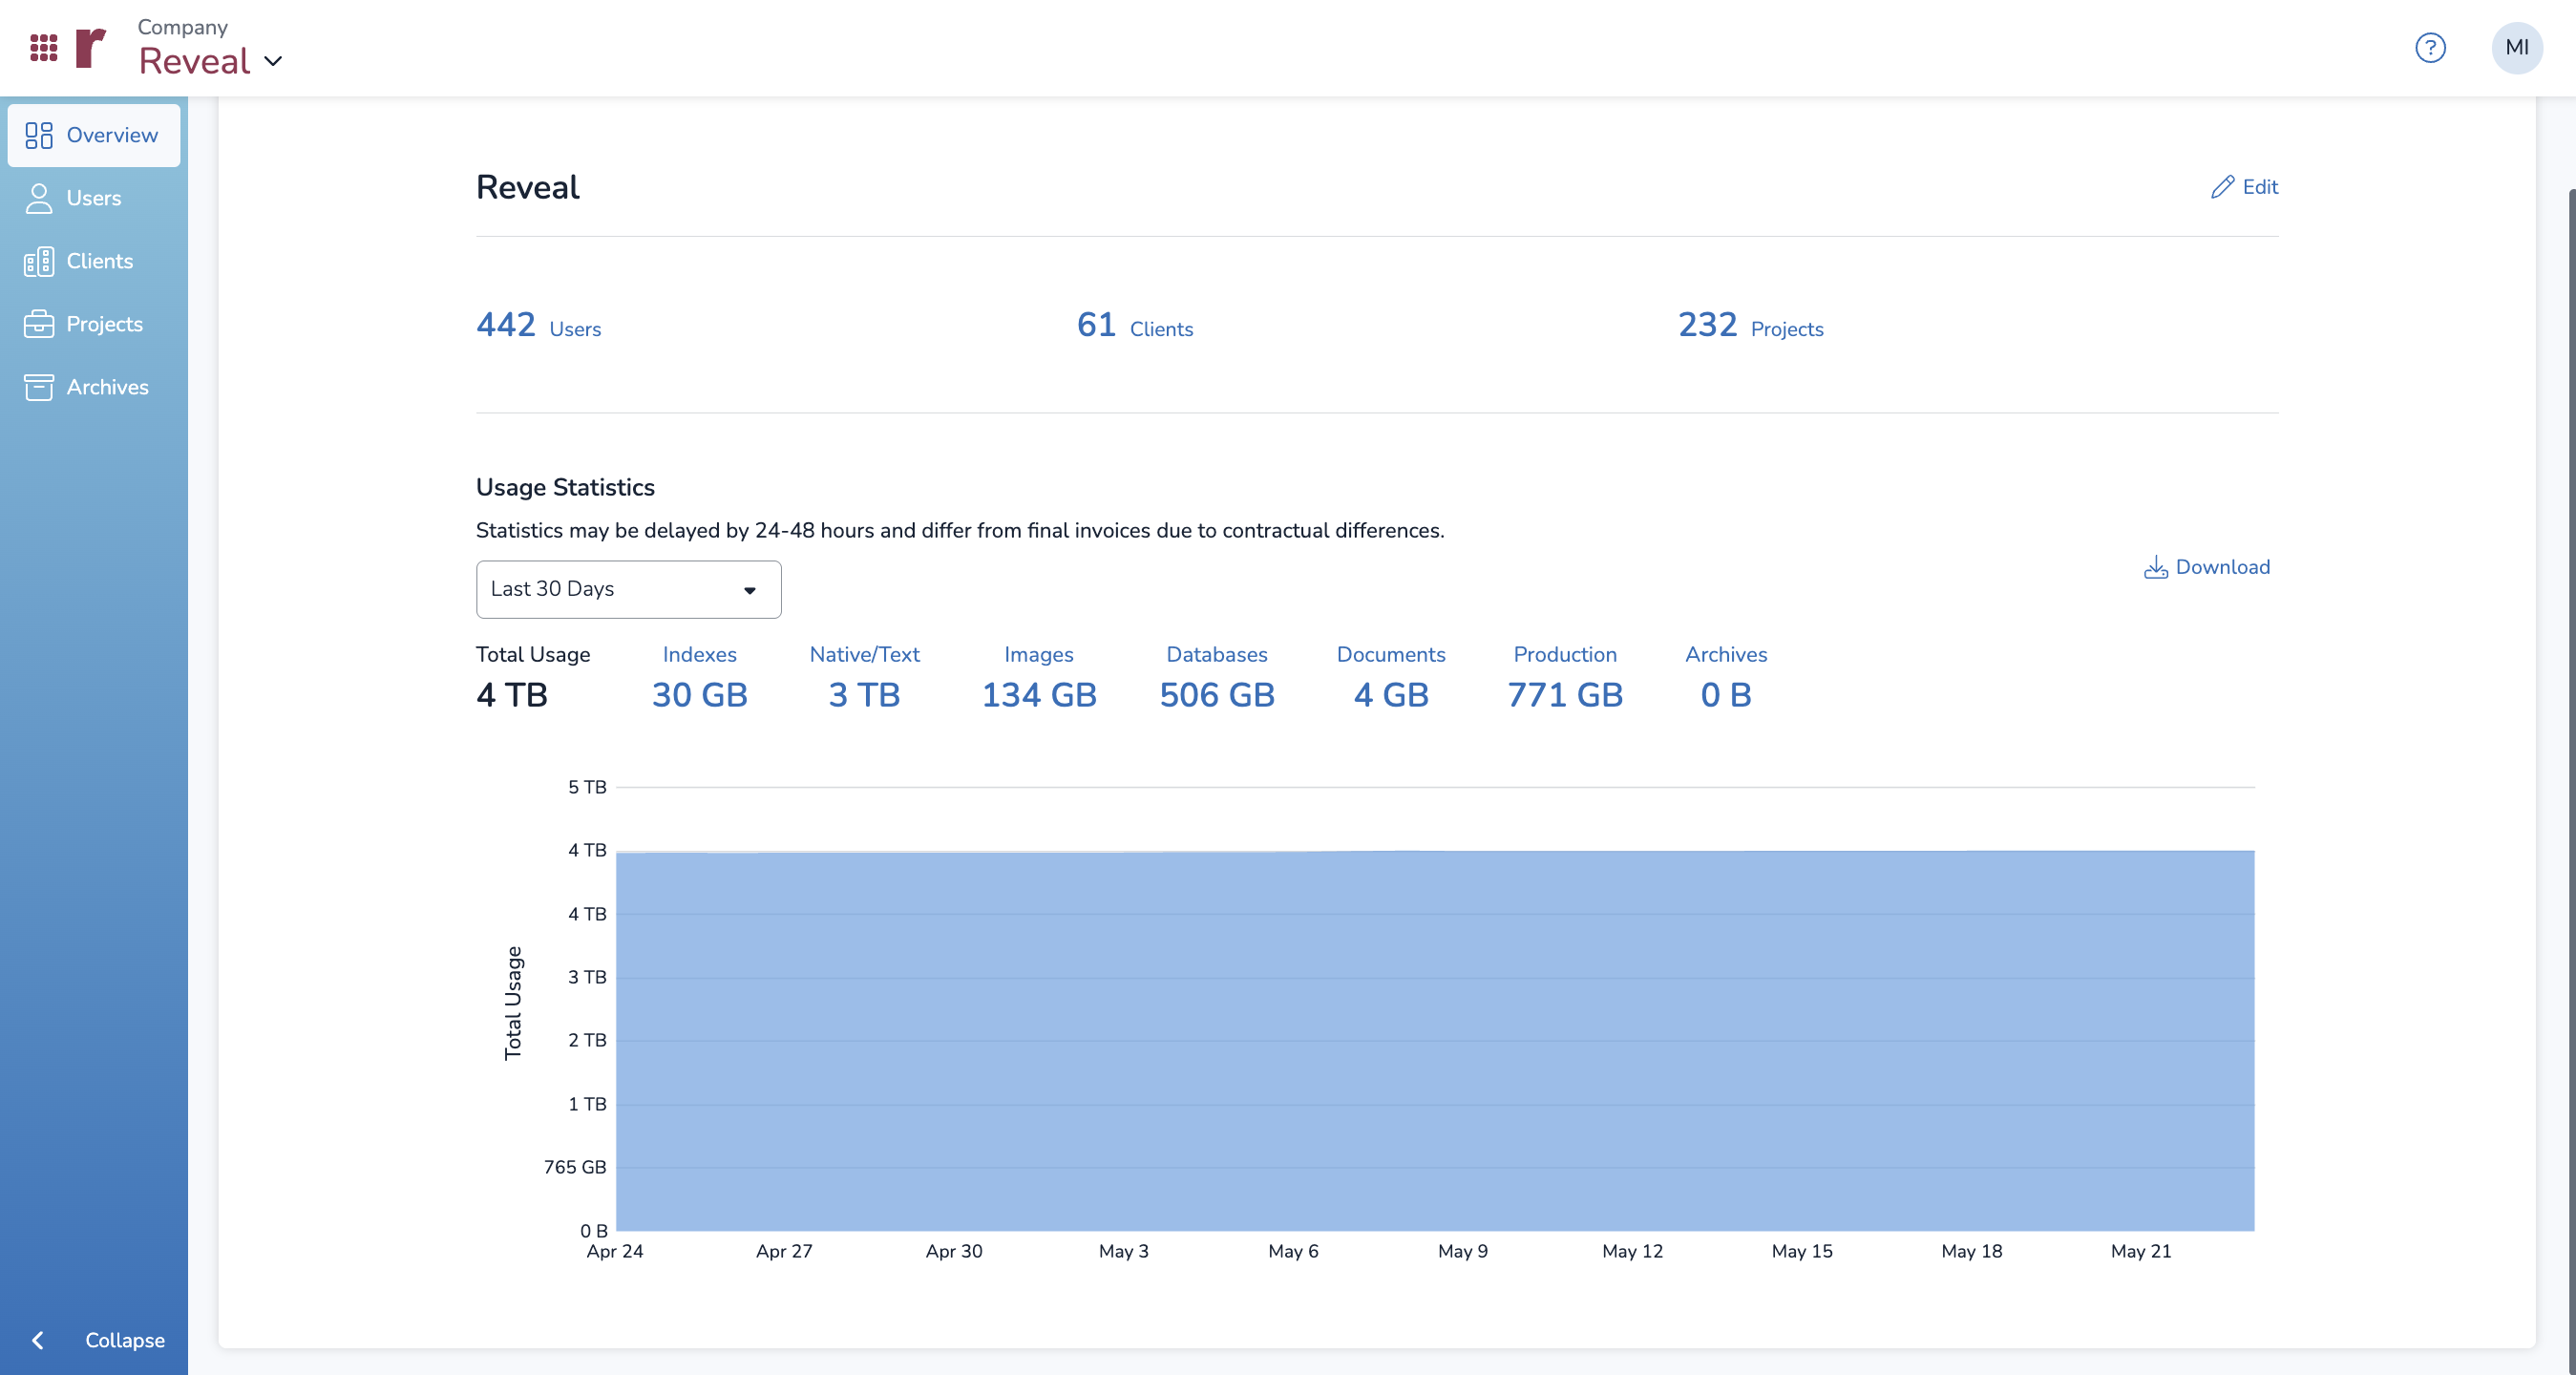
The company details screen provides the following capabilities:
Edit Company information.
Open the company’s Users, Clients or Projects by clicking on the hyperlink button showing how many of each are currently active under the company.
View Usage Statistics for total and broken-out categories of data, with a graph of changes in the selected category over the default of Last 30 Days. Gliding the pointer over the table allows you to see a bubble indicating volume as of a certain date in the graph. Additional date ranges will be added in subsequent releases.
You may Download the Usage Statistics.
Users
Users lists all users, active and inactive, configured under the Company. Clicking on any User record enables viewing and editing of the User account and assignments. See How to Manage Users for more information. The screen focus changes to the Users tab after creating or editing a user.
Clients
Clients lists all clients of the company. Additional Clients may be added to this instance of Reveal. The required pieces of information to create a client are:
Client Name
Client Number
Client Company
Once created, these values cannot be changed. There are fields below for client address and contact information, as well as Client Notes. The screen focus changes to the Clients tab after creating or editing a client. See How to Create a Client for more information.
Projects
Projects lists all projects for the company and its clients for viewing and modification. Opening a Project shows a statistics pane on the right (below the Edit button, where users are assigned, security set and artificial intelligence enabled for the project) and a user list (from which users may be selected for removal). See How to Create a Project for more information. The screen focus changes to the Projects tab after creating or editing a project.
Archives
Archives lists all archives created across all projects for a specific company. Company and Instance Admins can create Archives in this tab by following the steps in the Archives article. Note that an additional step is required: selecting from a dropdown list of project associated with your company.
Create and Manage a Company in Review Manager
Getting Started: Review Manager
Creating a company in Review Manager is required before you can create a new project. Managing a Company can be done in either Review Manager or in Reveal under Company > Companies. Below describes how to create a company in Review Manager, as well as manage a company in the Reveal interface.
Create a Company: Review Manager
Log into Review Manager as an Administrator.
Open the Instance Setup Pane.
Click Companies.
The Companies tab appears in the work area. All existing Companies are listed in the top window.
All Users are created under the Company, so there are sub-tabs under Companies to view Users By Company or Companies By User. In the illustration below showing the sub-tab Companies By User the Select User field is set display all companies with the selection No User (All Companies).
.png?width=1570&quality=high)
The Add New tab is the default tab, with only the minimum required field of Company Name showing.
You may optionally Upload a Logo for the company and preview it. All uploaded Logos are listed under the Logos menu link under the Instance Setup pane.
Choose the Additional Information button to fill out additional contact details if desired.
Choose Insert to complete the Company creation.
To Edit a company here, make any edits to the desired fields and choose Update to complete the changes.

Note
Before deleting a company, make sure it has no associated clients. The deletion will fail if any client are linked to it.
Companies Tab (Legacy Company Admin)
As of 2025.5, Reveal has removed the legacy Companies tab and replaced it with the below link, which redirects to Reveal’s Companies page.
