To create a new production, place the documents to be produced in Public or Private Work Folder(s) under the Folder View of any of the Dashboard screens. You will then reference the Work Folder(s) when you add a Production Job, described below.
Note
See Blackout Redactions – Production Settings for instructions on how to produce spreadsheets redacted through Blackout.
Log in to Reveal as an Administrator or Client Administrator.
Select a project.
Go to Project Admin > Production via the Navigation Panel. Your computer will automatically open a new window in your browser, shown below.
.png)
Under Production Jobs, Select +Add.
The Add Production Job modal will open, beginning with the Documents tab.
I. Documents Tab
.png)
Job Name: Name your Production Job.
Production Type: Choose either Public or Private (only visible to you).
Select Work Folders to Produce: Select folders, one or multiple, that contain documents for production.
II. Imaging Tab
There are four document source types to choose for your production. Each type will require its own set of settings.
Native View: Source your production from Native View, which consists of PDF versions of your original documents, or from a PDF set.
Spreadsheet & Native Views: Source from the Spreadsheet View when using natively redacted spreadsheets, and from the Native View for all other document types.
No Images (Native File Only): Produce the original document file type. This is used for Native Only productions; no images will be generated.
Original files, for example a Word document (.docx), cannot be redacted, cannot be stamped, and cannot replaced by slip sheets. The stamping and slip sheet tabs will grey out if you choose this type of production.
Image View (Legacy): Source your production from Image View or an Image Set. If no images are present, then images will be generated during production.
Native View and Spreadsheet & Native Views
In addition to image-based productions, you can produce PDFs from your document’s Native View. This can include any redactions applied in Native view.
Note
Redactions and annotations applied in the Image View are not carried over to the native PDF View, and vice versa. This ensures work product is prevented from crossing over between both views, but allows users to produce from either one.
PDF Set: Choose to source PDFs from you document’s Native View or one of your PDF sets.
Spreadsheet Set (Spreadsheet & Native Views Source only): Choose to source spreadsheet from your document’s Native View or one of your Spreadsheet Sets.
Important
Selecting Spreadsheets & Native Views, then filling out the Spreadsheet Set field, is the only way to produce spreadsheets that are redacted through Blackout.
Conversion Template: Select a template to specify file type format for Microsoft Word, Excel, Powerpoint, PDF, and Msg documents. Only documents without PDFs will be converted with the template.
Click the
 gear icon to open the File Type Settings modal, where you can edit and/or save a new template. See Production Templates for more details on how to interact with this modal.
Redactions: Set how image redactions should be treated.
None – Produce without redactions.
Burned In – Burn in redactions; this is the default setting.
See Through – Burn in redactions that are transparent, so text is readable underneath the redactions.
Redaction Profiles: Check which redaction profiles to burn in — minimum one and up to all of your profiles.
Override Slip Sheets: If “Always include documents with redactions” is checked, redacted documents that would normally be excluded by slip sheet conditions will be imaged and included. Privileged documents, if excluded by a slipsheet condition, will not be included if this setting is enabled.
Include annotations: Select whether to include Highlights, Shapes, and/or Text.
No Images (Native File Only)
There are no additional settings for this option. Jump to III. Numbering Tab.
Image View (Legacy)
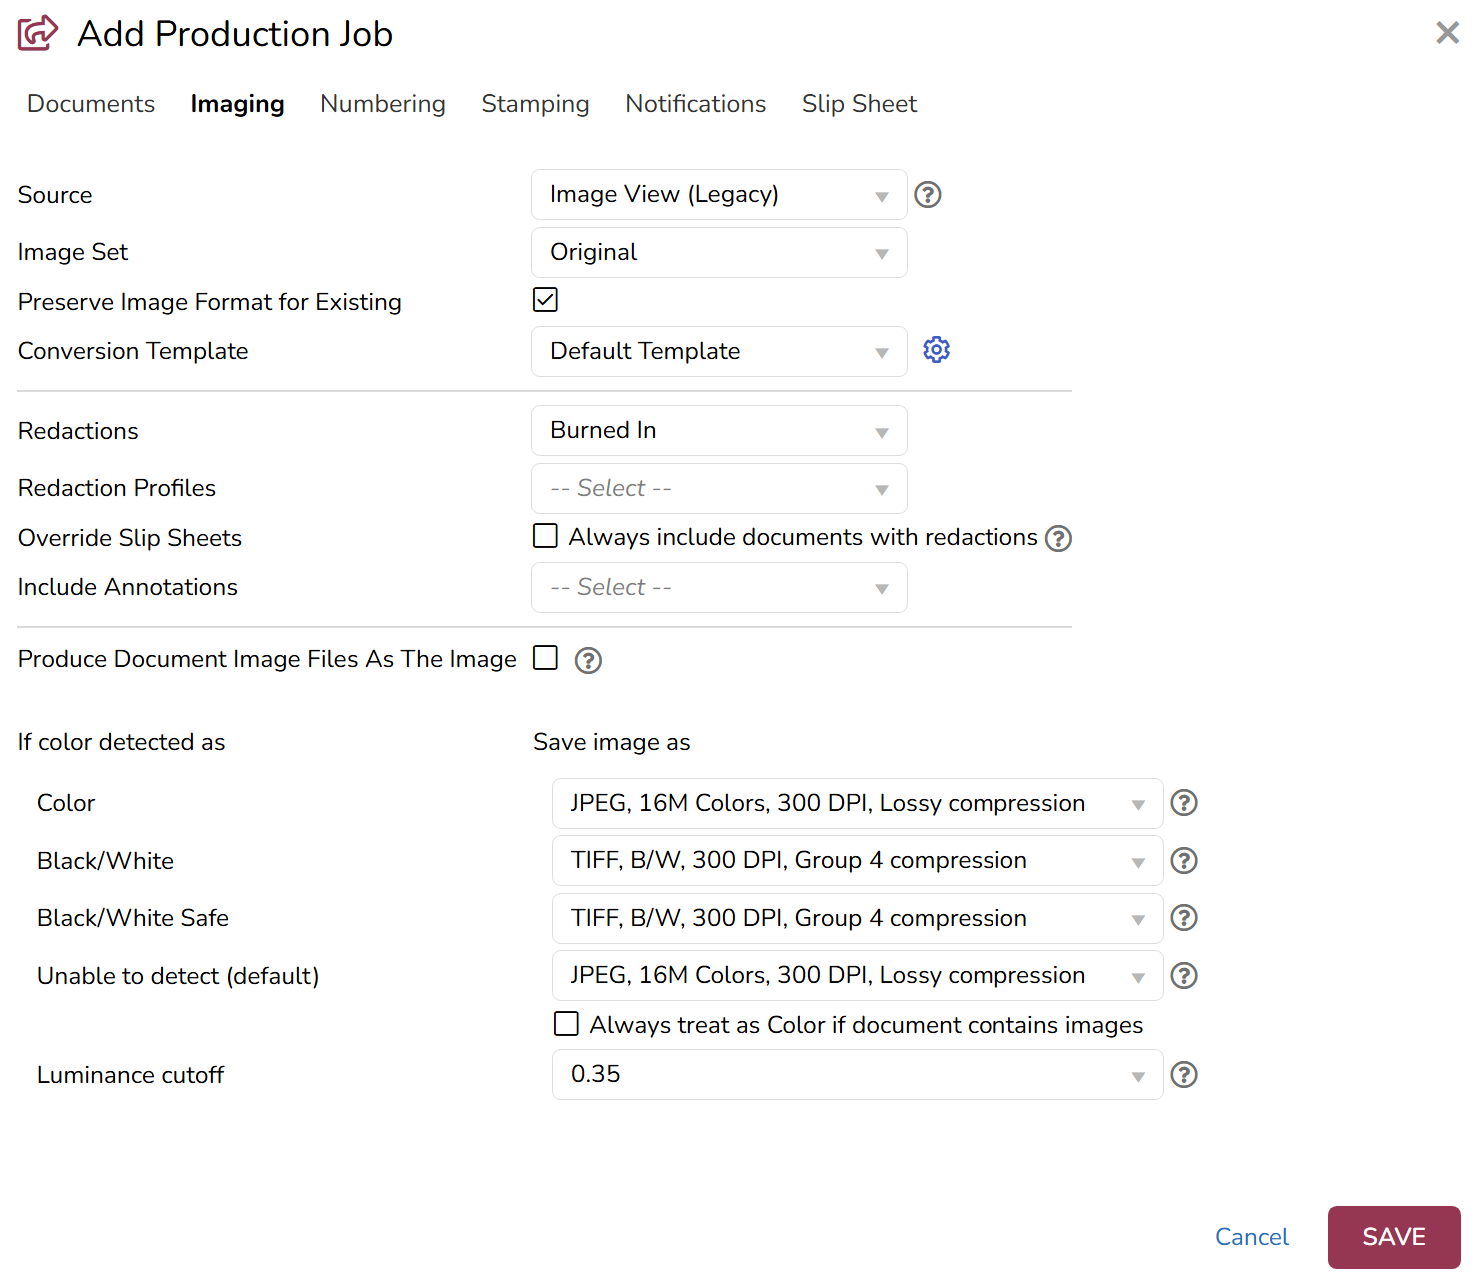
Image Set: Select an image set to use as the basis for producing images — either the original images generated from the document, or one of your Image Sets.
Documents lacking images in Image View will go through an image generation process that will convert native files to TIFF, PNG, or JPEG of your document.
Preserve Image Format for Existing: If checked, when a document in the image set already contains an image, e.g. through image jobs (bulk imaging) or overlays, the production will not attempt to tiff / re-image it. The image that's already present will be used in the production.
Conversion Template: Select a template to specify file type format for Microsoft Word, Excel, Powerpoint, PDF, and Msg documents.
Click the
gear icon to open the File Type Settings modal, where you can edit and/or save a new template. See Production Templates for more details on how to interact with this modal.
Redactions: Choose how image redactions should be treated.
None – Produce without redactions.
Burned In – Burn in redactions.
See Through – Burn in redactions that are transparent, so text underneath redactions is readable.
Redaction Profiles: Select redaction profiles to burn in — minimum one and up to all of your profiles.
Override Slip Sheets: If “Always include documents with redactions” is checked, redacted documents that would normally be excluded by slip sheet conditions will be imaged and included.
Privileged documents, if excluded by a slipsheet condition, will not be included if this setting is enabled.
Include annotations: Select whether to include Highlights, Freehand Annotations, Text Annotations, and/or Sticky Notes.
Produce Document Image Files As the Image: If checked, when the document type is an image type (e.g. .JPG, .PNG, .TIFF, etc.), then produce the native document as the image.
This is typically used to accelerate production speeds if there are many high-resolution images.
Note
Images produced from the Produce Document Image File As the Image setting will not receive stamped text (Bates Numbers, Confidentiality Labels, etc.), except for when the document contains redactions. Redacted documents will be produced like other imaged files.
Color Settings: These items determine format based upon color detection. The default settings are recommended.
For explanations about image file types, color modes, and compression types, see Color Detection and Luminance.
Always treat as Color if document contains images: If checked, all images will be treated as color, even if they’re grayscale or black and white.
This may increase image resolution and lengthen processing time.
Luminance Cutoff: Choose a value for luminance cutoff, between 0.25–0.50.
This value is used to determine if a document has color or not. The higher the luminance cutoff, the brighter the images in a file must appear to be before the file is treated as having color.
Jump to III. Numbering Tab.
III. Numbering Tab
Designate Bates number formatting by following the below steps. A preview of your Bates numbers is shown at the bottom of the modal, which dynamically updates each time a setting is changed.
.png)
Numbering Style: Choose the naming convention of your Bates numbers.
Page – Each production page is numbered sequentially. For example:
.png)
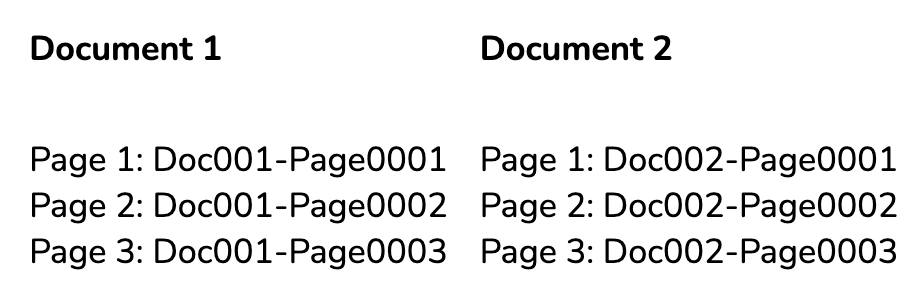
Document – Each production page is numbered sequentially, and pages within the same document will have a matching numerical prefix. For example:
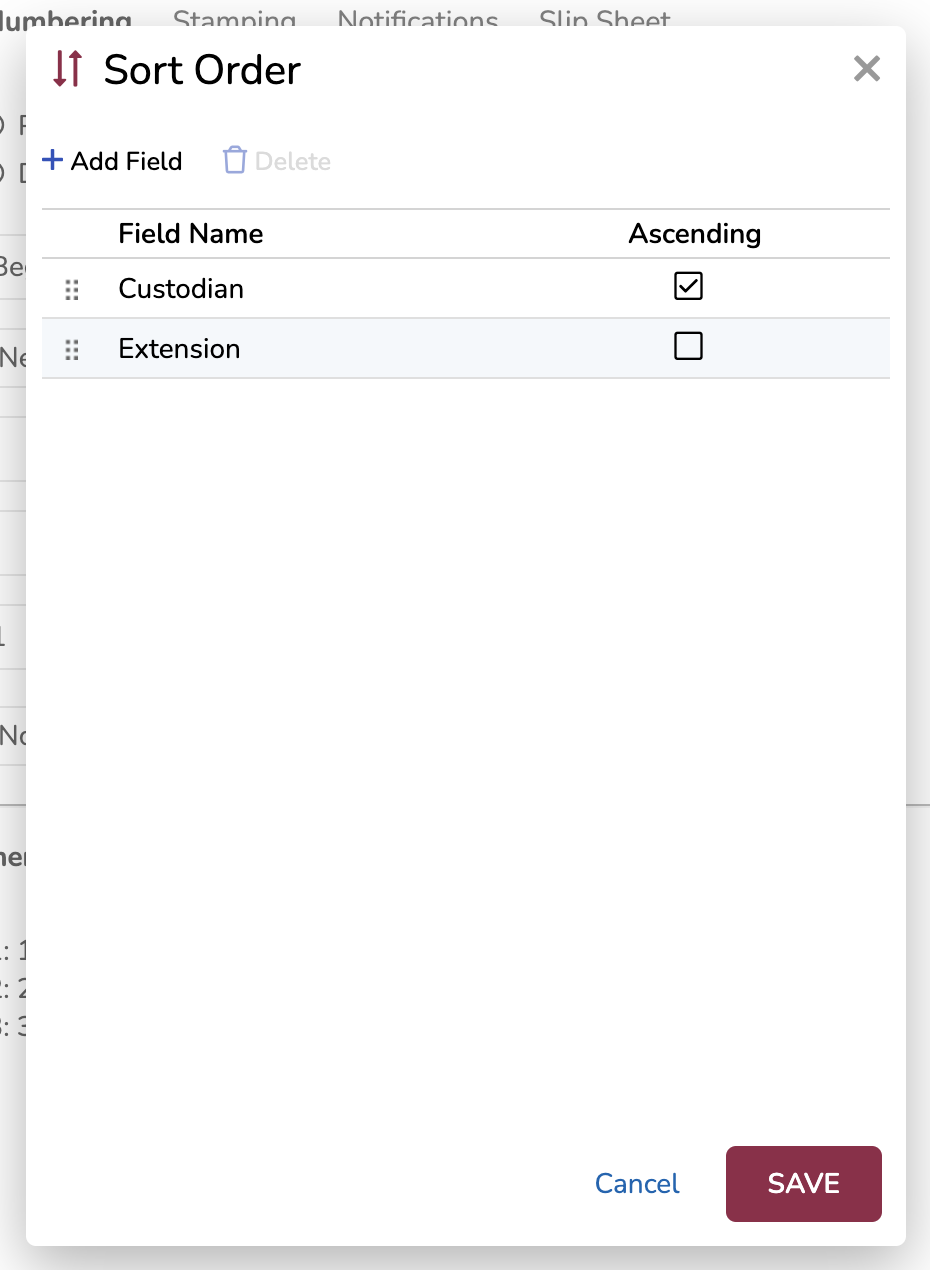
Sort Order: Click the ellipses [ … ] to change your sort order. You can add, re-order, and delete fields, as well as choose whether or not documents are sorted in ascending or descending order by field. Begin Number ASC (sort by ascending Begin Number) is the default.
Add multiple fields to create a nested sorting order. The below example would sort documents first by ascending Custodian, and then by descending file type for each custodian.
Note
Fields available in the "Add Field" list are based on the current field profile and visible fields in your Review Grid.
Important
If you change your sort order from the default Begin Number ASC, document families may sort out of order.
Numbering: Select how you want to source your numbering.
New Sequence – Create a brand new numbering sequence for your production.
Next Number – Continue numbering from a previous production, commonly used if you’re producing documents in multiple job batches.
Use Existing Numbers – Number the document using its Begin Number (BegDoc) value.
Set Type: Choose between an Image Set or a PDF Set.
Image Set: Choose your numbering source type from a pre-existing image or PDF set, depending on your Set Type. This should be used when selecting “Use Existing Numbers” in the Numbering field.
Number(s): Select your numbering source from the pre-existing Production Jobs. This should be used when selecting “Next Number” in the Numbering field.
Once selected, the below preview field will auto-fill to match your numbering source.
Prefix: Type your prefix, then choose a spacer from the dropdown (None, Hyphen, Space, Underscore, or Period).
The spacer will come after your prefix, e.g. “Prefix_”.
Suffix: Type your suffix, then choose a spacer from the dropdown (None, Hyphen, Space, Underscore, or Period).
The spacer will come before your suffix, e.g. “_Suffix”.
Start Number: Type a number to serve as the beginning of your sequence.
Document Number of Digits: Select padding at the document level, which will add zeros to the left side of your document number until the number of digits reaches the padding value.
Page Number of Digits: Select padding at the page level, which will add zeros to the left side of your page number until the number of digits reaches the padding value.
Page to Start Numbering: Choose to include or exclude the page number from the first page of your document.
Australian Production Protocols
Australian productions require advanced numbering and PDF export configurations using Numbering Jobs. For further instruction, see Australian Numbering.
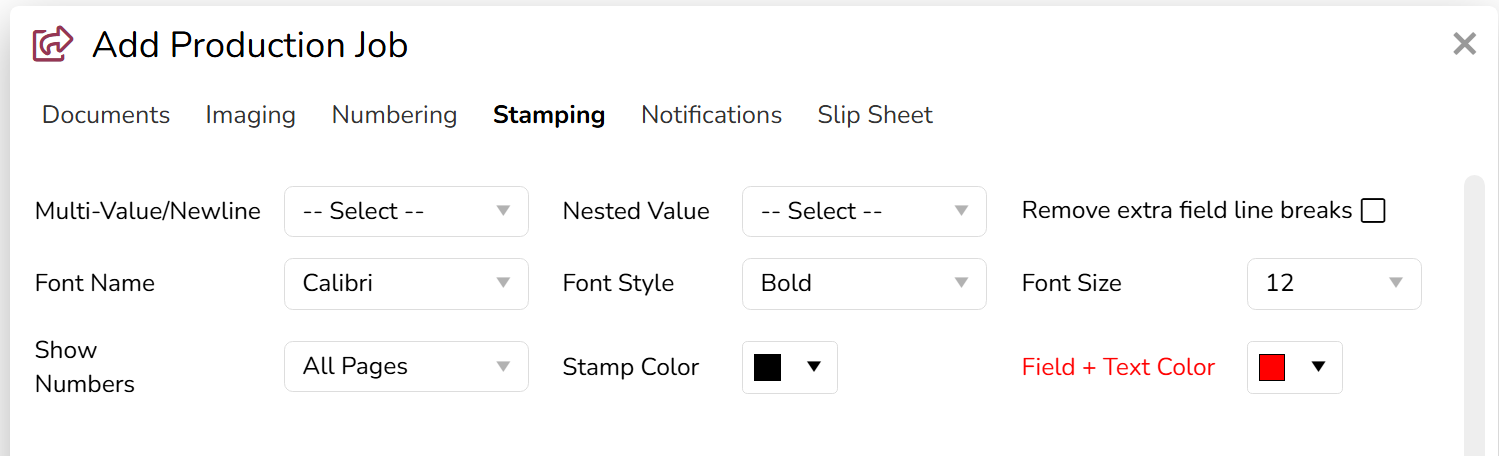
IV. Stamping Tab
Format your stamp(s). If you chose “None – Natives Only” in the Imaging tab, jump to V. Notifications Tab.
Format Your Stamp
Format the stamp text using the top half of the modal.
Multi-Value/Newlines: Select an ASCII value to represent line breaks in typed text (see step 4 in Position your stamp), typically ASCII:10 ( \n ).
Nested Value: Select an ASCII value to represent nested content in typed text.
Remove Extra Field Line Breaks: If checked, redundant or unnecessary ASCII values will be auto-removed by the system before creating the stamp.
Font Name: Choose a font — Arial, Calibri, Tahoma, Times New Roman, or Verdana.
Font Size: Select a text size, between 8–72.
Font Style: Choose text format — Bold, Italic, Underline, or Regular (no format).
Show Numbers: Choose whether to show numbers on All Pages of a document, or just on the First Page Only.
Stamp Color: Pick from 232 text color choices. If you want your stamp to be invisible, click the [
 ] icon.
Field + Text Color: Select the color for fields or text values to stamp into generated images. If you want your stamp to be invisible, click the [
] icon.
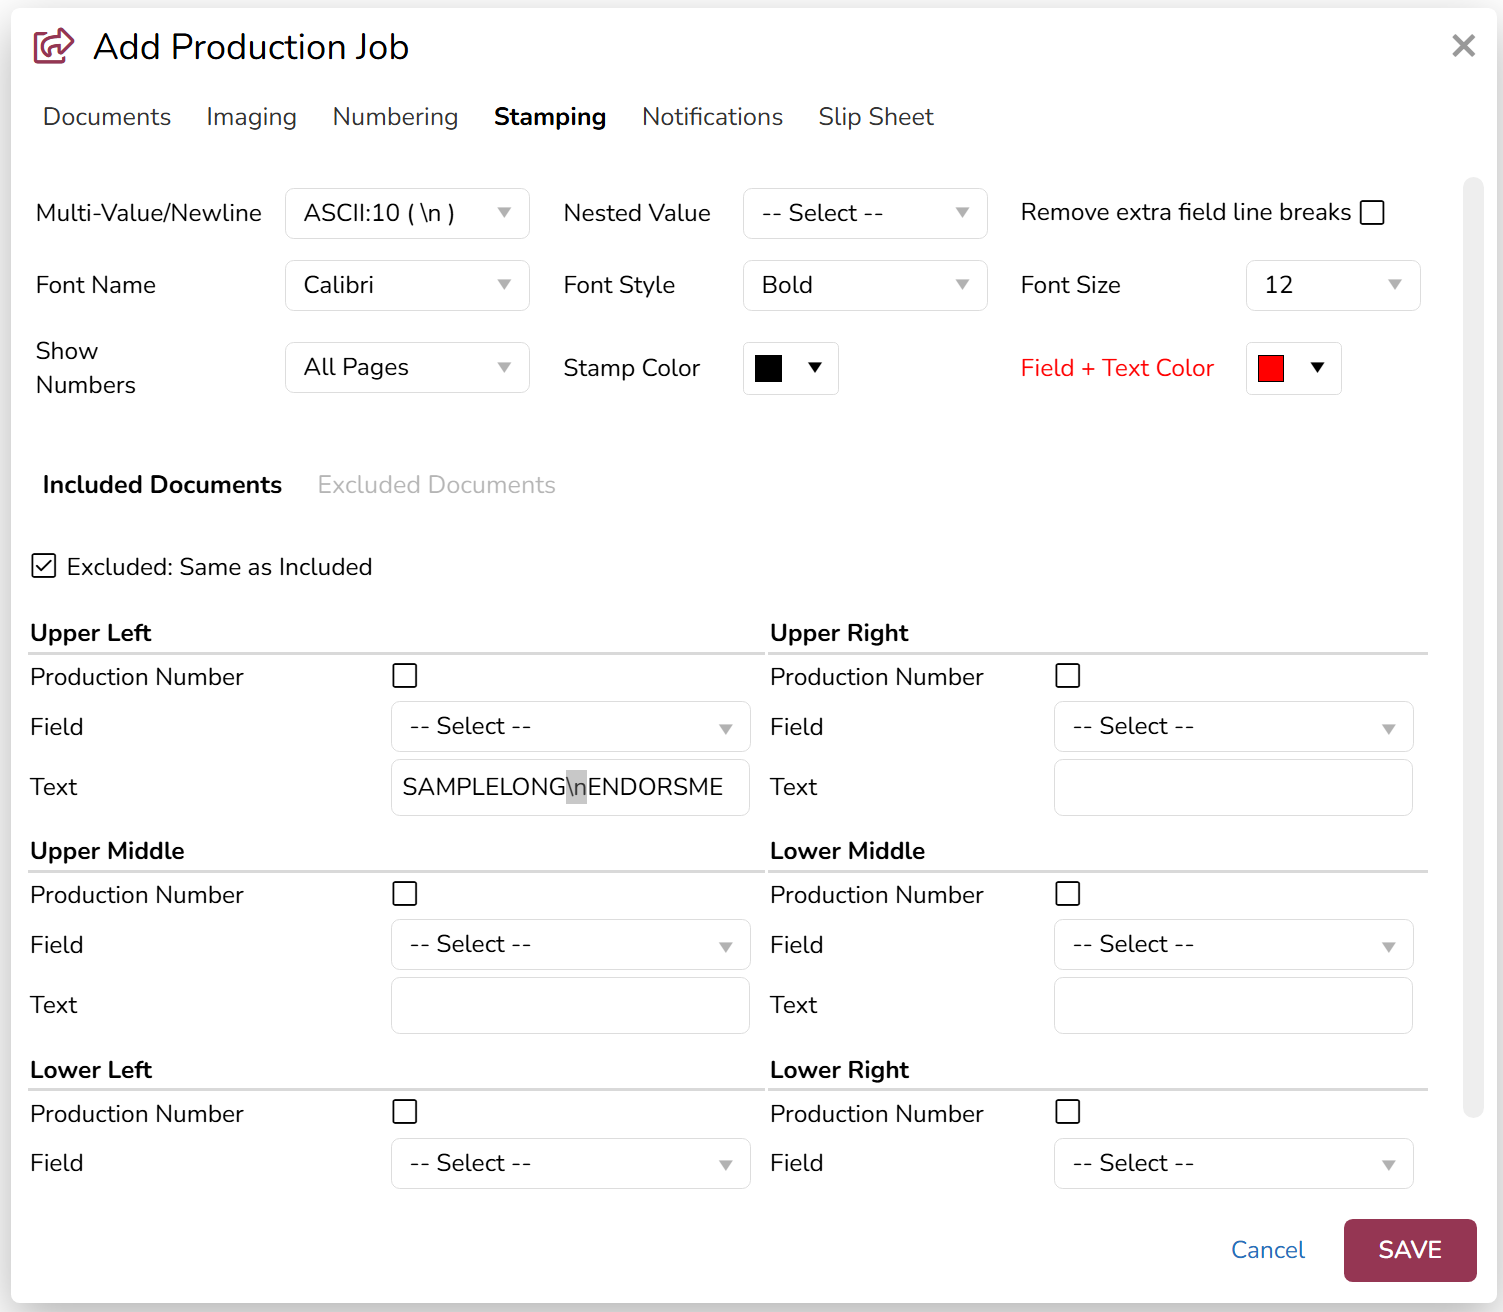
Position Your Stamp
Choose stamp location using the bottom half of the modal. On either the upper or lower portion of your documents, you can include text to the left, middle (center), or right.
Excluded: Same as Included: If checked, excluded documents will have the same stamps as included documents. Unchecking this box will give you access to the Excluded Documents tab, where you can fill out different stamping settings for excluded documents.
Note
Excluded Documents are defined using conditions in the Slip Sheet tab, and will receive a slip sheet as its produced image.
Production Number: In your chosen location, check the box to place your numbering. The most common location is the lower right corner.
Field: Select to include field metadata from the document record. Field values in this dropdown are dependent on which field profiles exist within the documents set for production.
Fields available in this dropdown are based on the current field profile and visible fields in your Review Grid.
Text: Type additional text you want to stamp on each document. Do not add a space after your ASCII value, as it is not needed for the newline to work.
E.g. a CONFIDENTIAL stamp on the lower left corner.
If you unchecked “Excluded: Same as Included”, then repeat steps 10–12 in the Excluded Documents tab.
V. Notifications Tab
Select Users and Teams to receive a notification after the Production job is completed.
Include All Teams checks all teams at once, and Include All Users selects all users at once.
.png)
If you chose “None - Natives Only” in the Imaging tab, click ADD to finish adding your Production Job. It will appear in the grid, ready to be preprocessed. Otherwise, proceed to the Slip Sheet tab.
VI. Slip Sheet Tab
The Slip Sheet tab controls what documents are considered “excluded documents” for the production. Excluded documents will receive a slip sheet as its produced image, with custom displayed text that describes why the document was excluded.
Slip Sheet conditions can be saved as a template and reused across productions within a project. Conditional rulings, font type, and other options can be saved within the Template.
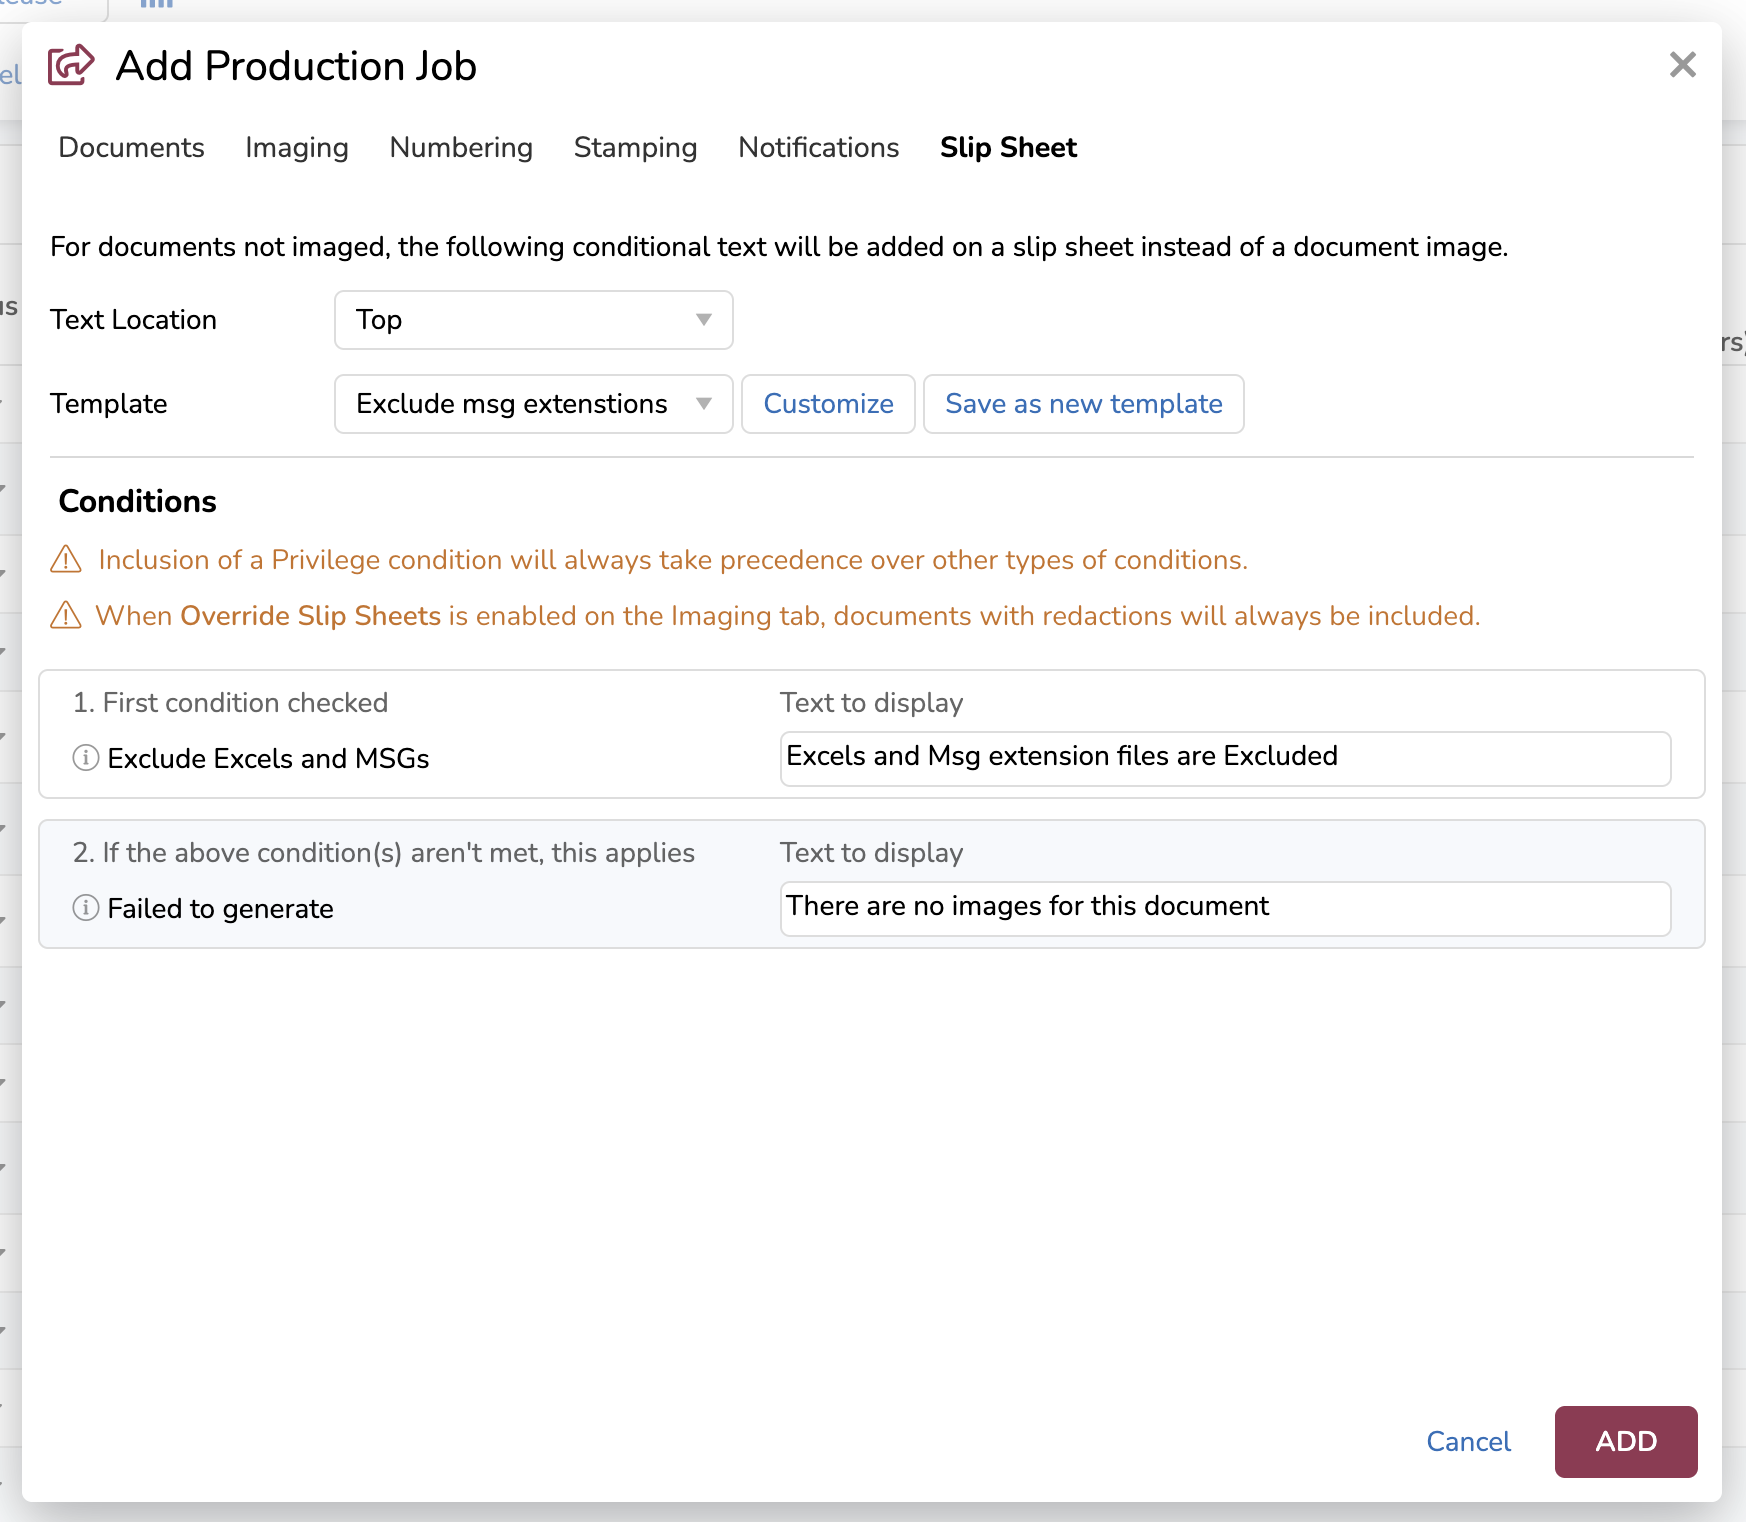
Text Location: Specify the location of your exclusion text — Top, Middle, or Bottom.
Template: Choose a slipsheet template.
Select Customize if you want to to edit your selected template. For more information on creating and editing Slip Sheets, see Production Templates.
When you’re done customizing your template, you can Stop customization (use the template for your production, but not save your changes), Save as a new template, or Delete template.
Click ADD to finish adding your Production Job. It will appear in the grid, ready to be preprocessed.
See Preprocess a Production Job for information about testing Production Jobs for errors, and Run a Production Job (Start Full Preprocessing) to see how to process your Production Job and prepare for export.