When a Production Job is created, running the Preproduction function allows you to gain information about the job, such as total documents and pages. Most importantly, it can draw attention to any documents that may error during production. This is an ideal tool to preview the expected content of a Production Job, fix any errors that may appear during preprocessing, and manage a very large or rolling production in more functional sections.
Production Jobs Table
After you create a Production Job, it will appear in the Production Jobs table with a Created status. You can manage your Production Jobs from this table, as well as perform preprocessing actions via the dropdown underneath the status column. Information regarding privileged documents and excluded documents discovered in preprocessing are also included in the table.
.png)
Production Job Statuses
A Production Job can have any of the following statuses:
| Created – A Production Job has been created. |
| Pending – A Production Job is waiting to begin preprocessing or processing. |
| In Progress – A Production Job is in the middle of preprocessing or processing. |
| Cancel Pending – A Production Job’s preprocessing or processing has been canceled, but is in the process of stopping. |
| Canceled – A Production Job’s preprocessing or processing has been canceled. |
| Failed – A Production Job’s preprocessing or processing has failed. |
| Complete – A Processing Job’s preprocessing or processing has completed. |
| Modified – A Processing Job’s settings have been edited after it has been preprocessed or processed. |
At any time, you can press the refresh ![]() icon in the upper left of the screen next to Production, which updates your table if Production Job statuses have changed.
icon in the upper left of the screen next to Production, which updates your table if Production Job statuses have changed.
.png)
Production Job Actions
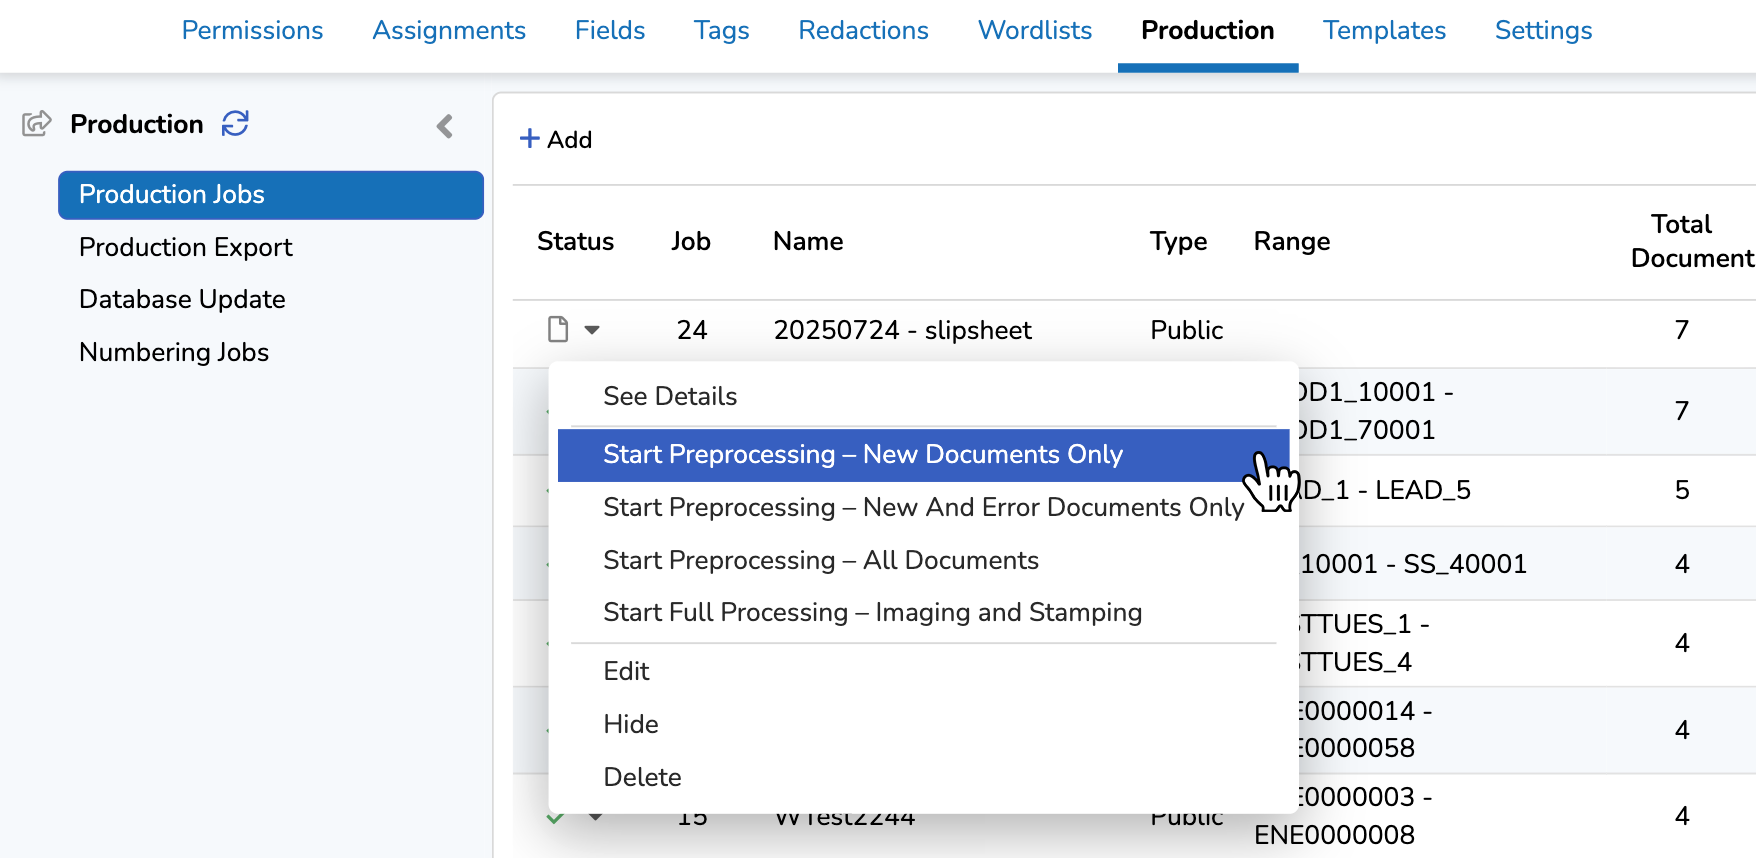
Click the arrow next to the status icon for any Production Job to perform any of the following actions. A confirmation popup will prompt you to confirm your action. Available actions in the dropdown vary based on the status of your Production Job.

See Details: Examine settings for your Production Job.
Start Preprocessing - New Documents Only: Preprocess only newly added documents in your Production Job.
Start Preprocessing - New and Error Documents Only: Preprocess newly added documents and errored documents in your Production Job.
Start Preprocessing - All Documents: Preprocess all documents in your Production Job.
Start Full Processing - Imaging and Stamping: Process the Production Job, getting it fully ready for Production Export.
Only documents that have gone through full processing will appear as selectable options in the Production Export Setup modal.
Summary Report: See a report of any Production Job that has gone through preprocessing or processing, including any errors.
Edit: Open Production Job settings settings for modification.
Hide: Visibly remove the Production Job from the table.
Hidden jobs can be shown by checking the Show Hidden Jobs box to the upper right of the table, which appears only if at least one job has been hidden. Hidden jobs made visible with this checkbox are italicized to distinguish from other jobs.
.png)
Unhide: Bring a hidden job back to visibility.
Delete: Remove the Production Job.
Run Preprocessing
To run preprocessing on your Production Job:
Open the Status dropdown.
Choose Start Preprocessing - New Documents Only.
A confirmation popup will appear. Click Yes to start your job.
Once the job starts, a grey gear will appear next to the the Status dropdown for your job. The gear will turn green and spin while the job is running. A finished, successful preprocessing job will contain a green checkmark in the status column, and the table will populate with values.
Note
Preprocessing will still indicate zero documents completed, since the project has yet to run through processing.
Errors
If any errors are reported, examine the type and cause by viewing the Summary Report, then re-run preprocessing for the Production Job by selecting Start Preprocessing - New and Error Documents Only in the Status dropdown. See Troubleshoot a Production for information on common preprocessing errors.
Once all errors have been addressed and verified as resolved, you may process the job, as described in Run Full Processing on production Jobs.