Users are individual accounts in your instance which can be granted access to different projects, areas, and permissions within Reveal. For information about how users function in Reveal, see About Permissions.
Once a new Reveal project is created within a company, users may be assigned to those projects and given appropriate role permissions. In Reveal, there are multiple locations where you can create and manage users:
At the instance-level
 Users area, via Home page > Users.
At the company-level
 Users screen, via Home page > Companies > [your company] > Users.
The Create Users modal is the same in both the Users area and the Users screen.
Note
For instructions on how to create a user in Review Manager, see Manage Users – Review Manager.
Create users
There are two methods of creating users from the Web interface. You can either:
Create users manually (through the Create User modal).
Import a load file with your users, best for bulk-uploading many users at once.
Create User modal
Note
The
Duplicate icon allows you to copy over a pre-existing user’s project assignment settings to a new user. See the Duplicate Users section for more information.
Click +CREATE USER (Users area) or +ADD USER > +CREATE USER (Users screen).
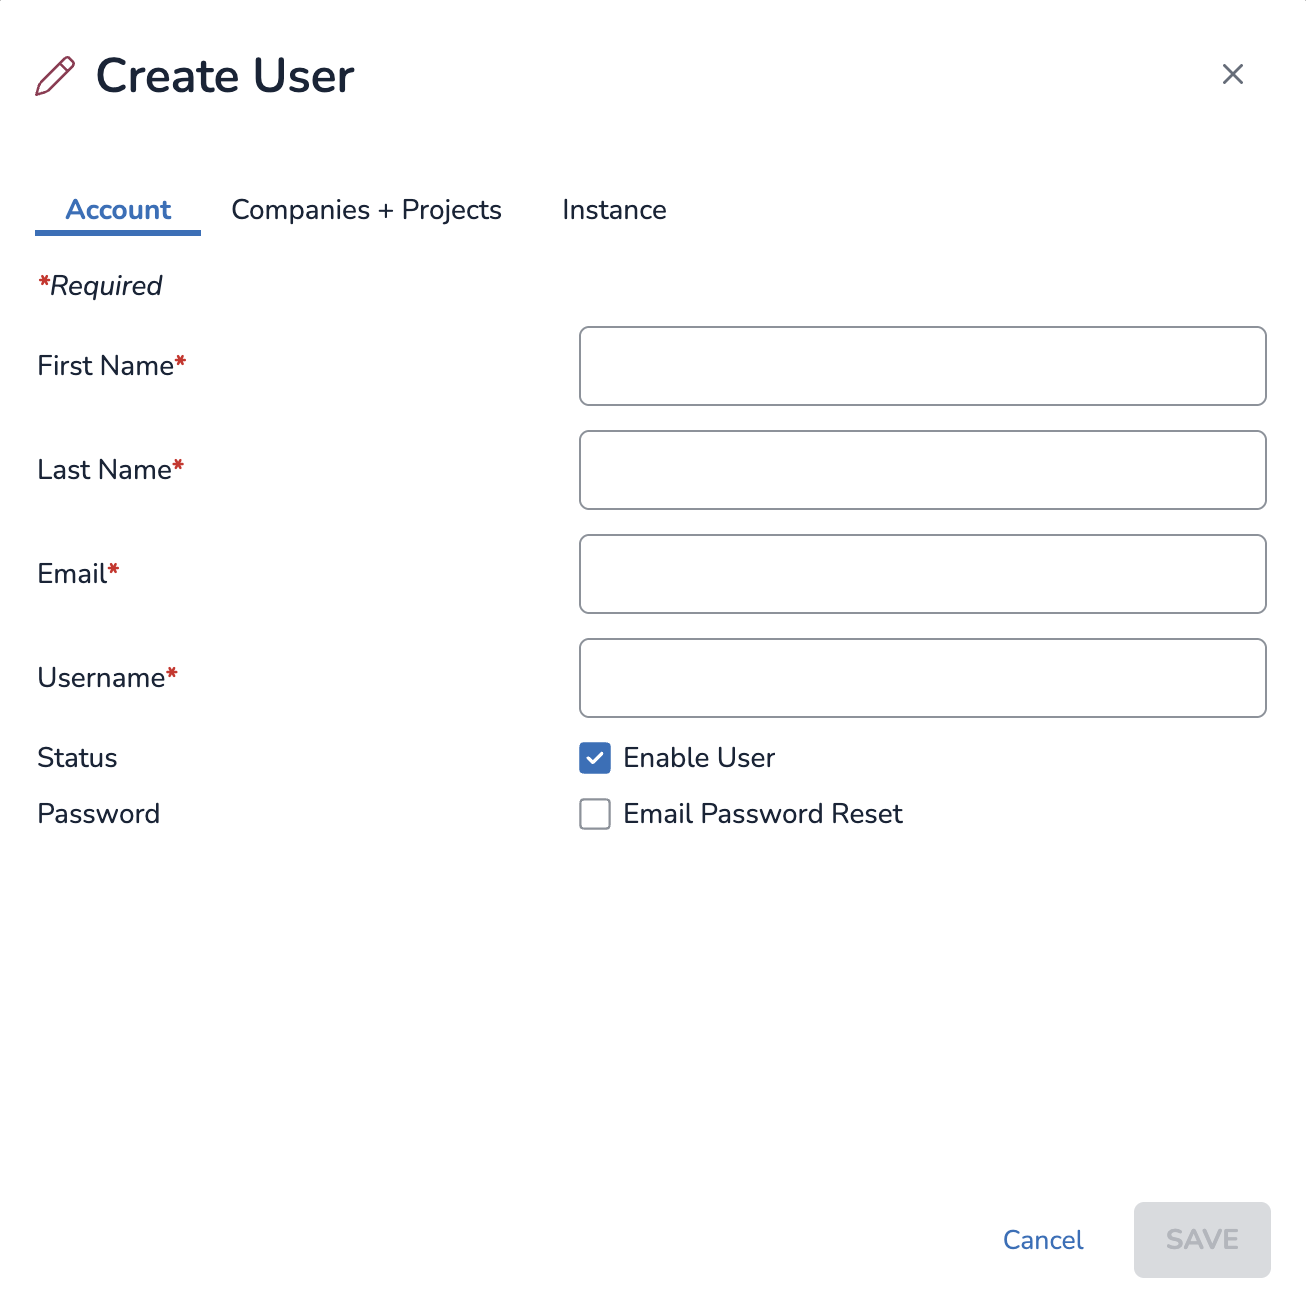
In the Create Users modal, click the Account tab.
First Name: Type your user’s first name.
Last Name: Type your user’s last name.
Email: Type your user’s email. This must be a unique – you cannot reuse an email of another existing user.
Username: Type your user’s username. The system will auto-generate a username based on the user’s email address, but a username can be any value as long as it isn’t already taken.
Important
A username cannot be changed after a user is created.
Status: Check Enable User to make the account active upon creation. Unchecking this box will create a deactivated user.
Password: Check Email Password Reset to send a password reset email. This allows the user to create their own password for their account.
Click the Companies + Projects tab.
.png)
Grant your user access to companies and/or projects.
Expand and collapse using the
.png) arrow to find specific
arrow to find specific  companies and
  projects.
Use the All Companies
.png) or All Projects dropdown to filter by project or company assignment.
or All Projects dropdown to filter by project or company assignment.Click the Project Role dropdown to assign a role to your user at the project level (Admin, Client Admin, Power Reviewer, Processing User, or Reviewer). Users can have different roles by project. Assigning a user to a role will automatically make the user a member of that company.
Click the Company Role dropdown to give a user Company Admin access.
No Access – Cannot see / access company or any projects in that company.
Member – Can see / access company and select projects in that company.
Company Admin – Can see / access company and all projects in that company, regardless of their permission levels for each project.
Note
There is no need to manually give Company Admins “Administrator” access to all projects under a company. They will automatically gain access by default, even if the project says “No Access” or is set to another role type.
Click the Instance tab.
.png)
Check the Instance Administrator box to give your user Instance Admin permissions. This will give the user access to all companies and projects, and give the user all permissions available in your instance.
Note
There is no need to manually give Instance Admins “Administrator” access to all companies or projects. They will automatically gain access by default, even if the company or project says “No Access” or is set to another role type.
Click Save to create your user.
Create user from import file
From the Users area, Instance Admins can import a file to bulk create new users.
I. Create users load file
Click
 Import Users.
Click
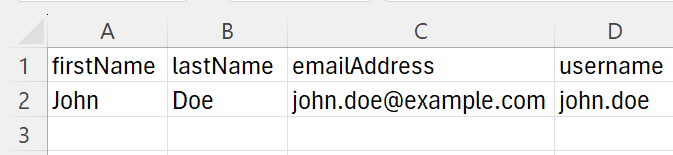
 Download template. The CSV file must have these column lineup: First Name, Last Name, Email Address, and Username.
 Note
You should use the provided template as-is. Any changes may result in the load file not working correctly.
In the spreadsheet, populate the columns with your user information.
II. Import users load file
Click
Import Users.In the Import Users modal click the Accounts tab.
Source: Select your source type, usually File.
File: Click Select File to upload your source file, which can be either CSV, XLS, or XLSX.
Language: Set your users’ UI display language.
Status: Check Enable User to make all accounts active upon creation. Unchecking this box will create deactivated users.
Login Instructions: Check Send email to users with login instructions to send a password reset email. This allows users to create their own password for their account.
Fill out the Companies + Project tab and Instance tab as needed. See the Create User modal section for a description of these tabs.
Warning
The project or company access you select in the Companies + Project tab and Instance tab will apply to all users in your load file.
Click IMPORT to import your users.
Note
If some users in the import file already exist in the system, a success message will indicate how many new users were created and which ones were skipped.
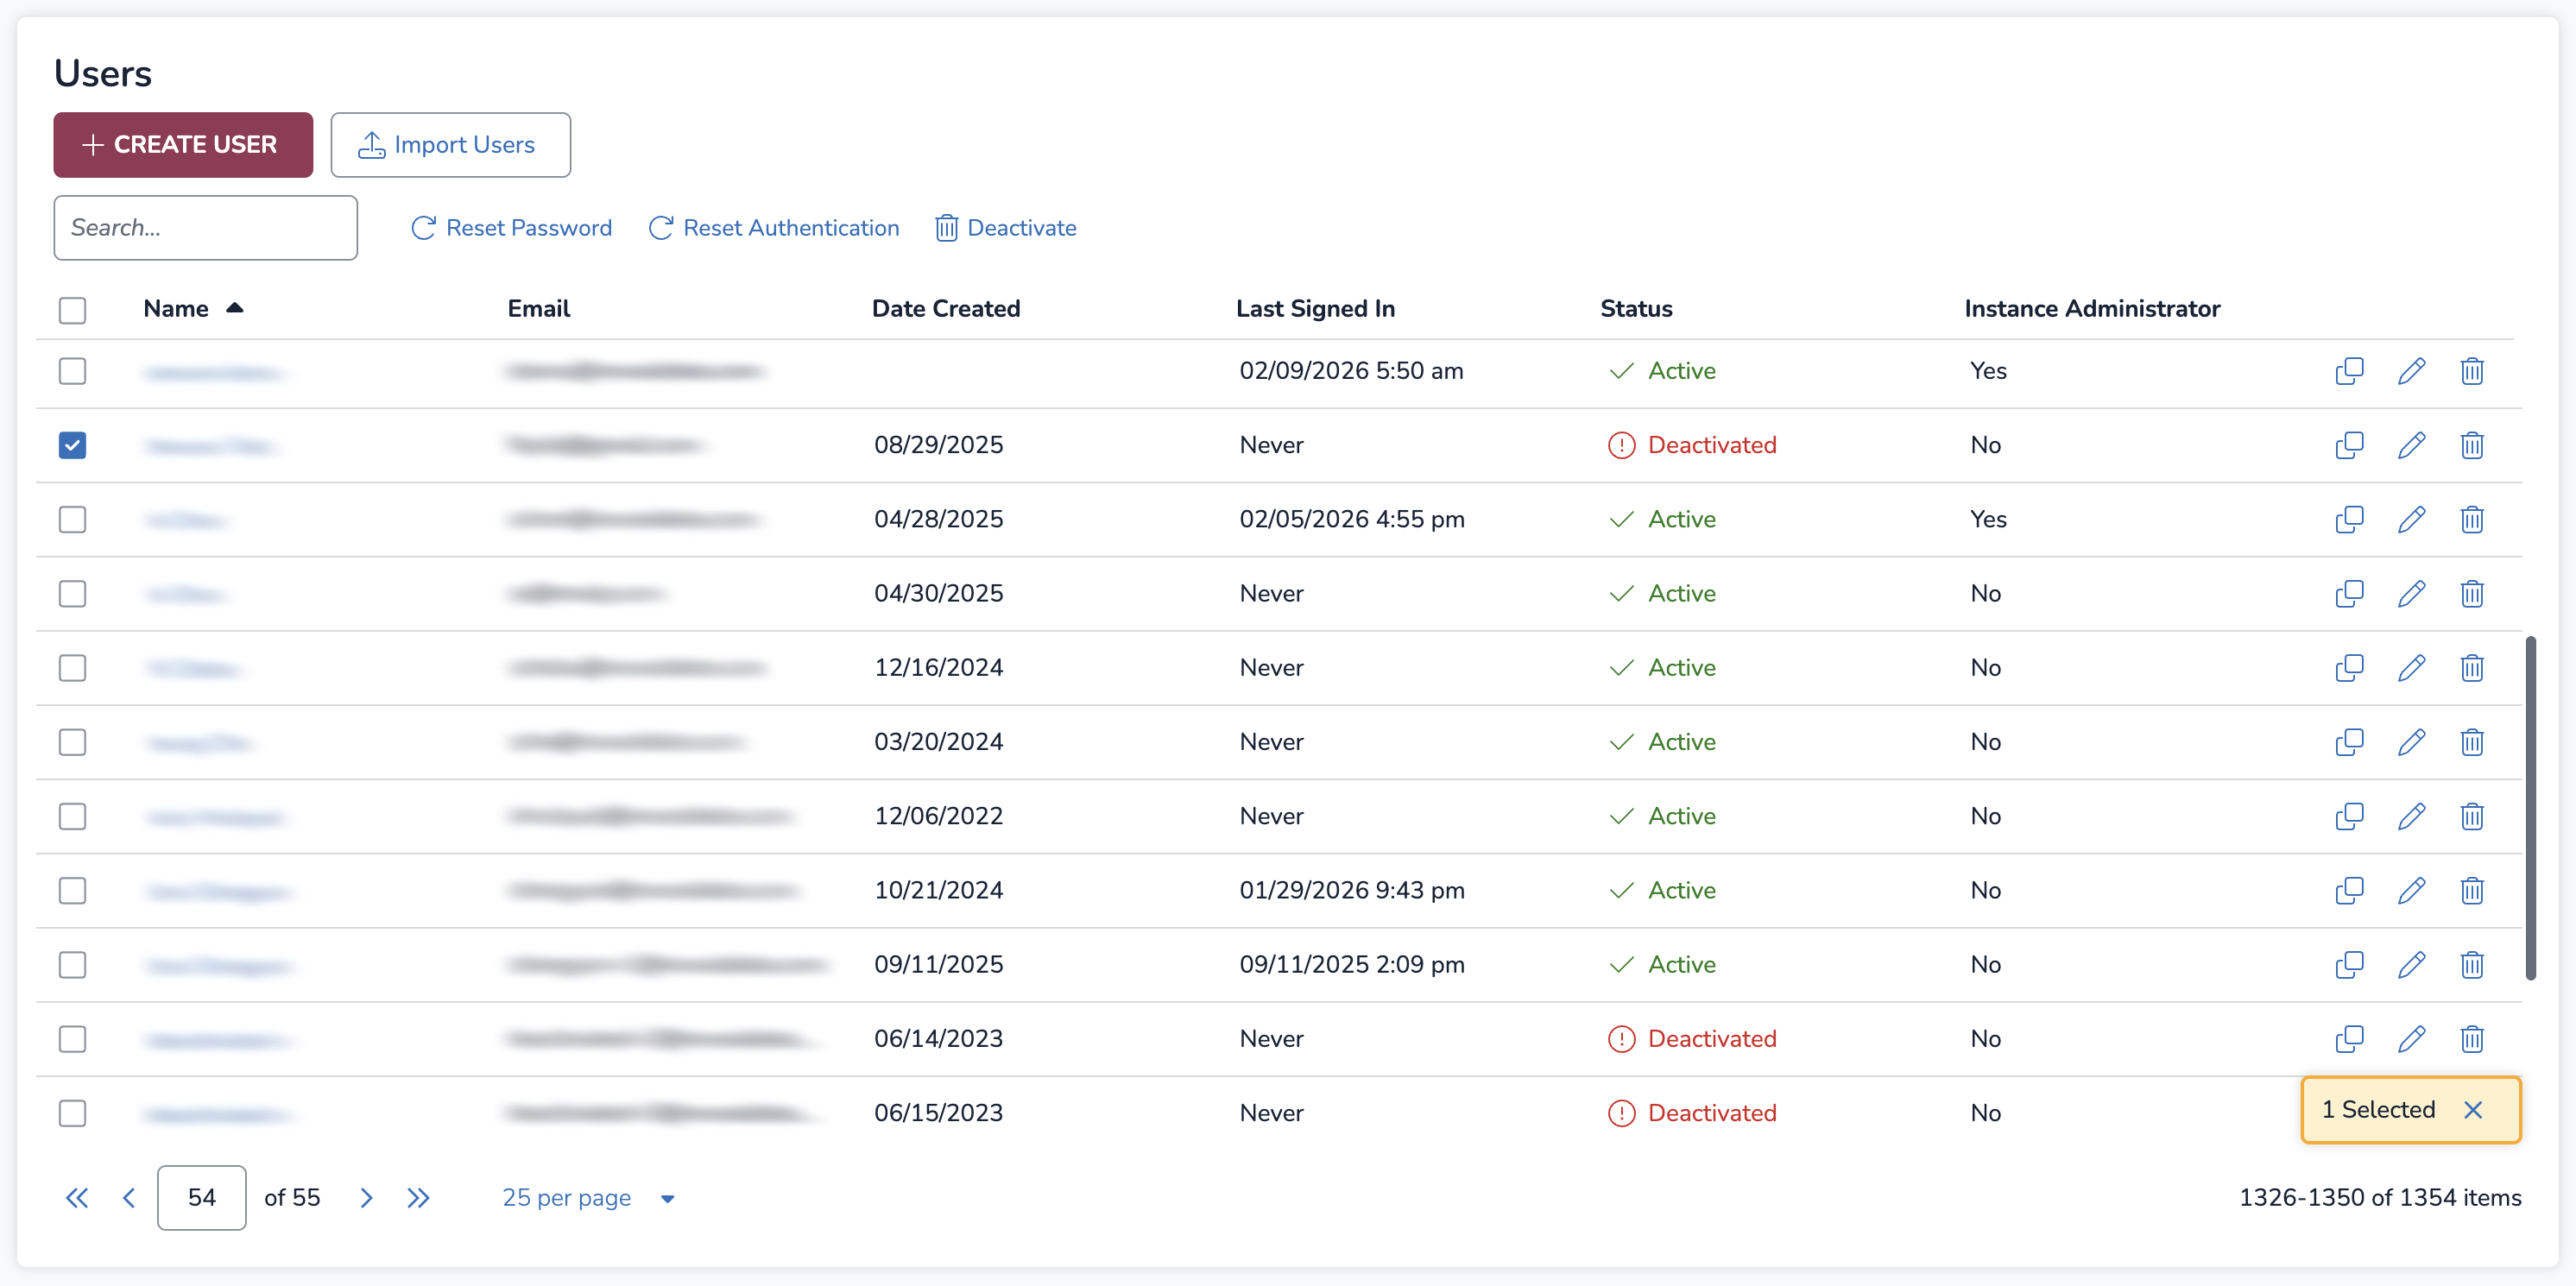
Managing users
From the Users area or the Users screen, you can perform the following actions:
Edit users
Duplicate users
Deactivate users
Activate / reactivate users
Reset passwords
Reset authentication
Edit users
Check a user from the list to select it.
Click the
.png) Edit icon.
Edit icon.In the Edit User modal, adjust fields as needed. See the Create User modal section for a description of each field.
The only field you cannot edit is the Username field. Usernames are set in stone after user creation.
Click SAVE to save your changes.
Deactivate users
You can deactivate an individual user or multiple users at a time.
Check one or more users from the list to select them.
Click
.png) Deactivate.
Deactivate.A Deactivate User confirmation modal will appear. Click CONFIRM.
Activate users
You can only activate one user at a time.
Click a user’s name from the Name column. This will open their user details.
Click
 Activate.
An Activate User confirmation modal will appear. Click CONFIRM.
Reset passwords
You can reset an individual user’s password or multiple users’ passwords at a time.
Check one or more users from the list to select them.
Click
.png) Reset Password.
Reset Password.A Reset Password confirmation modal will appear. Click RESET.
Users should receive an email notification with instructions on how to reset their password.
Reset authentication
You can reset an individual user’s authentication or multiple users’ authentications at a time.
Check one or more users from the list to select them.
Click
Reset Authentication.A Reset Password confirmation modal will appear. Click RESET.
Users should receive an email notification with instructions on how to update their account with new authentication.
Duplicate Users
From any user in your list, click the
Duplicate icon to the very right of your user’s row.Fill out the Account tab as described in the Create User modal section.
The Companies + Projects tab and Instance tab should already be populated according to the previous user’s project, company, and instance-level access. You can change access in these tabs before creating your user.
Note
Even at the instance level, there isn’t a way to delete users – only activate or deactivate users.