In Logikcull for Public Records, routing rules are Admin-configured automations that decrease the manual work needed for request triaging. The Routing Rules tab lets you combine conditions and actions to automate simple or complex routing workflows, and can be accessed via Settings >  Routing Rules.
Routing rules execute top-down from the order listed in the Routing Rules tab, skipping over any rules where the toggle is turned off. You can also set rules to stop processing; if that rule successfully triggers, the portal will stop running all the rules below it.
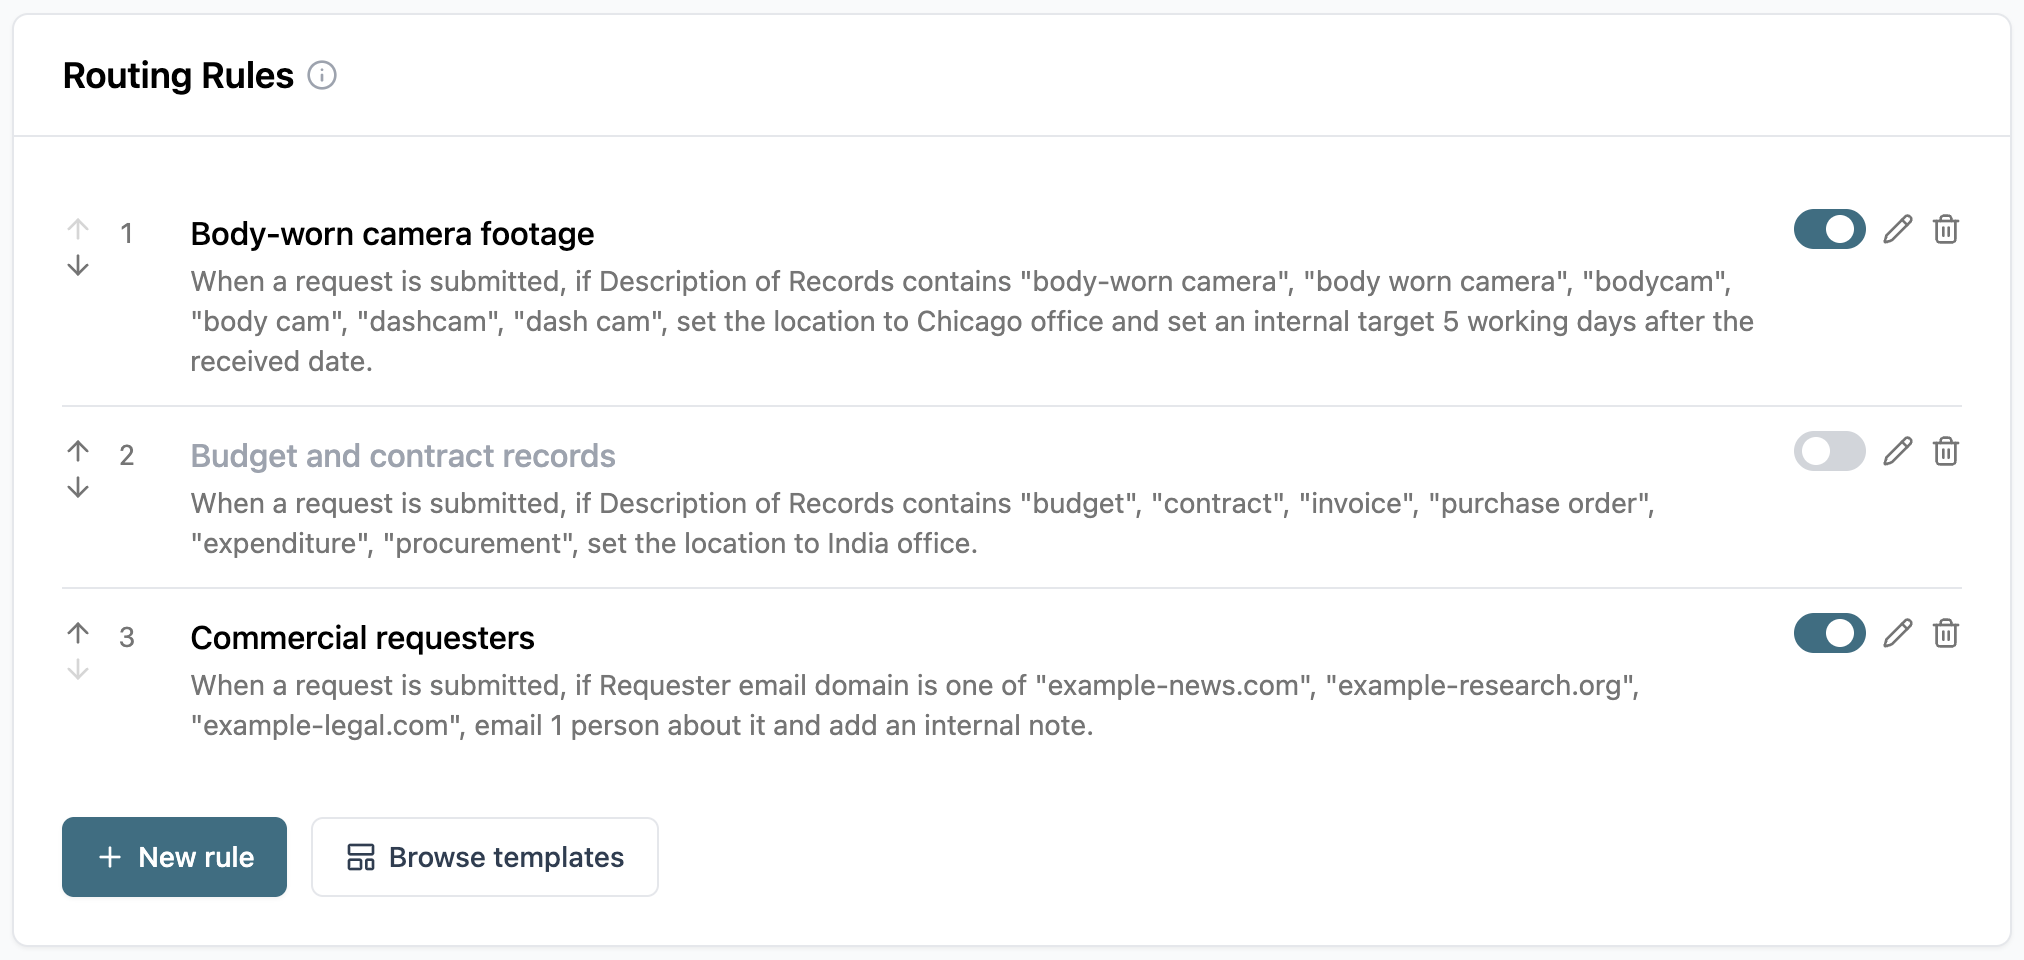
Routing rules can either be made from scratch, or adapted off one of the pre-existing templates:
Body-worn camera footage
Budget and contract records
Commercial requesters
Flagged requester review
Personnel and disciplinary records
Records custodian notice
Requests with no department chosen
Important
If a request reaches the end of the routing rule list and does not get assigned to a member or location, it will pass to the Fallback Assignee or the Unassigned queue. See Routing Flow Chart for a diagram that shows how routing rules determine where to assign or place a request after they’re triggered.
Create a routing rule
To create a new routing rule from scratch, click + New rule. This will take you to the rule creation screen, shown below.
.png)
Rule name: Name your rule. Keep the name short but intuitive so it’s easier to rearrange later.
Rule enabled: This toggle determines whether the rule will be on or off upon creation.
Click + Add condition to create a new condition. See the Routing rule components section for descriptions of each value.
.png)
Field: Choose the piece of information you want evaluated.
Condition: Select the type of condition for your rule.
Value: Input which values you want for your rule. Depending on your field and condition you may be typing in keywords, choosing from a dropdown, or checking one or more values.
Add more conditions to your rule, if needed. Conditions can also be deleted by clicking the X button.
Important
All of the conditions in your rule must be true in order for your rule to trigger.
Click + Add action to create a new action. See the Actions section for descriptions of each value.
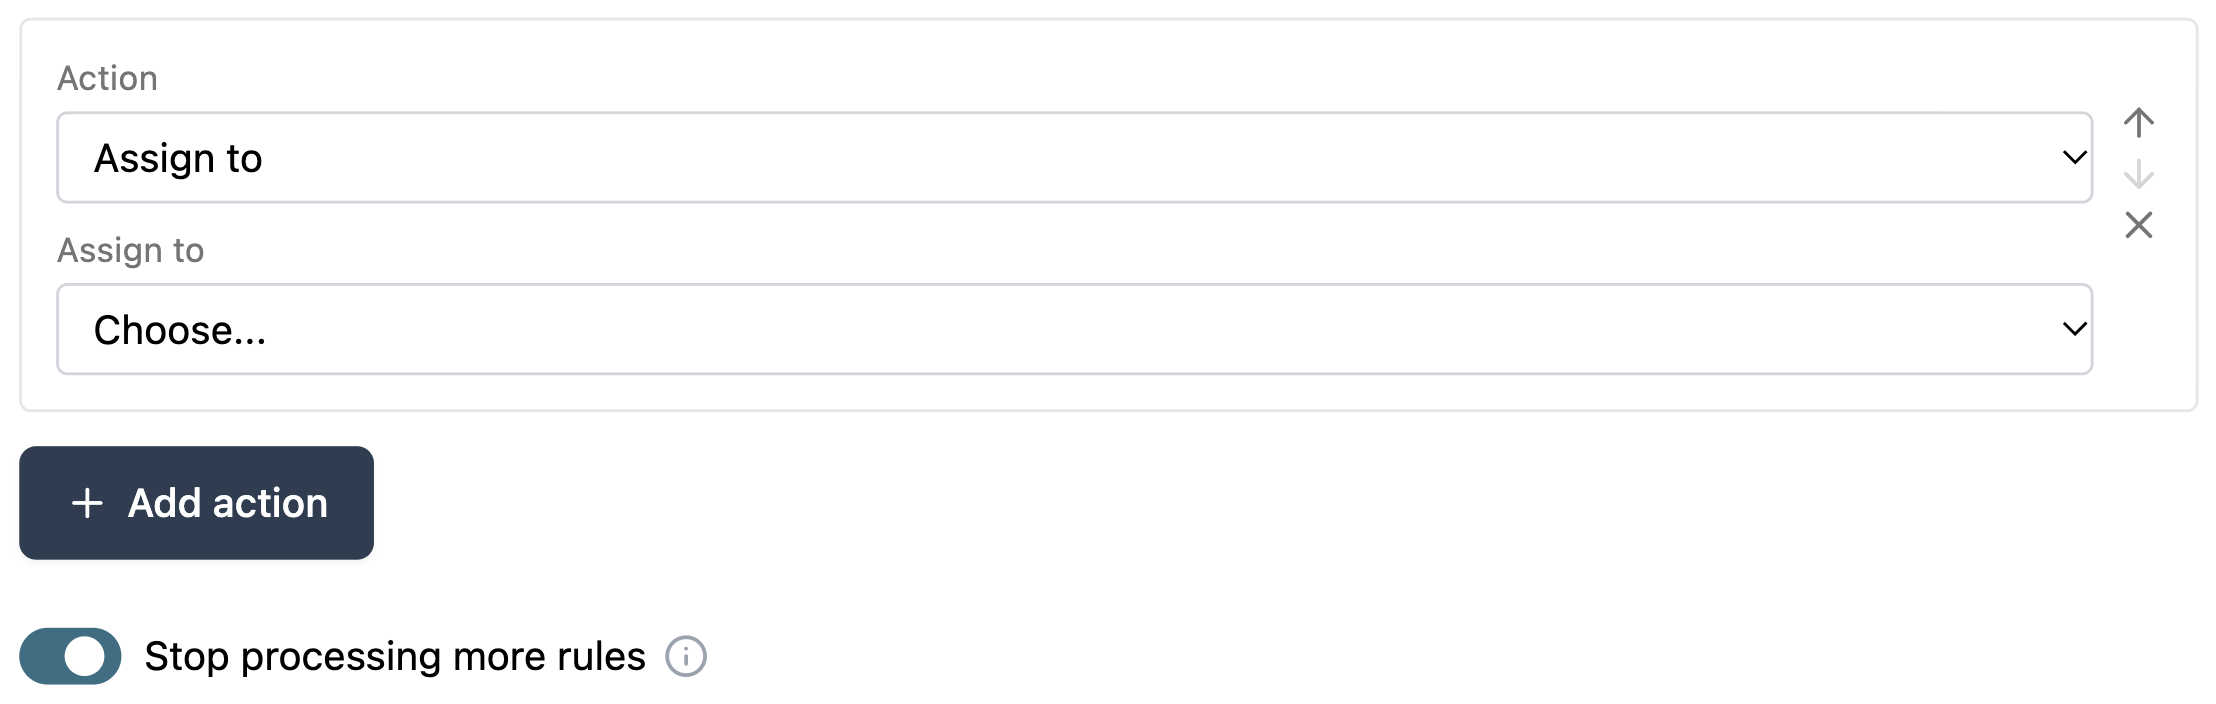
Action: Choose an action from the list.
Decide how you want the action to be performed by filling out the remainder of the fields. This may include selecting values from dropdowns, typing in email addresses, or writing a note.
Add more actions to your rule, if needed. Actions can also be deleted by clicking the X button.
Use the
 up and
  down icons to rearrange the order of your actions. Actions are triggered in top-down order.
Stop processing more rules: Enable this toggle if you want the rule to stop your automations once triggered. All rules below this one in the Routing Rules list will not be checked.
Read your rule in the In plain language box to see how your rule is represented in text.
Test your rule against your existing requests, if needed. See the Testing routing rules section for more information.
Click Save rule to create your rule.
Testing routing rules
Routing rules can be tested using the Test this rule feature. This will run your rule against all existing requests in a chosen time frame, regardless of their status (closed, rejected, etc.).
When tested, no actions are performed on triggered requests; nothing is assigned, labeled, or logged, and no one is emailed. The list simply displays which requests are captured by your rule.
.png)
To test your rule…
Look back over: Choose a timeframe from the dropdown, up to 365 days.
Click Test rule.
Interpret your results in the table.
The Matched On column shows you which contents of the request triggered your rule, letting you know which conditions the request met. What would happen lists, in plain English, the actions that would be performed on that request.
Routing rule components
Routing rules are comprised of two major components. Conditions determine whether or not your rule will trigger, or initiate the actions attached to the rule, and actions are specific tasks that are automatically performed by the portal once the conditions are met. Together, these components let you define exactly when a rule should run and what it should do when it’s triggered.
Conditions
When creating a condition, you’ll select a field to evaluate, the type of condition, and the values that are being compared to your evaluated field. You can select one of the fields from your form, like the requester’s email, or from a list of request details attached to the request, like whether or not the requester has been flagged as a frequent submitter.
Request details are additional details that are related to your request, but may not be captured in the fields from your request form. A table with descriptions is provided below.
Detail | Description |
|---|---|
Request type | The subject matter of the request (police, zoning, financial, etc.). |
Location | The location the request is assigned to. |
Requester email domain | The domain of the requester’s email (the portion after the @ symbol). |
Requester flag | The flag that has been attached to a specific requester. |
Detected language | The language that the system detects from the request, based off metadata and populated fields. |
Conditions list
The below table shows the conditions available to choose from and provides a description and example of each condition.
Condition | Description | Example |
|---|---|---|
is | Triggers when the value matches the keyword exactly. | Target department is Police Department. |
is not | Triggers when the value does not match the keyword. | Target department is not Records Department. |
is one of | Triggers when the value matches one of the listed keywords. | Target department is one of Police Department, Fire Department, Sheriff’s Office. |
contains any of these keywords | Triggers when the value includes at least one of the listed keywords. This is best used for long text fields, like request descriptions. | Request description contains any of these keywords body cam, dashcam, body-worn camera. |
does not contain | Triggers when the value includes exactly none of the listed keywords. This is best used for long text fields, like request descriptions. | Request description does not contain financial, contract, invoice. |
is empty | Triggers when the form field is not populated with content. | Phone number is empty
|
is not empty | Triggers when the form field has been filled out. | Phone number is not empty
|
.png)
Actions
When creating an action, you’ll select the action type and then fill out what you want performed – whether it be setting a date for completion, emailing a user, or adding extra details to the request itself. A table of actions is provided below, with descriptions.
Action | Description |
|---|---|
Add an internal note | Adds an internal note to the request. |
Set the location | Sets the request’s location. |
Assign to | Assigns the request to either a member, or to a location’s queue. |
Add a reviewer | Adds a reviewer to the request. |
Email someone | Sends an email to portal users or outside email addresses according to one of your existing email templates. Each rule can email up to 20 recipients. Adding more Email someone actions doesn't raise this limit. |
Apply labels | Adds one or more labels to the request. |
Set the request type | Assigns a request type to the request. |
Set an internal target date | Set a target date based on “X” amount of working days from the date you receive the request. |