Saved searches keep your reviews organized - and they're the foundation for building eDiscovery production sets in Logikcull.
Saving a search
To save a search for specific parameters or sets of documents, press Save to the right of the search bar.

Fill out the Save this Search popup. At the very top, icons show number of documents, pages, and storage size of your saved search.
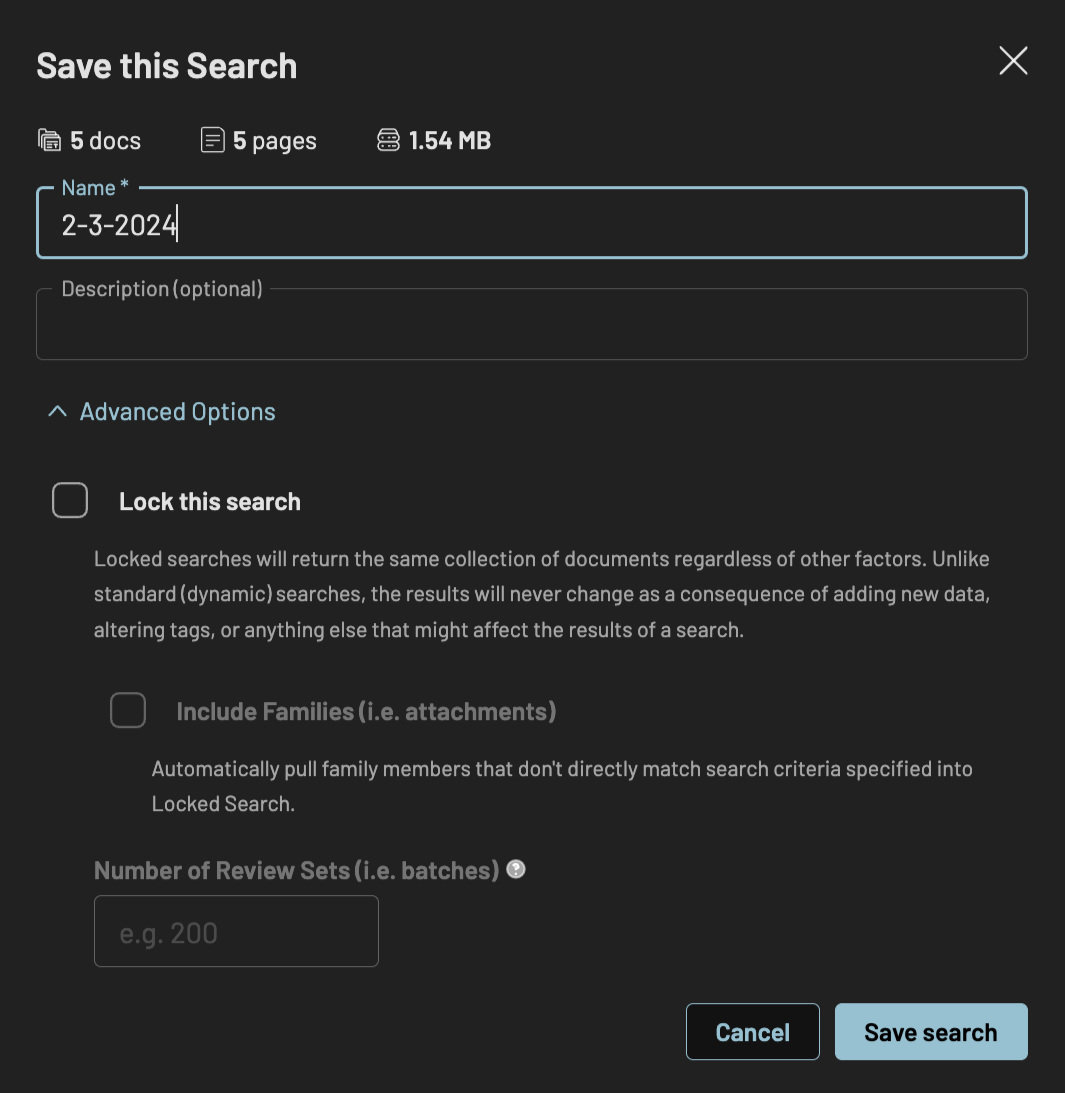
Name: Name your saved search. This defaults to today’s date.
Description: Optionally, add additional detail that might not fit in the title (e.g., “priv docs to QC”, “responsive to RFP 12”, etc.)
Lock this search: Locking the search will create a static set of documents. This means, that even if the tagging changes for the documents, the locked search will remain the same.
Include Families (i.e. attachments): After locking a search, you also have the option to pull in family members that are related to the documents in your locked search and make them a part of the locked search population.
Important
Logikcull will grey out the Include Families checkbox if doing so would push your total Save Search document count over 100,000.
In this case, save and lock your search without families at its current count, then select the Include and group family members checkbox during Step 1 of creating your download. Instructions can be found in our Download Productions article.
Number of Review Sets (batches): upon locking a search, you also have the option to create Review Sets by placing an integer in the box under "Number of Review Sets." Logikcull will automatically divide the locked saved search into approximately equally-sized review sets equal to the number you enter, keeping parents and children together for review. Learn more here: Assigning Documents to Review Sets.
Click Save search to save your search.
Once the search has been saved, a green success alert will show up at the top of the screen letting you know the search was correctly saved. If the alert is red, something likely went wrong and you'll need to re-save the search.
Accessing saved searches
All saved searches can be accessed by clicking Saved Searches above the Search Bar.

Viewing your saved searches
Selecting Saved Searches above the Search Bar opens the Saved Search table.
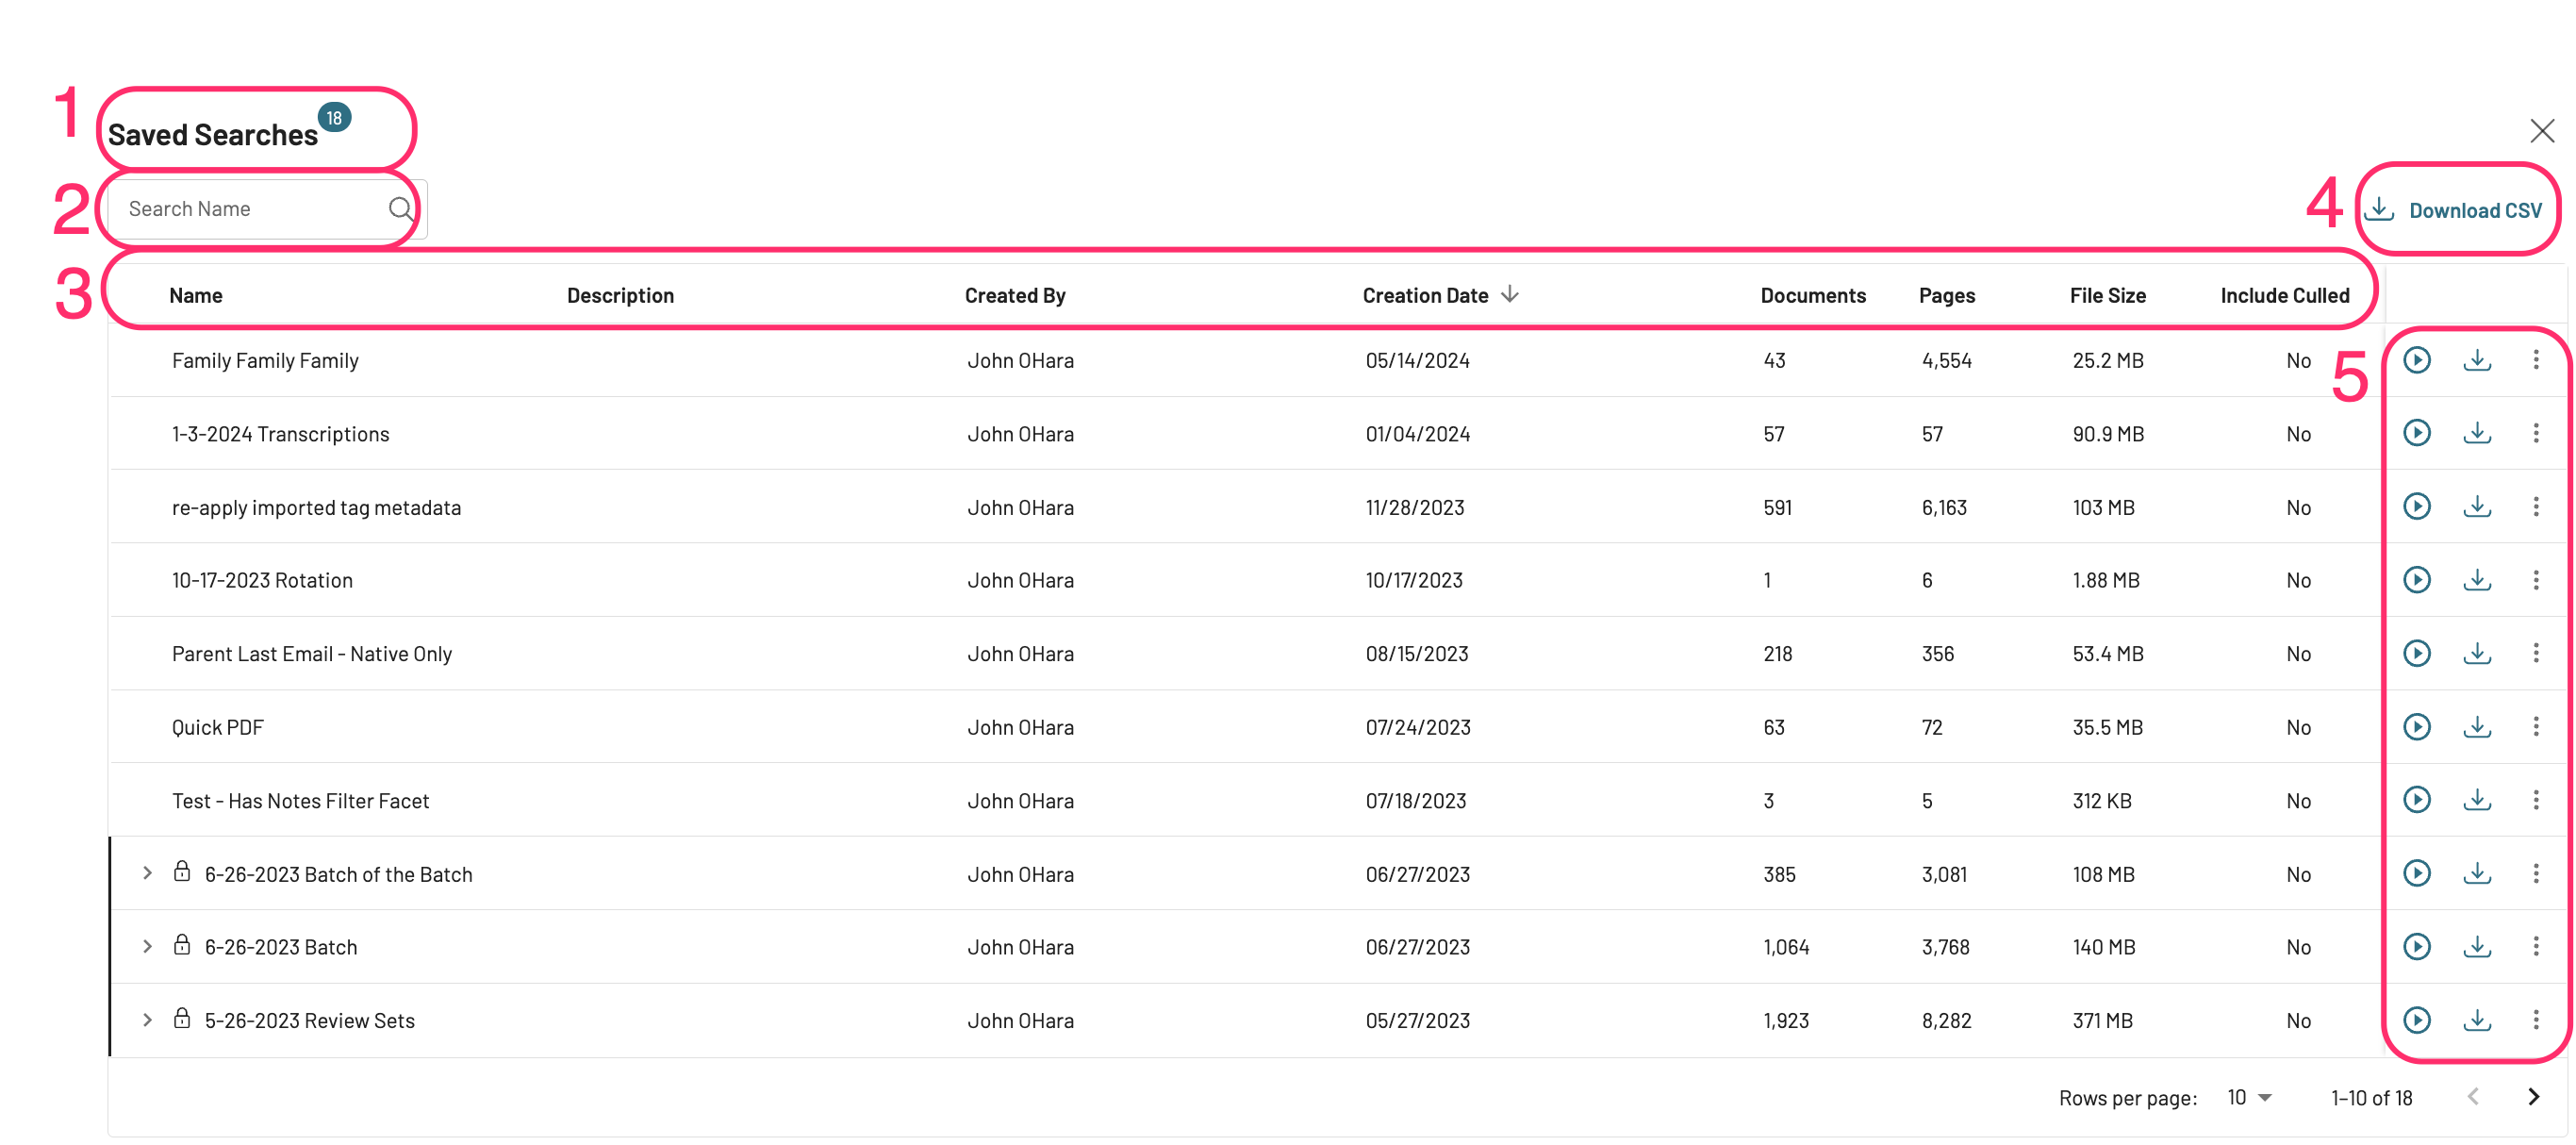
(1) The total number of saved searches in your Saved Search table is listed next to the title.
(2) Search bar: you can quickly narrow the table by searching for the title of a saved search.
(3) Default Information headers: your saved search list is organized as a table for easy navigation with the following default values.
Name (sortable)
Description (sortable)
Created By (sortable)
Creation Data (sortable)
Documents
Pages
File Size
Include Culled Documents
(4) Download CSV: Selecting the download button will export the table values, along with the search details like the search string and filters used, as a CSV file.
(5) Action Buttons
Run the saved search
Download the saved search (starts the Download workflow)
More options:
Copy to… starts the Data Copy workflow
Edit allows you to edit the name and/or description of the search
Lock/Unlock
Delete
More info
Important note about filter views and saved searches
The deduplication filter view and culled/unculled filter view are each saved as parameters in a saved search. For example, if you are in the Global Dedupe view and you run a saved search that was saved in the No Dedupe view, the filter view will update to reflect the parameters of the saved search. However, if you run a saved search using the Advanced Search Builder, the filter view will NOT be updated automatically. The best practice is to limit use of the Advanced Search Builder to saved searches that all share the same filter view.
Locking an existing search
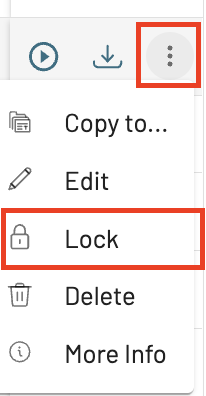
Under the list of saved searches created hover over the ellipsis button and selecting "Lock" from the drop-down. When locking a previously unlocked search, you will also be given the option to include families and/or designate review sets.
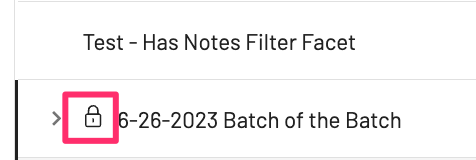
Once your saved search is locked, you will then see a locked icon for the saved search:
More tips for saved searches:
Dynamic saved searches may be re-run to update search results
Saved search names can be edited
Saved searches can be deleted.
Saved searches are used to download or produce documents. In addition, saved searches may be re-run like macros, the name can be edited, or it can be deleted. To update an existing saved search, you would want to run the old search, make any changes, and save it as a new search. You can also use the saved search to download or produce the documents in your saved search.