Use a saved search for your document set, then download load files, images, natives, and text to securely share with an outside party.
Looking for a quick PDF export of search results? Try our PDF Download tool.
Creating Downloads
Project and Account Admins can create downloads.
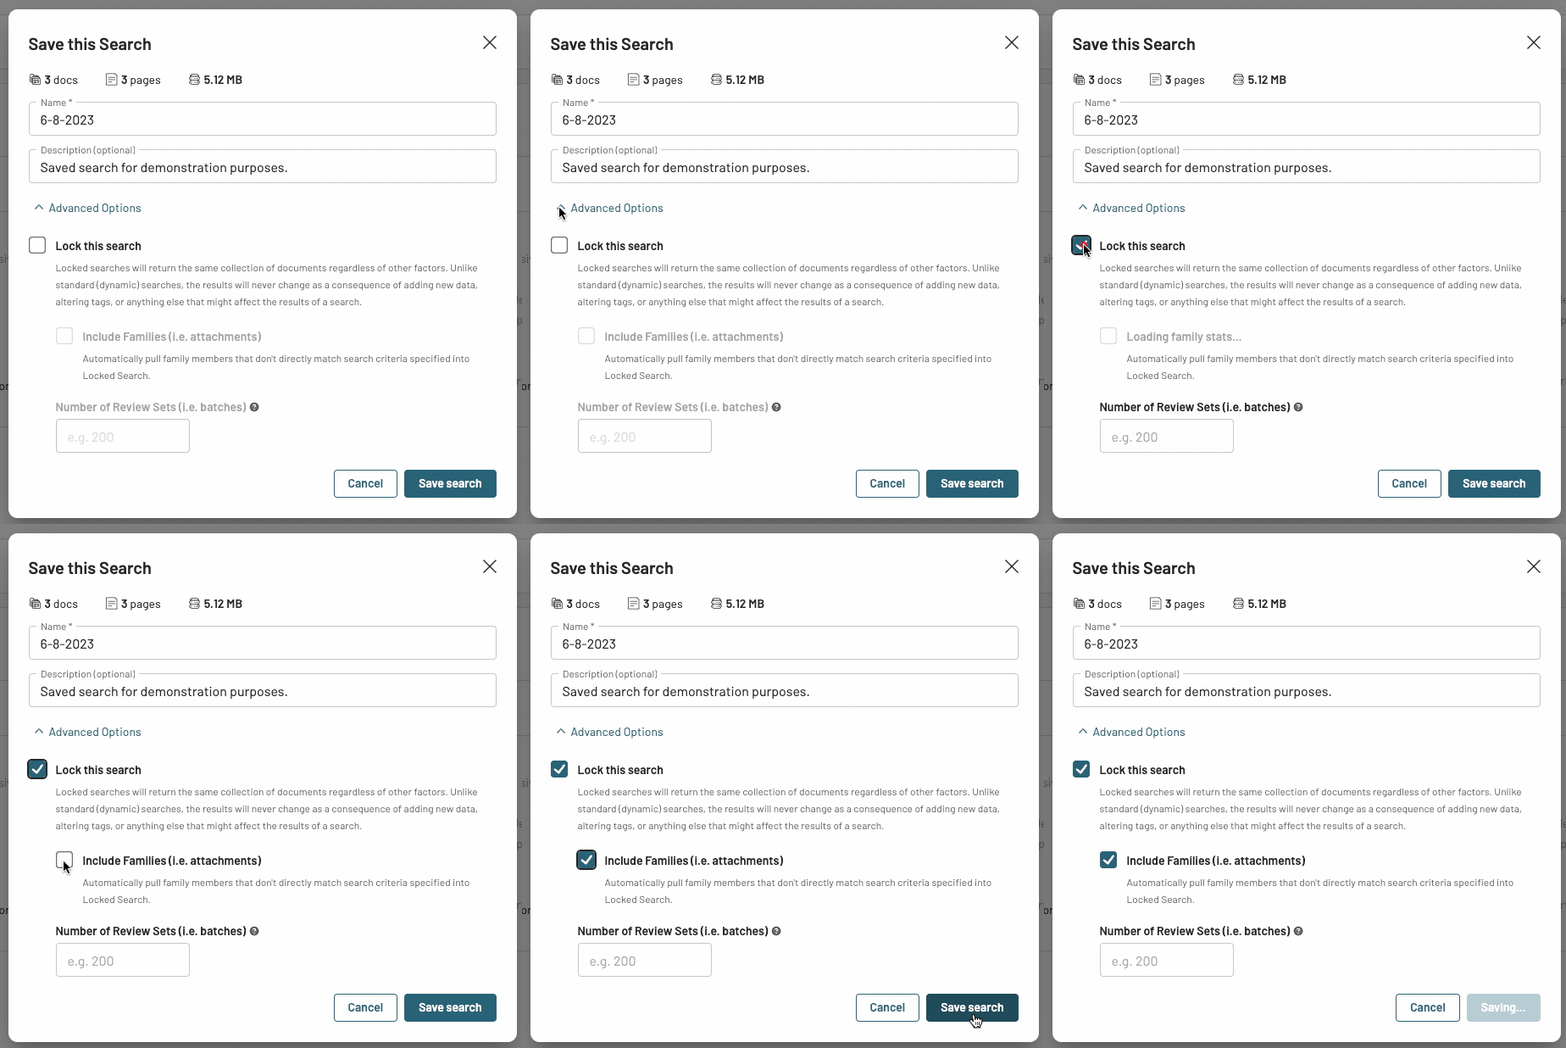
Downloads are based on saved searches. Create a Saved Search first by clicking "Save" under the Search pane. You can "Lock" the search to prevent changes, and/or "Include family members" that didn't match the search criteria.

To create the Download from a saved search, go to the “Saved Searches” list and click the “Download” button next to the relevant search:
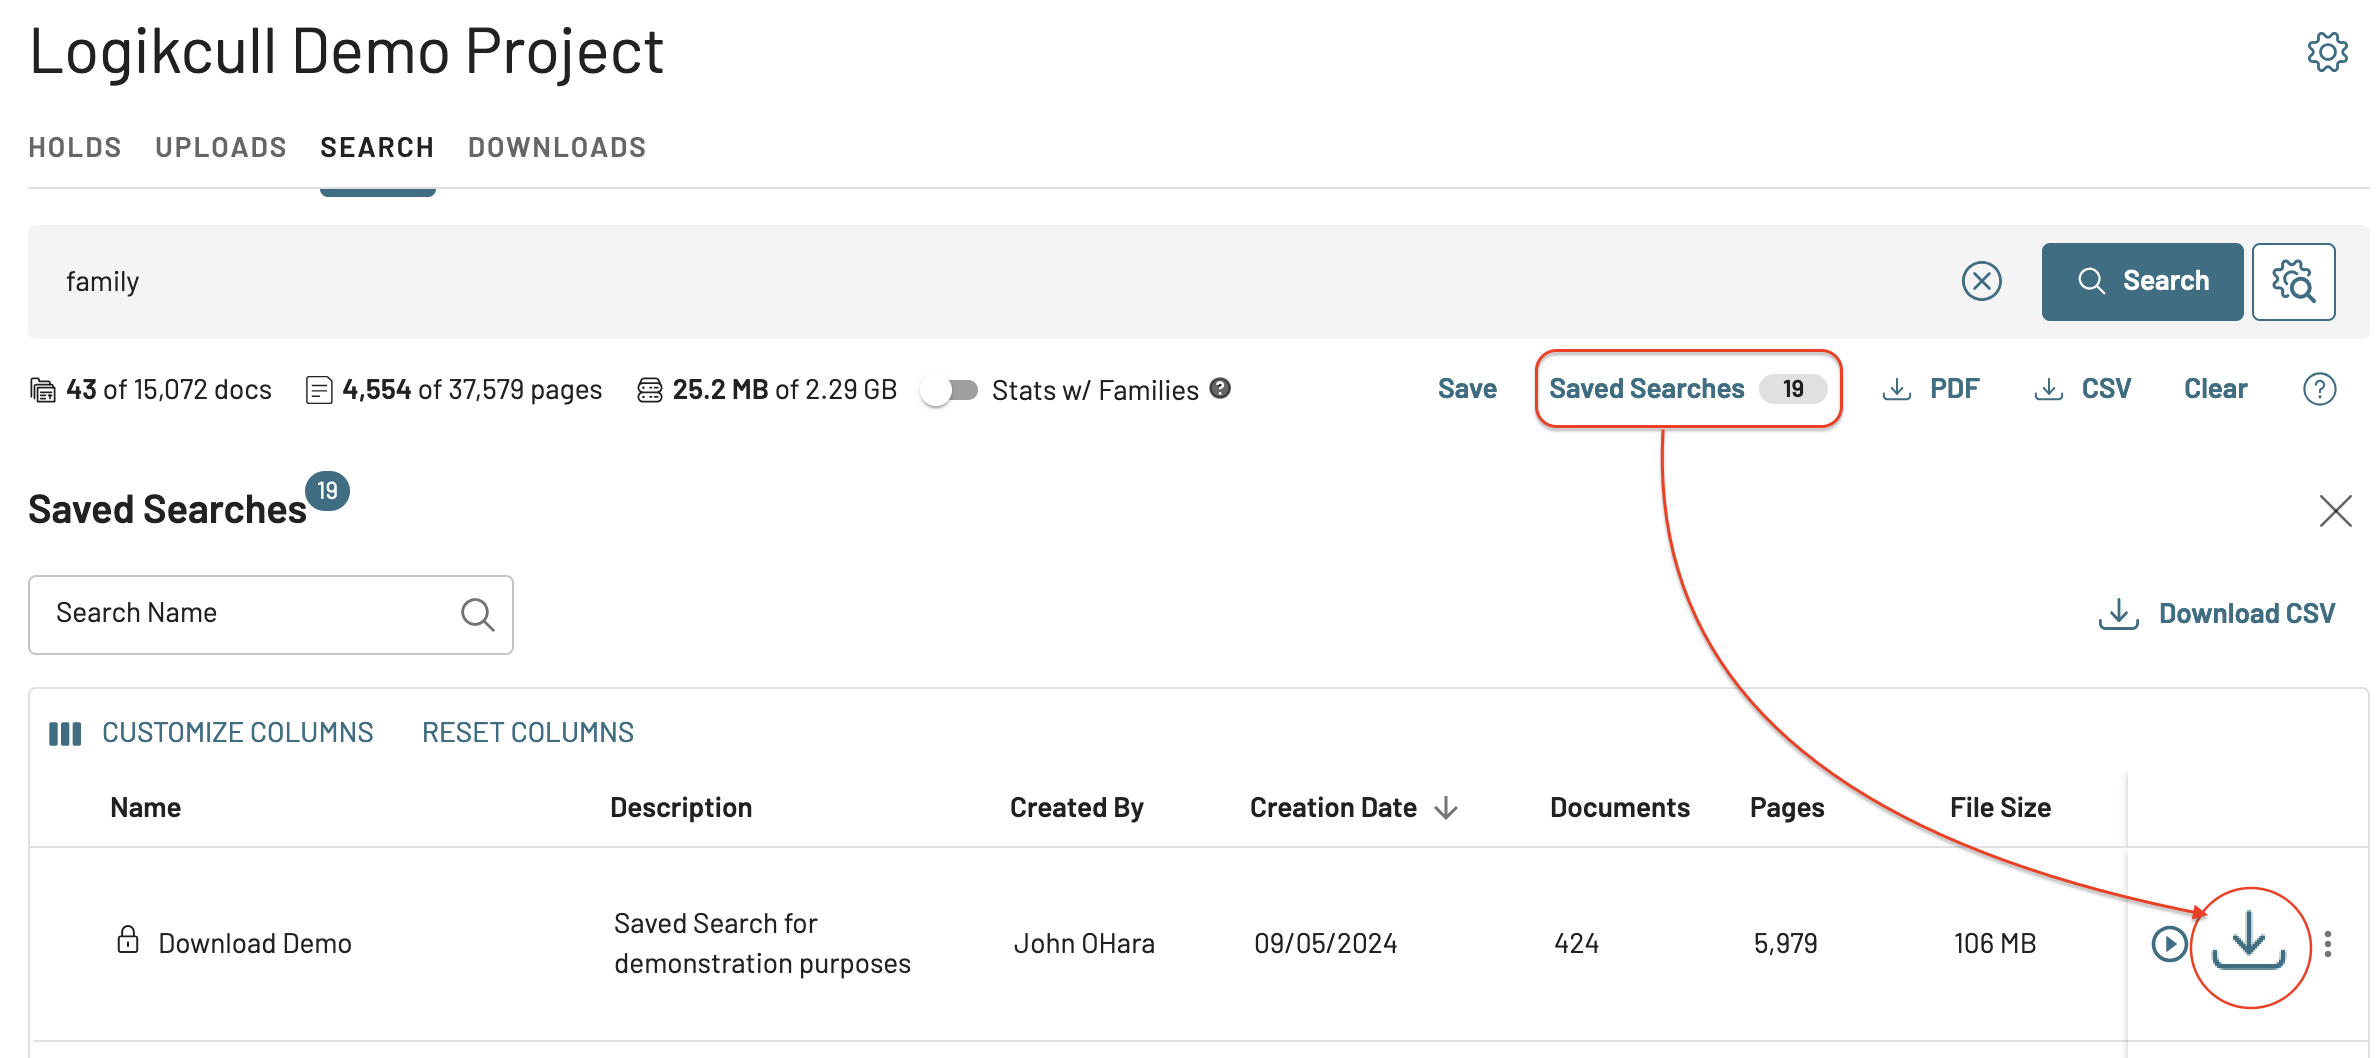
This will bring up the Create a Download popup.
Step I - Select files
Choose your files, template, sorting mechanism, and family inclusion.
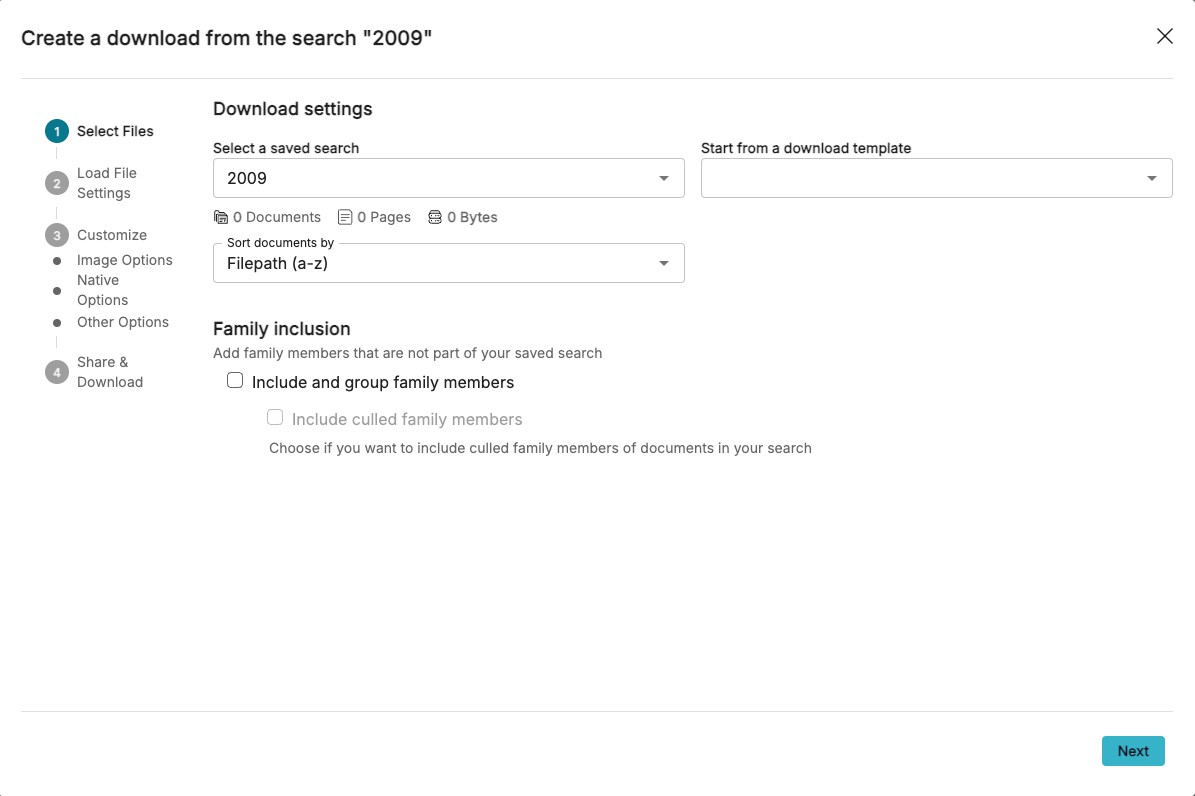
Select a saved search: Choose your saved search from the dropdown.
Start from a download template: If you have saved a pre-existing Download template, you may select one here. Later, in Step 4 of the Download creation process, you will be given the option to save a new template for future use. Additionally, any download templates that were previously saved and shared across projects within your account will also appear here as an option.
Sort documents by: This will allow you to choose the order of your documents in the download. Filepath (a-z) is set as the default option and will ensure families appear in order, but you also have advanced custom sort options available to you. Here's an article that explains those options.
Family inclusion: Add family members that are not part of your saved search.
Include and group family members: Check this box to pull in any family members of documents related to, but not currently a part of, your saved search.
Include culled family members: Check this box to pull in any family members of documents in your saved search that were culled.
Step II - Load File Settings
Choose the format and template of your load file. A Load File is a table of delimited information that contains metadata fields associated with each document.
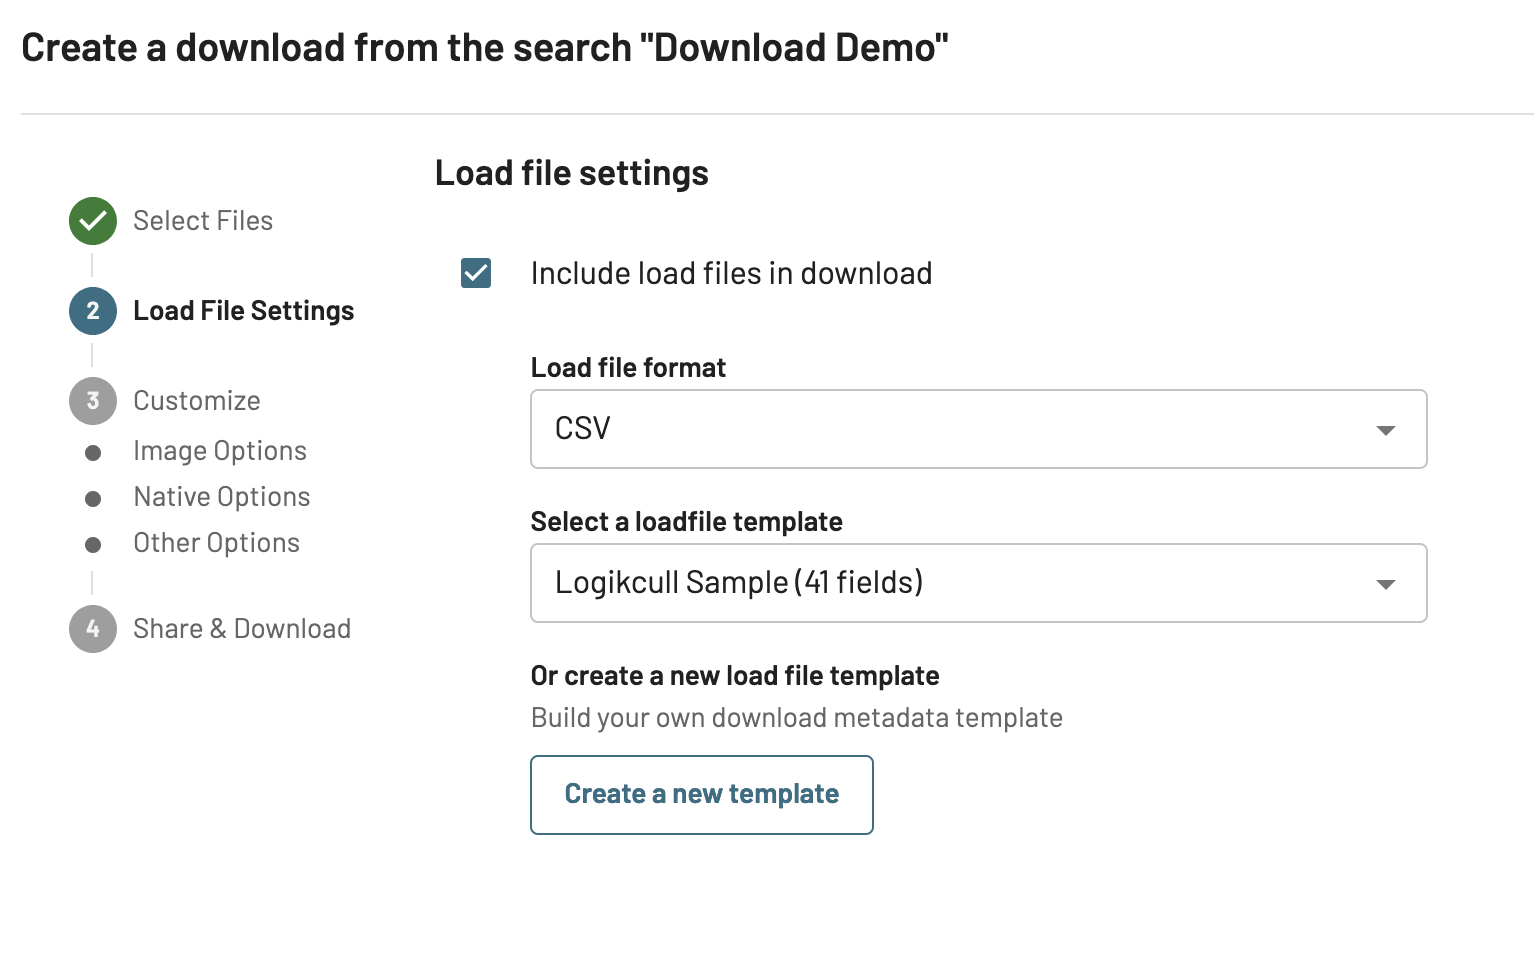
Include load files in download: Choose whether or not to include load files in your Download.
Warning
If you choose not to include load files in your download, the production will just be images/natives without metadata. Receiving parties won’t be able to easily load the production into their own review platform, and the production may not meet specifications (which often explicitly require a load file).
Load file format: Choose between CSV, DAT (Relativity or Concordance formatted), or .dii (Summation formatted) metadata load files, and between OPT or LFP image load files. When images are produced, both OPT and LFP image load files are automatically included, so you don’t need to manually select them.
Choose a load file template. Either create your own or select an existing template to use again.
Select a load file template: Select an existing file template from the dropdown. You may choose from a previously-created load file template that you or other users have saved or shared across the project and/or account, or one of Logikcull’s preset templates (Logikcull Sample is popular, which includes 41 commonly used fields).
Create new template: Click to open the template editor. The left side is available fields, the right side is the fields your load file will contain after you click on your selections. You may individually choose metadata fields from the full list on the left, or build off of a pre-populated template from the drop-down menu on the right and modifying accordingly.
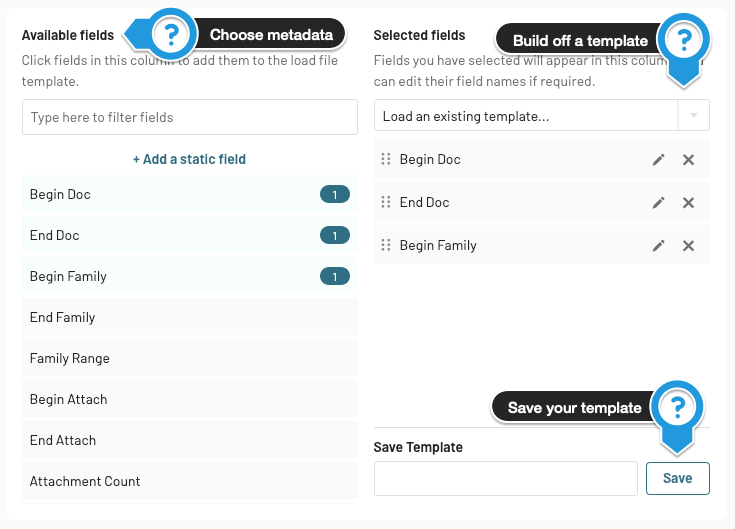
Once you are finished creating your customized load file template, you have the option to save your template to use for future downloads or to share across the account.
Step III - Customize
Customize your settings for production images, production natives, redactions, and more.
III.a - Image Options
.png)
Include images in download: Choose to include images of your documents in your download. Checking this box activates the drop-down to the right, where you can select the image type. Options include multipage color PDFs, single page B&W TIFF, and multipage B&W TIFF. Please note that only one image type can be used for the entire download.
Use previously downloaded images: You can also include Previously Downloaded Images (a previous download's Bates endorsement). Checking this box activates the drop-down to the right, where you can select a specific download volume (or the most recent download).
Name images by: Choose from the following options…
Bates Number as file name – Each document is named with its starting Bates number (i.e., in this example Documents 3, 6, 8, 11, and 13 each have multiple pages, reflecting a change in the number sequence), and each page is stamped with its own unique Bates.
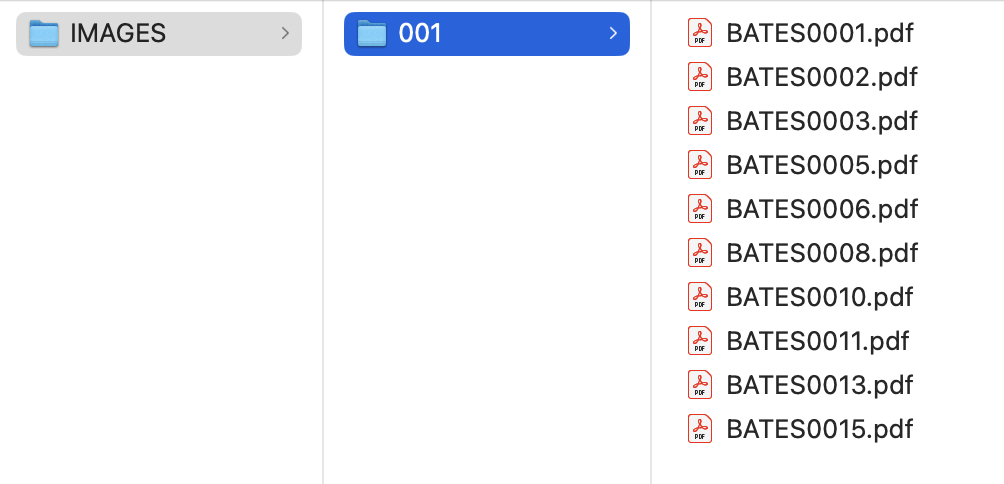
Original file name – Each document is named by its original file name as ingested into Logikcull. Duplicates will receive a suffixed number at the end of the name. Endorsements match whatever was selected on Step 3 (Page-level numbering, Document-level numbering, etc).
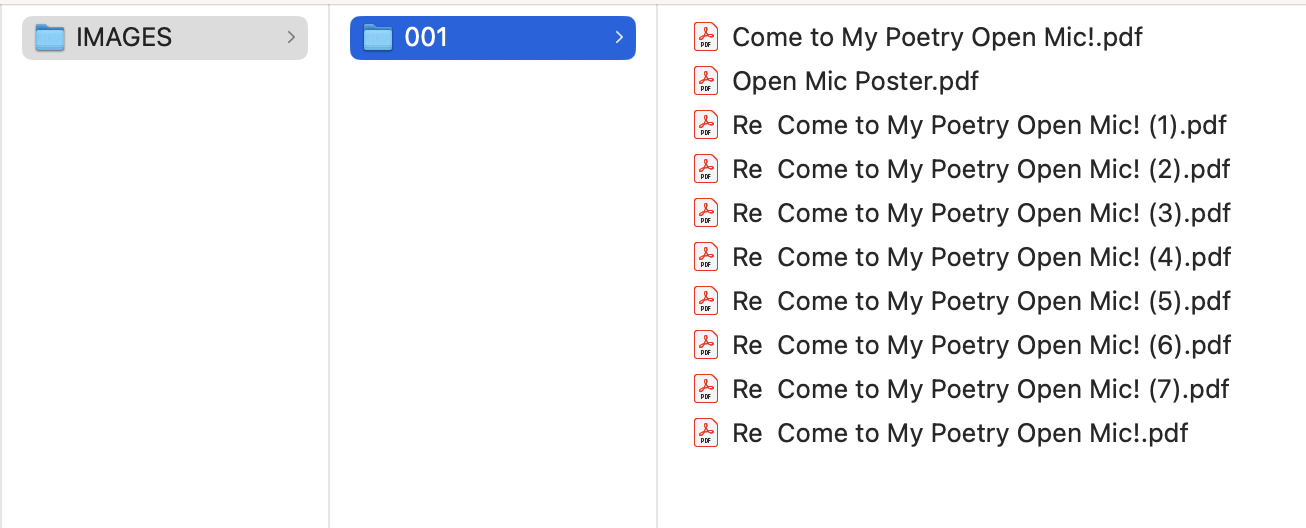
Suffixed Bates Number or Document Number as file name – Each document is named with a sequential Bates number, regardless of the number of pages in the document. The documents are endorsed with the filename + suffixed page numbers (in this example, the first page is stamped "BATES0008" and the following page is stamped "BATES0008_000002".
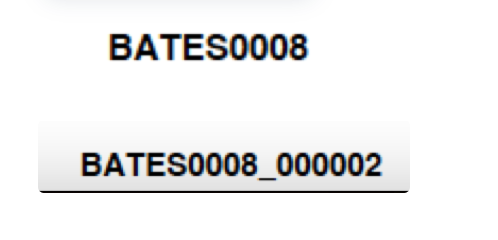
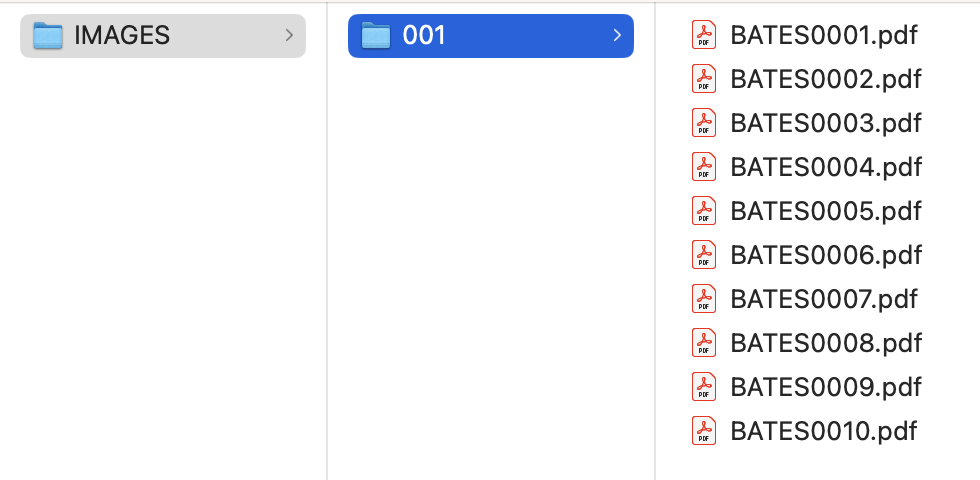
Imported Bates Number as file name – When naming images and natives, "Imported Bates Number" refers to imported metadata in a Database Upload. If your records were not given a Bates number prior to this download process, you can choose "Document Number as File Name" to name documents with the Bates number you assign during this process.
Important
Selecting "Imported Bates Number" without imported metadata will cause Logikcull to default to the original file name.
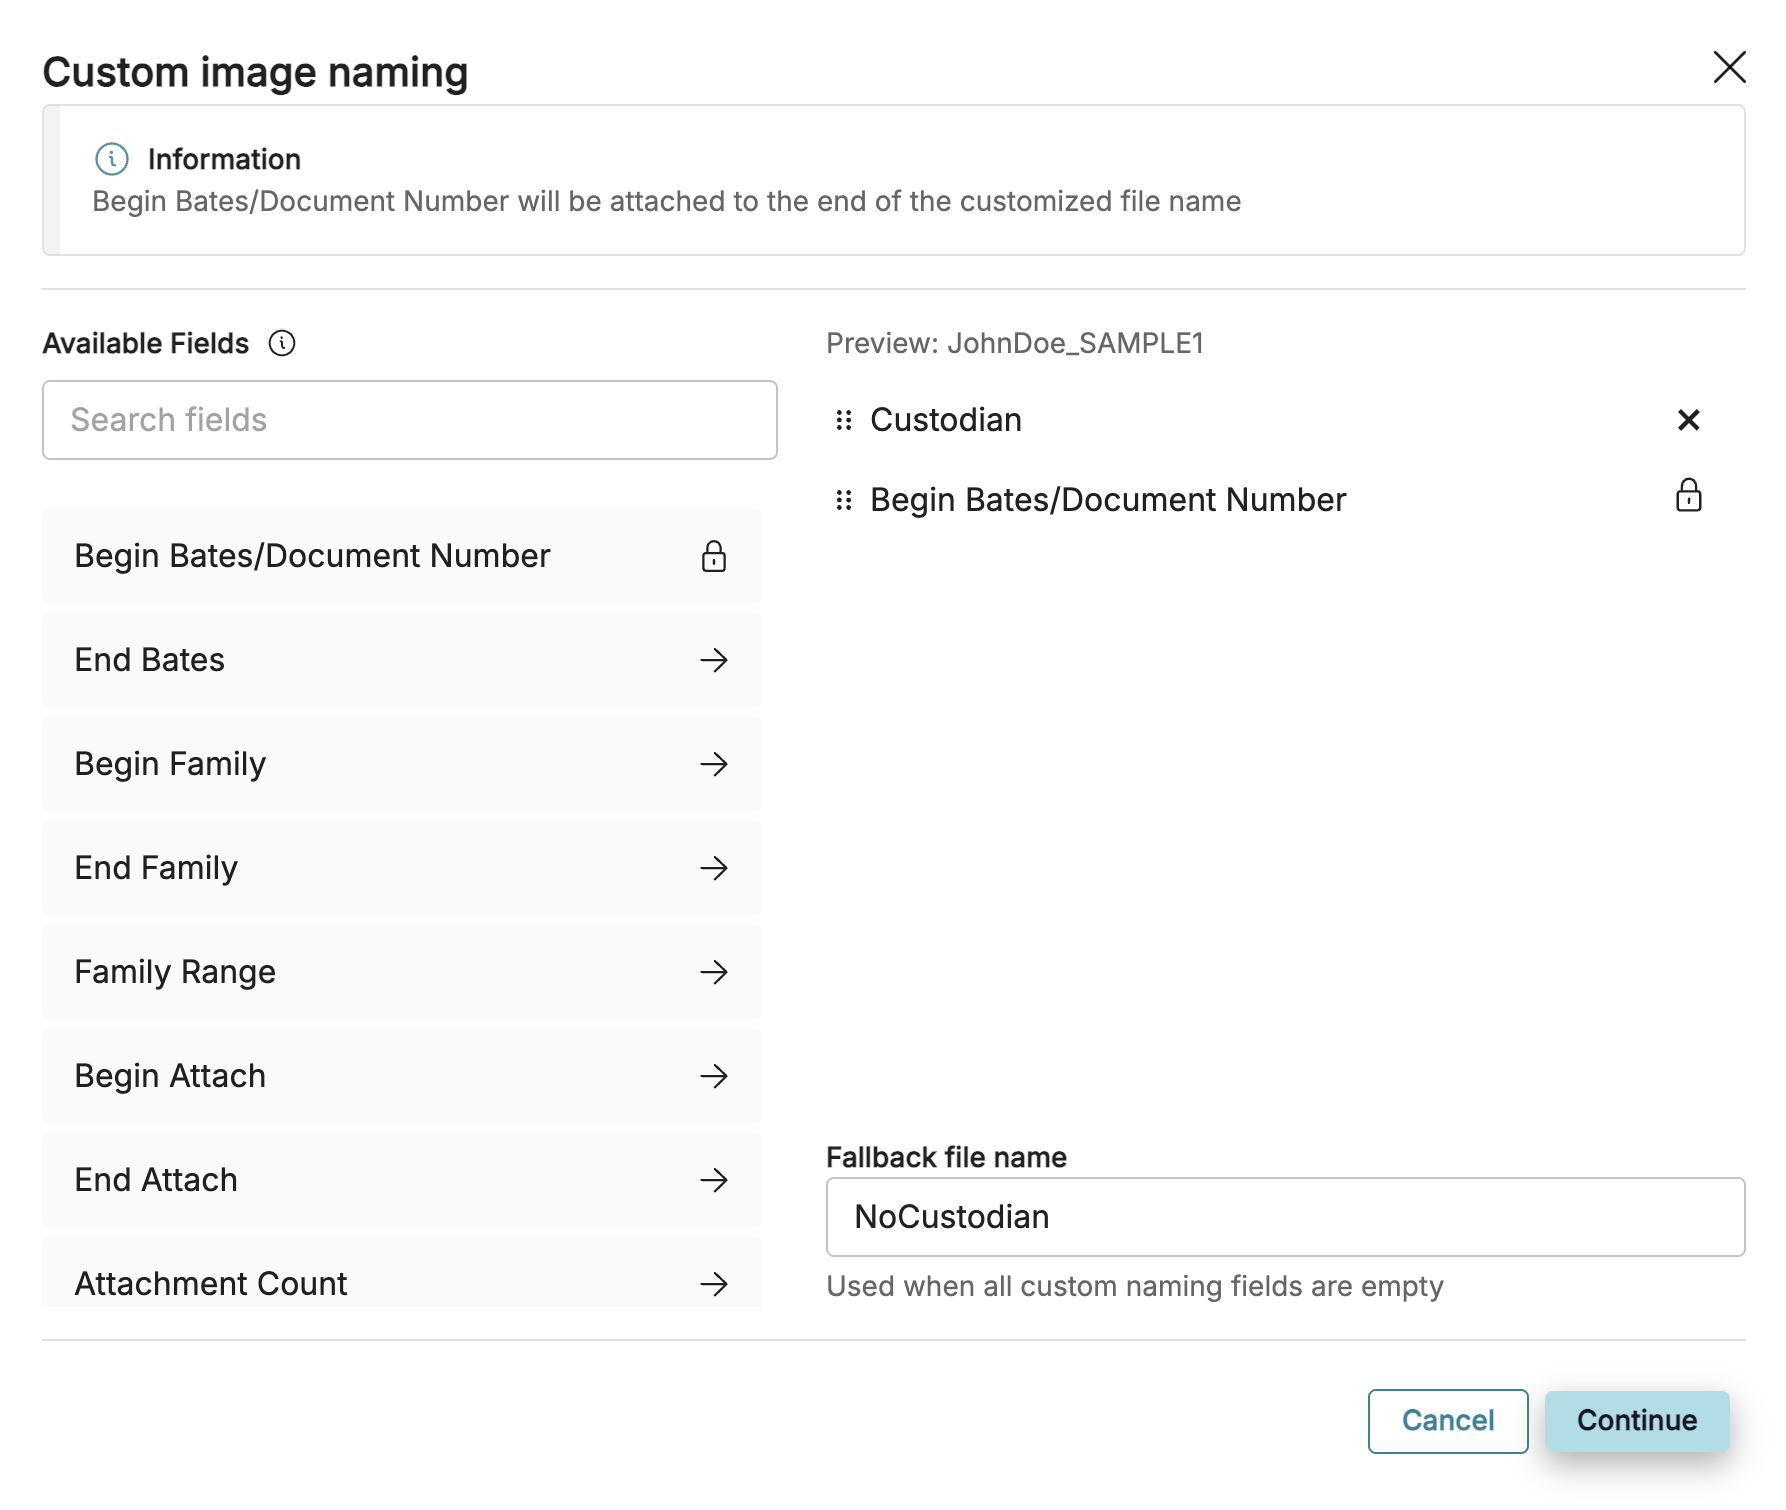
Custom filename – Each document is named using your choice of one or more fields separated with an underscore. Search for your fields and use the right arrow key to add them to your naming convention. You can also rearrange the fields in any order, but Begin Bates/Document Number is always at the bottom (last field in the naming convention) and cannot be moved. The preview displays a sample of what your name would look like. The Fallback file name is a name that populates when all of your custom fields are empty. For the below configuration, a document without a custodian would be named NoCustodian_SAMPLE1.
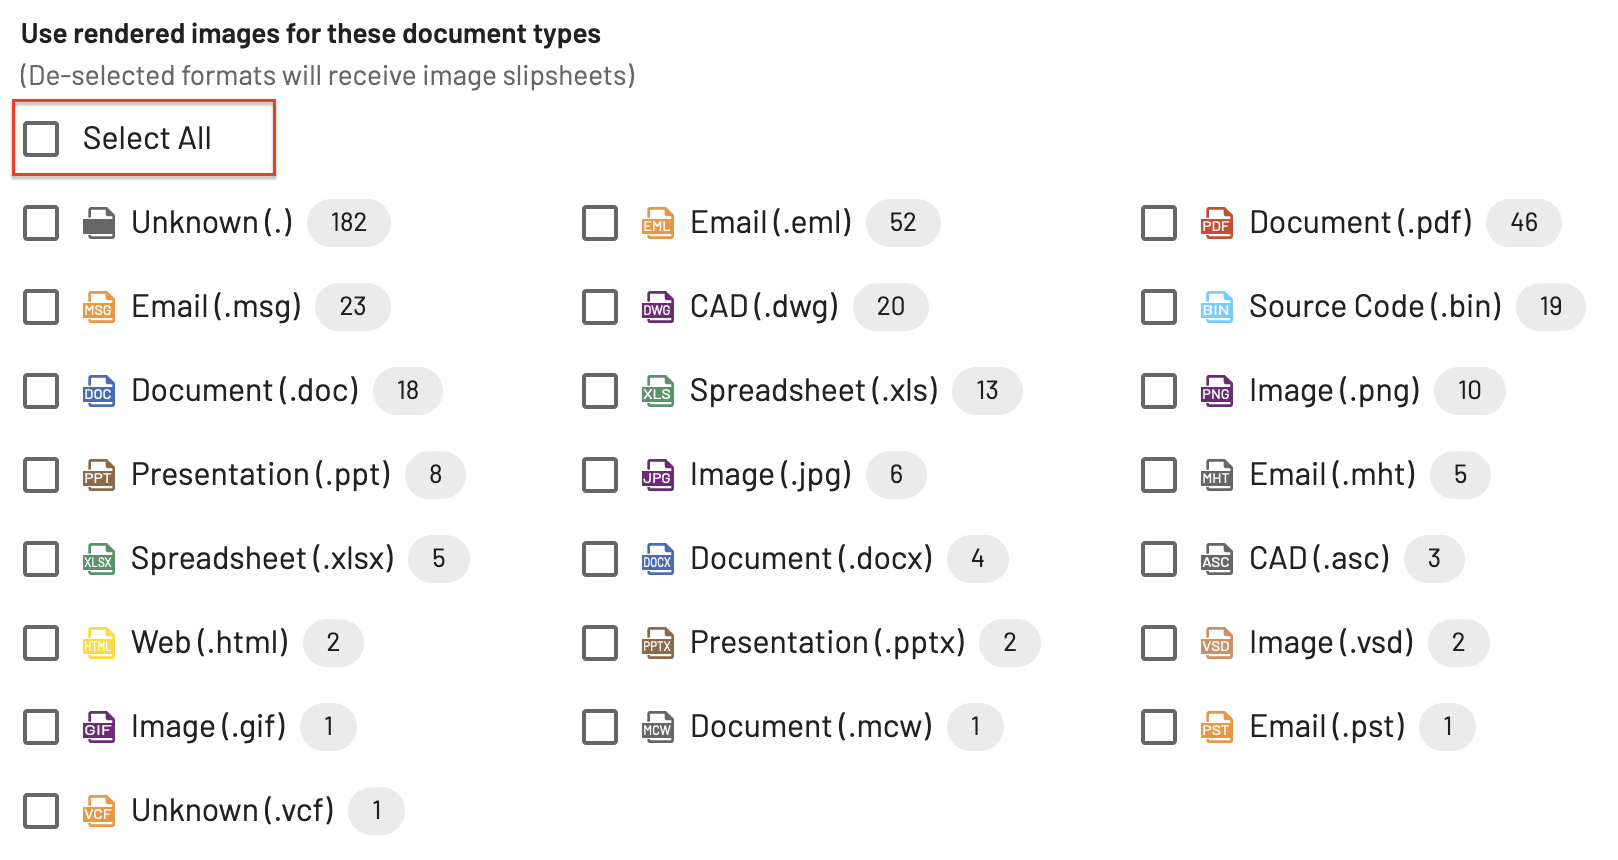
Use rendered images for these document types: Check the boxes next to image types you wish to include in the download. The number next to each document type represents the number of documents with that specific file type in the saved search. If there are only one or a few image types you wish to include, you have the option to select/de-select all at the top of the list.
Note
De-selected file types will receive image slipsheets. See the "Image slipsheet template" section below for more information.
Include endorsements / branding: Select this checkbox if you want to Bates Stamp or otherwise endorse document images. Selecting this checkbox will cause a new set of drop-down menus to appear below it. Instructions below are specifically for Bates Stamping documents, but can be modified as needed.
Note
You will enter the custom bates-prefix and Starting Document/Bates Number in the last Step 4 of the download form.
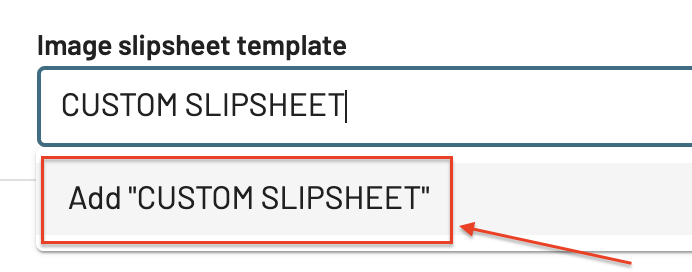
You can choose to include a custom endorsement (e.g., "CONFIDENTIAL") by typing directly into the endorsement box and selecting "Add [custom endorsement text]" - once selected, it will remain in the drop down menu as an optional endorsement.

Image slipsheet template: To choose the text that appears on an image slipsheet, select an option from the drop down menu. You can also create and save a custom message by typing directly in the text box and clicking "Add [custom slipsheet text]". The slipsheet template you select will appear on all slipsheeted images, which are determined by the image types that were de-selected earlier.
III.b - Native Options
.png)
Include native files in download: Check this box to include Native files (the original file type that was initially uploaded to Logikcull) in your download. Please note that, if a document image was redacted, the native version of that document will be withheld even if you choose to include natives in this step. When this checkbox is selected, it will activate the options below it. otherwise, you can jump to the Other Options section.
Name native files: Select how to name native files in your download. See Step 3 in the Image Options section for descriptions of each option.
Include native files for these document types: See Step 4 in the Image Options section for more information.
III.c - Other Options
.png)
Include redactions on images and redactable natives: Check this box to burn-in redactions created in the document viewer. Logikcull will re-OCR redacted images in order to exclude the underlying text from being exported.
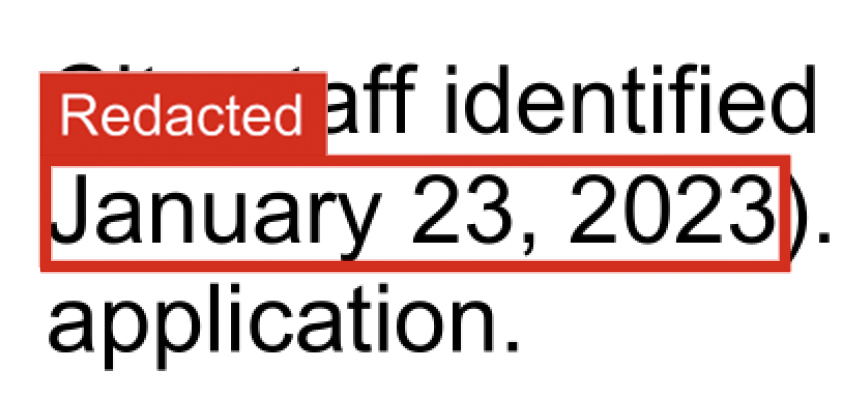
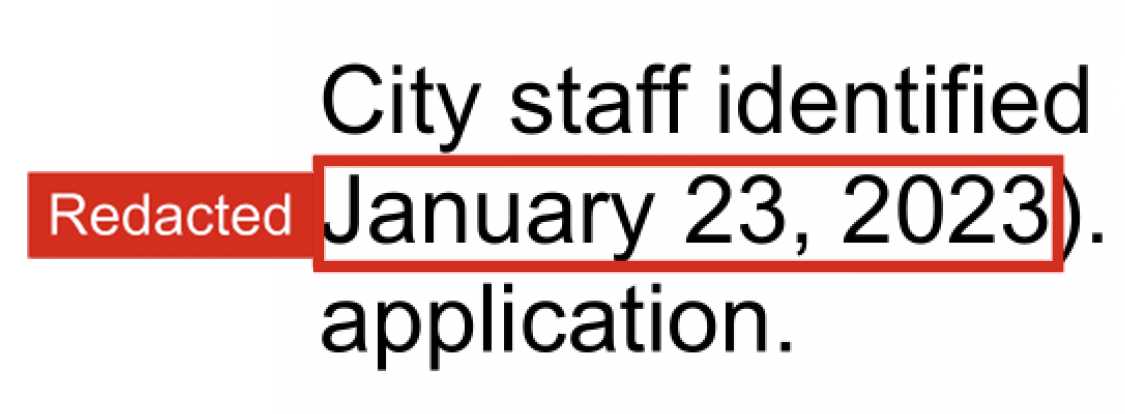
Make transparent for review: Check this box to present redactions as a transparent, red-outlined box.
Show redaction labels: Check this box to show redaction labels along with the transparent redactions, then pick one of two label placements.
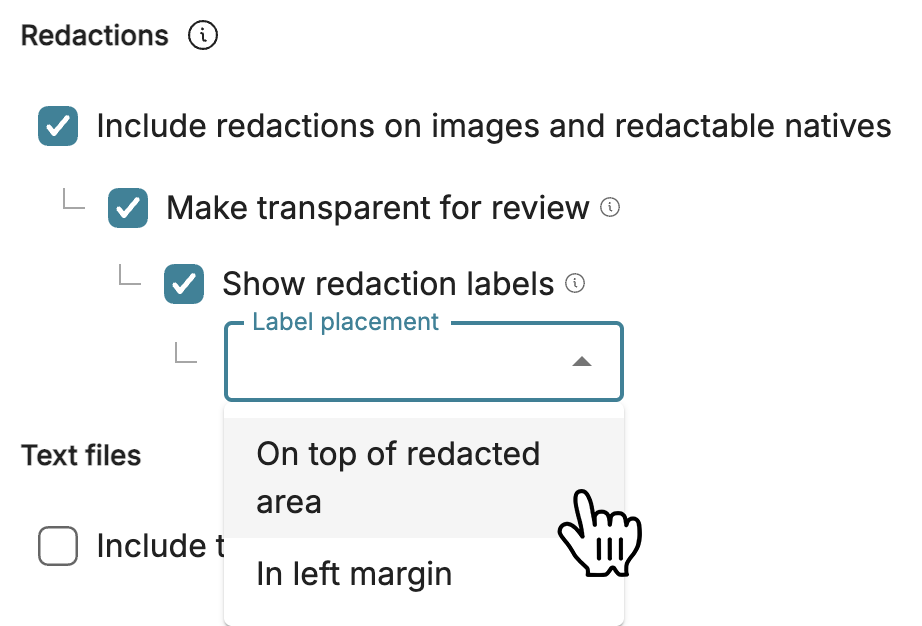
On top of redaction area.
In left margin.
Note
See the Transparent redaction label orientation section for a visual depicting how transparent labels are shown in text for each options.
Select redactions: Select which redaction labels you would like burned in your download. By default, this is set to all your redactions, but you can be selective if you have specific reasons for excluding redaction labels. Either:
Leave this dropdown set to all redactions to burn in all redactions, including redactions that remain unlabeled.
If you choose to exclude at least one redaction label from this dropdown, unlabeled redactions will remain unredacted in your production.
Important
Your redaction choices impact the availability of native files. If a document is redacted, that document and its family members will be excluded from the set of native documents unless Logikcull supports the redaction of a native file format (audio redactions, for example).
Text files: Choose to include text files in your download. This will also activate the right dropdown menu.
Select folder: Choose one of the following folder naming conventions for your download.
in a folder named "TEXT"
in a folder named "IMAGES"
in a folder named "NativeFiles"
Include WCAG (Web Content Accessibility Guidelines): Checking this box structures your produced PDFs to be WCAG 2.2-oriented. This produces tagged PDFs that pass automated accessibility checkers such as PAC, rather than a semantically structured tag tree or descriptive alt text, both of which still require human remediation.
Attention
Users are responsible for verifying compliance before publishing or distributing any downloaded documents. Our software also does not correct documents that are inherently incompatible with WCAG 2.2 or PDF/UA standards (e.g. documents with low contrast, small fonts, etc.).
Customize download by document tag: This allows you to specify the format in which specific documents are produced based on the tag those documents contain. See Tag-Based Overrides for Document Downloads for a full guide on this step.
Transparent redaction label orientation
The below table displays how transparent redactions look with and without labels. In the event a redaction is at the corner or side of a page and its label would otherwise be cut off, the top / left margin labels are adjusted to be bottom / right margin labels, respectively.
Type | Make transparent for review | Show redaction labels | Redaction label dropdown | Appearance |
|---|---|---|---|---|
No redaction labels visible | Checked | Unchecked | n/a |
|
Redaction labels above the redaction | Checked | Checked | “On top of redacted area” |
|
Redaction labels to the left of the redaction | Checked | Checked | “In left margin” |
|
.png)
Step IV
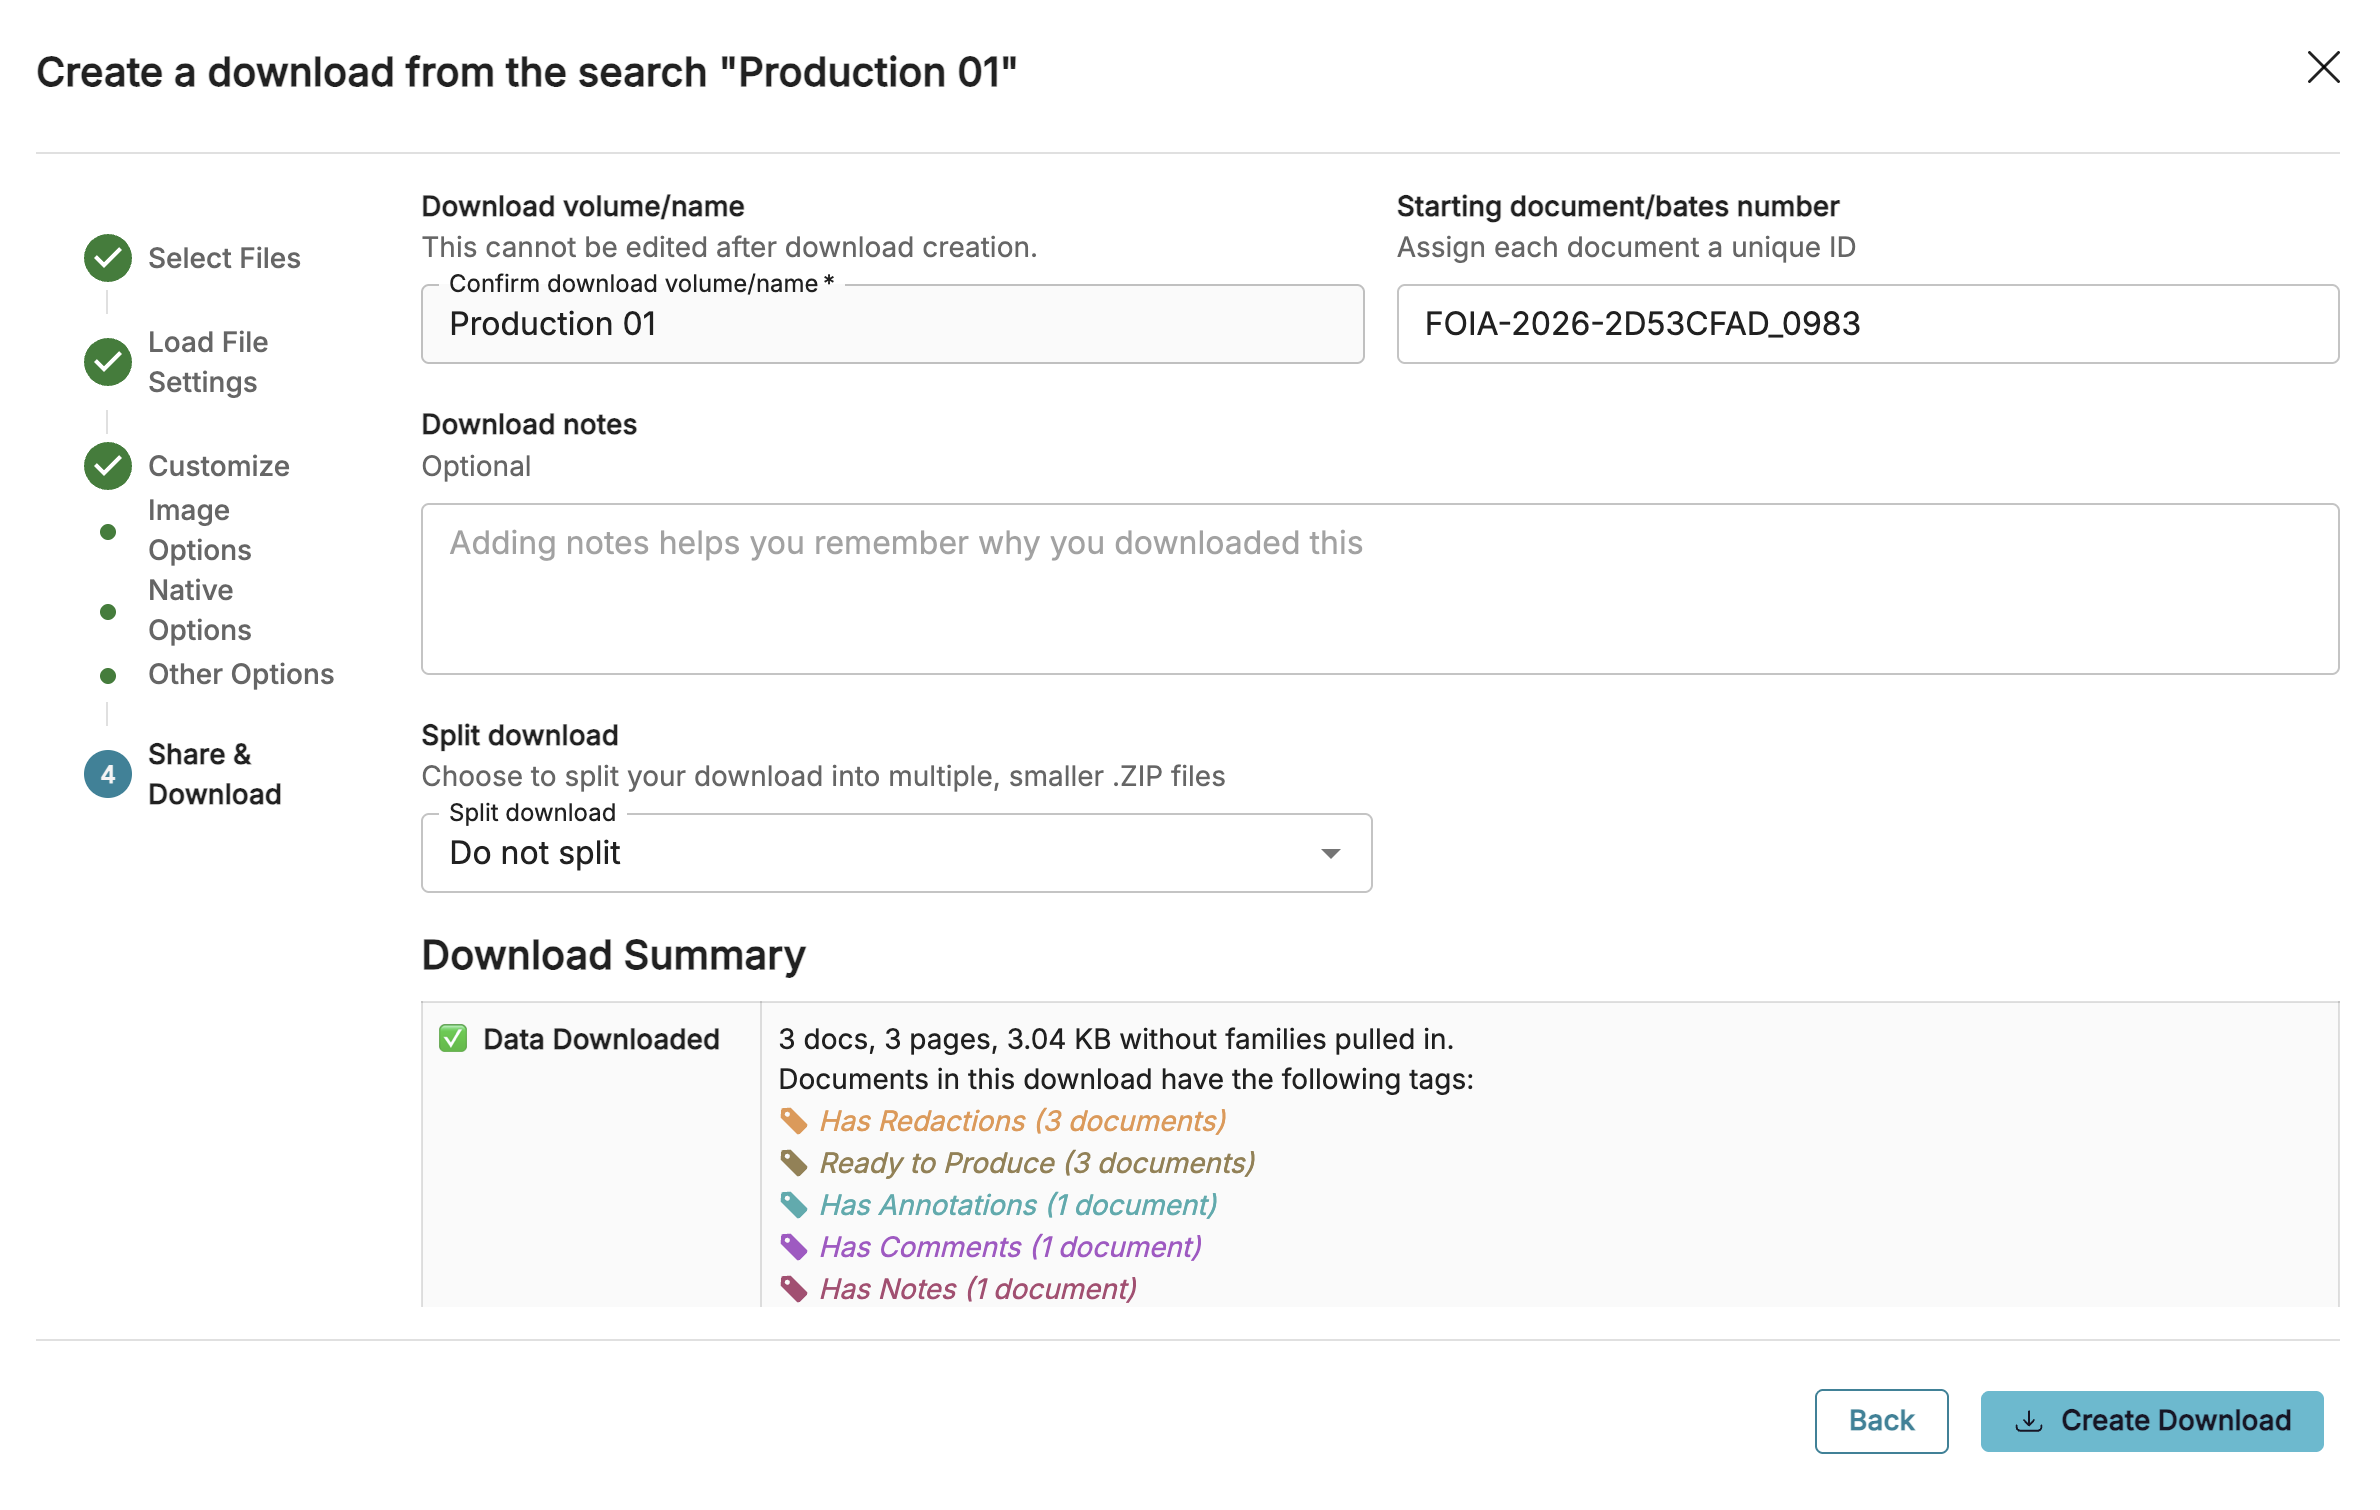
Download volume/name: The name associated with the download volume within Logikcull.
Warning
The download volume name cannot be renamed or modified after the download is completed.
Starting document/bates number: This is your last step to the bates-stamping process detailed in Image Options and Native Options. Input a starting document or bates number here. This is a required field even if you do not include endorsement settings.
Bates/Starting Numbers must be 50 characters or fewer and are restricted to letters, numbers, hyphens, periods, and underscores (i.e., no spaces). They must also end in a number.
When setting your Starting Document/Bates number, you must have an appropriate number of leading 0's for the amount of pages in your download. Some examples:
A 100 page document in which the Bates endorsement is separated by a period would have a starting Document/Bates number like BATES.001
A 1000 page document in which the Bates endorsement is separated by an underscore would have a starting Document/Bates number like BATES_0001
A 10,000 page document in which the Bates endorsement is separated by a hyphen would have a starting Document/Bates number like BATES-00001
Download notes: Optional space for notes about your download.
Split download: Choose to split your download into multiple split zips.
Download Summary table: This table provides a summary of your selections. The "Data Downloaded" row includes an inventory of tags applied to documents in Logikcull, and does not indicate that those tags are exposed in the download itself. The only way to share a document tag is by including it as metadata in a load file, or via a custom endorsement.
Save these settings as a template: Your download settings can be saved as a template in your project settings so you can use it in the future for faster and more accurate download production. This will populate future downloads with the same configuration settings as this download. You must complete the download to save the template.
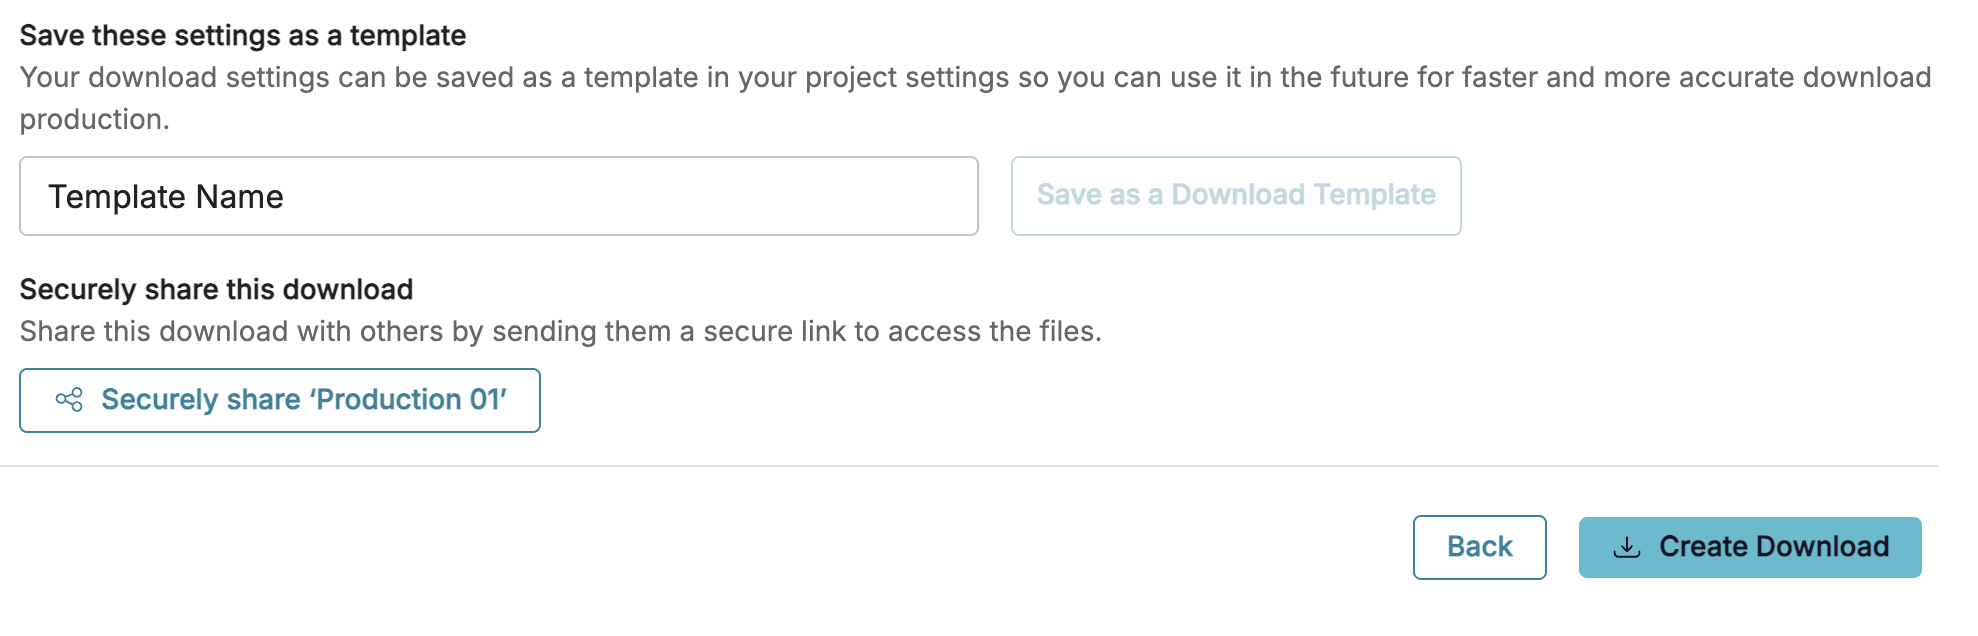
Template name: Name your template.
Click Save as a Download Template to create your template.
Securely share this download: Securely Share your download, either at creation or at any time following creation. More information about Securely Sharing downloads can be found in our ShareSafe – Sharing and Viewing Documents article.
Click Securely share [download volume / name] to share your download with 3rd parties via a shared link.
Accessing and Managing Downloads
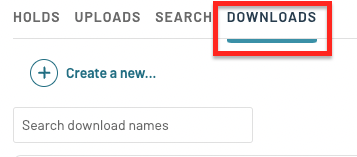
Once your download is complete, you'll receive a detailed email notification that your download is done. You can access your downloads through the Download tab in the top pane.