In this article you will learn how to:
How to Enable Sources
How to Enable Identity Sources
How to Configure Sync Modes
How to Set Retention Policies
How to Enter a Microsoft Domain
How to Enable Sources
On the ‘Sources’ page you will be able to enable sources, enable identity sources, configure sources, set retention policies, and enter a Microsoft domain (if needed). Changes made on the ‘Sources’ page affect your entire Onna site, and thus how your users can operate within your site.
When you enable sources, you set (for your entire site) which connectors can be used to create new data syncs (collections) in Onna. If a connector has not been enabled, the connector will not be available for selection when you set up a new source sync.
There are two sections where you can go to enable sources, ‘Enable sources’ and ‘Enable enterprise sources’:
Enable sources- Connectors in this section include those where you may need individual custodian log-in credentials to collect data from the custodian or sources. There are also connectors in this section that allow you to collect data across the entire organization. However, you’re not able to select specific custodians to collect data from, you must collect across the organization. These connectors include: Amazon S3, Confluence, Jira, and Zendesk.
Enable enterprise sources- Connectors in this section allow you to collect across an entire organization or to collect data from specific custodians in the organization with an authorized connection set up using source admin credentials.
To enable sources follow the steps below:
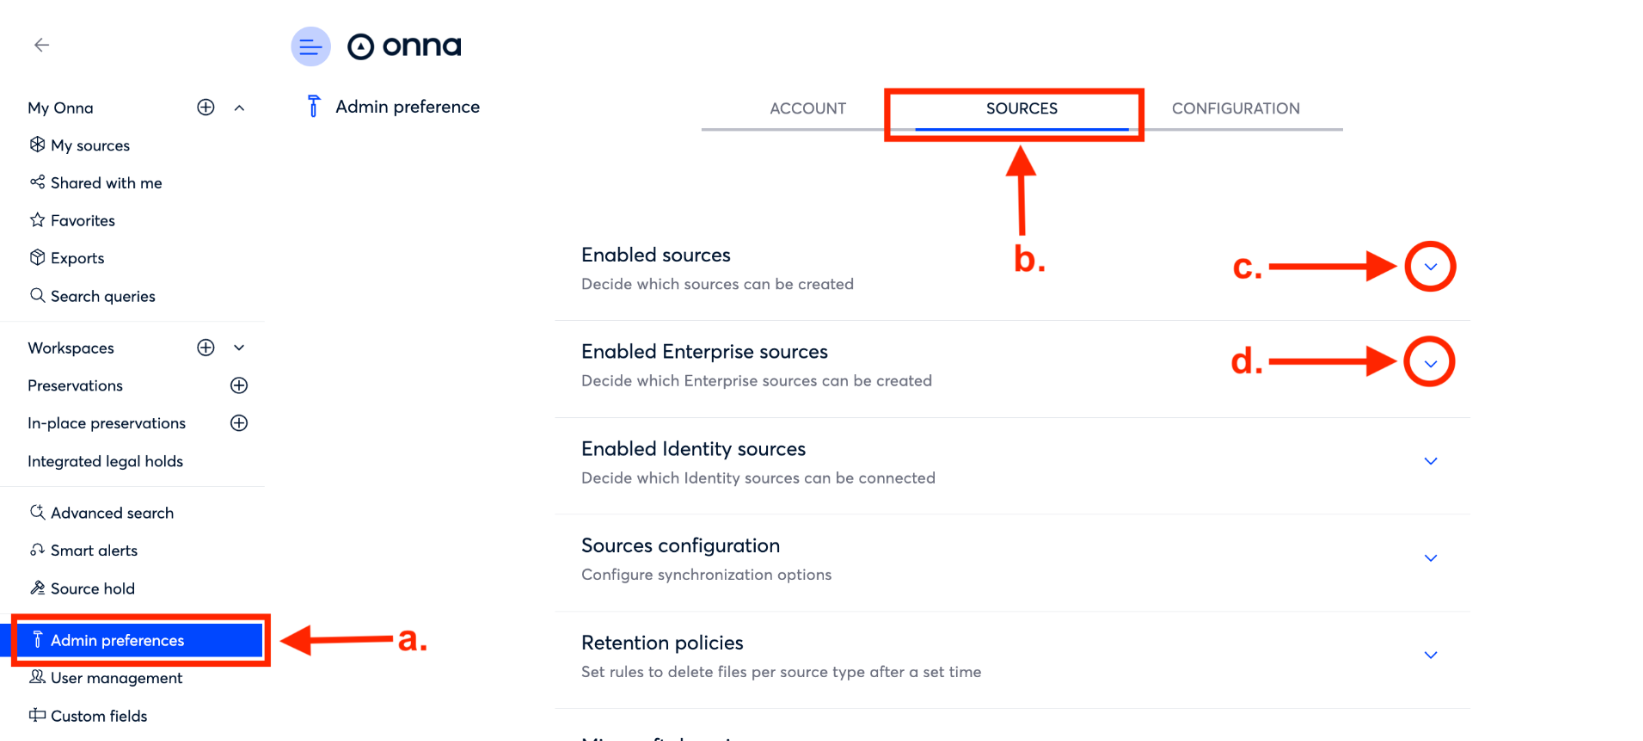
Step 1
Select Admin preferences from the main menu.
On the Admin preferences page, click on Sources.
Click on either Enabled sources or
Enabled Enterprise sources to expand the appropriate section.
Step 2
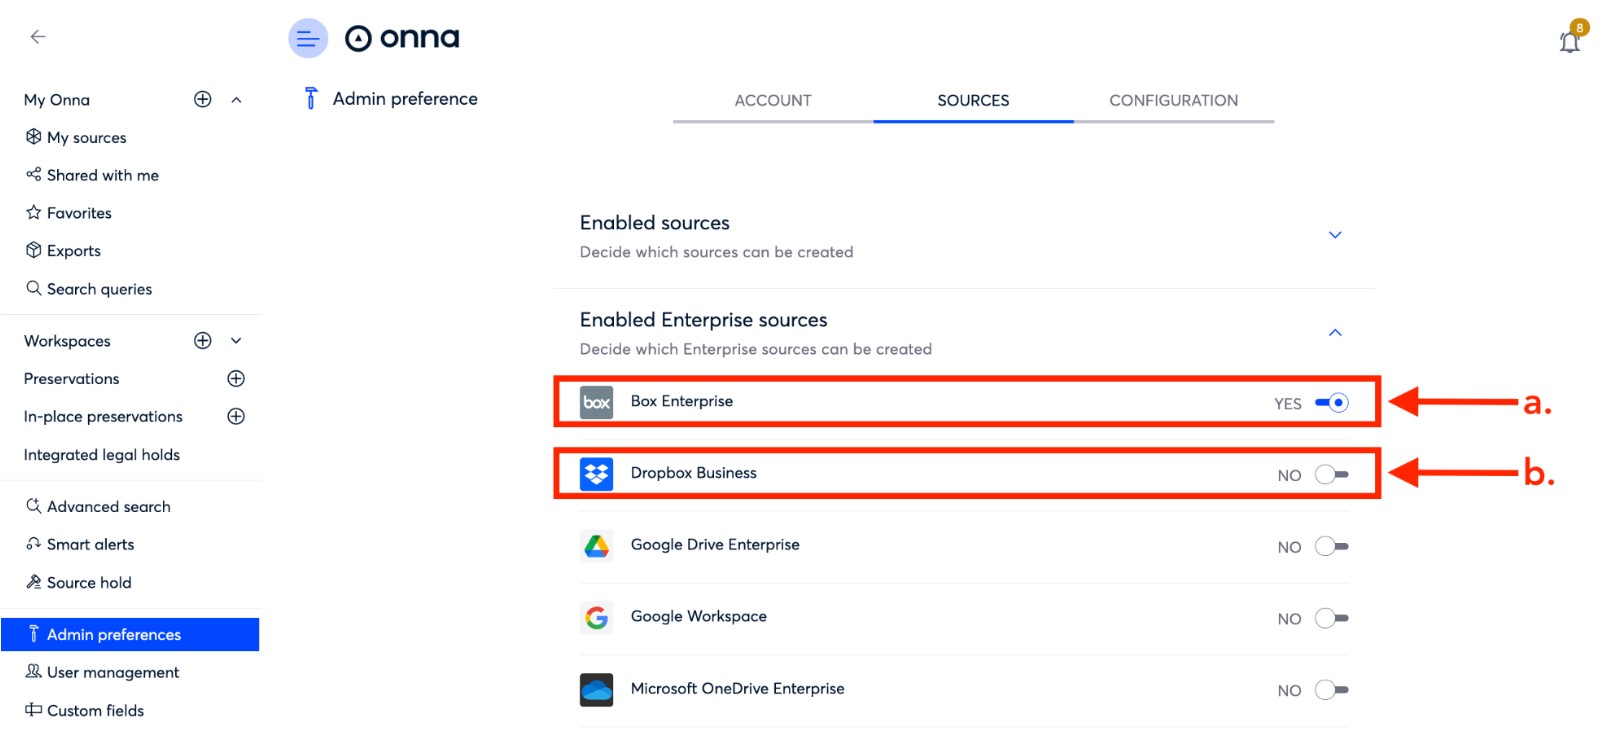
Enable a source by moving the toggle to the right of the connector name to YES.
Connectors where the toggle is set to NO will not appear in the UI as an option to select when you’re setting up a new data source sync.
How to Enable Identity Sources
Identity sources allow you to collect source users and certain information about those users such as name, email, or role. Once enabled you would add the identity source in the Identity mapping section of Onna. After the source has been added in Identity mapping the custodians collected can be used in different areas of the Onna platform, such as adding custodians to matters in Integrated Legal Holds.
To enable identity sources follow the steps below:
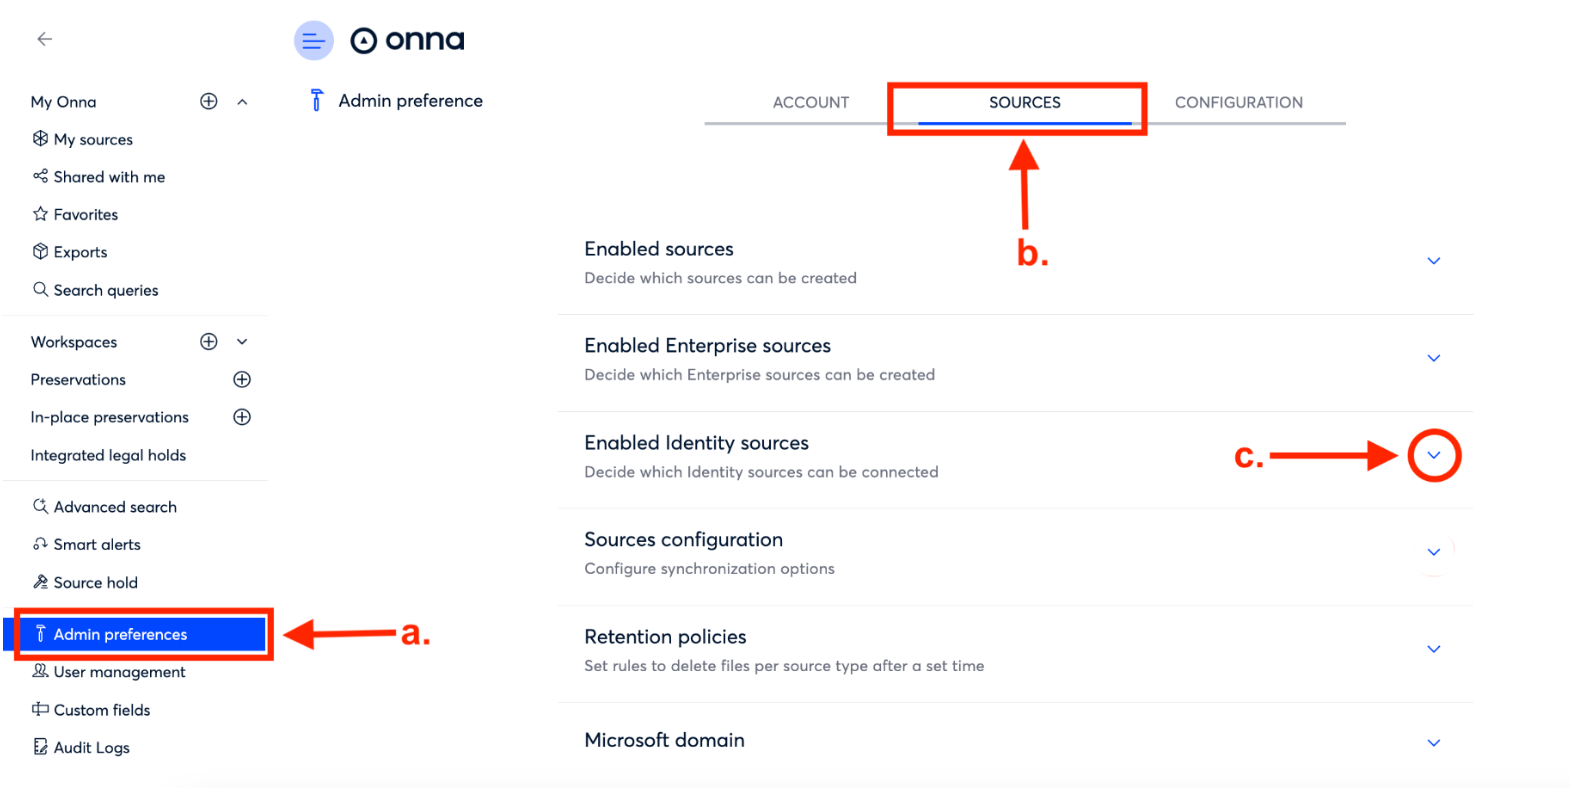
Step 1
Select Admin preferences from the main menu.
On the Admin preferences page, click on Sources.
Click on Enabled identity sources to expand the appropriate section.
Step 2
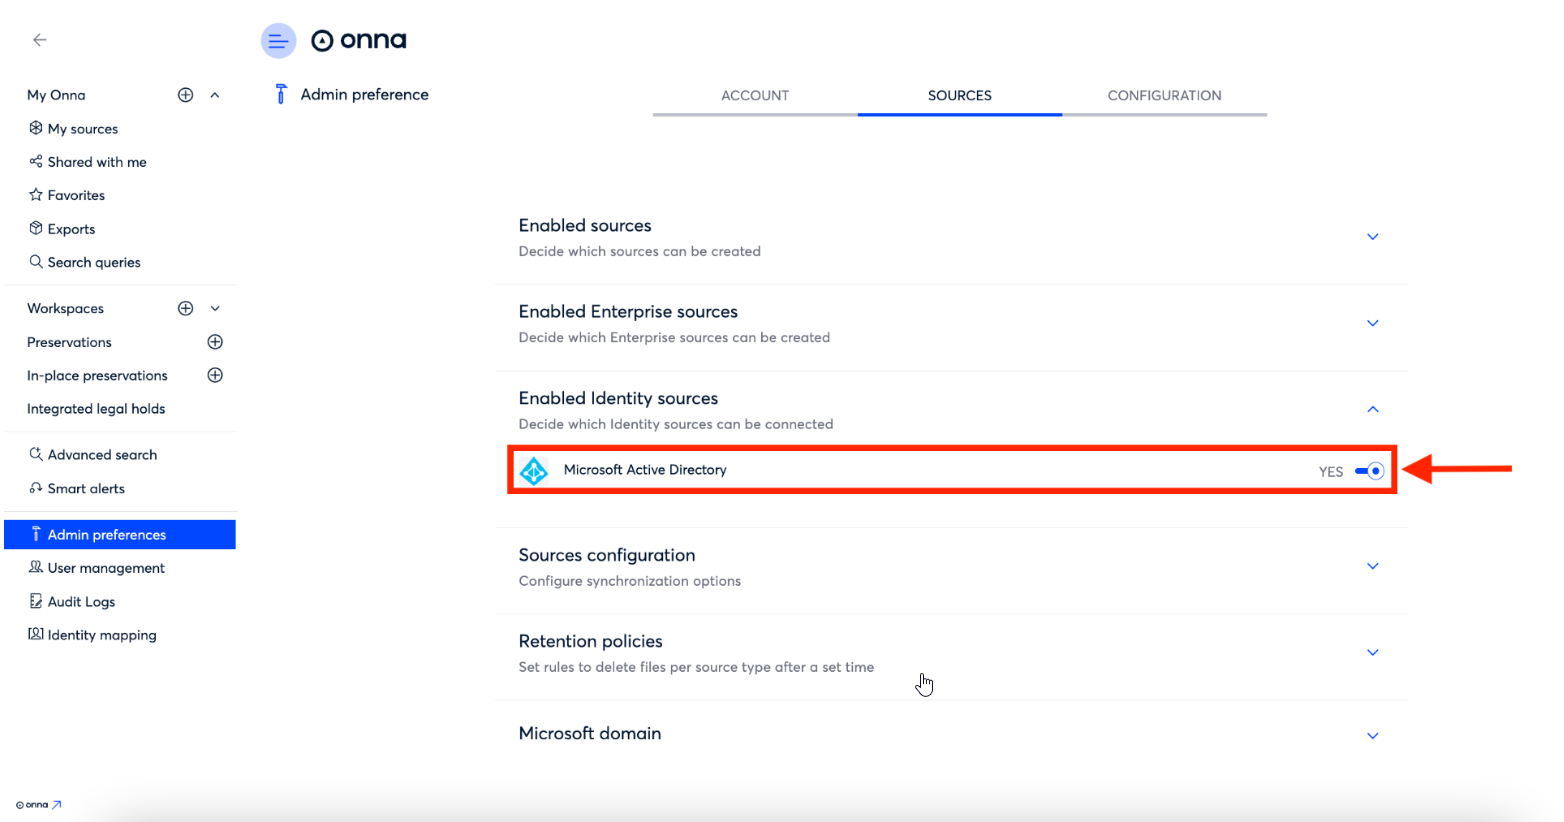
Once inside the Enabled identity sources section, you can enable an identity source by moving the toggle to the right of the source name to YES. Currently Onna supports the Microsoft Active Directory identity source. After the source is enabled, you can add it in Onna's Identity mapping section.
How to Configure Sync Modes
In Onna, you have access to three synchronization modes: one-time sync, auto-sync, and auto-sync with archiving. Nevertheless, there might be instances when you wish to set up your source syncs in a different manner. In such cases, you can select from two options to adjust your source syncs throughout your organization.
To configure source syncs, follow the steps below:
Step 1
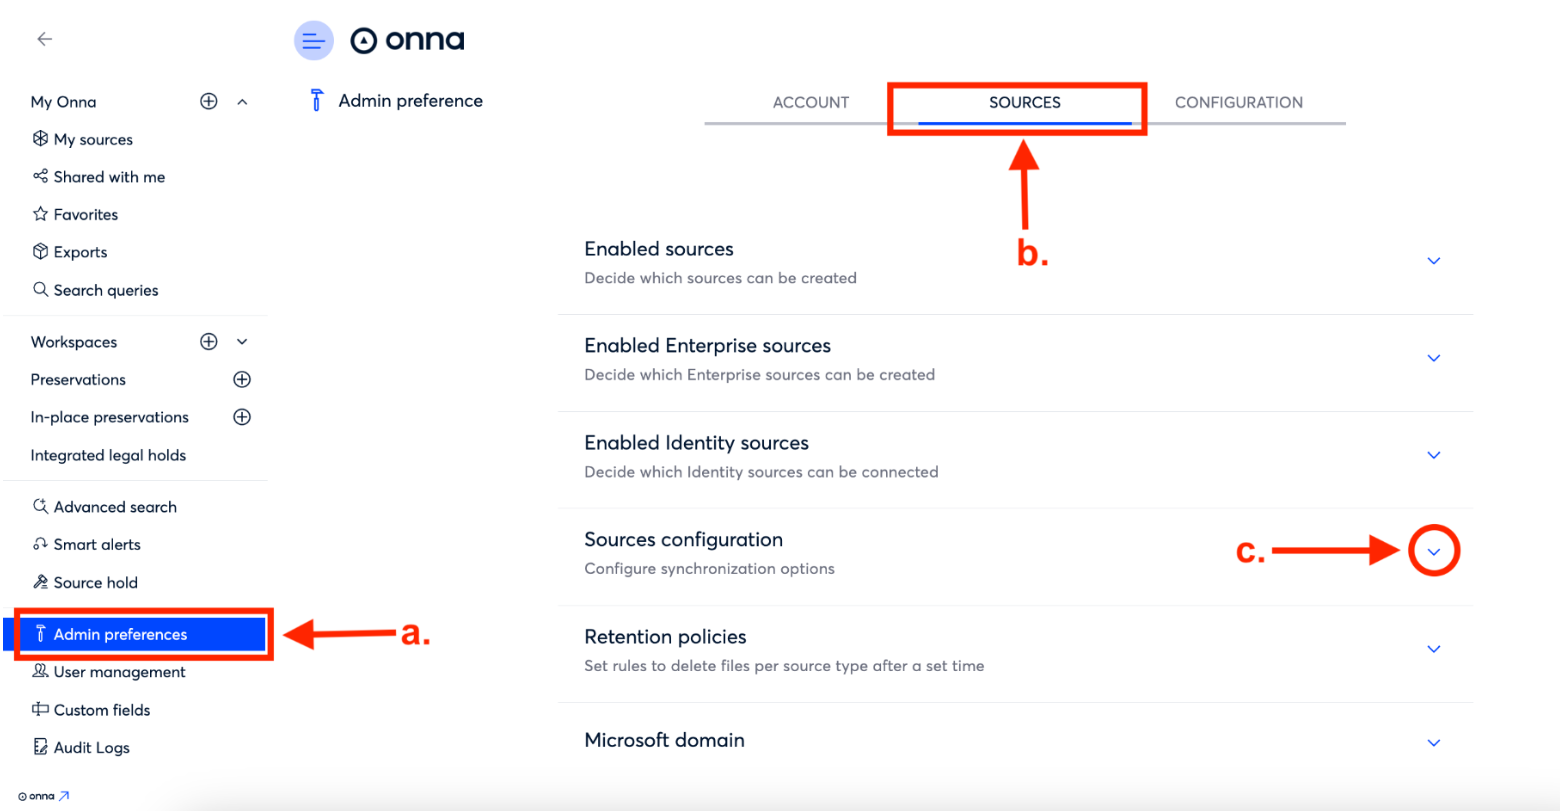
Select Admin preferences from the main menu.
On the Admin preferences page, click on Sources.
Click on Sources configuration to expand the appropriate section.
Step 2
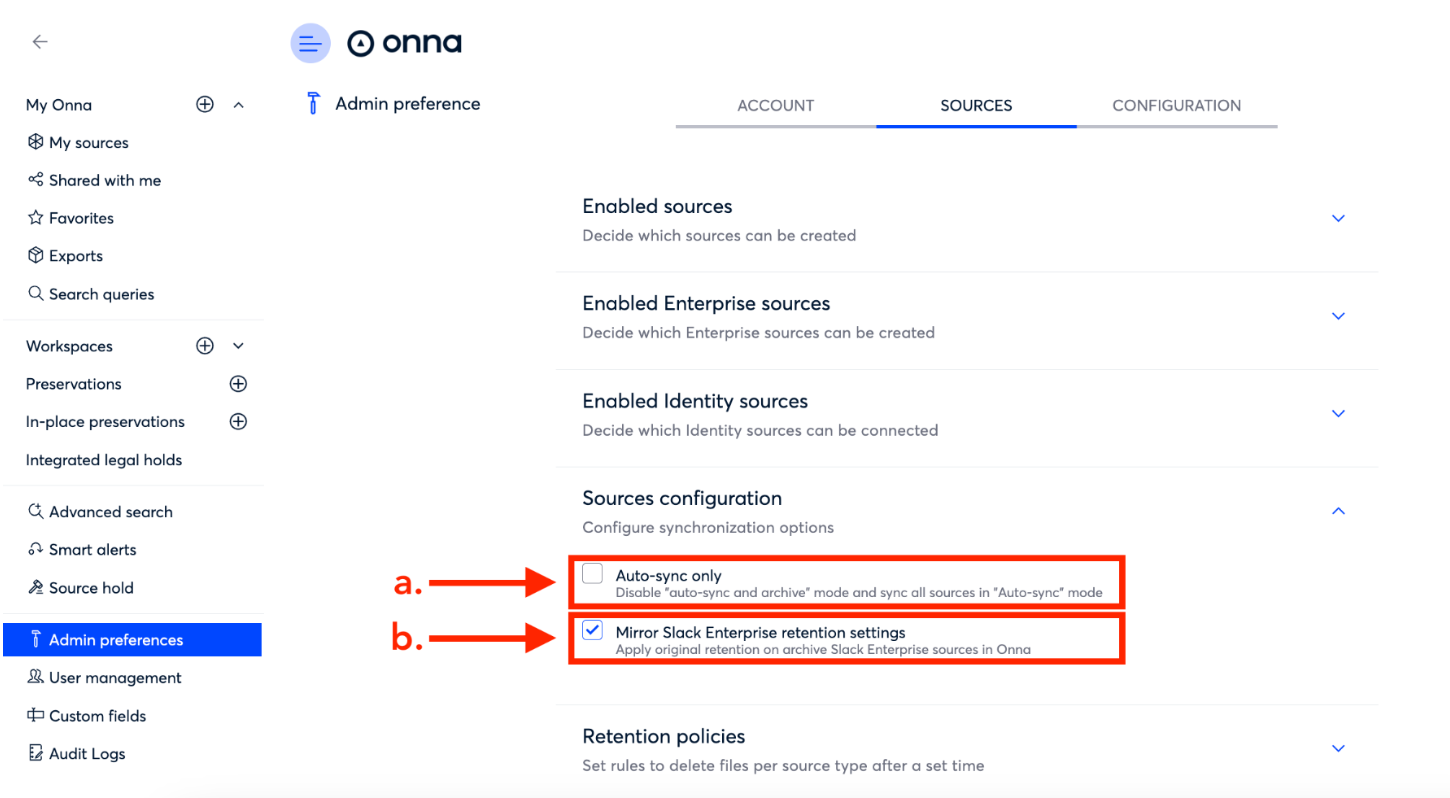
Inside Sources configuration you will see two ways to customize syncs across your organization:
Check Auto-sync only to disable Auto-sync and archive mode for all sources and only provide the option for users to configure a sync using Auto-sync.
Check Mirror Slack Enterprise retention settings to apply the same retention policy you have in Slack to Slack data sources you’ve synced into Onna. This setting will only apply to Auto-sync and archive mode syncs.
How to Set Retention Policies
Just as your data sources such as Slack Enterprise and Google Workspace offer the ability to set retention policies for how long data will stay in those source applications, you are also able to set Onna specific retention policies that guide how long data will remain in Onna (excluding data included in a Preservation).
The retention policies set in this section are distinctly separate from the policies set inside source applications and are based on the date/time data was synced into Onna, not on the creation date of the data. Additionally, these retention policies apply to all data across your Onna site.
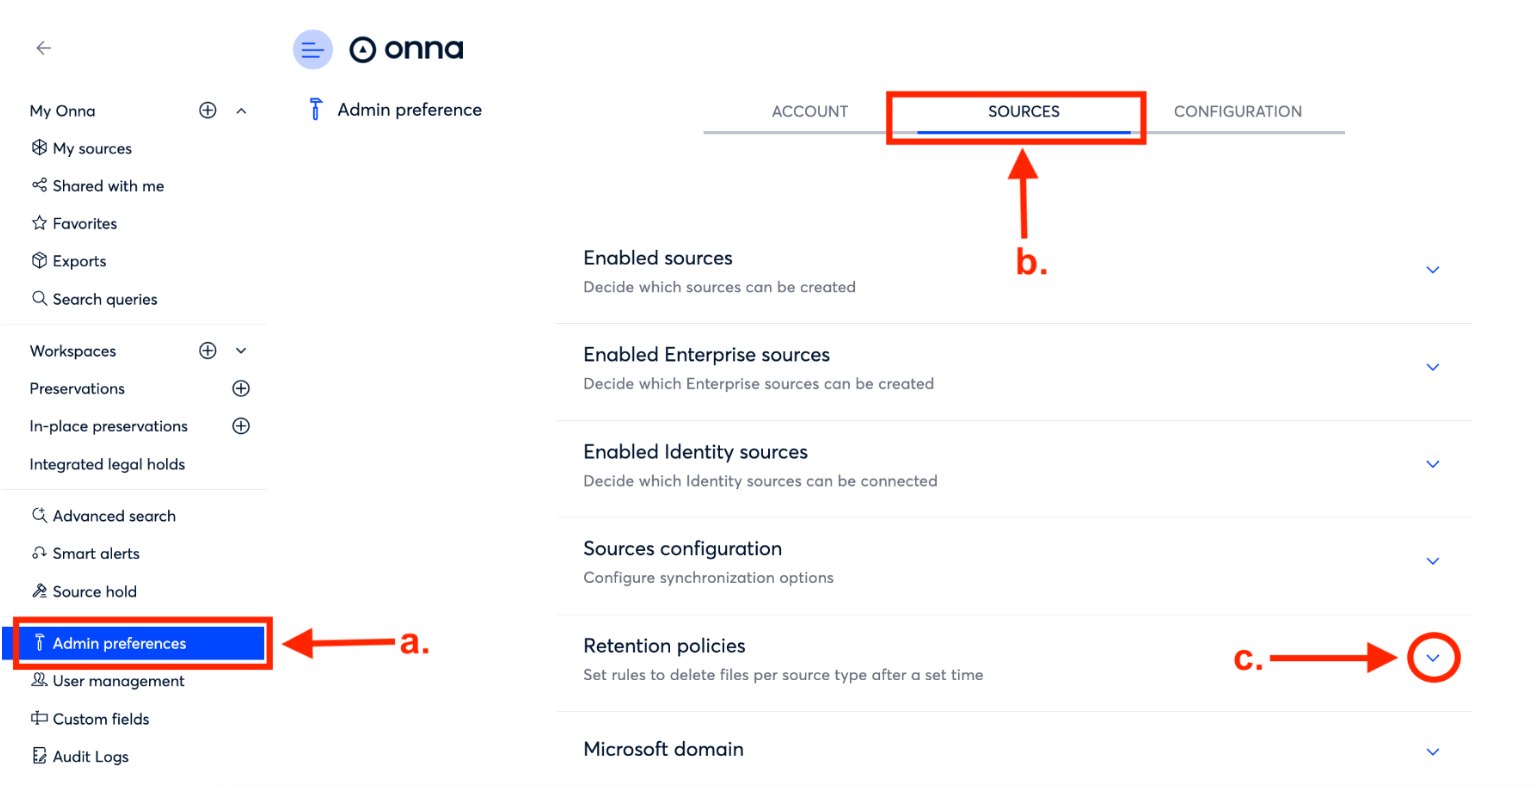
Select Admin preferences from the main menu.
On the Admin preferences page, click on Sources.
click on Retention policies to expand the appropriate section.
Once inside the Retention policies section, follow the steps in the article How to Create and Manage Retention Policies in Onna to set up your Onna retention policy.
How to Enter a Microsoft Domain
If you want to create individual source syncs using the non-enterprise versions of Microsoft OneDrive and Microsoft Outlook, an admin needs to connect to their Microsoft admin account to grant the permission for individual custodians to set up syncs of their own data into Onna.
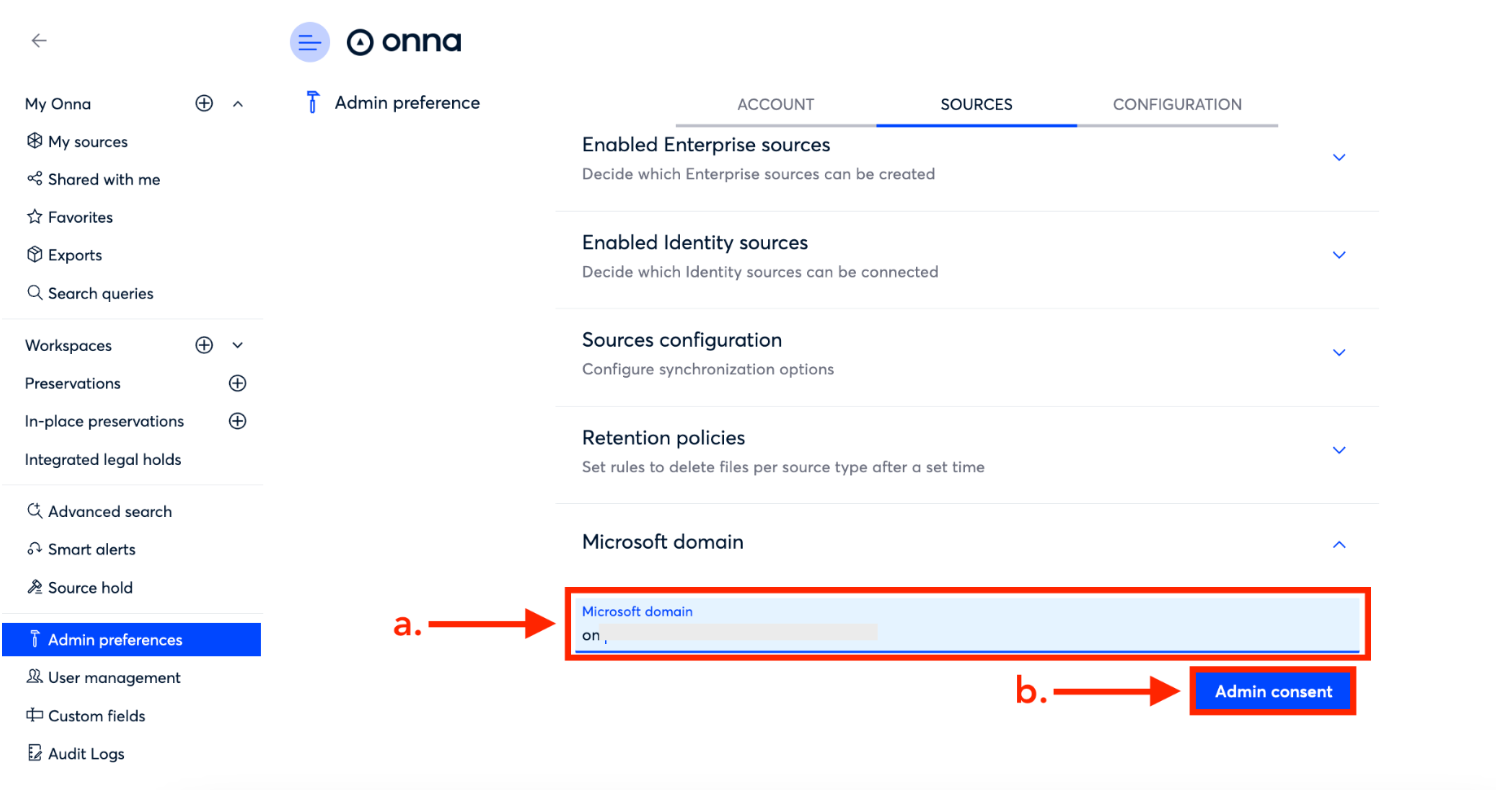
To enter a Microsoft domain and authorize individual custodians to create a source sync of their data follow the steps below:
Step 1
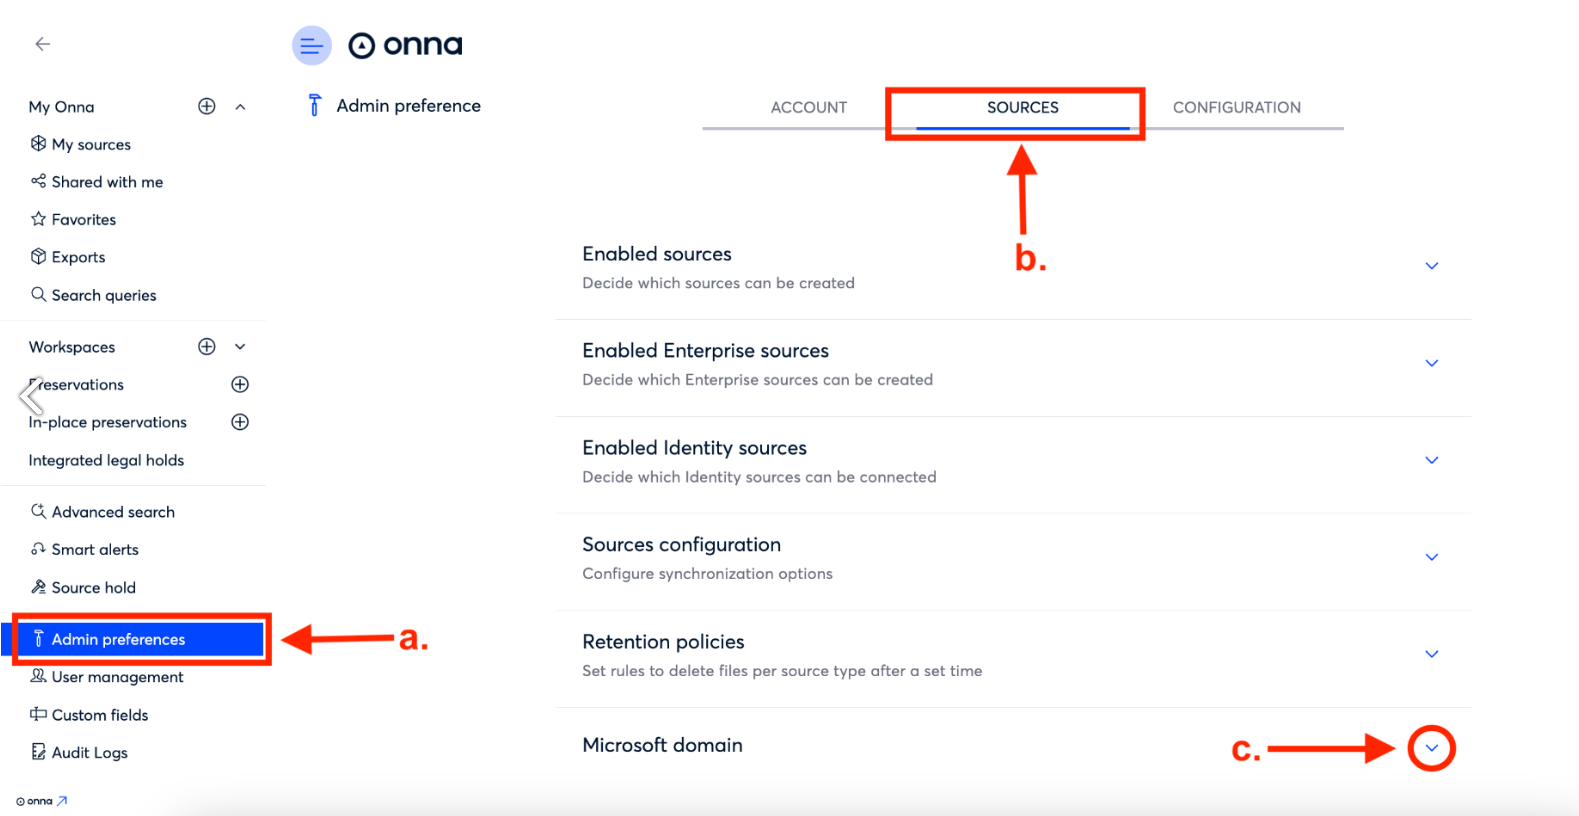
select Admin preferences from the main menu.
On the Admin preferences page, click on Sources.
Click on Microsoft domain to expand the appropriate section.
Step 2
Enter the Microsoft domain for your organization in the Microsoft domain field.
Click the blue Admin consent button. You’ll be taken to the OAuth flow to connect for your Microsoft account.
