Roles allow you to enable or disable specific permissions that can be exercised in a project, and also limit access to unauthorized areas in the Reveal environment. Role groups map the user to the specific role.
You can assign as many users as you want to a role group, but only a one-to-one association between roles and role groups is possible. You cannot have more than one role group assigned to a single Role, and vice versa.
For information about how role groups function in Reveal, and for a list of Reveal’s default role groups, see About Permissions.
Role groups are created and managed in the Role Groups page by navigating to Project Admin > Teams + Roles > Role Groups from the project navigation sidebar.
.png)
Create role groups
In general, creating a new role group involves the following steps:
Create role group.
Assign role group to role.
Assign users to role group.
All three steps can be performed in the Role Groups page.
I. Create your role group
Click
 Add.
Add.In the Add Group modal:
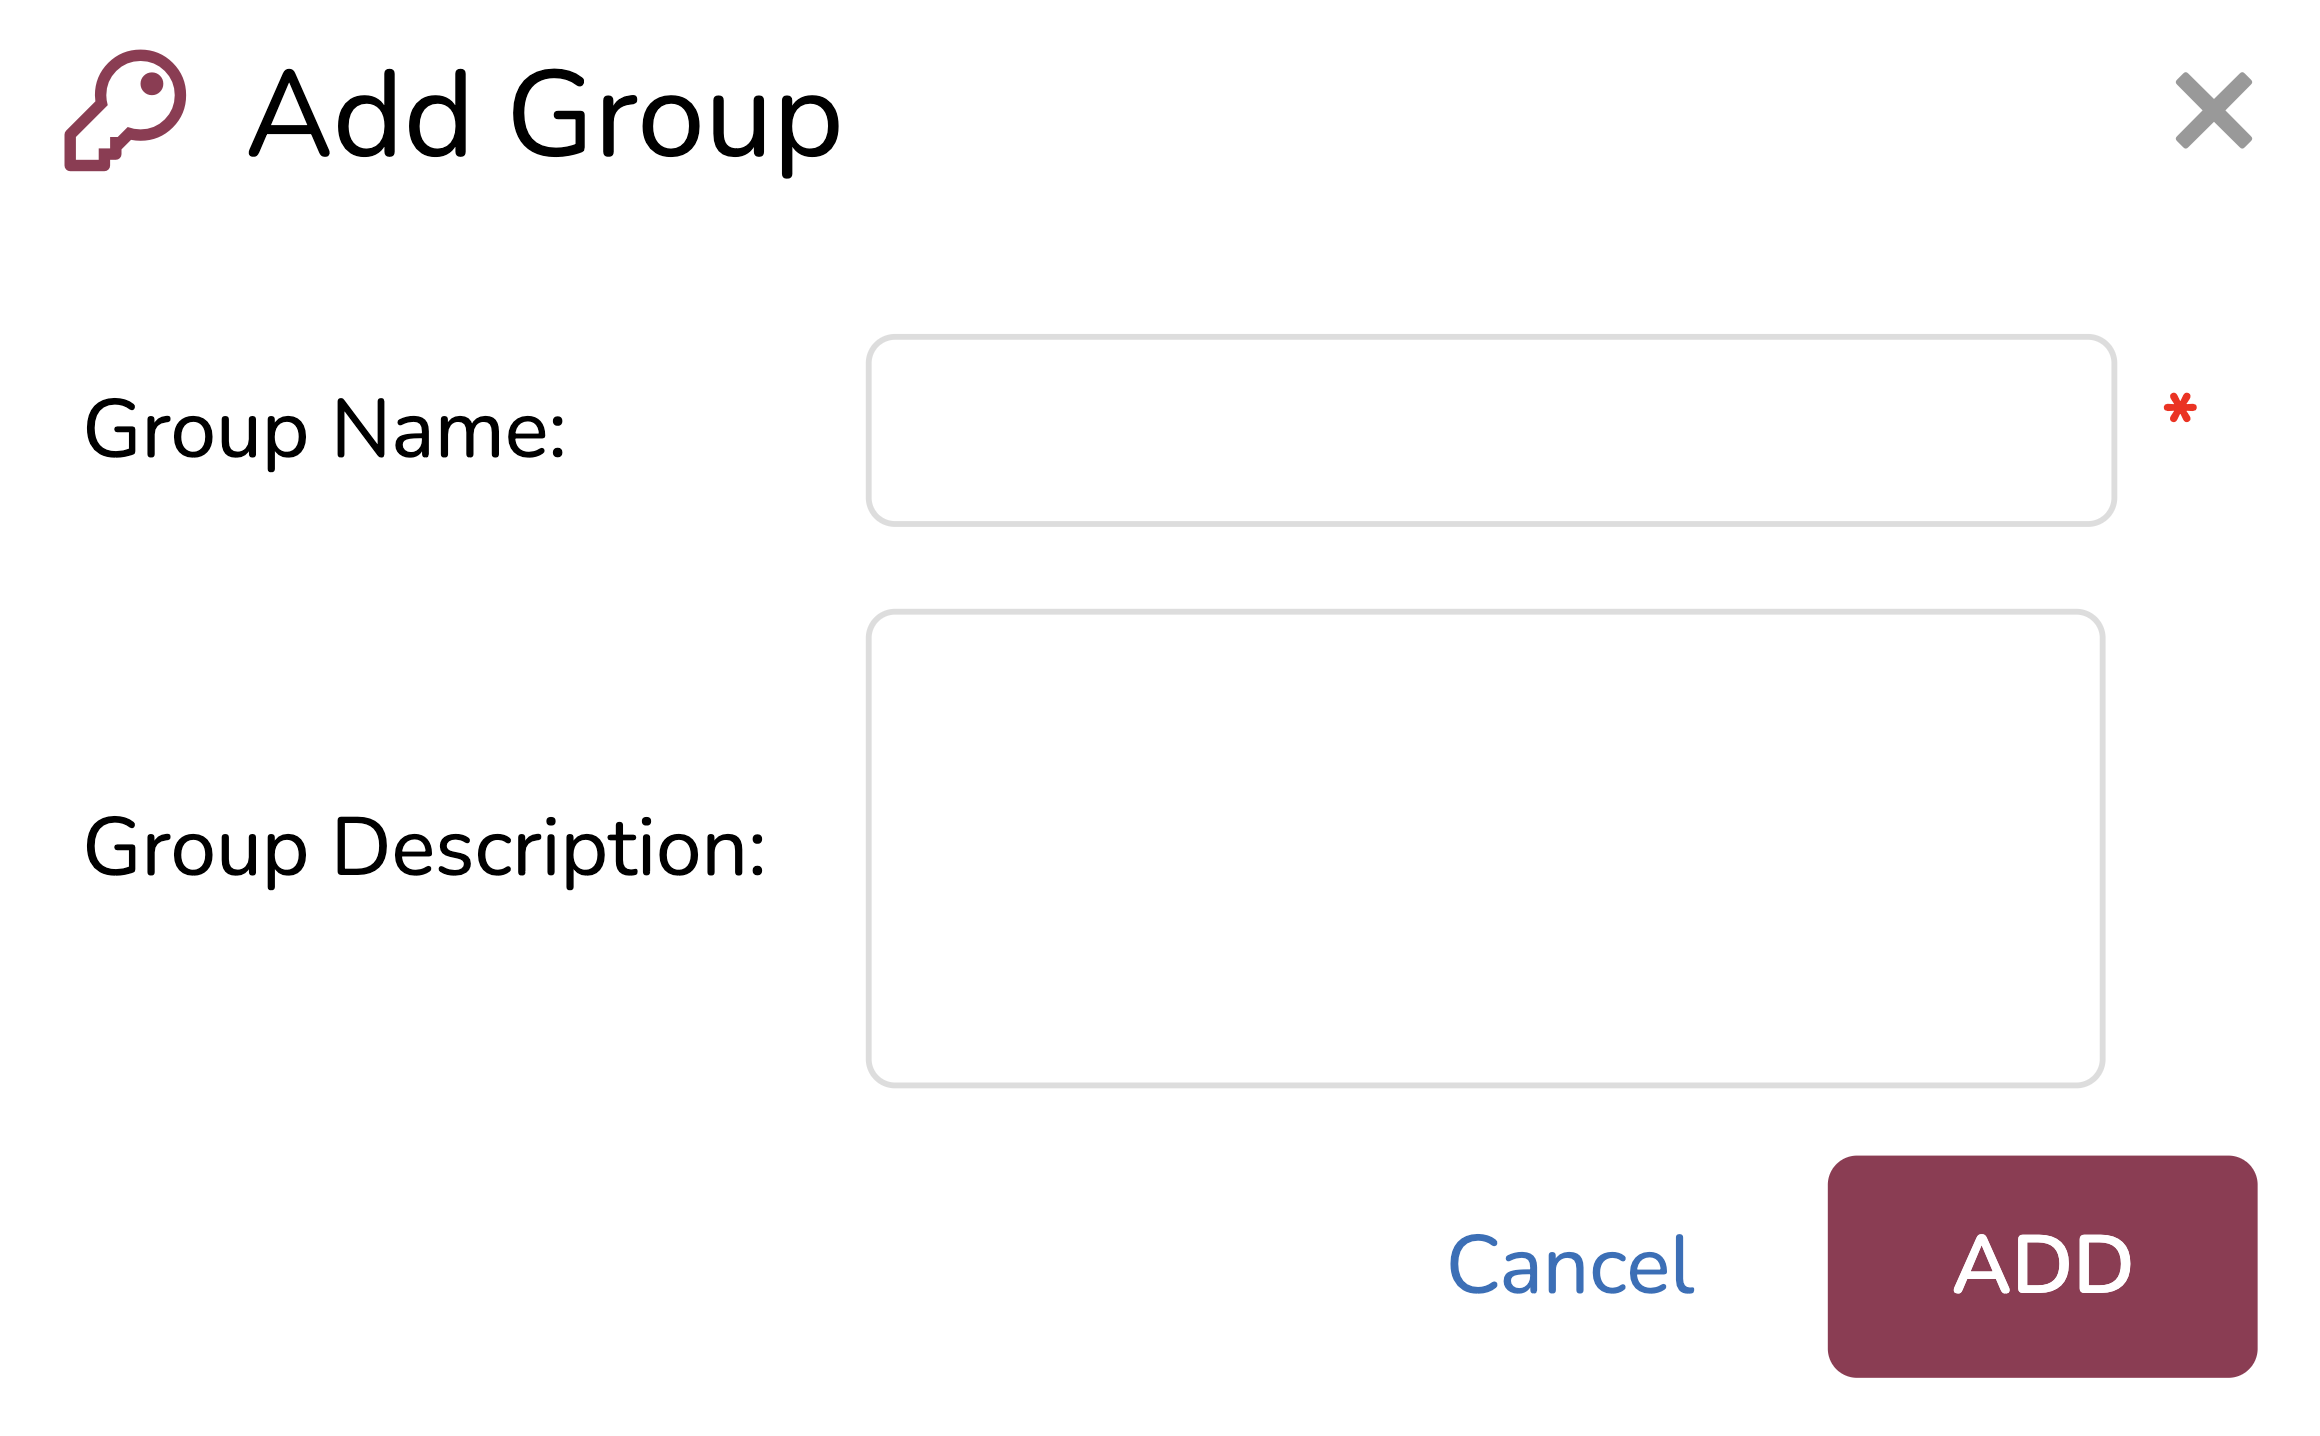
Group Name: Name your role group. It’s best practice for your role and role group to share the same name for easy mapping.
Group Description: Add a description of your role group,
Click ADD to create your role.
II. Assign role group to role
Click your desired role group from the list. Its row will highlight in blue.
Click
.png) Assign to Role.
Assign to Role.In the Assign to Role modal:
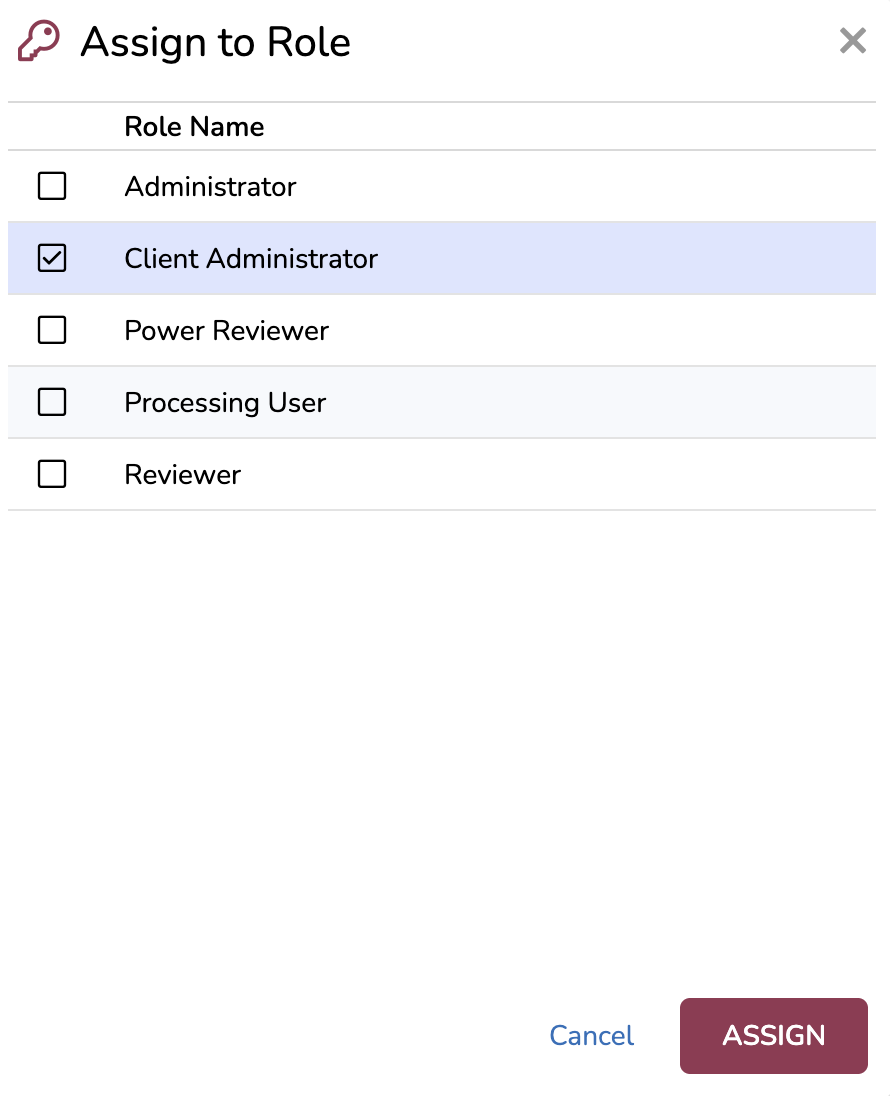
Check your new role from the list. It should have the same name as your role group.
If you haven’t yet created a role, follow the instructions in Manage Roles.
Click ASSIGN to pair your role with the role group.
III. Assign users to role group
Click your desired role group from the list. Its row will highlight in blue.
Click
.png) Assign Users.
Assign Users.In the Assign Users modal:
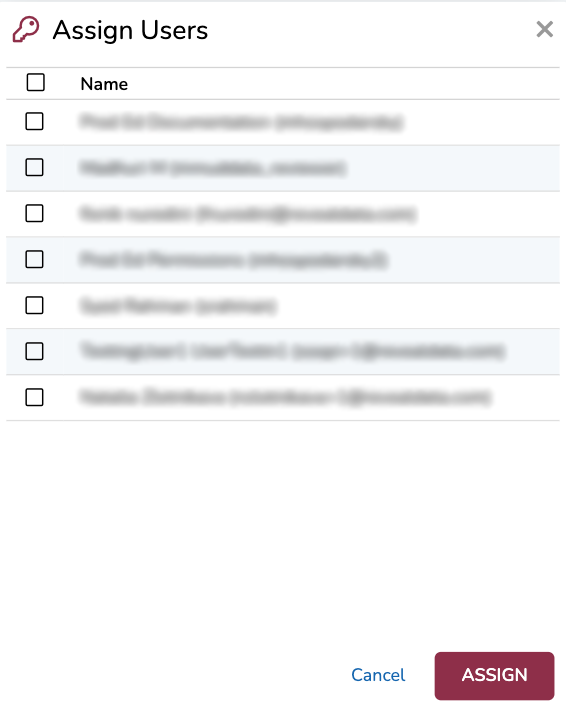
Check any number of users from the list.
Important
A user can only be a part of one role group. If you assign a user with a preexisting role group to another role group, their role group will switch automatically and you will not be notified.
Click ASSIGN to pair your user(s) with the role group.
Note
Users may need to log out and log back in to Reveal in order for permission changes to take effect.
Managing roles
Role group management is performed in the the Role Groups page. Here, you can:
Edit role groups
Delete role groups
Edit role groups
Editing a role group allows you to change its name or description. If you would like to change which users belong to a role group, follow the instructions in the Assign users to role group section.
Click your role group from the list. Its row will highlight in blue.
Click
.png) Edit.
Edit.Edit the fields as needed. See the Create your role group section for a description of each field.
Click EDIT to save your changes.
Delete roles
Click your role group from the list. Its row will highlight in blue.
Click
.png) Delete.
Delete.A confirmation modal will appear. Click OK to delete the role group.
Note
Reveal will not let you delete a role group if it has users assigned to it, or if it’s currently mapped to a role.