Reveal Review Archiving
Creating Project Archives
Navigate to Company Admin from the Flyout Menu.
Company Admin opens to the Projects tab.
On the Projects table select the project to be archived to open its Details screen.
In the Archives section, click the Create Archive button and confirm that you wish to create an archive when prompted.
An archive job will run and the status next to the job will show Completed.

See Downloading Project Archives.
Downloading Project Archives
Navigate to Company Admin from the Flyout Menu.
Company Admin opens to the Projects tab.
On the Projects table select the project to be archived to open its Details screen.
In the Archives section, locate the archive that you wish to download (or have just created with reference to Creating Project Archives).

The archive can now be downloaded and stored online or offline.
To download, click an access token to copy it to the clipboard.
Click "Get Download Manager" and click Save File when prompted.
Note
Download Manager is a PC only application.
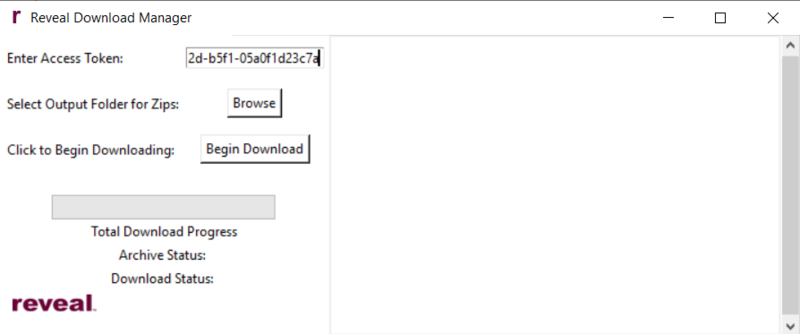
Download and run the utility.
When prompted, paste in the access token.
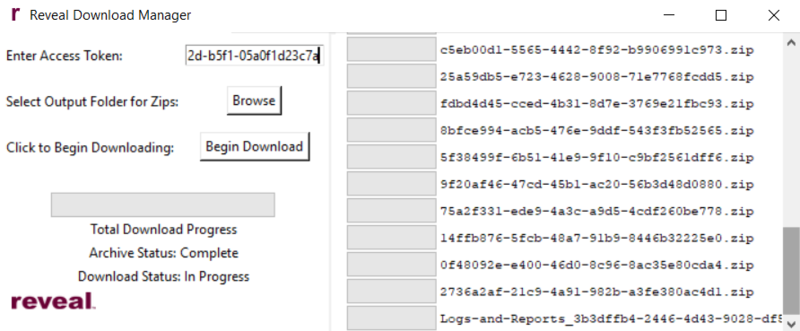
The download is complete with the Logs and Reports item.
Reveal Processing Archiving
Processing Archival Process – Leave In Place
The most practical option for archiving is to simply leave your processing project in place. Append the prefix “Archive-“ to the processing project name and this will alert Reveal to not count this toward your inactive totals, as it currently doesn’t count as peak-active after the first month of processing.
Processing Archival Process – SaaS Full Export
An alternative method of archiving that might be useful is to export a complete dataset of content processed in the tool. A Parent/Child Export using the guidelines below can be stored in a state ready to load into a Review Platform on demand. This is not fundamentally different from a normal export, but the guidelines below may be helpful to get everything out of the case prior to deletion.
Important
Disclaimer – Restoration
This process is meant to export all necessary content from a case, but it cannot be loaded directly back into the Reveal Processing application. The output will however be a Concordance-delimited DAT with Text and Natives that can be easily loaded into Reveal Review via the Review Manager application. The export should also work with any review platform that supports third-party deliverables with Concordance delimiters.
Important
Disclaimer – QC and Unprocessed Source Archives
This process is useful if there is not a significant number of errored or corrupt archives in the dataset. If there are several corrupt, incomplete or password protected archives present, keep in mind that the Parent/Child export will not include content from these. As such, it may be worthwhile to additionally preserve the source material if this had not yet been done.
High Level Process
Decide whether to scope or export all data from case, and whether or not to exclude previously exported documents.
Choose settings after reviewing recommendations at bottom.
Upload archive to S3 Browser on Load Machine to preserve a copy.
Optional Scoping
While the entire database can be exported, a user can also scope documents to a population that excludes previously exported content. Scoping can also be used to split the archive export into multiple smaller exports, perhaps along custodian lines. To achieve these delineations, you can use either Selective Sets or the scoping mechanisms in the Export Module:
Exclude Previously Exported Content
On the Export module page, about halfway down there is a modal to Exclude Previously Exported Documents. This will exclude the exact FileIDs previously exported.
Check the box underneath the heading to enable the functionality, then exclude all relevant prior exports. As exports could have been used for testing, overlays or third-party deliverables, it is recommended that these are evaluated individually rather than checking every previous export.
Export Criteria / Scope Selection
If no scope criteria are selected in the Export module, the export will contain all documents in the project. At the top of the Export page, there is a scoping mechanism where a subset of documents can be exported along multiple dimensions. If the case is extremely large, it may be worthwhile to divide the export among custodians or imports. A Selective Set can be used if multiple dimensions need to be used when scoping the archive export into smaller chunks.
Recommended Parent Child Settings
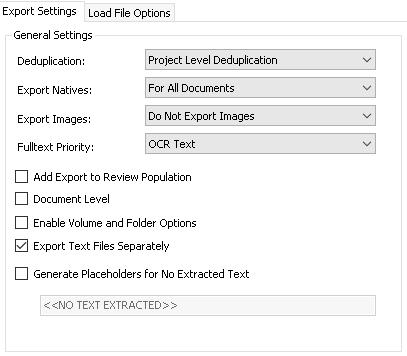
After the scoping is decided, the settings recommended are shown below.
Export Name – ARCHIVE_YYYYMMDD_X (using X to specify sub-scopes if exporting archive in more than one piece).
Type - Parent/Child
General Settings
Deduplication – Project Level
While deduplicating will significantly cut down the number of documents to export, if the custodian/data priority is not clear it may be worthwhile to export duplicate records. In most other cases Project Level Deduplication is recommended.
Export Natives – For All Documents
Export Images – Do Not Export Images
Images are not recommended as they will significantly increase archive size.
Fulltext Priority – OCR Text
OCR Text is recommended: this will use OCR text where present, and Extracted everywhere else. Only one text file will be exported per record, but since Natives are included in the export, additional text can be generated as necessary in future.
Add Export to Review Population – No
Document Level – No
Enable Volume and Folder Options – No
Export Text Files Separately – Yes
Generate Placeholders for No Extracted Text – No
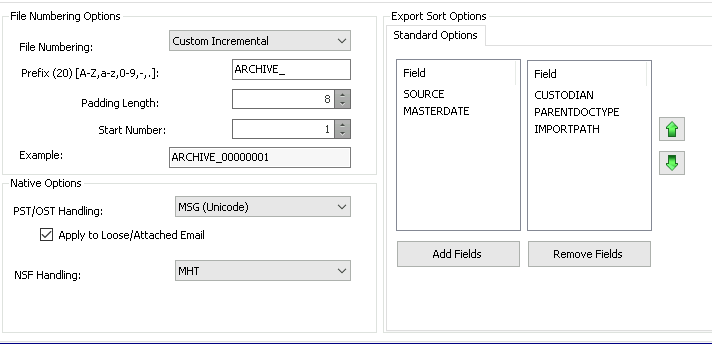
File Numbering Settings
File Numbering – Custom Incremental or Incremental
Prefix – ARCHIVE_ or existing preproduction prefix
While incremental can be used with the same prefix as previous exports from the case, a custom incremental range paired with a prefix may be helpful if you are exporting all documents not just unexported ones.
Padding Length – 8
Start Number – (1 if using Custom Incremental / ARCHIVE_ prefix)
Native Options
PST/OST Handling – MSG
MHT can also be used if space is a concern, but MSG is truer to the original format of the record for Exchange email.
Apply to Loose/Attached Email – No
This will ensure attachments and loose email will be exported in their original format rather than converted.
NSF Handling – MHT
Sort Options
Leave as default (pictured below)
Load File Options
Load File Type – Flat File
Export Field Names as First Line – Yes
Text Encoding – UTF-8 (Unicode)
Date Format – MM/dd/YYYY for US (This can be adjusted as desired for region)
Time Format – h:mm tt (This can be adjusted as desired for region)
Bool Format – TRUE/FALSE (This can be adjusted as desired for platform)
Delimiter Format: Concordance Default, Comma (020) / Quote (254) / Newline (174)
Fields: All fields except FULLTEXT and EMPTYFIELD (customize as you see fit)
Note
NOTE that the fulltext field is unnecessary as the text files are exported separately with pathing specified in other fields.

Additional Resources
Export settings and loadfile descriptions are described in greater detail in below articles from the Reveal Processing Knowledge Base.
Reveal AI Archiving
While full Reveal AI archives may likely not restore into a supported version of Reveal in the coming months, the below steps provide a guide to assure any specific work-product can be preserved for re-creation within the coming version of the application.
Items to save for an AI case:
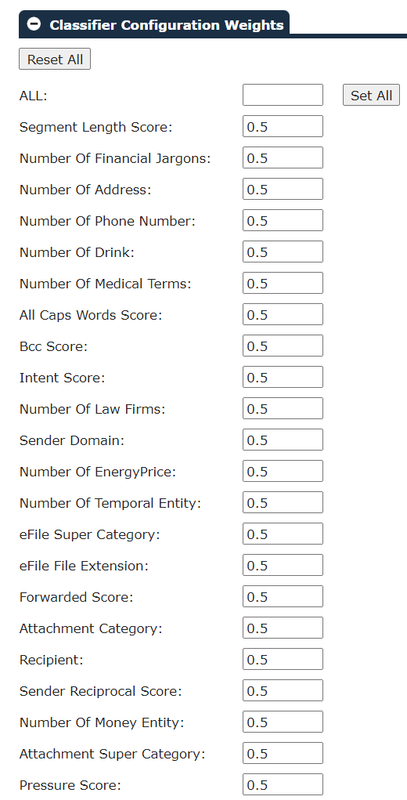
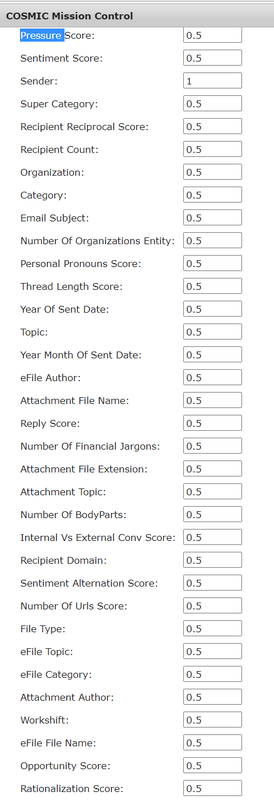
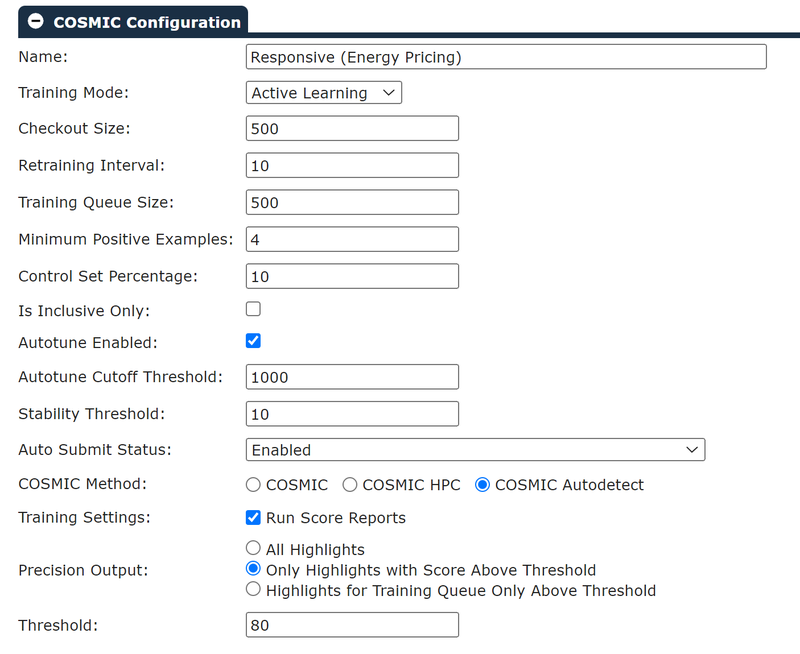
COSMIC settings:
Expand each section below and take a screenshot of the actual values: COSMIC Configuration, Classifier Configuration Weights, Reference Models:
| |

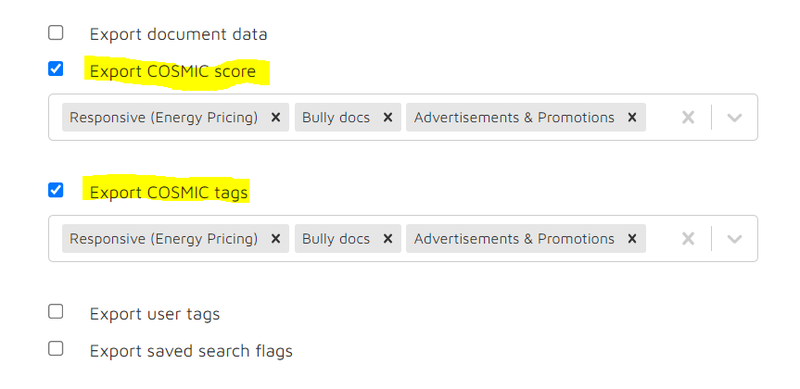
COSMIC Tags and Scores
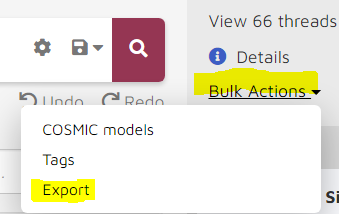
Export COSMIC tags and scores to CSV. You can select multiple tags/scores in one export:
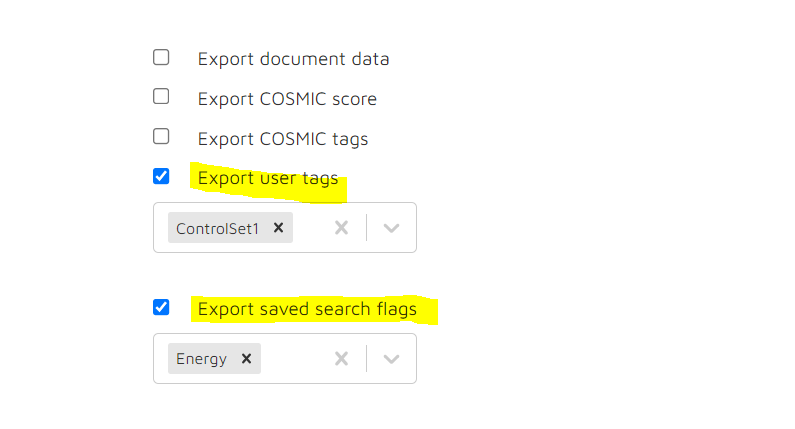
User Tags and Saved Search tags
Export these tags to CSV, you can multi-select them if needed:
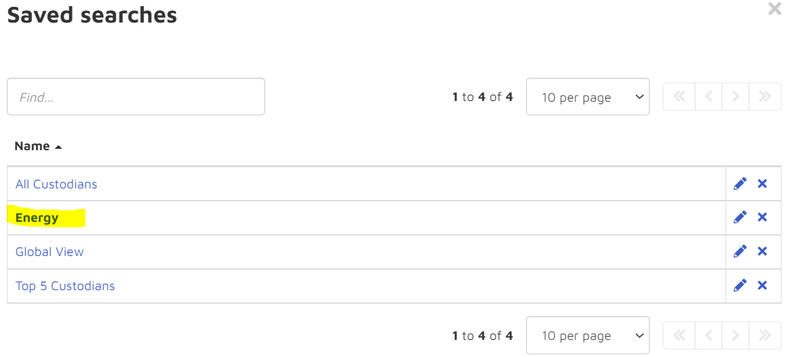
Saved Searches
Check if any saved searches exist, open them one-by-one and take screenshot of the searching conditions:

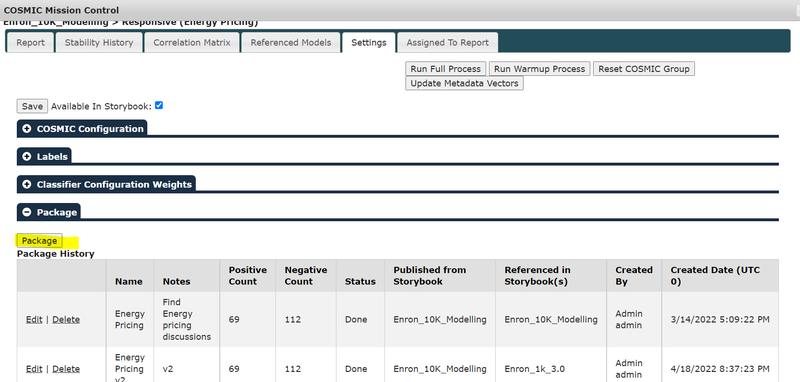
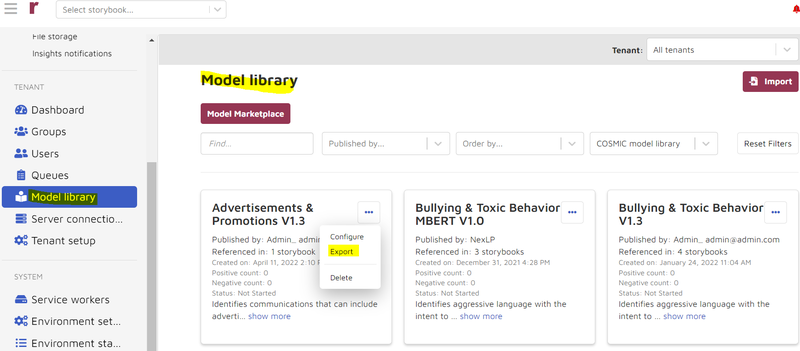
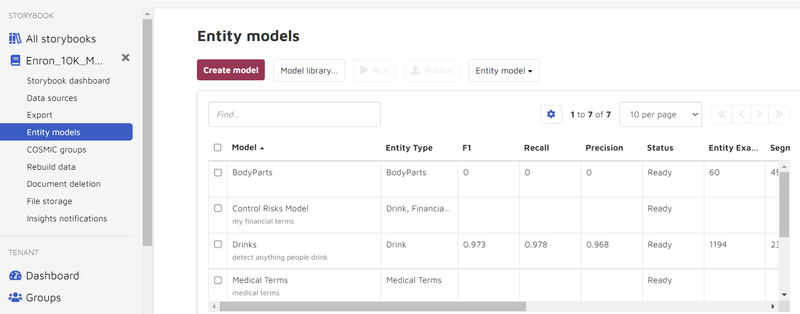
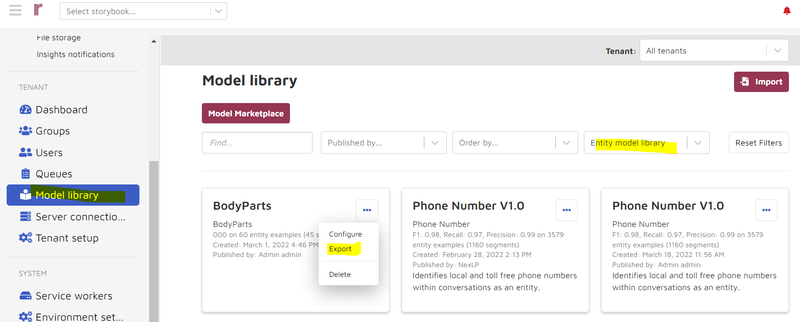
COSMIC Model Library and Entity Model library
If there are COSMIC groups in the case and the client wants to package the model, go to “Settings => Package” and package the model, export it to an NPS file and save it.
Brainspace Archiving
Note
In Reveal SaaS Hosted environments, Brainspace archiving can only be done by Reveal support personnel, and requires a support request to support@revealdata.com.
In Reveal SaaS Hosted environments, Brainspace archiving can only be done by Reveal support personnel, and requires a support request to support@revealdata.com.
Determine which elements of work product need to be preserved for each Brainspace dataset. Then follow the subsequent instructions for each element. Each of the instructions below assumes the user has sufficient Admin privileges. (For example, to export ALL Saved Searches requires at least Group Admin.)
Saved Searches
Tags
Notebooks
Focuses
Dataset Reports
Connectors
Classifiers
Control Sets
Training Rounds
Reports
Visuals
Portable Models
Saved Searches:
On the Analytics dashboard, click the Saved Searches icon:
 . The Saved Searches drop-down list will display Your Saved Searches and a tab for Other Searches. Click Export Saved Searches for both tabs:
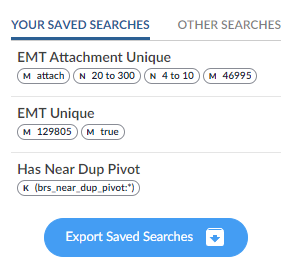
Confirm both downloads. They should be a *.txt file that contains something like the following:
search name,query,focus,classifier name,created date,user name
"EMT Unique","(brs_emt_thread_id:"129805") AND brs_emt_unique:"true")" , "","","2022-05-05T13:28:27+0000","Chris Wright"
Tags:
For information about tags, please see here.
Tags shared with Reveal Review should be PUSHED to Reveal Review to save their most current state.
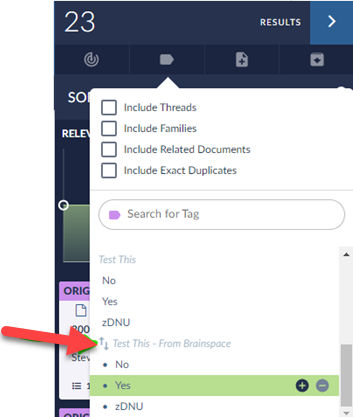
Tags held only within Brainspace (not Connect Tags) that need to be saved should have a NEW tag created in Reveal Review, searches on Tag values run in Brainspace to tag documents with the new Tag, then that new tag should be PUSHED to Reveal Review. This is illustrated by the following steps:
Find the non-Connect Tag in Tag management (e.g., Test This in the illustration below):

Create that tag (with a slight name change to keep it clear) under Tags in Project Admin of Reveal Review:
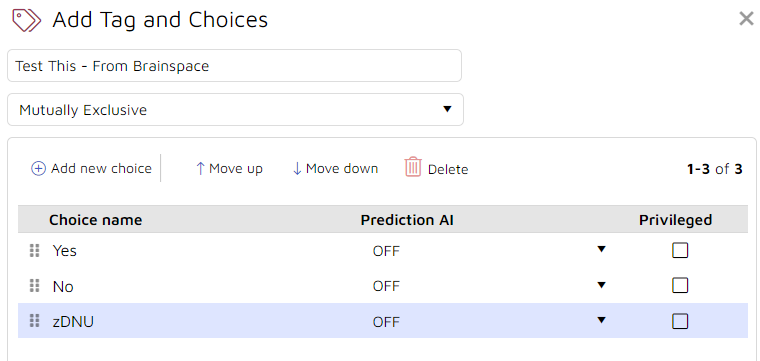
In Brainspace, use Tag management to Connect the new tag:

In the Analytics panel for the dataset, run an Advanced Search for the old tag and one value.

Use the mass tag button to apply the new tag to these documents. NOTE the new tag should have the “connect tag” indicator
 :
:
Repeat steps 6-7 for all values of the tag.
When complete, PUSH the tag from Tag management.
Notebooks:
Each notebook that needs to be preserved should be synced to a Work Folder (or alternately, a tag) in Reveal Review.
For information about Notebooks, see here.
Select a Notebook from the list of all notebooks.
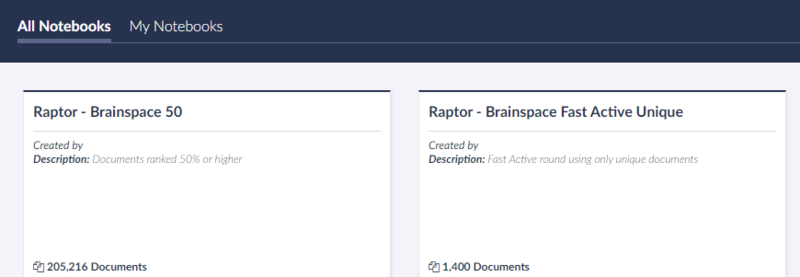
Select Synchronize for this notebook.

Provide credentials for Reveal Review, if prompted, and select Work Folders, then Push the Notebook.
Visit Reveal Review to confirm new Work Folder has been created and populated.
Repeat for all Notebooks that need to be saved.
Focuses:
For information on Focuses, see here.
The Cluster Wheel for a focus cannot be retained, but if a Focus needs to be saved, then saving the document list used to generate it is useful.
Use an Advanced Search for metadata, “Focus” to search for the Focus to be saved.
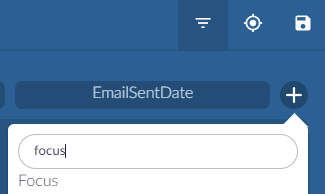
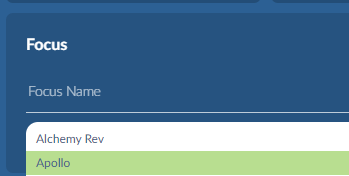
Save the Search Results to a new Notebook:
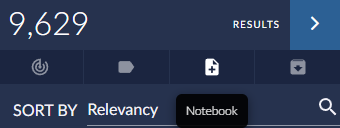
Synchronize the new Notebook to Reveal Review (see previous section for instructions).
Dataset Reports:
Dataset reports will be regenerated if there’s a future dataset build. However, some of them may have meaningful information that you may want to preserve. For more information on the dataset reports, please see here.
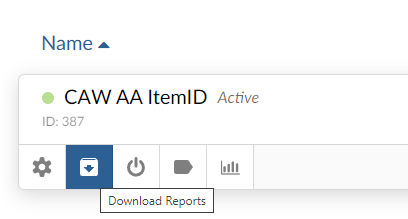
Under Administration > Datasets click to Download the reports for the dataset. Some reports to consider:
Batch Tools Version Report (build history)
Full Report (which may have been overlaid to Reveal Review)
Person Report (Communications nodes, including manually aggregated persons)
Schema.xml (preserve field mapping)
Connectors:
Connectors are used to point Brainspace to external data sources and contain potentially useful information about how the dataset was built. For more information on connectors, please see here.
Under the Administration > Connectors tab Download the connector report.

Screenshot capture the Dataset to preserve which Connector was used for the build.

Classifiers:
CMML Classifiers have a variety of work product and require separate actions to preserve. For more information on CMML, see here.
Classifiers – Portable Models:
To save only the deliberately reusable elements of a classifier, download the Portable Model, which can then be imported into another dataset. For more information, see here.
Click a Classifier card.
In the Training pane, click the Portable Model Actions icon:
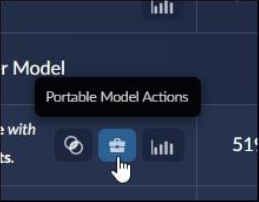
Click the Download button.
Classifiers – Reports:
Classifier reports may contain useful information for providing historical context and can be easily downloaded.
Click a Classifier card.
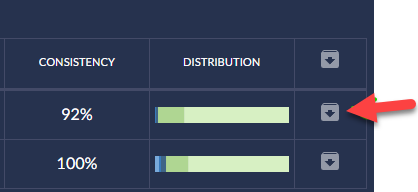
In the Training pane, click the Download Reports icon for the most recent training round.
Classifiers – Visuals:
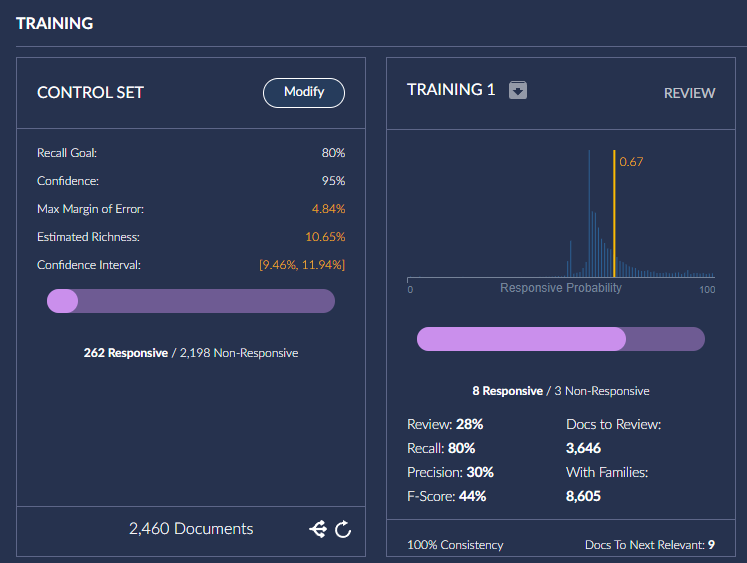
If the history of training is needed, use a screenshot tool to capture the visual information.
Classifiers – Training Rounds:
If it is desirable to recreate the classifier’s history, this can be done if the documents list for each training round is preserved.
Click a Classifier card.
In the Training pane, visit the first training round and select the View in Analytics icon:

This will load the Analytics Dashboard with the documents from that Training Round as Search Results. Use the Notebook button to drop these into a new notebook with a useful naming convention.
Synchronize the Notebook to Reveal Review as a Work Folder. (See Notebooks in previous section if needed.)
Repeat steps 2-4 for all training rounds.
Ensure Tagging is preserved as well. (See Tags in previous section if needed.)
Classifiers – Control Sets:
A newly created Classifier will create a randomly chosen Control Set, so these can’t be reused. Still, it may be useful to capture the previous one.
Click a Classifier card.
If a Control Set was created, select the Training Statistics Tab, and then press the View Control Set Documents in Analytics icon:
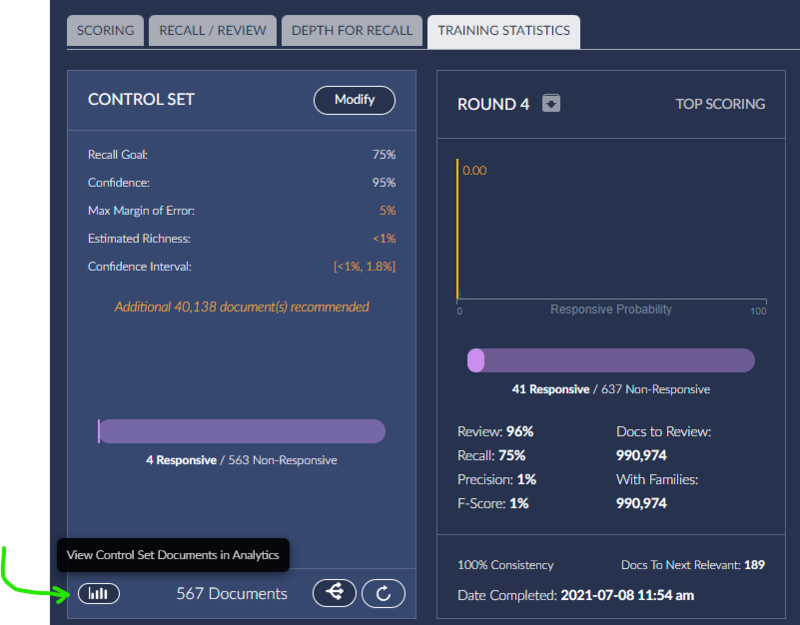
This will load the Analytics Dashboard with the documents from the Control Set as Search Results. Use the Notebook button to drop these into a new notebook with a useful naming convention.
Sync the Notebook to Reveal Review as a Work Folder. (See Notebooks in previous section if needed.)
Ensure Tagging is preserved as well. (See Tags in previous section if needed.)
