With Logikcull's redaction tool, you can easily mark out redactions. We'll automatically re-OCR and save the redacted version for you.
To start redacting, select the “Redact” button in the toolbar above or to the right of the document. (If you do not see the redaction option, you can customize your tool bar. You can learn how to customize the tool bars here.)
Note
Logikcull has various functionalities that make it easy to locate and redact PII. See the PII redaction in Document Viewer section for more information.

Redaction Color: Select between Black and White as a redaction color
Draw Redactions: Click the "Draw Redactions" icon to manually draw boxes around sections of text you wish to redact.
Select to Redact: Click the "Select to Redact" icon and click + drag a text selection. A pop-out menu will appear with the option to redact your selected text.
Redact Current Page: Click the "Redact Current Page" icon to fully redact an entire page.
Redact Multiple Pages: Click the "Redact Multiple Pages" icon to select one or more page ranges to redact. You can also select a redaction label from this menu.
You can click into any redaction to add, remove, or change the redaction label. Toggle redactions to be visible or invisible by clicking the "Redactions" icon in the top toolbar. You can also delete all redactions on a document by clicking the 3-dot menu at the top of the Redactions list in the document viewer.
You don't have to save after each redaction, but make sure to click "Save Redactions" before moving onto the next document.
Producing Redacted Documents:
When you download redacted documents using the 4-step download workflow and include redacted images, Logikcull will:
Withhold the native from being produced, even if the file type is selected for inclusion with native files
Withhold native parent documents when one or more children has redactions
Re-OCR the image to ensure the redacted text is not produced
Apply multiple redaction labels
You can apply multiple labels to a redaction.
Click any redaction to open up the Redaction Label popup.
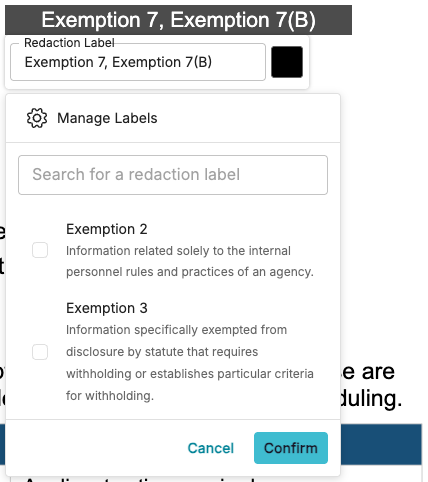
Use the checkboxes to choose one or more redaction labels.
Click Confirm to apply the labels.
Click Save Redactions to save your changes.
PII redaction and auto-redaction
When a document is loaded into the viewer, Logikcull runs PII detection on the searchable text of the image and presents the results in the document side panel.
You may need to add PII Detected to your side panel tools. Here's how. 🔗
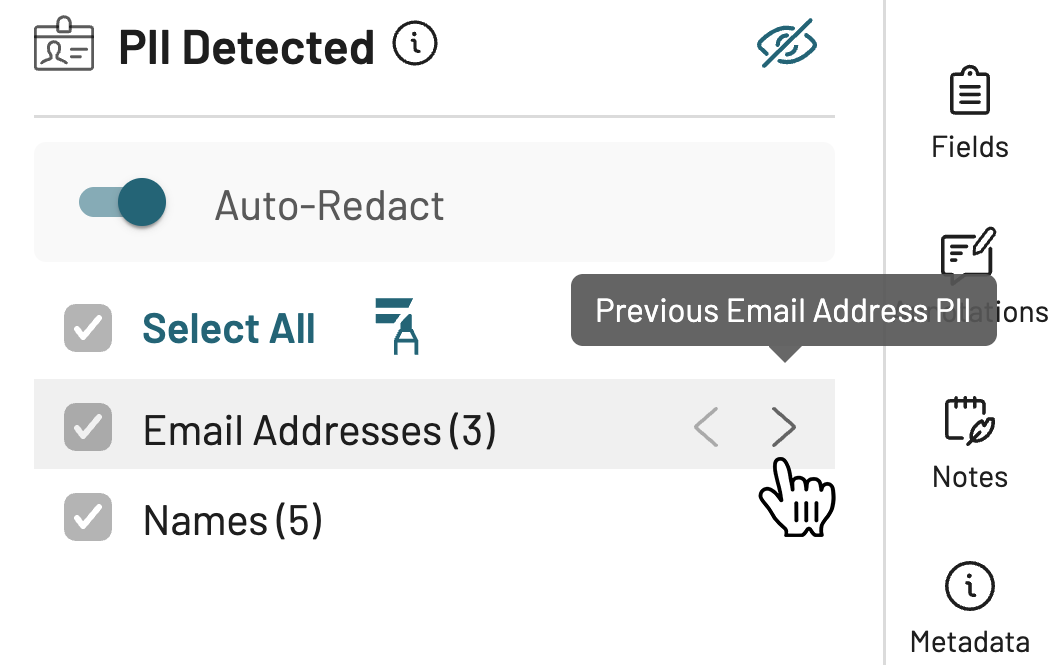
You can use the side panel to:
Select/deselect PII entity type by checking the box next to each PII type. PII that is left uncheck will hide
Manually the selected PII type(s) by using the
.png) redact icon. This will only redact the PII that are checked.
redact icon. This will only redact the PII that are checked.Navigate the selected PII type using the back and forward arrows.
Turn auto-redact on or off by pressing the auto-redact toggle.
Opening any new document will automatically redact all PII detected in that document.
Show/Hide all PII (squiggly lines) by using the
 eye icon.
Clicking the ![]() redact icon allows you to select a redaction label from a menu of options, or create your own.
redact icon allows you to select a redaction label from a menu of options, or create your own.

Note
See PII Detection for a list of PII that Logikcull can detect.